

Ricoh Caplio RR10 Operation Manual

RICOH Gate
for Macintosh
Operation Manual
English
To ensure correct use of the product, read this manual
carefully before use. Keep the manual handy for future
use.
Introduction
Thank you for purchasing a Ricoh product.
This manual explains the correct handling procedures and precautions for the product. To ensure
the best performance from the product, please read the manual carefully before using the
product. Keep the manual handy for future reference.
Important
• Be sure to make a backup copy of important data. Data may be lost in the event of misoperation by the
user or malfunction of the product.
• Ricoh Co., Ltd. assumes no liability for data created by the user using this product.
• Ricoh Co., Ltd. assumes no liability for damages caused by failure of the product, damages incurred due
to loss of text or data, or any other damages arising from use of the product.
Copyright
Reproduction or alteration of copyrighted documents, magazines, music and other materials, other than for
personal, home or similarly limited purposes, without the consent of the copyright holder is prohibited.
• This publication may not be reproduced in whole or part without the express written permission of Ricoh.
© 2001 Ricoh Co., Ltd.
• Ricoh reserves the right to change the contents of this publication without notice.
• Considerable care was taken in preparing this manual. If, however, you have any questions about any part
of the manual, or note any mistakes or inaccuracies, please contact us at the address listed on the back
cover.
Apple, Macintosh, Mac OS and QuickTime are registered trademarks of Apple Computer, Inc. in the United
States and other countries.
All other company and product names are registered trademarks and/or trademarks of their respective
owners.
Ricoh Co., Ltd.

What You Can Do Using This Software
Save files easily in the camera (Caplio RR10)
You can use the START key on the RICOH BASE to save files in your Macintosh.
Download images, voice memo and motion pictures and transfer files to the
camera
By connecting the camera to a Macintosh, you can download recorded images, voice memo
and motion pictures onto the Macintosh, and you can also transfer MP3 files, images, voice
memo (WAV files) and motion picture files (AVI file) stored in the Macintosh to the camera.
Choose the format of image files downloaded from the camera
You can specify the format of image files (JPEG, PICT, TIFF or PNG) downloaded from the
camera to suit your requirements.
Change the size of images downloaded from the camera
You can change the size of image files downloaded from the camera to suit your requirements.
1

Contents
What You Can Do Using This Software........................................................1
Reading the Manual......................................................................................4
Chapter 1 Preparing the Software.................................................... 7
Explanation of Software ................................................................................7
System Environment ...................................................................................10
Installing the Software.................................................................................11
To Install the Software............................................................................................. 11
Uninstalling the Software ........................................................................................ 15
Chapter 2 Connecting the Camera to a Macintosh....................... 17
Connecting the USB Cable.........................................................................17
Connecting the RICOH BASE to a Macintosh ........................................................ 17
Connecting the Camera to a Macintosh ................................................................. 19
Disconnecting the USB Cable....................................................................20
Chapter 3 Using RICOH Gate.......................................................... 21
Starting and Exiting RICOH Gate ...............................................................21
Starting Up RICOH Gate......................................................................................... 21
Exiting RICOH Gate ................................................................................................ 21
Closing the RICOH Gate Window ........................................................................... 22
Functions of the RICOH Gate Buttons........................................................23
Functions of the RICOH Gate Buttons .................................................................... 23
RICOH Gate Menu .................................................................................................. 24
Saving Camera Files in the Macintosh .......................................................25
Saving Data Using the Save Buttons ...................................................................... 25
Changing the Save Button Settings ........................................................................ 26
Changing the Setting of the START key.................................................................. 29
Automatically Saving Files Using the START key ................................................... 31
Saving Files From the Macintosh to the Camera........................................32
Uploading Using the Upload Button ....................................................................... 32
Changing the Upload Button Settings .................................................................... 34
Making an Index Print.................................................................................38
Making an Index Print ............................................................................................. 38
Changing the Print Settings .................................................................................... 38
Starting Up an Application..........................................................................41
Setting the Application to be Started Up ................................................................ 41
Starting Up the Application..................................................................................... 42
Other Functions ..........................................................................................43
Turning the Camera Off .......................................................................................... 43
2

Displaying and Setting Camera Information (Camera Property) ............................ 43
Changing the RICOH Gate Design......................................................................... 43
Displaying the RICOH Gate Version ....................................................................... 44
Appendix.............................................................................................. 45
Using the Caplio RR10 as a Web Camera .................................................45
Troubleshooting..........................................................................................48
Menus .........................................................................................................49
File Menu................................................................................................................. 49
RICOH Gate Setup Menu........................................................................................ 49
Help Menu............................................................................................................... 49
Setup Menu for Each Button ................................................................................... 49
Index...........................................................................................................50
Alphabetical Index .................................................................................................. 50
Installing Only Selected Software.................................................................................14
Tips
To automatically save images using the START key ....................................................19
Uploading an MP3 File .................................................................................................37
About ASCII..................................................................................................................44
3

Reading the Manual
This section explains the contents of each operation manual, how to read this manual, and the
meanings of the symbols used in this manual.
How to read each operation manual
■
For Macintosh Users
RICOH Gate for Macintosh
(this manual)
Read this manual first
For Windows Users
RICOH Gate for Windows
How to Use the Camera
Caplio RR10 Camera Operation
Manual
(Digital Camera)
m
This manual explains how to install the necessary
software, how to connect the camera to the
Macintosh, and how to use RICOH Gate to
transfer files between the camera and the
Macintosh.
m
This manual explains how to install the necessary
software, how to connect the camera to the PC,
and how to use RICOH Gate to transfer files
between the camera and the PC.
m
This manual explains the operation procedures,
from the preparations that are required before
using the camera to using the various functions to
record and play back files.
4

How to read this manual
■
To be read without fail
To install the necessary
software
m
Chapter 1 Preparing the Software
Before you can use RICOH Gate, you need to
install the software. This chapter explains about
the software on the CD-ROM supplied with the
camera.
To connect the camera to a
Macintosh
To use RICOH Gate
To be read as required
When you want to know how to
use other functions or to look
up the list of menus, etc.
m
Chapter 2 Connecting the Camera to a Macintosh
This chapter explains how to connect the camera
to a Macintosh.
m
Chapter 3 Using RICOH Gate
You can save recorded images in the Macintosh, or
save images stored in the Macintosh in the camera.
You can also make an index print of images stored
in the Macintosh.
m
Appendix
You can view the RICOH Gate menus, etc.
5
Meanings of Symbols
■
The meanings of the symbols used in this manual are as follows.
Important
This indicates points or restrictions relating to operation requiring your attention.
Important
• Do not place the camera on
the RICOH BASE with the
AC adapter converter
attached to the camera.
Note
This indicates a supplementary explanation of the operation concerned or points you
should know.
Note
• When uploading MP3 files,
be sure to read “Uploading
an MP3 File” (p.37) first.
m
This indicates the reference page for the function or operation concerned in this manual.
mmmmMenu:[File]→[Quit]
“System Environment” (p.10)
Reference destination in this manual
Item to be selected when operating
from the menu
This indicates information it is useful to know.
Tips
The examples of screen displays used in this manual are taken from MacOS9.
The examples of RICOH Gate screen displays are in the case of the background illustration
pattern being set to Basic.
The Caplio RR10 is referred to as “the camera” in this manual.
6
Chapter
1
Preparing the Software
This chapter explains the preparations required to use the
supplied software, such as the necessary system environment,
installing RICOH Gate, etc.
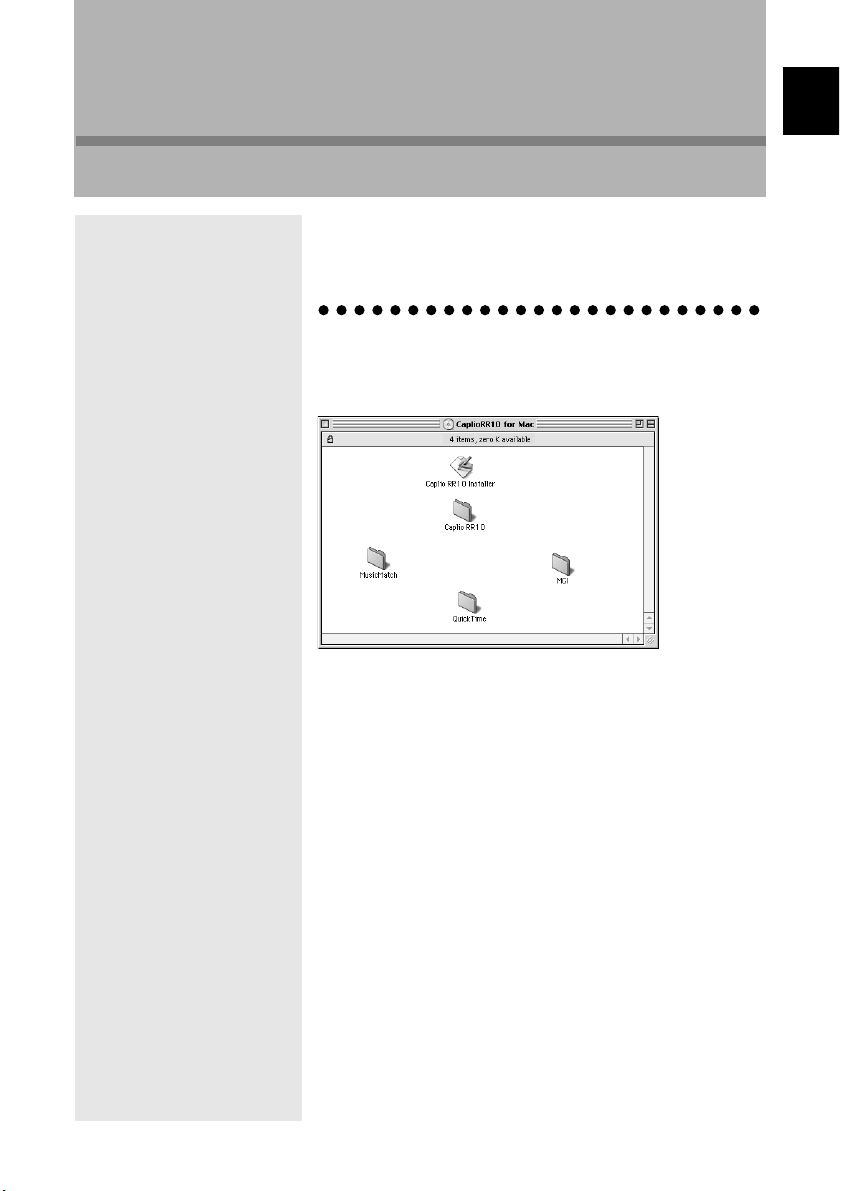
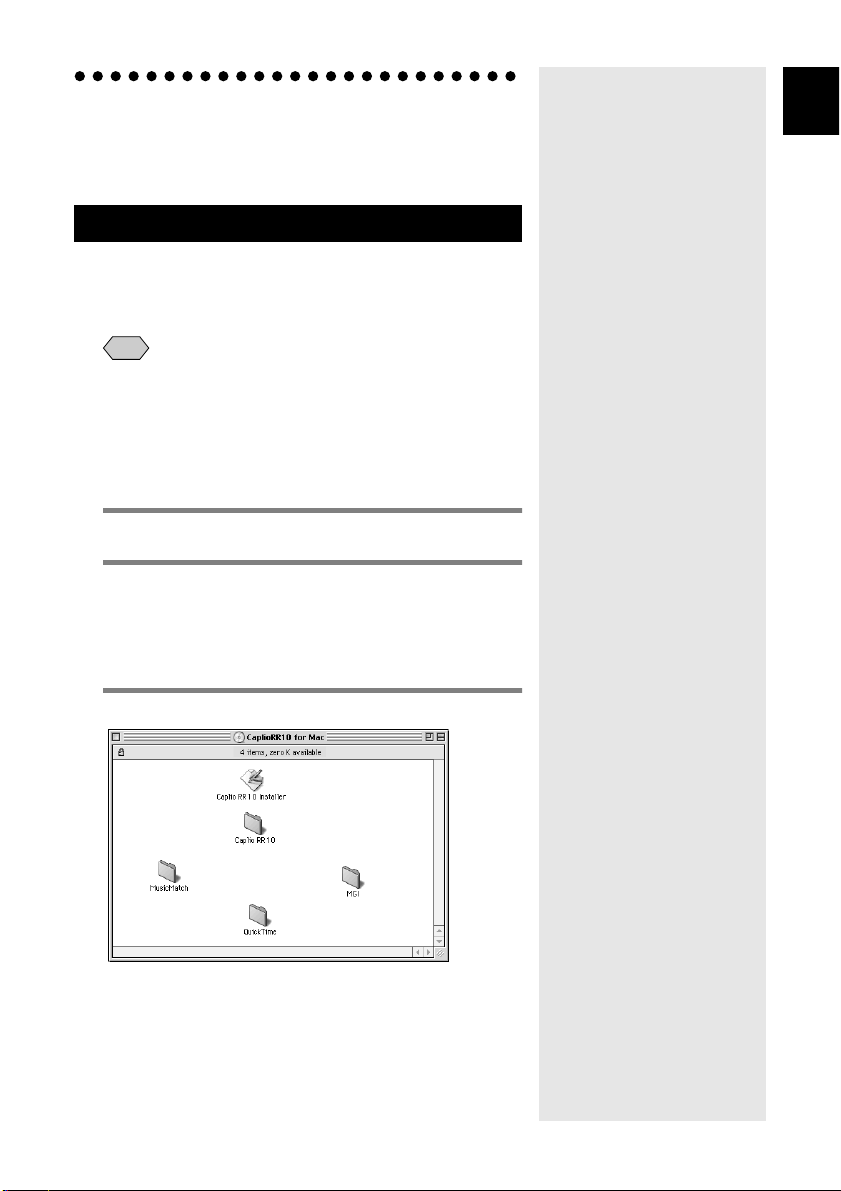
Explanation of Software
The following window is displayed when the CD-ROM is
opened.
1
Preparing the Software
7
Caplio RR10 Folder
■
Open the CD-ROM and you will find the [Caplio RR10
Software] Installer. To install the software listed below, click
on the Installer.
mm
mm
See "Installing the Software" (p.11).
Software Description
RICOH Gate
TWAIN Driver
USB Driver
Video Driver
This software enables you to download files
recorded with the camera and save them in
the Macintosh, or transfer files stored in the
Macintosh to the camera. RICOH Gate also
enables you to run other applications.
mm
mm
See "Using RICOH Gate" (p.21).
This software is for downloading still
images recorded with the camera directly
from the TWAIN application.
By installing the USB Driver, you can
connect the camera to a Macintosh using the
USB interface and use RICOH Gate,
TWAIN Driver and Video Driver.
If you select Easy installation, the USB
Driver is automatically installed. If you
select custom installation, the USB Driver is
automatically installed when you install
RICOH Gate, TWAIN Driver, or Video
Driver.
This software is required to use the camera
as a web camera (video capture camera).
8
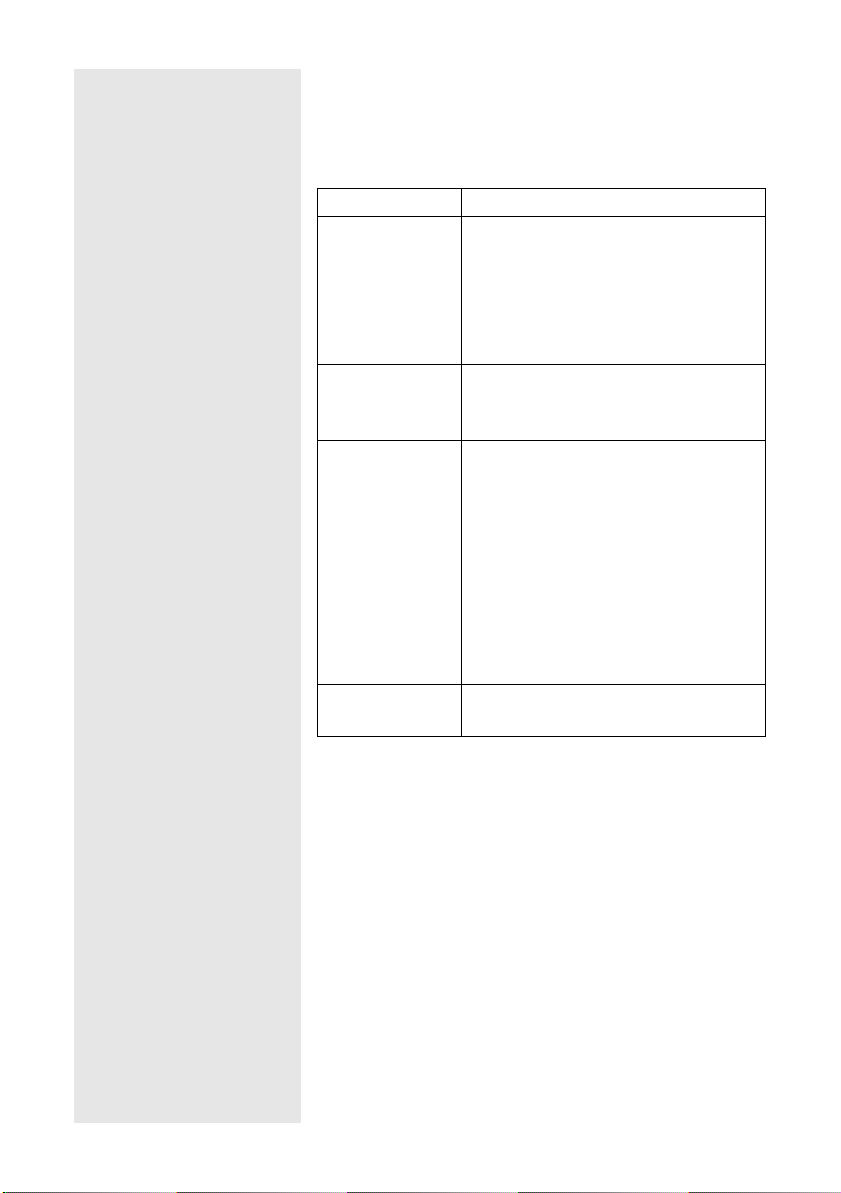
About Other Folders
■
Software Description
QuickTime folder
QuickTime 4 This folder contains QuickTime 4.1.2.
Check which version you are using before
installing the software.
MusicMatch folder
MusicMatch
JUKEBOX
MGI folder
MGI PhotoSuite This folder contains MGI PhotoSuite.
This folder contains [MusicMatch
JUKEBOX] software.
This software is for converting Audio CD
and WAV files to MP3 files (audio
compression files). You can play music by
downloading MP3 files through RICOH
Gate. (Use commercially available stereo
earphones.)
Note
• MP3 is an abbreviation of MPEG-1
AudioLayer 3 and is the international
audio compression standard. Data can
be compressed into about one-tenth of
the original volume.
• For more information, refer to Help of
the software.
This software is a well-rounded photo
editing package that delivers extensive
multimedia file playback and online
imaging service support.
1
Preparing the Software
Note
• If you have any queries concerning the above software, refer to the
ReadMe or Help of the relevant software first before contacting the
Support Center.
9
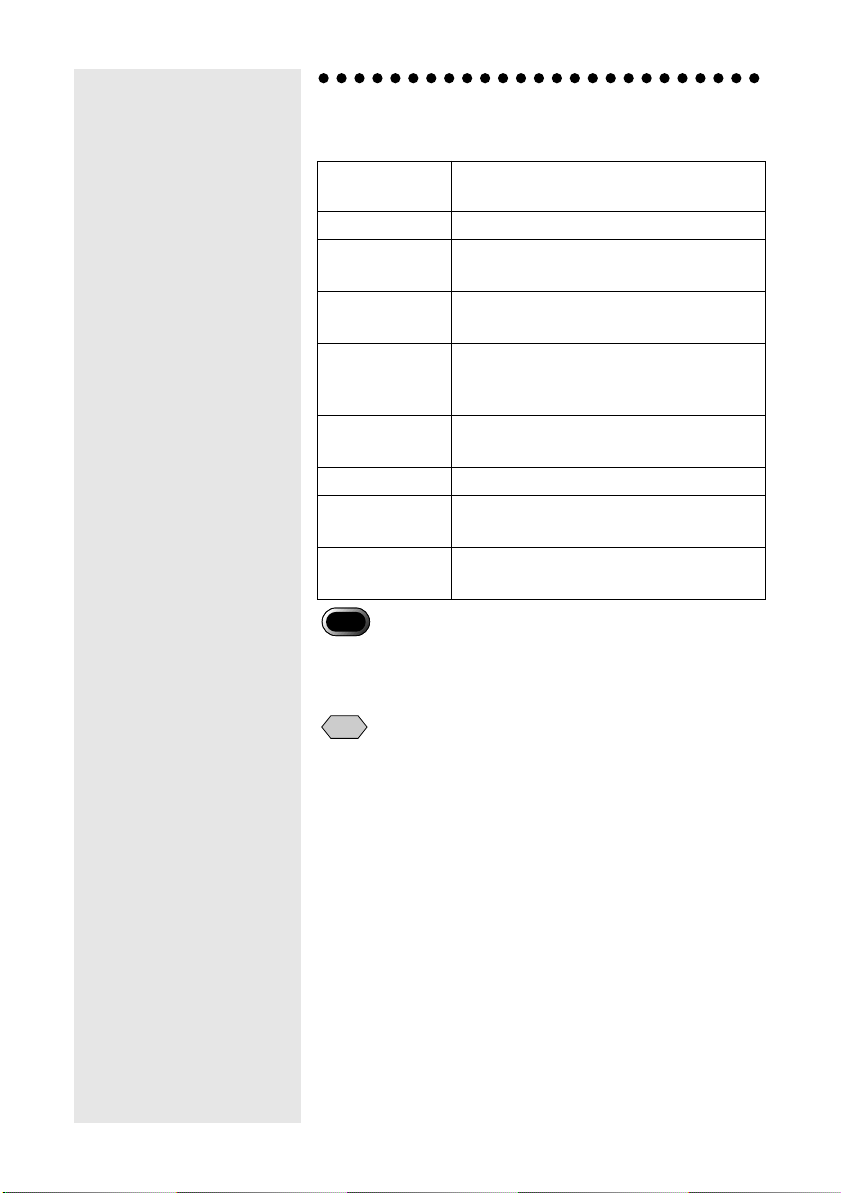
System Environment
The following environment is required to use RICOH Gate.
Operating
System
Macintosh
Memory
Memory
required
Available HD
space for
installation
Display
resolution
Display colors
CD-ROM drive
USB port
Important
• QuickTime 4.1.2 or later is required to open Text Mode File (TIFFMMR) recorded with the Ricoh digital camera.
MacOS 8.6 ~ 9.1
Macintosh with a USB port
96 MB or more (128 MB or more
recommended)
16 MB or more application memory without
using the compression utility
10 MB or more (for installation)
100 MB or more (for operation)
640 × 480 pixels or more (800 × 600 or more
recommended)
256 or more (32000 or more recommended)
CD-ROM drive capable of use on the above
Macintosh
USB port capable of use on the above
Macintosh.
10
Note
• If you are using files containing a large volume of data such as
motion picture or non-compression files, allocate sufficient
application memory for RICOH Gate.
Installing the Software
This section explains how to install the necessary software,
such as RICOH Gate, USB Driver for connecting the camera to
a Macintosh.
To Install the Software
■
To install the Caplio RR10 Software
Exit all other applications before following the procedures
below to install the software.
Note
• This section explains the installation procedure by the standard
installation method. Users who are familiar with Macintoshes
and digital cameras may choose to specify the software they
wish to install.
•
See "Caplio RR10 Folder" (p.8) to check the software installed
by this procedure.
Turn the Macintosh on.
1
Insert the CD-ROM supplied in the CD-
2
ROM drive.
The CD-ROM icon will appear on the desktop and
open the window.
1
Preparing the Software
Double-click on the installer icon.
3
The installer will start up and the initial screen will be
displayed.
11
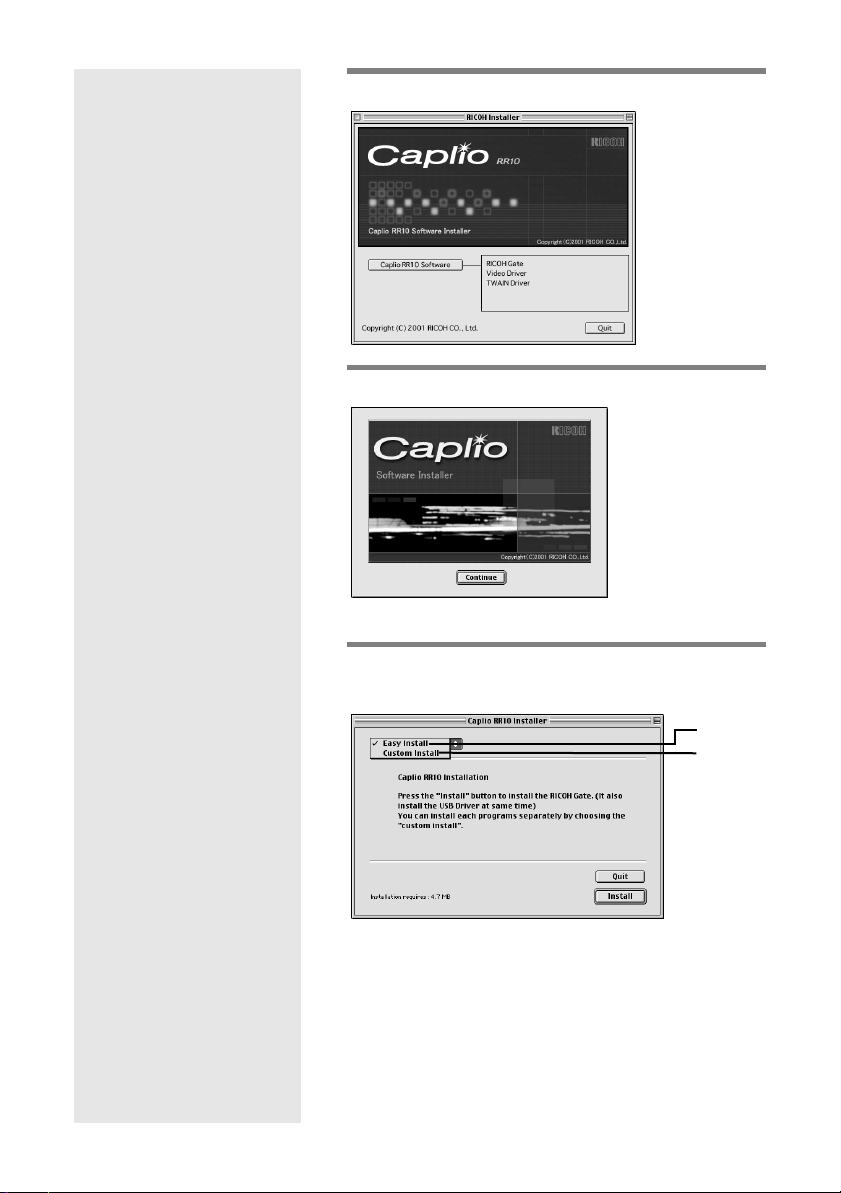
4
Click on [Caplio RR10 Software].
5
Click on [Continue].
The installer screen will be displayed.
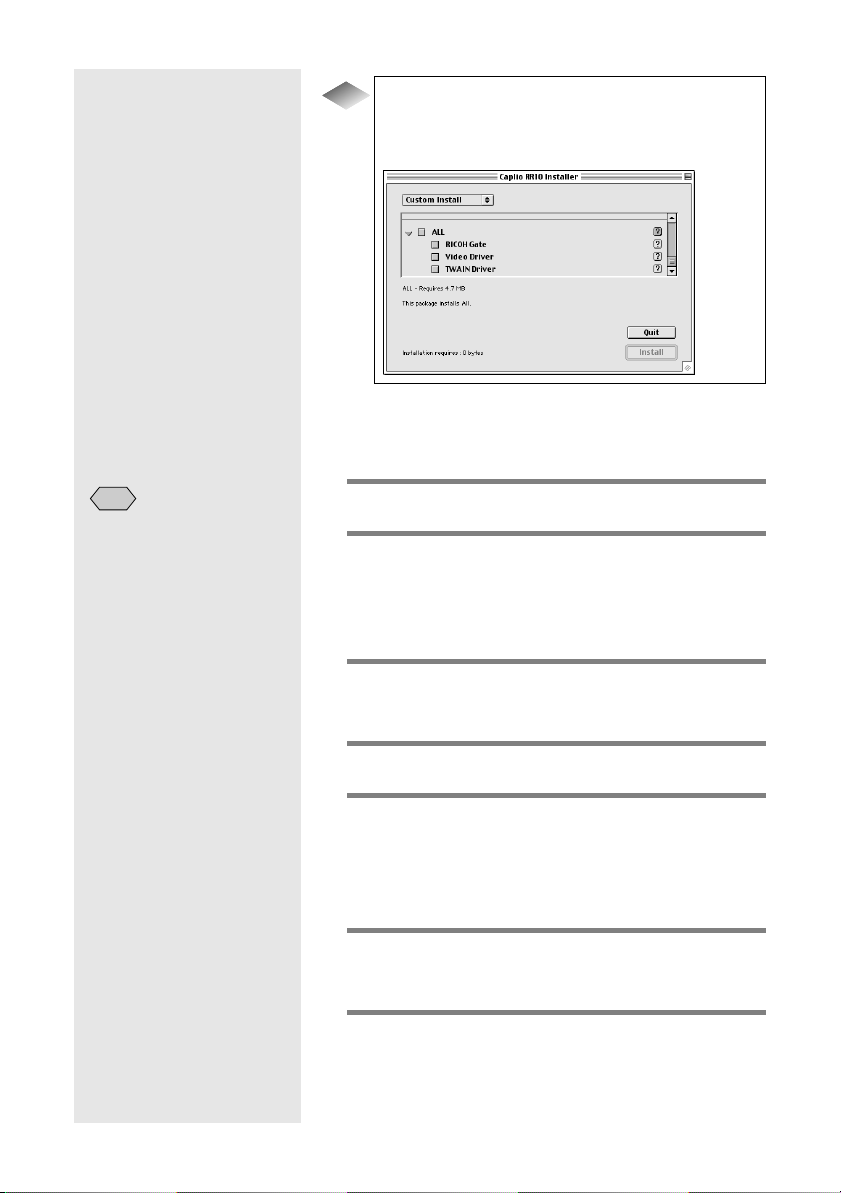
6
Select [Easy Install] and click on
[Install].
12
1
2
1 Easy Install
RICOH Gate and USB Driver will be installed.
2 Custom Install
Only the selected software will be installed.
Note
• If you select [Custom Install], the Custom Install screen will
be displayed. Choose the software that you want to install and
select [Install].
mm
mm
See "Installing Only Selected Software" (p.14).
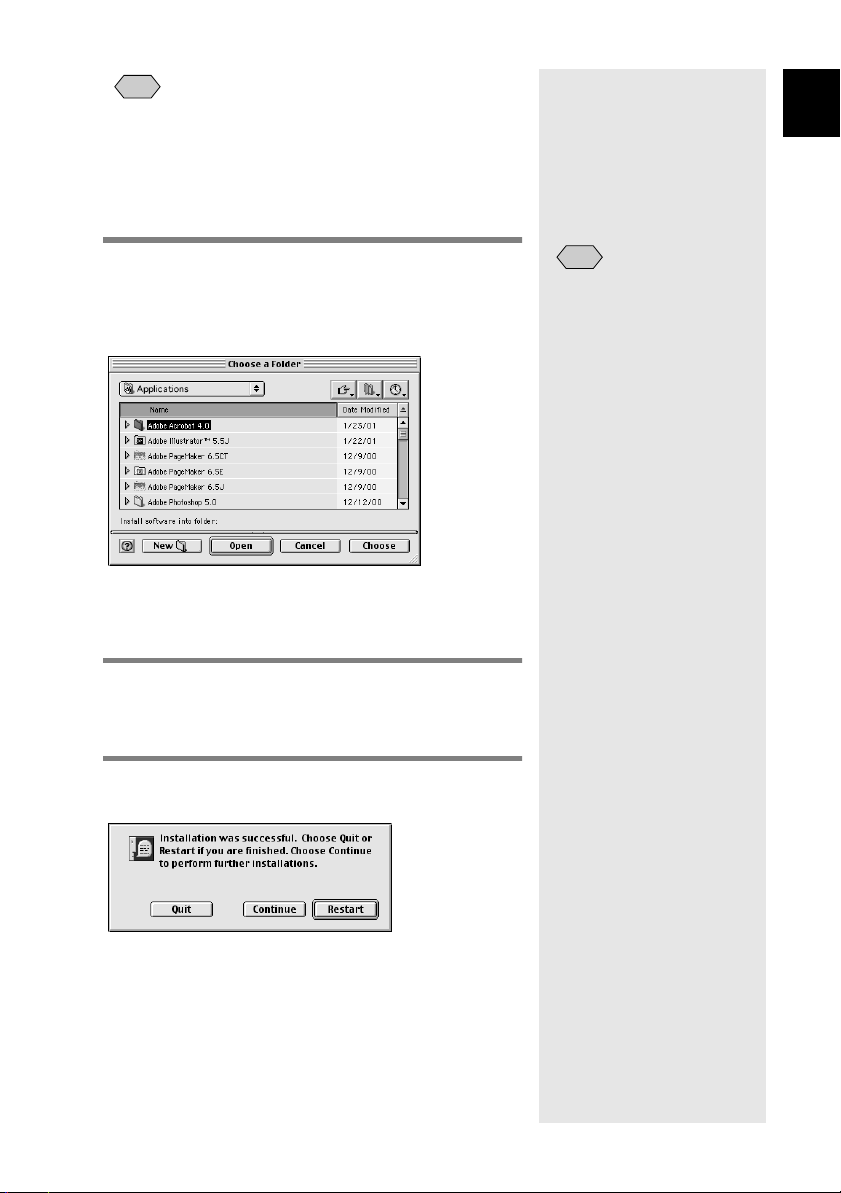
The [Choose a Folder] window will be displayed.
1
Preparing the Software
Choose the destination folder and click
7
on [Choose].
If you want to create a new folder in which to install
the software, select [New].
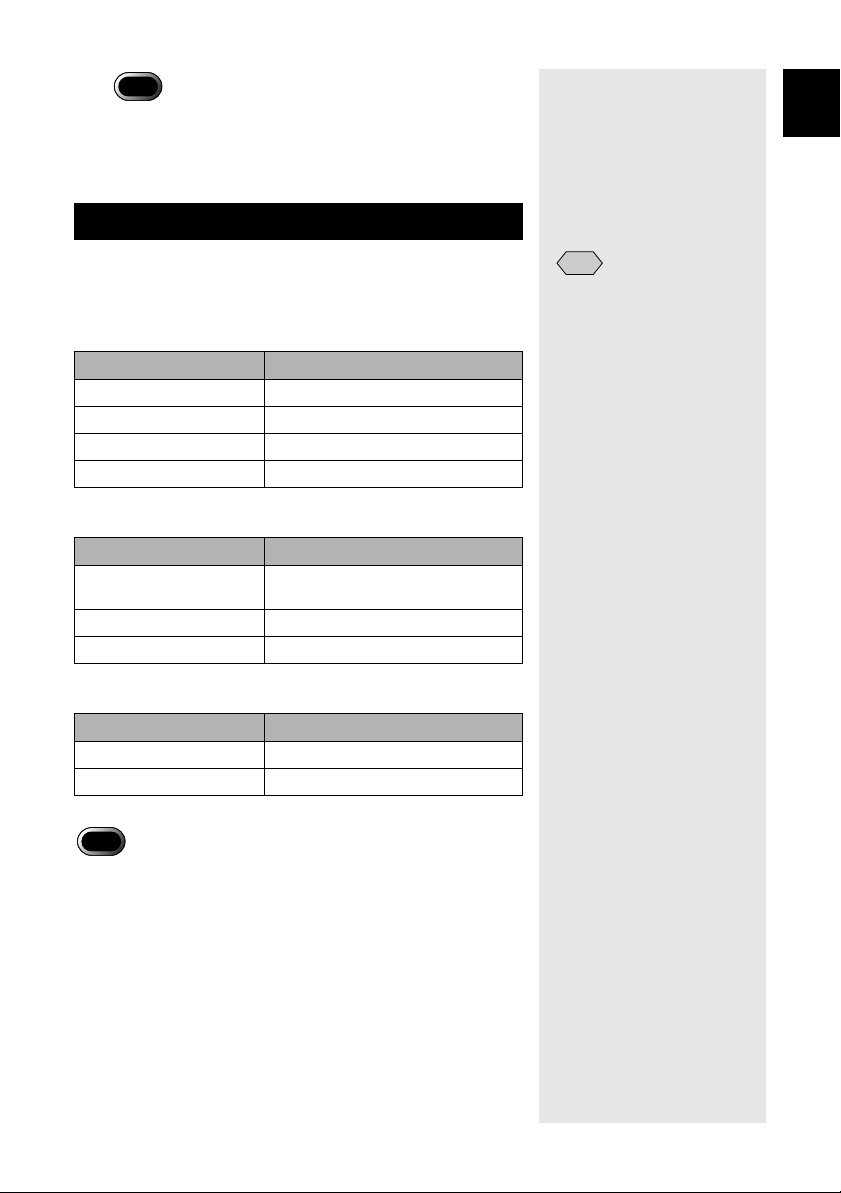
The message confirming that the Macintosh must be
restarted when installation is completed will be
displayed.
Select [Yes].
8
Installation will be performed and when completed, a
message to that effect will be displayed.
Select [Restart].
9
The Macintosh will be restarted.
Note
• The default setting for the
installation folder is Caplio
RR10 Software.
If you do not want to restart the Macintosh
straightaway, select [Quit], and if you want to
continue, select [Continue].
13
Installing Only Selected Software
Tips
If you select [Custom Install] in Step 6, the screen
for selecting the software will be displayed. You can
select the software that you need to install.
To Install QuickTime
■
QuickTime 4.1.2 or later is required for Text mode (TIFFMMR) recorded with the camera.
Note
• If QuickTime 4.1.2 or later
is already installed in your
Macintosh, this operation is
not required.
1
Turn the Macintosh on.
2
Insert the CD-ROM supplied into the CDROM drive.
The CD-ROM icon will be displayed on the desktop
and the window will be opened.
3
Open the [QuickTime] folder on the CDROM.
4
Open the [QuickTime] folder.
5
Double-click on the [QuickTime
Installer] icon in the [QuickTime
Installer] folder.
Installation of QuickTime will start.
6
Proceed in accordance with the
instructions displayed on the screen.
7
When installation is finished, restart the
Macintosh.
14
Important
• QuickTime may not be installed properly if an old version of
QuickTime is already running on your Macintosh. If this
happens, delete the old version of QuickTime before
installing.
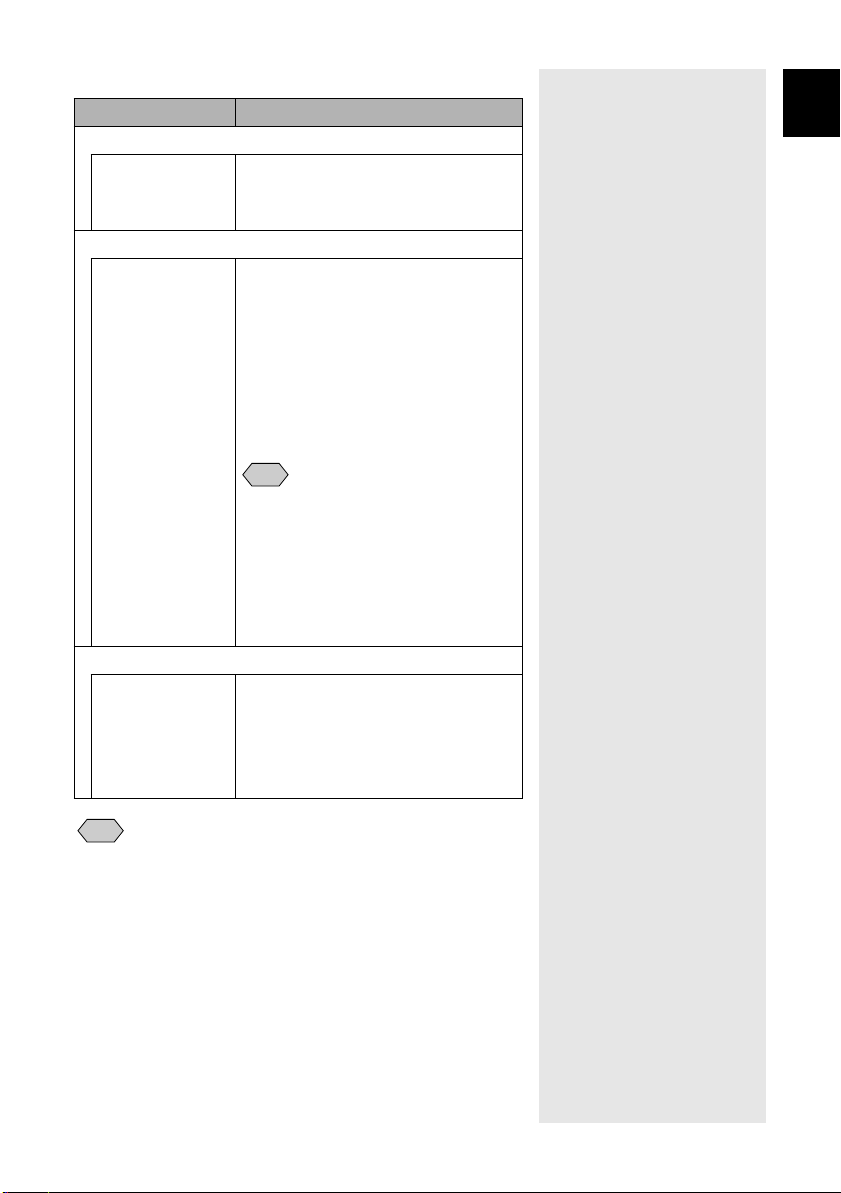
Uninstalling the Software
To delete unwanted software from the Macintosh, use the drag
& drop function to transfer the file to the trash can.
The file names and installation folders are as follows.
RICOH Gate
File name Installation Folder
RICOH Gate Caplio RR10 Software
RICOH Gate Alias System Folder : Startup Items
Caplio RR10 USB Driver System Folder : Extensions
Caplio RR10 PPC LIB System Folder : Extensions
TWAIN Driver
File name Installation Folder
Caplio RR10 TWAIN System Folder : Preferences :
TWAIN
Caplio RR10 USB Driver System Folder : Extensions
Caplio RR10 PPC LIB System Folder : Extensions
1
Preparing the Software
Note
• The Caplio RR10 Software
folder is created on the drive
that you were specified when
installed.
Video Driver
File name Installation Folder
Caplio RR10 Vdig System Folder : Extensions
Caplio RR10 USB Driver System Folder : Extensions
Important
• The Caplio RR10 USB Driver and Caplio RR10 PPC LIB are
required to use more than one software, as shown above. If you
delete the USB Driver when uninstalling unwanted files, the other
software will become unusable.
15
 Loading...