

Page 1
Operating Instructions Printer Client Reference 2
Introduction ........................................................................................................................... 5
How to Read This Manual.................................................................................................... 6
1.Macintosh Configuration
Configuring Macintosh......................................................................................................... 8
Changing to EtherTalkChanging to EtherTalk.................................................................................. 9
Configuring the Printer...................................................................................................................... 9
Changing the Printer Name............................................................................................................. 10
Changing the Zone .......................................................................................................................... 10
2.NetWare Configuration
Windows 95/98/Me .............................................................................................................. 11
Windows 2000...................................................................................................................... 14
Windows NT 4.0................................................................................................................... 17
1
3.Software and Utilities Included on the CD-ROM
Software and Utilities Included on the CD-ROM ............................................................ 20
Printer Drivers for This Printer......................................................................................... 21
SmartNetMonitor for Admin ............................................................................................. 23
SmartNetMonitor for Client............................................................................................... 25
Page 2

Operating Instructions Printer Client Reference 2
4.Setting up the Printer Driver and Canceling a Print Job
PCL 5c - Accessing the Printer Properties........................................................................ 28
Windows 95/98/Me - Accessing the Printer Properties.................................................................. 28
Windows 2000 - Accessing the Printer Properties.......................................................................... 30
Windows NT 4.0 - Accessing the Printer Properties....................................................................... 33
RPCS - Accessing the Printer Properties.......................................................................... 36
Windows 95/98/Me - Accessing the Printer Properties.................................................................. 36
Windows 2000 - Accessing the Printer Properties.......................................................................... 38
Windows NT 4.0 - Accessing the Printer Properties....................................................................... 41
PostScript 3 - Setting up for Printing................................................................................ 44
Windows 95/98/Me - Accessing the Printer Properties.................................................................. 44
Windows 2000 - Accessing the Printer Properties.......................................................................... 46
Windows NT 4.0 - Accessing the Printer Properties....................................................................... 49
Macintosh - Setting up for Printing................................................................................................. 52
Canceling a Print Job.......................................................................................................... 54
Windows 95/98/Me - Canceling a Print Job ................................................................................... 54
Windows 2000 - Canceling a Print Job........................................................................................... 55
Windows NT 4.0 - Canceling a Print Job........................................................................................ 57
2
Page 3
Operating Instructions Printer Client Reference 2
5.Uninstalling the Printer Driver
Uninstalling the PCL 5c Printer Driver ............................................................................ 59
Windows 95/98 - Uninstalling the PCL 5c Printer Driver.............................................................. 59
Windows 2000 - Uninstalling the PCL 5c Printer Driver............................................................... 60
Windows NT 4.0 - Uninstalling the PCL 5c Printer Driver............................................................ 61
Uninstalling the RPCS Printer Driver............................................................................... 62
Windows 95/98 - Uninstalling the RPCS Printer Driver ................................................................ 62
Windows 2000 - Uninstalling the RPCS Printer Driver.................................................................. 63
Windows NT 4.0 - Uninstalling the RPCS Printer Driver.............................................................. 64
Uninstalling the PostScript 3 Printer Driver .................................................................... 65
Windows 95/98 - Uninstalling the PostScript 3 Printer Driver....................................................... 65
Windows 2000 - Uninstalling the PostScript 3 Printer Driver........................................................ 66
Windows NT 4.0 - Uninstalling the PostScript 3 Printer Driver..................................................... 67
Macintosh - Uninstalling the PostScript 3 Printer Driver............................................................... 67
6.Sample Print/Locked Print
3
Sample Print......................................................................................................................... 68
Printing the Remaining Sets............................................................................................................ 70
Deleting a Sample Print File........................................................................................................... 72
Checking the Error Log................................................................................................................... 74
Locked Print......................................................................................................................... 76
Entering the Password..................................................................................................................... 78
Deleting the Locked Print File........................................................................................................ 80
Checking the Error Log................................................................................................................... 82
Page 4
Operating Instructions Printer Client Reference 2
7.Troubleshooting
Checking the Printer Status ............................................................................................... 84
SmartNetMonitor for Client............................................................................................................ 84
Web Browser............................................. ......... ...................................................... ....................... 85
8.Appendix
Color Guide.......................................................................................................................... 86
Color Printing Basics....................................................................................................................... 86
Staple and Punch Position .................................................................................................. 89
Stapling............................................................................................................................................ 89
Punching.......................................................................................................................................... 91
Collate and Job Separation................................................................................................. 94
INDEX.................................................................................................................................. 96
4
Page 5
Operating Instructions Printer Client Reference 2
Introduction
To get maximum versatility from this machine all operators should carefully read and follow the instructions in this manual. Please keep this manual in a handy place near the machine.
Please read th e Saf et y I nfo rm at io n in th e "S e tup G uid e " b efo re us ing th is machine. It contains i m po rtant information related to USER SAFETY and PREVENTING EQUIPMENT PROBLEMS.
Trademarks
AppleTalk, EtherTalk, LaserWriter, Macintosh are registered trademarks of Apple Computer, Inc.
Ethernet is a registered trademark of Xerox Corporation.
Microsoft, Windows, Windows NT are registered trademarks of Microsoft Corporation in the United
States and/or other countries.
Novell, Ne tWare are registered trademarks of Nov ell, Inc.
PostScript is a registered trademark of Adobe Systems, Incorporated.
PowerPC is a registered tradem ark of International Business Machines Corporation.
PCL is a registered trademark of Hewlett-Packard Company.
Solaris is a trademark or regis tered trademark of Sun Microsy stems, Inc. in the United States and oth er countries.
Other product names used here in are f or i dent if ic at ion purposes only and might be trademarks of their
respective companies. We disclaim any and all rights in those marks.
Note
5
The proper names of the Windows operating systems are as follows:
• Microsoft
• Microsoft
• Microsoft
• Microsoft
• Microsoft
• Microsoft
• Microsoft
®
Windows® 95 operating system
®
Windows® 98 operating system
®
Windows® Millennium Edition (Windows Me)
®
Windows® 2000 Professional
®
Windows® 2000 Server
®
Windows NT® Server operating system Version 4.0
®
Windows NT® Workstation operating system Version 4.0
Page 6
Operating Instructions Printer Client Reference 2
R
R
How to Read This Manual
Symbols
In this manual, the following symbols are used:
WARNING:
This symbol indicates a potentially hazardous situation which, if instructions are not followed, could
result in death or serious injury.
CAUTION:
This symbol indicates a potentially hazardous situation which, if instructions are not followed, may result in minor or moderate injury or damage to property.
* The statements above are notes for your safety.
Important
If this instruction is not foll owed, pape r might be misf ed, origin als might be d amaged, or d ata might be
lost. Be sure to read this.
Preparation
This symbol indicates the prior knowledge or preparations required before operating.
Note
This symbol indicates precautions for operation, or actions to take after misoperation.
6
Limitation
This symbol indicates numerical limits, functions that cannot be used together, or conditions in which
a particular function cannot be used.
Page 7
Operating Instructions Printer Client Reference 2
Reference
This symbol indicates a reference.
[]
Keys that appear on the machine's panel display.
Keys and buttons that appear on the computer's display.
{}
Keys built into the machine's operation panel.
Keys on the computer's keyboard.
7
Page 8
Operating Instructions Printer Client Reference 2
1. Macintosh Configuration
Configuring Macintosh
This section describes how to configure a Macintosh to use EtherTalk. The actual procedures to configure a Macintosh may differ depending on the version of the Mac OS. The following procedure describes how to configure Mac OS 8. If you are not using Mac OS 8, see the manual that comes with
your version of the Mac OS for more information.
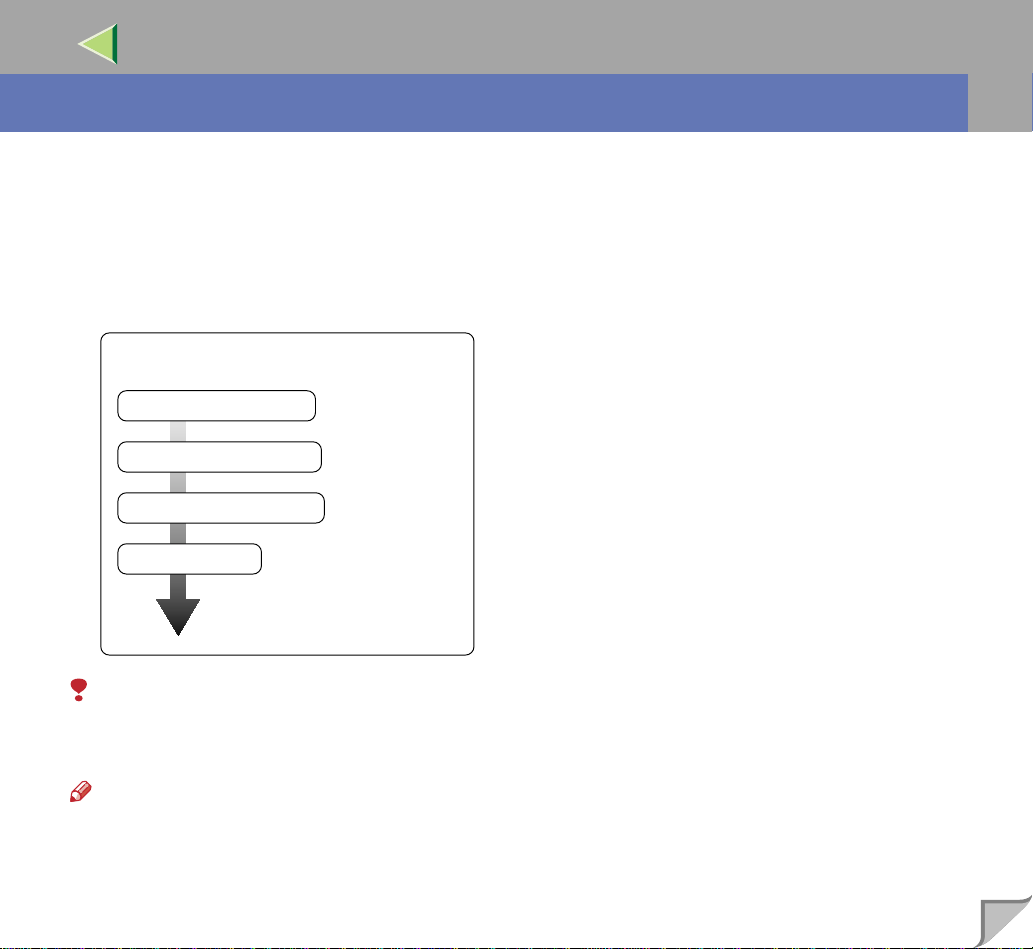
Basic Procedure
Change to EtherTalk
Configure the printer
Change the printer name
Change the zone
8
Limitation
❒ For use with Macintosh OS7.6 or later (excludes OS X).
❒ For use with a Macintosh, Power PC is required.
Note
❒ The PostScript 3 printer driver is stored in the following folder on the CD-ROM.
PS Driver:(lan gu age ): Di sk 1
Page 9
Operating Instructions Printer Client Reference 2
Changing to EtherTalkChanging to EtherTalk
Follow the procedure to configure a Macintosh to use EtherTalk.
Reference
❒ For more information abou t insta lling the s oftwar e requir ed for Ethe rTalk , see the Macin tosh ma n-
uals.
A
Open [Control Panel], and then double-click the [AppleTalk] icon.
B
From the [Connect via:] pop-up menu, select "Ethernet".
C
If you change zones, select a name from the [Current zone:] pop-up menu.
D
Close the [AppleTalk] control panels .
E
Restart the computer.
Configuring the Printer
9
Use the operation panel to activate the AppleTalk protocol. (The factory default is active.)
Reference
❒ For more information abo ut the conf igu ration, see the "Configuring the Printer for the Network with
the Operation Panel" in Administrator Reference 1 that comes with this printer.
Page 10
Operating Instructions Printer Client Reference 2
Changing the Printer Name
If the network has several same model printers, the names will be the same. Printers that have the same
name will have their names chang ed sli ghtly i n the Choos er. For exa mple , three printe rs named " print er" will appear in the chooser as "printer0", "printer1" and "printer2".
For more information about changing the printer name, see the PostScript 3 Supplement.
Changing the Zone
It may be necessary to change the zone configuration.
For more information about changing the printer name, see the PostScript 3 Supplement.
10
Page 11
Operating Instructions Printer Client Reference 2
2. NetWare Configuration
This chapter describes how to set up a client computer when using a NetWare print server.
Note
❒ This section assume s th at the c li ent has NetW ar e cl ie nt ap pli ca tio ns inst alled and is correctly con-
figured to communicate with a NetWare print server. If not, install the necessary applications before
starting the setting up procedur e.
Windows 95/98/Me
Follow the procedure to set up a Windows 95/98/Me client.
After installing the printer driver, change the print port to NetWare queue.
Preparation
❒ Log on to the NetWare file server before starting the following procedure.
A
Install the printer driver you want to use as "Local Printer".
Reference
❒ For more information about installing the printer driver, see Printer Client Reference 1 that comes
with this printer.
Note
❒ Any port can be selected during the installation, however, LPT1 is recommended.
11
Important
❒ Never have two versions of the same printer driver installe d on your system at the same time.
When upgrading to a new version of the printer driver, delete the old version, and then install the
new one.
B
Click [Start], point to [Settings], and then click [Printers].
Page 12
Operating Instructions Printer Client Reference 2
C
In the [Printers] window, click the icon of the printer you want to use.
On the [File] menu, click [Properties].
D
Click the [Details] tab, and then click [Add Port].
E
Click [Network], and then click [Browse].
F
On the network tree, double- click the name of the file server.
The queu es are displayed.
G
Click the queue you want to print, and then click [OK].
H
Click [OK].
In the [Print to the following port] box, a network path to the printer appears.
I
Click [OK] to close the Printer Properties, and again, open it.
J
Click the [Printer Settings] tab.
K
Click to clear the [Form Feed] and [Enable Banner] check boxes.
12
Note
❒ You should not chec k thes e boxes becau se they shou ld be spec ified usin g the pr inter dr iver. If
they are selected, the printer might not print correctly.
When using the PostScript 3 printer driver
Follow these steps to set up for the PostScript 3 printer driver.
A Click the [PostScript] tab.
B Click [Advanced].
C Click to clear the [Send CTRL+D before job] and [Send CTRL+D after job] check boxes.
Page 13

Operating Instructions Printer Client Reference 2
L
Click [OK] to close the Printer Propertie s.
----If a message is displayed during installation of the printer driver
When there is a driver in the computer that is newer than the one curren tly being installed, A message
window is displayed.
In such a case, you cannot inst all with the Auto Run program. Use the driver that was used in installing
the driver that is displayed in the message, and reinstall with [Add Printer].
A Click [Start], point to [Settings], and then click [Printers].
B Double-click the [Add Printer] icon.
C Follow the wizard to install the driver.
If the printer driver disk is a CD-ROM, the sources of installa tion are as fo llows. If the i nstaller st arts
up, click [Cancel] to quit it.
• PCL 5c
DRIVERS\PCL5C\WIN9X_ME\(Language)\DISK1
• RPCS
DRIVERS\RPCS\WIN9X_ME\(Language)\DISK1
• PostScript 3
DRIVERS\PS\WIN9X_ME\(Language)\DISK1
13
Page 14

Operating Instructions Printer Client Reference 2
Windows 2000
Preparation
❒ Log on to the NetWare file server before starting the following procedure. To use the NetWare serv-
er, select [Typical] installation.
A
Close all applications that are running.
B
Insert the CD-ROM into the CD-ROM drive.
The installer will start by Auto R un.
Important
❒
Never have two versions of the same printer driver installed on your system at the same time. When
upgrading to a new version of the printer dri ver, delete the old version, and then install the new one.
Note
❒ Auto Run might not automatically work with certain OS settings. In this case, launch "INST-
TOOL.EXE" located on the CD-ROM root directory.
14
C
Follow the instructions on the screen.
D
Select [Typical] installation, and then click [Next].
E
Follow the instructions on the screen.
F
Click [Add] when the "Select Port" dialog box appears.
G
Select [network printer], and then click [OK].
H
Double-click the computer nam e you want to use a s a print se rver i n the "Browse for Pr inter" wi ndow.
I
Select the printer you want to use, and then click [OK].
Page 15
Operating Instructions Printer Client Reference 2
J
After confirming that the pass indicates the selected printer has been displayed, click [Next].
K
Follow the instructions on the screen.
L
Restart the computer after installation is complete.
Note
❒ If the [Digital Signature Not Found] dialog box appears, click [Yes] to continue the installation.
M
Click [Start] on the task bar, point to [Settings], and then click [Printers].
The [Printers] window is displayed.
[
N
Click to select the icon of the printer you want to use, and then click
The printer driver's property is displayed.
Limitation
❒ Changing the printer settings requires Manage Printers permission. Members of the Administra-
tors and Power Users groups have Manage Printers permission by default. When you set up options, log on using an account that has Manage Printers permission.
Properties
]
on the
[
File
]
menu.
15
O
Click the [NetWare Settings] tab.
P
Click to clear the [Form feed] and [Enable banner] check boxes, and then click [OK].
When using the PostScript 3 printer driver
Follow these steps to set up for the PostScript 3 printer driver.
A Click the [PostScript] tab.
B Click [Advanced].
C Click to clear the [Send CTRL+D before job] and [Send CTRL+D after job] check boxes.
Page 16
Operating Instructions Printer Client Reference 2
Q
Click [OK] to close the [Printer properties] dialog box.
----If a message is displayed during installation of the printer driver
When there is a driver in the computer that is newer than the one currently being installed, the warning
dialog box appears.
In such a case, you cannot inst all with the Auto Run program. Use the driver that was used in installing
the driver that is displayed in the message, and reinstall with [Add Printer].
A Click [Start], point to [Settings], and then click [Printers].
B Double-click the [Add Printer] icon.
C Follow the wizard to install the driver.
If the printer driver disk is a CD-ROM, the sources of installa tion are as fo llows. If the i nstaller st arts
up, click [Cancel] to quit it.
• PCL 5c
DRIVERS\PCL5C\WIN2000\(Language)\DISK1
• RPCS
DRIVERS\RPCS\WIN2000\(Language)\DISK1
• PostScript 3
DRIVERS\PS\WIN2000\(Language)\DISK1
16
Page 17
Operating Instructions Printer Client Reference 2
Windows NT 4.0
Preparation
❒ Log on to the NetWare file server before starting the following procedure. To use the NetWare serv-
er, select [Typical] installation.
A
Close all applications that are running.
B
Insert the CD-ROM into the CD-ROM drive.
The installer will start by Auto R un.
Important
❒ Never have two versions of the same printer driver installed on your system at the same time. When
upgrading to a new version of the printer driver, delete the old version, and then install the new one.
Note
❒ Auto Run might not automatically work with certain OS settings. In this case, launch "INST-
TOOL.EXE" located on the CD-ROM root directory.
17
C
Follow the instructions on the screen.
D
Select [Typical] installation, and then click [Next].
E
Follow the instructions on the screen.
F
Click [Add] when the "Select Port" dialog box appears.
G
Select [network printer], and then click [OK].
H
Double-click the computer name you want to use as a print server in the "Browse for Printer" window.
I
Select the printer you want to use, and then click [OK].
Page 18
Operating Instructions Printer Client Reference 2
J
After confirming that the pass indicates the selected printer has been displayed, click [Next].
K
Follow the instructions on the screen.
L
Restart the computer after installation is complete.
M
Click [Start] on the task bar, point to [Settings], and then click [Printers].
The [Printers] window is displayed.
N
Click to select the icon of the printer you want to use, and then click [Properties] on the [File]
menu.
The printer driver's property is displayed.
Limitation
❒ Changing the printer settings requires Manage Printers permission. Members of the Administra-
tors and Power Users groups have Manage Printers permission by default. When you set up options, log on using an account that has Manage Printers permission.
O
Click the [NetWare Settings] tab.
18
P
Click to clear the [Form feed] and [Enable banner] check boxes, and then click [OK].
When using the PostScript 3 printer driver
Follow these steps to set up for the PostScript 3 printer driver.
A Click the [PostScript] tab.
B Click [Advanced].
C Click to clear the [Send CTRL+D before job] and [Send CTRL+D after job] check boxes.
Page 19

Operating Instructions Printer Client Reference 2
Q
Click [OK] to close the [Printer properties] dialog box.
----If a message is displayed during installation of the printer driver
When there is a driver in the computer that is newer than the one currently being installed, the warning
dialog box appears.
In such a case, you cannot inst all with the Auto Run program. Use the driver that was used in installing
the driver that is displayed in the message, and reinstall with [Add Printer].
A Click [Start], point to [Settings], and then click [Printers].
B Double-click the [Add Printer] icon.
C Follow the wizard to install the driver.
If the printer driver disk is a CD-ROM, the sources of installa tion are as fo llows. If the i nstaller st arts
up, click [Cancel] to quit it.
• PCL 5c
DRIVERS\PCL5C\NT4\(Language)\DISK1
• RPCS
DRIVERS\RPCS\NT4\(Language)\DISK1
• PostScript 3
DRIVERS\PS\NT4\(Language)\DISK1
19
Page 20
Operating Instructions Printer Client Reference 2
3. Software and Utilities Included on the CD-ROM
Software and Utilities Included on the CD-ROM
There are two CD-ROMs that comes with this printer. One is labeled "Operating Instruc tions" and the
other is "Printer Drivers and Utilities". The following items are included on the two CD-ROMs separately.
❖❖❖❖ Agfa Font Manager
Helps you to install new sc reen fonts , or organize and manage font s already i nstalle d on the system.
This manual is provided as a PDF file on the CD-ROM labeled "Printer Drivers and Utilities".
❖❖❖❖ SmartNetMonitor for Admin
A utility for the system administrator to manage prin ters on the network.
Reference
❒ For more informatio n about SmartNetMonitor for Admin, see the S martNetMonitor for Admin
Help file.
❖❖❖❖ SmartNetMonitor for Client
A utility for users to manage their own print status on the network.
Reference
❒ For more information about SmartNetMonitor for Client , see the SmartNetMonitor for Client Help
file .
20
Page 21
Operating Instructions Printer Client Reference 2
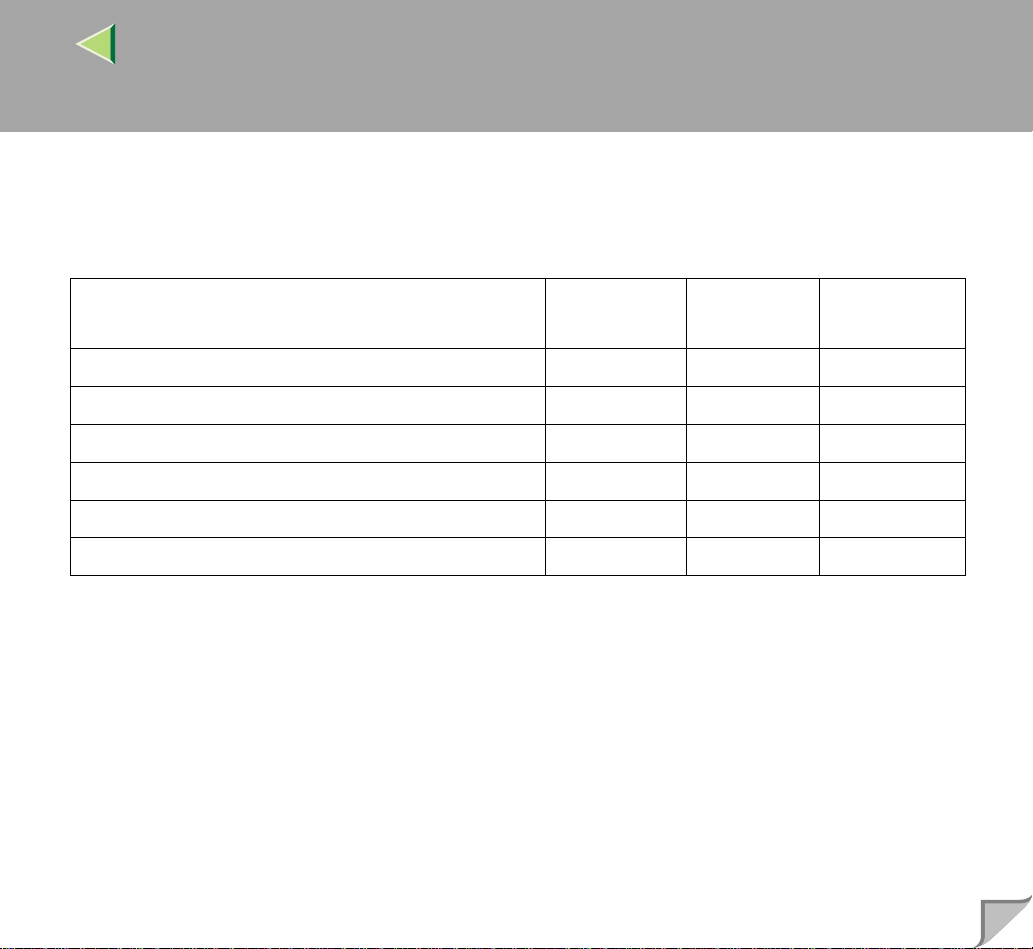
Printer Drivers for This Printer
Printing r equires in stallatio n of a prin ter drive r for your operatin g system. The follow ing drive rs are
included on the CD-ROM that comes with this printer.
Printer Language PCL 5c RPCS PostScript 3
Operating system
Windows 95
Windows 98
Windows Me
Windows 2000
Windows NT 4.0
Mac OS
*1
Microsoft Windows 95 operating system
*2
Microsoft Windows 98 operating system
*3
Microsoft Windows Me operating system
*4
Microsoft Windows 2000 professional
*1
*2
*3
*4
*5
*6
√√
√√
√√
√√
√√
Microsoft Windows 2000 Server
*5
Microsoft Windows NT Server operating system version 4.0, Microsoft Windows NT Workstation operating system version 4.0 in a computer using x86 processors.
*6
Required version is 7.6.1 or later operating system.
*7
Requires Service Pack 5 or later.
*8
The Adobe PostScript printer drivers and PostScript Printer Description (PPD) files are included on the
CD-ROM labeled "P rinter Drivers and Utilities".
√
*8
√
*8
√
*8
√
*8
√
*7 *8
*8
√
21
Page 22

Operating Instructions Printer Client Reference 2
❖❖❖❖ PCL 5c printer driver
This printer driver allows the computer to communicate with the printer via a printer language.
⇒ P.28 “Windows 95/98/Me - Accessing the Printer Properties”
⇒ P.30 “Windows 2000 - Accessing the Printer Properties”
⇒ P.33 “Windows NT 4.0 - Accessing the Printer Properties”
❖❖❖❖ RPCS printer driver
This printer driver al lows the compu ter to communi cate wi th the p rin ter vi a a pri nter l anguage . The
preset type user interface is provided in addition to the conventional one.
⇒ P.36 “Windows 95/98/Me - Accessing the Printer Properties”
⇒ P.38 “Windows 2000 - Accessing the Printer Properties”
⇒ P.41 “Windows NT 4.0 - Accessing the Printer Properties”
❖❖❖❖ Adobe PostScript Printer Drivers and PPD files
The Adobe Postscript printer drivers and the PPD files are included on the CD-ROM that comes
with this printer. Ad obe PostScript printer driver allows the comp uter to communicate w ith the
printer via a pr inter lang uage. The PP D files all ow the prin ter driver to enable the printer spe cific
functions.
⇒ P.44 “Windows 95/98/Me - Accessing the Printer Properties”
⇒ P.46 “Windows 2000 - Accessing the Printer Properties”
⇒ P.49 “Windows NT 4.0 - Accessing the Printer Properties”
⇒ P.52 “Macintosh - Setting up for Printing”
22
Page 23
Operating Instructions Printer Client Reference 2
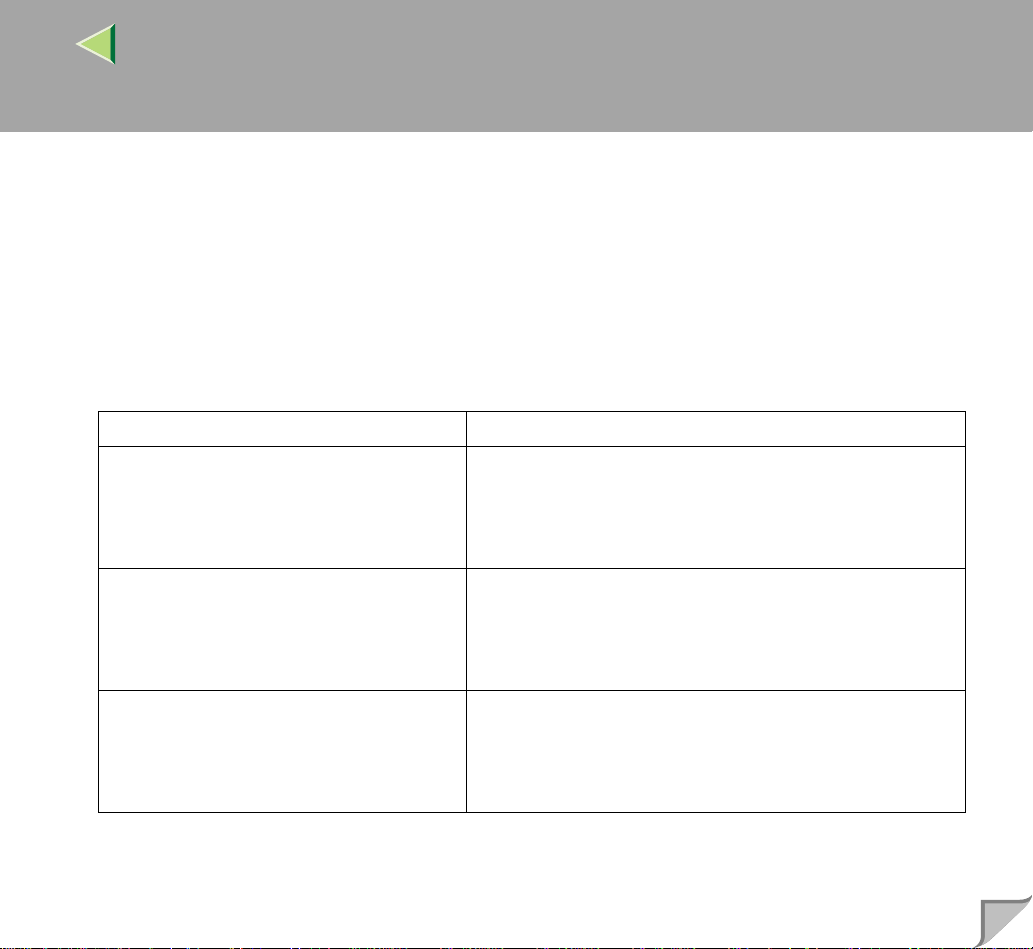
SmartNetMonitor for Admin
SmartNetMonitor for Admin is software that uses the TCP/IP and IPX/SPX protocols to monitor the
printers in a network. It can monitor multiple network printers having IP addresses. We recommend
network ad ministrators to use thi s software.
❖❖❖❖ File Path
SmartNetMonitor for Admin is sto red in the following folder on the CD-ROM
NETWORK\NETMON\ADMIN\DISK1
OS Protocol Stack
Microsoft Windows 95 / 98/M e TCP/IP provided with Wi nd ow s 95/9 8/ M e
IPX/SPX provided with Windows 95/98/Me
NetWare network client provided with Windows 95/98
Novell Client for Windows 95/98
Microsoft Windows 20 00 TCP/IP provided with Wi nd ow s 200 0
IPX/SPX provided with Windows 2000
NetWare Client provided with Windows 2000
Novell Client for Windows NT/2000
23
Microsoft Windows NT4 .0 TCP/IP provided with Wind ow s NT
IPX/SPX provided with Windows NT
Client Service for NetWare provided with Windows NT
Novell Client for Windows NT/2000
Page 24
Operating Instructions Printer Client Reference 2
❖❖❖❖ What can it do?
SmartNetMonitor for Admin is equipped with the following functions.
• Limits the settings to be done fr om the operation pane l, and disables change s to be made to some
of the items.
• Enables the selection of paper type loaded in the printer.
• Switches to the Energy Saver mode, and wake up from the Energy Saver mode.
• Checks the information on printing, paper exhaustion, and such, on the computer.
• Monitors multip le printers at t he same time. When ther e are many print ers, you can create groups
and classify the printers to facilitate management.
• Checks the printer's network settings and detailed information of devices.
• Enables you to change the printer's network settings.
• Checks per print log code the number of pages printed with the printer.
• Checks the results of print jobs executed from the computer.
• Checks the number of pages printed for each computer, using the user codes.
Note
❒ Using this function requires the User Account Enhance Unit Type B.
24
Reference
❒ See the SmartNetMonitor for Admin Help file for more information about using SmartNetMonitor
for Admin.
Page 25
Operating Instructions Printer Client Reference 2
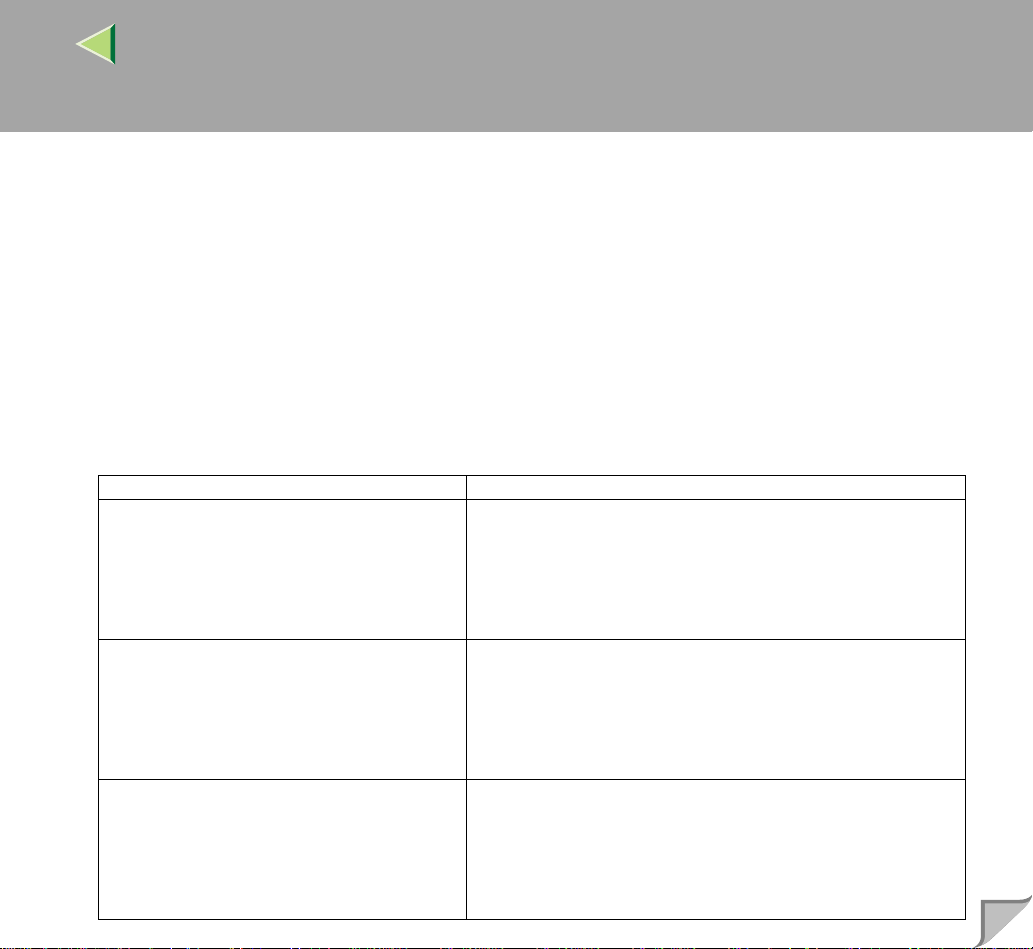
SmartNetMonitor for Client
SmartNetMonitor for Cli ent i s s oft war e e qui ppe d wi th the following functions. We recommend all us ers of this printer to install this software.
• Provides the function to print in a Peer-to-Peer network, using the TCP/IP protocol, NetBEUI, and
IPP from Windows 95/98/Me, Windows 2000, and Windows NT 4.0.
• Uses the TCP/IP and IPX/SPX protocols to monitor the status of devices in a network constantly.
❖❖❖❖ File Path
SmartNetMonitor for Client is stored in the following folder on the CD-ROM
NETWORK\NETMON\CLIENT\DISK1
OS Protocol Stack
Microsoft Windows 95 / 98/M e TCP/IP provided with Wi nd ow s 95/9 8/ M e
IPX/SPX provided with Windows 95/98/Me
NetBEUI provided with Windows 95/98/Me
NetWare network client provided with Windows 95/98
Novell Client for Windows 95/98
Microsoft Windows 20 00 TCP/IP provided with Wi nd ow s 200 0
IPX/SPX provided with Windows 2000
NetBEUI provided with Windows 2000
NetWare Client provided with Windows 2000
Novell Client for Windows NT/2000
Microsoft Windows NT4 .0 TCP/IP provided with Wind ow s NT
IPX/SPX provided with Windows NT
NetBEUI provided with Windows NT
Client Service for NetWare provided with Windows NT
Novell Client for Windows NT/2000
25
Page 26
Operating Instructions Printer Client Reference 2
❖❖❖❖ What can it do?
SmartNetMonitor for Client is equipped with the foll owing functions.
• Peer-to-Peer print function
• Prints directly on the network printer without a print server.
• Prints on a substitut e printer when the re are too many jobs acc umulated in the spe cified print-
er, or when an error disables printing (Recovery printing).
• Allocates multiple printings to multiple printers (Parallel Printing).
• Prior group registration of printers specified for Recovery/Parallel Printing.
• Checks the information on printing, paper exhaustion, and such, on the computer.
• Simultaneously monitors multiple printers in use.
• Checks the printer's network settings and detailed information of devices.
• Enables you to check the log of print jobs using the User ID.
• An error message warns when there is an error on the specified printer during transfer or printing
of data.
• Equipment monitoring function
• Checks the equipment inf ormati on on prin ting, pa per exha ustion, and su ch, on t he compute r.
• Simultaneously monitors multiple printers in use.
• Checks the printer's network settings and detailed information of devices.
• Enables you to check the log of print jobs using the user ID.
• A window opens to notify the completion of printing. You can also select to be notified of the
print condition, such as displaying the notice only when Recovery Printing is executed.
26
Page 27
Operating Instructions Printer Client Reference 2
Limitation
❒ Make similar settings for the option configuration of the printer for Recovery/Parallel Printing and
the printer for giving print commands. If the required options necessary for printing, such as the
Paper Feed Unit, are not installed on the substitute printer, that function is disabled.
❒ Load paper of the same size on both the printer for Recovery/Parallel Printing and the printer for
giving print command s. When specifyi ng a particular Pa per Tray for printing , load paper of the
same size into that tray.
❒ If the type and devices of the printer for Recovery/Parallel Printing and the printer for giving com-
mands are different, the print results might not turn out identical.
❒ If you select Sample Print or Locked Print, you cannot execute Recovery/Parallel Printing.
Reference
❒ See the SmartNetMonitor for Client Help file for more information about using SmartNetMonitor
for Client.
27
Page 28
Operating Instructions Printer Client Reference 2
4. Setting up the Printer Driver and Canceling a Print Job
PCL 5c - Accessing the Printer Properties
Windows 95/98/Me - Accessing the Printer Properties
There are two methods you can use to open the [Printer Properties] dialog box.
Making default printer settings
To make th e defaul t print er setti ngs, firs t open the [Printer Properties] dialog box from the [Printers]
window.
Note
❒ With some applications, the printer driver's settings are not used, and the application's own default
settings are applied.
A
Click [Start] on the taskbar, point to [Settings], and then click [Printers].
The [Printers] window appears.
B
Click to select the icon of the printer you want to use.
28
C
On the [File] menu, click [Properties].
D
Make the necessary settings, and then click [OK].
Page 29
Operating Instructions Printer Client Reference 2
----If a message is displayed during installation of the printer driver
When there is a driver in the computer that is newer than the one currently being installed, the warning
dialog box appears.
In such a case, you cannot inst all with the Auto Run program. Use the driver that was used in installing
the driver that is displayed in the message, and reinstall with [Add Printer].
A Click [Start], point to [Settings], and then click [Printers].
B Double-click the [Add Printer] icon.
C Follow the wizard to install the driver.
If the printer driver disk is a CD-ROM, the sources of installa tion are as fo llows. If the i nstaller st arts
up, click [Cancel] to quit it.
• PCL 5c
DRIVERS\PCL5C\WIN9X_ME\(Language)\DISK1
Making printer settings from an application
29
To make the printer sett ings for a spec ific application , open the [Printer Properties] dialog b ox from that
application. The following example describes how to make settings for the WordPad application that
comes with Windows 95/98/Me.
Note
❒
The actual procedure you should follow to open the
the application. For more information, see the documentation that comes with the application you are using.
❒ With some applications, the printer driver's settings are not used, and the application's own default
settings are applied.
❒ Any settings you make in the following procedure are valid for the current application only.
[Printer Properties]
dialog box may differ depending on
Page 30
Operating Instructions Printer Client Reference 2
A
On the [File] menu, click [Print].
The [Print] dialog box appears.
B
Select the printer you want to use in the [Name] list box, and then click [Properties].
The [Printer Properties] dialog box appears.
C
Make the necessary settings, and then click [OK].
D
Click [OK] to start print i ng.
Windows 2000 - Accessing the Printer Properties
Making printer default settings - Printer Properties
Limitation
❒ Changing the printer settings requires Manage Printers permission. Members of the Administrators
and Power Users grou ps have Manage Printe rs permission by defaul t. When you set up optio ns,
log on using an account that has Manage Printers permission.
30
A
Click [Start] on the taskbar, point to [Settings], and then click [Printers].
The [Printers] window appears.
B
Click to select the icon of the printer you want to use.
C
On the [File] menu, click [Properties].
The [Printer Properties] appears.
Page 31

Operating Instructions Printer Client Reference 2
D
Make the necessary settings, and then click [OK].
Note
❒ Settings you make here are used as the default settings for all applications.
❒ If the [
Digital Signature Not Found
] dialog box appears, click [
----If a message is displayed during installation of the printer driver
When there is a driver in the computer that is newer than the one currently being installed, the warning
dialog box appears.
In such a case, you cannot inst all with the Auto Run program. Use the driver that was used in installing
the driver that is displayed in the message, and reinstall with [Add Printer].
A Click [Start], point to [Settings], and then click [Printers].
B Double-click the [Add Printer] icon.
C Follow the wizard to install the driver.
If the printer driver disk is a CD-ROM, the sources of installa tion are as fo llows. If the i nstaller st arts
up, click [Cancel] to quit it.
• PCL 5c
DRIVERS\PCL5C\WIN2000\(Language)\DISK1
Yes
] to continue the installation.
31
Page 32

Operating Instructions Printer Client Reference 2
Making printer default settings - Printing Preferences Properties
Limitation
❒ Changing the printer settings requires Manage Printers permission. Members of the Administrators
and Power Users grou ps have Manage Printe rs permission by defaul t. When you set up optio ns,
log on using an account that has Manage Printers permission.
A
Click [Start] on the taskbar, point to [Settings], and then click [Printers].
The [Printers] window appears.
B
Click to select the icon of the printer you want to use.
C
On the [File] menu, click [Printing Preferences...].
The Printing Preferences Properties appears.
D
Make the necessary settings, and then click [OK].
Note
❒ Settings you make here are used as the default settings for all applications.
32
Making printer settings from an application
To make the p rinter set tings fo r a specif ic applica tion, op en the Prin ting Pre ferences Proper ties from
that application. The following example describes how to make settings for the WordPad application
that comes with Windows 2000.
Note
❒
The actual proced ures you should follo w to open the Prin ting Preferences Properties may d iffer dependin g on
the application. For mo re infor ma tio n, s ee th e doc um enta tion th at co mes w ith the a pplic ation yo u are u sing .
❒ Any settings you make in the following procedure are valid for the current application only.
Page 33

Operating Instructions Printer Client Reference 2
A
On the [File] menu, click [Print...].
The [Print] dialog box appears.
B
Select the printer you want to use in the [Select Printer] box.
C
Make the necessary settings, and then click [Apply] to start your printing.
Windows NT 4.0 - Accessing the Printer Properties
Making default printer settings - Printer Properties
Limitation
❒ Changing the printer settings requires Full Control access permission. Members of Administrators,
Server Operators, Print Operato rs, and Power U sers groups h ave Full Control permission by default. When you set up options, log on using an account that has Full Control permission.
A
Click [Start] on the taskbar, point to [Settings], and then click [Printers].
The [Printers] window appears.
33
B
Click to select the icon of the printer you want to use.
C
On the [File] menu, click [Properties].
The [Printer Properties] dialog box appears.
D
Make the necessary settings, and then click [OK].
Note
❒ Settings you make here are used as the default settings for all applications.
Page 34

Operating Instructions Printer Client Reference 2
----If a message is displayed during installation of the printer driver
When there is a driver in the computer that is newer than the one currently being installed, the warning
dialog box appears.
In such a case, you cannot inst all with the Auto Run program. Use the driver that was used in installing
the driver that is displayed in the message, and reinstall with [Add Printer].
A Click [Start], point to [Settings], and then click [Printers].
B Double-click the [Add Printer] icon.
C Follow the wizard to install the driver.
If the printer driver disk is a CD-ROM, the sources of installa tion are as fo llows. If the i nstaller st arts
up, click [Cancel] to quit it.
• PCL 5c
DRIVERS\PCL5C\NT4\(Language)\DISK1
Making default printer settings - Default Document Properties
34
Limitation
❒ Changing the printer settings requires Full Control access permission. Members of the Administra-
tors, Server Ope rators, Print O pera tors, an d Power Users groups have Full Control perm ission by
default. When you set up options, log on using an account that has Full Control permission.
A
Click [Start] on the taskbar, point to [Settings], and then click [Printers].
The [Printers] window appears.
B
Click to select the icon of the printer you want to use.
Page 35

Operating Instructions Printer Client Reference 2
C
On the [File] menu, click [Document Defaults].
The Default Document Properties appears.
D
Make the necessary settings, and then click [OK].
Note
❒ Settings you make here are used as the default settings for all applications.
Making printer settings from an application
To make the printer sett ings for a spec ific application , open the [Printer Properties] dialog b ox from that
application. The following example describes how to make settings for the WordPad application that
comes with Windows NT 4.0.
Note
❒
The actual procedure you should follow to open the
the application. For more information, see the documentation that comes with the application you are using.
❒ With some applic ations, the pri nter driver se ttings are not used, and the applicatio n's own default
settings are applied.
❒ Any settings you make in the following procedure are valid for the current application only.
Printer Properties
[
dialog box may differ depending on
]
35
A
On the [File] menu, click [Print].
The [Print] dialog box appears.
B
Select the printer you want to use in the [Name] list box, and then click [Properties].
The [Printer Properties] dialog box appears.
C
Make the necessary settings, and then click [OK].
D
Click [OK] to start print i ng.
Page 36

Operating Instructions Printer Client Reference 2
RPCS - Accessing the Printer Properties
Windows 95/98/Me - Accessing the Printer Properties
There are two methods you can use to open the [Printer Properties] dialog box.
Making default printer settings
To make th e defaul t print er setti ngs, firs t open the [Printer Properties] dialog box from the [Printers]
window.
Note
❒ With some applic ations, the pri nter driver se ttings are not used, and the applicatio n's own default
settings are applied.
A
Click [Start] on the taskbar, point to [Settings], and then click [Printers].
The [Printers] window appears.
36
B
Click to select the icon of the printer you want to use.
C
On the [File] menu, click [Properties].
D
Make the necessary settings, and then click [OK].
Page 37

Operating Instructions Printer Client Reference 2
----If a message is displayed during installation of the printer driver
When there is a driver in the computer that is newer than the one currently being installed, the warning
dialog box appears.
In such a case, you cannot inst all with the Auto Run program. Use the driver that was used in installing
the driver that is displayed in the message, and reinstall with [Add Printer].
A Click [Start], point to [Settings], and then click [Printers].
B Double-click the [Add Printer] icon.
C Follow the wizard to install the driver.
If the printer driver disk is a CD-ROM, the sources of installa tion are as fo llows. If the i nstaller st arts
up, click [Cancel] to quit it.
• RPCS
DRIVERS\RPCS\WIN9X_ME\(Language)\DISK1
Making printer settings from an application
37
To make the printer sett ings for a spec ific application , open the [Printer Properties] dialog b ox from that
application. The following example describes how to make settings for the WordPad application that
comes with Windows 95/98/Me.
Note
❒
The actual procedure you should follow to open the
the application. For more information, see the documentation that comes with the application you are using.
❒ With some applic ations, the pri nter driver se ttings are not used, and the applicatio n's own default
settings are applied.
❒ Any settings you make in the following procedure are valid for the current application only.
[Printer Properties]
dialog box may differ depending on
Page 38

Operating Instructions Printer Client Reference 2
A
On the [File] menu, click [Print].
The [Print] dialog box appears.
B
Select the printer you want to use in the [Name] list box, and then click [Properties].
The [Printer Properties] dialog box appears.
C
Make the necessary settings, and then click [OK].
D
Click [OK] to start print i ng.
Windows 2000 - Accessing the Printer Properties
Making printer default settings - Printer Properties
Limitation
❒ Changing the printer settings requires Manage Printers permission. Members of the Administrators
and Power Users grou ps have Manage Printe rs permission by defaul t. When you set up optio ns,
log on using an account that has Manage Printers permission.
38
A
Click [Start] on the taskbar, point to [Settings], and then click [Printers].
The [Printers] window appears.
B
Click to select the icon of the printer you want to use.
C
On the [File] menu, click [Properties].
The Printer Properties appears.
Page 39

Operating Instructions Printer Client Reference 2
D
Make the necessary settings, and then click [OK].
Note
❒ Settings you make here are used as the default settings for all applications.
❒ If the [
Digital Signature Not Found
] dialog box appears, click [
----If a message is displayed during installation of the printer driver
When there is a driver in the computer that is newer than the one currently being installed, the warning
dialog box appears.
In such a case, you cannot inst all with the Auto Run program. Use the driver that was used in installing
the driver that is displayed in the message, and reinstall with [Add Printer].
A Click [Start], point to [Settings], and then click [Printers].
B Double-click the [Add Printer] icon.
C Follow the wizard to install the driver.
If the printer driver disk is a CD-ROM, the sources of installa tion are as fo llows. If the i nstaller st arts
up, click [Cancel] to quit it.
• RPCS
DRIVERS\RPCS\WIN2000\(Language)\DISK1
Yes
] to continue the installation.
39
Page 40

Operating Instructions Printer Client Reference 2
Making printer default settings - Printing Preferences Properties
Limitation
❒ Changing the printer settings requires Manage Printers permission. Members of the Administrators
and Power Users grou ps have Manage Printe rs permission by defaul t. When you set up optio ns,
log on using an account that has Manage Printers permission.
A
Click [Start] on the taskbar, point to [Settings], and then click [Printers].
The [Printers] window appears.
B
Click to select the icon of the printer you want to use.
C
On the [File] menu, click [Printing Preferences...].
The Printing Preferences Properties appears.
D
Make the necessary settings, and then click [OK].
Note
❒ Settings you make here are used as the default settings for all applications.
40
Making printer settings from an application
To make the p rinter set tings fo r a specif ic applica tion, op en the Prin ting Pre ferences Proper ties from
that application. The following example describes how to make settings for the WordPad application
that comes with Windows 2000.
Note
❒
The actual proced ures you should follo w to open the Prin ting Preferences Properties may d iffer dependin g on
the application. For mo re infor ma tio n, s ee th e doc um enta tion th at co mes w ith the a pplic ation yo u are u sing .
❒ Any settings you make in the following procedure are valid for the current application only.
Page 41

Operating Instructions Printer Client Reference 2
A
On the [File] menu, click [Print...].
The [Print] dialog box appears.
B
Select the printer you want to use in the [Select Printer] box.
C
Make the necessary settings, and then click [Apply] to start your printing..
Windows NT 4.0 - Accessing the Printer Properties
Making default printer settings - Printer Properties
Limitation
❒ Changing the printer settings requires Full Control access permission. Members of Administrators,
Server Operators, Print Operato rs, and Power U sers groups h ave Full Control permission by default. When you set up options, log on using an account that has Full Control permission.
A
Click [Start] on the taskbar, point to [Settings], and then click [Printers].
The [Printers] window appears.
41
B
Click to select the icon of the printer you want to use.
C
On the [File] menu, click [Properties].
The [Printer Properties] dialog box appears.
D
Make the necessary settings, and then click [OK].
Note
❒ Settings you make here are used as the default settings for all applications.
Page 42

Operating Instructions Printer Client Reference 2
----If a message is displayed during installation of the printer driver
When there is a driver in the computer that is newer than the one currently being installed, the warning
dialog box appears.
In such a case, you cannot inst all with the Auto Run program. Use the driver that was used in installing
the driver that is displayed in the message, and reinstall with [Add Printer].
A Click [Start], point to [Settings], and then click [Printers].
B Double-click the [Add Printer] icon.
C Follow the wizard to install the driver.
If the printer driver disk is a CD-ROM, the sources of installa tion are as fo llows. If the i nstaller st arts
up, click [Cancel] to quit it.
• RPCS
DRIVERS\RPCS\NT4\(Language)\DISK1
Making default printer settings - Default Document Properties
42
Limitation
❒ Changing the printer settings requires Full Control access permission. Members of the Administra-
tors, Server Ope rators, Print O pera tors, an d Power Users groups have Full Control perm ission by
default. When you set up options, log on using an account that has Full Control permission.
A
Click [Start] on the taskbar, point to [Settings], and then click [Printers].
The [Printers] window appears.
B
Click to select the icon of the printer you want to use.
Page 43

Operating Instructions Printer Client Reference 2
C
On the [File] menu, click [Document Defaults...].
The Default Document Properties appears.
D
Make the necessary settings, and then click [OK].
Note
❒ Settings you make here are used as the default settings for all applications.
Making printer settings from an application
To make the printer sett ings for a spec ific application , open the [Printer Properties] dialog b ox from that
application. The following example describes how to make settings for the WordPad application that
comes with Windows NT 4.0.
Note
❒
The actual procedure you should follow to open the
the application. For more information, see the documentation that comes with the application you are using.
❒ With some applic ations, the pri nter driver se ttings are not used, and the applicatio n's own default
settings are applied.
❒ Any settings you make in the following procedure are valid for the current application only.
Printer Properties
[
dialog box may differ depending on
]
43
A
On the [File] menu, click [Print].
The [Print] dialog box appears.
B
Select the printer you want to use in the [Name] list box, and then click [Properties].
The [Printer Properties] dialog box appears.
C
Make the necessary settings, and then click [Apply].
D
Click [OK] to start print i ng.
Page 44

Operating Instructions Printer Client Reference 2
PostScript 3 - Setting up for Printing
Windows 95/98/Me - Accessing the Printer Properties
There are two methods you can use to open the [Printer Properties] dialog box.
Making default printer settings
To make the printe r default settings , first op en the [Printer Properties] dialog box from the [Printers]
window.
Note
❒ With some applic ations, the pri nter driver se ttings are not used, and the applicatio n's own default
settings are applied.
A
Click [Start] on the taskbar, point to [Settings], and then click [Printers].
The [Printers] window appears.
44
B
Click to select the icon of the printer you want to use.
C
On the [File] menu, click [Properties].
The [Printer Properties] dialog box appears.
D
Make the necessary settings, and then click [OK].
E
Click [OK].
Page 45

Operating Instructions Printer Client Reference 2
----If a message is displayed during installation of the printer driver
When there is a driver in the computer that is newer than the one currently being installed, the warning
dialog box appears.
In such a case, you cannot inst all with the Auto Run program. Use the driver that was used in installing
the driver that is displayed in the message, and reinstall with [Add Printer].
A Click [Start], point to [Settings], and then click [Printers].
B Double-click the [Add Printer] icon.
C Follow the wizard to install the driver.
If the printer driver disk is a CD-ROM, the sources of installa tion are as fo llows. If the i nstaller st arts
up, click [Cancel] to quit it.
• PostScript 3
DRIVERS\PS\WIN9X_ME\(Language)\DISK1
Making printer settings from an application
45
To make the printer sett ings for a spec ific application , open the [Printer Properties] dialog b ox from that
application. The following example describes how to make settings for the WordPad application that
comes with Windows 95/98/Me.
Note
❒
The actual procedure you should follow to open the
the application. For more information, see the documentation that comes with the application you are using.
❒ With some applic ations, the pri nter driver se ttings are not used, and the applicatio n's own default
settings are applied.
❒ Any settings you make in the following procedure are valid for the current application only.
[Printer Properties]
dialog box may differ depending on
Page 46

Operating Instructions Printer Client Reference 2
A
On the [File] menu, click [Print].
The [Print] dialog box appears.
B
Select the printer you want to use in the [Name] list box, and then click [Properties].
The [Printer Properties] dialog box appears.
C
Make the necessary settings, and then click [OK].
D
Click [OK] to start print i ng.
Windows 2000 - Accessing the Printer Properties
Making printer default settings - Printer Properties
Limitation
❒ Changing the printer settings requires Manage Printers permission. Members of the Administrators
and Power Users grou ps have Manage Printe rs permission by defaul t. When you set up optio ns,
log on using an account that has Manage Printers permission.
46
A
Click [Start] on the taskbar, point to [Settings], and then click [Printers].
The [Printers] window appears.
B
Click to select the icon of the printer you want to use.
C
On the [File] menu, click [Properties].
The Printer Properties appears.
Page 47

Operating Instructions Printer Client Reference 2
D
Make the necessary settings, and then click [OK].
Note
❒ Settings you make here are used as the default settings for all applications.
❒ If the [
Digital Signature Not Found
] dialog box appears, click [
----If a message is displayed during installation of the printer driver
When there is a driver in the computer that is newer than the one currently being installed, the warning
dialog box appears.
In such a case, you cannot inst all with the Auto Run program. Use the driver that was used in installing
the driver that is displayed in the message, and reinstall with [Add Printer].
A Click [Start], point to [Settings], and then click [Printers].
B Double-click the [Add Printer] icon.
C Follow the wizard to install the driver.
If the printer driver disk is a CD-ROM, the sources of installa tion are as fo llows. If the i nstaller st arts
up, click [Cancel] to quit it.
• PostScript 3
DRIVERS\PS\WIN2000\(Language)\DISK1
Yes
] to continue the installation.
47
Page 48

Operating Instructions Printer Client Reference 2
Making printer default settings - Printing Preferences Properties
Limitation
❒ Changing the printer settings requires Manage Printers permission. Members of the Administrators
and Power Users grou ps have Manage Printe rs permission by defaul t. When you set up optio ns,
log on using an account that has Manage Printers permission.
A
Click [Start] on the taskbar, point to [Settings], and then click [Printers].
The [Printers] window appears.
B
Click to select the icon of the printer you want to use.
C
On the [File] menu, click [Printing Preferences...].
The Printing Preferences Properties appears.
D
Make the necessary settings, and then click [OK].
Note
❒ Settings you make here are used as the default settings for all applications.
48
Making printer settings from an application
To make the p rinter set tings fo r a specif ic applica tion, op en the Prin ting Pre ferences Proper ties from
that application. The following example describes how to make settings for the WordPad application
that comes with Windows 2000.
Note
❒
The actual proced ures you should follo w to open the Prin ting Preferences Properties may d iffer dependin g on
the application. For mo re infor ma tio n, s ee th e doc um enta tion th at co mes w ith the a pplic ation yo u are u sing .
❒ Any settings you make in the following procedure are valid for the current application only.
Page 49

Operating Instructions Printer Client Reference 2
A
On the [File] menu, click [Print...].
The [Print] dialog box appears.
B
Select the printer you want to use in the [Select Printer] box.
C
Make the necessary settings, and then click [Print] to start your printing.
D
Click [OK] to start your printing.
Windows NT 4.0 - Accessing the Printer Properties
Making default printer settings - Printer Properties
Limitation
❒ Changing the printer settings requires Full Control access permission. Members of Administrators,
Server Operators, Print Operato rs, and Power U sers groups h ave Full Control permission by default. When you set up options, log on using an account that has Full Control permission.
49
A
Click [Start] on the taskbar, point to [Settings], and then click [Printers].
The [Printers] window appears .
B
Click to select the icon of the printer you want to use.
C
On the [File] menu, click [Properties].
The [Printer Properties] dialog box appears.
D
Make the necessary settings, and then click [OK].
Note
❒ Settings you make here are used as the default settings for all applications.
Page 50

Operating Instructions Printer Client Reference 2
----If a message is displayed during installation of the printer driver
When there is a driver in the computer that is newer than the one currently being installed, the warning
dialog box appears.
In such a case, you cannot inst all with the Auto Run program. Use the driver that was used in installing
the driver that is displayed in the message, and reinstall with [Add Printer].
A Click [Start], point to [Settings], and then click [Printers].
B Double-click the [Add Printer] icon.
C Follow the wizard to install the driver.
If the printer driver disk is a CD-ROM, the sources of installa tion are as fo llows. If the i nstaller st arts
up, click [Cancel] to quit it.
• PostScript 3
DRIVERS\PS\NT4\(Language)\DISK1
Making default printer settings - Default Document Properties
50
Limitation
❒ Changing the printer settings requires Full Control access permission. Members of the Administra-
tors, Server Ope rators, Print O pera tors, an d Power Users groups have Full Control perm ission by
default. When you set up options, log on using an account that has Full Control permission.
A
Click [Start] on the taskbar, point to [Settings], and then click [Printers].
The [Printers] window appears.
B
Click to select the icon of the printer you want to use.
Page 51

Operating Instructions Printer Client Reference 2
C
On the [File] menu, click [Document Defaults].
The Default Document Properties appears.
D
Make the necessary settings, and then click [OK].
Note
❒ Settings you make here are used as the default settings for all applications.
Making printer settings from an application
To make the printer sett ings for a spec ific application , open the [Printer Properties] dialog b ox from that
application. The following example describes how to make settings for the WordPad application that
comes with Windows NT 4.0.
Note
❒
The actual procedure you should follow to open the
the application. For more information, see the documentation that comes with the application you are using.
❒ With some applic ations, the pri nter driver se ttings are not used, and the applicatio n's own default
settings are applied.
❒ Any settings you make in the following procedure are valid for the current application only.
Printer Properties
[
dialog box may differ depending on
]
51
A
On the [File] menu, click [Print].
The [Print] dialog box appears.
B
Select the printer you want to use in the [Name] list box, and then click [Properties].
The [Printer Properties] dialog box appears.
C
Make the necessary settings, and then click [OK].
D
Click [OK] to start print i ng.
Page 52

Operating Instructions Printer Client Reference 2
Macintosh - Setting up for Printing
Making paper settings from an application
A
Open the fi le you want to print.
B
On the [File] menu, click [Page Setup].
The [Adobe PS] dialog box appears.
C
Confirm that the printer you want to use is shown in [Format for:], and then use [Paper] to select
the paper size you want to use.
Note
❒ If the printer is now shown in the [Format for:] box, use the pop-up menu to display a list of avail-
able printers.
Reference
❒ The actual appearance of the [
See the documentation that comes with the Macintosh for more information.
Page Setup
] dialog box depends on the application you are using.
52
D
After configuring the settings, click [OK].
Page 53

Operating Instructions Printer Client Reference 2
Setting up for printing from an application
A
Open the fi le you want to print.
B
On the [File] menu, click [Print].
The [Printer] dialog box appears.
C
Confirm th at the printer is selected in the [Printer] box, and then make the printer settings.
D
After configuring the settings, click [Print].
53
Page 54

Operating Instructions Printer Client Reference 2
Canceling a Pri nt J ob
Windows 95/98/Me - Canceling a Print Job
A
Double-click the printer icon on the Windows taskbar.
A window appears, showing all the print jobs that are currently queuing to be printed. Check the
current status of the job you want to cancel.
B
Select the name of the job you want to cancel.
C
In the [Document] menu, click [Cancel Printing].
Note
❒ You can also open the print job queue window by double-clicking the printer icon in the [Printer]
window.
D
Press {{{{Job Reset}}}}.
54
On Line
Job Reset
Menu
Form Feed
Power Error Data In
Escape
#
Enter
ZDJS023N
A message appears on the operation panel display indicating that the print job is being cancelled.
Page 55

Operating Instructions Printer Client Reference 2
Important
❒ The procedure above cancels the print job that i s currently bein g processed by t he printer. In
some cases, the printer may already be processing data for the next print job foll owi ng the one
currently being output . In this cas e, the nex t prin t job is als o cancel ed when yo u press {Job Re-
set}.
❒ When the printer is being shared by multiple c omputers, be careful not to acc identally cancel
someone else's print job.
Note
❒ You cannot stop printing data that has already been processed internally by the printer. Because
of this, printing may continue for a few pages after you press {Job Reset}.
❒ A print job that contains a large volume of data may take considerable time to stop.
Windows 2000 - Canceling a Print Job
A
Double-click the printer icon on the taskbar.
A window appears, showing all the print jobs that are currently queuing to be printed. Check the
current status of the job you want to cancel.
55
B
Select the name of the job you want to cancel.
C
On the [Document] menu, click [Cancel Printing].
Note
❒ You can also open the print job queue window by double-clicking the printer icon in the [Printers]
window.
Page 56

Operating Instructions Printer Client Reference 2
D
Press {{{{Job Reset}}}} on the operation panel.
On Line
Menu
Escape
56
Job Reset
Form Feed
Power Error Data In
#
Enter
ZDJS023N
A message appears on the panel display indicating that the print job is being canceled.
Important
❒ When the printer is being shared by multiple c omputers, be careful not to acc identally cancel
someone else's print job.
Note
❒ You cannot stop printing data that has already been processed internally by the printer. Because
of this, printing might continue for a few pages after you press [Job Reset].
❒ A print job that contains a large volume of data might take considerable time to stop.
Page 57

Operating Instructions Printer Client Reference 2
Windows NT 4.0 - Canceling a Print Job
A
Double-click the printer icon on the Windows taskbar.
A window appears, showing all the print jobs that are currently queuing to be printed. Check the
current status of the job you want to cancel.
B
Select the name of the job you want to cancel.
C
In the [Document] menu, click [Cancel Printing].
Note
❒ You can also open the print job queue window by double-clicking the printer icon in the [Printer]
window.
D
Press {{{{Job Reset}}}}.
57
On Line
Job Reset
Menu
Form Feed
Power Error Data In
Escape
#
Enter
ZDJS023N
A message appears on the operation panel display indicating that the print job is being cancelled.
Page 58

Operating Instructions Printer Client Reference 2
Important
❒ The procedure above cancels the print job that i s currently bein g processed by t he printer. In
some cases, the printer may already be processing data for the next print job foll owi ng the one
currently being output . In this cas e, the nex t prin t job is als o cancel ed when yo u press {Job Re-
set}.
❒ When the printer is being shared by multiple c omputers, be careful not to acc identally cancel
someone else's print job.
Note
❒ You cannot stop printing data that has already been processed internally by the printer. Because
of this, printing may continue for a few pages after you press {Job Reset}.
❒ A print job that contains a large volume of data may take considerable time to stop.
58
Page 59

Operating Instructions Printer Client Reference 2
5. Uninstalling the Printer Driver
Uninstalling the PCL 5c Printer Driver
This section describes how to uninstall the printer driver. The actual procedure may differ depending
on the operating system.
Follow one of the appropriate procedures below.
Windows 95/98 - Uninstalling the PCL 5c Printer Driver
A
Close all the applications that are currently running.
B
Click [Start] on the taskbar, point to [Settings], and click [Printers].
The [Printers] window appears.
C
Click to select the icon of the printer you want to remove.
D
On the [File] menu, click [Delete].
A confirmation dialog box appears.
E
Click [Yes] to uninstall the printer driver.
59
Page 60

Operating Instructions Printer Client Reference 2
Windows 2000 - Uninstalling the PCL 5c Printer Driver
Limitation
❒ Uninstalling a printe r driver requires Manag e Printers permission. Me mbers of the Administrator s
and Power Users groups have Manage Printers permission by default. When you uninstall a printer
driver, log on using an account that has Manage Printers permission.
A
Close all the applications that are currently running.
B
Click [Start] on the taskbar, point to [Settings], and click [Printers].
The [Printers] window appears.
C
Click to select the icon of the printer you want to remove.
D
On the [File] menu, click [Delete].
A confirmation dialog box appears.
E
Click [Yes] to uninstall the printer driver.
60
Page 61

Operating Instructions Printer Client Reference 2
Windows NT 4.0 - Uninstalling the PCL 5c Printer Driver
Limitation
❒ Uninstalling a printer driver requires Full Control access permission. Members of the Administrators,
Server Operators, Prin t Operators, and Powe r Users groups have Full Con trol Permission by default. When you install a printer driver, log on using an account that has Full Control permission.
A
Close all applications that are currently running.
B
Click [Start] on the taskbar, point to [Settings], and click [Printers].
The [Printers] window appears.
C
Click to select the icon of the printer you want to remove.
D
On the [File] menu, click [Delete].
A confirmation dialog box appears.
E
Click [Yes] to uninstall the printer driver.
61
Page 62

Operating Instructions Printer Client Reference 2
Uninstalling the RPCS Printer Driver
This section describes how to uninstall the printer driver. The actual procedure may differ depending
on the operating system.
Follow one of the appropriate procedures below.
Windows 95/98 - Uninstalling the RPCS Printer Driver
A
Close all the applications that are currently running.
B
Click [Start] on the taskbar, point to [Settings], and click [Printers].
The [Printers] window appears.
C
Click to select the icon of the printer you want to remove.
D
On the [File] menu, click [Delete].
A confirmation dialog box appears.
62
E
Click [Yes] to uninstall the printer driver.
Page 63

Operating Instructions Printer Client Reference 2
Windows 2000 - Uninstalling the RPCS Printer Driver
Limitation
❒ Uninstalling a printe r driver requires Manag e Printers permission. Me mbers of the Administrator s
and Power Users groups have Manage Printers permission by default. When you uninstall a printer
driver, log on using an account that has Manage Printers permission.
A
Close all the applications that are currently running.
B
Click [Start] on the taskbar, point to [Settings], and click [Printers].
The [Printers] window appears.
C
Click to select the icon of the printer you want to remove.
D
On the [File] menu, click [Delete].
A confirmation dialog box appears.
E
Click [Yes] to uninstall the printer driver.
63
Page 64

Operating Instructions Printer Client Reference 2
Windows NT 4.0 - Uninstalling the RPCS Printer Driver
Limitation
❒ Uninstalling a printer driver requires Full Control access permission. Members of the Administrators,
Server Operators, Prin t Operators, and Powe r Users groups have Full Con trol Permission by default. When you install a printer driver, log on using an account that has Full Control permission.
A
Close all applications that are currently running.
B
Click [Start] on the taskbar, point to [Settings], and click [Printers].
The [Printers] window appears.
C
Click to select the icon of the printer you want to remove.
D
On the [File] menu, click [Delete].
A confirmation dialog box appears.
E
Click [Yes] to uninstall the printer driver.
64
Page 65

Operating Instructions Printer Client Reference 2
Uninstalling the PostScript 3 Printer Driver
This section describes how to uninstall the PostScript 3 printer driver.
The actual procedure may differ depending on the operating system.
Follow one of the appropriate one of the following procedures below.
Windows 95/98 - Uninstalling the PostScript 3 Printer Driver
A
Close all applications that are currently running.
B
Click [Start] on the taskbar, point to [Settings], and then click [Printers].
The [Printers] window appears.
C
Click to select the icon of the printer you want to remove.
D
On the [File] menu, click [Delete].
A confirmation dialog box appears.
65
E
Click [Yes] to uninstall the printer driver.
Page 66

Operating Instructions Printer Client Reference 2
Windows 2000 - Uninstalling the PostScript 3 Printer Driver
Limitation
❒ Uninstalling a printe r driver requires Manag e Printers permission. Me mbers of the Administrator s
and Power Users groups have Manage Printers permission by default. When you uninstall a printer
driver, log on using an account that has Manage Printers permission.
A
Close all the applications that are currently running.
B
Click [Start] on the taskbar, point to [Settings], and click [Printers].
The [Printers] window appears.
C
Click to select the icon of the printer you want to remove.
D
On the [File] menu, click [Delete].
A confirmation dialog box appears.
E
Click [Yes] to uninstall the printer driver.
66
Page 67

Operating Instructions Printer Client Reference 2
Windows NT 4.0 - Uninstalling the PostScript 3 Printer Driver
Limitation
❒ Uninstalling a printer driver requires Full Control access permission. Members of the Administrators,
Server Operators, Prin t Operators, and Powe r Users groups have Full Con trol Permission by default. When you uninstall a printer driver, log on using an account that has Full Control permission.
A
Close all applications that are currently running.
B
Click [Start] on the taskbar, point to [Settings], and then click [Printers].
The [Printers] window appears.
C
Click to select the icon of the printer you want to remove.
D
On the [File] menu, click [Delete].
A confirmation dialog box appears.
E
Click [Yes] to uninstall the printer driver.
67
Macintosh - Uninstalling the PostScript 3 Printer Driver
A
Drag the “AdobePS” file from the [Extensions] folder in [System Folder] to [Trash].
B
Drag the PPD file and plug-i n file fro m the [Printer Descriptions] folder in the [Extensions] fold-
er in [System Folder] to [Trash].
Page 68

Operating Instructions Printer Client Reference 2
6. Sample Print/Locked Print
Sample Print
Use this function to pri nt onl y the first set of a multiple-set print jo bs. Th e remaining sets are s ave d on
the optional Hard Disk Dri ve in the printe r. The sav ed job can be print ed or canc eled fr om the pri nter' s
operation panel.
Important
❒ If you turn off the power switch, the job that was saved on the Hard Disk Drive will be deleted.
Limitation
❒ To use this function, the optional Hard Disk Drive must be installed on the printer.
Reference
❒ For more information about settings for printer driver, see the printer driver's Help file.
Note
❒ You can identify the file you want to print by the User ID and the time when the job was stored.
❒ The actual number of page s the printe r c an sa ve depen ds on the contents of the print images. For
example, the printer can s ave up to 30 jobs or 2,000 pag es for Sample Prin t and Locked Print. It
depends on the data volume.
❒ If the first set of the sample print file is not as you expected and you do not want to print the remain-
ing sets, delete the sample print file using the operation panel.
❒ If you print the remaining sets of the sample print file, the job in the printer is deleted automatically.
68
A
From an application, select the menu command to print
The print dialog box appears.
B
Open the Printer Properties.
Page 69

Operating Instructions Printer Client Reference 2
C
From the [Job Type:] box, select [Sample Print].
D
In the [User ID:] box, type a User ID of up to eight alphanumeric characters.
Note
❒ This is used to identify the user associated with a job.
❒ The User ID can consist of up to eight alphanumeric (a-z, A-Z, 0-9) characters.
E
Click [OK].
F
After making all desired settings, click [OK].
G
Check the print job, and then select fr om the ope rat ion pane l whet her to print the remaining
sets or del ete them.
Reference
❒ ⇒ P.70 “Printing the Remaining Sets”
❒ ⇒ P.72 “Deleting a Sample Print File”
69
Page 70

Operating Instructions Printer Client Reference 2
Printing the Remaining Sets
A
Press {{{{Menu}}}}.
On Line
Menu
Escape
70
Job Reset
Form Feed
Power Error Data In
#
Enter
ZDJS001N
"Menu" appears on the panel display.
B
Press {{{{UUUU}}}} or {{{{TTTT}}}} to display "Sample Print", and then press {{{{Enter}}}}.
Menu:
Sample Print
The User ID and the time when the job was stored are displayed.
C
Press {{{{UUUU}}}} or {{{{TTTT}}}} to display the file you want to print, and then press {{{{Enter}}}}.
Sample Print
08:56 ABCD1234
Page 71

Operating Instructions Printer Client Reference 2
D
Confirm that "Print File" is displayed, and then press {{{{Enter}}}}.
Select Action:
Print File
The remaining sets are displayed.
Note
❒ To cancel printing, press {Escape}.
E
Press {{{{Enter}}}}. To change the number of sets you want to print, press {{{{UUUU}}}} or {{{{TTTT}}}} and select
the number of sets, and then press {{{{Enter}}}}.
Qty: 6(1-999)
Press # to Print
The job is printed, and the job that was saved on the H ard Disk Drive is deleted.
71
Page 72

Operating Instructions Printer Client Reference 2
Deleting a Sample Print File
A
Press {{{{Menu}}}}.
On Line
Menu
Escape
72
Job Reset
Form Feed
Power Error Data In
#
Enter
ZDJS001N
"Menu" appears on the panel display.
B
Press {{{{UUUU}}}} or {{{{TTTT}}}} to display the "Sample Print" menu, and then press {{{{Enter}}}}.
Menu:
Sample Print
C
Press {{{{UUUU}}}} or {{{{TTTT}}}} to display the file you want to delete, and then press {{{{Enter}}}}.
The following message appears on the panel display.
Sample Print:
08:56 ABCD1234
Page 73

Operating Instructions Printer Client Reference 2
D
Press {{{{UUUU}}}} or {{{{TTTT}}}} to display "Delete File", and then press {{{{Enter}}}}.
Select Action:
Delete File
Note
❒ If you want to cancel the deletion of a sample print file, press {Escape}.
E
Press {{{{Enter}}}} to delete the file.
The following message appears on the panel display.
08:56 ABCD1234
Press# to Delete
F
Press {{{{On Line}}}}.
"Ready " appears on the panel display.
73
Ready
Page 74

Operating Instructions Printer Client Reference 2
Checking the Error Log
When a print job is not saved on the Hard Disk Drive, it remains in the error log and can be checked
using the operation panel.
Limitation
❒ The error log displays up to 20 of the newest jobs. If you turn off the power switch, the log up to then
is deleted.
A
Press {{{{Menu}}}}.
On Line
Menu
Escape
74
Job Reset
Form Feed
Power Error Data In
#
Enter
ZDJS001N
"Menu" appears on the panel display.
B
Press {{{{UUUU}}}} or {{{{TTTT}}}} to display "Sample Print", and then press {{{{Enter}}}}.
Menu:
Sample Print
The User ID and the time when the job was stored are displayed.
Page 75

Operating Instructions Printer Client Reference 2
C
Press {{{{UUUU}}}} or {{{{TTTT}}}} to display "Error File(s)", and then press {{{{Enter}}}}.
Sample Print:
Error File(s)
D
Press {{{{UUUU}}}} or {{{{TTTT}}}} to check the log.
Error File(s):
06:52 AB5D1234
After you finish checking the error log, press {Escape}.
The displ ay is returned to the Sample Print job selection menu.
Note
❒ To print a document with an error, eith er print or delete the job saved on the Hard Disk Drive,
and then command the host computer to print again.
E
When you finish checking the error log, press {{{{Escape}}}}.
The displ ay is returned to the Sample Print job selection menu.
75
F
Press {{{{On Line}}}}.
"Ready " appears on the panel display.
Ready
Page 76

Operating Instructions Printer Client Reference 2
Locked Print
Use this function to maintain privacy when printing confidential documents. Documents will not be
printed out automatical ly, unless a password i s entered, using the operation panel after sending the print
job.
Important
❒ If you turn off the power switch, the job that was saved on the Hard Disk Drive will be deleted.
Limitation
❒ To use this function, the optional Hard Disk Drive must be installed on the printer.
Reference
❒ For more information about settings for printer driver, see the printer driver's Help file.
Note
❒ You can identify the file you want to print by the User ID and the time when the job was stored.
❒ The actual number of page s the printe r c an sa ve depen ds on the contents of the print images. For
example, the printer can s ave up to 30 jobs or 2,000 pag es for Sample Prin t and Locked Print. It
depends on the data volume.
After the locked print file is printed, the job in the printer is deleted automatically.
76
A
From an application, select the menu command to print.
The print dialog box appears.
B
Open the Printer Properties.
C
From the [Job Type:] box, select [Locked Print].
Page 77

Operating Instructions Printer Client Reference 2
D
In the [User ID:] box, type a User ID of up to eight alphanumeric characters.
Note
❒ This is used to identify the user associated with a job.
❒ The User ID can consist of up to eight alphanumeric (a-z, A-Z, 0-9) characters.
E
In the [Password:] box, type a password of four digits.
Note
❒ The password must be four digits (0-9).
F
Command to print.
The job is saved on the Hard Disk Drive.
G
Enter the password using the operation panel, and then specify whether to print or delete.
Reference
❒ ⇒ P.78 “Entering the Password”
❒ ⇒ P.80 “Deleting the Locked Print File”
77
Limitation
❒ Print jobs are not saved on the Hard Disk Drive in the following cases. You can check the Error
Log for jobs that were not saved.
• When there ar e 30 Sa m ple P rin t a n d L oc ked P rin t jo bs s a ve d o n the H ard D isk D riv e , an d a
31st job is transmitted.
• The total number of pages saved on the Hard Disk Drive exceeds 2,000 pages.
Page 78

Entering the Password
A
Press {{{{Menu}}}}.
On Line
Menu
Operating Instructions Printer Client Reference 2
78
Escape
Job Reset
Form Feed
Power Error Data In
#
Enter
ZDJS001N
"Menu" appears on the panel display.
B
Press {{{{UUUU}}}} or {{{{TTTT}}}} to display "Locked Print", and then press {{{{Enter}}}}.
Menu:
Locked Print
The User ID and the time when the job was stored are displayed.
C
Press {{{{UUUU}}}} or {{{{TTTT}}}} to display a file you want to print, and then press {{{{Enter}}}}.
Locked Print
08:56 ABCD1234
Page 79

Operating Instructions Printer Client Reference 2
D
Enter the password.
A Press {{{{UUUU}}}} or {{{{TTTT}}}} to enter the left most digit of the password, and then press {{{{Enter}}}}.
Password:
[0---]
B The next digit appears.
Password:
[*0--]
C Enter the remaining digit of th e password, and then press {{{{Enter}}}}.
E
Confirm that "Press # to Print" is displayed, and then press {{{{Enter}}}}.
Select Action:
Print File
79
Note
❒ If you want to cancel printing, press {Escape}.
F
Press {{{{Enter}}}}.
08:56 ABCD1234
Press # to Print
The job is printed, and the job that was saved on the Hard Disk Drive is deleted.
Page 80

Operating Instructions Printer Client Reference 2
Deleting the Locked Print File
A
Press {{{{Menu}}}}.
On Line
Menu
Escape
80
Job Reset
Form Feed
Power Error Data In
#
Enter
ZDJS001N
"Menu" appears on the panel display.
B
Press {{{{UUUU}}}} or {{{{TTTT}}}} to display the "Locked Print" menu, and then press {{{{Enter}}}}.
Menu:
Locked Print
C
Press {{{{UUUU}}}} or {{{{TTTT}}}} to display a file you want to delete.
Locked Print
08:56 ABCD1234
Page 81

Operating Instructions Printer Client Reference 2
D
Enter the password of the locked print file.
A Press {{{{UUUU}}}} or {{{{TTTT}}}} to enter the left most digit of the password, and then press {{{{Enter}}}}.
Password:
[0---]
B The next digit appears.
Password:
[*0--]
C Repeat steps A and B to enter the remaining password digits, and then press {{{{Enter}}}}.
E
Press {{{{UUUU}}}} or {{{{TTTT}}}} to display "Delete File", and then press {{{{Enter}}}}.
Select Action:
Delete File
81
Note
❒ If you want change the locked print file, press {Escape}.
F
Press {{{{Enter}}}}.
"Deleted" appears on the panel display, and then the printer returns to the previous menu.
Page 82

Operating Instructions Printer Client Reference 2
Checking the Error Log
When a print job is not saved on the Hard Disk Drive, it remains in the error log and can be checked
using the operation panel.
Limitation
❒ The error log displays up to 20 of the newest jobs. If you turn off the printer power, the log up to then
is deleted.
A
Press {{{{Menu}}}}.
On Line
Menu
Escape
82
Job Reset
Form Feed
Power Error Data In
#
Enter
ZDJS001N
"Menu" appears on the panel display.
B
Press {{{{UUUU}}}} or {{{{TTTT}}}} to display "Locked Print", and then press {{{{Enter}}}}.
Menu:
Locked Print
The User ID and the time when the job was stored are displayed.
Page 83

Operating Instructions Printer Client Reference 2
C
Press {{{{UUUU}}}} or {{{{TTTT}}}} to display "Error File(s)", and then press {{{{Enter}}}}.
Locked Print:
Error File(s)
D
Press {{{{UUUU}}}} or {{{{TTTT}}}} to check the log.
Error File(s):
06:52 AB5D1234
After you finish checking the error log, press {Escape}.
The display is returned to the Locked Print job selection menu.
Note
❒ To print a document with an error, eith er print or delete the job saved on the Hard Disk Drive,
and then command the host computer to print again.
E
When you finish checking the error log, press {{{{Escape}}}}.
The displ ay is returned to the Sample Print job selection menu.
83
F
Press {{{{On Line}}}}.
"Ready " appears on the panel display.
Ready
Page 84

Operating Instructions Printer Client Reference 2
7. Troubleshooting
Checking the Printer Status
SmartNetMonitor for Client
A
Start up SmartNetMonitor for Client.
B
Right-clic k the Smar tNetM onitor for Cl ient icon fr om the task bar, and th en poi nt an d leftclick [Options] from the displayed menu.
The [SmartNetMonitor for Client-Options] window is displayed.
C
Select the printer you want to use, check [To be Monitored], and then click [OK].
D
Right-clic k the Smar tNetM onitor for Cl ient icon fr om the task bar, and th en poi nt an d leftclick the printer you want monitor.
The [Status] window of the target printer to be monitored is opened.
E
Click the [Configuration] tab to find the amount of paper in the Paper Tray, etc..
Note
❒ See the Help files for SmartNetMonitor for Client for details on each item.
84
Page 85

Operating Instructions Printer Client Reference 2
Web Browser
A
Start up the web browser.
B
Type "http://(the IP address of the printer you want the status displayed)" for the address.
The status of the selected printer is displayed on the web browser.
C
Click [Status] to find the amount of paper in the Paper Tray, etc..
Note
❒ See the Help files for details on each item.
85
Page 86

Operating Instructions Printer Client Reference 2
8. Appendix
Color Guide
Color Printing Basics
Additive (Emitted) and Subtractive (Reflected) Color Models
All light is a mixture of red, green, and blue, which is nor mally called the RGB model. When red, green,
and blue are of equal intensities, the RGB color model produces white.
Note
❒ RGB is also cal le d a ddi tiv e or emi tted c ol or . Th e c ol ors on y ou r co mpu ter sc reen ar e produced by
varying the intensities of RGB.
86
Page 87

Operating Instructions Printer Client Reference 2
Printed color is a mixture of cyan, mag enta, and yellow, whic h is normally cal led the CMY color model. When mixed in equal proportions the CMY color model produces black.
Note
❒ CMY is also called subtr active or refl ective co lor. The prin ter uses CMY toner plus K (black) ton er
(CMYK color model) to provide full color printing.
The colors of the RGB color mode l can be mixed to produce the cyan, magenta, and yello w of the CMY
color model and vice v ersa. Two colors of one model are mixe d to prod uce the c olor of the other model
(mixing blue and green produces cy an, for example). The re maining color is the compl ement of the color produced (red in this example). Complementary colors are: red and cyan, green and magenta, blue
and yellow.
87
Page 88

Operating Instructions Printer Client Reference 2
Printed Color
The printer produces full-c olor out put using four to ner color s: cyan, magenta , yellow, and black. These
four color s make up the CMYK color model.
Note
❒ Mixing CMY in equal proportions should hypothetically produce pure black, but imperfections in the
ink cause an equal measure of these colors to produce a muddy or dark brown. Black toner is added
to the color model in order to make it possible to produce pure black.
For example, if the image is created with cyan only, there is no problem in printing all of it with cyan
toner. Howe ver, f ull-c olor im ages are actua lly com prised of 10,0 00s of fine col ors. These fi ne colo rs
can be expressed by changing the ratio of CMYK toner particles to be printed per unit surface.
There are also dark and light shadings to eac h col o r . The se shadings can be express ed b y changing the
amount of toner particles to be printed per unit surface.
88
Page 89

Operating Instructions Printer Client Reference 2
Staple and Punch Position
Stapling
By installing the 2 Tray Finisher, you can staple one printing at a time when printing multiple copies.
See the Help files of the printer driver for details on th e print methods.
Limitation
❒ The printer cannot staple paper that is fed from the Bypass Tray.
❒ The printer cannot sort "Thick", "Labels", or "OHP" paper types in the Paper Tray.
Note
❒ If you cannot make the settings for stapling even when the 2 Tray Finisher is connected, the optional
devices might not have been attached properly. Make the proper settings for the optional devices in
the printer driver's dialog box. See Printer Client Reference 1.
❒ Outputs of staple depend on the print direction and feed di rection. The following ta ble shows the
staple positions.
89
Page 90

❖❖❖❖ Staple Position
Operating Instructions Printer Client Reference 2
90
❒ When double-sided printing is selected, adjust the staple position to the binding direction.
❒ If you are punching at the same time, specify the same side.
❒ The paper sizes and number of pages that can be stapled are displayed below.
Paper Size Staple Capacity
A3, 11 × 17, B4, Legal 30
A4, B5, Letter 50
Page 91

Operating Instructions Printer Client Reference 2
Punching
Used to punch holes in the printing.
Limitation
❒ The printer cannot punch paper that is fed from the Bypass Tray.
❒ To use this function, the 2 Tray Finisher must be installed on the printer.
❒ The printer cannot sort "Thick", "Labels", or "OHP" paper types in the Paper Tray.
Note
❒ Outputs of punch d epend on the pri nt direction and feed direction. The following tabl e shows the
punch positions.
91
Page 92

❖❖❖❖ Punch Position
Operating Instructions Printer Client Reference 2
92
❒ If you cannot make the settings for punc hing even when t he 2 Tray Finisher is conn ected, the op-
tional devices might not have been attached properly. Make the proper settings for the optional devices in the printer driver's dialog box. See Printer Client Reference 1.
❒ When Duplex Print is selected, adjust the punch position to the binding direction.
Page 93

Operating Instructions Printer Client Reference 2
❒ The paper sizes that can be punched are displayed below.
Type Feed Direction Paper Size
93
2 holes
NA 3 holes
EU 4 holes
Northern EU 4 holes
K
←
L
←
K
←
L
←
K
←
L
←
K
←
L
←
A4, 16K, Letter
A3, 8K, 11×17
A4, B5, 16K, Letter
A3, B4, 8K, 11×17
A4, B5, 16K, Letter
A3, B4, 8K, 11×17
A4, B5, 16K, Letter
A3, B4, A4, B5, A5, 8K, 16K,
11×17, Legal, Foolscap, Folio, F,
Letter
Page 94

Operating Instructions Printer Client Reference 2
Collate and Job Separation
Reference
❒ For more information about collate and job separation, see the printer driver's Help file.
❖❖❖❖ Collate
Outputs can be assembled as sets in sequential order.
94
3
2
1
3
2
1
3
2
1
3
2
1
❖❖❖❖ Job Separation
The shift tray moves backward or forward each time the copies of one set or those of each job are
delivered, causing the next copy to shift whe n deliver ed so th at you ca n differ entiate each set or job.
3
2
1
1
2
3
1
1
2
2
3
3
Page 95

Operating Instructions Printer Client Reference 2
Limitation
❒ The printer cannot collate or job separation printing on the paper loaded on the Bypass Tray.
❒ The printer cannot collate or job separation printing on "Thick", "Labels", and "OHP" paper types in
the Paper Tray.
❒ To use these function, a Memory Unit of at least 128MB or Hard Disk Drive must be installed on the
printer.
❒ Job separation requires the optional 2 Tray Finisher must be installed on the printer.
Note
❒ If you cannot make the settings for stapling even when the 2 Tray Finisher is connected, the optional
devices might not have been attached properly. Make the proper settings for the optional devices in
the printer driver's dialog box. See Printer Client Reference 1.
❒ If the output end is the 2 Tray Finisher Shift Tray, job separation is executed.
❒ If you make the setting for "job separation" with the printer driver, the output end becomes the 2 Tray
Finisher Shift Tray a utom ati ca ll y. Th e RP CS pr in ter dri ve r autom ati ca ll y se t for "jo b s epa ratio n" , if
you select the 2 Tray Finisher Tray for the output tray.
95
Page 96

Operating Instructions Printer Client Reference 2
INDEX
A
Additive (Emitted) Color Models
,
,
9
,
86
86
,
11
,
8
,
20
87
,
,
,
9
, 74,
86
78
,
,
Agfa Font Manager
C
Changing the Zone (Macintosh)
Changing to EtherTalk
Checking the Error Log
Checking the Printer Status
,
CMY
CMY color model
Collate
Color Guide
color models
Color Printing Basics
configuration
87
,
94
Macintosh
NetWare
D
Deleting a Sample Print File
Deleting the Locked Print File
E
Entering the Password
EtherTalk
,
82
84
,
72
,
,
80
10
86
J
Job Separation
,
94
M
Macintosh
,
8
uninstall, PostScript
N
NetWare
NetWare Configuration
,
11
Windows 2000
Windows 95/98/Me
Windows NT 4.0
P
PCL 5c
PostScript
PostScript 3
printer driver
printer name
,
22
Windows 2000, uninstalling
Windows 95 /98, uninstalling
Windows NT 4.0, uninstalling
,
22
Macintosh, uninstall
Windows 2000, uninstalling
Windows 95 /98, uninstalling
Windows NT 4.0, uninstalling
,
21
,
10
,
,
14
,
17
,
,
11
67
67
,
,
,
,
,
,
96
60
59
61
66
65
67
Page 97

Operating Instructions Printer Client Reference 2
97
Printing a Locked Print File
Printing the Remaining Sets
Punching
,
91
,
,
76
70
R
,
RGB
RGB color model
RPCS
86
,
86
Windows 2000, uninstalling
Windows 95/98, uninstalling
Windows NT 4.0, uninstalling
,
,
,
63
62
64
S
,
89
,
68
,
94
,
,
25
23
,
86
Sample Print
Setting up the Printer Driver and Canceling a Print Job
SmartNetMonitor for Admin
SmartNetMonitor for Client
Software and Utilities Included on the CD-ROM
Sorting copies into sets
Stapling
Subtractive (Reflected) Color Models
T
troubleshooting
,
84
,
,
28
20
W
Windows 2000
canceling a job
PCL 5c, uninstalling
PostScript, uninstalling
printer properties, PCL 5c
printer properties, PostScr i pt 3
printer properties, RPCS
RPCS, uninstalling
Windows 95/98
PCL 5c, uninstalling
PostScript, uninstalling
RPCS, uninstalling
Windows 95/98/Me
canceling a job
printer properties, PCL 5c
printer properties, PostScr i pt 3
printer properties, RPCS
Windows NT 4.0
canceling a job
document defaults, PCL 5c
document defaults, PostScript 3
document defaults, RPCS
PCL 5c, uninstalling
PostScript, uninstalling
printer properties, PCL 5c
printer properties, PostScr i pt 3
printer properties, RPCS
RPCS, uninstalling
,
,
,
55
54
57
,
,
,
,
,
,
63
62
64
60
,
59
,
61
,
,
,
,
,
66
65
67
,
,
,
,
30
28
34
33
38
36
42
41
,
,
,
,
46
44
50
49
Page 98

Operating Instructions Printer Client Reference 2
98
Copyright © 2001
Page 99

Operating Instructions Printer Client Reference 2
99
UE USA G060-6830
 Loading...