

Page 1

Operating Instructions Administrator Reference 2
Introduction ........................................................................................................................... 6
How to Read This Manual.................................................................................................... 8
1.Windows 2000 Print Server Configuration
Configuring the Protocols................................................................................................... 10
Configuring TCP/IP and IPP for Printing ....................................................................................... 10
Configuring NetBEUI for Printing.................................................................................................. 11
Installing Software............................................................................................................... 13
Installing by "Network" installation................................................................................................ 13
Changing Port Settings.................................................................................................................... 16
Printing with a Standard TCP/IP Port.............................................................................. 17
Installing the Printer Driver............................................................................................................. 17
Configuring LPR Port Printing ......................................................................................... 19
Installing the Printer Driver............................................................................................................. 19
Setting Up Options .............................................................................................................. 21
Setting the Printer Shared.................................................................................................. 24
1
Page 2
Operating Instructions Administrator Reference 2
2.Windows NT 4.0 Print Server Configuration
Configuring the Protocols................................................................................................... 25
Configuring TCP/IP and IPP for Printing ....................................................................................... 25
Configuring NetBEUI for Printing.................................................................................................. 27
Installing Software............................................................................................................... 29
Installing by "Network" installation................................................................................................ 29
Changing Port Settings.................................................................................................................... 32
Configuring LPR Port Printing ......................................................................................... 33
Installing the Printer Driver............................................................................................................. 33
Setting Up Options .............................................................................................................. 35
Setting the Printer Shared.................................................................................................. 38
3.NetWare Configuration
NetWare 3.x - Advanced Settings....................................................................................... 40
Installing SmartNetMonitor for Admin........................................................................................... 41
Setting Up as a Print Server ............................................................................................................ 42
Setting Up as a Remote Printer....................................................................................................... 44
NetWare 4.x, 5 - Advanced Settings................................................................................... 48
Installing SmartNetMonitor for Admin........................................................................................... 49
Setting Up as a Print Server ............................................................................................................ 50
Setting Up as a Remote Printer....................................................................................................... 54
2
Page 3
Operating Instructions Administrator Reference 2
4.Monitoring and Configuring the Printer
Changing Names and Comments....................................................................................... 58
SmartNetMonitor for Admin........................................................................................................... 59
Web Browser............................................. ......... .............................................................. ............... 61
Displaying the Status of Printer......................................................................................... 63
SmartNetMonitor for Admin........................................................................................................... 63
SmartNetMonitor for Client............................................................................................................ 64
Web Browser............................................. ......... .............................................................. ............... 65
5.Making Printer Settings with the Operation Panel
Menu Chart.......................................................................................................................... 66
Accessing the Main Menu................................................................................................... 69
Paper Input Menu ............................................................................................................... 72
Paper Input Parameters.................................................................................................................... 72
Changing the Paper Input Menu...................................................................................................... 75
List/Test Print Menu........................................................................................................... 79
List/Test Print Parameters............................................................................................................... 79
Printing a Configuration Page......................................................................................................... 80
Interpreting the Configuration Page................................................................................................ 83
Maintenance Menu.............................................................................................................. 86
Maintenance Menu Parameters ................ ......... ............................................................................. 86
Changing the Maintenance Menu.................................................................................................... 89
System Menu........................................................................................................................ 92
System Parameters .......................................................................................................................... 93
Changing the System Menu ............................................................................................................ 99
3
Page 4
Operating Instructions Administrator Reference 2
Host Interface Menu.......................................................................................................... 102
Host Interface Parameters ............................................................................................................ 102
Changing the Host Interface Menu ............................................................................................... 106
PCL Menu.......................................................................................................................... 109
PCL Parameters............................................................................................................................. 109
Changing the PCL Menu............................................................................................................... 112
Language Menu................................................................................................................. 115
Changing the Language Menu ...................................................................................................... 115
6.Appendix
Configuring the Printer using SmartNetMonitor for Admin........................................ 118
Changing the Network Interface Board Configuration................................................................. 119
Locking the Menus on the Printer's Operating Panel.................................................................... 120
Changing the Paper Type.............................................................................................................. 121
Managing the Number of Copies to be Printed............................................................................. 122
Configuring the Energy Save Mode.............................................................................................. 123
Configuring the Network Interface Board with a Web Browser.................................. 124
Going to the Top Page................................................................................................................... 126
SNMP.................................................................................................................................. 128
4
Remote Maintenance by telnet......................................................................................... 129
Using telnet.................................................................................................................................... 129
Commands List.............................................................................................................................. 131
Getting Printer Information over the Network.............................................................. 146
Printer current status...................................................................................................................... 146
Printer configuration................................................................................................................... ... 155
Page 5
Operating Instructions Administrator Reference 2
Understanding the Displayed Information ..................................................................... 159
Print Job Information..................................................................................................................... 159
Print Log Information.................................................................................................................... 160
Configuring the Network Interface Board..................................................................................... 161
Message List....................................................................................................................... 164
System Log Information............................................................................................................. ... 164
Precautions......................................................................................................................... 170
Connecting a Dial Up Router to a Network .................................................................................. 170
PostScript Printing from Windows................................................................................................ 171
NetWare Printing........................................................................................................................... 172
When Using DHCP....................................................................................................................... 173
Memory Capacity and Paper Size.................................................................................... 175
Moving and Transporting the Printer............................................................................. 177
Moving the Printer......................................................................................................................... 178
Specifications...................................................................................................................... 179
Mainframe..................................................................................................................................... 179
Options .......................................................................................................................................... 183
5
INDEX................................................................................................................................ 190
Page 6
Operating Instructions Administrator Reference 2
Introduction
To get maximum versatility from this machine all operators should carefully read and follow the instructions in this manual. Please keep this manual in a handy place near the machine.
Please read the Safety Information in the "Printer Reference" before using this machine. It contains important information related to USER SAFETY and PREVENTING EQUIPMENT PROBLEMS.
Important
Parts of this manual are subject to change without prior notice. In no event will the company be liable
for direct, indirect, speci al, incidental, or consequential damages as a resul t of handling or operatin g the
machine.
Software Version Conventions Used in This Manual
• NetWare 3.x means NetWare 3.12 and 3.2.
• NetWare 4.x means NetWare 4.1, 4.11 and IntranetWare.
Trademarks
Apple, AppleTalk, EtherTalk, La serWriter, Macint osh are regist ered trademarks of Apple Computer, Inc.
Ethernet is a registered trademark of Xerox Corporation.
Microsoft, Windows, Windows NT are registered trademarks of Microsoft Corporation in the United
States and/or other countries.
Netscape, Netscape Navigator are registered trademarks of Netscape Communications Corporation.
Novell, NetWare, NDS are registered trademarks of Novell, Inc.
PostScript is a registered trademark of Adobe Systems, Incorporated.
PCL is a registered trademark of Hewlett-Packard Company.
Solaris is a trade mark or r egist ered t radema rk of Sun Mi crosys tems, I nc. in t he Unit ed Sta tes a nd o ther
countries.
Other product names used here in are f or i dent if ic at ion purposes only and might be trad emarks of their
respective companies. We disclaim any and all rights in those marks.
6
Page 7
Operating Instructions Administrator Reference 2
Note
The proper names of the Windows operating systems are as follows:
• Microsoft
• Microsoft
• Microsoft
• Microsoft
• Microsoft
• Microsoft
• Microsoft
®
Windows® 95 operating system
®
Windows® 98 operating system
®
Windows® Millennium Edition (Windows Me)
®
Windows® 2000 Professional
®
Windows® 2000 Server
®
Windows NT® Server operating system Version 4.0
®
Windows NT® Workstation operating system Version 4.0
7
Page 8
Operating Instructions Administrator Reference 2
R
R
How to Read This Manual
Symbols
In this manual, the following symbols are used:
WARNING:
This symbol indicates a potentially hazardous situation which, if instructions are not followed, could
result in death or serious injury.
CAUTION:
This symbol indicates a potentially hazardous situation which, if instructions are not followed, may result in minor or moderate injury or damage to property.
* The statements above are notes for your safety.
Important
If this instruction is not foll owed, pape r might be misf ed, origin als might be d amaged, or d ata might be
lost. Be sure to read this.
Preparation
This symbol indicates the prior knowledge or preparations required before operating.
Note
This symbol indicates precautions for operation, or actions to take after misoperation.
8
Limitation
This symbol indicates numerical limits, functions that cannot be used together, or conditions in which
a particular function cannot be used.
Page 9

Operating Instructions Administrator Reference 2
Reference
This symbol indicates a reference.
[]
Keys that appear on the machine's panel display.
Keys and buttons that appear on the computer's display.
{}
Keys built into the machine's operation panel.
Keys on the computer's keyboard.
9
Page 10
Operating Instructions Administrator Reference 2
1. Windows 2000 Print Server Configuration
Configuring the Protocols
Configuring TCP/IP and IPP for Printing
Follow these instructio ns to configure the Network Interfa ce Board and Windows 2000 to use the TCP/
IP protocol and IPP.
Configuring the printer
Configure the printer to use the TCP/IP protocol.
• Confirm that the TCP/IP prot ocol is set to be active. (The factory default is active.)
• Assign an IP address and make other settings required for using the TCP/IP protocol.
Reference
❒ For more information about how to make the above settings, see "Windows 2000 Configuration" in
Printer Client Reference 1 that comes with this printer.
❒ If DHCP is used to assign IP addresses, see P.173 “When Using DHCP”.
Note
❒ After setting the IP address, use the ping command to confirm that it has been set correctly.
Click [Start], point to [Programs], point to [Accessories] and then click [Command Prompt].
A
Type the following. (Example IP address is 192.168.15.16)
B
C:> ping 192.168.15.16
If the address has been configured correctly, the following message appears.
Reply from 192.1 68 .15 .1 6 : by tes =3 2 ti me <10 ms TTL =32
If the address has been configured incorrectly, the following message appears.
Request timed out.
10
Page 11
Operating Instructions Administrator Reference 2
Configuring a Windows 2000 computer
Follow these steps to configure a Windows 2000 computer to use the TCP/IP protocol.
A
Click [Start] on the taskbar, poin t to [Settings], and then clic k [Network and Dial-up Connections].
B
Click [Local Area Connection]. On the [File] menu, click [Properties].
C
Confirm that "Internet Proto col (TCP/ IP) " i s se lected in the [Components checked are used by
this connection:] box under the [General] tab.
Note
❒ If the check box of TCP/IP protocol is not selected, select the box.
❒ If the TCP/IP protocol is not installed, click [
information about installing the TCP/IP protocol, see Windows 2000 Help file.
D
Configure the TCP/IP protocols with the appropriate IP address, subnet mask and other settings.
Confirm with the network administrator that the settings are correct.
Install
] under the [
General
] tab and install it. For more
11
Configuring NetBEUI for Printing
Follow these instructio ns to conf igure t he Network Inte rfac e Board and Windo ws 2000 to use the NetBEUI protocol.
Page 12
Operating Instructions Administrator Reference 2
Configuring the printer
Configure the printer to use the NetBEUI protocol.
• Confirm that the NetBEUI protocol is set to be active. (The factory default is active.)
Reference
❒ For more information about how to make the above settings, see "Windows 2000 Configuration" in
Printer Client Reference 1 that comes with this printer.
Configuring a Windows 2000 computer
Follow these steps to configure a Windows 2000 computer to use the NetBEUI protocol.
A
Click [Start] on the taskbar, poin t to [Settings], and then clic k [Network and Dial-up Connections].
B
Click [Local Area Connection]. On the [File] menu, click [Properties].
C
Confirm that "NetBEUI Protocol" is selected in the [Components checked are used by this con-
nection:] box under the [General] tab.
12
Note
❒ If the check box of the NetBEUI protocol is not selected, select the box.
❒ If the NetBEUI prot oco l is no t in st al led , cl ick [Install] under the [General] tab and install it. For more
information abou t inst allin g the Ne tBEU I proto col, se e Wind ows 2 000 Help file . "Netw ork" in stall ation installs the PCL 5c and RPCS printer driver and SmartNetMonitor for Client. When you print
using TCP/IP, NetBE UI or IPP protocol in Peer-t o-P ee r Ne two rk, you m ust sel ect th is inst al la ti on .
Page 13

Operating Instructions Administrator Reference 2
Installing Software
Preparation
❒ Select "Network" installation when you use the printer for direct printing.
❒ "Network" installa tion instal ls the P CL 5c and RPC S prin ter driver and SmartNet Mon itor for Client.
When you print using TC P/IP, NetBEUI or IPP protocol in Peer-to-Pee r Network, you must select
this installation.
❒ "Custom" installation allows to install SmartNetMonitor for Client separately.
Installing by "Network" installation
A
Close all applications that are running.
B
Insert the CD-ROM into the CD-ROM drive.
The installer will start by Auto R un.
Note
❒ Auto Run might not automatically work with certain OS settings. In this case, launch "INST-
TOOL.EXE" located on the CD-ROM root directory.
13
C
Follow the instructions on the screen.
D
Select "Network" installation when the selection screen appears.
E
Follow the instructions on the screen.
F
Select a p rinter you want to use when the [Select Printer] dialog box appears.
Page 14

Operating Instructions Administrator Reference 2
G
Click [Add..] when the [Select Port] dialog box appear.
H
Select [SmartNetMonitor for Client] and then click [OK].
Available printers will be listed.
I
Select a printer you want to use.
TCP/IP
A Select the printer you want to use, and then click [OK].
Note
❒ Printers that respond to an IP br oadcast from the computer will be displayed. To print to a
printer not listed here, click [
NetBEUI
A Click [NetBEUI].
A list of printers that can be printed by the NetBEUI protocol appears.
B Select the printer you want to use, and then click [OK].
Specify Address
] and then type the IP address or host name.
14
Note
❒ Printers that respond to an broadcast from the computer will be displayed. To print to a printer
not listed here, cli ck [Specify Address] and then ty pe the NetB EUI addres s. Confir m the NetBEUI address on the networ k confi gu ra tio n pag e. F or mo re in for ma tio n abo ut the pri nti ng of
configuration page, see P.173 “When Using DHCP”.
❒ You cannot print to printers beyond routers.
Page 15

Operating Instructions Administrator Reference 2
IPP
A Click [IPP].
The IPP setting dialog box appears.
B In [Printer URL], type "http://(printer's IP addr ess)/printer" as the IP address of the printer.
C As necessary, type the names to di stinguish the printer i n [IPP Port Name]. Type a name dif-
fering from those of any existing port names.
If you omit this, the address entered in [Printer URL] will be set as the IPP port name.
(Example IP address is 192.168.15.16)
http://192.168.15.16/printer
D If using a proxy server and IPP user name, click [Detailed Settings] and configure the nec-
essary settings.
Note
❒ For more information about these setting, see the Help file.
J
Click [OK].
15
K
Confirm the selected port is highlighted, and then click [Next].
L
Click [Finish].
Note
❒ During installation, the [
to continue the installation.
M
Restart the computer after installation is complete.
Digital Signature Not Found
] dialog box may a ppear. In thi s case, click [
Yes
]
Page 16
Operating Instructions Administrator Reference 2
N
Set up the o ptions with the print er driver.
Note
❒ You can specify the "User Code" with the printer properties after installing the printer driver. See
the Help file for the printer driver.
❒ You must set up the options when the bidirectional transmission is unable. For more information
about the conditions of the bidirecti onal transmiss ion, see P.22 “The conditions of the bidirec-
tional transmissions”.
Changing Port Settings
Follow the steps to change SmartNetMonitor for Client settings, such as the proxy server settings or
IPP URL.
Note
❒ There are no settings for the NetBEUI protocol.
A
From the [Printers] window, click the icon of the printer you want to use. On the [File] menu,
click [Properties].
16
B
Click the [Ports] tab, and then cli ck [Configure Port].
The [Port Settings] dialog box appears
• For TCP/IP protocol, you can configure Timeout Settings.
• For IPP, you can configure User Settings, Proxy Settings and Timeout Settings.
Note
❒ For more information about these settings, see SmartNetMonitor for Client Help file.
Page 17
Operating Instructions Administrator Reference 2
Printing with a Standard TCP/IP Port
Preparation
❒ Select [Typical] installation when you use the printer with Standard TCP/IP port.
❒ [Typical] installation installs the PCL 5c and RPCS printer driver.
Installing the Printer Driver
A
Close all applications that are running.
B
Insert the CD-ROM into the CD-ROM drive.
The installer will start by Auto R un.
Important
❒ Never have two versions of the same printer driver installe d on your system at the same time.
When upgrading to a new version of the printer driver, delete the old version, and then install the
new one.
17
Note
❒ Auto Run might not automatically work with certain OS settings. In this case, launch "INST-
TOOL.EXE" located on the CD-ROM root directory.
C
Follow the instructions on the screen.
D
Select [Typical] installation, and then click [Next].
E
Follow the instructions on the screen.
Page 18
Operating Instructions Administrator Reference 2
F
Select [Standard TCP/IP] when the "Select Port" dialog box appears, and then click [Next].
G
Click [Next] in the "Add Standard TCP/IP Printer Port Wizard" window.
H
Type the printer name or IP address in the "Printer Name or IP Address" box.
I
Click [Finish] in the "Add Standard TCP/IP Printer Port Wizard" window.
J
Confirm that the selected port has been displayed in the "Port" box, and then click [Next].
Note
❒ During installation, the [
to continue the installation.
K
Click [Finish].
Note
❒ You can specify the "User Code" with the printer properties after installing the RPCS pritner driv-
er. See the Help file for the printer driver.
L
Restart the computer after t he installation is co mplete.
Digital Signature Not Found
] dialog box may a ppear. In thi s case, click [
Yes
18
]
M
Set up the o ptions with the print er driver.
N
You must set up the options when the bidirectional transmission is disabled.
Reference
❒ For more information about the status of the bidirectional transmission, see P.22 “The conditions
of the bidirectional transmissions”.
❒ For more information about settings for options, see P.21 “Setti ng Up Option s”.
Page 19

Operating Instructions Administrator Reference 2
Configuring LPR Port Printing
Preparation
❒ Select [Typical] installation when you use the printer with the LPR port.
❒ [Typical] installation installs the PCL 5c and RPCS printer driver.
Installing the Printer Driver
A
Close all applications that are running.
B
Insert the CD-ROM into the CD-ROM drive.
The installer will start by Auto R un.
Important
❒ Never have two versions of the same printer driver installe d on your system at the same time.
When upgrading to a new version of the printer driver, delete the old version, and then install the
new one.
19
Note
❒ Auto Run might not automatically work with certain OS settings. In this case, launch "INST-
TOOL.EXE" located on the CD-ROM root directory.
C
Follow the instructions on the screen.
D
Select [Typical] installation, and then click [Next].
E
Follow the instructions on the screen.
Page 20
Operating Instructions Administrator Reference 2
F
Select [LPR Port] when the "Select Port" dialog box appears, and then click [Next].
G
Type the printer's IP address in the "Name or address of server providing lpd" box.
H
Type "lp" in the "Name of printer or print queue on that server" box, and then click [OK].
I
Confirm that the selected port has been displayed in the "Port" box, and then click [Next].
J
Click [Finish].
Note
❒ During installation, the [
to continue the installation.
K
Restart the computer after t he installation is co mplete.
L
Set up the o ptions with the print er driver.
Reference
❒ For more information about settings for options, see P.21 “Setti ng Up Option s”.
Digital Signature Not Found
] dialog box may a ppear. In thi s case, click [
Yes
20
]
Note
❒ You can specify the "User Code" with the printer properties after installing the printer driver. See
the Help file for the printer driver.
❒ You must set up the opt ion s when the bi dir e cti ona l t ra ns miss io n i s dis ab led . F or m or e i nfor m a-
tion about the s tatus of th e bidirectio nal transmiss ion, see P.22 “The conditions of the bidirec -
tional transmissions”.
Page 21
Operating Instructions Administrator Reference 2
Setting Up Options
You must set up installed options, paper size and feed direction with the printer driver when the bidirectional transmission is disabled.
Limitation
❒ Changing the printer settings requires Manage Printers permission. Members of the Administrators
and Power Users grou ps have Manage Printe rs permission by defaul t. When you set up optio ns,
log on using an account that has Manage Printers permission.
A
Click [Start] on the taskbar, point to [Settings], and then click [Printers].
The [Printers] window appears.
B
Click the icon of the printer you want to use. On the [File] menu, click [Properties].
C
Click the [Accessories] tab.
Note
❒ If you use the RPCS printer driver, Click [Change Accessories] tab.
❒ If you use th e PS printer driver, Click [Device Settings] tab.
21
D
Select options you have installe d fr om the [Options] group and make any sett ings you re quire.
E
Click [OK] .
Page 22

Operating Instructions Administrator Reference 2
----The conditions of the bidirectional transmissions
When the bidirection al transmission s is enabled, the information about the paper size and f eed direction
settings are automat ical ly sen t to t he printer by the c omputer. You can also c onfir m th e prin ter' s condi tion from your computer.
• The bidirectional transmissions is supported by Windows 95/98/Me, Windows 2000 and Windows
NT 4.0.
Note
❒ The RPCS pritner driver supports the bidirectional transmission and update the printer status auto-
matically.
❒ The PCL 5c printer driver supports the bidirectional transmission, you can update the printer status
manually.
❒ The PostScript 3 printer driver does not supports the bidirectional transmission.
To support the bidirectional transmissions, the following conditions below are required.
❖❖❖❖ Connecting with the parallel interface cable and the USB exchange cable.
• The computer supports the bidirectional transmissions.
• The Interface cable supports the bidirectional transmissions.
• The printer is connected to the computer using the standard parallel interface cable and the par-
allel connector.
• On Windows 2000, the [Enable bidirectional support] is selected and [Enable printer pooling] is
not selected under the [ports] tab.
22
Page 23
Operating Instructions Administrator Reference 2
❖❖❖❖ Connecting with the network
• SmartNetMonitor for Client and the TCP/IP protocol are used.
• On Windows 2000, the [Enable bidirectional support] is selected and [Enable printer pooling] is
not selected under the [ports] tab.
• SmartNet Monitor for Client included on the CD-ROM is installed.
23
Page 24
Operating Instructions Administrator Reference 2
Setting the Printer Shared
Limitation
❒ Changing the printer settings requires Manage Printers permission. Members of the Administrators
and Power Users grou ps have Manage Printe rs permission by defaul t. When you set up optio ns,
log on using an account that has Manage Printers permission.
A
Click [Start] on the taskbar, point to [Settings], and then click [Printers].
The [Printers] window appears.
B
Click the icon of the printer you want to use. On the [File] menu, click [Properties].
C
Select [Shared as:] under the [Sharing] tab.
D
Click [OK].
24
Page 25
Operating Instructions Administrator Reference 2
2. Windows NT 4.0 Print Server Configuration
Configuring the Protocols
Configuring TCP/IP and IPP for Printing
Follow these instructions to configure the Network Interface Board and Windows NT to use the TCP/
IP protocol and IPP.
Configuring the printer
Configure the printer to use the TCP/IP protocol.
• Confirm that the TCP/IP prot ocol is set to be active. (The factory default is active.)
• Assign an IP address and make other settings required for using the TCP/IP protocol.
Reference
❒ For more information abou t how to mak e the abov e settings , see "Windo ws NT 4.0 Con figur ation "
in Printer Client Reference 1 that comes with this printer.
❒ If DHCP is used to as sign IP addresses, see P.36 “The conditions of the bidir ectional transmis-
sions”.
25
Note
❒ After setting the IP address, use the ping command to confirm that it has been set correctly.
Start
Click [
A
Type the following. (Example IP address is 192.168.15.16)
B
], point to [
Programs
], and then click [
Command Prompt
].
C:> ping 192.168.15.16
If the address has been configured correctly, the following message appears.
Reply from 192.1 68 .15 .1 6 : by tes =3 2 ti me <10 ms TTL =32
If the address has been configured incorrectly, the following message appears.
Request timed out.
Page 26
Operating Instructions Administrator Reference 2
Configuring a Windows NT computer
Follow these steps to configure a Windows NT computer to use the TCP/IP protocol.
A
Open [Control Panel] and double-click the [Network] icon. Confirm that "TCP/IP Protocol" is
listed in the [Network protocols] box under the [Protocols] tab.
Note
❒ If the TCP/IP protocol is not installed, click [
information about installing the TCP/IP protocol, see Windows NT Help file.
B
Configure the TCP/IP protocols with the appropriate IP address, subnet mask and other settings.
Confirm with the network administrator that the settings are correct.
C
Click the [Services] tab, and confirm that "Microsoft TCP/IP Printing" is installed.
If "Microsoft TCP/IP Printing" is not installed, click [Add] under the [Services] tab, and install it.
For more information a bout installing a nd configuring ne twork services, see Windows NT Help fil e.
Add
] under the [
Protocols
] tab and install it. For more
26
Page 27
Operating Instructions Administrator Reference 2
Configuring NetBEUI for Printing
Follow these instructions to configure the Network Interface Board and Windows NT to use the NetBEUI protocol.
Configuring the printer
Configure the printer to use the NetBEUI protocol.
• Confirm that the NetBEUI protocol is set to be active. (The factory default is active.)
Reference
❒ For more information abou t how to mak e the abov e settings , see "Windo ws NT 4.0 Con figur ation "
in Printer Client Reference 1 that comes with this printer.
Configuring a Windows NT computer
Install the NetBEUI pro tocol on t he Windows NT co mputer, and c hange the LAN adapter n umber (Lana Number).
27
A
Open [Control Panel] and double-c lick the [Network] icon. Confirm that "Net BEUI Protocol " is
listed in the [Network Protocols] box under the [Protocols] tab.
Note
❒ If the NetBEUI proto col is no t installed , click [Add...] under the [Protocols] tab, and install it. For
more information about installing the NetBEUI protocol, see Windows NT Help file.
B
Change the Lana Number. Click the [Services] tab, c lick " NetBIOS Inter face" in the [Network
Services:] box , and click [Properties:].
Page 28
Operating Instructions Administrator Reference 2
C
Click the Lana Number corresponding the Nbf protocol of the [Network Route] headline, and
click [Edit].
D
Type "0" as the Lana Number.
Note
❒ If the other protocol's Lana Number is configured with "0", you must change the Lana Number a
number other than "0".
E
Click [OK].
F
Click [Close], and close the [Network] dialog box.
G
After confirming the message to restart, click [Yes].
Note
❒ After you change the Lana Number, you must restart the computer.
28
Page 29
Operating Instructions Administrator Reference 2
Installing Software
Preparation
❒ Select "Network" installation when you use the printer for direct printing.
❒ "Network" installa tion instal ls the P CL 5c and RPC S prin ter driver and SmartNet Mon itor for Client.
When you print using TC P/IP, NetBEUI or IPP protocol in Peer-to-Pee r Network, you must select
this installation.
❒ "Custom" installation allows to install SmartNetMonitor for Client separately.
Installing by "Network" installation
A
Close all applications that are running.
B
Insert the CD-ROM into the CD-ROM drive.
The installer will start by Auto R un.
Note
❒ Auto Run might not automatically work with certain OS settings. In this case, launch "INST-
TOOL.EXE" located on the CD-ROM root directory.
29
C
Follow the instructions on the screen.
D
Select "Network" installation when the selection screen appears.
E
Follow the instructions on the screen.
F
Select a p rinter you want to use when the [Select Printer] dialog box appears.
Page 30
Operating Instructions Administrator Reference 2
G
Click [Add..] when the [Select Port] dialog box appear.
H
Select [SmartNetMonitor for Client] and then click [OK].
Available printers will be listed.
I
Select a printer you want to use.
TCP/IP
A Select the printer you want to use, and then click [OK].
Note
❒ Printers that respond to an IP br oadcast from the computer will be displayed. To print to a
printer not listed here, click [
NetBEUI
A Click [NetBEUI].
A list of printers that can be printed by the NetBEUI protocol appears.
B Select the printer you want to use, and then click [OK].
Specify Address
] and then type the IP address or host name.
30
Note
❒ Printers that respond to an broadcast from the computer will be displayed. To print to a printer
not listed here, cli ck [Specify Address] and then ty pe the NetB EUI addres s. Confir m the NetBEUI address on the networ k confi gu ra tio n pag e. F or mo re in for ma tio n abo ut the pri nti ng of
configuration page, see P.36 “The conditions of the bidirectional transmissions”.
❒ You cannot print to printers beyond routers.
Page 31

Operating Instructions Administrator Reference 2
IPP
A Click [IPP].
The IPP setting dialog box appears.
B In [Printer URL], type "http://(printer's IP addr ess)/printer" as the IP address of the printer.
C As necessary, type the names to di stinguish the printer i n [IPP Port Name]. Type a name dif-
fering from those of any existing port names.
If you omit this, the address entered in [Printer URL] will be set as the IPP port name.
(Example IP address is 192.168.15.16)
http://192.168.15.16/printer
D If using a proxy server and IPP user name, click [Detailed Settings] and configure the nec-
essary settings.
Note
❒ For more information about these setting, see the Help file.
J
Click [OK].
31
K
Confirm the selected port is highlighted, and then click [Next].
L
Click [Finish].
Note
❒ During installation, the [
to continue the installation.
M
Restart the computer after installation is complete.
Digital Signature Not Found
] dialog box may a ppear. In thi s case, click [
Yes
]
Page 32

Operating Instructions Administrator Reference 2
N
Set up the o ptions with the print er driver.
Note
❒ You can specify the "User Code" with the printer properties after installing the printer driver. See
the Help file for the printer driver.
❒ You must set up the options when the bidirectional transmission is unable. For more information
about the conditions of the bidirecti onal transmiss ion, see P.36 “The conditions of the bidirec-
tional transmissions”
Changing Port Settings
Follow the steps to change SmartNetMonitor for Client settings, such as the proxy server settings or
IPP URL.
Note
❒ There are no settings for the NetBEUI protocol.
A
From the [Printers] window, click the icon of the printer you want to use. On the [File] menu,
click [Properties].
32
B
Click the [Ports] tab, and then cli ck [Configure Port].
The [Port Settings] dialog box appears
• For TCP/IP protocol, you can configure Timeout Settings.
• For IPP, you can configure User Settings, Proxy Settings and Timeout Settings.
Note
❒ For more information about these settings, see SmartNetMonitor for Client Help file.
Page 33

Operating Instructions Administrator Reference 2
Configuring LPR Port Printing
Preparation
❒ Select [Typical] installation when you use the printer with the LPR port.
❒ [Typical] installation installs the PCL 5c and RPCS printer driver.
Installing the Printer Driver
A
Close all applications that are running.
B
Insert the CD-ROM into the CD-ROM drive.
The installer will start by Auto R un.
Important
❒ Never have two versions of the same printer driver installe d on your system at the same time.
When upgrading to a new version of the printer driver, delete the old version, and then install the
new one.
33
Note
❒ Auto Run might not automatically work with certain OS settings. In this case, launch "INST-
TOOL.EXE" located on the CD-ROM root directory.
C
Follow the instructions on the screen.
D
Select [Typical] installation, and then click [Next].
E
Follow the instructions on the screen.
Page 34

Operating Instructions Administrator Reference 2
F
Select [LPR Port] when the "Select Port" dialog box appears, and then click [Next].
G
Type the printer's IP address in the "Name or address of server providing lpd" box.
H
Type "lp" in the "Name of printer or print queue on that server" box, and then click [OK].
I
Confirm that the selected port has been displayed in the "Port" box, and then click [Next].
J
Click [Finish].
Note
❒ During installation, the [
to continue the installation.
K
Restart the computer after t he installation is co mplete.
L
Set up the o ptions with the print er driver.
Reference
❒ For more information about settings for options, see P.35 “Setti ng Up Option s”.
Digital Signature Not Found
] dialog box may a ppear. In thi s case, click [
Yes
34
]
Note
❒ You can specify the "User Code" with the printer properties after installing the printer driver. See
the Help file for the printer driver.
❒ You must set up the opt ion s when the bi dir e cti ona l t ra ns miss io n i s dis ab led . F or m or e i nfor m a-
tion about the s tatus of th e bidirectio nal transmiss ion, see P.36 “The conditions of the bidirec -
tional transmissions”.
Page 35

Operating Instructions Administrator Reference 2
Setting Up Options
You must set up installed options, paper size and feed direction with the printer driver when the bidirectional transmission is disabled.
Limitation
❒ Changing the printer settings requires Full Control Access permission. Members of the Administra-
tors and Power Users groups have Full Control Access permission by default. When you set up options, log on using an account that has Full Control Access permission.
A
Click [Start] on the taskbar, point to [Settings], and then click [Printers].
The [Printers] window appears.
B
Click the icon of the printer you want to use. On the [File] menu, click [Properties].
C
Click the [Accessories] tab.
Note
❒ If you use the RPCS printer driver, Click [Change Accessories] tab.
❒ If you use th e PS printer driver, Click [Device Settings] tab.
35
D
Select options you have installe d fr om the [Options] group and make any sett ings you re quire.
E
Click [OK] .
Page 36

Operating Instructions Administrator Reference 2
----The conditions of the bidirectional transmissions
When the bidirection al transmission s is enabled, the information about the paper size and f eed direction
settings are automat ical ly sen t to t he printer by the c omputer. You can also c onfir m th e prin ter' s condi tion from your computer.
• The bidirectional transmissions is supported by Windows 95/98/Me, Windows 2000 and Windows
NT 4.0.
• If you use the RPCS ptinter driver and the bidirectional transmissions is enabled, the [Change Ac-
cessories] tab are grayed out.
Note
❒ The RPCS pritner driver supports the bidirectional transmission and update the printer status auto-
matically.
❒ The PCL 5c printer driver supports the bidirectional transmission, you can update the printer status
manually.
❒ The PostScript 3 printer driver does not supports the bidirectional transmission.
To support the bidirectional transmissions, the following conditions below are required.
36
❖❖❖❖ Connecting with the parallel interface cable and the USB exchange cable.
• The computer supports the bidirectional transmissions.
• The Interface cable supports the bidirectional transmissions.
• The printer is connected to the computer using the standard parallel interface cable and the par-
allel connector.
• On Windows NT 4.0, the [Enable bidirectional support] is selected and [Enable printer pooling]
is not selected under the [ports] tab.
Page 37

Operating Instructions Administrator Reference 2
❖❖❖❖ Connecting with the network
• SmartNetMonitor for Client and the TCP/IP protocol are used.
• On Windows NT 4.0, the [Enable bidirectional support] is selected and [Enable printer pooling]
is not selected under the [ports] tab.
• SmartNet Monitor for Client included on the CD-ROM is installed.
37
Page 38

Operating Instructions Administrator Reference 2
Setting the Printer Shared
Limitation
❒ Changing the printer settings requires Full Control Access permission. Members of the Administra-
tors and Power Users groups have Full Control Access permission by default. When you set up options, log on using an account that has Full Control Access permission.
Use the [Printers] window to set up the printer.
A
Click [Start] on the taskbar, point to [Settings], and then click [Printers].
The [Printers] window appears.
B
Click the icon of the printer you want to use. On the [File] menu, click [Properties].
C
Select [Shared] in the [Sharing] tab.
Note
❒ If you use alternate drivers for Windows 95/98/Me client, service pack 4 or more is required. And
install the appropriate printer driver for each client.
38
D
Click [OK].
The printers attached to the network are displayed.
Page 39

Operating Instructions Administrator Reference 2
3. NetWare Configuration
This chapter describes how to configure the printer to use as a print server or a remote printer in a NetWare environment.
Note
❒ NetWare must be set to active using the operation panel of the printer. For more information about
how to set it, see Administrator Reference 1 that comes with this printer.
❖❖❖❖ SmartNetMonitor for Admin
To use a printer in a NetWare environment, configure the NetWare printing environment by using
SmartNetMonitor for Admin.
Note
❒ If you configure Ne tWare printing envi ronment by using Sm artNetMonitor for Admi n under fol-
lowing environment, NetWare Client which is provided by Novell is required.
• NDS mode in Windows 95/98
• NDS or Bindary mode in Windows 2000/Windows NT4.0
❖❖❖❖ Printers listed by SmartNetMonitor for Admin
SmartNetMonitor for Admin displays a list of printers, which are connected to the network.
If you cannot fin d out the pr inter fr om the displa yed list, r efer to t he configur ation page p rinted fro m
the printer. For more information about printing a configuration page, see P.80 “Printing a Config-
uration Page”.
39
Page 40

Operating Instructions Administrator Reference 2
NetWare 3.x - Advanced Settings
The actual procedures for configuring the printer differ depending on whether the Network Interface
Board is configured as a print server or as a remote printer. This section describes how to configure it
in the NetWare 3.x environment.
40
Note
❒ This section ass umes NetW are is fun ctional and that th e necess ary envi ronment for the Ne tWare
Print Service is available.
Page 41
Operating Instructions Administrator Reference 2
Installing SmartNetMonitor for Admin
A
Close all applications that are running.
B
Insert the CD-ROM into the CD-ROM drive.
The installer will start by Auto R un.
Note
❒ Auto Run might not automatically work with certain OS settings. In this case, launch "INST-
TOOL.EXE" located on the CD-ROM root directory.
C
Follow the instructions on the screen.
D
Select "Custom" installation and then click [Next].
E
Remove the check mark from the RPCS Printer Driver and PCL 5c Printer Driver.
F
Click to sel ect [SmartNetMonitor for Admin], and then click [Install].
41
G
Click [OK].
H
Follow the instructions on the screen.
After installation is comp leted , see P.42 “Setting Up as a Print Serve r” wh en you us e the print er as
a print server.
See P.44 “Setting Up as a Remote Printer” when you use the printer as a remote printer.
Note
❒ If you require restarting th e compu ter after insta llation of S martNe tMonito r for Admin was com-
pleted, restart the computer and continue to configuration.
Page 42

Operating Instructions Administrator Reference 2
Setting Up as a Print Server
A
Log on to the file server as a Supervisor or a Supervisor equivalent.
B
Run SmartNetMonitor for Admin.
C
Click the [Group] menu and click [Open LAN] and select [IPX/SPX].
A list of printers appears
Note
❒ If you cannot identify which printer to configure from the list of printers, print Configuration Page
from the printer and f ind the desire d printer. For mor e information a bout printing Confi guration
Page, see P.80 “Printing a Configuration Page”.
❒ If no printer name app ears in the list, ma tch the frame ty pes of the IPX /SPX protocol bet ween
the computer and printe r. Use the [Network] dialog box of Windo ws to ch ang e the fr ame ty pe of
the computer. For mor e informatio n about chan ging the fr ame type of equipment, see "Config-
uring the Printer for the Network" in Administrator Reference 1.
D
Click to select the pri nt er you want to configure, and the n click [NIB Setup Tool] on the [Tools]
menu.
42
E
Click to sel ect [Wizard], and then click [OK].
F
Type the device name into the [Device Name] box and comment into the [Comment] box as nec -
essary, and then click[Next].
G
Select the [NetWare] check box, and then click [Next].
Page 43

Operating Instructions Administrator Reference 2
H
Click to select [Bindery Mode], type the file server name into the [File Server Name:] box, and
then click [Next].
In the [File Server Name:] box, type t he name of the fil e server in whic h a print server is to be creat ed.
You can also select a file server from the list that appears by clicking [Browse].
I
Type the print server name into the [Print Server Name] box, printer name into the [Printer
Name] box, and print queue name into the [Print Queue Name] box, and then click [Next].
• In the [Print Server Name] box, type the name of the NetWare print server within 47 characters.
• In the [Printer Name] box, type the name of the NetWare printer.
• In the [Print Queue Name] box, type the name of the print queue to be added to NetWare.
J
After confirming the settings, click [Next].
The settings take effect, and the NIB setup tool exits.
K
Exit SmartNetMonitor for Admin.
L
Turn the p rinter power off and on.
Note
❒ To confirm that the printer is configured correctly, type as follows from the command prompt.
F:> USERLIST
❒ If the printer works as configured, the name of the print server appears as an attached user.
43
Page 44

Operating Instructions Administrator Reference 2
Setting Up as a Remote Printer
A
Log on to the file server as a Supervisor or a Supervisor equivalent.
B
Run the SmartNetMonitor for Admin.
C
Click the [Group] menu and click [Open LAN] and select [IPX/SPX].
A list of printers appears.
Note
❒ If you cannot identify which printer to configure from the list of printers, print Configuration Page
from the printer and f ind the desire d printer. For mor e information a bout printing Confi guration
Page, see P.80 “Printing a Configuration Page”.
❒ If no printer name app ears in the list, ma tch the frame ty pes of the IPX /SPX protocol bet ween
the computer and printe r. Use the [Network] dialog box of Windo ws to ch ang e the fr ame ty pe of
the computer. For mor e informatio n about chan ging the fr ame type of equipment, see "Config-
uring the Printer for the Network" in Administrator Reference 1.
D
Click to select the pri nt er you want to configure, and the n click [NIB Setup Tool] on the [Tools]
menu.
44
E
Click to sel ect [Property Sheet] and click [OK].
F
Click the [NetWare] tab, and make the following settings.
A In the [Print Server Name] box, type the name of the print server.
B In the [File Server Name] box, type the name of the file server in which a print server is to be
created.
Clicking [Browse], you can select a file server among those listed in the [Browse] dialog box.
Page 45
Operating Instructions Administrator Reference 2
C In the [Print Server Operation Mode] group, click [As Remote Printer].
D In the [Remote Printer No.] box, type the printer number.
Important
❒ Use the same printer number as that to be created in the printer server.
E Click [OK] to clos e the property sheet.
F After a confirmation dialog box appears, click [OK].
G
On the [NIB] menu, click [Exit] to exit the NIB Setup Tool.
H
Type "PCONSOLE" from the command prompt.
F:> PCONSOLE
I
Create a print queue as follows.
Note
❒ If you use a currently defined print queue, go to step
A From the [Available Options] menu, select [Print Queue Information] and press {{{{ENTER}}}}.
B Press {{{{INSERT}}}} and type a print queue name.
C Press {{{{ESC}}}} to return to t he [Available Options] menu.
.
J
45
J
Create a printer as follows.
A From the [Available Options] menu, select [Print Server Information] and press {{{{ENTER}}}}.
B To create a new print server, press {{{{INSERT}}}} and type a print server name.
If you use an currently defined print server, select one of the print servers shown in the [Print
Server] list.
Important
❒ Use the same name as that specified in the NIB Setup Tool. (Step
F
-A).
Page 46

Operating Instructions Administrator Reference 2
C From the [Print Server Information] menu, select [Print Server Configuration].
D From the [Print Server Configuration] menu, select [Printer Configuration].
E Select the printer which is indicated as "Not Installed".
Important
❒ Use the same number as that s pecified as Remote Printer No. usin g the NIB Setup Tool.
(Step
F If you change the name of the printer, type a new name.
A name "Printer x" is assigned to the printer. x stands for the number of the selected printer.
G As type, select [Remote Parallel, LPT1].
The IRQ, Buffer size, Starting form, and Queue service mode are automatically configured.
H Press the {{{{ESC}}}} key, and click [Yes] in the confirmation dialog box.
I Press the {{{{ESC}}}} key to return to [Print Server Configuration Menu].
K
Assign print queues to the created printer as follows.
A From [Print Server Configuration Menu], select [Queues Serviced By Printer].
B Select the printer created in step
C Press the {{{{INSERT}}}} key to select a queue serviced by the printer.
F
-D).
.
J
46
Note
❒ You can select more than one queue at a time.
D Follow the instructions on the screen to make other necessary settings.
When you have finished the above steps, confirm that the queues are assigned.
L
Press the {{{{ESC}}}} key until "Exit?" appears, and select [Yes] to exit PCONSOLE.
Page 47

Operating Instructions Administrator Reference 2
M
Start the print server by typing the following from the console of the NetWare Server.
If it is running, restart it after exiting it.
❖❖❖❖ To exit
CAREE: unload ps er ver
❖❖❖❖ To start
CAREE: load pser ve r print_server_name
Note
❒ If the printer works as configured, "Waiting for job" appears.
47
Page 48

Operating Instructions Administrator Reference 2
NetWare 4.x, 5 - Advanced Settings
The actual procedures for configuring the printer differ depending on whether the Network Interface
Board is configured as a print server or as a remote printer. This section describes how to configure it
in the NetWare 4.x, 5 environment.
❖❖❖❖ To use NetWare 5
• If you use Pure IP, use the prin ter a s a prin t server . You cannot use the printer as a remot e printe r
when you use Pure IP.
• If you use Pure IP, configure the pri nter t o use th e TCP/IP pr otocol . For more i nformat ion abo ut
how to make the set ti ngs , s ee " Configuring the pri nt er f or the Network" in Administrator Refer-
ence 1 that comes with this printer.
48
Page 49

Operating Instructions Administrator Reference 2
Installing SmartNetMonitor for Admin
A
Close all applications that are running.
B
Insert the CD-ROM into the CD-ROM drive.
The installer will start by Auto R un.
Note
❒ Auto Run might not automatically work with certain OS settings. In this case, launch "INST-
TOOL.EXE" located on the CD-ROM root directory.
C
Follow the instructions on the screen.
D
Select "Custom" installation and then click [Next].
E
Remove the check mark from the RPCS Printer Driver and PCL 5c Printer Driver.
F
Click to sel ect [SmartNetMonitor for Admin], and then click [Install].
49
G
Click [OK].
H
Follow the instructions on the screen.
After installation is comp leted , see P.42 “Setting Up as a Print Serve r” wh en you us e the print er as
a print server.
See P.44 “Setting Up as a Remote Printer” when you use the printer as a remote printer.
Note
❒ If you require restarting th e compu ter after insta llation of S martNe tMonito r for Admin was com-
pleted, restart the computer and continue to configuration.
Page 50

Operating Instructions Administrator Reference 2
Setting Up as a Print Server
A
Log on to the file server as a Supervisor or a Supervisor equivalent.
B
Run SmartNetMonitor for Admin.
C
Click the [Group] menu and click [Open LAN] and select [IPX/SPX] or [TCP/IP].
A list of printers appears
Note
❒ If you use Pure IP, select [
❒ If you cannot identify which printer to configure from the list of printers, print Configuration Page
from the printer and f ind the desire d printer. For mor e information a bout printing Confi guration
Page, see P.80 “Printing a Configuration Page”.
❒ If no printer name app ears in the list, ma tch the frame ty pes of the IPX /SPX protocol bet ween
the computer and printe r. Use the [Network] dialog box of Windo ws to ch ang e the fr ame ty pe of
the computer. For mor e informatio n about chan ging the fr ame type of equipment, see "Config-
uring the Printer for the Network" in Administrator Reference 1.
TCP/IP
].
50
D
Click to select the pri nt er you want to configure, and the n click [NIB Setup Tool] on the [Tools]
menu.
Note
❒ If you use Pure IP, see P.52 “Using Pure IP in the NetWare 5 environment”
E
Click to sel ect [Wizard], and then click [OK].
F
Type the device name into the [Device Name] box and comment into the [Comment] box as nec -
essary, and then click[Next].
Page 51

Operating Instructions Administrator Reference 2
G
Select the [NetWare] check box, and then click [Next].
H
Click to select [NDS Mode], type the file server name into the [File Server Name:] box, the NDS
tree name into the [NDS Tree:] box and the context into the [NDS Context:] box, and then click
[Next].
In the [File Server Name:] box, type t he name of the fil e server in whic h a print server is to be creat ed.
You can also select a file server from the list that appears by clicking [Browse].
Clicking [Browse], you can select a NDS context among those listed in the [Browse] dialog box.
As a context, object names are typed from a lower object and divided by a period. For example, if
you want to create a print server into NET under DS, type "NET.DS".
I
Type the print server name into the [Print Server Name] box, printer name into the [Printer
Name] box, print queue n ame into the [Print Queue Name] box, and print queue vo lume into the
[Print Queue Volume], and then click [Next].
• In the [Print Server Name] box, type the name of the NetWare print server within 47 characters.
• In the [Printer Name] box, type the name of the NetWare printer.
• In the [Print Queue Name] box, type the name of the print queue to be added to NetWare.
• In the [Print Queue Volume], type the volume of print queue. As a volume, obj ect names are typed
from a lower object and divided by a period. You can select a volume by clicking [Browse].
51
J
After confirming the settings, click [Next].
The settings take effect, and the NIB setup tool exits.
K
Exit SmartNetMonitor for Admin.
Page 52

Operating Instructions Administrator Reference 2
L
Turn the p rinter power off and on.
Note
❒ To confirm that the printer is configured correctly, type as follows from the command prompt.
F:> NLIST USER /A/B
❒ If the printer works as configured, the name of the print server appears as an attached user.
Using Pure IP in the NetWare 5 environment
A
Log on to the file server as an Admin or an Admin equivalent.
B
Run SmartNetMonitor for Admin.
C
Click [Property Sheet] and click [OK].
The [NIB Setup Tool] dialog box appears.
D
Click the [NetWare] tab, and make the following settings.
A In the [Print Server Name:] box, type the name of the print server.
B In the [File Server Name:] box, type the name of th e file ser ver in whic h a pri nt ser ver is to
be created.
Clicking [Browse], you c an s el ect a file server among t hose listed in the [Browse File Server] di-
alog box.
52
Page 53

Operating Instructions Administrator Reference 2
C In the [NDS Context:] box, type the context of the print server.
Clicking [Browse], you can select a NDS tree and a NDS context among those listed in the
[Browse Context] dialog box.
As a context, object names are typed from a lower object and divided by a period. For example,
if you want to create a print server into NET under DS, type "NET.DS".
D In the [Print Server Operation Mode] group, click [As Print Server].
E Click [OK] to clos e the property sheet.
F After a confirmation dialog box appears, click [OK].
E
Exit SmartNetMonitor for Admin.
After this step, go to step
on P.50 “Setting Up as a Print Server”.
H
53
Page 54

Operating Instructions Administrator Reference 2
Setting Up as a Remote Printer
A
Log on to the file server as an Admin or an Admin equivalent.
B
Run the SmartNetMonitor for Admin.
C
Click the [Group] menu and click [Open LAN] and select [IPX/SPX].
A list of printers appears.
Note
❒ If you cannot identify which printer to configure from the list of printers, print Configuration Page
from the printer and f ind the desire d printer. For mor e information a bout printing Confi guration
Page, see P.80 “Printing a Configuration Page”.
❒ If no printer name app ears in the list, ma tch the frame ty pes of the IPX /SPX protocol bet ween
the computer and printe r. Use the [Network] dialog box of Windo ws to ch ang e the fr ame ty pe of
the computer. For mor e informatio n about chan ging the fr ame type of equipment, see "Config-
uring the Printer for the Network" in Administrator Reference 1.
D
Click to select the pri nt er you want to configure, and the n click [NIB Setup Tool] on the [Tools]
menu.
54
E
Click to sel ect [Property Sheet] and click [OK].
F
Click the [NetWare] tab, and make the following settings.
A In the [Print Server Name] box, type the name of the print server.
B In the [File Server Name] box, type the name of the file server in which a print server is to be
created.
Clicking [Browse], you can select a file server among those listed in the [Browse] dialog box.
Page 55

Operating Instructions Administrator Reference 2
C In the [NDS Context] box, type the context in which the print server is to be created.
Clicking [Browse], you can select a context among those listed in the [Browse] dialog box.
As an context, object names a re ty ped fr om a lowe r leve l o bject and di vided by a per iod. Fo r ex-
ample, if you want to create a print server into NET under DS, type "NET.DS".
D In the [Print Server Operation Mode] group, click [As Remote Printer].
E In the [Remote Printer No.] box, type the number of the printer.
Important
❒ Use the same number as that of the printer to be created in the print server.
F Click [OK] to clos e the property sheet.
G
On the [NIB] menu, click [Exit] to exit the NIB Setup Tool.
55
H
From Windows, run NW Admin.
Reference
❒ For more information about NWAdmin, see the documentation that comes with the NetWare.
I
Create a print queue as follows.
A Select the container object the print queue is located in among those in the directory tree,
and click [Create] on the [Object] menu.
B In the [Class of new object] box, click "Print Queue", and click [OK].
Page 56

Operating Instructions Administrator Reference 2
C In the [Print Queue name] box, type the name of the print queue.
D In the [Print Queue Volume] box, click [Browse] button.
E In the [Available objects] box, click the volu me in which the print queue is cre ated, and click
[OK].
F After confirming the settings, click [Create].
J
Create a printer as follows.
A Select the container object the print er is l ocat ed i n, and cl ic k [Create] in the [Object] menu.
B In the [Class of new object] box, click "Printer", and click [OK]. When you are using Net-
Ware 5, click "Printer (Non NDPS)".
C In the [Printer name] box, type the name of the printer.
D Click [Define additional properties] to check a box, and click [Create].
K
Assign print queues to the created printer as follows.
A Click [Assignments], and click [Add] in the [Assignments] group.
B In the [Available objects] box, click the queue created in step
C Click [Configuration], and in the [Printer type] box, select [Parallel] using the drop-down
menu, and then click [Communication].
D Click [Manual load] in the [Communication type] group, and click [OK].
E After confirming the settings, click [OK].
, and click [OK].
I
56
L
Create a print server as follows.
A Select the context s pecified us ing the NIB Set up Tool (Step
click [Create].
B In the [Class of new object] box, click "Print Server", and click [OK]. When you are using
NetWare 5, click "Print Sever (Non NDPS)".
-A), and on the [Object] menu,
I
Page 57

Operating Instructions Administrator Reference 2
C In the [Print Server name] box, type the name of the print server.
Important
❒ Use the same name as that specified using the NIB Setup Tool. (Step
D Click [Define additional properties] to check a box, and click [Create].
M
Assign the printer to the created print server as follows.
A Click [Assignments], and click [Add] in the [Assignments] group.
B In the [Available objects] box, click the queue created in the step
C In the [Printers] group, click the printer assigned in step B , and click [Printer Number].
D Type the printer number and click [OK].
Important
❒ Use the same number as that s pecified as Remote Printer No. usin g the NIB Setup Tool.
(Step
E After confirming the settings, click [OK].
N
Start the print server by typing the following from the console of the NetWare Server.
If it is running, restart it after exiting it.
F
-E).
K
-A).
F
, and click [OK].
57
❖❖❖❖ To exit
CAREE: unload ps er ver
❖❖❖❖ To start
CAREE: load pser ve r print_server_name
Page 58
Operating Instructions Administrator Reference 2
4. Monitoring and Configuring the Printer
Changing Names and Comments
You can change printer names and make a comment on printers to ease your identifying the printers
listed on SmartNetMonitor for Client.
The following utilities are used to change printer names and comments.
❖❖❖❖ SmartNetMonitor for Admin
Allows you to change names and comments w hen the TCP/IP protocol or IPX /SPX protocol i s
available. You can install Smar tNetMonitor for Ad min from the CD -ROM that comes with the
printer. For more information about installing SmartNetMonitor for Admin, see P.49 “Installing
SmartNetMonitor for Admin”.
❖❖❖❖ Web Browser
Allows you to change names and comments when the TCP/IP protocol is available.
Note
❒ Each of the names, in a TCP/IP protocol form (printer name) and in a NetBEUI protocol form, is
changed individually. Comments are, however, common to both of them.
❒ The factory default name consists of "RNP" and the last 3 bytes of the MAC address of the net-
work interface board. For example, when the MAC address is 00:00:74:62:7D:D5, the factory default name is "RNP627DD5". Comments are not configured.
58
Page 59

Operating Instructions Administrator Reference 2
SmartNetMonitor for Admin
A
Run SmartNetMonitor for Admin.
B
Click the [Group] menu, point to [Open LAN], and select [TCP/IP] or [IPX/SPX]. A list of printers
appears.
Note
❒ Select the protocol of the printer you want to change the settings.
C
On the list, click to select the printer whose network interface board you want to change the
settings.
D
From the [Tools] menu, select [NIB Setup Tool].
The NIB Setup Tool starts up.
E
Select [Property Sheet], and then click [OK].
59
TCP/IP
A Click the [General] tab, and then type the name into the [Device Name] box and comment
into the [Comment] box.
• In the [
name consists of "RNP" and the last 3 bytes of the MAC address of the network interface board.
For example, when the MAC address is 00:00:74:62:7D:D5, the factory default name is
"RNP627DD5". No name of 9 characters is permitted if prefixed with "RNP". Also, when DHCP
is selected as an IP address setting, the number of characters is limited to within 13 characters.
• In the [Comment] box, type any comment on printers within 31 characters.
Device Name
] box, type the name of the printer within 47 characters. The factory default
Page 60

Operating Instructions Administrator Reference 2
NetBEUI
A Click the [General] tab, and then type the comment into the [Comment] box.
In the [Comment] box, type any comment on printers within 31 characters.
B Click the [NetBEUI] tab.
C Type the name into the [Computer Name] box.
• In the [Computer Name] box, type the name that helps you to identify printers using the Net-
BEUI protocol. The facto ry de fa ult name co nsi st s of "RNP" a nd the last 3 bytes of the MAC
address of the network interface board. For example, when the MAC address is
00:00:74:62:7D:D5, the factory default name is "RNP627DD5". A maximum of 13 characters of capital English letters, numeric, or symbols (except "*+,/:;<=>?[\]|. and space) can be
used. No name is permitted if prefixed with "RNP". You must avoid the duplication of the
same name on a network.
• In the [Comment] box, type any comment on printers within 31 characters.
F
Click [OK].
The NIB Setup Tool exits, and the setting is transmitted to the printer.
60
G
Exit SmartNetMonitor for Admin.
Page 61

Operating Instructions Administrator Reference 2
Web Browser
A
Run the Web browser.
B
Type the address "http:// (IP address of the printer you want to change the settings)".
The status of the selected printer is displayed on the Web browser.
C
Click [Configuration].
A dialog box that prompts you to type the user name and password appears.
D
Type the user name and password, and then click [OK].
Type only the password in this dialog box. The factory default password is "password".
E
Change names and comments.
TCP/IP
A Click the [General] tab, and then type the name into the [Printer Name] box and comment
into the [Comment] box.
• In the [Printer Name] box, type the name of the printer within 47 characters. The factory de-
fault name consists of "RNP" and the l ast 3 bytes of the MAC address of the n etwork interface
board. For example, when the MAC address i s 00: 00: 74: 62:7D:D5, the factory default name
is "RNP627DD5". No name of 9 characters is permitted if prefi xed with "RNP". Also, when
DHCP is selected as an IP address setting, the number of characters is limited to within 13
characters.
• In the [Comment] box, type any comment on printers within 31 characters.
61
Page 62

Operating Instructions Administrator Reference 2
NetBEUI
A Click [NetBEUI].
B Type the name into the [Computer Name] box and comment into the [Comment] box.
• In the [Computer Name] box, type the name that helps you to identify printers using the Net-
BEUI protocol. The facto ry de fa ult name co nsi st s of "RNP" a nd the last 3 bytes of the MAC
address of the network interface board. For example, when the MAC address is
00:00:74:62:7D:D5, the factory default name is "RNP627DD5". A maximum of 13 characters of capital English letters, numeric, or symbols (except "*+,/:;<=>?[\]|. and space) can be
used. No name is permitted if prefixed with "RNP". You must avoid the duplication of the
same name on a network.
• In the [Comment] box, type any comment on printers within 31 characters.
F
Click [Apply].
The setting is transmitted to the printer.
G
Exit the Web browser.
62
Page 63

Operating Instructions Administrator Reference 2
Displaying the Status of Printer
You can view the status of printers us ing SmartNet Monitor fo r Admin, SmartNet Monitor fo r Client, or
Web browser.
SmartNetMonitor for Admin
A
Run SmartNetMonitor for Admin.
B
Click the [Group] menu, point to [Open LAN], and select [TCP/IP] or [IPX/SPX].
The status of printers is indicated with an icon in the list.
Note
❒ For more information about the status icons, see the Help file.
C
To get further information, click the desired printer to select from the list, and then click
[Open] on the [Device] menu.
The status of the printer is displayed on a dialog box.
63
Note
❒ For more information about each item on the dialog box, see the Help file.
Page 64

Operating Instructions Administrator Reference 2
SmartNetMonitor for Client
To view the status of printers using SmartNetMonitor for Client, you must, in advance, configure
SmartNetMonitor for Client so it monitors the printer whose status you want to view.
Monitoring Printers
A
Run SmartNetMonitor for Client.
The SmartNetMonitor for Client icon appears at the righ t end of the taskbar.
B
Right-clic k the Smar tNetMonit or for Clie nt icon, an d check if the desire d printer is configured on the pop-up menu that appears.
If it is configured, see P.65 “Displaying the Status of Printers”.
C
If the desired printer is not configured, click [Options] on the pop-up menu.
The [SmartNetMonitor for Client - Options] dialog box appears.
64
D
Click the printer to be monitored, and select the [To Be Monitored] check box from the [Moni-
toring Information Settings] group.
Note
❒ Selecting the [
the SmartNetMonitor for Client icon on the task tray.
E
Click [OK].
The dialog box closes and the configured printer is monitored.
Displayed on Task Bar
] check box will bring up the status of a printer with an icon on
Page 65

Operating Instructions Administrator Reference 2
Displaying the Status of Printers
A
Run SmartNetMonitor for Client.
B
The status of printers is displayed on the SmartNetMonitor for Client icon on the task tray.
Note
❒ For more information about the status icons, see the Help file.
C
To get further information on the status, right-click the SmartNetMonitor for Client icon and
click the desired printer.
The status of the printer is displayed on a dialog box.
Note
❒ For more information about each item on the dialog box, see the Help file.
Web Browser
65
A
Run the Web browser.
B
Type the address "http:// (IP address of the printer whose status you want to view)".
The status of the selected printer is displayed on the Web browser.
C
Click [Status] and you can check the status of the printer.
Note
❒ For more information about each item, see the Help file.
Page 66

Operating Instructions Administrator Reference 2
5. Making Printer Settings with the Operation Panel
Menu Chart
This section describe s how to ch ange the def ault set tings of the printer and provide s informat ion on the
parameters included in each menu.
Category Function menu
Sample Print
Locked Print
Paper Input ⇒ P.72 Bypass Size
List/Test Print ⇒ P.79 Config. Page
*1
*1
Select Action / Error File(s)
Select Action / Error File(s)
Tray Paper Size
Paper Type
Tray Locking
Tray Priority
Menu List
Color Demo Page
PS Config. Page
66
PCL Config.Page
Hex Dump
Maintenance ⇒ P.86 Color Regis t.
Image Density
Registration Prt. Test Sheet
Adjustment
Page 67

Operating Instructions Administrator Reference 2
Category Function menu
Maintenance ⇒ P.86 HDD Format
ROM Update
Menu Protect
System ⇒ P.92 MisfeedRecovery
Prt. Err Report
Auto Continue
Memory Overflow
Sub Paper Size
Page Size
Duplex
Output Tray
Job Separation
Energy Saver 1
*2
67
Energy Saver 2
B&W Page Detect
Unit of Measure
System ⇒ P.92 Resolution PCL
PS3
Host Interface ⇒ P.102 I/O Buffer
I/O Timeout
Page 68

Operating Instructions Administrator Reference 2
Category Function menu
Host Interface ⇒ P.102 Network Setup IP Address
Subnet Mask
Gateway Address
Access Control
Access Mask
Network Boot
Frame Type (NW)
Active Protocol
Ethernet
PCL Menu ⇒ P.109 Orientation
Form Lines
Font Source
Font Number
68
Point Size
Font Pitch
Symbol Set
Language ⇒ P.115
*1
The "Sample Print" menu and the "Locked Pr int" menu app ear onl y when th e opti onal Hard Disk Drive
is installed.
*2
While the pr inter is On Line, press {Enter}, and then press {Escape}, finally press {Menu}. You can
access the "Menu Protect" on the panel display.
Page 69

Operating Instructions Administrator Reference 2
Accessing the Main Menu
Press {Menu}, and "Menu" appears on the panel display.
On Line
Menu
Escape
69
Job Reset
Form Feed
Power Error Data In
#
Enter
ZDJS001N
This menu shows the following 9 items which can be displayed one by one pressing {UUUU} or {TTTT}.
• Sample Print
• Locked Print
• Paper Input
• List/Test Print
• Maintenance
• System
• Host Interface
• PCL Menu
• Language
Page 70

Operating Instructions Administrator Reference 2
Note
❒ If the optional Hard Disk Drive is not installed, the "Sample Print" menu and the "Locked Print" menu
cannot be displayed on the operation panel.
❒ {TTTT}: Press to go to the next page.
❒ {UUUU}: Press to go back to the previous page.
❒ After making the printer settings, be sure to return to the previous menu by pressing {Escape}.
On Line
Menu
Escape
70
Job Reset
Form Feed
Power Error Data In
#
Enter
ZDJS024N
Page 71

Operating Instructions Administrator Reference 2
❒ After making the printer settings, press {On Line} to return to the "Ready " condition.
On Line
Menu
Escape
71
Job Reset
Form Feed
Power Error Data In
#
Enter
ZDJS022N
❒ The revised settings are not canceled even if the power switch is turned off.
Page 72

Operating Instructions Administrator Reference 2
Paper Input Menu
There are 5 menu items in the "Paper Input" menu.
• Bypass Size
• Tray Paper Size
• Paper Type
• Tray Locking
• Tray Priority
Reference
❒ For more information about loading paper in the tray, see the Setup Guide.
Paper Input Parameters
Menu Description
Bypass Size The paper size for the bypass tray.
For more information about paper sizes that can be set in the bypass tray, see "Pa-
per and Other Media" in Maintenance Guide 2.
72
Tray Paper Size The paper size for Tray 2, optional tray 3 and tray 4.
For more information about paper sizes that can be set in each tray, see Maintenance Guide 2.
Note
❒ Only the installed trays appear on the panel display.
Page 73

Operating Instructions Administrator Reference 2
Menu Description
Paper Type If you use different kinds of paper, you set the paper type for Tray 1, Tray 2, Tray
3 or Bypass Tr ay.
For more information about paper sizes that can be set in each tray, see Mainte-
nance Guide 2.
❖❖❖❖ Tray 1, Tray 2, Tray 3, Tray 4
Plain Paper, Recycled Paper, Special Paper, Color Paper, Letterhead, Preprinted, Prepunched, Bond Paper, Cardstock
❖❖❖❖ Bypass Tray
Plain Paper, Recycled Paper, Special Paper, Color Paper, Letterhead, Preprinted, Prepunched, Bond Paper, Cardstock, Transparency, Thick Paper,
Plain:Dup.Back, Thick:Dup.Back
Note
❒ Default : Plain Paper
❒ Only the installed trays appear on the panel display.
73
Page 74

Operating Instructions Administrator Reference 2
Menu Description
Tray Locking If you use different kinds of paper, you can lock a tray to prevent printing on
wrong paper such as letterhead or colored paper. When "Auto Select" is selected
in the Paper Source selections from the printer driver, the locked tray will not be
used. You can select each tray set to on or off.
Tray 1, Tray 2, Tray 3, Tray 4
Note
❒ Default : Off
❒ Only the installed trays appear on the panel display.
❒ You can lock multiple trays.
❒ If you want to use the locked tray, you must select the tray from the
printer driver.
❒ When a locked tray is selected from the printer driver, the printer
does not search for another tray.
Tray Priority You can set which tray should be checked first when "Auto tray Select" is select-
ed in the Paper Source selections from the printer driver. When printing from
DOS, the tray selected here is used when no tray is selected for a print job.
Tray 1, Tray 2, Tray 3
74
Note
❒ Default : Tray 1
❒ Only the installed trays appear on the panel display.
❒ It is recommended that you load paper of the size and direction you
most frequently use in the tray selected with "Tray Priority".
Page 75

Operating Instructions Administrator Reference 2
Changing the Paper Input Menu
Tray Locking
A
Press {{{{Menu}}}}.
On Line
Menu
Escape
75
Job Reset
Form Feed
Power Error Data In
#
Enter
ZDJS001N
"Menu" appears on the panel display.
B
Press {{{{UUUU}}}} or {{{{TTTT}}}} to display "Paper Input", and then press {{{{Enter}}}}.
Menu:
Paper Input
Page 76
Operating Instructions Administrator Reference 2
C
Press {{{{UUUU}}}} or {{{{TTTT}}}} to display "Tray Locking", and then press {{{{Enter}}}}.
Paper Input:
Tray Locking
D
Press {{{{UUUU}}}} or {{{{TTTT}}}} to display the tray to change the tray locking off, and then press {{{{Enter}}}}.
Tray Locking:
Tray 1
Note
❒ Bypass Tray would not be locked.
E
Press {{{{UUUU}}}} or {{{{TTTT}}}} to display "Off", and then press {{{{Enter}}}}.
Tray 1:
*Off
76
Wait for two seconds.
"Menu" appears on the panel display.
F
Press {{{{On Line}}}}.
"Ready " appears on the panel display.
Page 77
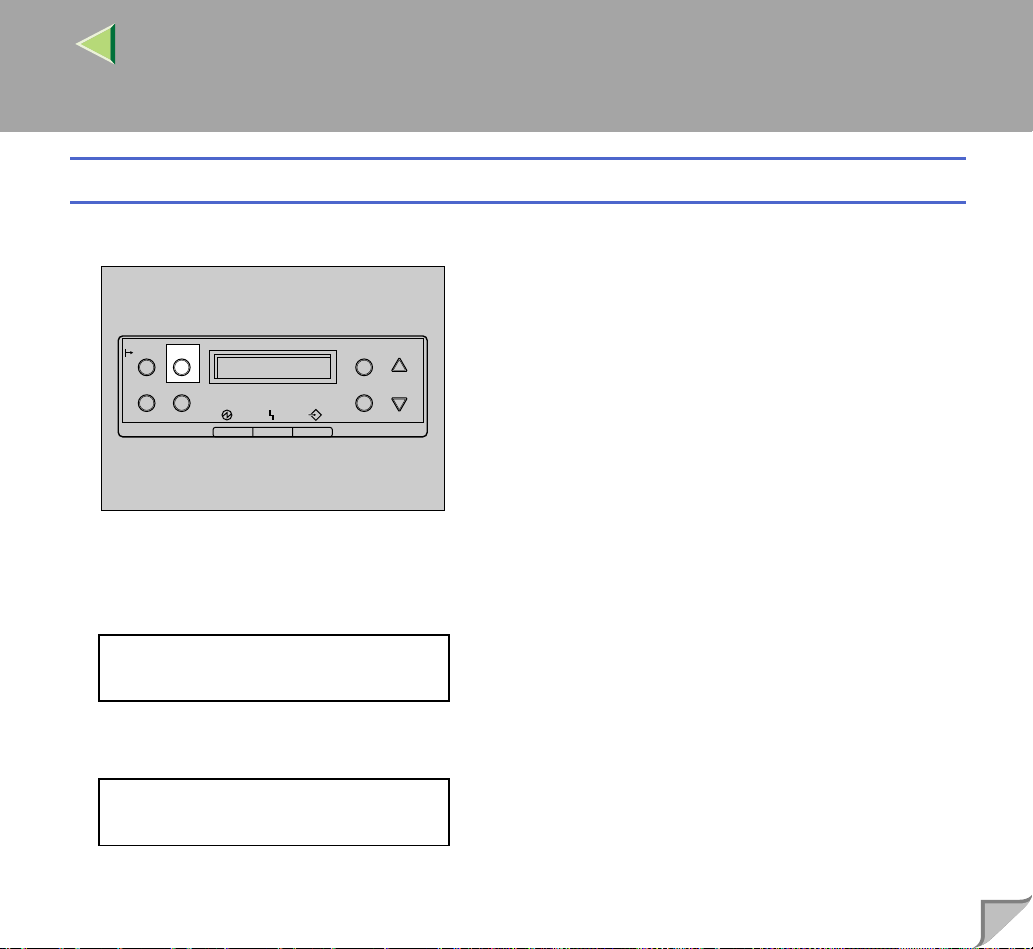
Tray Priority
A
Press {{{{Menu}}}}.
On Line
Menu
Operating Instructions Administrator Reference 2
77
Escape
Job Reset
Form Feed
Power Error Data In
#
Enter
ZDJS001N
"Menu" appears on the panel display.
B
Press {{{{UUUU}}}} or {{{{TTTT}}}} to display "Paper Input", and then press {{{{Enter}}}}.
Menu:
Paper Input
C
Press {{{{UUUU}}}} or {{{{TTTT}}}} to display "Tray Priority", and then press {{{{Enter}}}}.
Paper Input:
Tray Priority
Page 78

Operating Instructions Administrator Reference 2
D
Press {{{{UUUU}}}} or {{{{TTTT}}}} to select the tray type you wan t to use.
E
Press {{{{Enter}}}}. Wait for two seconds.
"Menu" appears on the panel display.
F
Press {{{{On Line}}}}.
On Line
Menu
Escape
78
Job Reset
Form Feed
Power Error Data In
#
Enter
ZDJS022N
"Ready " message appears on the panel display.
Ready
Page 79

Operating Instructions Administrator Reference 2
List/Test Print Menu
There are 6 menu items in the "Lis t/Test Print" menu.
• Config. Page
• Menu List
• Color Demo Page
• PS Config. Page
• PCL Config.Page
• Hex Dump
List/Test Print Parameters
Menu Description
Config. Page You can print the current configuration of the printer. See P.80 “Printing a Con-
figuration Page”.
79
Menu List You can print the Menu List which shows the function menus of this printer.
Color Demo Page You can print the Color Demo Page.
PS Config. Page You can print a list of the installed PS Fonts.
PCL Config.Page You can print the current configuration of the PCL.
Hex Dump You can print the Hex Dump.
Page 80

Operating Instructions Administrator Reference 2
Printing a Configuration Page
Reference
❒ For more information, see P.83 “Interpreting the Configuration Page”.
A
Press {{{{Menu}}}}.
On Line
Menu
Escape
80
Job Reset
Form Feed
Power Error Data In
#
Enter
ZDJS001N
"Menu" appears on the panel display.
B
Press {{{{TTTT}}}} or {{{{UUUU}}}} to display "List/Test Print" menu.
Menu:
List/Test Print
Page 81

C
Press {{{{Enter}}}}.
On Line
Menu
Operating Instructions Administrator Reference 2
81
Escape
Job Reset
Form Feed
Power Error Data In
#
Enter
ZDJS021N
The following message appears on the panel display.
List/Test Print:
Config. Page
D
Press {{{{Enter}}}}.
The following message appears on the panel display.
Printing...
In a short time, the printing a configuration page will start.
Important
❒ If you cannot complete printing a configuration page correctly, make sure an error message ap-
pears on the panel d is pl ay. For more information about error messages, s ee "Troubleshooting"
in Maintenance Guide 2.
Page 82

E
Press {{{{On Line}}}}.
On Line
Menu
Operating Instructions Administrator Reference 2
82
Escape
Job Reset
Form Feed
Power Error Data In
#
Enter
ZDJS022N
"Ready " message appears on the panel display.
Ready
Page 83

Operating Instructions Administrator Reference 2
Interpreting the Configuration Page
System Reference
❖❖❖❖ Printer ID
Shows the serial number assigned to the board by its manufacturer.
❖❖❖❖ Firmware Version
Shows the version number of the printer controller firmware.
❖❖❖❖ Engine Version
Shows the version number of the printer engine.
❖❖❖❖ Pages Printed
Shows the total number of pages printed by the printer to date.
❖❖❖❖ NCS Version
Shows the version number of the Network Interface Board.
83
❖❖❖❖ Total Memory
Shows the total amount of memory (SDRAM) installed on the printer.
❖❖❖❖ Printer Language
Shows the version number of the printer language.
❖❖❖❖ Printer Hard Disk Drive
Shows "Ins talled" when the Printer Hard Desk Drive is ins talled properly.
Page 84
Operating Instructions Administrator Reference 2
❖❖❖❖ IEEE 1394
Shows "Installed" when the IEEE 1394 Interface Unit Type 1045 is installed properly.
❖❖❖❖ Accounting Module
Shows "Installed" when the User Account Enhance Unit TypeB is installed properly.
❖❖❖❖ Options
Shows the options that you installed.
Paper Input
Shows the settings made under the "Paper Input" menu.
Reference
❒ For more information, see P.72 “Paper Input Menu”.
System
Shows the settings made under the "System" menu.
84
Reference
❒ For more information, see P.92 “System Menu”.
PCL Menu
Shows the settings made under the "PCL Menu".
Reference
❒ For more information, see P.109 “PCL Menu”.
Page 85

Operating Instructions Administrator Reference 2
Host Interface
Shows the settings made under the "Host Interface" menu.
When DHCP is active on the network, the actual IP Address, Subnet Mask and Gateway Address ap-
pear in parentheses on the configuration page.
Reference
❒ For more information about "Host Interface" menu, see P.102 “Host Interface Menu”.
Error Log
Shows the log of printer errors.
85
Page 86

Operating Instructions Administrator Reference 2
Maintenance Menu
There are 6 menu items in the "Maintenance" menu.
• Color Regist.
• Image Density
• Registration
• HDD Format
• ROM Update
• Menu Protect
Note
❒ This "HDD Format " appears only when the Hard Disk Driv e is installed. For more information,
see "Installing the Printer Hard Disk Type 3800C" in the Setup Guide.
Maintenance Menu Parameters
86
Menu Description
Color Regist. You can adjust the color alignment for each color (CMYK)
-7 to +7
Image Density You can select the print image density.
-3 to +3
Page 87

Operating Instructions Administrator Reference 2
Menu Description
87
Registration
❖❖❖❖ Prt. Test Sheet
You can print the registration test sheet.
Tray 3, Tray 4, Duplex.Backside
Note
❒ Only the installed trays appear on the panel display.
❖❖❖❖ Adjustment
You can select the start position for printing on page.
Vert.:Tray 3, Vert.:Tray 4, Vert.:Dup.Bak
-4 to +4 (by 0.5 mm)
Note
❒ The registration value are not default.
❒ Only the installed trays appear on the panel display.
HDD Format You can format the Hard Disk Drive.
Available when the Hard Disk Drive is installed.
Reference
❒ For more information about formatting the Hard Disk Drive, see "In-
stalling the Hard Disk Type 3800C" in the Setup Guide.
ROM Update You can update the printer ROM data.
Page 88

Operating Instructions Administrator Reference 2
Menu Description
Menu Protect This procedure lets you protect menu settings against accidental changes. It
makes it impossible to change the menu settings you make with the normal procedure unles s you perfor m the requi red key ope ration. In a network en vironment,
protecting settings restricts changes to menu settings to network administrators.
• Level 1
• Level 2
• Off
Note
❒ While the printer is Online, press {Enter}, and then press {Escape},
finally press {Menu}. You can access the "Menu Protect" menu on
the panel display.
❒ You can protect the "Maintenance", "System", "Host Interface" and
"Language" menu on Level 1.
❒ You can protect the "Paper Input", "Maintenance", "System", "Host
Interface" and "Language" menu on Level 2.
88
Page 89

Operating Instructions Administrator Reference 2
Changing the Maintenance Menu
Protecting the menus
A
Check if the On Line indicator is on. If not, press {{{{On Line}}}} to enter the " Ready " condition.
B
Press {{{{Enter}}}}, then {{{{Escape}}}}, and then {{{{Menu}}}}.
On Line
Menu
Escape
89
Job Reset
Form Feed
Power Error Data In
#
Enter
ZDJS025N
"Menu" appears on the panel display.
C
Press {{{{UUUU}}}} or {{{{TTTT}}}} to display the "Maintenance" menu, and then press {{{{Enter}}}}.
The following message appears on the panel display.
Maintenance:
Image Density
Page 90

Operating Instructions Administrator Reference 2
D
Press {{{{UUUU}}}} or {{{{TTTT}}}} to display "Menu Protect".
Maintenance:
Menu Protect
E
Press {{{{Enter}}}}.
The following message appears on the panel display.
Menu Protect:
*Off
F
Press {{{{UUUU}}}} or {{{{TTTT}}}} to select the levels desired, and then press {{{{Enter}}}}. Wait for two seconds.
"Menu" appears on the panel display.
G
Press {{{{On Line}}}}.
90
On Line
Job Reset
Menu
Form Feed
Power Error Data In
Escape
#
Enter
ZDJS022N
Page 91

Operating Instructions Administrator Reference 2
"Ready " message appears on the panel display.
Ready
Removing Protect
A
Check if the On Line indicator is on. If not, press {{{{On Line}}}} to enter the " Ready " condition.
B
Press {{{{Enter}}}}, then {{{{Escape}}}}, and then {{{{Menu}}}}.
"Menu" appears on the panel display.
C
Press {{{{UUUU}}}} or {{{{TTTT}}}} to display "Maintenance" menu, and then press {{{{Enter}}}}.
The following message appears on the panel display.
Maintenance:
Image Density
91
D
Press {{{{UUUU}}}} or {{{{TTTT}}}} to display the "Menu Protect", and then press {{{{Enter}}}}.
E
Press {{{{UUUU}}}} or {{{{TTTT}}}} to display "Off", and then press {{{{Enter}}}}. Wait for two seconds.
"Menu" appears on the panel display.
F
Press {{{{On Line}}}}.
"Ready " message appears on the panel display.
Page 92

Operating Instructions Administrator Reference 2
System Menu
There are 14 menu items in the "System" menu.
• MisfeedRecovery
• Prt. Err Report
• Auto Continue
• Memory Overflow
• Sub Paper Size
• Page Size
• Duplex
• Output Tray
• Job Separation
• Energy Saver 1
• Energy Saver 2
• B&W Page Detect
• Unit of Measure
• Resolution
92
Page 93

Operating Instructions Administrator Reference 2
System Parameters
Menu Description
MisfeedRecovery Yo u can select whether Misfeed Recovery is enabled. When it is on, printing re-
starts after the misfed paper has been cleared.
• On
• Off
Note
❒ Default: On
Prt. Err Report You can select whether or not t o h a ve a error report pr i nte d when a printe r er ror
or memory error occurs.
• On
• Off
Note
❒ Default: Off
93
Page 94

Operating Instructions Administrator Reference 2
Menu Description
Auto Continue You can set whether Auto Continue is enabled. When it is on, printing continues
after a system error occurs.
• Off
• 0 m inute
• 1 m inute
• 5 m inutes
• 10 minutes
• 15 minutes
Note
❒ Default: Off
❒ When it is on, and certain types of error occur, the current job might
be canceled, and the machine automatically resumes the next job.
Memory Overflow You can select whether the memory overflow error report should be printed.
• Not Print
• Error Report
94
Note
❒ Default: Not Print
Page 95

Operating Instructions Administrator Reference 2
Menu Description
Sub Paper Size You can enable the Sub Paper Size feature. When you select "Auto", the printer
substitutes the paper of a certain size which is to be an alternative if the paper currently specified is not loaded. When you select "Off", the printer uses the paper
in the current specified paper input tray regardless of its size.
• Auto
• Off
Note
❒ Default: Auto
Page Size You can specify the default paper size.
11 x 17, 8 1/2 x 14, 11 x 8 1/2, 8 1/2 x 11, 5 1/2 x 8 1/2 , 7 1/4 x 10 1/2, 10 1/2 x
7 1/4, 8 x 13, 8 1/2 x 13, 8 1/4 x 13 , A 3 ( 2 97x 420), B4 JIS(257 x3 64), A4 (297 x
210), A4 (210 x 297), B5 JIS(257x182) , B5 JIS(182x257), A5 (210 x 148), A5
(148 x 210), A6 (1 05 x 148), 8K (267 x3 90 ), 1 6K ( 19 5 x 267), 16K (267 x 195),
4 1/8 x 9 1/2, 3 7/8 x 7 1/2, C5 Env (162x229), C6 Env (114x162), DL Env
(110x220), Custom Size
Note
❒ Default: Auto
95
Page 96

Operating Instructions Administrator Reference 2
Menu Description
Duplex You can select whether you want to print on both sides of each page.
• Off
• Short Edge Bind
• Long Edge Bind
Note
❒ Default: Off
❒ This menu appears only when the optional Duplex Unit is installed.
Output Tray You can select the default output tray. When you select "Auto Tray SW", the
printer automatically changes to another output tray if the output tray become
full. This function is available only when the Mailbox or the 2 Tray Finisher is
installed.
Standard Tray, External Tray, Mailbox Tray 2, Mailbox Tray 3, Finisher Tray 1,
Finisher Tray 2, Auto Tray SW
Note
❒ Default: Standard Tray
❒ Only the installed trays appear on the panel display.
96
Job Separation You can enable Job Separation.
• Off
• On
Note
❒ Default: Off
❒ This menu appears only when the optional 2 Tray Finisher is in-
stalled.
Page 97

Operating Instructions Administrator Reference 2
Menu Description
Energy Saver 1 You can set On/Off for the Energy Save Mode level 1. This is preheat mode.
• On
• Off
Note
❒ Default: On
❒ When the printer switches to Energy Saver mode, the Power indi-
cator turns off, while the On Line indicator stays on.
Energy Saver 2 You can set how many minutes the printer wait before switching to Energy Saver
mode. Energy Saver mode reduces electric power consumption.
• On
5 minutes, 15 minutes, 30 minutes, 45 minutes, 60 minutes.
• Off
Note
❒ Default: On (60 minutes)
❒ When the printer switches to Energy Saver mode, the Power indi-
cator turns off, while the Online indicator stays on and "Energy
Save Mode " is displayed on the panel display.
97
Page 98

Operating Instructions Administrator Reference 2
Menu Description
B&W Page Detect You can specify whether the Black & White Page Detect feature is enabled.
• On
• Off
Note
❒ Default: On
❒ Switching mode is applied only one time (B&W ⇒ Color) and the
printer proceeds with the rest of the pages in Color Mode until the
end of the job once it switched.
Unit of Measure You can select "mm" or "inch" for the custom paper size.
Resolution You can set the print resolution in dots per inch.
❖❖❖❖ PCL
300 x 300 dpi, 600 x 600 dpi
❖❖❖❖ PS
600 x 600 dpi, 1200 x 600 dpi, 1200 x 1200 dpi
98
Note
❒ Default: PCL 600 x 600 dpi, PS 1200 x 600 dpi
Page 99

Operating Instructions Administrator Reference 2
Changing the System Menu
The following examples changing the setti ngs for "Ene rgy Save r 2".
A
Press {{{{Menu}}}}.
On Line
Menu
Escape
99
Job Reset
Form Feed
Power Error Data In
#
Enter
"Menu" appears on the panel display.
B
Press {{{{UUUU}}}} or {{{{TTTT}}}} to display "System".
Menu:
System
ZDJS001N
Page 100

C
Press {{{{Enter}}}}.
On Line
Menu
Operating Instructions Administrator Reference 2
100
Escape
Job Reset
Form Feed
Power Error Data In
#
Enter
ZDJS021N
The following message appears on the panel display.
System:
MisfeedRecovery
D
Press {{{{UUUU}}}} or {{{{TTTT}}}} to display "Energy Saver 2", and press {{{{Enter}}}}.
System:
Energy Saver 2
E
Press {{{{UUUU}}}} or {{{{TTTT}}}} to display "E. Saver2 Timer", and press {{{{Enter}}}}.
The following message appears on the panel display.
Energy Saver 2:
E. Saver2 Timer
 Loading...