

Ricoh AFICIO MP 161SPF, AFICIO MP 161F User Manual
Transmission
1
Send Settings
2
Reception
3
Operating Instructions
Facsimile Reference
Changing/Confirming Communication Information
4
Fax via Computer
5
Appendix
6
Read this manual carefully before you use this machine and keep it handy for future reference. For safe and correct use, be sure to read the
Safety Information in "About This Machine" before using the machine.

Introduction
This manual contains detailed instructions and notes on the operation and use of this machine. For your
safety and benefit, read this manual carefully before using the machine. Keep this manual in a handy
place for quick reference.
Important
Contents of this manual are subject to change without prior notice. In no event will the company be liable for direct, indirect, special, incidental, or consequential damages as a result of handling or operating the machine.
Notes:
Some illustrations in this manual might be slightly different from the machine.
Certain options might not be available in some countries. For details, please contact your local dealer.
Caution:
Use of controls or adjustments or performance of procedures other than those specified in this manual
might result in hazardous radiation exposure.
Two kinds of size notation are employed in this manual. With this machine refer to the metric version.

NOTICE
❖ NOTICE TO USERS (NEW ZEALAND)
• The grant of a Telepermit for any item of terminal equipment indicates
only that Telecom has accepted that the item complies with minimum conditions for connection to its network. It indicates no endorsement of the
product by Telecom, nor does it provide any sort of warranty. Above all, it
provides no assurance that any item will work correctly in all respects with
another item of Telepermitted equipment of a different make or model, nor
does it imply that any product is compatible with all of Telecom's network
services.
• This equipment is not capable, under all operating conditions, of correct
operation at the higher speeds for which it is designed. Telecom will accept
no responsibility should difficulties arise in such circumstances.
• This equipment shall not be set up to make automatic calls to the Telecom
“111” Emergency Service.
• If a charge for local calls is unacceptable, the “Dial” button should NOT be
used for local calls. Only the 7-digits of the local number should be dialled
from your telephone. DO NOT dial the area code digit or the “0” prefix.
• This equipment may not provide for the effective hand-over of a call to another device connected to the same line.
• This device may be subject to ringing or bell tinkle when calls are made
from another device on the same line. If this occurs, the problem SHOULD
NOT be referred to the Telecom Faults Service.
• This equipment should not be used under any circumstances, which may
constitute a nuisance to other Telecom customers. For example, repeated
attempts to make unsolicited sales offers to the same number or group of
numbers, such as when a block of numbers terminate on the same PABX.
• The call log incorporated in this equipment does not record all answered
calls. The call log, therefore may not agree with the Telecom account which
may include calls not shown on the log.
• Not all telephones will respond to incoming ring when connected to the
extension socket.
i

Manuals for This Machine
Refer to the manuals that are relevant to what you want to do with the machine.
Important
❒ Media differ according to manual.
❒ The printed and electronic versions of a manual have the same contents.
❒ Adobe Acrobat Reader/Adobe Reader must be installed in order to view the
manuals as PDF files.
❒ Depending on which country you are in, there may also be html manuals. To
view these manuals, a Web browser must be installed.
❖ About This Machine
Be sure to read the Safety Information in this manual before using the machine.
This manual provides an introduction to the functions of the machine. It also
explains the control panel, preparation procedures for using the machine,
how to enter text, and how to install the CD-ROMs provided.
❖ General Settings Guide
Explains User Tools settings, and Address Book procedures such as registering fax numbers, e-mail addresses, and user codes. Also refer to this manual
for explanations on how to connect the machine.
❖ Troubleshooting
Provides a guide to solving common problems, and explains how to replace
paper, toner, and other consumables.
❖ Security Reference
This manual is for administrators of the machine. It explains security functions that the administrators can use to protect data from being tampered
with, or prevent the machine from unauthorized use.
Also refer to this manual for the procedures for registering administrators, as
well as setting user and administrator authentication.
❖ Copy Reference
Explains Copier functions and operations. Also refer to this manual for explanations on how to place originals.
❖ Facsimile Reference
Explains Facsimile functions and operations.
❖ Printer Reference
Explains Printer functions and operations.
❖ Scanner Reference
Explains Scanner functions and operations.
ii

❖ Network Guide
Explains how to configure and operate the machine in a network environment, and use the software provided.
This manual covers all models, and includes descriptions of functions and
settings that might not be available on this machine. Images, illustrations, and
information about operating systems that are supported might also differ
slightly from those of this machine.
❖ Other manuals
• Quick Reference Copy Guide
• Quick Reference Fax Guide
• Quick Reference Printer Guide
• Quick Reference Scanner Guide
• PostScript3 Supplement
•UNIX Supplement
• Manuals for DeskTopBinder Lite
• DeskTopBinder Lite Setup Guide
• DeskTopBinder Introduction Guide
•Auto Document Link Guide
Note
❒ Manuals provided are specific to machine types.
❒ For “UNIX Supplement”, please visit our Web site or consult an authorized
dealer.
❒ “PostScript3 Supplement” and “UNIX Supplement” include descriptions of
functions and settings that might not be available on this machine.
❒ The following software products are referred to using general names:
Product name General name
DeskTopBinder Lite and DeskTopBinder Professional
*1
Optional
*1
DeskTopBinder
iii

TABLE OF CONTENTS
NOTICE ....................................................................................................................i
Manuals for This Machine .....................................................................................ii
How to Read This Manual .....................................................................................1
Symbols .....................................................................................................................1
Name of Major Item....................................................................................................1
Names of Major Functions .........................................................................................1
Reading the Display...............................................................................................2
Reading the Display Panel and Using Keys...............................................................3
Function List ..........................................................................................................5
1. Transmission
Transmission Modes .............................................................................................9
Selecting Type of Transmission ...............................................................................10
Memory Transmission..............................................................................................11
Sending multiple originals using the exposure glass (Memory Transmission) ......14
Parallel Memory Transmission ..............................................................................15
Automatic Redial ...................................................................................................15
Dual Access...........................................................................................................16
Simultaneous Broadcast........................................................................................16
If memory runs out while storing an original..........................................................17
ECM (Error Correction Mode)................................................................................17
Immediate Transmission ..........................................................................................17
Sending multiple originals using the exposure glass (Immediate Transmission)
IP-Fax Functions ..................................................................................................20
Terminology .............................................................................................................22
Notes on Using IP-Fax .............................................................................................23
Functions Not Available for IP-Fax Transmission ....................................................23
Internet Fax Functions ........................................................................................24
Notes on Using Internet Fax ....................................................................................26
Functions Not Available for E-mail Transmission.....................................................27
Functions Not Available for E-mail Reception..........................................................27
E-mail Subject ..........................................................................................................27
T.37 Full Mode .........................................................................................................28
Placing Originals..................................................................................................29
Acceptable Original Sizes ........................................................................................31
Paper Size and Scanned Area.................................................................................31
Detecting Blank Sheet..............................................................................................32
Scan Settings .......................................................................................................34
Original Type............................................................................................................34
JBIG Transmission ................................................................................................35
Resolution ................................................................................................................35
Image Density (Contrast) .........................................................................................36
Mixing Scan Settings for a Multiple Page Original ...................................................37
Specifying a Destination .....................................................................................38
Sending Over a Fax Line .........................................................................................38
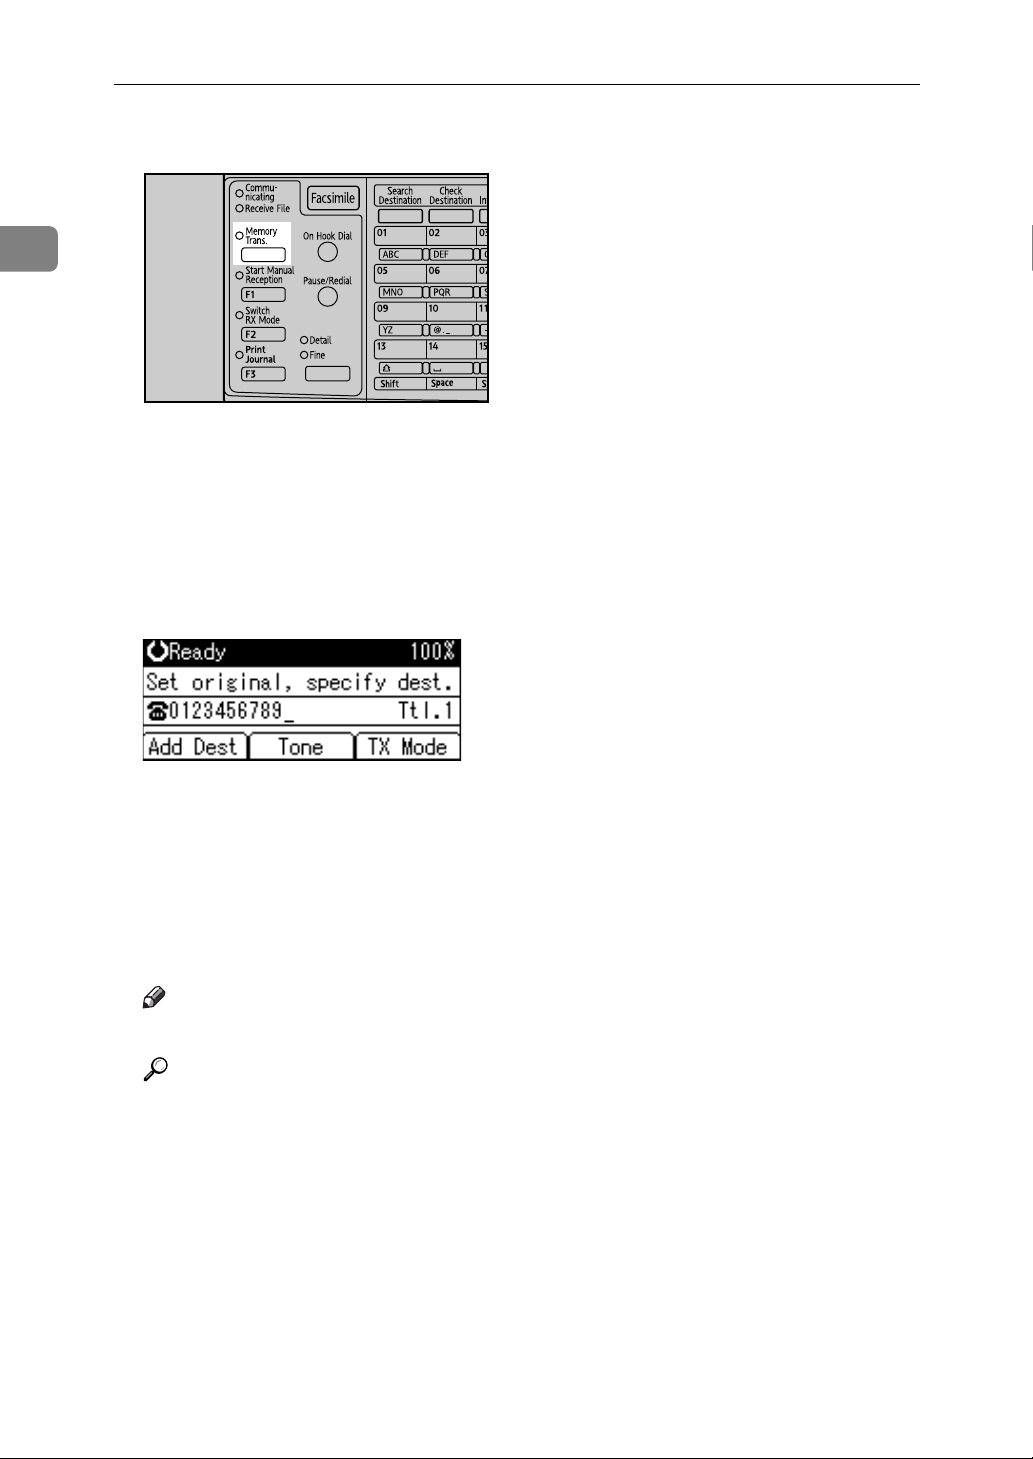
Entering a pause ...................................................................................................39
Entering a tone ......................................................................................................39
Sending by IP-Fax....................................................................................................41
iv
Regarding IP-Fax destinations ..............................................................................43
...19

Sending to an E-mail Address..................................................................................44
Bypassing the SMTP server..................................................................................47
Using the Quick Dial Keys........................................................................................49
Specifying a destination using the Quick Dial key.................................................49
Specifying a group of destinations using the Quick Dial key .................................50
Checking the Specified Destination .........................................................................52
Redial .......................................................................................................................53
Programming Destinations in the Address Book .............................................55
Programming Destinations from Check Destination Screen....................................56
Programming Destinations from Redial Screen .......................................................57
Searching for a Destination in the Address Book ............................................58
Search by Name ......................................................................................................59
Search by Destination List .......................................................................................61
Search by Registration Number ...............................................................................62
Search by Fax Number ............................................................................................64
Search by E-mail Address........................................................................................66
Search by IP-Fax Destination ..................................................................................68
Search by LDAP Server ...........................................................................................70
On Hook Dial ........................................................................................................73
Manual Dial ...........................................................................................................75
Memory Storage Report ......................................................................................76
Canceling a Transmission ..................................................................................77
Before the Original Is Scanned ................................................................................77
While the Original Is Being Scanned........................................................................77
While the Original Is Being Transmitted...................................................................78
Before the Transmission Is Started..........................................................................79
2. Send Settings
Sending at a Specific Time (Send Later) ...........................................................81
Sender Settings....................................................................................................83
E-mail Options......................................................................................................86
Entering the Subject.................................................................................................86
Requesting a Reception Notice................................................................................88
Fax Header Print ..................................................................................................90
Label Insertion .....................................................................................................91
Setting SUB Codes for Transmission ................................................................93
Setting a Password ..................................................................................................95
Setting SEP Codes for Reception ......................................................................96
Entering a Password ................................................................................................98
SEP Code RX Reserve Report ................................................................................98
SEP Code RX Result Report ...................................................................................99
Two-Sided Transmission (Double-Sided Transmission) ...............................100
3. Reception
Types of Reception............................................................................................103
Immediate Reception .............................................................................................103
Memory Reception .................................................................................................104
Substitute Reception ..............................................................................................105
Receiving documents unconditionally .................................................................105
Receiving documents according to parameter-specified settings .......................106
v

Reception Modes ...............................................................................................107
Auto Switch ............................................................................................................107
Manual Reception ..................................................................................................107
Auto Reception.......................................................................................................108
Switching the Reception Mode...............................................................................108
Receiving Internet Fax Documents .................................................................. 109
Auto E-mail Reception ...........................................................................................109
Manual E-mail Reception .......................................................................................110
Received Images ...................................................................................................110
Reception Functions .........................................................................................112
Forwarding Received Documents ..........................................................................112
SMTP Reception Using Internet Fax......................................................................113
Routing e-mail received via SMTP ......................................................................114
JBIG Reception ......................................................................................................115
Auto Fax Reception Power-Up...............................................................................116
Printing Options.................................................................................................117
Print Completion Beep ...........................................................................................117
Checkered Mark.....................................................................................................117
Centre Mark ...........................................................................................................118
Reception Time ......................................................................................................118
Page Separation and Length Reduction ................................................................119
TSI Print (Transmitting Subscriber Identification Print) ..........................................119
If There Is No Paper of the Correct Size ................................................................120
Setting priority trays.............................................................................................120
Just size printing..................................................................................................121
4. Changing/Confirming Communication Information
Printing a List of Files in Memory (Print TX Standby File List) .....................123
Printing a File from Memory .............................................................................125
Checking the Transmission Result (TX File Status).......................................127
Confirming on Display ............................................................................................127
Confirming by Report .............................................................................................128
Confirming by E-mail..............................................................................................129
Confirming by Report and E-mail ...........................................................................129
Communication Result Report (Memory Transmission) ........................................130
Immediate TX Result Report (Immediate Transmission) .......................................131
Communication Failure Report ..............................................................................132
Checking the Reception Result (RX File Status) ............................................133
Confirming on Display ............................................................................................133
Confirming by Report .............................................................................................134
Journal.................................................................................................................134
Printing the Journal ...........................................................................................135
Journal ...................................................................................................................136
Transmitting Journal by E-mail...............................................................................138
Journal by e-mail .................................................................................................138
Printing a File Received with Memory Lock.................................................... 139
vi

5. Fax via Computer
Sending Fax Documents from Computers ...................................................... 141
Before Use .............................................................................................................142
Using the Software.................................................................................................142
LAN-Fax Driver....................................................................................................143
Address Book ......................................................................................................143
LAN-Fax Cover Sheet Editor ............................................................................... 144
Auto Run program ...............................................................................................144
Installing Individual Applications ............................................................................145
Setting LAN-Fax Driver Properties.........................................................................146
Setting print properties ........................................................................................146
Making settings for option configuration..............................................................147
Basic Transmission ................................................................................................148
Specifying a destination using a destination list ..................................................149
Specifying a destination using Address Book......................................................149
Specifying a destination by directly entering a fax number,
Internet Fax destination, or IP-Fax destination..................................................150
Specifying Options .................................................................................................151
To send a fax document at a specific time ..........................................................151
To print a sender stamp.......................................................................................152
To attach a cover sheet ....................................................................................... 152
To display preview...............................................................................................152
Saving as files .....................................................................................................152
Checking Transmission Using LAN-Fax Driver......................................................153
Confirming Transmission Results by E-mail ..........................................................154
LAN-Fax Result Report ..........................................................................................155
Printing and Saving ................................................................................................155
Editing Address Book.............................................................................................156
Programming new destinations ...........................................................................156
Editing programmed destinations........................................................................157
Deleting programmed destinations......................................................................158
Using the Machine's Address Book Data in the Destination List of the LAN-Fax
Editing Fax Cover Sheets ......................................................................................159
Creating a cover sheet ........................................................................................159
Attaching a created cover sheet..........................................................................160
Managing Facsimile Functions Using SmartDeviceMonitor for Admin ..................161
LAN-Fax Operation Messages...............................................................................161
Programming Destination Information from Web Browser ...........................162
To Edit Machine Properties Already Programmed .................................................162
To Add New Receiver ............................................................................................163
....158
6. Appendix
Programming Frequently Used Functions to User Function Keys ...............165
Specifications.....................................................................................................166
Specifications Required for the Internet Fax Destination Machines.......................168
Maximum Values................................................................................................169
INDEX....................................................................................................... 170
vii

viii

How to Read This Manual
Symbols
This manual uses the following symbols:
Indicates important safety notes.
Ignoring these notes could result in serious injury or death. Be sure to read these
notes. They can be found in the “Safety Information” section of About This Machine.
Indicates important safety notes.
Ignoring these notes could result in moderate or minor injury, or damage to the
machine or to property. Be sure to read these notes. They can be found in the
“Safety Information” section of About This Machine.
Indicates points to pay attention to when using the machine, and explanations
of likely causes of paper misfeeds, damage to originals, or loss of data. Be sure
to read these explanations.
Indicates supplementary explanations of the machine's functions, and instructions on resolving user errors.
This symbol is located at the end of sections. It indicates where you can find further relevant information.
[ ]
Indicates the names of keys that appear on the machine's display panel.
{ }
Indicates the names of keys on the machine's control panel.
Name of Major Item
Major item of this machine is referred to as follows in this manual:
• Auto Document Feeder capable of scanning both sides of a sheet → ARDF
Names of Major Functions
This machine's major functions are referred to in this manual as follows:
• Internet Fax (by specifying an e-mail address) → Internet Fax
• Internet Fax (by specifying an IPv4 address) → IP-Fax
1

Reading the Display
This section explains how to use the keys on the control panel and screen items.
The display guides you through operations, shows messages, machine status,
and destinations registered in the destination lists.
If you press the {Facsimile} or {Clear Modes} key during operation, the standby
screen appears.
Press the {OK} key to complete the settings.
Press the {Escape} key to return to the previous screen.
Note
❒ This machine automatically returns to standby mode if you do not use the
machine for a certain period of time. You can select the period using the Facsimile Auto Reset Timer in System Settings.
❒ To return to the standby screen manually, do one of the following:
• If you have placed the original in the optional ARDF and have not pressed
the {Start} key, remove the original.
• If you have not placed an original, press the {Clear Modes} key.
• If you are in User Tools mode, press the {User Tools/Counter} key.
Reference
“System Settings”, General Settings Guide
“Fax Features”, General Settings Guide
“Registering Addresses and Users for Facsimile/Scanner Functions”, General Settings Guide
2

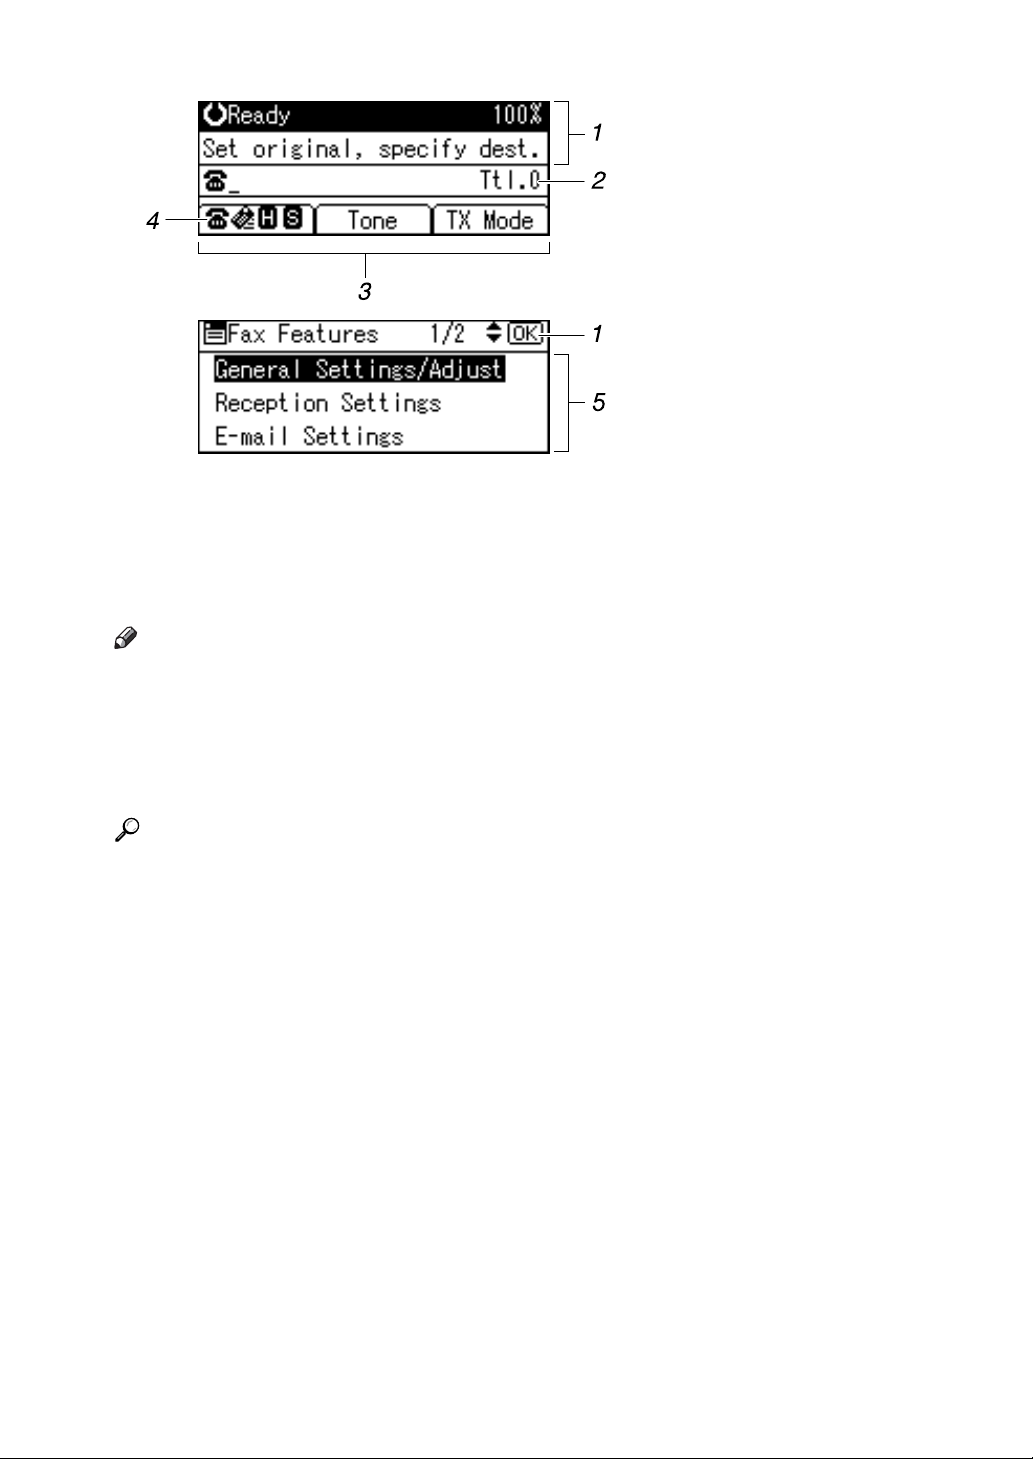
Reading the Display Panel and Using Keys
This section explains screen items and their corresponding keys.
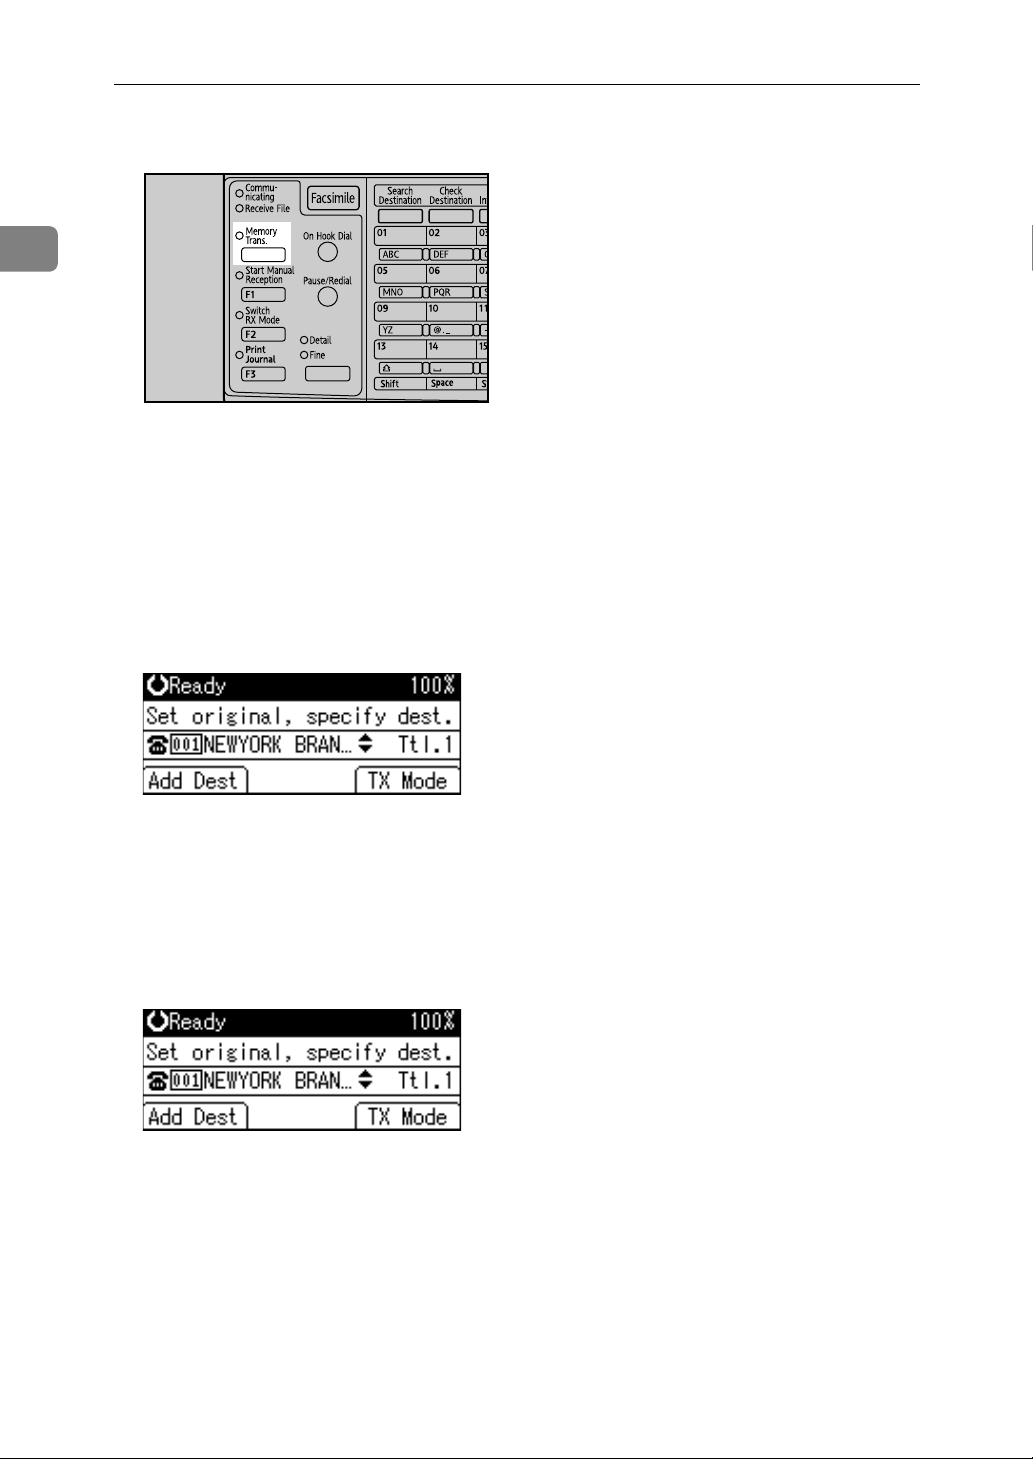
ARX045S
1. Selection keys
Correspond to items at the bottom line on
the display.
Example: The standby display
• When the instruction “Press []”
appears in this manual, press the left
selection key.
• When the instruction “Press [Tone]”
appears in this manual, press the middle selection key.
• When the instruction “Press [TX Mode]”
appears in this manual, press the right
selection key.
2. {Escape} key
Press to cancel an operation or return to
the previous display.
3. {OK} key
Press this to set numeric values, make
settings, or select an entered item.
4. Scroll keys
Press to move the cursor to each direction
one by one.
When {U}, {T}, {V} or {W} appears in
this manual, press the scroll key of the
same direction.
3
ALT009S
1. Machine status and message
2. Destination entry
3. Selection keys
Note
❒ The display will differ depending on installed optional units.
❒ You can change Internet Fax setting under E-mail Settings in the Fax Features
menu.
❒ You can change IP-Fax settings under IP-Fax Settings in the Fax Features
menu.
Reference
p.9 “Transmission Modes”
p.49 “Specifying a destination using the Quick Dial key”
p.58 “Searching for a Destination in the Address Book”
“Fax Features”, General Settings Guide
“Registering Addresses and Users for Facsimile/Scanner Functions”, General Settings Guide
4. Switches the destination between
fax number, e-mail address and IPFax destination.
5. Selectable items
4

Function List
This section explains various items that can be specified in the Fax Features
menu.
Click the {User Tools/Counter} key to display the Fax Features menu. For details
about the settings, see “Fax Features”, General Settings Guide.
❖ General Settings/Adjust
Function name Description
Adjust Sound Volume Adjust the sound volume during On Hook
Mode and Immediate Transmission.
Program Fax Information Register the sender details that appear on the
recipient's fax machine and faxed document.
On Hook Release Time Use this function to specify a time to cancel
On Hook mode after you transmit using On
Hook dialing.
Set User Function Key Frequently used functions programmed as
User Function keys are shown on the menu
immediately after the power is turned on.
❖ Reception Settings
Function name Description
Switch Reception Mode
RX Mode Auto Switch Time Specify the number of rings with the Auto
Authorized Reception Specify whether or not unwanted fax mes-
Checkered Mark Specify whether or not a checkered mark is
Center Mark Specify whether or not a centre mark is to be
Print Reception Time Specify whether or not received date and
Specify the method for receiving fax messages.
Switch Time. In Auto Select Mode, the machine rings a number of times to give you the
chance to pick up the handset before taking
the call automatically.
sages are to be screened out.
to be printed on the first page of received fax
documents.
printed halfway down the left side and at the
top centre of each page received.
time are to be printed at the bottom of received fax messages.
5

❖ E-mail Settings
Function name Description
Internet Fax Settings
Maximum E-mail Size Use this setting to limit the size of sent e-
SMTP RX File Delivery This function is available on systems that al-
You can select to display or not.
When you want to send an Internet Fax, set
On to display the icon.
mail, so that destinations that refuse e-mail
over a certain size can still receive your email. When this function is set to on, you
cannot send e-mail that is larger than the
specified limit.
low routing of e-mail received via SMTP.
❖ IP-Fax Settings
Function name Description
Enable H.323 Specify whether or not H.323 is used for IP-
Fax transmission.
Enable SIP Specify whether or not SIP is used for IP-Fax
transmission.
H.323 Settings Set the IPv4 address or host name of gate
keeper, and alias telephone number.
SIP Settings Set the SIP server's IPv4 address and SIP user
name.
Gateway Settings Register, change, or delete the gateway used
for transmission to IP-Fax. Register to use the
gateway without using the gatekeeper/SIP
server.
6

❖ Administrator Tools
Function name Description
Print Journal Prints a Journal. Up to 50 of the latest results
of transmission/delivery results can be
checked on this machine.
Print TX Standby File List Use this function to print the transmission
standby file list.
Communication Page Count Checks the transmission and reception, and
totals on the display.
Memory Lock When you switch Memory Lock on, received
documents are stored in memory and not
printed automatically.
Forwarding
Folder TX Result Report When a folder is included in the forwarding
Parameter Setting Parameter Setting allow you to customize
Program Special Sender
Program Memory Lock ID Program a Memory Lock ID to be entered be-
Select Dial/Push Phone Use this function to select a line type.
G3 Analog Line You need to make the following settings for
Menu Protect Using Menu Protect, you can prevent unau-
Specify whether or not received fax messages
are to be forwarded to a programmed receiver.
destination or the forwarding destination by
special sender, the specified destination will
be notified of the results of forwarding.
various settings to suit your needs. To
change function settings, set the Parameter
Switches.
Program/Change/Delete Special Senders,
perform initial setup, and print the Special
Sender List. You can set functions for each
sender if Special Senders are preprogrammed.
fore printing documents when the Memory
Lock function is activated.
the G3 Analog Line before you connect the
machine to a standard G3 analog line.
thenticated users from changing the user
tools.
Reference
“Fax Features”, General Settings Guide
7

8
1. Transmission
This section explains basic transmission operations such as specifying a transmission mode or a destination.
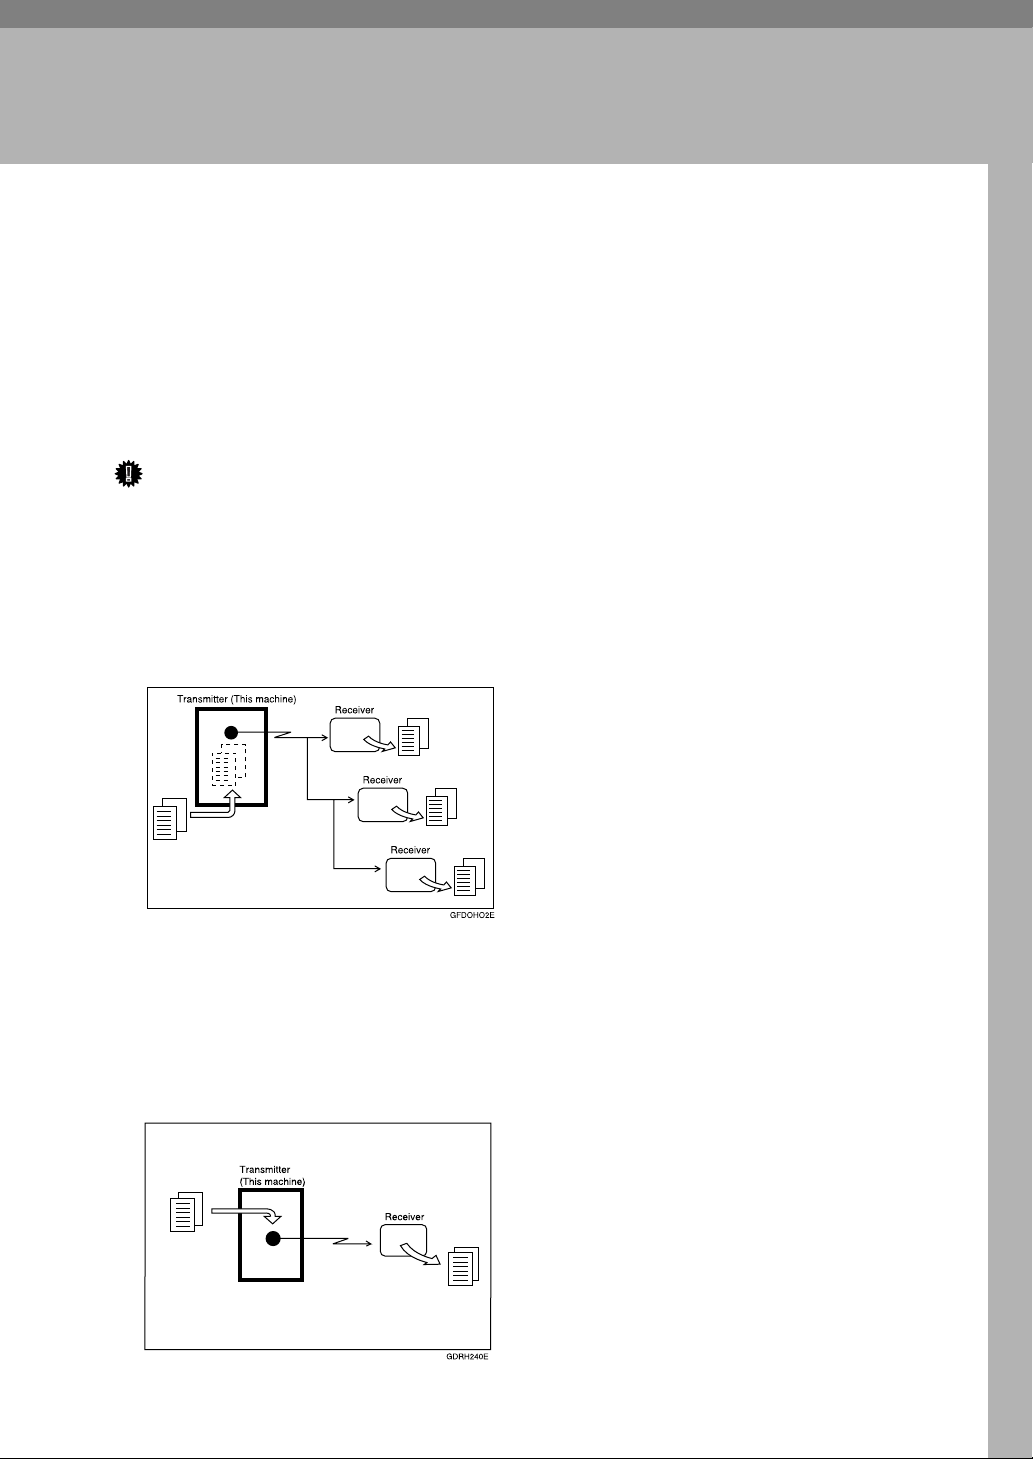
Transmission Modes
There are two types of transmission:
• Memory Transmission
• Immediate Transmission
Important
❒ It is recommended that you call the receivers and confirm with them when
sending important documents.
❖ Memory Transmission
Transmission starts automatically after the original is stored in memory. This
is convenient when you are in a hurry and want to take the document away
with you. You can also send the same original to several destinations.
❖ Immediate Transmission
Immediately dials the destination number, and while scanning the original,
sends it. It is very convenient when you want to send an original quickly or
when you want to check the destination you are sending to. When using this
type of transmission, the original is not stored in memory. You can only specify one address.
9

1
Transmission
You can change transmission mode by pressing the {Transmission Mode} key.
ASO023S
Check the indicator on the operation panel to see which mode is currently active.
If it is not lit, Immediate Transmission mode is set.
Reference
p.15 “Parallel Memory Transmission”
p.16 “Simultaneous Broadcast”
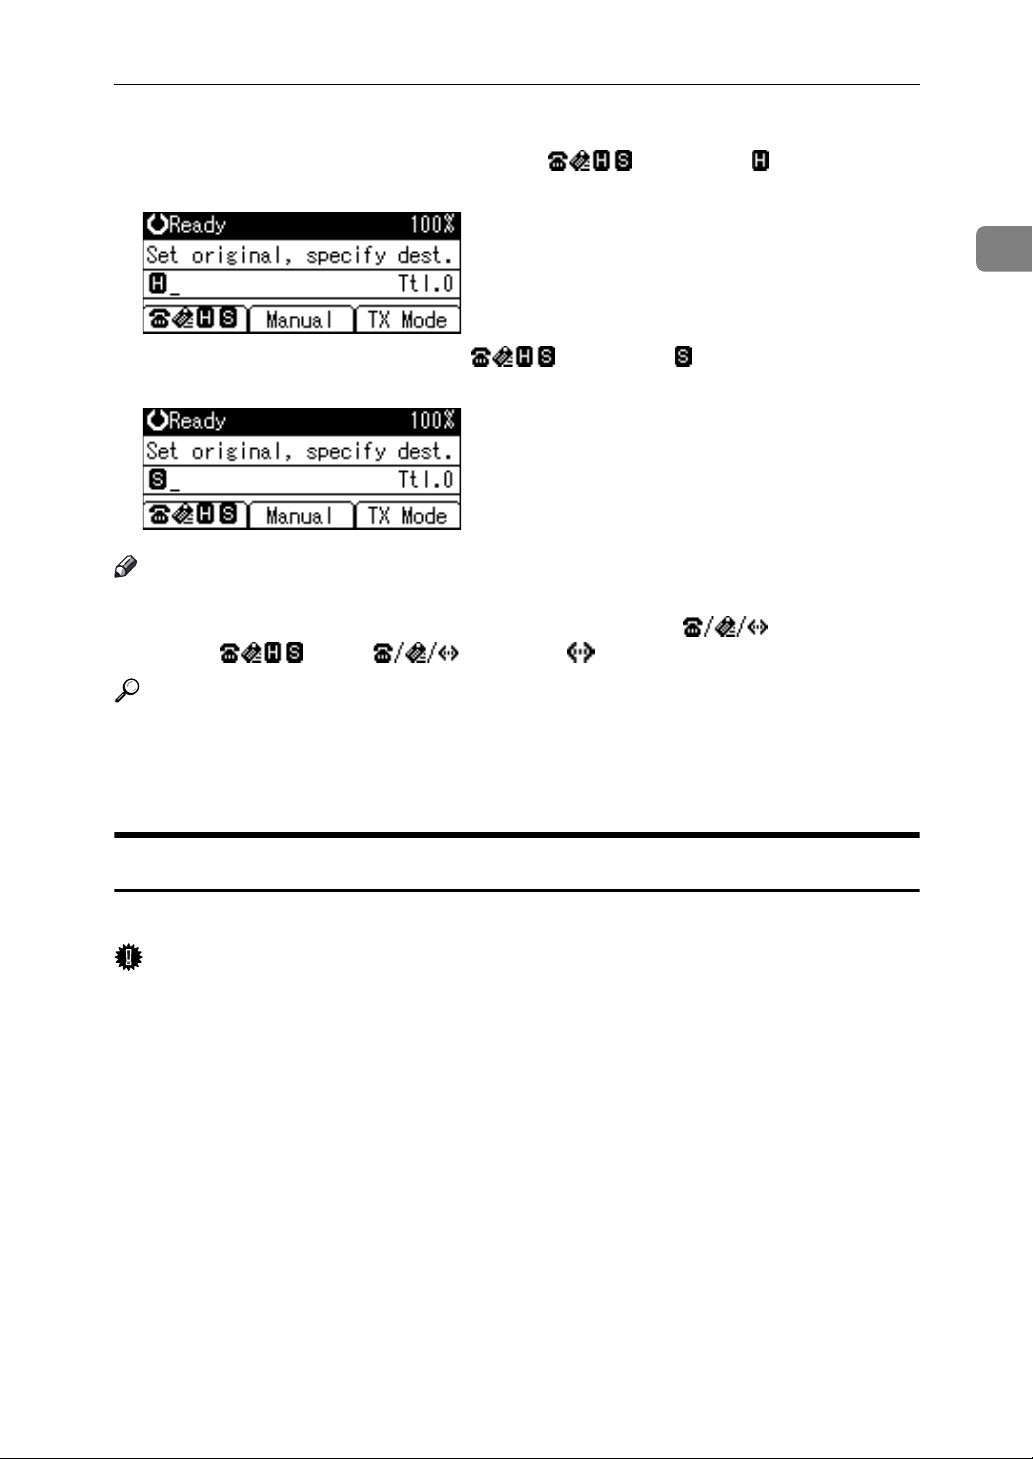
Selecting Type of Transmission
You can select the transmission type: standard fax, IP-Fax, or Internet Fax.
Switch between types of transmission by pressing the selection key displayed on
the standby screen.
Important
❒ To select IP-Fax destinations or Internet Fax destinations, the optional print-
er/scanner unit must be installed. The display differs depending on whether
or not the optional printer/scanner unit is installed.
❖ When sending over a fax line
Press [] to display in the destination display column.
❖ When sending to an e-mail address
Press [] to display in the destination display column.
10
Transmission Modes
❖ When sending by IP-Fax
When using a gatekeeper server, press [] to display in the destina-
tion display column.
When using a SIP server, press [] to display in the destination dis-
play column.
Note
❒ If either “Enable H.323” (when using a gatekeeper) or “Enable SIP” (when us-
ing a SIP server) is selected in the Fax Features menu, is displayed in
place of . Press [] to display in the destination display column.
1
Reference
p.20 “IP-Fax Functions”
p.24 “Internet Fax Functions”
“Fax Features”, General Settings Guide
Memory Transmission
Memory transmission mode has standard fax, Internet Fax and IP-Fax.
Important
❒ If there is a power failure (the main power switch is turned off) or the machine
is unplugged for about twelve hours, all the documents stored in memory are
deleted. As soon as the main power switch is turned on, the Power Failure Report is printed to help you identify deleted files. Simply turning off the power
by pressing the Operation switch does not delete stored documents. See
“Troubleshooting When Using the Facsimile Function”, Troubleshooting.
❒ If memory is full (0% appears on the top right corner of the display), Memory
Transmission is disabled. Use Immediate Transmission instead.
11
1
Transmission
A Make sure that Memory Trans. indicator lights.
ASO023S
Normally Memory Transmission mode is selected.
If it is not lit, Immediate Transmission mode is selected. Press the {Transmis-
sion Mode} key.
B Place the original.
C Make the scan settings you require.
D Using the number keys or a Quick Dial key, specify a destination.
To specify a destination using a Quick Dial key, see “Using the Quick Dial
Keys”.
If you make a mistake, press the {Clear/Stop} key, and then enter the correct
number.
E When sending the same original to several destinations (broadcasting),
press [Add Dest] to specify the destinations.
You do not have to press [Add Dest] when adding a destination using the destination list.
12

Transmission Modes
F Specify the next destination.
Pressing [] switches the type of transmission between fax number, e-
mail address, and IP-Fax destination.
A fax number, e-mail address and IP-Fax destination can be specified simultaneously.
G Press the {Start} key.
Note
❒ If the combined total number of programmed destinations exceeds the
maximum value, only Immediate Transmission is possible.
❒ For the maximum number of destinations you can specify per file, see
“Maximum Values”.
❒ For the maximum number of destinations you can specify for all files (in-
cluding files in memory), see “Maximum Values”.
❒ For the maximum number of documents you can store in memory for
Memory Transmission, see “Maximum Values”.
❒ For the maximum number of pages you can store in memory (using A4
Standard <ITU-T q1 Chart>), see “Maximum Values”.
1
Reference
p.34 “Original Type”
p.35 “Resolution”
p.36 “Image Density (Contrast)”
p.38 “Sending Over a Fax Line”
p.41 “Sending by IP-Fax”
p.44 “Sending to an E-mail Address”
p.49 “Specifying a destination using the Quick Dial key”
p.50 “Specifying a group of destinations using the Quick Dial key”
p.53 “Redial”
p.169 “Maximum Values”
“Fax Features”, General Settings Guide
“Troubleshooting When Using the Facsimile Function”, Troubleshooting
13
Transmission
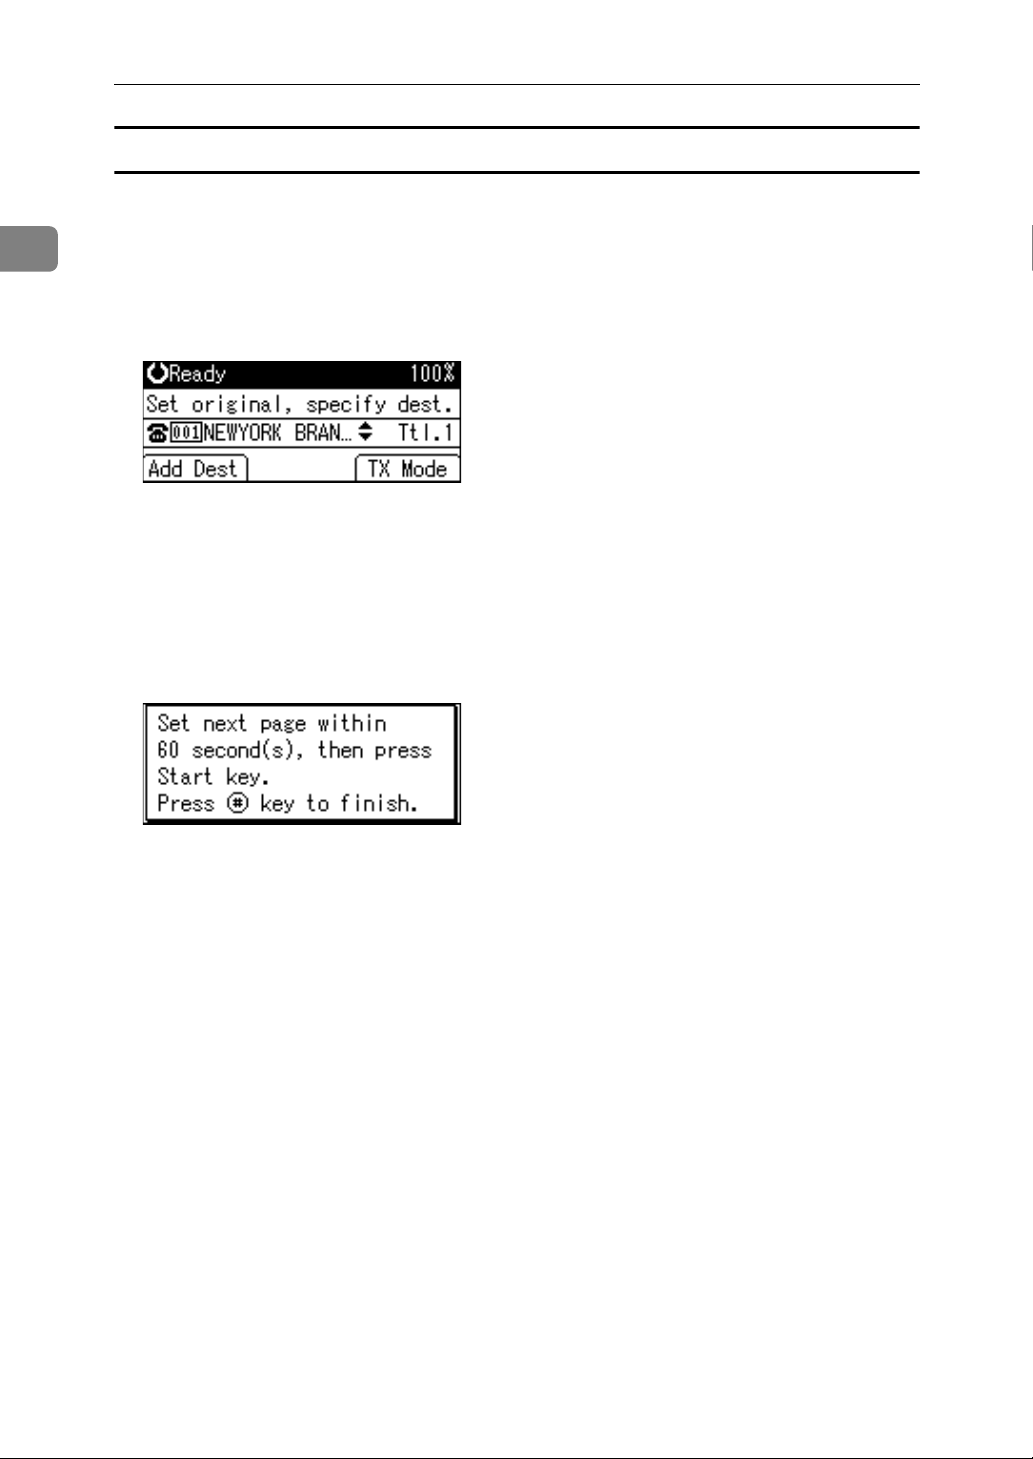
Sending multiple originals using the exposure glass (Memory Transmission)
Follow these steps to send multiple originals using the exposure glass.
1
A Make sure that Memory Trans. indicator lights.
B Place the first page of the original face down on the exposure glass.
C Specify a destination.
D Make the scan settings you require.
E Press the {Start} key.
The machine starts scanning.
F Place the next original on the exposure glass within 60 seconds after the ma-
chine has finished scanning the first original.
G Repeat steps
to F for all originals.
D
H Place the last original, and then press the {q} key.
The machine dials the destination and starts transmission.
14

Transmission Modes
Parallel Memory Transmission
This function dials while the original is being scanned.
Standard Memory Transmission stores the original in memory, then dials the
destination. However, Parallel Memory Transmission allows you to confirm the
connection status quickly. In addition, this function scans the original faster than
Immediate Transmission. This is useful when you are in a hurry and need to use
the original for another purpose.
Important
❒ Standard Memory Transmission is used instead of Parallel Memory Trans-
mission in the following cases:
• When the line is busy and could not be connected to
•With Send Later
• When you store an original for Memory Transmission while another communication is in progress
• When two or more destinations are specified
• When an original is placed on the exposure glass, and then sent
1
Note
❒ You can turn this function on or off with the User Parameters (switch 07, bit 2)
in the Fax Features menu.
❒ Standard Memory Transmission may be used instead of Parallel Memory
Transmission if there is not enough free memory left.
❒ If you use this function, the Memory Storage Report will not be printed.
❒ If the {Clear/Stop} key is pressed, the original jams or memory runs out, Par-
allel Memory Transmission will stop. The Communication Result Report is
printed and files are deleted.
❒ When using Parallel Memory Transmission, only the page number is printed
on the header of the fax, the total number of originals is not automatically
printed.
Reference
“Fax Features”, General Settings Guide
Automatic Redial
If a fax document could not be sent because the line was busy or an error occurred during transmission, redial is attempted at five-minute intervals up to
five times.
If redialing fails after four redials, the machine cancels the transmission and
prints a Communication Result Report or Communication Failure Report.
Note
❒ If there are a large number of files stored in memory, documents might not be
sent in the order they were scanned.
15

1
Transmission
Dual Access
The machine can scan other documents into memory even while sending a fax
document from memory, receiving a document into memory, or automatically
printing a report. Since the machine starts sending the second document immediately after the current transmission ends, the line is used efficiently.
Note
❒ During Immediate Transmission or when in User Tools mode, the machine
cannot scan an original.
Simultaneous Broadcast
Use this function to send the same original to multiple destinations simultaneously.
To specify multiple destinations, specify the first destination, and then specify
the next destination by pressing [Add Dest].
If you dial several destinations for the same document (broadcasting), the documents are sent in the order in which they were dialed. If the fax document could
not be transmitted, the machine redials that destination after the last destination
specified for broadcasting. For example, if you specify four destinations, A
through D, for broadcasting, and if the lines to destinations A and C are busy,
the machine dials the destinations in the following order: A, B, C, D, A, and C.
To check the transmission progress, print the TX file list.
If you specify a second transmission while broadcasting to several destinations,
faxes are transmitted alternately to each remaining destination in the current
and second broadcast.
For example, if you specify a broadcast to destinations A and B, and then specify
a broadcast to destinations C and D while transmission to destination A is in
progress, the machine sends the faxes in the following order: A, C, B, and then D.
If the previous file and next file are both on standby, these are also sent in the
same order.
Note
❒ To avoid accidentally pressing the wrong Quick Dial key, you can set the ma-
chine so that each time a destination is added using a Quick Dial key, [Add
Dest] must be pressed. Make the setting in User Parameters (switch 17, bit 2)
in the Fax Features menu.
Reference
p.123 “Printing a List of Files in Memory (Print TX Standby File List)”
“Fax Features”, General Settings Guide
16

Transmission Modes
If memory runs out while storing an original
If you run out of memory while storing an original (free space reaches 0%), the
“
Memory is full. Scanning will be stopped and only scanned page(s)
will be stored.
Note
❒ When this happens, only the scanned pages are sent. If you want to delete the scanned
pages and cancel transmission in this case, contact your service representative.
” message appears. Press [Exit] to transmit stored pages only.
ECM (Error Correction Mode)
If part of a transmission fails because of a line problem, the lost data is automatically resent.
Important
❒ For this function to work, the other machine must have ECM.
❒ This function is not available with Internet Fax.
1
Immediate Transmission
Immediate Transmission is possible with standard fax transmission and IP-Fax
transmission.
Important
❒ Internet Fax is executed in only Memory Transmission that starts transmis-
sion automatically after storing documents in memory. If you specify Immediate Transmission in Internet Fax, the “
memory transmission.
and then switch to Memory Transmission.
❒ Group cannot be used for Immediate Transmission. You cannot send the
same document to multiple destinations (broadcasting). If you specify a
group, the “
message appears. When this happens, press [Exit], and then switch to Memory Transmission.
Try again after switching to memory transmission.”
” message appears. When this happens, press [Exit],
Try again after switching to
17
1
Transmission
A Make sure that Memory Trans. indicator is not lit.
ASO023S
If Memory Trans. indicator is lit, press the {Transmission Mode} key to select
Immediate Transmission mode.
B Place the original.
C Select the scan settings you require.
D Using the number keys or a Quick Dial key, specify a destination.
To specify a destination using a Quick Dial key, see “Using the Quick Dial
Keys”.
If you make a mistake, press the {Clear/Stop} key, and then enter the correct
number.
E Press the {Start} key.
The machine dials a destination.
Note
❒ Documents are not stored in memory.
Reference
p.34 “Original Type”
p.35 “Resolution”
p.36 “Image Density (Contrast)”
p.38 “Sending Over a Fax Line”
p.41 “Sending by IP-Fax”
p.49 “Specifying a destination using the Quick Dial key”
p.50 “Specifying a group of destinations using the Quick Dial key”
p.53 “Redial”
18
Transmission Modes
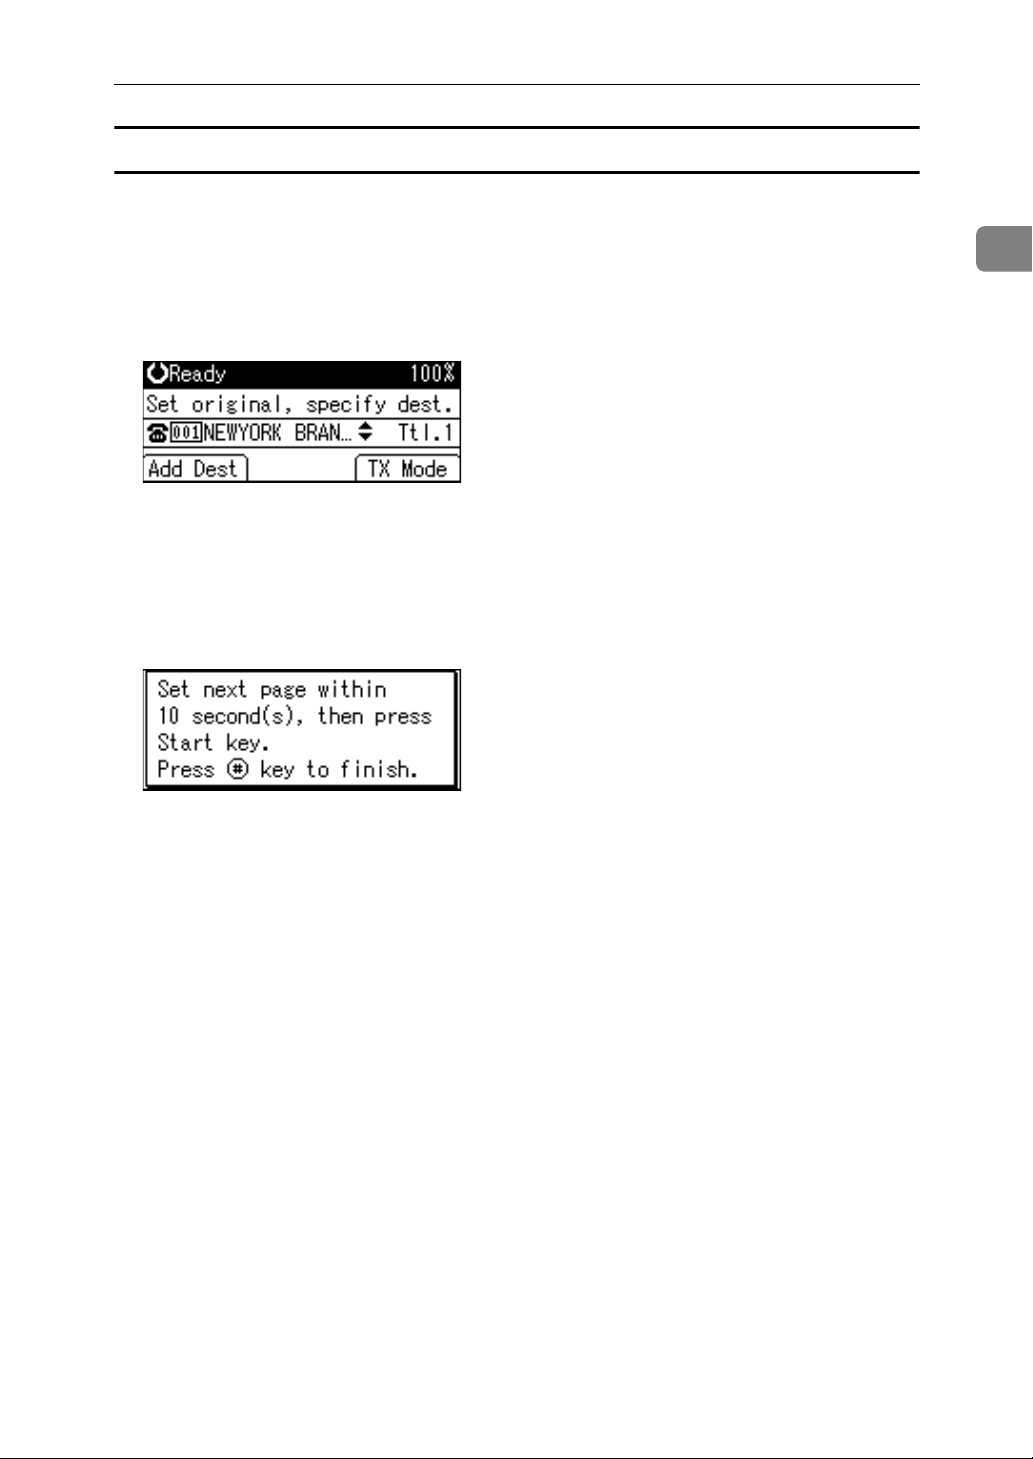
Sending multiple originals using the exposure glass (Immediate Transmission)
Follow these steps to send multiple originals using the exposure glass.
A Make sure that Memory Trans. indicator is not lit.
B Place the first page face down on the exposure glass.
C Specify a destination.
D Make the scan settings you require.
E Press the {Start} key.
F Place the next original on the exposure glass within 10 seconds after the ma-
chine has finished scanning the first original.
1
G Repeat steps
to F for all originals.
D
H Place the last original, and then press the {q} key.
19

1
Transmission
IP-Fax Functions
The IP-Fax function sends or receives documents between two facsimiles directly via a TCP/IP network.
This function has the following advantages and is suitable for communication
within the same LAN:
• Reducing communication costs
• Communicating between IP-Faxes at higher speed than by standard fax
IP-Fax uses SIP and H.323 as the network protocol.
Specify an IPv4 address or host name instead of a fax number for sending. When
using a gatekeeper, specify its alias telephone number. When using a SIP server,
you can send by specifying SIP user name. Specify addresses of the gatekeeper
or SIP server (proxy server, register server, redirect server) as appropriate in IPFax Settings in the Fax Features menu.
You can also transmit to a G3 facsimile connected to the public switched telephone network (PSTN) via a gateway (T.38-compliant).
You can receive IP-Faxes in the same manner as standard faxes.
20
 Loading...