

Page 1

PostScript 3 Supplement
Introduction..........................................................................................................................................3
How to Read This Manual...................................................................................................................5
1. Using PostScript 3
Setting up Options................................................................................................................................7
Job Type.............................................................................................................................................................8
Collate..............................................................................................................................................................16
Duplex Printing................................................................................................................................................17
Color Mode...................................................................................................................................................... 19
Staple ...............................................................................................................................................................20
Punch ...............................................................................................................................................................21
Paper Selection ................................................................................................................................................22
Paper Size ........................................................................................................................................................22
Media Type.......................... ...... ..... .................................................................................................................23
Paper Source....................................................................................................................................................24
Destination Tray ..............................................................................................................................................24
Resolution........................................................................................................................................................25
Gradation .........................................................................................................................................................26
Color Profile ....................................................................................................................................................27
Color Setting....................................................................................................................................................29
Dithering..........................................................................................................................................................30
Gray Reproduction...........................................................................................................................................32
Black Overprint ...............................................................................................................................................33
Toner Saving............................................... ..... ...... ..........................................................................................34
Color Control...................................................................................................................................................34
User Code ........................................................................................................................................................35
Options.............................................................................................................................................................36
1
Page 2
2. Printer Utility for Mac
Installing Printer Utility for Mac......................................................................................................39
Starting Printer Utility for Mac........................................................................................................40
Printer Utility for Mac Functions.....................................................................................................41
Downloading PS Fonts....................................................................................................................................42
Displaying the Printer's Fonts..........................................................................................................................44
Deleting Fonts..................................................................................................................................................44
Initializing the Printer Disk .............................................................................................................................45
Page Setup ....................................................... ...... ..........................................................................................46
Renaming the Printer.......................................................................................................................................46
Restarting the Printer.......................................................................................................................................47
Downloading PostScript Files .........................................................................................................................48
Selecting the Zone ...........................................................................................................................................48
Displaying Printer Status.................................................................................................................................49
Launching the Dialogue Console.....................................................................................................................50
INDEX...................................................................................................................................51
2
Page 3
Introduction
To get maximum versatility fro m this print er all opera tors shoul d careful ly read and fol low the inst ructions in this manual. Please keep this manual in a handy place near the printer.
Please read the Safe ty I nform at ion b efo re usi ng this p rin ter. I t co ntain s imp ort ant infor ma tion rela ted
to USER SAFETY and PREVENTING EQUIPMENT PROBLEMS.
Important
Contents of this manual are subject to change without prior notice. In no event will the company be
liable for direct, indirect, special, incidental, or consequential damages as a result of handling or operating the printer.
Trademarks
Microsoft®, Windows® and Wind ows NT® are registered trademarks of Microsoft Corporation in the
United States and/or other countries.
®
Adobe
Appletalk, Apple, Macintosh, Mac OS, Mac OS X are registered trademarks of Apple Computer, In-
corporated.
Other product names used here in are f or i dent if ic at ion pu rp oses only and might be trademarks of thei r
respective companies. We disclaim any and all rights in those marks.
The proper names of the Windows operating systems are as follows:
• The product name of Windows
• The product name of Windows
• The product name of Windows
• The product names of Windows
and PostScript® are registered trademarks of Adobe Systems Incorporated.
®
95 is Microsoft® Windows 95.
®
98 is Microsoft® Windows 98.
®
Me is Microsoft® Windows Millennium Edition (Windows Me).
®
XP are as follows:
Microsoft® Windows® XP Professional
Microsoft
®
Windows® XP Home Edition
3
Page 4
4
• The product names of Windows® 2000 are as follows:
Microsoft
Microsoft
®
Windows® 2000 Advanced Server
®
Windows® 2000 Server
Microsoft® Windows® 2000 Professional
• The product names of Windows NT
Microsoft
• Microsoft
®
Windows NT® Server 4.0
®
Windows NT® Workstation 4.0
®
4.0 are as follows:
Notes:
Certain options might not be available in some countries. For details, please contact your local dealer.
Page 5
How to Read This Manual
R
R
Symbols
In this manual, the following symbols are used:
WARNING:
This symbol indicates a potentially hazardous situation which, if instructions are not followed, could
result in death or serious injury.
CAUTION:
This symbol indicates a potentially hazardous situation which, if instructions are not followed, may result in minor or moderate injury or damage to property.
* The statements above are notes for your safety.
Important
If this instruction is not followed, paper might be misfed, or data might be lost. Be sure to read this.
Preparation
This symbol indicates the prior knowledge or preparations required before operating.
Note
This symbol indicates precautions for operation, or actions to take after misoperation.
5
Limitation
This symbol indicates numerical limits, functions that cannot be used together, or conditions in which
a particular function cannot be used.
Reference
This symbol indicates a reference.
Page 6

[]
Keys that appear on the machine's display.
Keys and buttons that appear on the computer's display.
{}
Keys built into the machine's control panel.
Keys on the computer's keyboard.
6
Page 7
1. Using PostScript 3
Setting up Options
This section describes specific printer functions and menus added by installing the PPD file. For more
information about Windows 95/98/Me PostScript 3 printer driver functions and menus, see the printer
driver Help.
Preparation
For Macintosh, Mac OS 8.6 or a later version, or Mac OS X 10.1 or a later version is required. Mac
OS X classic is also supported.
Limitation
❒ If you use Mac OS X, the following functions cannot be used:
• Sample Print
• Locked Print
• User Code
7
Page 8
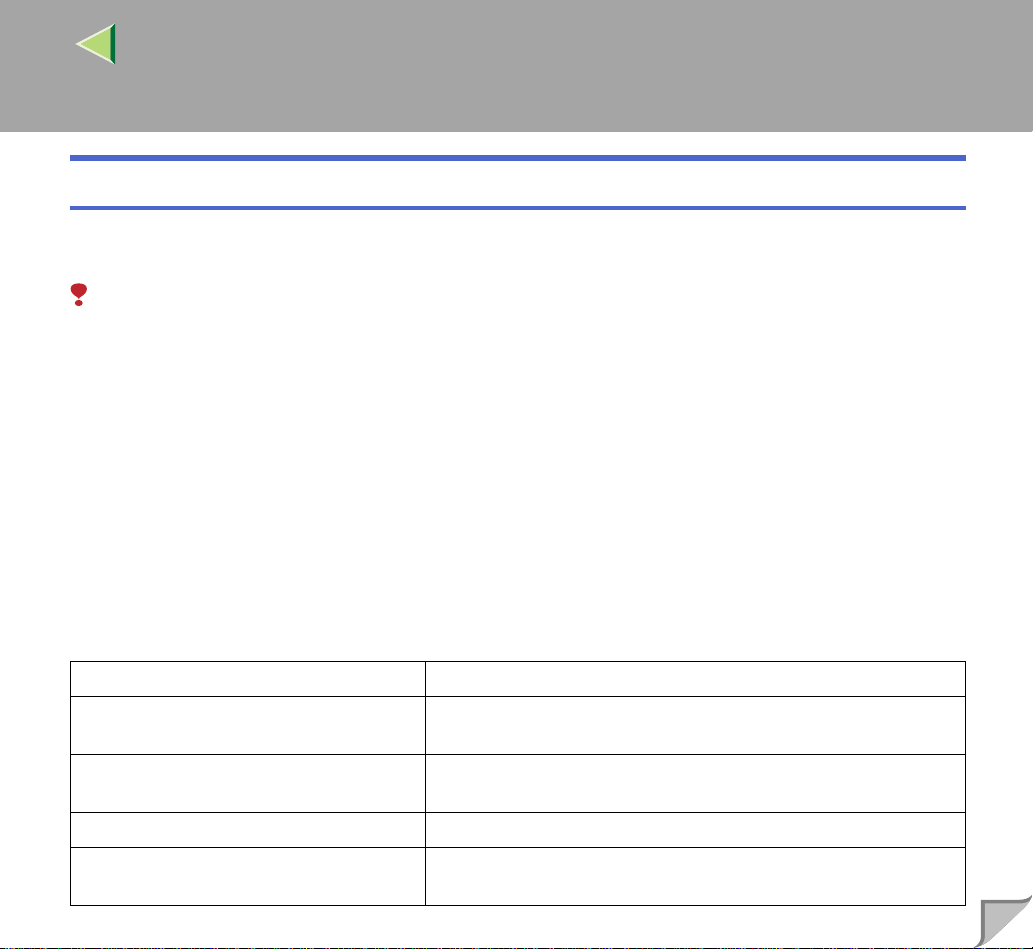
Job Type
Use this function to select print job type.
The following table shows where you can select this function.
Windows 95/98/Me [Job Type] on the [Setup] tab
Windows 2000, Windows XP [Print Job] on the [Job Log] tab in the [Printing Preferences] dialog
box
Windows NT 4.0 [Print Job] on the [Job Log] tab in the [Document Defaults] dialog box
Mac OS [Job Type] on [Job Log] in the print dialog box
Mac OS X This function is not available.
You can select the following items:
❖❖❖❖ Normal
Select this function for normal printing. The print job starts immediately after the print command is
sent.
Note
❒ Under Windows 95/98/Me, if you want to use a user ID, click [Details...].
8
❖❖❖❖ Sample Print
Use this function to print only one set from a multiple-set print job.
The other sets a re sa ved i n the prin ter. The saved job c an be pr inted from t he pr inter 's c ontrol panel.
You can also delete the saved job.
Limitation
❒ To use this function, the optional hard disk drive must be installed on the printer.
Page 9
Note
❒ The user ID can consist of up to eight alphanumeric (a-z, A-Z, 0-9) characters.
❒ Entering the user ID helps you distinguish the print job from others.
Reference
For more information about how to use Sample Print, see p.9 “How to Use Sample Print”.
❖❖❖❖ Locked Print
Use this function to save documents in memory using a password, and then edit and print them as
required.
Limitation
❒ To use this function, the optional hard disk drive must be installed on the printer.
Note
❒ The user ID can consist of up to eight alphanume ric (a-z, A-Z, 0-9) char acters. The password
must be four digits.
Reference
For more information about how to use Locked Print, see p.13 “How to Use Locked Print”.
9
How to Use Sample Print
This describes how to print a document using the Sample Print function.
Note
❒ If the application has a collate option, make sure that it is not selected before sending a print job. By
default, sample pr int jo bs are automatically collated by the pr i nter d ri ver . If t he col la te o pti on is s elected in the application print dialog box, more prints than intended may be printed.
Page 10
Windows 95/98/Me
AAAA
In an application, select the menu command to print.
The print dialog box appears.
BBBB
Open the printer properties dialog box to set Sample Print.
CCCC
Click the [Setup] tab.
DDDD
In [Job Type], click [Sample Print].
EEEE
Click [Details...] button.
FFFF
In [User ID], enter the user ID using up to eight alphanumeric (a-z, A-Z, 0-9) characters.
Note
❒ Set this to identify the user associated with the job.
GGGG
Click [OK] to close the printer properti es dial og box.
HHHH
Start printing from the application's print dialog box.
The Sample Print job is sent to t he printer and one set is printed.
10
IIII
Check the sample print to confirm that the settings are correct.
If the settings are correct, see “Printing the Remaining Sets”, Printer Client Reference.
If not, you can delete the saved job. See “Deleting a Sample Print File”, Printer Client Reference.
When using the optional scanner unit, see Printer Client Reference Copier System Edition.
Page 11
Windows 2000, Windows XP, Windows NT 4.0
AAAA
In an application, select the menu command to print.
The print dialog box appears.
BBBB
Open the printer properties dialog box to set Sample Print.
CCCC
Click the [Job Log] tab.
DDDD
In [Print Job], click [Sample Print].
EEEE
In [User ID], enter the user ID using up to eight alphanumeric (a-z, A-Z, 0-9) characters.
Note
❒ Set this to identify the user associated with the job.
FFFF
Click [OK] to close the printer properti es dial og box.
GGGG
Start printing from the application's print dialog box.
The Sample Print job is sent to t he printer and one set is printed.
11
HHHH
Check the sample print to confirm that the settings are correct.
If the settings are correct, see “Printing the Remaining Sets”, Printer Client Reference.
If not, you can delete the saved job. See “Deleting a Sample Print File”, Printer Client Reference.
When using the optional scanner unit, see Printer Client Reference Copier System Edition.
Page 12
Mac OS
AAAA
In an application, select the menu command to print.
The print dialog box appears.
BBBB
On the pop-up menu, click [Job Log].
CCCC
In [Job Type], click [Sample Print], and then select the appropriate setting.
DDDD
In [User ID], enter the user ID using up to eight alphanumeric (a-z, A-Z, 0-9) characters.
Note
❒ Set this to identify the user associated with the job.
❒ The user ID can consist of up to eight alphanumeric (a-z, A-Z, 0-9) characters.
EEEE
After making the necessary settings you want, click [Print].
The Sample Print job is sent to t he printer and one set is printed.
FFFF
Check the sample print to confirm that the settings are correct.
If the settings are correct, see “Printing the Remaining Sets”, Printer Client Reference.
If not, you can delete the saved job. See “Deleting a Sample Print File”, Printer Client Reference.
When using the optional scanner unit, see Printer Client Reference Copier System Edition.
12
Page 13
How to Use Locked Print
This describes how to print a document using the Locked Print function.
Note
❒ If the application has a collate option, make sure that it is not selected before sending a print job. By
default, locked pri nt jobs are a utomatica lly collat ed by the prin ter driver . If the col late optio n is selected in the application print dialog box, more prints than intended may be printed.
Windows 95/98/Me
AAAA
In an application, select the menu command to print.
The print dialog box appears.
BBBB
Open the printer properties dialog box to set Locked Print.
CCCC
Click the [Setup] tab.
DDDD
In [Job Type], click [Locked Print].
EEEE
Click [Details...].
13
FFFF
In [User ID], enter the user ID using up to eight alphanumeric (a-z, A-Z, 0-9) characters, and
then enter a 4-digit password in [Password].
Note
❒ Set this to identify the user associated with the job.
GGGG
Click [OK] to close the printer properti es dial og box.
Page 14
HHHH
Start printing from the application's print dialog box.
The Locked Print job is sent to t he printer.
IIII
Check the locked print to confirm that the settings are correct.
If the settings are correct, see “Printing a Locked Print File”, Printer Client Reference.
If not, you can delete the saved job. See “Deleting a Locked Print File”, Printer Client Reference.
When using the optional scanner unit, see Printer Client Reference Copier System Edition.
Windows 2000, Windows XP, Windows NT 4.0
AAAA
In an application, select the menu command to print.
The print dialog box appears.
BBBB
Open the printer properties dialog box to set Locked Print.
CCCC
Click the [Job Log] tab.
DDDD
In [Job Type], click [Locked Print].
EEEE
In [User ID], enter the user ID using up to eight alphanumeric (a-z, A-Z, 0-9) characters, and
then enter a 4-digit password in [Password].
14
Note
❒ Set this to identify the user associated with the job.
FFFF
Click [OK] to close the printer properti es dial og box.
GGGG
Start printing from the application's print dialog box.
The Locked Print job is sent to t he printer.
Page 15
HHHH
Check the locked print to confirm that the settings are correct.
If the settings are correct, see “Printing a Locked Print File”, Printer Client Reference.
If not, you can delete the saved job. See “Deleting a Locked Print File”, Printer Client Reference.
When using the optional scanner unit, see Printer Client Reference Copier System Edition.
Mac OS
AAAA
In an application, select the menu command to print.
The print dialog box appears.
BBBB
On the pop-up menu, click [Job Log].
CCCC
In [Job Type], click [Locked Print], and then select the appropriate setting.
DDDD
In [User ID], enter the user ID using up to eight alphanumeric (a-z, A-Z, 0-9) characters, and
then enter a 4-digit password in [Password].
Note
❒ Set this to identify the user associated with the job.
15
EEEE
After making the necessary settings you want, click [Print].
The Locked Print job is sent to t he printer.
FFFF
Check the locked print to confirm that the settings are correct.
If the settings are correct, see “Printing a Locked Print File”, Printer Client Reference.
If not, you can delete the saved job. See “Deleting a Locked Print File”, Printer Client Reference.
When using the optional scanner unit, see Printer Client Reference Copier System Edition.
Page 16
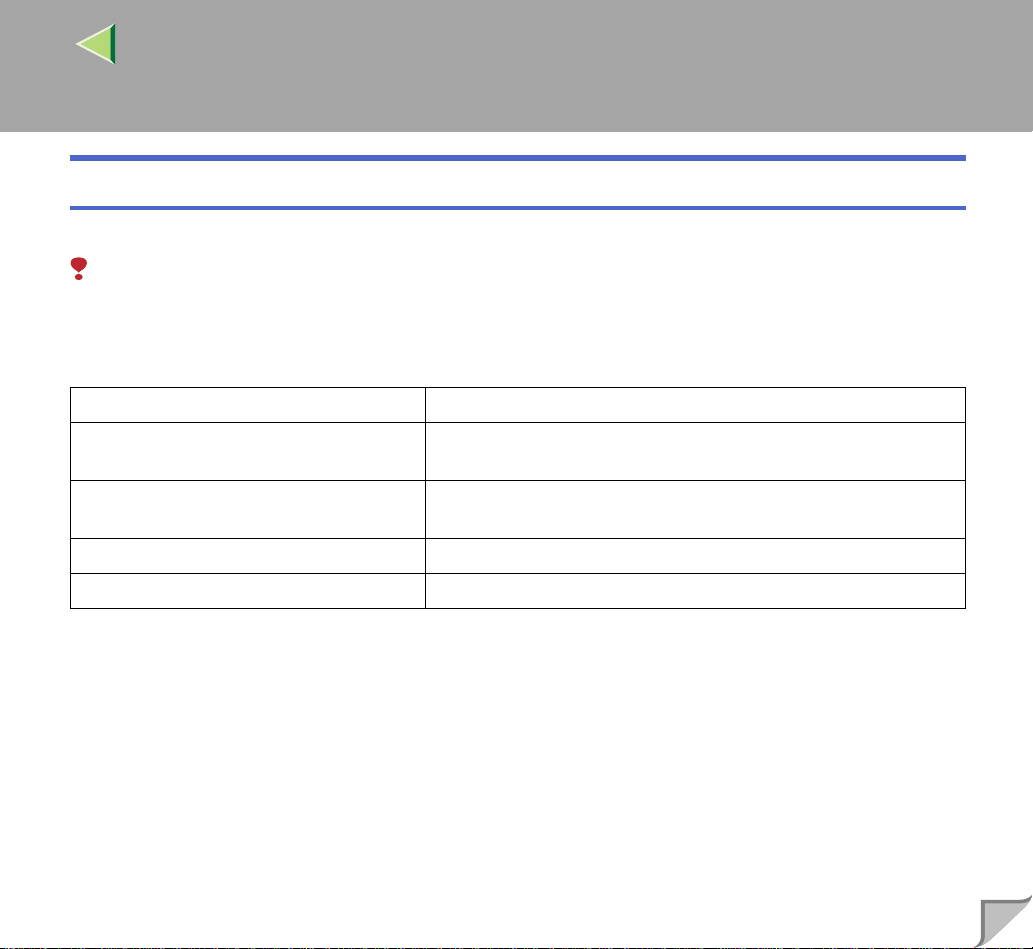
Collate
Use this function to enable collation. With this f eature, the printer can efficiently pr int collated sets of
multiple-page documents.
Limitation
❒ To use this function, a memor y unit of tota l 128 MB or the har d disk dr ive must be instal led on the
printer.
❒ Under Windows 20 00, W indows X P, M ac OS, or Mac OS X , make s ur e t he fol low ing che ck b oxes
have not been selected.
• Windows 2000, Windows XP
The [Collated] check box on [Paper/Output] on [Advanced...] on the [Paper/Quality] tab in the
[Printing Preferences] dialog box.
• Mac OS
The [Collate] check box in the print dialog box.
• Mac OS X
The [Collate] check box on [Copies & Pages] in the printer dialog box.
The following table shows where you can select this function.
Windows 95/98/Me [Collate] on the [Setup] tab
16
Windows 2000, Windows XP [Collate] on [Advanced...] on the [Paper/Quality] tab in the [Printing
Preferences] dialog box
Windows NT 4.0 [Collate] on [Document Options] on the [Advanced] tab in the [Docu-
ment Defaults] dialog box
Mac OS [Collate:] on [Printer Specific Options] in the print dialog box
Mac OS X [Collate] on the [Features 1] tab on [Printer Feature] in the printer dia-
log box
Page 17
Duplex Printing
Use this function to select duplex printing.
Limitation
❒ To use this function, the optional duplex unit must be installed on the printer.
❒ You cannot perform duplex printing when using the bypass tray.
The following table shows where you can select this function.
Windows 95/98/Me [Duplex] on the [Setup] tab
Windows 2000, Windows XP [Print on Both Sides (Duplex)] on the [Layout] tab in the [Printing Pref-
erences] dialog box
Windows NT 4.0 [Print on Both Sides (Duplex Printing)] on the [Page Setup] tab in the
[Document Defaults] dialog box
Mac OS [Print on Both Sides] on [Layout] in the print dialog box
Mac OS X [Print on both Sides] check box on [Duplex] in the print dialog box
You can select the following items. Availability of these items varies depending on the operating system you are using.
17
Page 18

Windows 95/98/Me
❖❖❖❖ Off
Disables duplex printing.
❖❖❖❖ Open to Left
Prints so you can open it to the left.
❖❖❖❖ Open to Top
Prints so you can open it to the top.
Windows 2000, Windows XP, Mac OS, Mac OS X
Note
❒ If you use a Macintosh, click the button that means [Flip on Long Edge] or [Flip on Short Edge].
❖❖❖❖ None
Disables duplex printing.
18
❖❖❖❖ Flip on Long Edge
Prints so you can open it to the long edge when bound along the long edge.
❖❖❖❖ Flip on Short Edge
Prints so you can open it to the short edge when bound along the short edge.
Page 19

Windows NT 4.0
❖❖❖❖ None
Disables duplex printing.
❖❖❖❖ Short Side
Prints so you can open it to the short edge when bound along the short edge.
❖❖❖❖ Long Side
Prints so you can open it to the long edge when bound along the long edge.
Color Mode
Use this function to select whether the document is printed in color or black and white.
The following table shows where you can select this function.
Windows 95/98/Me [Color Mode] on the [Setup] tab
Windows 2000 [Color Mode] on [Advanced...] on the [Paper/Quality] tab in the [Print-
ing Preferences] dialog box
19
Windows XP [Color] on the [Paper/Quality] tab in the [Printing Preferences] dialog
box
Windows NT 4.0 [Color Mode] on [Document Options] on the [Advanced] tab in the
[Document Defaults] dialog box
Mac OS [Color Mode:] on [Printer Specific Options] in the print dialog box
Mac OS X [Color Mode] on the [Features 1] tab on [Printer Features] in the print
dialog box
Page 20

Note
❒ If you are using Windows 95/98/Me, this mode is called “Color/Black and White”.
You can select the following items:
❖❖❖❖ Color
Prints color documents in full color.
Note
❒ Color images are printed usi ng CMYK to ner, Cyan, Ma genta, Yel low, and Blac k. CMYK re pre-
sents the three primary subtractive colors.
❒ If you want to adjust the print color, use the settings in the [Advanced] dialog box accessed from
the [Advanced] button on the [Print Quality] tab.
❖❖❖❖ Black and White
Prints everything, inc luding col or documen ts, in bla ck and white. Bl ack and White printin g is faste r
than Color. To stop black and white a reas b eing pr inte d with CMYK to ner, selec t [Black and White]
in the printer driver as well as in the application.
Staple
20
Use this function to staple output. When you turn staple on, the printed document is collated automatically. You should switch off Coll ate from the [Print] window of your application to prevent the entire
job being stapled together.
Limitation
❒ To use this function, the finisher must be installed on the printer.
❒ The memory unit of total 128 MB or the optional hard disk drive must be installed on the printer.
Page 21

The following table shows where you can select this function.
Windows 95/98/Me [Staple] on the [Setup] tab
Windows 2000, Windows XP [Printer Features] on [Advanced...] on the [Paper/Quality] tab in the
[Printing Preferences] dialog box
Windows NT 4.0 [Printer Features] on [Document Options] on the [Advanced] tab
Mac OS [Staple:] on [Printer Specific Options] in the print dialog box
Mac OS X [Staple] on the [Features 3] tab on [Printer Features] in the print dialog
box
Punch
Use this function to punch bindi ng holes through sheets. When you tur n punch on, the printed document
is collated automatic ally. You should swi tch off Collate fr om the [Print] window o f your appli cati on to
prevent the entire job being punched.
Limitation
❒ To use this function, the finisher must be installed on the printer.
The following table shows where you can select this function.
21
Windows 95/98/Me [Punch] on the [Setup] tab
Windows 2000, Windows XP [Printer Features] on [Advanced...] on the [Paper/Quality] tab in the
[Printing Preferences] dialog box
Windows NT 4.0 [Printer Features] on [Document Options] on the [Advanced] tab
Mac OS [Punch:] on [Printer Specific Options] in the print dialog box
Mac OS X [Punch] on the [Features 3] tab on [Printer Features] in the print dialog
box
Page 22

Paper Selection
Paper Sources and Output Tray Tabs
Use this function to select the media type, input tray, and output tray.
Limitation
❒ This function is for Windows 95/98/Me only.
Reference
For more information about the [Paper Sources and Output Tray] tabs, see the printer driver Help.
Paper Size
Use this function to select the paper size.
The following table shows where you can select this function.
Windows 95/98/Me [Size:] on the [Paper] tab
Windows 2000, Windows XP [Paper/Output] on [Advanced...] on the [Paper/Quality] tab in the
[Printing Preferences] dialog box
22
Windows NT 4.0 [Paper Size:] on the [Page Setup] tab in the [Document Defaults] dialog
box
Mac OS [Paper:] on the [Page Attributes] tab in the [Page Setup] dialog box
Mac OS X [Paper Size:] in the Page Setup dialog box
Page 23

Reference
For more information about paper sizes su pported by thi s printer, see “Types of Paper and Other
Media”, Maintenance Guide.
When using the optional scanner unit, see Maintenance Guide Copier System Edition.
Media Type
Use this function to select the media type.
The following table shows where you can select this function.
Windows 95/98/Me [Type:] on [All Pages] on the [Paper] tab
Windows 2000, Windows XP [Media:] on the [Paper/Quality] tab in the [Printing Preferences] dialog
box
Windows NT 4.0 [Paper/Output] on the [Advanced] tab in the [Document Defaults] dia-
log box
Mac OS [Paper Type:] on [Printer Specific Options] in the print dialog box
Mac OS X [Paper Type] on the [Features 3] tab on [Printer Features] in the print
dialog box
23
Reference
For more information about media supported by this printer, see “Types of Paper and Other Media”,
Maintenance Guide.
When using the optional scanner unit, see Maintenance Guide Copier System Edition.
Page 24

Paper Source
Use this function to select the paper sources.
The following table shows where you can select this function.
Windows 95/98/Me [All Pages] on the [Paper] tab
Windows 2000, Windows XP [Paper/Quality] tab in the [Printing Preferences] dialog box
Windows NT 4.0 [Page Setup] tab in the [Document Defaults] dialog box
Mac OS [Paper Source:] on [General] in the print dialog box
Mac OS X [Paper Feed] in the print dialog box
Destination Tray
Use this function to select the output tray.
The following table shows where you can select this function.
Windows 95/98/Me [Destination] on the [Paper] tab
Windows 2000, Windows XP [Printer Features] on [Advanced...] on the [Paper/Quality] tab in the
[Printing Preferences] dialog box
24
Windows NT 4.0 [Printer features] on [Document Options] on the [Advanced] tab
Mac OS [Destination:] on [Printer Specific Options] in the print dialog box
Mac OS X [Destination] on the [Features 3] tab on [Printer Features] in the print
dialog box
Page 25

Resolution
Use this to set the resolution to [600dpi] or [1200dpi].
Limitation
❒ If the resolution option is set to [
1200dpi
], the gradation option must be set to [
The following table shows where you can select this function.
Windows 95/98/Me [Advanced] on the [Print Quality] tab
Windows 2000, Windows XP [Graphic] on [Advanced...] on the [Paper/Quality] tab in the [Printing
Preferences] dialog box
Windows NT 4.0 [Graphic] on [Document Options] on the [Advanced] tab in the [Docu-
ment Defaults] dialog box
Mac OS [Printer Specific Options] in the print dialog box
Mac OS X [Resolution] on the [Features 1] tab on [Printer Features] in the print
dialog box
Note
❒ This function is displayed as [Print Quality] under Windows XP.
Fast
].
25
Page 26

Gradation
Use this function to select a type of gradation suited to your requirements.
The following table shows where you can select this function.
Windows 95/98/Me [Print Quality] tab
Windows 2000, Windows XP [Gradation] on [Advanced...] on the [Paper/Quality] tab in the [Printing
Preferences] dialog box
Windows NT 4.0 [Gradation] on [Document Options] on t he [Advanced] tab in the [Doc-
ument Defaults] dialog box
Mac OS [Gradation:] on [Printer Specific Options] in the print dialog box
Mac OS X [Gradation] on the [Features 1] tab on [Printer Features] in the print di-
alog box
You can select the following items:
❖❖❖❖ Fast
Prints quickly but loses smoothness.
❖❖❖❖ Standard
Prints with good gradation.
26
Page 27

Color Profile
Use this function to select the color profile pattern.
The following table shows where you can select this function.
27
Windows 95/98/Me The [
Windows 2000, Windows XP [
Windows NT 4.0 [
Mac OS [
Mac OS X [
Color Profile
ing Preferences
Color Profile
[
Document Defaults
Color Profile:
Color Profile
dialog box
Print Quality
] tab
] on [
Advanced...
] dialog box
] on [
Document Options
] dialog box
] on [
Printer Specific Options
] on the [
Features 2
] on the [
] tab on [
Paper/Quality
] on the [
] in the print dialog box
Printer Features
] tab in the [
Advanced
Print-
] tab in the
] in the print
You can select the following items:
Important
❒ Under Windows 95/98/ Me, yo u ca n con fig ur e [Color Profile] in [Advanced] by selecting [Manual] from
the[Color] setting. Selecting [Automatic] sets the printer to “Auto”.
❖❖❖❖ Auto
Use this setting to aut omat ic al ly c onf igure the best color pr of ile pattern based on t he a ppearance of
the document to be printed.
❖❖❖❖ Photographic
Use this setting to enhance reproduction of photos and graphics that include midtones.
Page 28

❖❖❖❖ Presentation
Use this setting to enhance reproduction of documents containing text and graphics. This CRD is
best for printing colored charts, graphs, presentation materials and so on. If you use this CRD for
printing photographs, color and gradation might not reproduce so well.
❖❖❖❖ Solid Color
Use this setting to print specifi c single colors, logos and so on.
❖❖❖❖ User Setting
Use this setting to print images using a CRD downloaded from your application.
❖❖❖❖ CLPsimulation
Prints the output colors simila r to the colors displayed on the computer screen.
Note
❒ Use this function to s elec t a c olo r ren der i ng d ictio nar y (CR D). The CRD is refer r ed to co lor ma tc h-
ing, so you should select the appropriate CRD for the document you are printing. The selected CRD
is also referred to when [Fine] or [Super Fine] is selected for “Color Setting”. The following items are
available: [Auto],[Photographic], [Presentation], and [Solid Color].
28
Page 29

Color Setting
Use this function to select the correction method used for color conversion.
The following table shows where you can select this function.
29
Windows 95/98/Me [
Windows 2000, Windows XP [
Windows NT 4.0 [
Mac OS [
Mac OS X [
Advanced
Color Setting
ing Preferences
Color Setting
[
Document Defaults
Color Setting:
Color Setting
dialog box
] on the [
] on [
] dialog box
] on [
] on [
] on the [
Print Quality
Advanced...
Document Options
] dialog box
Printer Specific Options
Features 2
] tab
] on the [
] on the [
] tab on [
Paper/Quality
] in the print dialog box
Printer Features
] tab in the [
Advanced
Print-
] tab in the
] in the print
Important
❒ Under Windows 95/98/Me, you can configure [Color Setting] in [Advanced] by selecting [Manual] from
the [Color] setting. Selecting [Automatic] sets the print resolution to “Super Fine”.
Note
❒ The color rendering dictionary selected in the Color Profile setting is used.
You can select the following items:
❖❖❖❖ Off
No modification to the color setting.
Page 30

❖❖❖❖ Fine
Select this setting to perform color matching based on the printer's built-in color rendering dictionaries, and to perform CMYK conver sion. Thi s setting perfor ms print ing at an output t arget of Monitor γ = 1.8.
❖❖❖❖ Super Fine
Select this sett ing to use a c olor rend ering dict ionary simil ar to the Fin e setting bu t is capa ble of producing output that is mor e viv id. Use this setting to emphasize lighter colors. This setting performs
printing at an output target of Monitor γ = 2.2.
Note
❒ Use this function to s elec t a c olo r ren der i ng d ictio nar y (CR D). The CRD is refer r ed to co lor ma tc h-
ing, so you should select the appropriate CRD for the document you are printing. The selected CRD
is also referred to when [Fine] or [Super Fine] is selected for “Color Setting”. The following items are
available: [Auto],[Photographic], [Presentation], and [Solid Color].
Dithering
Use this function to set the Image Rendering mode.
The following table shows where you can select this function.
30
Windows 95/98/Me [Advanced] on the [Print Quality] tab
Windows 2000, Windows XP [Dithering] on [Advanced...] on the [Paper/Quality] tab in the [Printing
Preferences] dialog box
Windows NT 4.0 [Dithering] on [Document Options] on the [Advanced] tab in the [Doc-
ument Defaults] dialog box
Mac OS [Dithering] on [Printer Specific Options] in the print dialog box
Mac OS X [Dithering] on the [Features 2] tab on [Printer Features] in the print di-
alog box
Page 31

Important
❒ Under Windows 9 5/98/Me, you can configur e [Dithering] in [Advanced] by selecting [Manual] from
[Color] setting. Selecting [Automatic] sets the printer to “Auto”.
You can select the following items:
❖❖❖❖ Auto
Use this setting to configure the best dithering method automatically, based on the appearance of
the document to be printed.
❖❖❖❖ Photographic
Performs dithering in an appropriate form for photographs.
❖❖❖❖ Text
Performs dithering in an appropriate form for text.
❖❖❖❖ User Setting
Use this setting to print images set in your application as half tone.
31
Page 32

Gray Reproduction
Use this function to select Black Color mode for text and line art.
The following table shows where you can select this function.
32
Windows 95/98/Me [
Windows 2000, Windows XP [
Windows NT 4.0 [
Mac OS [
Mac OS X [
Advanced
Black Text/Graphics
the [
Black Text/Graphics
the [
Black Text/Graphics
box
Black Text/Graphics
the print dialog box
] on the [
Printing Preferences
Document Defaults
Print Quality
] on [
] on [
] on [
] on the [
] tab
Advanced...
] dialog box
Document Options
] dialog box
Printer Specific Options
] on the [
Features 2
] tab on [
Paper/Quality
] on the [
Advanced
] in the print dialog
Printer Features
] tab in
] tab in
] in
Important
❒ Under Windows 95/98/Me, you can configure [Gray Reproduction] in [Advanced] by selecting [Manual]
from the [Color] setting. Selecting [Automatic] sets the printer to “Pure Black Text”.
Note
❒ Under Windows 2000, Windows XP, Windows NT 4.0, Mac OS, or Mac OS X, this function is called
“Black Text/Graphics”.
You can select the following items:
Page 33

❖❖❖❖ Pure Black Text
Select this setting to use black toner.
Note
❒ Under Windows 2000, Windows XP, Windows NT 4.0, Mac OS, or Mac OS X, this mode is called
“K”.
❖❖❖❖ CMY+K
Select this setting to use all toners in combination.
Black Overprint
Select whether or not to print black over the other colors.
The following table shows where you can select this function.
Windows 95/98/Me [Advanced] on the [Print Quality] tab
Windows 2000, Windows XP [Black Over Print] on [Advanced...] on the [Paper/Quality] tab in the
[Printing Preferences] dialog box
Windows NT 4.0 [Black Over Print] on [Document Options] on the [Advanced] tab in the
[Document Defaults] dialog box
33
Mac OS [Black Over Print:] on [Printer Specific Options] in the print dialog box
Mac OS X [Black Over Print] on the [Features 2] tab on [Printer Features] in the
print dialog box
Important
❒ Under Windows 95/98/M e, you can configure [Black Over Print] in [Advanced] by selecting [Manual]
from the [Color] setting.
Page 34

Toner Saving
Use this function to reduce the amount of toner used when printing.
The following table shows where you can select this function.
Windows 95/98/Me [Toner Saving] on the [Print Quality] tab
Windows 2000, Windows XP [Toner Saver] on [Advanced...] on the [Paper/Quality] tab in the [Print-
ing Preferences] dialog box
Windows NT 4.0 [Toner Saver] on [Document Options] on the [Advanced] tab in the
[Document Defaults] dialog box
Mac OS [Toner Saver:] on [Printer Specific Options] in the print dialog box
Mac OS X [Toner Saver] on the [Features 1] tab on [Printer Features] in the print
dialog box
Color Control
Use this function to select whether or not you want the colors in the documents to be adjusted before
printing, so that the printed page matches the colors on the screen closer.
The following table shows where you can select this function.
34
Windows 95/98/Me [Print Quality] tab
Windows 2000, Windows XP [Graphic] on [Advanced] on the [Paper/Quality] tab in the [Printing
Preferences] dialog box
Windows NT 4.0 This function is not available.
Mac OS [Print Color] on the [Color Matching] tab in the print dialog box
Mac OS X This function is not available.
Page 35

Note
❒ Under Windows 2000 or Windows XP, this function is called “Image Color Management”.
❒ Under Windows NT 4.0, this function cannot be configured.
❒ Under Mac OS, this function is called “Color Matching”.
❖❖❖❖ Image Color Control
Open the [Image Color Matching] dialog box, and then click this button to specify exactly how you
want the colors on your screen adjusted before printing.
User Code
Use this function to set a user code for print logging.
Enter a user code using up to eight digits. A user code identifies a group of users and allows you to
check the number of sheets printed under each code using SmartNetMonitor for Admin.
The following table shows where you can select this function.
Windows 95/98/Me [User Code] on the [Statistics] tab
Windows 2000, Windows XP [User Code] on the [Job Log] tab in the [Printing Preferences] dialog
box
35
Windows NT 4.0 [User Code] on the [Job Log] tab in the [Document Defaults] dialog
box
Mac OS [User Code] on [Job Log] in the print dialog box
Mac OS X This function is not available.
Reference
For more information about using SmartNetMonitor for Admin, see Help.
Page 36

Options
See “Setting Up Options”, Printer Client Reference or A dministrator Reference for the installatio n
method appropriate to your printing environment.
When using the opti onal scanner unit, see Printer Client Reference Copier System Edition or Adminis-
trator Reference Copier System Edition.
The following table shows where you can select this function.
Windows 95/98/Me [Option] on the [Accessories] tab
Windows 2000, Windows XP [Installable Options] on the [Device Setting] tab
Windows NT 4.0 [Installable Options] on the [Device Setting] tab in the [Document De-
faults] dialog box
Mac OS [Chooser] on the Apple menu
Mac OS X This function is not available.
❖❖❖❖ Tray 3
• You can select the tray with the following menu for Paper Feed Unit Type 3800C:
Paper Source, see p.24 “Paper Source”.
36
❖❖❖❖ Tray 3 and 4
• You can select the other tray with the following menu for an additional Paper Feed Unit Type
3800C:
Paper Source, see p.24 “Paper Source”.
❖❖❖❖ Tray 3 (LCT)
• You can select the tray with the following menu for PS470:
Paper Source, see p.24 “Paper Source”.
Page 37

❖❖❖❖ Duplex Unit
• You can use the following function with Duplex Unit Type 7000:
Duplex Printing, see p.17 “Duplex Printing”.
❖❖❖❖ Hard Disk
• You can use the following function with Printer Hard Disk Type 7000:
Collate, see p.16 “Collate”.
Note
❒ This function is for Windows 95/98/Me only.
❖❖❖❖ Total Memory
• You can use the following function with Memory Unit Type C (64/128/256 MB):
Collate, see p.16 “Collate”.
Note
❒ The memory unit of total 128 MB must be installed on the printer.
❒ This function is for Windows 95/98/Me only.
❖❖❖❖ Mailbox
37
Note
❒ The optional mailbox and finisher cannot be installed together.
❒ The optional scanner unit and mail box cannot be installed together.
• You can use the following function with Mail Bin Type 3800C:
Destination, see p.24 “Destination Tray”.
Page 38

❖❖❖❖ Multi bin
Note
❒ If the optional scanner unit is installed, the multi bin can be used.
• You can use the following function with PT460:
Destination, see p.24 “Destination Tray”.
❖❖❖❖ Finisher
Note
❒ The optional mailbox and finisher cannot be installed together.
❒ The memory unit of total 128 MB or the optional hard disk drive must be installed on the printer.
• The following functions are available with SR770:
Destination, see p.24 “Destination Tray”.
Staple, see p.20 “Staple”.
Punch, see p.21 “Punch”.
38
Page 39

2. Printer Utility for Mac
Using Printer Utility for Mac, you can download fonts, change the printer's name, and so on.
Limitation
❒ If a Macintosh and printer are connected by USB, you cannot use Printer Utility for Mac.
Note
❒ Printer Utility for Mac is included on the CD-ROM labeled “Printer Drivers and Utilities”.
❒ Printer Utility for Mac requires Mac OS 8.1 or later. (Mac OS X Classic environment is supported.)
❒ Printer Utility for Mac cannot be used under Mac OS X (native mode).
Installing Printer Utility for Mac
Follow the procedure below to install Printer Utility fo r Mac on the printer.
AAAA
Start the Macintosh.
BBBB
Insert the CD-ROM into the CD-ROM drive.
The CD-ROM icon appears.
CCCC
Double-click the hard disk icon to open it.
39
DDDD
Double-click the CD-ROM icon.
The contents of the CD-ROM appear.
EEEE
Double-click the [Mac OS] folder.
FFFF
Double-click the [PS Utility] folder on the CD-ROM, drag the [Printer Utility for Mac] file, and then drop it into the Macintosh hard disk.
GGGG
Drag the C D-ROM icon and drop it into [Trash] to eject the CD-ROM.
Printer Utility for Mac is install ed.
Page 40

Starting Printer Utility for Mac
This describes how to start Printer Utility for Mac.
Important
❒ Before starting Pri nter Utili ty for Mac, confirm that the printe r is select ed in [Chooser] on the Apple
menu.
AAAA
Double-click the Printer Utility for Mac icon.
The [
Printer Utility for Mac
BBBB
Click [OK].
CCCC
In the [Available Printers:] box, select the printer you want to use.
Note
❒ If you have changed zones, select a name in [Available Network Zones:].
❒ Under Mac OS, click [Choose Printer..] on the Apple menu to change the printer.
❒ Under Mac OS X, click [Choose Printer..] on the Printer Utility for Mac menu to change the printer.
DDDD
Select the printer you want to use.
Printer Utility for Mac will take a few seconds to start.
] dialog box appears.
40
Reference
For more information, see “Printer Utility for Mac Functions”.
Page 41

Printer Utility for Mac Functions
Printer Utility for Mac functions are described below.
❖❖❖❖ Apple menu (Mac OS), Printer Utility for Mac menu (Mac OS X)
• [About Printer Utility for Mac...]
• [Choose Printer...]
Display the Choose target printer dialog box.
❖❖❖❖ File menu
• [Download PS Fonts...]
Downloads fonts (PostScrip t Type 1) to the printer. See p.42 “Downloading PS Fonts”.
• [Display Printer's Fonts...]
Displays and deletes fonts in the printer memory and hard disk. See p.44 “Displaying the Print-
er's Fonts”.
• [Initialize Printer's Disk...]
Initializes the printer's hard disk. See p.45 “Initializing the Printer Disk”.
• [Page Setup...]
Sets up the paper size to print a Printer Font Catalog and Printer Font Sample. See p.46 “Page
Setup”.
• [Rename Printer...]
Changes the printer name when viewing with Appletalk. See p.46 “Renaming the Printer”.
• [Restart Printer]
Restarts the printer. See p.47 “Restarting the Printer”.
41
Page 42

❖❖❖❖ Utility menu
• [Download PostScript File...]
Downloads a PostScript file. See p.48 “Downloading Po stScript Files”.
• [Select Zone...]
Changes the zone the printer belongs to with Appletalk. See p.48 “Selecting the Zone”.
• [Display Printer Status...]
Displays printer status. See p.49 “Displaying Printer Status”.
• [Launch Dialogue Console...]
Creates a nd edits a PostScript file, and then downl oad it to the printer. See p.50 “Launching the
Dialogue Console”.
Downloading PS Fonts
You can download PS fonts to printer memory or hard disk.
Important
❒ The following procedures to download fonts assume that you are a system administrator. If you are
not, be sure to consult your system administrator.
❒ If the printer restarts, all printer settings return to default.
❒ Confirm that a Macintosh and printer are connected with Appletalk.
42
Note
❒ Some fonts cannot be downloaded.
❒ Before downloading, read the documentation about the fonts you want to use.
AAAA
On the [File] menu, click [Download PS Fonts...].
Page 43

BBBB
Click [Add to list].
The dialog box to select fonts appears.
CCCC
Select the desired font files, and then click [Open].
A list of selectable font names appears.
DDDD
After adding all the fonts you want to download, click [OK].
The dialog box of selected fonts to download appears.
EEEE
Click [Download].
The fonts begin to be downloaded, and download status is displayed.
Important
❒ During download, do not turn off the power switch, operate the panel or open/close the cover.
FFFF
When the completion message appears, click [OK].
GGGG
Click [Cancel].
43
Page 44

Displaying the Printer's Fonts
You can display available fonts already downloaded to the printer. Fonts in printer memory and hard
disk can be displayed.
Note
❒ The fonts displayed in italics are default fonts.
AAAA
On the [File] menu, click [Display Printer's Fonts...].
A dialog box appears.
BBBB
Click [Printer's memory] or [Printer's disk].
CCCC
Click [OK].
Deleting Fonts
You can delete fonts from printer memory or hard disk.
AAAA
On the [File] menu, click [Display Printer's Fonts...].
A dialog box appears.
44
BBBB
Click [Printer's memory] or [Printer's disk].
CCCC
Select the fonts you want to delete.
Limitation
❒ You cannot delete the fonts displayed in italics.
Page 45

DDDD
Click [Delete].
A confirmation message appears.
EEEE
Confirm the fonts you want to delete and the printer name from which you want to delete
them.
FFFF
Click [Continue], and then click [OK].
GGGG
Click [OK].
Initializing the Printer Disk
When initia liz ing th e pri nt er 's hard di sk, al l font s do wnl o ade d to th e har d disk are dele te d . Be fore in itializing, be sure to check the fonts on the hard disk.
Important
❒ When initializin g the pri nter's hard dis k from the con trol panel, all da ta on th e ha rd disk is dele ted.
Before initializing, be sure to check the data on the hard disk.
AAAA
On the [File] menu, click [Initialize Printer's Disk...].
A confirmation message appears.
45
Note
❒ To cancel initialization, click [
BBBB
Click [Execute].
Initializing starts.
Important
❒ Do not turn off the power switch until initialization is complete, otherwise the hard disk might get
damaged.
Cancel
].
Page 46

CCCC
When the completion message appears, click [OK].
Page Setup
You can set the paper size on which to print a Print Fonts Catalogue and Prints Fonts Sample.
AAAA
On the [File] menu, click [Page Setup...].
BBBB
Select a paper size.
Renaming the Printer
You can change the printer name as displayed under Appletalk. If you connect several printers to the
network, assign differe nt names so you can identif y them. If several printer s have the same name, a digit
appears next to the printer name in [Chooser].
AAAA
On the [File] menu, click [Rename Printer...].
BBBB
In the [New Name:] filed enter a new name.
Limitation
❒ You can enter up to 31 digits and letters.
❒ Do not use symbols, for example “*”, “:”, “=”, “@”, “~”.
46
CCCC
Click [Rename].
The printer name is changed.
DDDD
Click [OK].
Page 47

EEEE
On the Apple menu, click [Chooser].
FFFF
Click the [AdobePS] icon.
GGGG
Select the printer renamed in step B, and then close [Chooser].
Note
❒ If there are several Appletalk zones, select the zone the printer belongs to.
Restarting the Printer
You can restart the printer.
AAAA
On the [File] menu, click [Restart Printer].
BBBB
Confirm the message that appears on the screen, and then click [Restart].
The print er restarts.
Note
❒ The fonts that you downloaded to printer memory will be deleted.
❒ If the printer restarts, all settings return to default.
47
Page 48

Downloading PostScript Files
You can download a PostScript file to the printer.
AAAA
On the [Utility] menu, click [Download PostScript File...].
BBBB
Select the file you want to download, and then click [Open].
CCCC
Enter a log file name, and then click [Save].
The selected file is downloaded.
Note
❒ Errors are recorded in the log file.
Selecting the Zone
You can change the zone to which the printer belongs under Appletalk.
Important
❒ Confirm that a Macintosh and printer are connected with Appletalk.
48
AAAA
On the [Utility] menu, click [Select Zone...].
The zone to which the printer belongs and the available zone list appear.
BBBB
Select the zone which you want to locate the printer in, and then click [Change].
A confirmation message appears.
CCCC
Click [Continue].
A confirmation message appears.
Page 49

DDDD
Click [OK].
EEEE
On the Apple menu, click [Chooser].
FFFF
Click the [AdobePS] icon.
GGGG
On the [Appletalk zone:] list, select the zone selected in step B.
HHHH
On the [Select a PostScript Printer:] list, select the printer you want to use.
IIII
Close [Chooser].
Displaying Printer Status
You can display and confirm current printer status.
AAAA
On the [Utility] menu, click [Display Printer Status...].
Current printer status appears.
BBBB
Confirm current printer status.
You can check memory capacity, VM (Virtual Memory) space, hard disk status, and ava ilable space
on the hard disk. You can also check the zone in which the printer is located.
49
CCCC
Click [OK].
Page 50

Launching the Dialogue Console
You can create and edit a PostScript file for printing, and then download it to the printer.
Important
❒ “Launch Dialogue Console” is recommended for users with an understanding of PostScript.
❒ Do not download any file other than PostScript files to the printer.
❒ “Launch Dialogue Console” must be used at your own risk.
AAAA
On the [Utility] menu, click [Launch Dialogue Console...].
Open the editing screen. The Dialogue Console menu bar appears.
BBBB
In the editor screen, enter a PostScript command.
Note
❒ To edit a PostScript file, click [Open] on the [File] menu to open it.
❒ You can search for or replace a character string using the [Search] menu.
CCCC
After editing the PostScript file, click [Download Top Window] on the [Console] menu to start
printing.
The PostSc ript file is sent to the printer.
50
Note
❒ The [Reply from Printer] box opens, depending on the PostScript file sent.
DDDD
On the [Console] menu, click [Return To Main Menu] to close the PostScript file.
Page 51

INDEX
51
B
Black Overprint
,
33
C
,
Collate
Color Control
Color Mode
Color Profile
Color Setting
16
,
,
,
,
34
19
27
29
D
,
30
,
,
44
,
,
17
Deleting Fonts
Displaying Printer's Fonts
Displaying Printer Status
Dithering
Downloading PostScript Files
Downloading PS Fonts
Duplex Printing
F
Functions
Printer Utility for Mac
G
Gradation
Gray Reproduction
,
26
,
32
,
42
49
44
,
,
41
48
I
Initializing Printer Disk
Installing
,
39
Printer Utility for Mac
,
45
J
Job Type
,
8
L
Launching the Dialogue Console
M
Media Type
,
23
O
Options
,
36
P
Page Setup
Paper Selection
Paper Size
Paper Source
Printer Utility for Mac
,
,
22
,
Functions
46
,
24
,
22
41
,
39
,
39
,
50
Page 52

R
52
Renaming the Printer
Resolution
Restarting the Printer
,
25
S
Selecting the Zone
Setting up Options
T
Toner Saving
,
34
U
User Code
,
35
,
,
,
,
48
7
46
47
Page 53

53
Copyright © 2003
Page 54

54
EN USA
GB GB
AE AE G080-6862
 Loading...