

Page 1
T ransAct
Scale Data Management Program
Installation &
Operation Guide
37882
Page 2

Contents
Overview and Menu Structure........................................................ 1
Menu Structure of TransAct and TransAct Plus ............. 2
Getting Started Using Windows...................................................... 3
QuickStart for Experienced Windows Users................... 3
Windows Navigation Tools ............................................. 3
Basic Concepts................................................................. 4
Using the Mouse............................................................... 4
Using the Menus............................................................... 5
Using Dialog Boxes (Windows and Tables) ..................... 6
Selecting Options ............................................................. 7
Working with Windows ..................................................... 8
Shrinking, Enlarging, Restoring, and Closing a Window 10
Quick Reference Table for Windows Navigation .......... 11
Installing TransAct for Windows .................................................. 13
Windows 3.1 Installation ............................................... 13
Windows 95 Installation ................................................ 17
Customizing TransAct with transact.ini File .................. 21
Starting and Exiting the Program................................................. 22
Starting the Program for the First Time ........................ 22
Creating a Customer Database .................................... 23
Quitting the Program ...................................................... 24
Database Recovery and Restoration.............................. 24
Creating Security Logins and Passwords .................................... 27
Establishing User Access Levels and Logins ............... 27
Login Name .................................................................... 28
Password........................................................................ 28
Security Level ................................................................. 29
Real Name...................................................................... 30
Password Verification ................................................... 30
Viewing Valid User List ................................................. 31
Function Buttons in Tables ........................................... 31
Operator Login Directions............................................. 32
Rev. 1.1, 4/97
i
Table of Contents
Page 3

Setting Up TransAct—Administration .......................................... 35
Setting Up Customer Accounts..................................... 35
Customer Number, Name, and Address ........................ 36
Ticket Type ..................................................................... 36
Default Categories.......................................................... 37
Hotlinked Buttons in Customer Account Tables ............. 38
Function Buttons in Customer Account Tables .............. 45
Permits.......................................................................... 45
Categories .................................................................... 48
Utilities .......................................................................... 52
Backup............................................................................ 52
Restore Backup .............................................................. 56
Archive Transactions ...................................................... 57
Restore Archive .............................................................. 61
Preferences .................................................................. 63
Company Data................................................................ 63
Scale Port ....................................................................... 64
Ticket Printer .................................................................. 67
Tickets ............................................................................ 70
Note Headings................................................................ 72
About TransAct ............................................................. 74
Weighing....................................................................................... 76
Select Transaction Window .......................................... 76
Date and Time ................................................................ 76
Status Bar....................................................................... 77
Weight Display Window.................................................. 77
Print Weight Button......................................................... 78
Options Button................................................................ 78
Update Tare Button ........................................................ 81
Weigh In / Weigh Out Transactions .............................. 84
Starting a Weigh In/Weigh Out Transaction ................... 84
Completing a Weigh In/Weigh Out Transaction ............. 87
Single-Weigh Transactions with Tares ......................... 90
Stored Tares Used as the Weight Out............................ 90
Stored Tares Used as the Weight In .............................. 93
Accounting.................................................................................... 95
Statements.................................................................... 95
Setting Rates .............................................................. 100
Measured Rates ........................................................... 101
Table of Contents
ii
Page 4

Minimum Charges ........................................................ 104
Discounts...................................................................... 106
Miscellaneous Rates .................................................... 109
Payments.................................................................... 110
Recording a Payment ................................................... 110
Single-Item Payment .................................................... 111
Multi-Line Item Payment............................................... 111
Applying a Credit .......................................................... 112
Reporting .................................................................................... 114
Quick Scan ................................................................. 114
Reset ........................................................................... 115
Scan ........................................................................... 115
Totals ........................................................................... 118
Reports ....................................................................... 119
Appendix..................................................................................... 123
Uninstall/Reinstall ....................................................... 123
Uninstalling TransAct to Delete the Database.............. 123
Uninstalling TransAct While Preserving the Database . 123
Reinstalling TransAct with Restored Database ........... 124
Reinstalling TransAct with an Empty Database............ 125
Editing the TransAct Initialization File......................... 125
[TransAct] Directory Editing.......................................... 127
[Options] Database Directory Editing ........................... 127
[Ticket Notes] Editing.................................................... 127
[Weigh Options] Editing ................................................ 127
[Tares] Editing .............................................................. 128
[Rates] Editing .............................................................. 128
[Category 1-4] Editing................................................... 129
[Indicator Types] Editing ............................................... 132
[Scale Settings] Editing................................................. 132
[Printer Settings] Editing ............................................... 132
Creating Custom-Format Print Tickets ....................... 133
Literal Text Fields ......................................................... 136
Database Fields............................................................ 136
Flag Field...................................................................... 138
Printer Command Field................................................. 141
Column Posting Field ................................................... 141
TransAct License Agreement ..................................... 142
TransAct Software Programming Support Service ..... 145
iii
Table of Contents
Page 5
KENWORTH
Overview and Menu Structure
Thank you for purchasing TransAct™ for Windows®. This program will
reduce labor costs, minimize human error and increase data-handling
capabilities in your truck scale operations. Both the standard Transact
program, and the financial accounting version, Transact Plus, contain
the following features:
• Automatic ticket processing
• Fault-tolerant data recovery to
protect from system crashes
• Multilevel password protection
• Stores and combines up to
three tares per transaction—
truck, trailer, and container
• Four configurable categories to
customize your application
• Configurable product rates
• Unlimited configurable ticket formats
• Interfaces to ticket, tape, journal, thermal, and laser printers
• Summary or detailed reports by customer account, tonnage, material
category, date, and transaction
• Compatible with barcode, magstripe and RF interfaces
Additional features in Transact Plus:
• Prints customer invoice statements with detailed transaction data
• Complete payment tracking and financial reporting capabilities
® Windows is a registered trademark of Microsoft Corp.
™ TransAct is a trademark of Rice Lake Weighing Systems.
1
Overview
Page 6
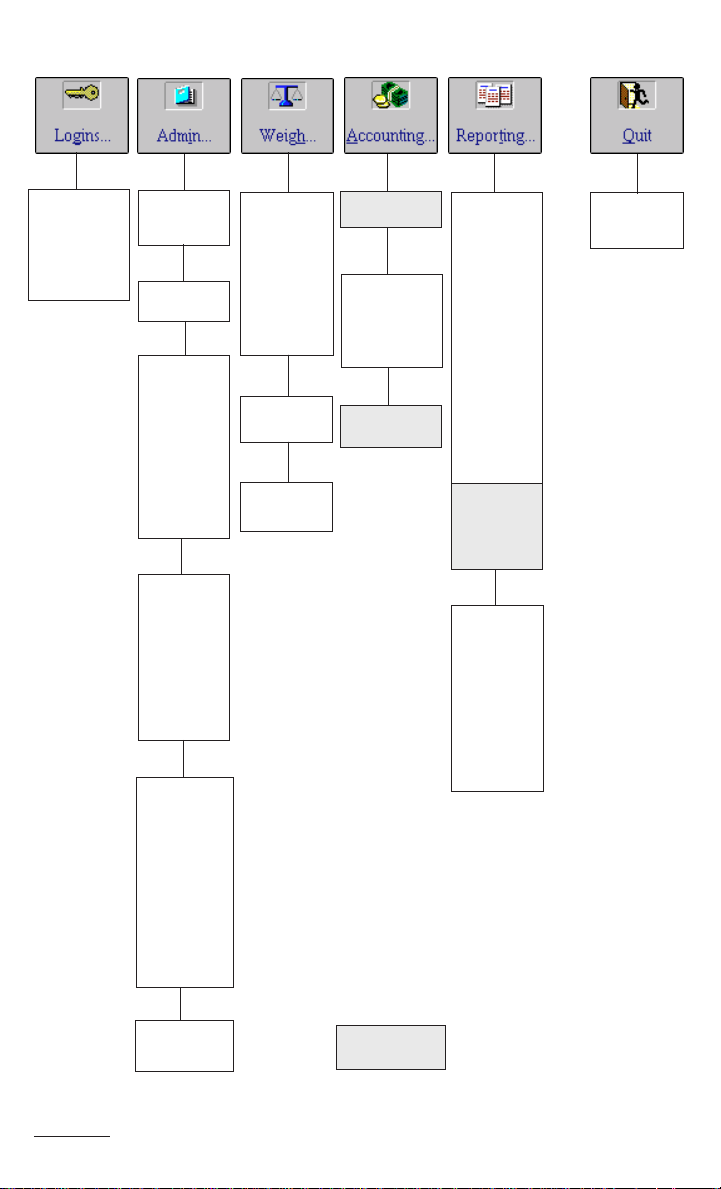
Menu Structure of Transact and Transact Plus
User Login
Guest
Operator
Supervisor
Administrator
Customer
Accounts
Permits
Categories
Two main
categories
installed.
Up to four
configurable
categories
available
Utilities
Backup
Restore
Archive
transaction
Restore
archives
Preferences
Company
Data
Scale Port
Ticket
Printer Port
Tickets
Notes
Headings
Begin
Transaction
by Account
by Ticket
by Permit
by License
by Truck ID
Weigh-In
Transaction
Weigh-Out
Transaction
Statements
Meas. Rates
Min. Charge
Discounts
Misc. Rates
Payments
Report
Options
Tonnage/
Charges
Accounts
Permits
Haulers
Materiial
Trucks
Containers
Pup Trailers
Payments/
Credits
Balances/
Reconcile
Quick Scan
by Ticket
by Date
by Type
by Account
by Hauler
by Area
by Vehicle
by Material
Quit
Transact
Overview
About
Transact
Transact Plus™ Features
2
Page 7
Getting Started Using Windows
QuickStart for Experienced Windows Users
If you have used Windows 3.1 or Windows 95 extensively, this chapter
will be a review for you and can be skipped. Jump ahead to Installing
Transact for Windows on page 13.
Windows Navigation Tools
If you are new to Microsoft Windows, this section is for you. You’ll
become familiar with the navigation techniques and terms used in the
manual. We’ll describe using the mouse, using menus, using dialog
boxes, and navigating within a window. The section ends with a table
of symbols and terms used in Windows and Transact for Windows.
3
Getting Started Using Windows
Page 8

Basic Concepts
Microsoft Windows is a graphical software environment that
makes using the computer easier. Windows uses icons, pulldown menus, and dialog boxes to help the user interact with the
computer. With Windows, multiple applications can run at once.
When running Windows, the computer screen becomes a desk-
top. The desktop contains programs and utilities in boxes called
windows. Windows can be arranged on the desktop to suit
individual needs. Windows can be sized and moved to anywhere
on the desktop. Windows can be minimized into an icon, or
maximized to fill the entire desktop (screen). When a window is
shrunk to an icon, Windows places the icon in the lower left
hand corner of the desktop, until it is restored to a window again.
When an application is shrunk into an icon on the desktop, the
program continues to run in memory, but does not take up space
on the desktop. In the meantime, other applications can be used.
Using the Mouse
Moving the mouse moves the pointer on the screen. The shape of
the pointer will change to reflect the kind of work you are doing.
The most common pointer shape is the arrow.
• Pointing to an object is usually only the first step in performing
a mouse routine. Point to an object by moving the tip of the
pointer on top of the object to be selected.
• Clicking or click means to press the mouse button and release it
immediately while pointing to an object. Clicking starts an action
like starting a transaction, or saving a new customer account.
Getting Started Using Windows
4
Page 9

• Double clicking is pressing the mouse button twice in rapid
succession. Double clicking is usually used as a shortcut. For
example to open Transact, double click the icon instead of
selecting it with a single click then pressing Enter or using the
Open command.
• Dragging is pressing the mouse button and holding it down
while moving the mouse. Drag the mouse to select an area or
move an object.
Using the Menus
The row of icons found at the top of the Transact screen is called the
menu bar. Each of the icons represents a pull-down menu which lists
all available Transact commands or implements a section of the
program.
Producing a pull-down menu and selecting commands can be done
using the mouse or keyboard.
With the Mouse
To select a menu command using a mouse:
1. Point to one of the icons in the menu bar and click the mouse
button.
The menu drops down and stays open until another icon is
selected, or an item from the pull-down menu is selected.
2. Point and click the command to use.
With the keyboard
To select a command using the keyboard:
1. Press and hold the Alt key to activate the menu bar.
One letter in each icon that appears on the menu bar is underlined. The underlined letter is the menu’s hot key. Each command has an underlined hot key. Press the underlined letter to
display the pull-down menu or execute the command.
2. To select an item from a pull-down menu use the UP and
DOWN arrow keys to select one of the commands on the pulldown menu and press Enter. Or press the underlined hot key to
execute the command.
5
Getting Started Using Windows
Page 10
Closing a Menu
To close a pull-down menu, move the pointer back up to the
menu bar and pull down a different menu.
Menu Standards
All Windows applications follow certain standards when listing menu
items. The following lists various standards found when using Transact
menu items and other Windows applications.
• Dimmed commands appear when the command is unavailable
at the current time.
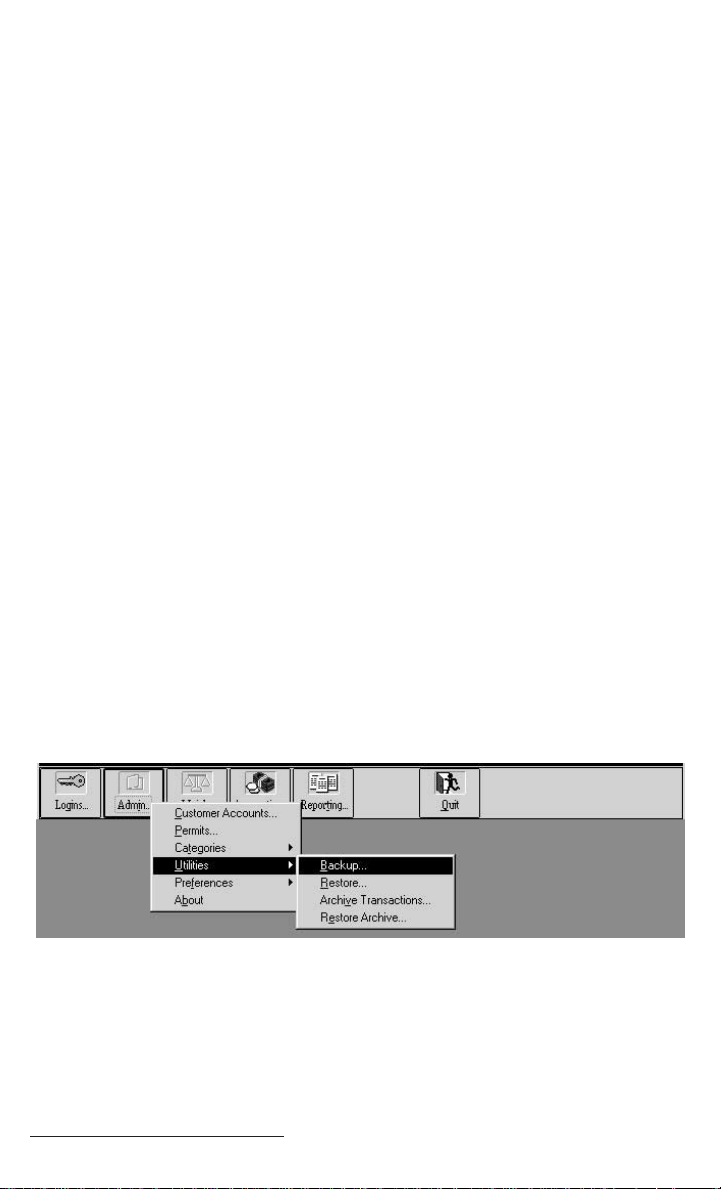
• Cascading menu indicator When a command that has a triangle
after it is selected, another menu appears with more commands.
These menus are called cascading menus. In Transact, the
Utilities command on the Admin menu is a cascading menu.
Using Dialog Boxes (Windows and Tables)
Transact was written to use dialog boxes for the entire program. For
simplicity, all dialog boxes are referred to as windows throughout this
manual. All of the information necessary to run Transact is entered into
these dialog box windows.
Moving within Dialog Boxes
Selecting a command from the menu bar or a pull-down menu brings
up a dialog box. For example, selecting Backup from the cascading
Utilities command on the Admin... pull-down menu...
Using Dialog Box Windows
brings up the Backup Database window (dialog box) as shown following:
Getting Started Using Windows
6
Page 11
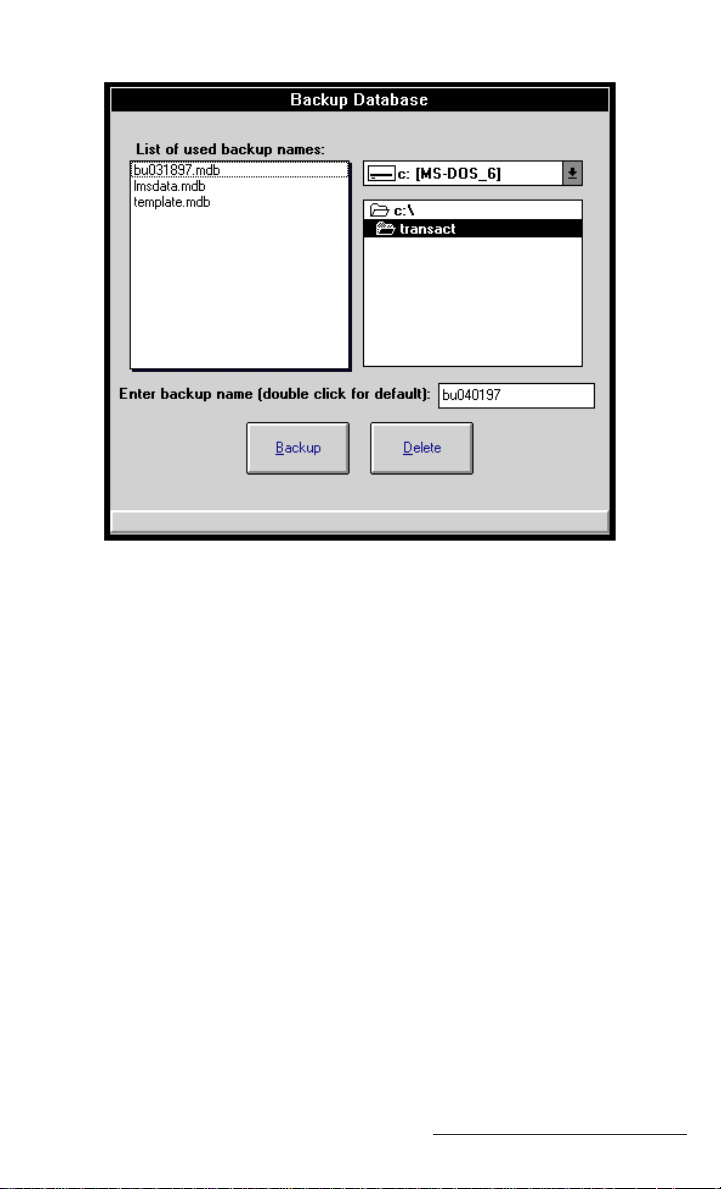
Backup Window (Dialog Box)
Dialog box windows are often separated into different groups. The
following methods explain how to move from option to option or to
another group. Current options are highlighted or have a dotted rectangle placed around it. There are several ways to move from one
option to another.
• With the mouse, click the option or group.
• Use the Tab key to move from option to option or to another
option group.
• Hold down Shift and press Tab to move the opposite direction.
• Use the arrow keys to move among options in a group.
• Press Alt plus the underlined hot key in the option name.
Selecting Options
Check Boxes
Check boxes turn options on and off. An X in the box indicates the
7
Getting Started Using Windows
Page 12

option is on; an empty box means the option is off.
Click a check box with the mouse to toggle between on and off, or
press Tab to move to the desired check box and press the Spacebar to
toggle between on and off.
Command Buttons
Command buttons carry out an action. Most windows contain at least
two command buttons. One to execute the command or save the
settings, and the other to cancel the command.
Dimmed command buttons are unavailable. When a command button
is selected it appears to be depressed, and has a darker border than the
other buttons.
Drop-Down List Boxes
Drop-down list boxes appear when a dialog box is too small to list all
options. Drop-down list boxes initially appear as a rectangular box
with a single option. At the far right end of the box is a down arrow.
When the arrow is clicked, a list of options appears. If there are more
options than can fit in the box, a scroll bar appears for moving through
the list.
Transact was written to use field descriptions as it’s primary sort field.
When using the keyboard, information within drop-down boxes can be
selected by typing the field description. For example, instead of
clicking the single down arrow to produce the drop-down list of
customer accounts, use the Tab key to move to the field and type the
customers name.
Working with Windows
This section explains how to move windows, dialog boxes, icons, and
how to move within windows. For simplicity the techniques used to
work with windows are described for use with the mouse.
Scroll Bars
When a window or dialog box cannot show all of the information it
contains, scroll bars appear. Scroll bars appear at the right side and the
bottom of a window. Use the vertical scroll bar to move the window up
or down, and the horizontal scroll bar to move from side to side.
Each scroll bar has a scroll arrow at each end and contains a small
square box called a scroll box. The position of the scroll box in the
scroll bar represents your position within the information.
Getting Started Using Windows
8
Page 13

Click the mouse on the gray area of the scroll bar to move the viewing
area by one full window.
Click the direction arrows to move in smaller steps.
Drag the scroll box to move to a certain location and view the contents
of the window more quickly.
Moving a Window
Windows can be moved to anywhere on the desktop. Icons and dialog
boxes with title bars can also be moved.
1. Point to a windows’s title bar, an icon, or the title bar of a
dialog box.
2. Click and hold down the left mouse button and drag the
pointer to the new location.
3. As the pointer moves, an outline of the window or dialog
box moves with it. When moving icons, the pointer
changes to a black and white outline of the icon.
4. When the window, icon, or dialog box is in the new location, release the mouse button.
Press Escape (Esc) anytime before releasing the mouse button
to cancel the move.
Resizing a Window
1. Select the window to resize.
2. Move the pointer to the side or corner of the window until
the pointer changes to a two-headed arrow.
3. Hold down the mouse button and drag until the window is
the desired size. An outline of the window moves with the
pointer.
9
Getting Started Using Windows
Page 14
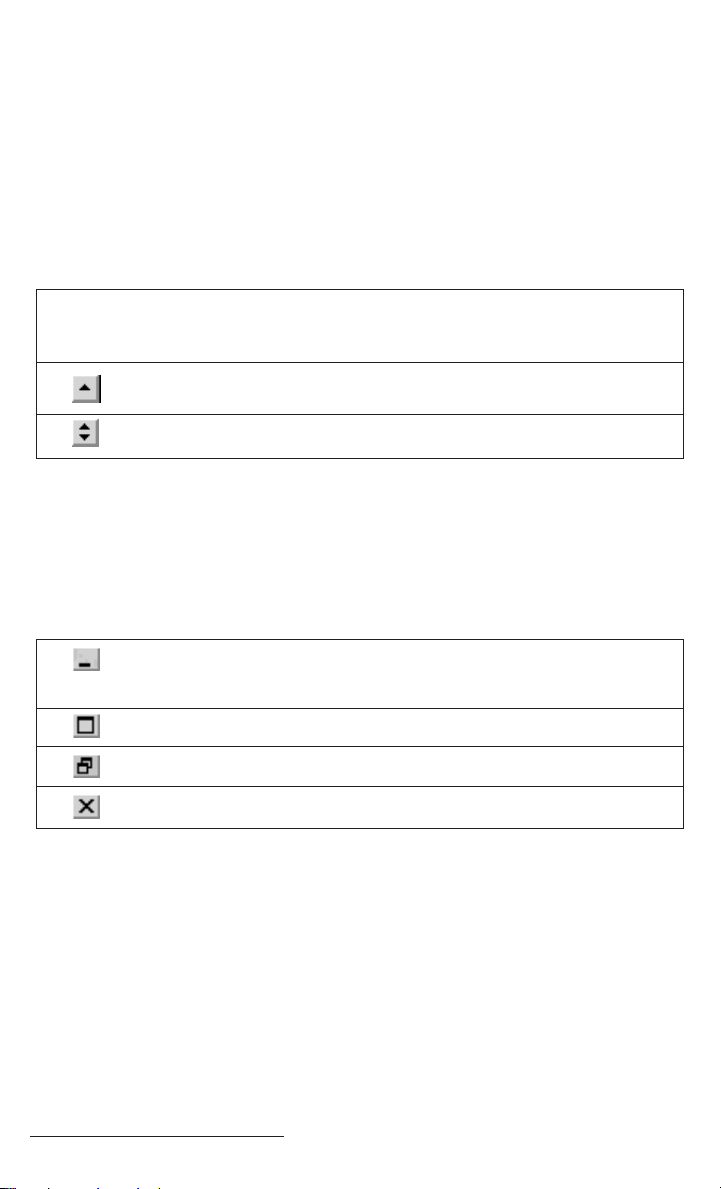
Shrinking, Enlarging, Restoring, and Closing a Window
The following table specifies the different symbols found in the upper
right hand corner of a window. These symbols are used to shrink,
enlarge, restore, and close windows. Symbols for Windows 3.1 and
Windows 95 are documented.
Windows 3.1
Windows 3.1 Window Symbols
Shrinks the Window into an icon into the lower left hand corner
of the screen.
Increases the application window to full screen.
Restores the application window to original window size.
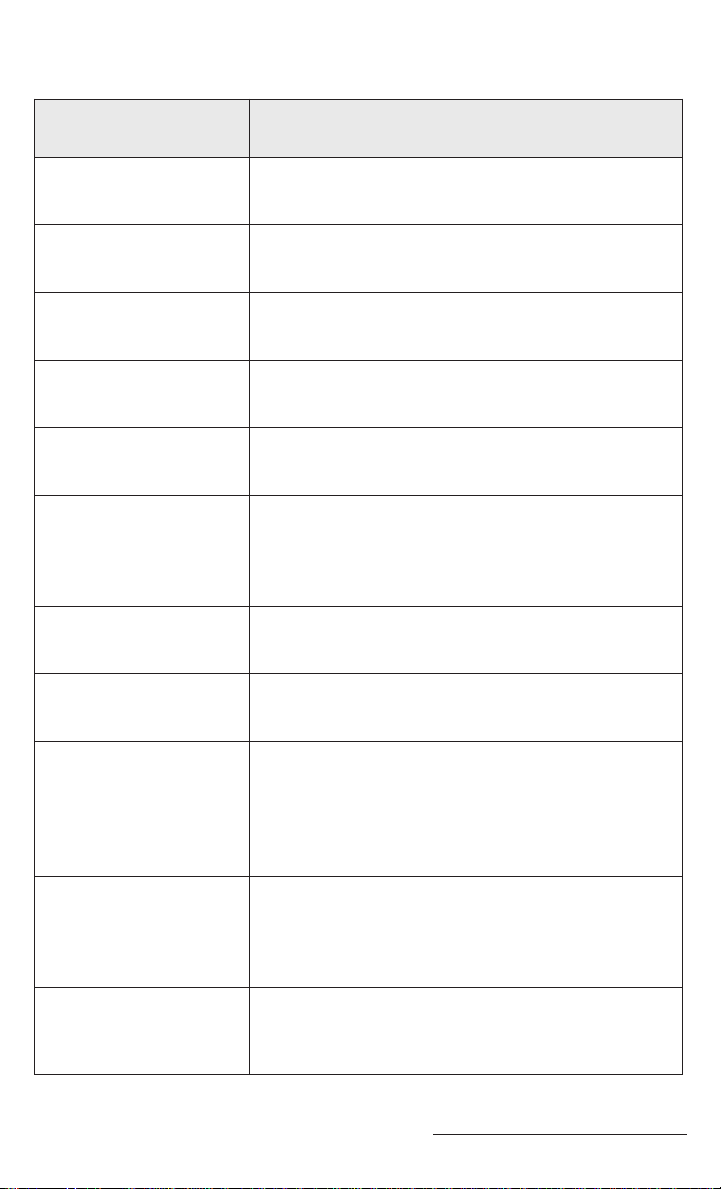
Windows 95
Windows 95 Window Symbols
Shrinks the window onto the Windows 95 menu bar at the
bottom of the screen.
Increases the application window full screen.
Restores the application window to original window size.
Exits or Quits the application.
Getting Started Using Windows
10
Page 15
Quick Reference Table for Windows Navigation
mreT noitinifeD
tceleS.egnahcotmetinaetavitcarotceleS
droceR.elbatanihtiwnoitamrofnifoteS
dleiF.droceranihtiwsmetilaudividnI
nocIehtgnitneserpererutcipahtiwnottubA
.noitcnufs’nottub
uneMnwoD–lluPrabunemehtrednudnuofsdnammocfotsilA
.noci
tnioPaotworraesuomehtevomotdesunoitcA
roemandnammoc,emanunemderised
nihtiwmaeb-Iehtevomotrotcejbocihparg
.decalpebdluohsrosrucehterehwottxet
retnioP.esuomehtybdellortnoclobmysneercs-nonA
maeb-IotresuehtswollalobmysretniopesuomsihT
.txetnihtiwrosrucehtnoitisop
nottuBesuoMemos(snottubowtsahyllausuesuomehT
ehT.)eerhtevahsnoisrevdetatumyllaciteneg
.snoitcatsometelpmoclliwnottubtfeL
tcasnarTnonottubesuomthgirehtgnikcilC
.unemnwod-llupnimdAehtyalpsidlliwsmrof
)elgniS(kcilC.nottubesuomehtfokcilcelgnisaotsrefeR
,txetnihtiwrosrucehtnoitisoperotuoyswollA
atcelesro,metiunemrounematceles
.tcejbocihparg
garDotnottubesuomtfelehtnwoddlohdnakcilC
otro,xobgolaidro,noci,wodniwaevom
.sretcarahctxetelpitlumtceles
Continued
11
Getting Started Using Windows
Page 16
)deunitnoc(mreT )deunitnoc(noitinifeD
kcilCelbuoDdiparnieciwtnottubesuomehtsserP
amrofrepotenodyllausU.noisseccus
,tcasnarTnepoot,elpmaxeroF.tuctrohs
.nocimargorpehtkcilc-elbuod
kcilC+tfihSelpitlumtcelesotuoyswollanoitcasihT
ehttcelesotkcilC.tsilanismetievitucesnoc
yektfihSehtnwoddlohdnasserP.metitsrif
esuomtfelehtgnikcilcelihwdraobyekehtno
.metitsalehtnonottub
kcilC+lrtCelpitlumtcelesotuoyswollanoitcasihT
dlohdnasserP.tsilanismetievitucesnocnon
draobyekehtnoyek)lortnoc(lrtCehtnwod
.nottubesuomtfelehtgnikcilcelihw
rettel+tlAyektlAehtnwodgnidlohdnagnisserpelihW
otretteldenilrednuehtsserpdraobyekehtno
.dnammocnatcelesrounemanepo
yekworrAdraobyekdecnahnE401ro101dradnatsA
.gnitagivanrofsyeklanoitcerid4sedivorp
retnE.dnammocdetcelesehtetucexE
csEtuohtiwmetitnerrucaesolcotecnocsEsserP
uneMehtetavitcaedoteciwt,eciohcagnikam
.raB
baT.nottubrodleiftxenehttceleS
baT+tfihS.nottubrodleifsuoiverpehttceleS
raBecapSaetucexeroxobkcehcaffo/nonrutotdesU
.dnammocdetceles
Getting Started Using Windows
12
Page 17
Installing TransAct for Windows
TransAct for Windows requires the following hardware and software:
• An IBM-compatible computer, 486-75 MHz or higher CPU
• At least 8 MB of RAM (16 MB RAM is highly recommended)
• A fixed hard disk with a minimum of 4 MB of available disk
space to install the program files
• VGA, SVGA, or higher resolution monitor
• DOS version 5.0 or higher
• Windows Version 3.1 or later running in enhanced mode
When installed, the Setup program installs all of the files to run
TransAct, initialization files, and all icons associated with the program.
These instructions explain how to install TransAct on an individual
workstation using Windows 3.1 or Windows 95. Before the Setup
program can be run, Windows 3.1 or higher must currently be running
on the system. It is important to be familiar with the basic navigation
techniques of using Windows. If you are not familiar with moving
around in Windows, review Getting Started Using Windows beginning
on page 3 of this manual.
NOTE! Before beginning the installation, log off any networks your
computer may be a connected to, and quit any open programs.
Windows 3.1 Installation
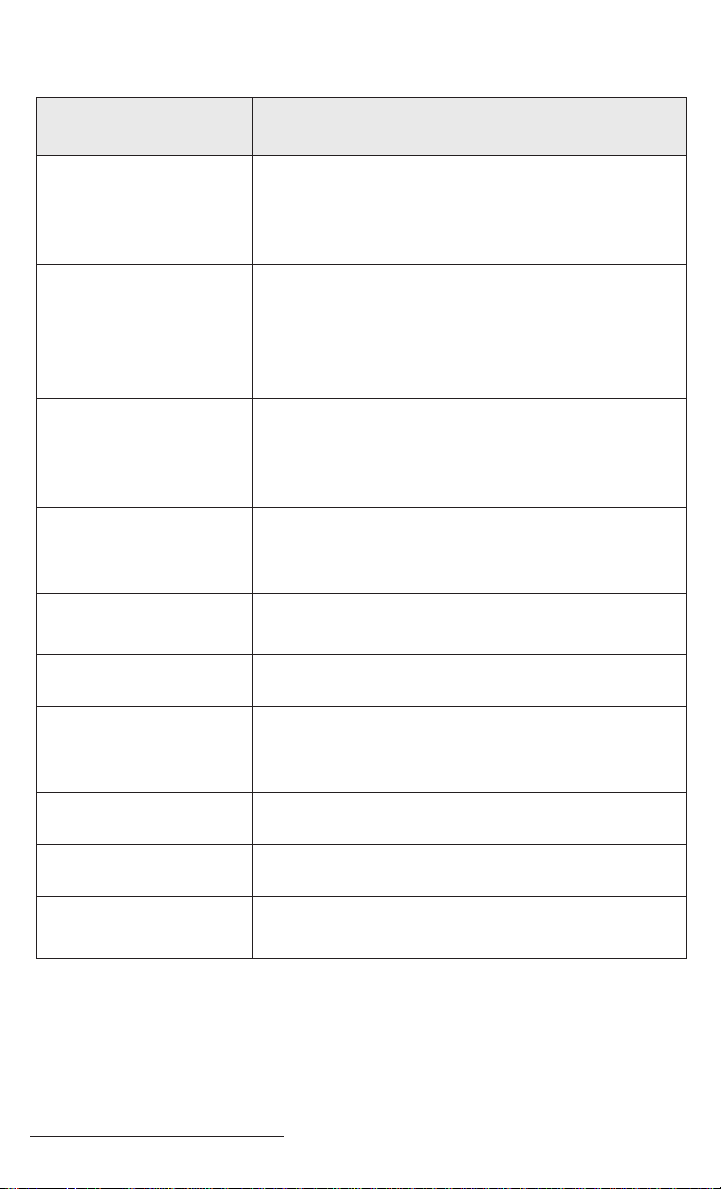
Insert the TransAct diskette labeled Disk: 1 of 2 in drive A or B.
Choose File | Run from the Program Manager menu.
Starting Installation from Program Manager
13
Installation
Page 18
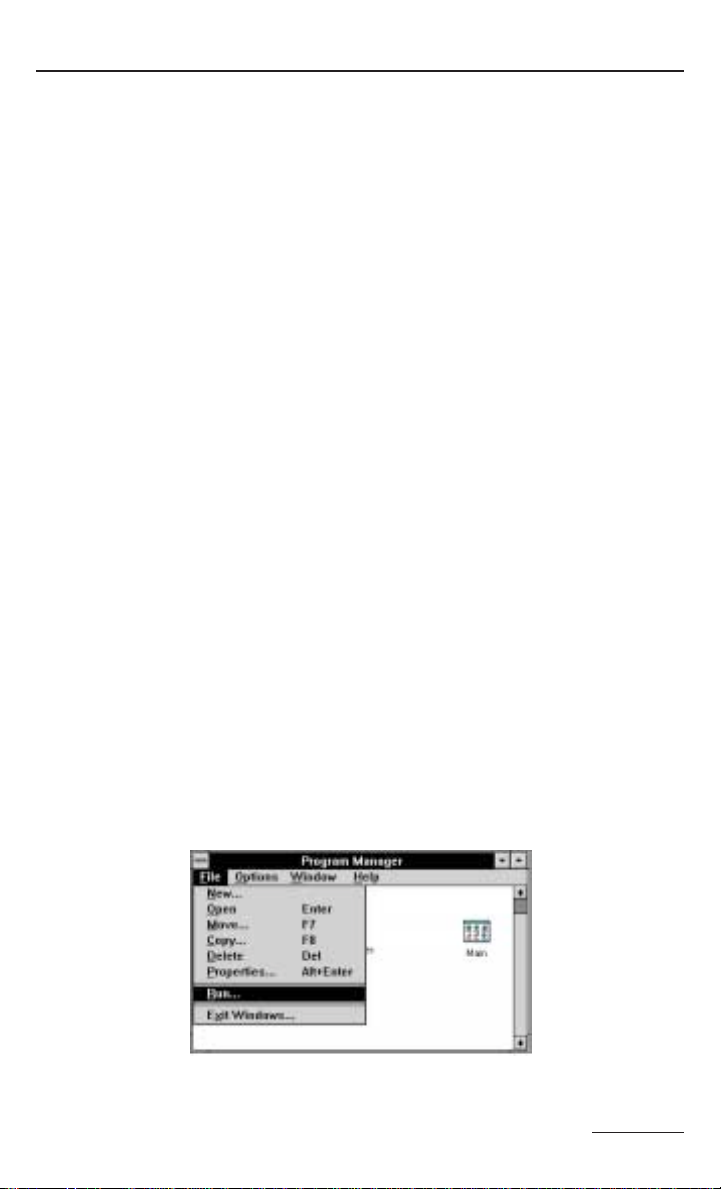
In the Command Line field, type a:setup or b:setup depending on the
drive you are using.
Install Command
Click OK to start the installation program.
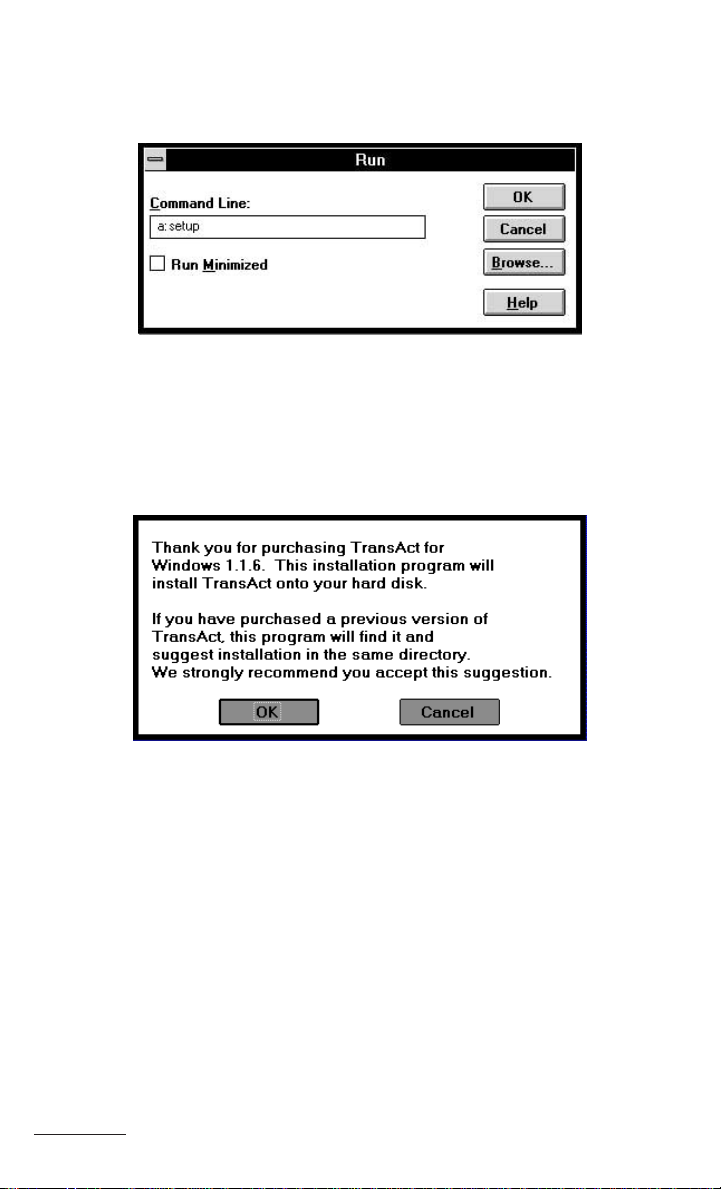
A brief installation explanation is displayed.
Installation Welcome
Click OK to continue with the installation.
TransAct automatically installs two category tables with common
industry standards. Solid Waste default categories are applicable for a
landfill or recycling operation. General default categories are more
suited to gravel, concrete, and similar operations. These tables can be
edited, and more categories can be added later to match your application more closely.
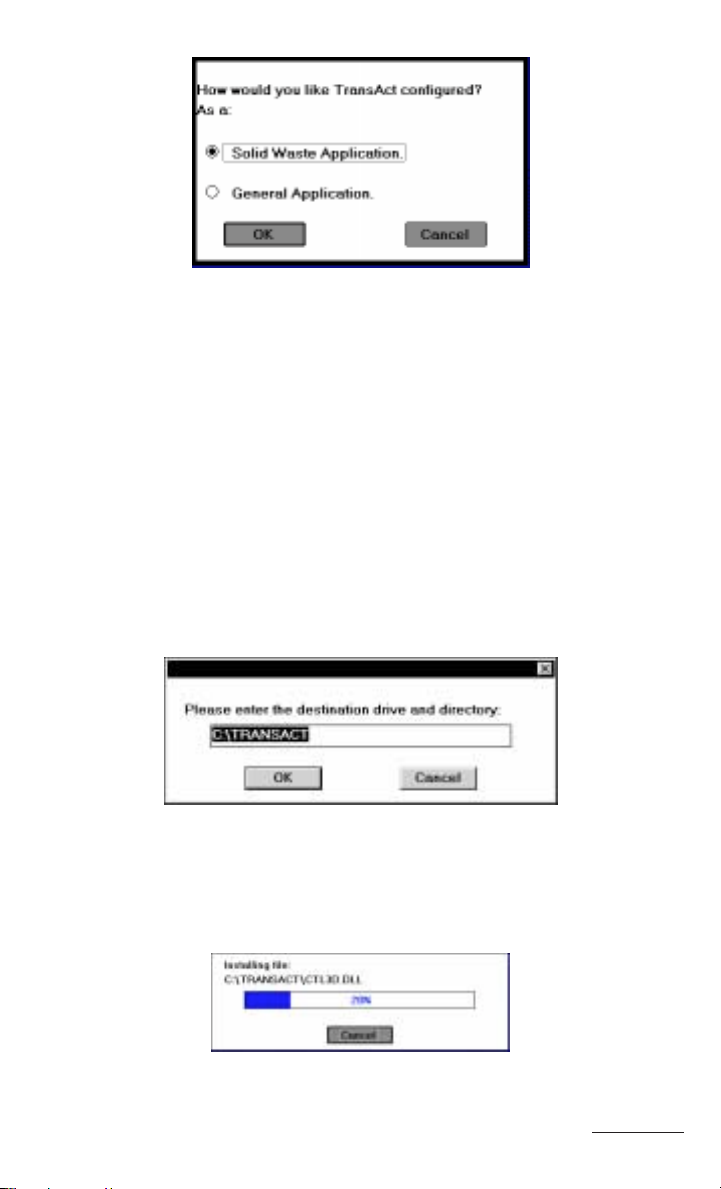
Select the type of application (Solid Waste or General) which more
closely relates to your type of business.
Installation
14
Page 19
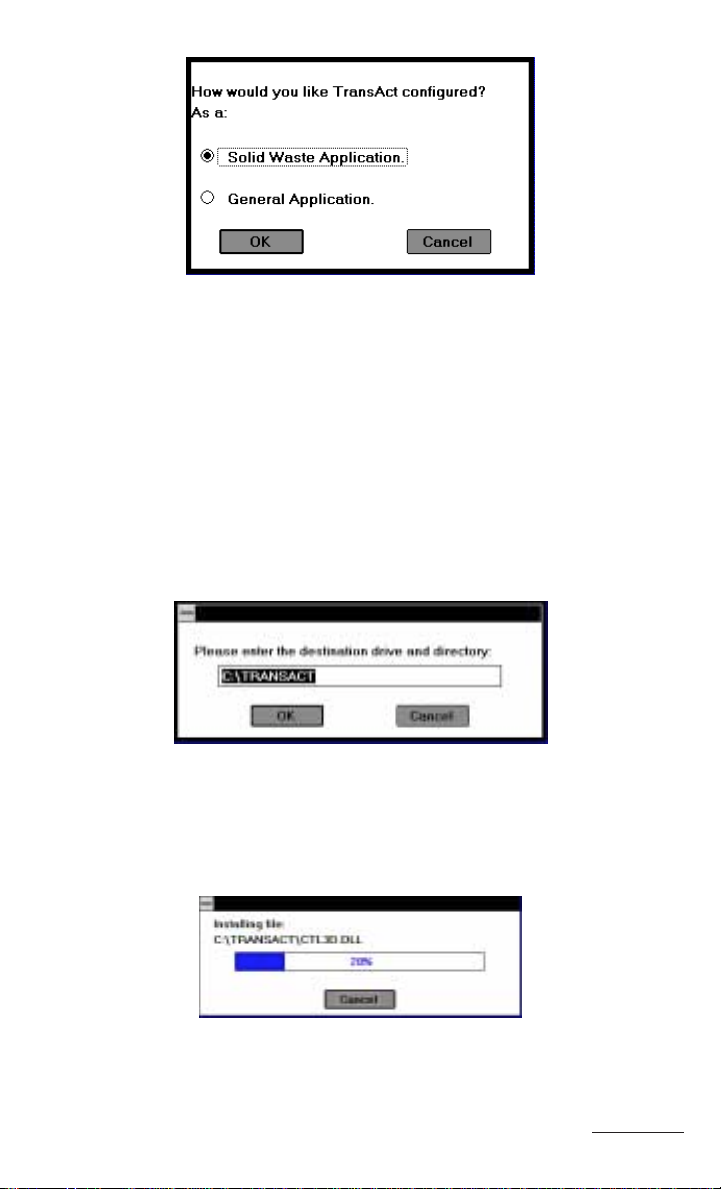
Selecting Industry Type
Solid Waste Application has categories for Hauler and Refuse.
General Application has categories for Hauler and Material.
The setup program looks for any previously installed versions of
TransAct and recommends installation to that same directory. For a
first time installation, the setup program recommends installation to the
directory C:\TRANSACT. Unless there is a particular reason, do not
change the directory.
Default Installation Directory
Click OK to continue and accept the default directory for installation.
The TransAct setup program starts installing the program files.
Program Installation
15
Installation
Page 20
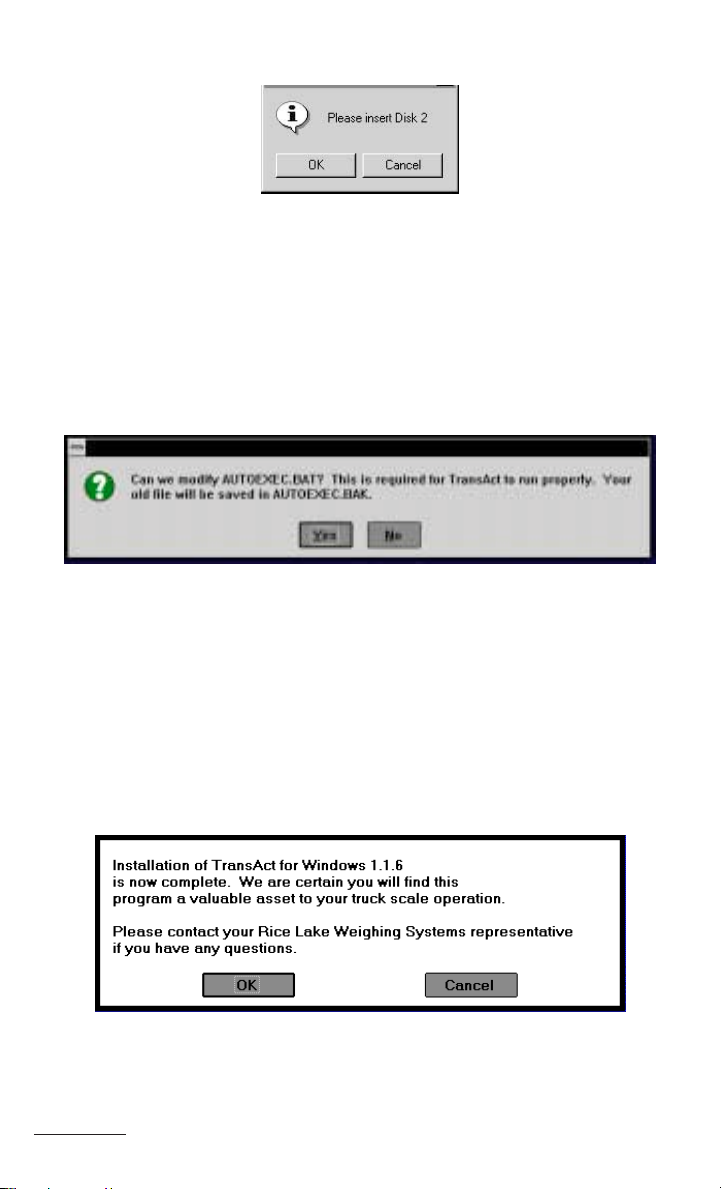
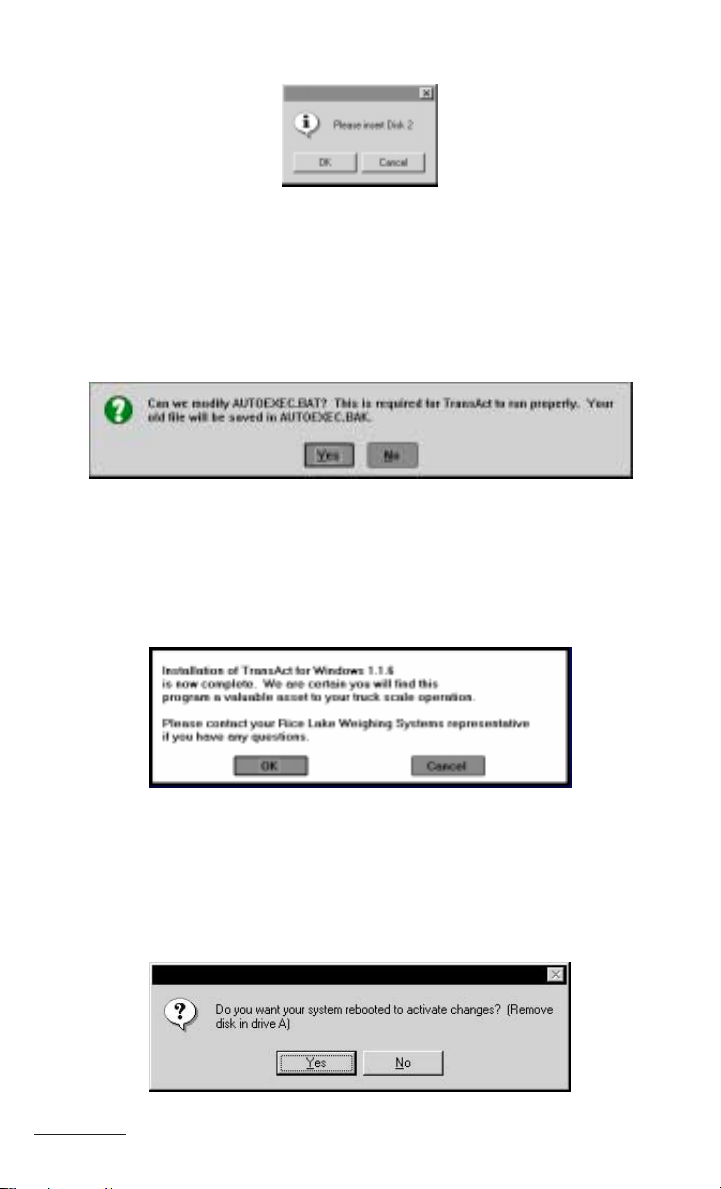
When prompted, insert the remaining TransAct disk.
Disk 2 Prompt
Click OK to continue with the installation.
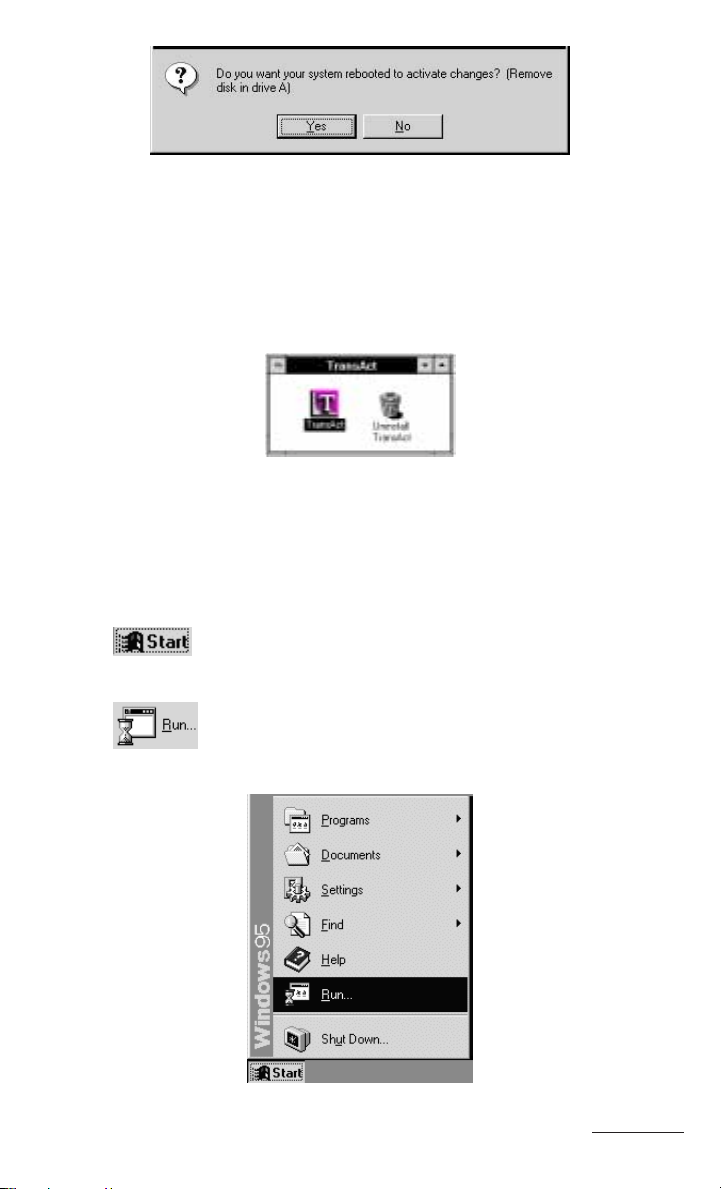
The AUTOEXEC.BAT configuration file must include the command
SHARE /F:5100 /L:500 for TransAct to run. If this command needs to
be added, the following message appears:
Update AUTOEXEC.BAT File
The Windows 3.1 and Windows 95 Share program installs file-sharing
and locking capabilities. Windows for Workgroups uses the VSHARE
command instead of the SHARE command. If this command needs to
be added, an additional message will appear.
Click on Yes to make the necessary changes and continue.
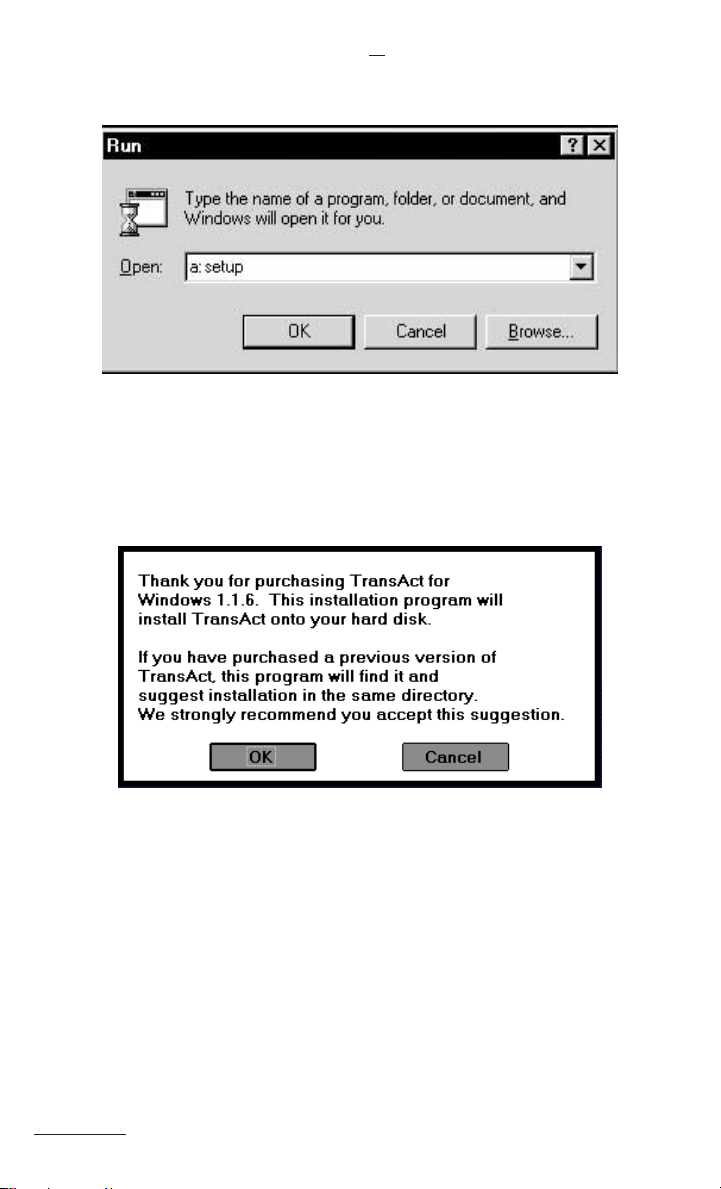
The following message will appear when installation is complete:
Installation Complete
Click OK to continue.
A final dialog box will ask if you want to reboot (restart) the system.
Installation
16
Page 21
Reboot Message
Remove the disk in drive A. Click Yes to reboot your computer system
and allow the changes to take effect.
Installation is now complete. Once the computer re-boots, double click
on the TransAct icon in the Program Manager to start the program.
TransAct Icon
Windows 95 Installation
Insert the TransAct diskette labeled Disk 1 of 2 in drive A or B.
Select
desktop.
Select
Start in the lower left-hand corner of the Windows 95
Run from the Start menu as shown below.
17
Installation
Page 22
The Run dialog box appears. In the Open field, type a:setup or
b:setup depending on the drive you are using.
Install Command
Click OK to start the installation program.
A brief installation welcome and explanation is displayed.
Installation Welcome
Click OK to continue with the installation.
TransAct automatically installs two main category tables with common
industry standards. You can add two more category tables later. These
tables can be later renamed and edited to more closely fit your industry
standards.
Select the type of application which most closely relates to your type
of business.
Installation
18
Page 23
Selecting Industry Type
Solid Waste Application provides category tables for Hauler
and Refuse.
General Application provides category tables Hauler and
Material.
The setup program looks for any previously installed versions of
TransAct and recommend installation to that same directory.
For a first time installation the setup program recommends installation
to the default directory C:\TRANSACT. Unless there is a particular
reason, do not change the default directory or path name.
Default Installation Directory
Click OK to continue and accept the default directory for installation.
The TransAct setup program starts installing the program files.
Program Installation
19
Installation
Page 24
When prompted, insert the remaining TransAct for Windows disk.
Disk 2 Prompt
Click OK to continue with the installation.
The AUTOEXEC.BAT configuration file must include the command
SHARE /F:5100 /L:500 for TransAct to run. If this command needs to
be added, the following message appears.
Update AATOEXEC.BAT File
Click Yes to make the necessary changes and continue.
The following message appears when installation is complete.
Installation Complete
Click OK to continue.
A final dialog box will ask if you want to reboot the system.
Installation
20
Page 25
Click Yes to reboot your computer system and allow the changes to
take effect. Don’t forget to remove the disk first in Drive A or B as the
dialog box recommends.
After restarting, the TransAct program is ready to run by double
clicking on the TransAct program icon in the Program Manager.
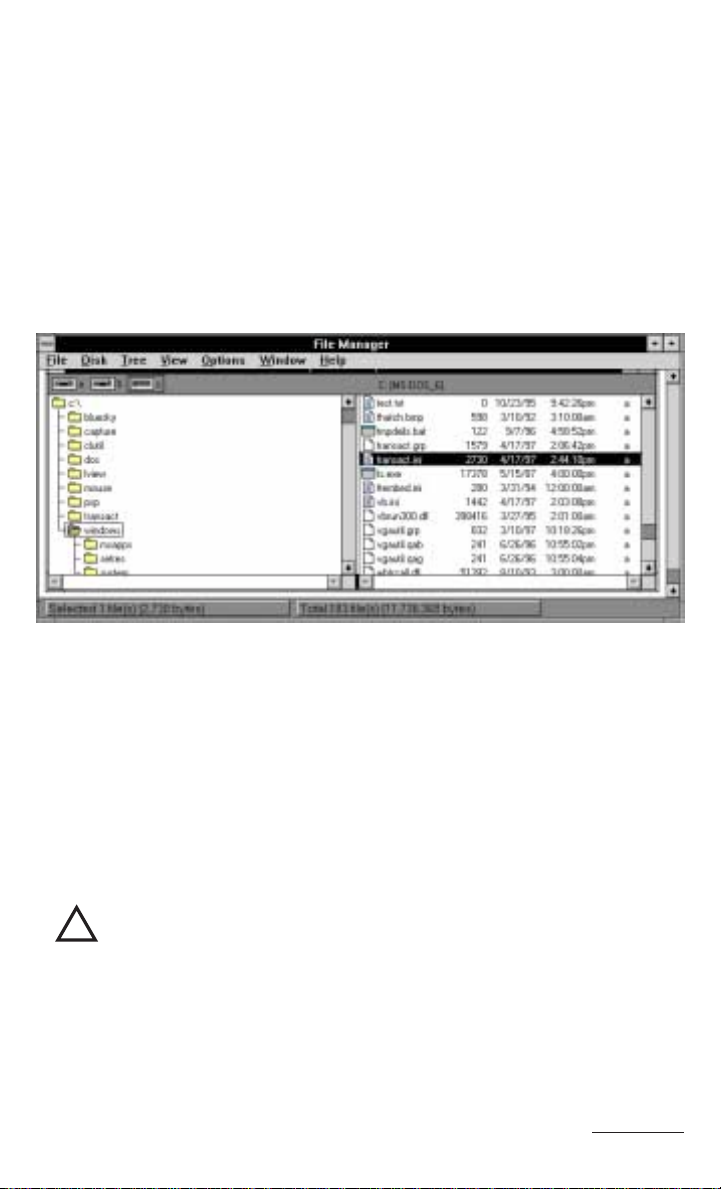
Customizing TransAct with transact.ini File
During installation, the program creates the transact.ini file, located in
your hard drive C:\Windows directory as shown below.
Hard Drive Location of transact.ini file
This file contains the program defaults for category names, category
setup, ticket formats, and other information used to run TransAct.
After you become familiar with TransAct, you may wish to change
some of these defaults to customize the program better for your
business and your customers.
Directions for modifying the transact.ini file to change these defaults
are found in Editing the TransAct Initialization File in the Appendix.
Caution
!
DO NOT DELETE OR MOVE the transact.ini file. If deleted or
moved to another directory, TransAct will not be able to run.
21
Installation
Page 26
Starting and Exiting the Program
Starting the Program for the First Time
To start TransAct for Windows, double click the TransAct program
icon from the TransAct program group in the Program Manager.
TransAct Program Icon
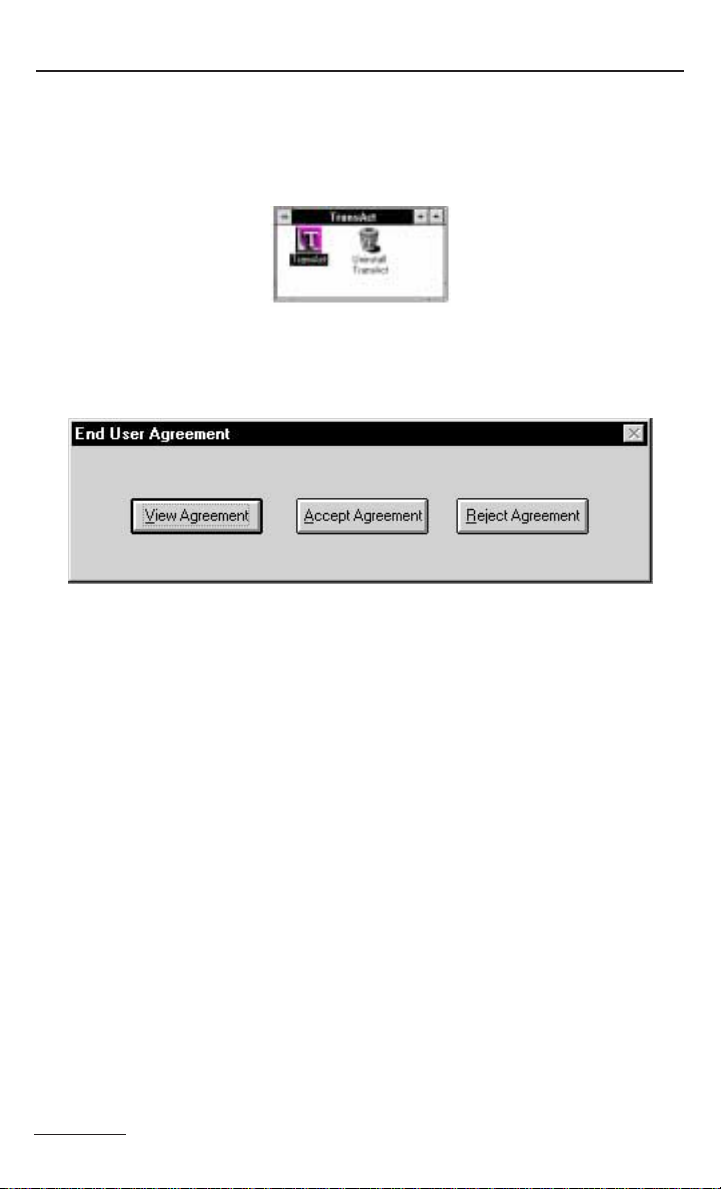
When initially starting TransAct, the following message appears.
End User Agreement Dialog Box
When running TransAct for the first time, you must view and accept
the terms of the licensing information before TransAct will open. Use
the mouse to point and click on the View Agreement button.
The license agreement is a Windows Write file. TransAct automatically opens the Write application and the license file—but it does not
automatically exit the Write program.
So an informational message appears to remind you to exit Write from
the pull-down File menu once you have read the license agreement.
Click the OK button to continue and read the license agreement. Once
you have read the license agreement select File | Exit to quit Write and
continue with TransAct.
After reading the license agreement you must choose to accept the
agreement before continuing. Click on Accept Agreement to continue.
If you select the Reject Agreement button, TransAct will close and
you will return to the program manager.
Installation
22
Page 27
Creating a Customer Database
The final step before using TransAct is to create the customer database.
After accepting the license agreement, you will be asked if you wish to
build a database. This database will provide the forms on which you
will enter your customer accounts and other data.
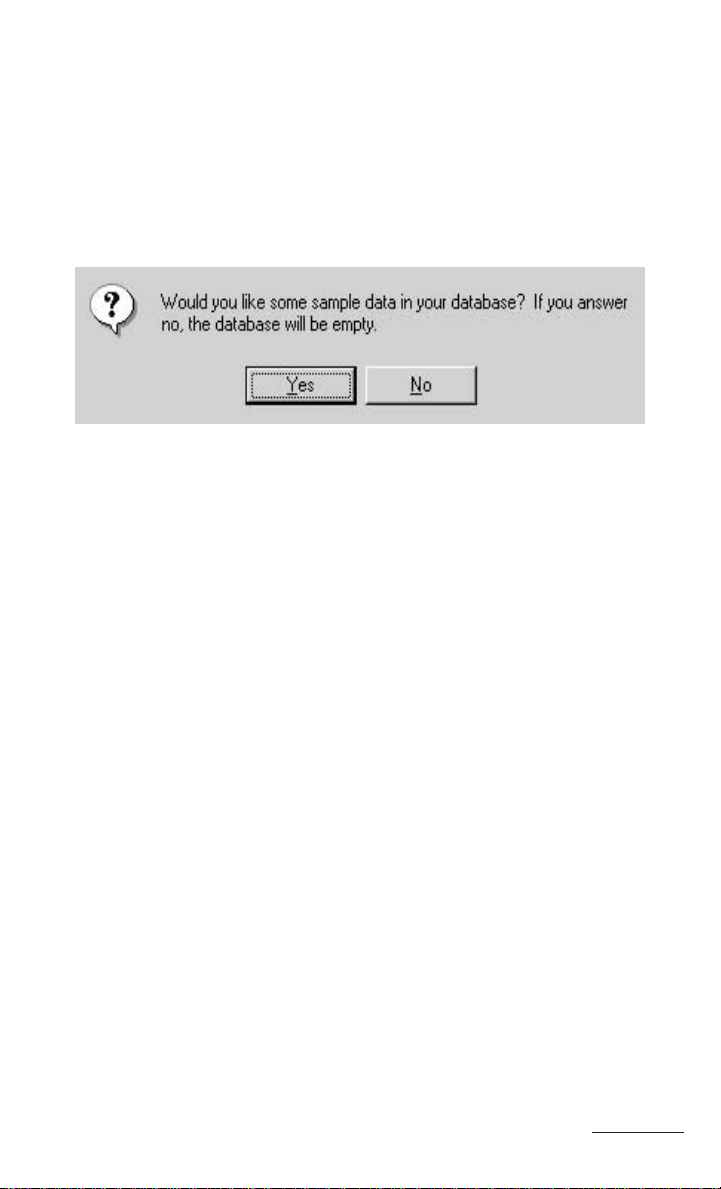
Click on the Start Build button. Another message pops up and asks if
you would like your database to contain sample information.
Sample Database Dialog Box
A sample database with fictitious customer accounts, trucks, and
transactions could be helpful until you become familiar with entering
your own information. If you have never used a data management
program like TransAct, installing this sample database is recommended
to allow you to learn how to use the program. All of the information in
the sample database can be overwritten or deleted.
After you’ve spent some time learning the program using the sample
database, you’ll be ready to start entering your own customer data.
Rather than overwriting each fictitious customer account in the sample
database with your actual customer accounts, we recommend that you
quit out of the TransAct program, then delete (uninstall) the entire
program. The Uninstall program will search out and delete all
TransAct files in your system. With a “clean slate,” you may then
reinstall TransAct onto your system. You will use the same install
procedure as described previously in this chapter, but with one major
change—this time you will not choose to have sample data put into
your database.
The procedure for uninstalling and reinstalling TransAct is found in the
Appendix. When you’ve learned the TransAct program and you’re
ready for this step, turn to that section and follow the instructions.
Click on the Yes button to install the sample database now.
23
Installation
Page 28

Click on the No button to install an empty database.
If you click Yes to install the sample database, a TransAct Database
Utility screen appears with a graphic progress box so you can monitor
the database installation.
When the database installation is 100% completed, a message with a
single OK button is displayed alerting you to the successful installation.
Click OK to continue. The TransAct program login screen appears and
you are ready to begin.
To continue with login directions and establishing security access for
all planned users, turn to the Security Logins and Passwords section on
page 27 now.
To learn how to quit the TransAct program, or how to recover a
database from an incorrect shutdown, power outage, or system error,
continue reading in this section.
Quitting the Program
Click on the Quit button from the main menu toolbar.
Database Recovery and Restoration
If TransAct is not exited correctly due to a power outage or system
error, the database may become damaged. TransAct has a built in
tolerant structure to help prevent losing information. By storing minibackups of the database, TransAct can recover damaged databases.
The next time TransAct is started after a power outage or system error,
the following message will appear.
Installation
24
Page 29

Database Recovery Needed
Click on Continue to bring up a window with repair choices.
Database Recovery in Progress
Click on the Auto Repair button to retrieve information from the last
mini-save. While the repair is being done, a progress screen is displayed so you can monitor the repair process.
Caution
!
DO NOT use your computer while the database is being repaired.
25
Installation
Page 30
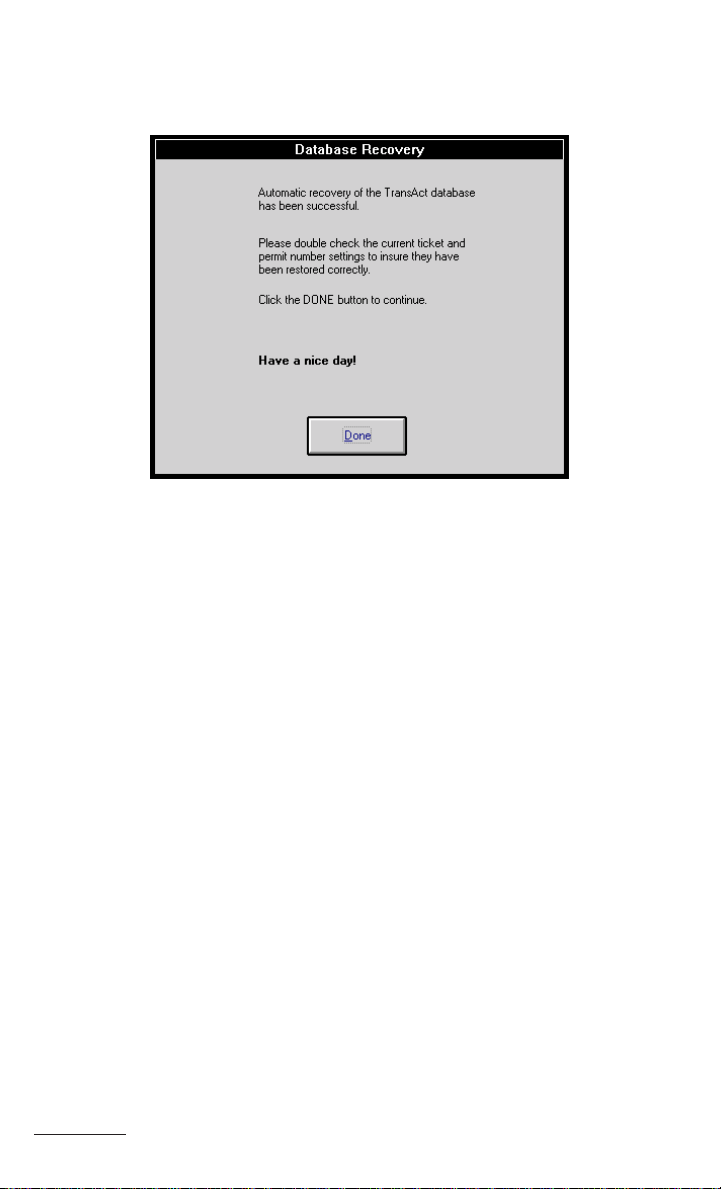
Once the database has been repaired the following message will
appear.
Database Recovery Complete
Click Done. Review the repaired database. If it is not correct, you may
wish to restore your last backup. For information, see the Restore
Backup section under Preferences in the chapter, Setting up TransAct—
Administration.
If you have any questions about the database recovery utility, call your
distributor or Rice Lake Weighing Systems software support line at
(715) 234-2003.
Installation
26
Page 31

Creating Security Logins and Passwords
The first time TransAct is opened, the person acting as the administrator can set up logins, passwords, and access levels for everyone who
uses the program. Once the administrator has established those security
items, only a user with administrator-level security access can view or
change those logins, passwords, and access levels.
Users with lower levels of security have restricted access to items in
the TransAct program.
TransAct recognizes four access levels of users and restrictions:
Level 3 Administrator Read, set up, and update everything
Level 2 Supervisor Read, update all except security logins
Level 1 Operator Read all tables, add scale transactions
Level 0 Guest Read selected tables only
Establishing User Access Levels and Logins
When opening TransAct for the first time (after the License Agreement
has been accepted) a prompt appears asking for a login name and
password. The program assumes that this first user is the program
administrator, so the access level for this screen is by default at the
Administrator level.
Login and Password Request
Type in “admin” for the login name and press your computer’s Enter
key. No password is needed for this initial set up, so simply press
Enter twice. The next screen appearing is the User Table where you
can establish user logins, passwords, and access levels for others.
Creating Logins and Passwords
27
Page 32
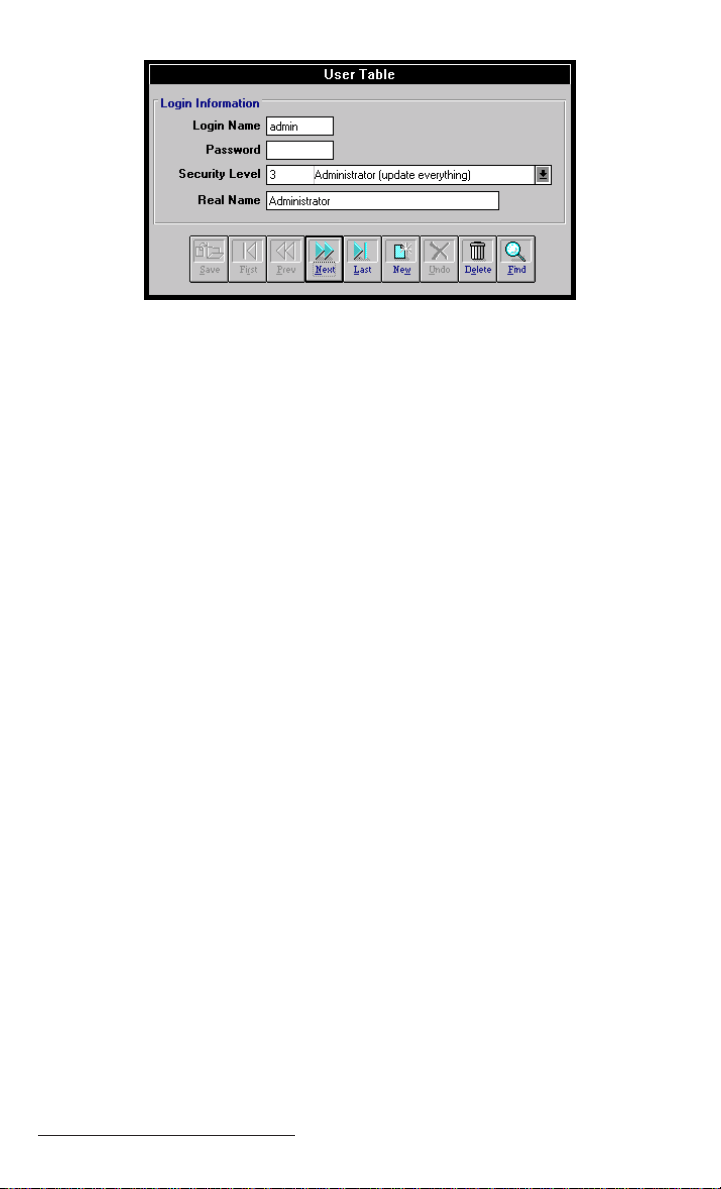
Login User Table
If the User Table does not appear on your screen automatically, you
can manually call up the User Table to enter or modify logins:
Click on Login... from the menu bar to call up the User Table.
User table entries consist of a login name, password, security level, and
real name. Use the Tab key to move to the next entry dialog line, or
press the Enter key to both enter an item in the user table and to move
to the next entry dialog line.
Click the New... button in the User Table to create a new user screen.
Login Name
Enter a login name for the first user. The login name can be up to eight
characters long. Information in this field is not case sensitive. For
example, if the Login Name is Admin with a capital A, the user does
not have to type Admin when logging into the system, he can type
admin with a lowercase “a” and still get into the system using the
Admin account. Press Enter.
Password
Passwords are optional, but recommended to ensure a secure environment. Without password protection, any user could sign in as the
administrator and make unauthorized changes to the database. Passwords can be up to eight characters long. The password is not case
sensitive.
When entering a password, only an asterisk (*) appears to symbolize a
character. Press Enter.
28Creating Logins and Passwords
Page 33

Security Level
Use the single down arrow next to the Security Level box to display a
drop down box listing valid security levels. Use the mouse to point and
click on the desired security level for the user. TransAct provides four
different levels of security.
Security Levels
Level 3 is the Administrator level. Only the administrator can add or
delete users and reset passwords. TransAct is packaged with an
“admin” login set to the administrator level. The “admin” login
is not password protected as shipped. Because the administrator
level has access to everything in the program, it should be
password protected with your own unique password.
Level 2 is the Supervisor level. The supervisor level allows access to
everything in the TransAct program except logins. This level is
not allowed to add or delete users or reset passwords.
Level 1 is the Operator level. The operator level is given access to
read, but not update, all tables. This level provides access to the
Weigh form and allows an operator to view Quick Scan results,
run reports, and perform all functions under Utilities.
Level 0 is the Guest level. A guest is only allowed to view tables
such as Customer Accounts, Categories, and Permits, in the
program. A guest is not permitted to edit tables, view weigh
transactions, or create transactions.
Creating Logins and Passwords
29
Page 34

Real Name
Type in the user’s first and last name. This field is used to help the
administrator identify the logins in the future.
Press Save when all entry lines have been completed.
Password Verification
When the complete user table entry is saved, an additional window
pops up and ask for the password to be verified.
Password Verification
Type in the password identically as it was entered in the User Table
window. Press Enter on the keyboard to continue.
If the password was incorrect, the following window will appear.
Click OK and enter the correct password.
If the password was entered correctly, the following window appears:
Click OK to continue.
30Creating Logins and Passwords
Page 35

Viewing Valid User List
Click on the Find button to view a list of all users set up.
List of Valid Logins and Users
Click on any item to see (and/or change) the user table for that entry.
Click on the Done button when the list is finished and correct.
Click on the Print button to print the user list.
Function Buttons in Tables
The bottom of the User Table window contains a row of function
buttons to quickly move around in the table.
Function Buttons
This is a feature common to many of the tables in TransAct. The
Table of Function Buttons following describes each of these buttons.
Creating Logins and Passwords
31
Page 36

Table of Function Buttons
Save changes to the item. Create a new item.
Display the first item. Undo unsaved changes to item.
Display the previous item. Delete the item from the list.
Display the next item. Show a list of all items.
Display the last item.
Many of the TransAct tables have a similar row of function buttons at
the bottom of their tables. The buttons are a convenient navigation
shortcut to move around within the tables. All of these function buttons
operate the same as the buttons above. In some tables, certain buttons
are not needed and will be inactive (greyed out).
Operator Login Directions
After logins and passwords have been established by the administrator,
a login prompt screen will appear each time anyone starts the TransAct
program. Notice that all menu buttons are inactive (greyed out) until a
login is entered. Depending on the login entered, and the access level
of that login, some or all menu buttons will become active when the
program opens.
32Creating Logins and Passwords
Page 37

Program Login Prompt
To login:
Enter the Login Name. Press Enter.
Enter the Password. Press Enter.
TransAct opens with the About TransAct screen. Any active menu
item (not greyed out) can now be opened by clicking on it.
About TransAct Screen
Creating Logins and Passwords
33
Page 38

Guest access level menu bar:
Guest Menu Bar (active items are read-only)
Operator access level menu bar:
Operator Menu Bar (some active items are read-only)
Supervisor access level menu bar:
Supervisor Menu Bar (active items can be edited)
Administrator access level menu bar:
Administrator Menu Bar (all items can be edited)
34Creating Logins and Passwords
Page 39

Setting Up TransAct—Administration
This section describes commands and sub-menus under the Admin...
button of the main menu toolbar.
Click Admin... to view the sub-menus available.
In the sub-menus you can create detailed Customer Accounts for your
database, complete with IDs and tares for each customer’s fleet of
trucks, trailers, and containers. You can build tables for each
customer’s selected Categories and create Permits for others who may
be authorized to use a customer’s account.
Admin... also has database Utilities to save, backup, restore, and
archive files.
You will use the Preferences sub-menus to set up tickets and establish
communication between your scale, printer, and computer.
Setting Up Customer Accounts
Use Customer Accounts to create and edit customer accounts. All
weigh transactions are attached to a customer account in some way.
To begin creating or editing customer accounts, point and click on the
Admin... button from the toolbar. Select Customer Accounts... and
click the left mouse button.
Selecting Customer Accounts
The Customer Accounts Table appears, showing information for the
first customer in the customer account table. If you have chosen to
install a sample database, information for the customer will be filled in.
If you have not installed the sample database, there are no customers
yet. The customer account window will show customer number 0 and
all fields will be blank. Begin entering information for your first
customer in the customer account fields.
35
Setting Up TransAct
Page 40
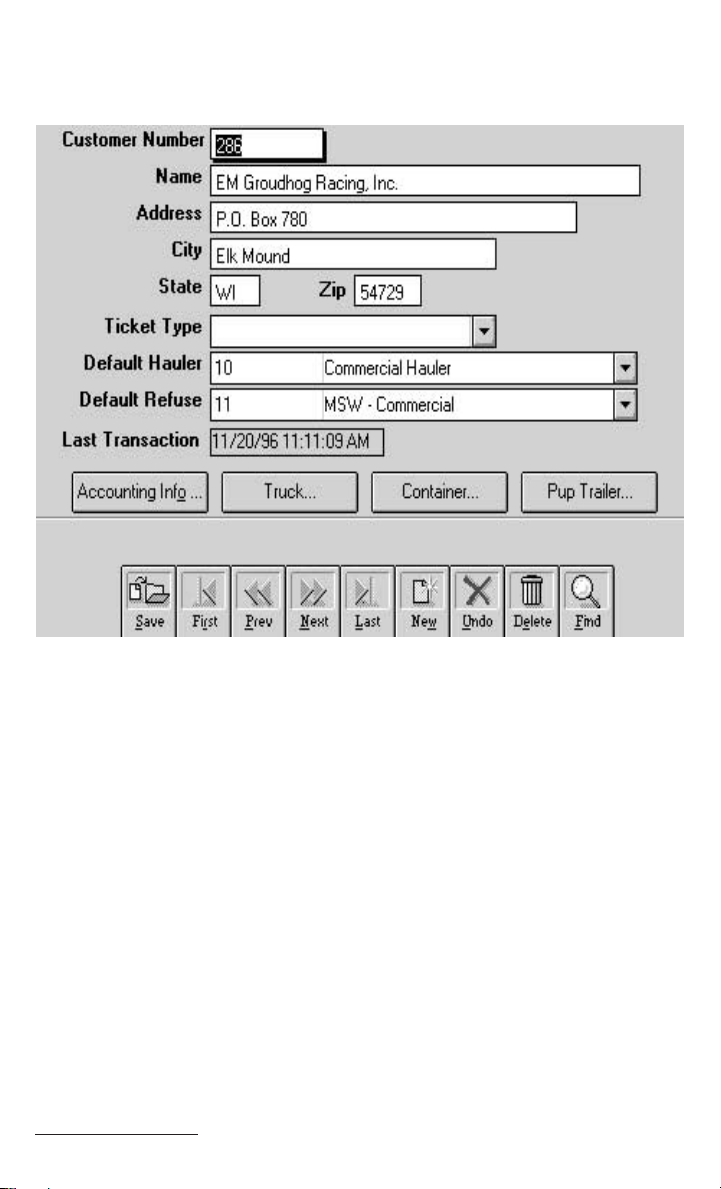
Click New to create a new customer account.
Customer Account Table: General Information
Customer Number, Name, and Address
Every customer account must have a Customer Number and Name.
The number cannot be larger than 9999999999 (10 numeric characters). The name cannot be longer than 40 alphanumeric characters.
Address information can be entered for the customer, but is not required. Enter the address information in the Address, City, State, and
Zip fields of the customer account window.
Ticket Type
Each customer account can default to a specific ticket format which
you can design. TransAct comes with a ticket format pre-designed for
you, named default.gtk. The format of this ticket is shown following.
Setting Up TransAct
36
Page 41

Stillson County Landfill
Ticket: 3777
T & J Services
Vehicle: 4
Container: 101
Time In: 04/18/97 11:14:22 AM
Time Out: 04/18/97 11:18:05 AM
In: 7740 lb
Out: 7300 lb
Net: 440 lb = 440.0 lbs
Non-Hazardous Asbestos
@ $0.02 per lb
Total Charge: $8.80
Amount Paid: $0.00
[Special Ticket Info]
[Notes Info]
Default.gtk ticket format
Other ticket formats may be created, saved, and assigned to various
customer accounts. For information on designing custom ticket formats, see Creating Custom-Format Print Tickets in the appendix.
Default Categories
When creating customer accounts, default items can be set for each
category. Default categories are intended to simplify weigh form
processing. For example, if a customer brings garbage into a solid
waste landfill 95% of the time, Garbage should probably be used as his
default category. It will then be automatically entered into the categories text box on the weigh forms. Setting the default category item to
Garbage eliminates the need to select Garbage as the main category
each time the customer comes into the landfill.
Click on the single down arrow to the right of the main category name
to display a drop-down box containing all of the items in a main
category. Click on the item that will be the default for the customer
account. All category fields will automatically fill with item None
which has a code of -1. Default items will be used when transactions
are created in the Weigh form, unless changed by the operator.
TransAct permits four main categories to be assigned to each account.
For simplicity, only two categories are initially installed. There is no
limit to the number of items that can be entered under each main
category. See page 48 for more information on setting up categories.
37
Setting Up TransAct
Page 42

Main categories can be modified and assigned different names to make
TransAct more appropriate for your application. This is a procedure
that should only be done by an administrator with computer experience, as it entails opening special initialization (.ini) files in the
TransAct folder on the hard drive. See Editing the TransAct Initializa-
tion File in the appendix for more information about using .ini files.
Selecting Items in Refuse Category
Hotlinked Buttons in Customer Account Tables
From the Customer Account Table, you can jump directly to the
screens needed to set up accounting information, truck ID’s and tares,
container ID’s and tares, and pup trailer ID’s and tares. You make
those jumps by clicking the blue hotlinked buttons near the bottom of
the Customer Account Table.
Accounting Info...
The Accounting Info button displays accounting information for the
customer account. Note that this button only appears in TransAct Plus.
This window allows the user to adjust previous and current balances,
revoke an account, activate account invoicing, require the customer to
Setting Up TransAct
38
Page 43

pay in cash, or select to have the customer account tax exempt.
Customer Account Table Window
If an account is revoked, the system warns the operator. If the scale is
in unattended mode, a vehicle from a revoked account cannot activate
a weigh transaction.
The Customer Account Table window contains a row of function
buttons that navigate you within the table similar to the function
buttons in other TransAct tables. See page 31 for information on using
function buttons.
Function Buttons for Navigating within Tables
Note that the New button is not available in this table. Customer
accounting tables are generated from completed transactions, not set up
manually.
Click on the Save button to save all changes made to items in the
Customer Account Table.
If any changes have been made and not saved, the following warning
will appear when trying to continue.
39
Setting Up TransAct
Page 44

Unsaved Changes Warning
Click Yes to save the changes.
Click No to
not save changes before continuing.
Click General Info... to return to the main customer account window.
Notes on Truck, Container, and Trailer Tare Handling
TransAct allows each account to use three different tare types. When
TransAct was installed, the three tare types were defined as Truck,
Container, and Pup Trailer. These tare names can be changed in the
TransAct initialization file. For example, “Container” could be
changed to “Boxes”. See Editing the TransAct Initialization File in the
Appendix for more information.
When tare weights are used during a transaction, the total of all tares
for the transaction is calculated and applied toward the net weight.
Truck Tare Weights
Each customer account can have a list of trucks with their recorded tare
weights attached to the account. When one of the trucks with a recorded tare enters the scale, the tare is automatically used for the
transaction. It shows as Weight Out for an incoming transaction, and as
Weight In for an outgoing transaction.
Click the Truck... hotlink button to view a list of truck numbers and
tare weights.
Setting Up TransAct
40
Page 45

Truck List
To begin creating a list of trucks and tare weights, click on the column
headings. To edit an existing truck from the sample database, click on
the truck number. The truck table as shown below appears:
Truck Table
Each truck must have an alpha-numeric number. It may be up to 10
characters in length. The tare weight may be up to 999999999.
41
Setting Up TransAct
Page 46

Optional fields include: Expiration Date, Badge Number, Container
Required, and Pup Trailer Required.
A truck with a passed expiration date activates a warning to the operator and cannot be weighed. To change an expiration date, enter the new
date using the keyboard.
You can also click the
calendar button to the right of the expiration date box. When the calendar button is used, click the single down
arrow next to the current month to select a different month. Use the
left/right arrows to select the year. Click on the day of the month you
want the truck number to expire. Click on the calendar button again to
close the calendar window and display the selected date.
The Badge Number may be up to 10 characters in length.
When an x appears in the boxes to the right of Container and Pup
Trailer Required, the scale operator will be prompted to select a
container or pup trailer before completing a weigh transaction.
Click on Save to record each completed truck table screen.
Click on New to create a new truck table screen.
The other function buttons at the bottom of the Truck Table window
operate in the same manner as in other TransAct lists and tables.
Click Done to return to the Trucks List.
Click Done again to return to the main Customer Account window.
Container and Pup Trailer Tare Weights
Each customer account can have a list of both Containers and Pup
Trailers with stored tare weights. Container and pup trailer tare weights
are added to the truck’s tare weight to generate the total tare weight for
the transaction.
Click either the Container or Pup Trailer button to view existing
numbers and tare weights for the account.
Setting Up TransAct
42
Page 47

Container List
To begin creating a list of container or pup trailer tare weights, click on
the column headings. To edit existing information, click on the number
and the Container Table or Pup Trailer Table appears.
Container Window
Each item must have an alpha-numeric number. The container or trailer
number may be up to 10 characters in length. The tare weight, if used,
may be up to 999999999.
If an expiration date is used and it has passed, the container or pup
trailer function will not be activated until its expiration date is changed
to active status. Enter an active date using the keyboard.
43
Setting Up TransAct
Page 48

You can also click the calendar button to the right of the expiration
date box. When the calendar button is used, click the single down
arrow next to the current month to select a different month. Use the
left/right arrows to select the year. Click on the day of the month you
want the truck number to expire. Click on the calendar button again to
close the calendar window and display the selected date.
Calendar
Click Save to save a Container or Pup item
Click New to create a new item.
The function buttons at the bottom of the Container or Pup Trailer
windows operate in the same manner as in other TransAct tables.
Click Done to return to the truck list.
Click Done again to return to the main Customer Account window.
If any changes have been made and not saved, the following warning
appears when trying to continue.
Unsaved Changes Warning
Click Yes to return to the Container or Pup Trailer List window and
save the changes.
Setting Up TransAct
44
Page 49

Click No to not save changes before continuing.
Click Done to return to the Customer Account Table.
Function Buttons in Customer Account Tables
The function buttons at the bottom of the Customer Account window
operate in the same manner as in other TransAct lists and tables. See
Function Buttons in Tables on page 31 for a description of each.
Click Find to view a list of all customer accounts.
View and Select Account List
To select a customer account to edit, click on the customer account.
Click Print to print the customer account list.
Click Done to return to the customer account window.
Permits
Use Permits to setup individual “sub” accounts within a customer
account. For example, a township may allow several of its residents to
use the landfill under the township’s customer account. However the
township would like to keep track of the residents using the landfill
45
Setting Up TransAct
Page 50

under their account. Using the Permits section, individual permit
numbers can be assigned to each township resident using the
township’s customer account. The resident’s name, address, driver’s
licenses, license plate number, and issue/expiration date can be included in Permits.
To begin creating or editing permits, point and click on Admin... from
the toolbar. Select Permits... and click the left mouse button.
Selecting Permits
The Permits window appears. This window shows information for the
first permit in the permit table. If there are no permits created yet, the
permit window will show a permit number of 0 and all fields will be
blank. Begin entering permits in the blank fields.
Setting Up TransAct
46
Page 51

Click New to create a new permit.
To enter a permit:
Every permit must have a Permit Number and Name. The permit must
also be attached to a Customer Account. The Permit Number cannot be
larger than 999999999 (9 numeric characters). The Name cannot be
longer then 40 alpha/numeric characters. Select the Customer Account
the permit is attached to by clicking on the single down arrow to the
right of the Customer Account field. Point and click to select the
desired Customer Account.
The address, driver’s license, and memo fields are optional. When
entering a driver’s license, the first character must be a letter. Forty
characters of text is provided for the Memo field.
Record a permit issue date and expiration date in the issue and expiration date fields.
To select a date, use the Tab key until the box is highlighted and enter
the date using the keyboard. Or click the calendar button to the right of
the date boxes. When the calendar opens, click the single down arrow
next to the current month to select a different month, and the left/right
arrows to select the year. Click on the day of the month the permit is
being issued or set to expire. Click on the calendar button again to
close the calendar window and display the selected date.
Calendar
Use the Status field to manually set a permit to be valid or invalid.
When a permit expires or is invalid, the system will warn the operator
at the time a transaction is started. Only a system administrator or
supervisor will be able to renew or validate the permit.
Click Save to save a permit.
If any changes have been made and not saved, a warning appears when
trying to continue.
47
Setting Up TransAct
Page 52

Click Yes to save the changes.
Click No to
not save changes before continuing.
Function buttons at the bottom of the Permit window are used to
navigate around the permit table. See page 31 for operating directions
for function buttons.
Categories
Use the Categories command to create and edit items in a category. A
category groups transactions for reporting purposes. For example, a
category could be Material and items in this category could be compost, tires, yard waste, etc. for solid waste applications. For aggregate
applications, they could be sand, gravel, cement, etc. Categories also
serve as a means for applying rates.
Categories are defined in the TransAct initialization file. For example,
a solid waste location may refer to material as Refuse or simply
Product. The Material heading could be changed to Refuse or Product
by editing the initialization file. (Refer to the Appendix for more
information on configuring the transact.ini file).
NOTE: TransAct installs two main categories by default. Two more
main categories can be added using the transact.ini file.
Each category can have one or two subcategories. Subcategories are
also defined in the initialization file. Subcategories help group category
items for reporting purposes. For example, a solid waste landfill may
wish to add a subcategory In/Out to their Material category. Each
material item in the category can be classified as a material coming in
to the landfill or going out of the landfill. Later this subcategory can be
used to create reports for regulatory agencies on materials deposited in
the landfill and materials moved out of the landfill.
To begin creating or editing an item in a category, click on Admin...
from the toolbar. Select Categories from the Admin pull-down menu.
Select the desired category and click the left mouse button.
Setting Up TransAct
48
Page 53

The following examples use the Material category.
Selecting Categories
After selecting a category, the category window appears. The category
window shows the information for the first item in the category. If
there are no items in the category yet, the category window will show a
code of 0000 and blank description field. Begin entering items at this
point in the blank boxes.
Example of a Category Window with Two Subcategories Added
Click New to create a new category item.
The category window has a Code and Description field. Each category
item must have a numeric or alpha-numeric code and description. The
code may be up to 4 characters in length. The description may be up to
30 characters in length.
If subcategories are defined, they will appear as drop-down lists. Click
on the single down arrow to view a list of subcategory items. Point and
49
Setting Up TransAct
Page 54

click on the desired item.
Selecting Subcategory Item
Click Save to save an item you created.
If changes have been made and not saved, you will see a warning that
changes have not been saved.
Unsaved Changes Warning
Click Yes to return to the category window, and save the changes.
Click No to
not save changes before continuing.
Click Find to view a list of all items in the main category.
The window following shows a list of items in the main Material
category of the sample database.
Setting Up TransAct
50
Page 55

List of Items in the Material Category
NOTE:TransAct automatically generates a category item called
None that has a code -1. The None item cannot be edited and is
not shown in the item list, but is available elsewhere in the
program. Do not create a category item called None.
To edit an existing item, click on the item from the item list. The item
is brought into the category window for editing.
Click Save to save changes.
Click Undo to undo changes before they have been saved.
Click Done to return to the category window.
The other function buttons operate like those in other TransAct tables.
See page 31 for Function Button operation.
51
Setting Up TransAct
Page 56

Utilities
Backup
Why is it important to backup your data? Electronic data is very
fragile. If your hard drive fails, everything on it is lost. It is important
to create a backup plan and train users to follow the plan. Tape backup
is the most commonly used type of backup.
A common backup plan is a weekly backup, where a week’s worth of
daily tapes are rotated Monday through Friday. Other companies
utilize a monthly rotation using a different tape for each day of the
month. Regardless of your backup method, be certain not to rely on a
single tape.
TransAct provides a utility for backing up your database to your local
hard drive. TransAct allows backup of the database to a floppy diskette
if the database is small enough to fit on one floppy. Unfortunately, it
rarely is, so tape backup is recommended. A database backup to your
local drive should be performed daily prior to tape backup.
Creating a Backup File
To run the backup utility, click on Admin... from the toolbar and select
Utilities from the Admin pull-down menu. Select Backup and click
the left mouse button.
Selecting Backup
The Backup Database window appears.
Setting Up TransAct
52
Page 57

Backup Database Window
The left window displays a list of existing backup names.
The right window displays the destination drive and directory.
The database backup will, by default, be placed on the same drive and
directory in which TransAct has been installed (usually C:\transact).
To change that location, click on the single down arrow next to the
drive box to show a drop-down box of available destinations. Click on
the letter to select your preferred backup drive.
Selecting a Different Destination
Under the destination box is the directory box. Use this box to select a
different directory other than the default directory where the TransAct
program has been installed.
53
Setting Up TransAct
Page 58

Default Directory
The default backup name is automatically generated by adding today’s
date numbers to the letters “bu” (i.e. bummddyy). To change the
filename, press the tab key until the default filename is highlighted (or
use the mouse to place the cursor in the filename box), delete the
default filename, and type your desired backup filename in the box.
Entering a Filename
NOTE:File names can be up to 8 characters long with no
spaces. They can contain letters, numbers, and special characters.
To change back to the default file name, place the cursor in the
filename box and double click.
Click Backup to begin the backup procedure.
If a backup filename is selected that already exists, the following
warning appears.
Setting Up TransAct
Backup File Already Exists Warning
54
Page 59

Click Yes to overwrite the file with the new backup.
Click No to return to the backup database window.
If no file name or an unacceptable name has been entered in the Enter
backup name: box the following warning appears.
No Backup Filename
Click on OK to return to the backup database window so you can enter
a correct backup file name.
Once the backup is complete, Backup Successfully Completed will be
displayed at the bottom of the Backup Database Screen.
Deleting Existing Backup Files
To delete backup files, select the file to delete with a single click from
the list of used backup names.
Click on Delete to delete the selected file. To avoid mistakes, the
following warning appears before the file is deleted.
Delete File Warning
Click Yes to delete the file and proceed.
Click No to return to the backup window.
55
Setting Up TransAct
Page 60

Restore Backup
This utility allows the restoration of any backed up file in case the
database becomes damaged or corrupt.
To restore a backup file, click on Admin... from the toolbar and select
Utilities from the pull-down menu. Select Restore and click the left
mouse button.
Selecting Restore
The Restore Database window appears.
Restore Database Window
The left window displays a list of available backups found in the
Setting Up TransAct
56
Page 61

default drive and directory.
The right window displays the default drive and directory where the
TransAct program was installed (usually C:\transact).
If you are restoring from a floppy diskette click on the single down
arrow to show a drop-down box listing available drives. Select your
floppy drive (usually A:).
Selecting Diskette Drive A
Under the destination box is the directory box. Use this box to select a
different directory.
A list of available backup files on your floppy diskette appears in the
box to the left. Point and click on the file you wish to restore.
Click Restore to begin restoring the backup.
Restore Successfully Completed will appear at the bottom of the
restore backup window once the restore is complete.
Archive TransActions
Archiving is a way of removing transactions from the database and
storing them without having to delete information. Archiving is
important because it helps manage your database and improves system
performance.
TransAct allows archiving of all transactions or just invoiced transactions for a specified date range.
Creating an Archive
To archive transactions, click on Admin... from the toolbar and select
Utilities. Select Archive TransActions and click the left mouse
button.
57
Setting Up TransAct
Page 62

Selecting Archive T ransActions
The Archive TransActions window appears.
Archive TransActions Window
Select a date range to archive by typing in the “From” and “To” dates,
or use the calendar buttons to the right of the boxes to set the dates.
The area next to the date allows the user to choose which transactions
are archived. Whenever Archive TransActions is opened, the default
selection is All TransActions. To select to have only invoiced transactions archived, choose Invoiced TransActions.
To use a default archive filename, place the cursor in the Archive
Name box and double click. TransAct generates the filename by
adding the invoice “Date To” date numbers to the letters “ar” (i.e.
armmddyy).
Setting Up TransAct
58
Page 63

To change the filename, press the Tab key until the default filename is
highlighted (or use the mouse to place the cursor in the filename box),
delete the default filename and type in your desired archive filename.
To change back to the default filename, place the cursor in the
filename box and double click.
Click on the Archive button to continue.
Because archiving will alter the database, TransAct recommends
making a backup of the current database prior to archiving. The
following window appears.
Backup Warning
Click Yes to have the backup window automatically open. Once the
backup is complete, archiving continues.
Click No when a backup prior to archiving is not desired. Archiving
automatically continues.
Click Cancel to return to the Archiving TransActions window.
If a filename has been highlighted in the List of archive files or a
duplicate filename typed in the Archive Name box, the following
warning appears.
Duplicate Archive Filename
Click No to return to the archive transactions window.
Click Yes to overwrite the existing filename.
59
Setting Up TransAct
Page 64

If no file name is specified, the following warning appears:
No Filename Warning
Click OK to return to the archive window. Type in a filename and
click on the Archive button again. The backup database prompt
appears again, but it is not necessary to do another backup; click No to
continue archiving.
Deleting Existing Archive Files
To delete archive files, use the mouse to click on the file to delete from
the Archive TransActions window.
Click Delete to delete the selected file. To prevent mistakes, the
following warning appears before the file is deleted.
Delete File Warning
Click Yes to delete the file and proceed.
Click No to return to the archive window
Setting Up TransAct
60
Page 65

Restore Archive
The Restore feature is used to restore archived transactions. Restoring
archived transactions may be necessary for some reporting purposes.
To run the restore utility, click on Admin... from the toolbar and select
Utilities. Select Restore Archive and click.
Selecting Restore Archive
The Restore Archived TransActions window appears.
Restore Archived TransActions Window
The left window displays a list of available archives found in the
61
Setting Up TransAct
Page 66

default drive and directory where the TransAct program is installed.
The right window displays the default drive and directory where the
TransAct program was installed (usually on drive C:\TransAct ).
If you are restoring an archive from a floppy diskette, click on the
single down arrow to show a drop-down box listing available drives.
Select your floppy drive (usually drive A:).
Under the destination box is the directory box. Use this box to select a
different directory other than the C default directory where the
TransAct program has been installed.
Setting Up TransAct
62
Page 67
A list of available backup files on your floppy disk appears in the box
to the left. Click on the file(s) you wish to restore.
NOTE: To select multiple files for restoring, use the Shift key with the
mouse to select continuous file names. Use the Ctrl key with the
mouse to select discontinuous file names.
Click Restore Archive to begin the restoration of your selected file(s).
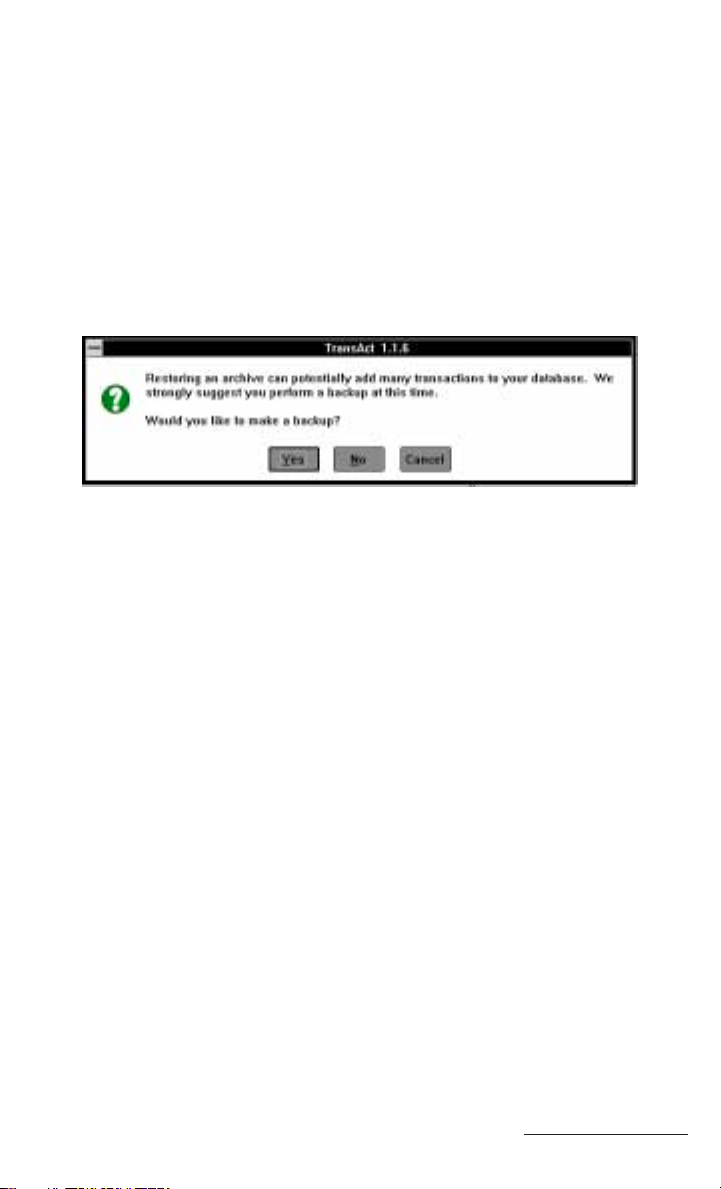
Because restoring an archive will alter the database, TransAct recom-
mends making a backup of the current database. Prior to restoring, the
following window appears.
Click Yes to have the backup window automatically open. Once the
backup is complete, archive restoring continues.
Click No when a backup prior to archive restoring is not desired;
archive restoring automatically begins.
Click Cancel to return to the Restore Archive TransActions window.
Archive Restored appears at the bottom of the window when the
archive restoration is complete.
Preferences
Company Data
The company data screen contains your company’s name, address,
phone number, and site number. This information appears on invoices
and reports.
To enter your company’s data, select Preferences from the Admin...
pull-down menu. Select Company Data and click the left mouse
button.
63
Setting Up TransAct
Page 68

Selecting Company Data...
Company Data Window
The Company D w indow appears.
Using the Tab key to move from box to box, enter your company’s
data.
Click Save to save the entries.
Click Undo to exit without saving changes.
Scale Port
This section is used to define the type of scale connected to the computer. You must know specific information about the digital indicator
you are using with the scale to properly interface with TransAct.
To set up the scale port, select Preferences from the Admin... pull-
Setting Up TransAct
64
Page 69

down menu. Select Scale Port and click on the left mouse button.
The Set Scale Port Parameters window appears:
Set Scale Port Parameters
A direct scale interface is not required to run TransAct in a demonstration mode. If a scale will not be interfaced, select MANUAL from the
Connector list. Nothing else needs to be done to set up the port.
65
Setting Up TransAct
Page 70

To demonstrate how TransAct would run with a scale, select SIM, to
let you simulate a scale in the Weigh Form. Nothing else needs to be
done to setup the port.
If a scale is being interfaced with the computer, select the communication port (COM1 through COM4) to which the interface cable is
attached. Use the scroll bar in the Connector box to view all four ports
as shown below.
Scale Port Connector
Use the scroll bar to the right of the Device Type box to view available
scale types. If you cannot find the type of indicator you are using, call
your dealer or the TransAct technical support line for assistance.
Selecting a Device (Scale) Type
NOTE:TransAct supplies common scale drivers to make setting
up these devices simple. Unfortunately, we cannot list every
indicator in the industry. Contact us with additional indicator
types so we can add the drivers to later releases of the software.
When a communication port and device type are selected, the settings
boxes become available for editing (i.e. Baud Rate, Flow Control, Data
Bits, Stop Bits, and Parity). Check the installation manual of your scale
indicator for the correct settings.
After the scale port is set up, click the Test button to view data being
received from the scale. If you have difficulty connecting with the
scale you may need to change one or more of the settings.
The following shows a test display from a correctly interfaced scale.
Setting Up TransAct
66
Page 71

Correctly-Interfaced Scale Test Output
If the scale is correctly interfaced with the computer, you should be
able to read the scale weight in the diagonal print out area. The correct
weight should also be displayed in the Weight box at the bottom of the
window.
Click Done to return to the Set Scale Port Parameters window.
Click Pause to stop the window from scrolling.
If the test screen is blank or shows something other then the above
picture, the computers settings are not correct for the scale indicator.
Ticket Printer
This section is used to define the type of ticket printer connected to the
computer. You will need to know specific information about the ticket
printer you are using to properly interface with TransAct .
To set up the ticket printer, select Preferences from the Admin... pulldown menu. Select Ticket Printer Port.
67
Setting Up TransAct
Page 72

Selecting Ticket Printer Port
The Set Printer Port Parameters window appears
Set Printer Port Parameters
If a ticket printer is not going to be used with the TransAct program,
simply select None from the Connector list, and nothing else needs to
be done to setup the port.
Setting Up TransAct
68
Page 73

If a printer will be used, TransAct provides several ticket printer
solutions. Receipt printers, dot matrix printers, and laser printers can
all be used as ticket printers. Use the scroll bar within the Device Type
box to view a list of all available print drivers.
Common drivers are available for ticket printers which produce
receipts similar to what we might receive at a grocery store. Such
drivers include SP2000, SP2200, IDS 150A, Star SP200, and the
Epson TM.
TransAct also provides options for using an already existing Windows
printer, such as a dot matrix or laser printer. To use a printer already
configured for Windows, select Windows Default from the Device
Type list.
It is also possible to send data directly to a printer via the Ticket File.
This option is helpful when printing to custom preprinted forms. Select
Direct to Printer Port to utilize this option. Using this option for a
ticket printer should not affect how reports are printed if they are
printing to the same printer as long as the printer is also defined as a
Windows printer.
Select the communications port (LPT1, LPT2 or COM1 through
COM4) to which your cable is attached. Use the scroll bar in the
Connector box to view all ports and choose the appropriate one.
Ticket Printer Connector
NOTE:TransAct supplies common ticket printer drivers to make
setting up these devices simple. Unfortunately we cannot list
every printer in the industry. Please contact us with your specific
ticket printer types so we can add the new drivers to later
releases of the software.
When using a printer selection other than Windows Default or Direct
to Printer Port, the Baud Rate, Flow Control, Data Bits, Stop Bits,
69
Setting Up TransAct
Page 74

and Parity sections will also need to be set. After the communication
port and device type have been selected, the settings boxes become
available for editing. Check the reference manual of your ticket printer
for correct settings.
After the ticket printer is set up, click the test button to send up to four
lines of text to the printer. Click Test to open the test window.
Ticket Printer Test Window
Enter text into any or all of the four lines.
Click Send to print the text to the printer.
Click Done when testing is complete.
If nothing is sent to the printer, be sure the printer is powered on and
check the connections between the computer and printer.
Tickets
The tickets section lets you reset the ticket number, receipt number,
invoice number, and select the default ticket file.
Setting Up TransAct
70
Page 75

If you wish to change the appearance of printed tickets from the format
specified in the default ticket file, it will be necessary to access the
TransAct initialization file in your computer hard drive. This should
only be done by the system administrator. For information on changing
the formatted appearance of tickets in this manner, see Creating
Custom-Format Print Tickets in the Appendix.
To reset any of the above items, select Preferences from the pull-down
Admin... menu. Select Tickets.
Selecting Tickets...
The Tickets window appears as shown below.
Tickets Window
Press the tab key to move from box to box or use the mouse to place
the cursor in a box. Once the desired box is selected, enter the change.
TransAct will print out tickets according to the format established in
71
Setting Up TransAct
Page 76

the “default.gtk” file stored in your computer hard drive. The default
ticket has the following format:
Stillson County Landfill
Ticket: 3777
T & J Services
Vehicle: 4
Container: 101
Time In: 04/18/97 11:14:22 AM
Time Out: 04/18/97 11:18:05 AM
In: 7740 lb
Out: 7300 lb
Net: 440 lb = 440.0 lbs
Non-Hazardous Asbestos
@ $0.02 per lb
Total Charge: $8.80
Amount Paid: $0.00
[Special Ticket Info]
[Notes Info]
Printed Weight Ticket with default.gtk Format
Click Save to save the entries and changes.
Click Undo to undo any unsaved changes.
To learn more about editing the ticket file, refer to Creating Custom-
Format Print Tickets in the Appendix.
Note Headings
TransAct allows the user to establish up to four note lines that can be
used in the Weigh form when creating or completing a transaction.
These notes are printed on the transaction ticket given to the customer.
The followin section allows the user to define the headings used for
each line of note text.
To edit the headings for the notes, select Preferences from the pulldown Admin... menu. Select Note Headings.
Setting Up TransAct
72
Page 77

Selecting Note Headings
The Configure Ticket Note Headings window appears.
Configure Ticket Note Headings Window
Only the boxes containing entered text will show up when Notes is
selected in the Weigh transaction. Any of the empty lines of notes will
not show on printed tickets. A note is only stored with uncompleted
transactions. Once the transaction has been completed and printed, the
note is erased.
Following is an example of a four-line note in the Weigh form generated from note headings “Name”, “Address”, “City”, and “Memo” text
entered in the Configure Ticket Note Headings Window.
73
Setting Up TransAct
Page 78

Four-Line Note Heading in the Weigh form
In this example, all four note lines appear with headings because all
four lines were defined in the Configure Ticket Note Heading window.
If you wanted only a simple one-line note with a single heading, enter
only that heading on only one line in the Configure Ticket Note
Heading window. In that case, the following screen would pop up
when Notes was pressed:
Single-Heading Note
About TransAct
To display the current version and serial number of TransAct you are
using, select About from the Admin... pull-down menu.
Setting Up TransAct
74
Page 79

Selecting About
The start-up “About TransAct” screen appears. This screen also
appears whenever TransAct first starts.
About TransAct Start-Up Screen
When the About TransAct screen is displayed, you may click any other
main menu button in the toolbar to move to other parts of the program
and close the About TransAct screen.
75
Setting Up TransAct
Page 80

Weighing
Use the Weigh section of TransAct to create and complete weigh
transactions. The information created during a weigh transaction is
stored in the TransAct database. Transactions from these databases can
be edited, and reports including them can be printed using the Reports
features found in the Reporting menu.
Select Transaction Window
Click on the Weigh... main menu toolbar button to begin a transaction.
After clicking the Weigh button from the menu bar, the Select Transac-
tion window appears. All weight transactions are started here.
Select Transaction Window
Date and Time
The top left corner of the window contains the date and time. TransAct
reads this information from the computer system. If the time or date is
wrong, exit TransAct, change the computer’s time and date, and restart
TransAct.
The time, date, Print Weight button, Options... button, and display
window are always present in the Select Transaction window. The
Update Tare... button is only available until a transaction has started.
76Weighing
Page 81

Status Bar
The status bar at the bottom of the window displays the next ticket
number and the ticket format file (unless you have modified the ticket
format, it will show as “default.gtk”).
Weight Display Window
The display window shows the scale weight. This window will look
different depending on the type of scale selected (see “Preferences” of
the Admin section).
When the scale port is in MANUAL mode, the display window is
inactive. Weights must be manually entered in the Weight In/Weight
Out boxes of the Transaction Detail table.
When the scale port is in SIM mode, arrows for increasing and decreasing a truck weight appear next to the display window to simulate
a scale action. These buttons increase or decrease simulated truck
weights in increments of 1000 pounds.
Weight Display Window in Simulation Mode
When a scale indicator is connected to the computer, TransAct reads
the weight supplied by the scale indicator and displays the weight in
the display window. The unit of measure (lb-pound or kg-kilogram) of
the scale indicator also appears in the display window.
A motion indicator in the top left corner of the display window informs
the operator when the scale is in motion. The operator cannot continue
with the transaction, until the motion indicator clears from the display.
77
Weighing
Page 82

Once motion has stopped, the weight of the scale can be locked to help
speed the weighing process. To lock the weight, double click in the
lower left corner of the display window. Once weight is locked, the
truck can continue into the site while the operator modifies information
about the transaction before storing the ticket.
Locking a Stable Weight
Print Weight Button
Click the Print Weight button to print a weight without creating a
transaction. Clicking on the Print Weight button prints only the date,
time and weight of the truck to the ticket printer.
Options Button
Click the Options... button to change weighing options setup. The
Weighing Options screen allows the operator to change the list order,
scale properties, badge reader information, weight adjustment readings
(expressed as a percentage of actual scale weight), default transaction
direction, and ticket format file.
Weighing Options screen
78Weighing
Page 83

List Order
List Order determines how tables containing lists, such as
(Customer) Account, (Open) Ticket, and Categories, will be
displayed in drop down boxes. Make your selection by clicking
in the circle by the selection. When By Code is selected for List
Order, the lists display in number code order. When By Descrip-
tion is selected, the lists display in description order.
Example: When List Order is By Code, select customer account
286-EM Groundhog Racing, Inc., by typing only the customer
account code, 286.
When List Order is By Description, select customer account
286-EM Groundhog Racing, Inc., by typing only the customer
description, EM Groundhog Racing, Inc.
Scale Properties
Use Scale Properties to setup tolerances and zero return for
interfaced scale indicators. When Zero Return is checked,
TransAct will not allow transactions to be created or completed
until the scale indicator returns to zero. If a transaction is attempted before returning to zero, the following warning appears:
Tolerance is the amount the indicator can fluctuate when there is
no load on the scale. When a tolerance weight is specified,
TransAct recognizes a Zero Return, + or – the tolerance weight.
Enter a positive weight for this field. The tolerance is used
exclusively with the zero return property.
Adjustments
TransAct provides two Adjustments fields. The adjustments
boxes appear in the weighing Transaction Detail screen only
when a description is entered into these fields. Adjustment
descriptions can be added or removed from the Weighing
Options table at any time.
The Adjustments fields are used to calculate the Ticket Weight
Zero Return Warning
79
Weighing
Page 84

and Charge of the transaction without changing the Weight In,
Weight Out or Net Weight. When applied to a transaction,
adjustments are made in one percent (1%) increments. The
percent is calculated from the Ticket Weight and applied to the
Charge. The adjusted percent is stored with the completed
transaction ticket and can be viewed using the Quick Scan
feature under the Reporting menu.
Ticket Format File
The Ticket Format File contains information from the database
that is printed on the customer’s ticket. During installation, a
default ticket file was installed for the appropriate application
you selected, Solid Waste or General.
To select a different ticket-format file for the current transaction,
use the down arrow to the right of the Ticket Format File box.
Once the transaction is complete, the default ticket file specified
in Preferences is restored.
NOTE:A custom Ticket Format File can be manually created
with any text editor (such as Windows NotePad or Windows
Write). See Creating Custom-Format Print Tickets in the
Appendix for more information on editing of the ticket file.
Badge Reader Properties
Use the Badge Reader Properties to create a semi-automated
environment. A badge reader device can be used to read a badge
number or identify a truck number. When the badge reader
device reads a magnetic strip or bar code from the badge,
TransAct uses the information to start a transaction. The badge
number used to identify a truck number is stored in the customer
database. When TransAct matches the badge number with the
customer, the customer’s information stored in the computer is
entered into the Weigh table.
When the Auto Store Ticket option is checked, the transaction
automatically is saved once the weight of the scale stabilizes. If
the Auto Print Ticket option is checked, the ticket prints and the
transaction completes automatically.
Returning to the Weigh Window
Click on the Options... button next to the display window or the
Done button to return to the Weigh window. Clicking either
80Weighing
Page 85

button saves the settings selected in Options before returning to
the Weigh window.
Update Tare Button
The Update Tares... button allows stored tare weights to be updated
while the truck is on the scale. Updating tares is allowed only at the
beginning of the transaction so that a previously-stored tare (that for
whatever reason is now incorrect) can be overwritten with the actual
weight from the scale. The Update Tares... button must be selected
when you are in the Select Transactions table—once you are in the
final Transaction Detail screen, it’s too late to choose to update a tare .
To add or update a tare, wait for the motion indicator to clear. Click on
Update Tares.... The Update Tares Table appears.
Update Tares Table
The table uses the descriptions assigned to each tare field. For example, Truck = Tare1, Container = Tare2, and Pup Trailer = Tare3. If a
tare field is not used, the button is disabled.
Select a customer account by typing the account code or description in
the Select Account field, or click the single down arrow next to the
Select Account field. The customer account and existing tare fields are
displayed in the tare table.
81
Weighing
Page 86

Update Tares for Selected Customer Account
From this table, tare weights can be added or updated by clicking the
Add or Update buttons to the right of each tare field type. A tare field
shown in a different color (for example, Pup Trailer) indicates that no
tares exist for that field. New tares can be added by clicking on the
Add or Update Pup Trailer button.
To add a new truck tare, leave the tare field blank and click the Add or
Update Truck button. When Tare1 (Truck) is clicked, an empty table
for Tare1 is displayed. Likewise, an empty table appears when Tare2
or Tare3 are selected. To demonstrate adding a new tare, we will use
the Truck Table.
Adding a New Truck Tare
82Weighing
Page 87

The weight from the scale is automatically placed into the Tare Weight
box. You can modify that scale value by keying in changes to the tare
value, but doing so will trigger a Keyed Tare note to be printed on the
final weigh ticket. Enter a truck number and any other information
needed for this entry.
Click Save to store new tare.
Click Done to return to the Select Transaction table.
If any changes have been made and not saved, a warning will appear
when trying to continue.
To edit an existing tare, use the single down arrow next to the tare
fields to view tare lists and select a tare.
Selecting an Existing Tare to Update
Click on the Add or Update (Truck, Container, or Pup Trailer) button.
The selected tare table appears. A truck tare is used for this example.
83
Weighing
Page 88

Add or Update Tares
The selected truck information is displayed in the Truck Table. The
stored Tare Weight is replaced with the weight from the scale. To
restore the stored value to the Truck Table, click the Undo button.
Make any other changes to the table and click Save.
Click Done to return to the Select Transaction table.
The function buttons at the bottom of the tare windows operate the
same as function buttons in other TransAct tables.
Function Buttons at Bottom of Tare Tables
Weigh In / Weigh Out Transactions
When a transaction does not use any stored tare weights, it is considered a Weigh In/Weigh Out transaction. The truck must be weighed
coming into the site and exiting the site. The net weight is recorded,
charges are calculated, and the ticket is stored.
Starting a Weigh In/Weigh Out Transaction
To start a transaction, click the Weigh... button from the main menu
toolbar. The Select Transaction table appears where you can select an
84Weighing
Page 89

Account, Permit, License Number, or Truck ID to begin the transaction.
Use the Tab key to move from field to field or use the up/down arrow
keys on the keyboard to choose an item from the list. Click on the
single down arrow next to Account to produce a drop down box listing
all customer accounts.
NOTE: Remember, depending on the List Order selected from
the Options window, the account can be entered by typing a code
or description. Use the Esc key to clear any information typed
incorrectly. Press Enter when correct.
Select Transaction Window
NOTE:If an entered Truck ID number is used by more than one
company, a window appears asking which account the truck
should be assigned to. Choose the correct customer account to
start the transaction.
Duplicated Truck ID Numbers
85
Weighing
Page 90

After selecting an Account, Permit, License Number or Truck ID, press
Enter. Now the main weigh form,the Transaction Detail appears.
Transaction Detail Window
The Ticket Number, Date and Time, and Customer Account are locked
fields established from the previous screen.
If the wrong customer account was selected, click Cancel.
Select the appropriate Bill-To Account if different from the Customer
Account. Use the single down arrow next to the Bill-To Account field
to display a list of available account names.
If tare groups are stored for an account, the available fields are enabled
in the Transaction Detail table. For this Weigh In/Weigh Out transaction, it is assumed you will not select one of these stored tares.
If you decide to select a stored tare, click on the single down arrow
next to the tare field to display a list of available tares. If a tare with a
stored weight is selected, you no longer have a Weigh In/Weigh Out
transaction. Turn to the next sections in this chapter of the manual
dealing with stored tares to continue the transaction.
If a truck, container, or trailer tare is selected but shows a 0 stored
weight, the transaction is still treated as Weigh In/Weigh Out.
86Weighing
Page 91

Click on Units to change the unit of measure you will want printed on
the ticket. Units of measure can only be adjusted when the transaction
is being created. The Weight In, Weight Out, and Net Weight fields
reflect the same unit of measure as the scale.
The status bar at the bottom of the window, displays how the charge is
calculated, the direction of the transaction (incoming/outgoing) and if
the charge is a payable or receivable.
When a transaction is created, the account’s default categories are
displayed. Single down arrows are available to list items in a category.
Use these lists to select or change a category item. Or use the keyboard
and type the code or description in the field. Any changes to the default
items are only stored with the current transaction. Once the transaction
is complete, the account defaults are reset.
Click Cancel to return to the Select Transaction table.
Click Notes to add a message that is printed on the customer ticket.
The note is stored until the transaction is completed and the ticket is
printed. Note Headings are defined under Preferences in the Admin
section.
Click on Store Ticket to store the ticket information from the Weigh
In transaction. Storing the open transaction also makes the scale
available for another transaction. Once the ticket is stored, the program
returns to the Select Transaction table, where a new weigh transaction
can be created.
Completing a Weigh In/Weigh Out Transaction
Starting from the Select Transaction table, select an open ticket. Use
the Tab key to highlight the Ticket field and type the ticket number or
account name, or click on the single down arrow next to the Ticket
field to produce a drop down box listing all open transaction tickets.
Click the open ticket number to complete the Weigh Out.
NOTE:Depending on the List Order selected in the Options
window, the ticket can be entered by typing a code or description.
87
Weighing
Page 92

Select Transaction Window to Complete Weigh Out
The Transaction Detail table appears, containing the information
recorded at the beginning of the transaction.
Transaction Detail Window
88Weighing
Page 93

If an incorrect ticket was selected, click Cancel.
The total scale weight appears in the Weight Out box. The net weight
is calculated and displayed in the Net Weight box.
Use the single down arrow to the right of the Bill-To Account field, to
change the billing account if different from the Customer Account.
Use the single down arrow to the right of the category fields to select a
different category.
Use the function buttons on the right of the window to add Notes,
receive a cash payment, and print the ticket.
Click Notes to add a message to the customer ticket.
Click Cash to record a cash payment received at the time of transac-
tion completion.
After selecting the Cash button, fields for entering the cash amount and
check number appear in the Transaction Detail table.
Cash Payment Button
Click Print Ticket to print the customer ticket and store the transaction
in the database. The following decision window appears.
Print Ticket Decision Window
89
Weighing
Page 94

Click Yes to print the ticket for the customer and store the transaction
information in the TransAct database.
Click No to store the transaction information without printing the
ticket.
Click Cancel to return to the Transaction Detail table.
Single-Weigh Transactions with Tares
Tare transactions use one of three tare fields; Tare1, Tare2, and Tare3.
The names of these buttons can be configured for the specific application, using the TransAct initialization file in the appendix. We will
refer to Tare1 as Truck, Tare2 as Container, and Tare3 as Pup Trailer.
Default Tare Names
When a tare is selected, a Material Direction box becomes available.
Use the mouse to select the direction material is moving at the site,
Incoming or Outgoing.
Material or Refuse Direction
For example, landfill operations are mostly Incoming to the site;
aggregate sand and gravel operations are mostly Outgoing.
Stored Tares Used as the Weight Out
A tare weight is used as a Weight Out when the default Material
Direction is set to Incoming in the Options table.
Example: A landfill operation has Incoming refuse. Stored tares are
used to calculate the net weight of loads.
Use the single down arrows to the right of the tare fields to display and
select available tares. Click on the tares to be used. The total weight of
90Weighing
Page 95

all tares selected is displayed in the Weight Out box. The tare weight is
automatically subtracted from the Weight In and the adjusted weight
appears in the Net Weight box.
Tares Applied as Weight Out to Incoming Material Load
The Ticket Number, Date and Time, and Customer Account are locked
fields once the transaction begins.
If an incorrect customer account was selected, click Cancel to reset the
transaction.
Select the appropriate Bill-To Account if different from the Customer
Account.
When a customer account is selected, any tare fields used by the
account are enabled. Any unused tare fields are disabled.
Example: The customer in the above figure (D&D Disposal Co.,
Inc.) is using two tare fields, Truck and Container. The third tare
field is not used by this customer, and is disabled.
When a customer account is selected, the default categories for the
customer are displayed. A category item can be changed by using the
mouse and clicking the single down arrows next to each category.
Select the new category item from the list. Category item changes are
only stored with the current transaction. When the account is selected
91
Weighing
Page 96

for a new transaction, the default categories are listed.
The status bar at the bottom of the window, displays how the charge is
calculated, the direction of the transaction (incoming/outgoing) and
whether the charge is a payable or receivable.
Use the function buttons on the right of the screen
to add Notes, receive a Cash payment, change the
measurement Unit, and Print the Ticket.
Click Print Ticket to print the customer ticket and store the transaction
in the database. But first, the following decision window appears.
Print Ticket Decision Window
Click Yes to print the ticket for the customer and store the transaction
information in the TransAct database.
Click No to store the transaction information without printing a ticket.
Click Cancel to return to the Transaction Detail table.
If Tare1 requires a Tare2 (Container) or a Tare3 (Pup Trailer) with it,
the following warning appears.
92Weighing
Page 97

Example: Certain trucks used by D&D Disposal Co., Inc. will
always have a container with them. The trucks bringing containers to the site can be set up to require a container in the tare
table. To setup Tare 1 items to require Tare 2 or Tare 3 items,
refer to Setting up Customer Accounts in the Admin section.
Click on OK to return to the Transaction Detail table, where you can
select the item required, Tare2 or Tare3, and click on the Print Ticket
button to complete the transaction.
Stored Tares Used as the Weight In
A stored tare is used as a Weight In when the default Material Direction is set to Outgoing in the Options table.
Example: An aggregate operation with outgoing rock or gravel uses
stored tares as Weight In to calculate net weight.
Use the single down arrows to the right of the tare fields to display and
select available tares. Click on the tare to be used. The total weight of
all tares selected (truck, container, and pup trailer) is displayed in the
Weight In box. The tare weight is automatically subtracted from the
Weight Out and the adjusted weight appears in the Net Weight box.
Tare Weight Applied to Outgoing Material Leaving a Site
93
Weighing
Page 98

Select the appropriate Bill-To Account if different from the Customer
Account.
When a customer account is selected, the default categories for the
customer are displayed. A category item can be changed by clicking
the single down arrows next to each category. Select the new category
item from the list. Category item changes for an account are only
stored with the current transaction. When the account is selected for a
new transaction, the default categories are listed again.
Use the function buttons on the right to add Notes,
receive a Cash payment, change the Unit of measure, and Print the Ticket.
Click Print Ticket to print the customer’s ticket
and store the transaction in the database. First, the following decision
window appears:
Print Ticket Decision Window
Click Yes to print the ticket for the customer and store the transaction
information in the TransAct database.
Click No to store the transaction information without printing a ticket.
Click Cancel to return to the Transaction Detail window.
94Weighing
Page 99

Accounting
Use this section to set up rate tables, create and print customer invoices
and statements, and record customer payments.
Statements
Use Statements to create monthly billing statements. Statements can
only be created using TransAct Plus.
To generate statements, click on Accounting... from the main menu
toolbar. Select Statements and click the left mouse button.
Selecting Statements
After selecting Statements, the Statement Options window appears.
Statement Options Window
95
Accounting
Page 100

The date entered in the Statement To Date box is used as the cutoff
date for Transactions (charges, payments, and credits) appearing on the
statement. Besides these transactions from the current billing period, a
statement also shows the previous balance from the prior billing
period.
Example: Many companies issue monthly statements based on
the last day of the month. When Statements is selected from the
Accounting menu, the current system date appears in the Statement To Date box. Assume today is March 5th, but only transactions dated through February 28 should appear on the Statements. Change the date to 2/28/YY.
The Statement to Date can be entered using the keyboard or mouse.
When using the keyboard, enter the month, day and year separated by
slashes (/).
When using the mouse, click the
calendar button to the right of
the date box. Click the single down arrow next to the current month to
select a different month and the left/right arrows to select the year.
Select the day by clicking on the numbers displayed in the calendar. To
close the calendar window, click on the calendar button again or press
the Enter key.
Calendar
Click on the Apply Finance Charge box to have a monthly finance
charge applied to an unpaid previous balance.
Accounting
96
 Loading...