


High Speed Coin Counter
Operation Manual
(CS-95A)
1. Introduction
2. General Information
3. Technical Specification
4. Precautions
5. Operation Panel
Copyright © 2005,2006 Scales and More. All rights reserved.
Contents
6. Function Setting
7. Operation Panel
8. Troubleshooting
9. Daily Maintenance
10. Other Maintenance

1. Introduction
2. Technical Specification
The High Speed Coin Counting Machine is a
compact, multi-function, fast coin counter.
Before operating the machine, please read
this manual carefully. Do not operate the
machine until you understand the contents of
this document.
Should you have any doubts, please contact
your local distributor or sales agent for further
advice.
Please keep this manual readily available for
future reference.
3. General Information
Hopper
Thickness
Knob
Counting Speed:
Hopper Capacity:
Countable Coin Size
Thickness:
Diameter:
Coin Type Number:
Max. Counting Display:
Counting Mode:
Power Consumption:
Power Requirements:
or AC 220V + 10%, 60Hz
Dimensions:
Net Weight:
2300 Coins/Min (Max.)
5000 pcs. (Max.)
0.7 - 3.9mm
14 - 34mm
9(1-9)
9999999
Continuous Counting Mode
Batch Counting Mode
Accumulation Counting Mode
70W
AC 120V + 10%, 50Hz
26.8 (W) x 36 (L) x 19.6 (H) cm
11kg
4. Precautions
Do not install in the following places:
On an incline
Direct sunlight
Dusty areas
In or near water (it does not float)
Uneven platform
Operation
Panel
Coin
Outlet
Power
Switch
Diameter
Knob
Rejected
Coin
Copyright © 2005,2006 Scales and More. All rights reserved.
Operate at a location where an outlet is
available nearby and where the plug can be
readily removed.
Before putting the coins into the Hopper,
please remove all paper scraps, lint, rubber
bands, etc.
Do not open the Top Cover when coins are in
the hopper.
When using a bag to collect coins, please
place the bottom of the coin bag on the floor,
or on a stand, to prevent the machine from
tipping over

5. Operation Panel
Add
Bat
For Selecting the accumulation
mode
For selecting the batch num
or continuous counting mode.
ber
BM
Type
-1
-10
+10
+1
MC
M+
MR
CLR
Transfer the batch into memory
Coin type selector
Decrease the batch by one
Decrease the batch by ten
Increase the batch by ten
Increase the batch by one
Clear count number in memory
Add count number to memory
For displaying count number
memory
Clear the present count number
in
Stop/Start
Start stop counting
6. Function Setting
Batch Counting Mode Setting:
Press the BAT key, the display will show 0.
Press the BAT key again, the display will show: 20, and the BAT indicator on the right side of the display will
be on. It indicates that the machine is in the batch counting mode and the batch number is 20. Each time
the BAT key is pressed, the batch number advances in the order: 0,20,25,40,50,100,200,500,1000,5000, 0;
if you want to set a number which is not listed, press the -1 -10 +10 +1 key to amend the batch number; if
the amended batch number should be kept in memory, press BM key.
Accumulation Counting Mode Setting:
Press the ADD key to select the accumulation mode "on" or "off". In accumulation counting mode, the
"ADD" indicator on the right side of the display will be on and the counting will be accumulated from the
previous number on the display.
Memory setting:
After counting is finished, if the counting number on the display should be reserved in memory, press M+
key; if you want to re-show the stored data in the memory, press MR key; if the memory should be cleared,
press MC key. When then is any data stored in the memory, the "MEM" indicator on the right side of the
display will be on.
Coin type setting (Only for Non US Coins Calibrated for US Coins Out of The Box)
The machine has nine electronic presets for counting different denominations of coins, press TYPE key to
select the counting area, the area code from 1 to 9 will be shown on the left of the display, and the relative
memory will change with the presets.
Copyright © 2005,2006 Scales and More. All rights reserved.

7. Operation Procedures
Step 1: Turn on the power switch, the display will show 0 and the ADD indicator on the right side
of the display will be on. The machine is in accumulation counting mode and ready to start
counting.
Step 2: Set coin diameter adjusting knob to the desired denomination according to the coin
diameter.
Step 3: Set coin thickness adjusting knob to the desired denomination according to the coin
thickness.
Step 4: Place a coin bag, or a carton, on the coin outlet.
Step 5: Put the coins into the Hopper and press the STOP/START key to start the counting. The
machine will stop when the count number comes up to the batch number, or after the machine
completes counting all the coins in the hopper.
Step 6: If the counting should stop in halfway, press the STOP/START key, the counting will stop;
with the key pressed again, the machine will restart, and the previous count number is retained
and new counting will be added to it.
Step 7: When counting is completed, if you want to clear the display, press the CLR key. The
count display will reset to "0" or the last count number in accumulation mode, press the CLR key
again, the count display will reset to "0".
Unscrew knob
releasing metal
ring
Changing the coin tube holder
Attach coin catcher
tube holder
(replace knob to
lock into place)
Attach coin
wrapper stopper.
Hooks on.
Shotgun style wrapper
works best
Changing the coin bag
Drop coin director
down into
tube holder.
This directs coins
into wrappers
Unscrew knob
releasing metal
ring
Pull bag up
around metal ring
Bring ring back down and
replace knob, then fold bag
top down to cover metal ring
Copyright © 2005,2006 Scales and More. All rights reserved.
8. Troubleshooting
Coin Runway Jamming:
When coin are jammed in the coin runway of the machine,
rotate the diameter knob counter-clockwise to release the left
guide plate. The jammed coin will fall into the rejected coin
box and then you can re-adjust the diameter knob again.
Centrifugal Disc Jamming:
If foreign objects are mixed with coin in the hopper, jamming
may occur between the centrifugal disc and the coin guide
plate. When jamming has occurred, remove the coins in the
hopper, open the top cover by pulling the lock lever towards
you, pull the front of allocation belt assembly towards you and
remove the foreign objects, pull up the Hook of the top cover to
unlock it and then close the top cover.
9. Daily Maintenance
Be certain to turn the main power
off before attempting daily
maintenance.
Clean the coin passage at least
once a day with the brush supplied.
Check whether the feed belt is
dirty or worn. If it is dirty, clean it;
if it is worn, replace it with a new
one.
If the machine has technical
problems (that you can not fix)
please contact your distributor.
Copyright © 2005,2006 Scales and More. All rights reserved.

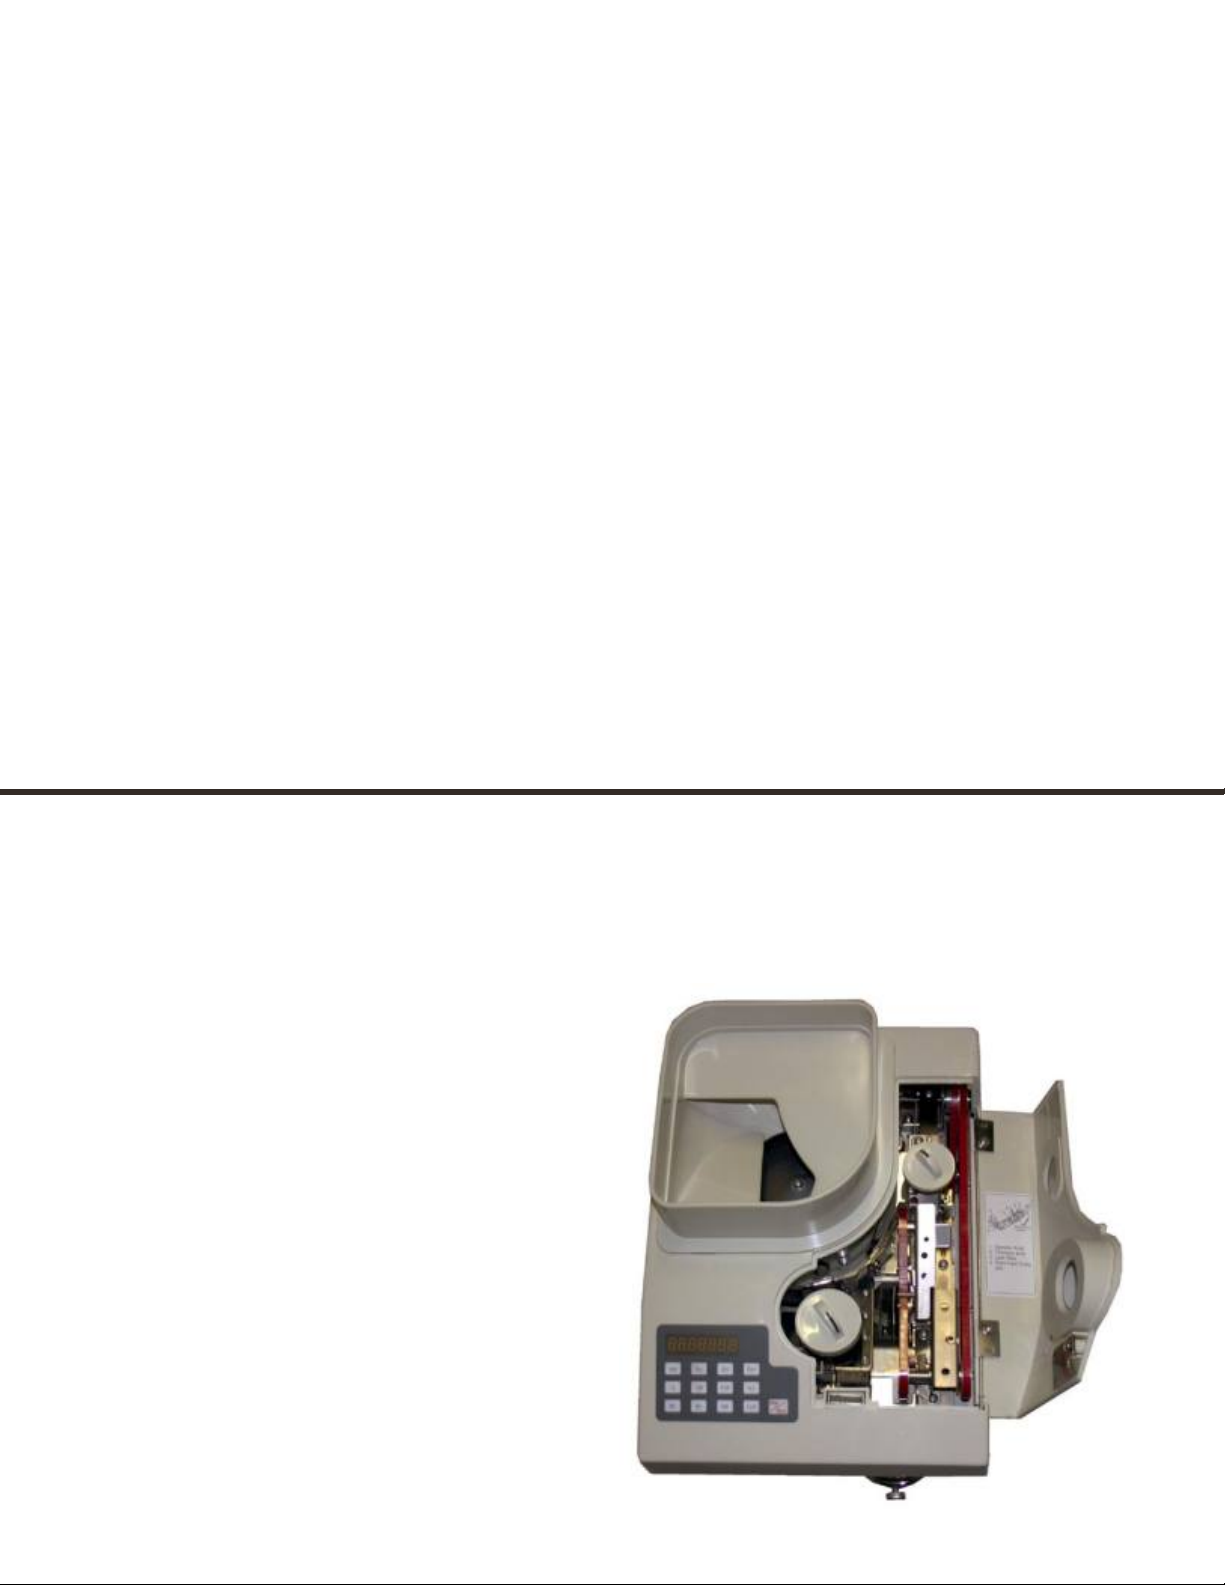
10. Other Maintenance
STEP 1.
As right diagram 1, open the
upper cover, pull the Front Feed
Pulley Arm upward, then remove
the V-Belt 322 and V-belt 564 from
the machine, then, put on a new
V-Belt on the Pulleys.
Diagram 1
STEP 2.
As the left diagram 2, remove the
Diagram 2
STEP 3.
As right diagram, remove the
Rubber Washer on the Plastic
Pedal, unscrew the four screws
in the Plastic Pedal.
Unscrew the screw 1 and screw 2,
rotate the Coin outlet Chute, then
you can screw off it from the
machine.
Pull the Bottom Cover upward,
remove the Bottom Cover from
the machine.
V-belt 350 and fix a new belt on
the pulley, the tension can be
adjusted by adjusting the
position of the Pressure Roller
Arm.
Copyright © 2005,2006 Scales and More. All rights reserved.
Diagram 3
 Loading...