

Page 1

User Manual
AP-1001g-P
802.11g 54Mbps Wireless Access
Point and Wireless Bridge
Page 2

FCC Compliance
NOTE: This equipment has been tested and found to comply with the limits for a Class B digital
device, pursuant to Part 15 of the FCC Rules. These limits are designed to provide reasonable
protection against harmful interference in a residential installation. This equipment generates,
uses and can radiate radio frequency energy and, if not installed and used in accordance with the
instructions, may cause harmful interference to radio communications. However, there is no
guarantee that interference will not occur in a particular installation. If this equipment does cause
harmful interference to radio or television reception, which can be determined by turning the
equipment off and on, the user is encouraged to try to correct the interference by one of the
following measures:
• Reorient or relocate the receiving antenna.
• Increase the separation between the equipment and receiver.
• Connect the equipment into an outlet on a circuit different from that to which the receiver
is connected.
• Consult the dealer or an experienced radio/TV technician for help.
This device complies with Part 15 of the FCC Rules. Operation is subject to the following two
conditions: (1) This device may not cause harmful interference, and (2) this device must accept
any interference received, including interference that may cause undesired operation.
Any changes or modifications not expressly approved by the party responsible for compliance
could void the user's authority to operate this equipment.
Important Note:
FCC Radiation Exposure Statement:
This equipment complies with FCC radiation exposure limits set forth an uncontrolled
environment. This equipment should be installed and operated with minimum distance 20cm
between the radiator & your body.
This transmitter must not be co-located or operating in conjunction with any other antenna or
transmitter.
This device is intended only for OEM integrators under the following
conditions:
1) The antenna must be installed such that 20cm is maintained between the antenna and users,
and
2) The transmitter module may not be co-located with any other transmitter or antenna.
As long as 2 conditions above are met, further transmitter
OEM integrator is still responsible for testing their end product for any additional compliance
requirements required with this module installed (for example, digital device emissions, PC
peripheral requirements, etc.)
IMPORTANT NOTE: In the event that these conditions can not be met
laptop configurations or co-location with another transmitter), then the FCC authorization is no
longer considered valid and the FCC ID can not
circumstances, the OEM integrator will be responsible for re-evaluating the product (Including the
transmitter) and obtaining a separate FCC authorization.
be used on the final product. In these
test will not be required. However, the
(for example certain
Page 3

End Product Labeling
This transmitter module is authorized only for use in device where the antenna may
be installed such that 20cm may be maintained between the antenna and users (for
example: Notebook, Assist Point, Router and similar product). The final end
product must be labeled in a visible area with the following: “Contains TX FCC
ID: PXPAP1001G”.
Manual Information That Must be Included
The OEM integrator has to be aware not to provide information to the end
user regarding how to install or remove this RF module in the users manual of
the end product which integrate this module.
The user’s manual for OEM integrators must include the following information in a
prominent location “IMPORTANT NOTE: To comply with FCC RF exposure
compliance requirements. The antenna must not be co-located or operating in
conjunction with any other antenna or transmitter and antenna must be installed
such that 20cm is maintained between the antenna and users
Canada (IC):
To prevent radio interference to the licensed service, this device is intended to be operated
indoors and away from windows to provide maximum shielding. Equipment (or its transmit
antenna) that is installed outdoors is subject to licensing.
Page 4

Contents
INTRODUCTION............................................................................................................. 1
THE PRODUCT.................................................................................................................. 1
PRODUCT FEATURES........................................................................................................ 1
BASIC IP NETWORKING ................................................................................................... 2
WIRELESS LAN BASICS................................................................................................... 3
GETTING STARTED...................................................................................................... 5
AP1001G CONFIGURATION ........................................................................................ 5
WEB CONFIGURATION ..................................................................................................... 5
BASIC CONFIGURATION ....................................................................................................... 6
ADMINISTRATION ............................................................................................................ 6
LOCATION........................................................................................................................ 6
IP CONFIGURATION ......................................................................................................... 7
OPERATION MODE ........................................................................................................... 8
ADVANCE CONFIGURATION ................................................................................................. 9
RADIO SETTING ............................................................................................................... 9
WPA SECURITY............................................................................................................. 10
SECURITY SERVER SETTINGS ......................................................................................... 11
NON-WPA SECURITY................................................................................................... 11
PROTOCOL ..................................................................................................................... 13
MISCELLANEOUS ........................................................................................................... 13
STATUS .............................................................................................................................. 15
SYSTEM STATUS ............................................................................................................ 15
ASSOCIATION STATUS.................................................................................................... 15
SUPER USER....................................................................................................................... 16
SUPER USER................................................................................................................... 16
FIRMWARE UPGRADE..................................................................................................... 16
IRMWARE VERSION ...................................................................................................... 17
F
FACTORY RESET......................................................................................................... 17
Page 5

Introduction
The Product
The product is based on the IEEE 802.11g standard, which is the latest 54Mbps Wireless LAN
(WLAN) standard. This standard is five times faster than the widely deployed WiFi (802.11b)
products that are found in homes, airport and public wireless hotspots. Because 802.11g uses the
same 2.4GHz frequency band, the product is fully interoperable with existing WiFi cards and
devices.
Having two wireless protocols in one product ensure that your investments are protected, while
enabling you to enjoy the fastest Wireless LAN speed.
This product could operate as either one of the following modes:
a. Wireless LAN Access Point (AP) mode, or
b. Wireless Ethernet Bridge mode.
Product Features
Fully compatibility with IEEE 802.11g WLAN standard
Wireless data rate of up to 108Mbps
2.4GHz license-free frequency band
Full backward compatibility with 802.11b standard (WiFi 11Mbps)
802.1x Authentication (For AP mode only). Used with a RADIUS server to check and
verify the identity of WLAN users.
WEP (Wired Equivalent Privacy). A simple WLAN encryption standard to protect wireless
data from sniffers.
WPA (WiFi Protected Access), for AP mode only. An improved WLAN encryption
standard where the secret key renew automatically at regular intervals.
TKIP (Temporal Key Integrity Protocol). A new encryption key will be generated by
corporate RADIUS server when a authorized wireless adaptor/user associate with
the Access Point. This encryption key renew automatically at regular intervals. This
is normally used in high security enterprise networks.
Pre Shared Key (WPA-PSK). A new key is generated each time a wireless adaptor
connects to the Access Point. This normally used for home user without a RADIUS
server.
Intuitive Web-based configuration
Access Control List provides added security for AP mode.
1
Page 6

Basic IP Networking
IP = Internet Protocol
IP stands for Internet Protocol. In an IP network, every device has a unique IP Address (For
example: 192.168.1.35) to identify itself. There are two ways of assigning an IP address to a PC
or Router: Static and Automatic (DHCP). Static IP addresses are keyed-in manually, while
Dynamic IPs are distributed by a DHCP Server.
Ports
Every packet of traffic is identified by its Source and Destination Addresses, which would ensure
that the packet arrives at the correct destination. A Port Number is also embedded in each
packet; to identify which software application that generated and uses that packet. Therefore, if
AP1001g blocks a certain port number, it denies the particular software from using the
connection.
Static IP Address
Static IP addressing ensures that the device will always have the same IP address. Static
addressing is commonly used for your servers.
Dynamic IP Address
A dynamic IP address is one that is automatically assigned to a PC. These IP addresses are
“dynamic” because they are only temporarily leased to the PC when it connects to the network.
This is the most convenient and common way of managing IP addresses in a network. The
Server that manages this pool of IP addresses is called the DHCP Server. The product has a
DHCP Server built-in to simplify the network management.
DHCP (Dynamic Host Configuration Protocol)
The PC obtaining an IP address from the Server is called the DHCP Client. If there is already a
DHCP Server running on your network, you must disable one of the two DHCP servers. Running
more than one DHCP server together will cause network problems!
2
Page 7

Wireless LAN Basics
A Wireless LAN (WLAN) is a computer network that transmits and receives data with radio
signals instead of using cables. WLANs have become common in homes, offices, airports and
public Hotspots. WLAN can support the same applications and software that run on a wired
network (LAN). Besides supporting the same software and functions, WLAN brings greater
convenience and eliminates the need to lay Ethernet cables in a home or office.
The AP1001g is based on the finalised 802.11g standard. The IEEE 802.11g standard is an
improvement on the 802.11b (WiFi) standard. It increases the data rate up to 54 Mbps within the
2.4GHz band. As the 802.11b standard is also using the 2.4GHz frequency band, the product is
fully backward compatible with the older 802.11b devices. WiFi cards can be used to connect to
AP1001g at 11Mbps.
The AP1001g can even support 108Mbps wireless data rate at Turbo mode. This is only
applicable for user using recommended Turbo-capable Cardbus (with Atheros chipset).
The AP1001g is also known as the Wireless Access Point (AP). The PC using the Cardbus is
known as the Client. WLAN networking involves a few additional parameters to be configured:
SSID
The SSID is the “network name” for the WLAN network. The SSID is any name, and can be any
set of characters or numbers, and must be configured on both the AP and Client. The Client sniffs
the radio frequencies for an AP with the same SSID with itself. The client locks onto the AP and
they are “associated”.
To enable plug-and-play convenience, most client cards can sniff the frequencies to extract the
available SSIDs to let the user choose from.
Encryption
WLAN traffic can be captured by anybody to be read! The solution is to use encryption to make
the traffic appear as random characters to the eavesdropper. Both the AP and client must use the
same encryption standard and key to enable them to decode the “rubbish”. If the encryption
settings are mismatched, the client and AP cannot associate. WEP (Wired Equivalent Privacy) is
the most common WLAN encryption standard.
MAC Address Control
Every client card has a unique MAC Address. This MAC Address can be input into the AP
(Router), such that the AP only allows this pool of MAC Addresses to use the WLAN.
Channel
There are a total of 13 channels in the 2.4GHz band. Depending on regulation, not all the
frequencies may be available in every country. Frequency is configured on the AP only. The client
searches for the AP and locks onto that AP’s channel.
Signal Strength
Radio signals drop in power over a distance. Even if all the settings are correct, a low signal
strength makes association impossible. The usable distance between the AP and client can
range from a few meters indoor to 200m outdoors maximum. When setting up the AP, make sure
that you:
Keep the distance from the AP to the clients as short as possible.
3
Page 8

Make sure that the WLAN signals do not have to pass through too many concrete walls
and metal structures to reach the client.
Make sure that APs are located far away from one another to avoid interference.
Interference
Interference happens when 2 APs with the same channels are placed near to one another. The
speed of the network drops and the signal strength fluctuates wildly.
Roaming
Association happens when the SSID, Encryption and MAC Address Control settings are correct
between the AP and client. If 2 APs with these same settings are located in the same area, the
client would choose to associate to the one which gives it a better signal strength. The client
would roam over to the 2nd AP when he moves nearer to it. The client switches AP and
frequency as he does so.
4
Page 9
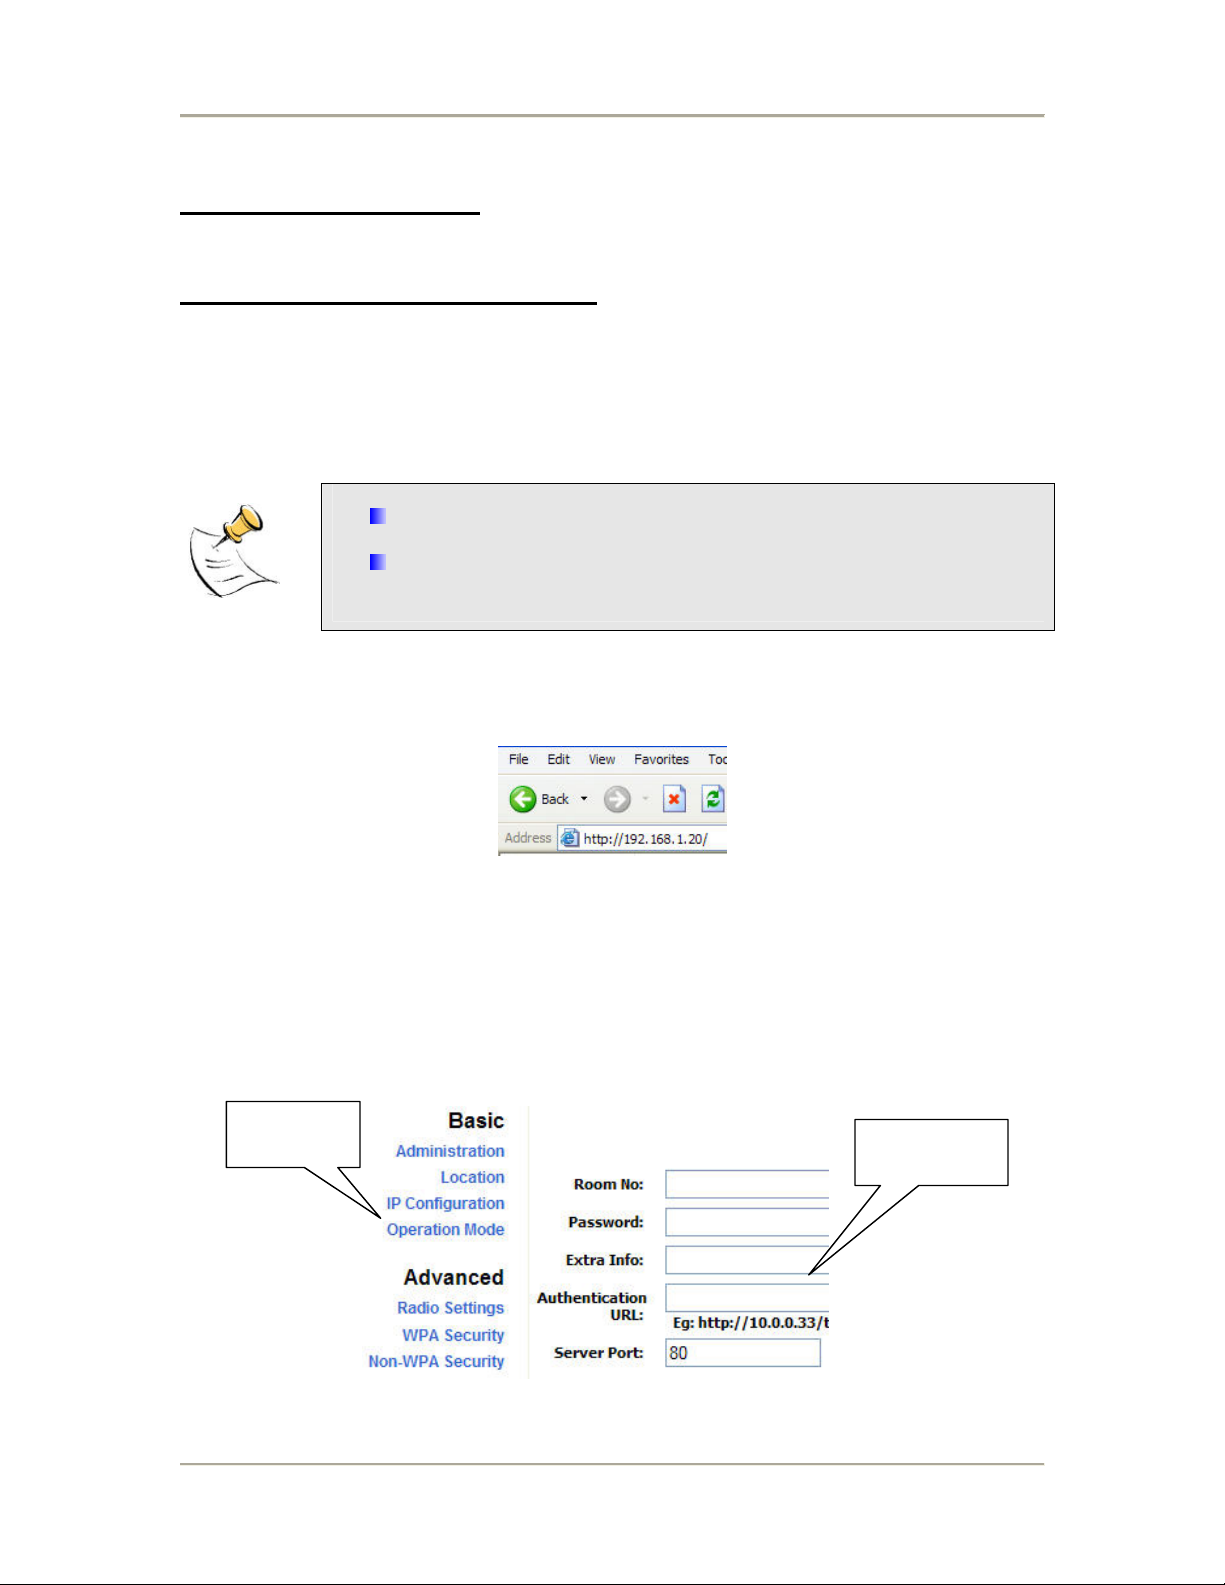
GETTING STARTED
AP1001G CONFIGURATION
Web Configuration
AP1001g can be configure using a web server.
1. Connect the network as shown previously.
2. Open a Web browser (Internet Explorer, Netscape etc.).
3. Type AP1001g LAN IP (192.168.1.20) address into the browser’s Address field. The
default LAN IP address of AP1001g is 192.168.1.20.
4. Enter username and password. There are two types of users, admin user and super user.
The default username and password for admin user is admin/admin and the default
username and password for super user is super/super. Only super user will be able to
carry out firmware upgrade.
In every AP1001g Web Configuration page, the left panel is the navigation menu containing the
main sections. The right-side frame is where the detailed configuration is done.
Navigation
panel
If you are accessing the web server via Ethernet cable, check that the
upper LED lights up on AP1001g.
If your PC is wireless, check the PC’s card utility to make sure that the
signal strength is good and that the bottom LED lights up on AP1001g.
Configuration
panel
5
Page 10
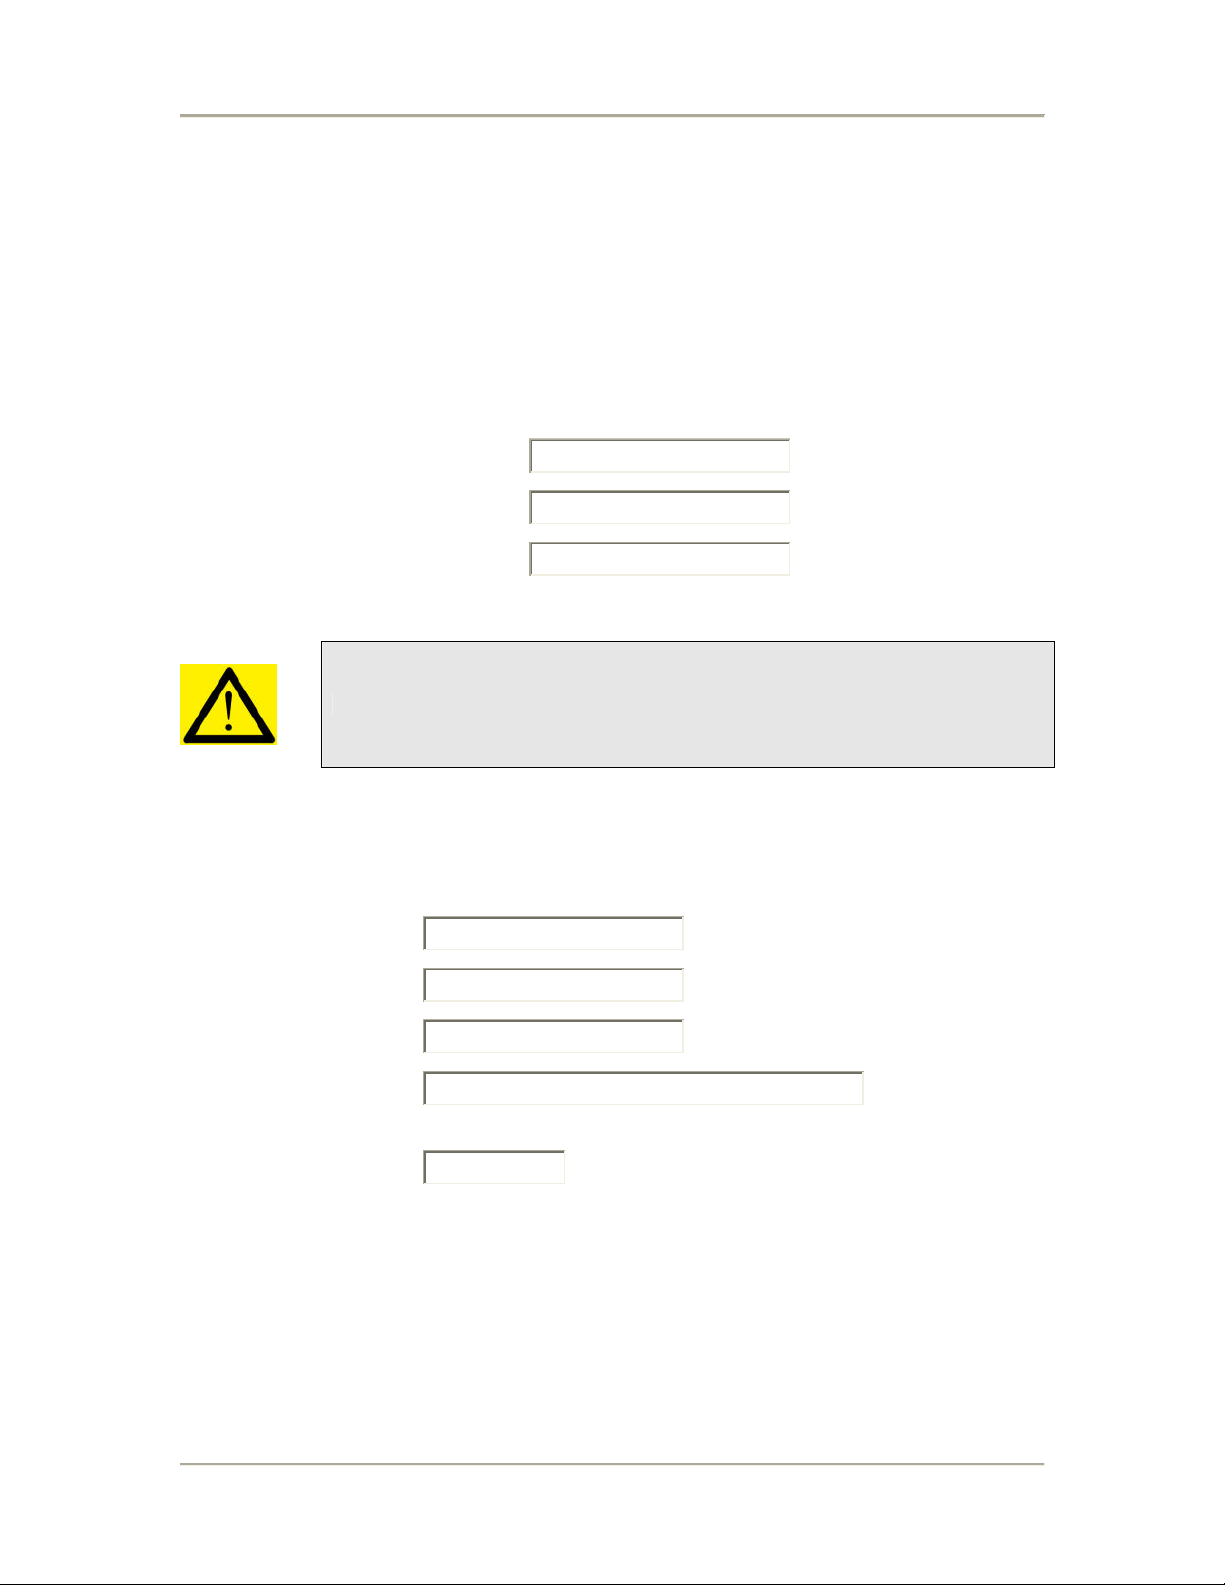
Basic Configuration
Administration
This page allows you to change the Username and Password for admin user. The default
username and password is admin / admin. After every factory reset, the Username and Password
reverts to this combination. Device name allows you to give APRT-2001g2 a name.
Device Name:
User Name:
Password:
admin
*****
The username and password are case sensitive.
Location
This page allows you to store information such as where the AP1001g is being placed.
Room No:
Password:
Extra Info:
Authentication
URL:
Server Port:
Eg: http://10.0.0.33/test.asp or http://www.abc.com/test.asp
80
Room No: Enter the room number where the AP1001g is being place.
Password: Enter the password.
Extra Info: Enter any extra information that for the particular room.
Authentication URL: The website for the authentication server.
Server Port: The port number use by the server.
6
Page 11
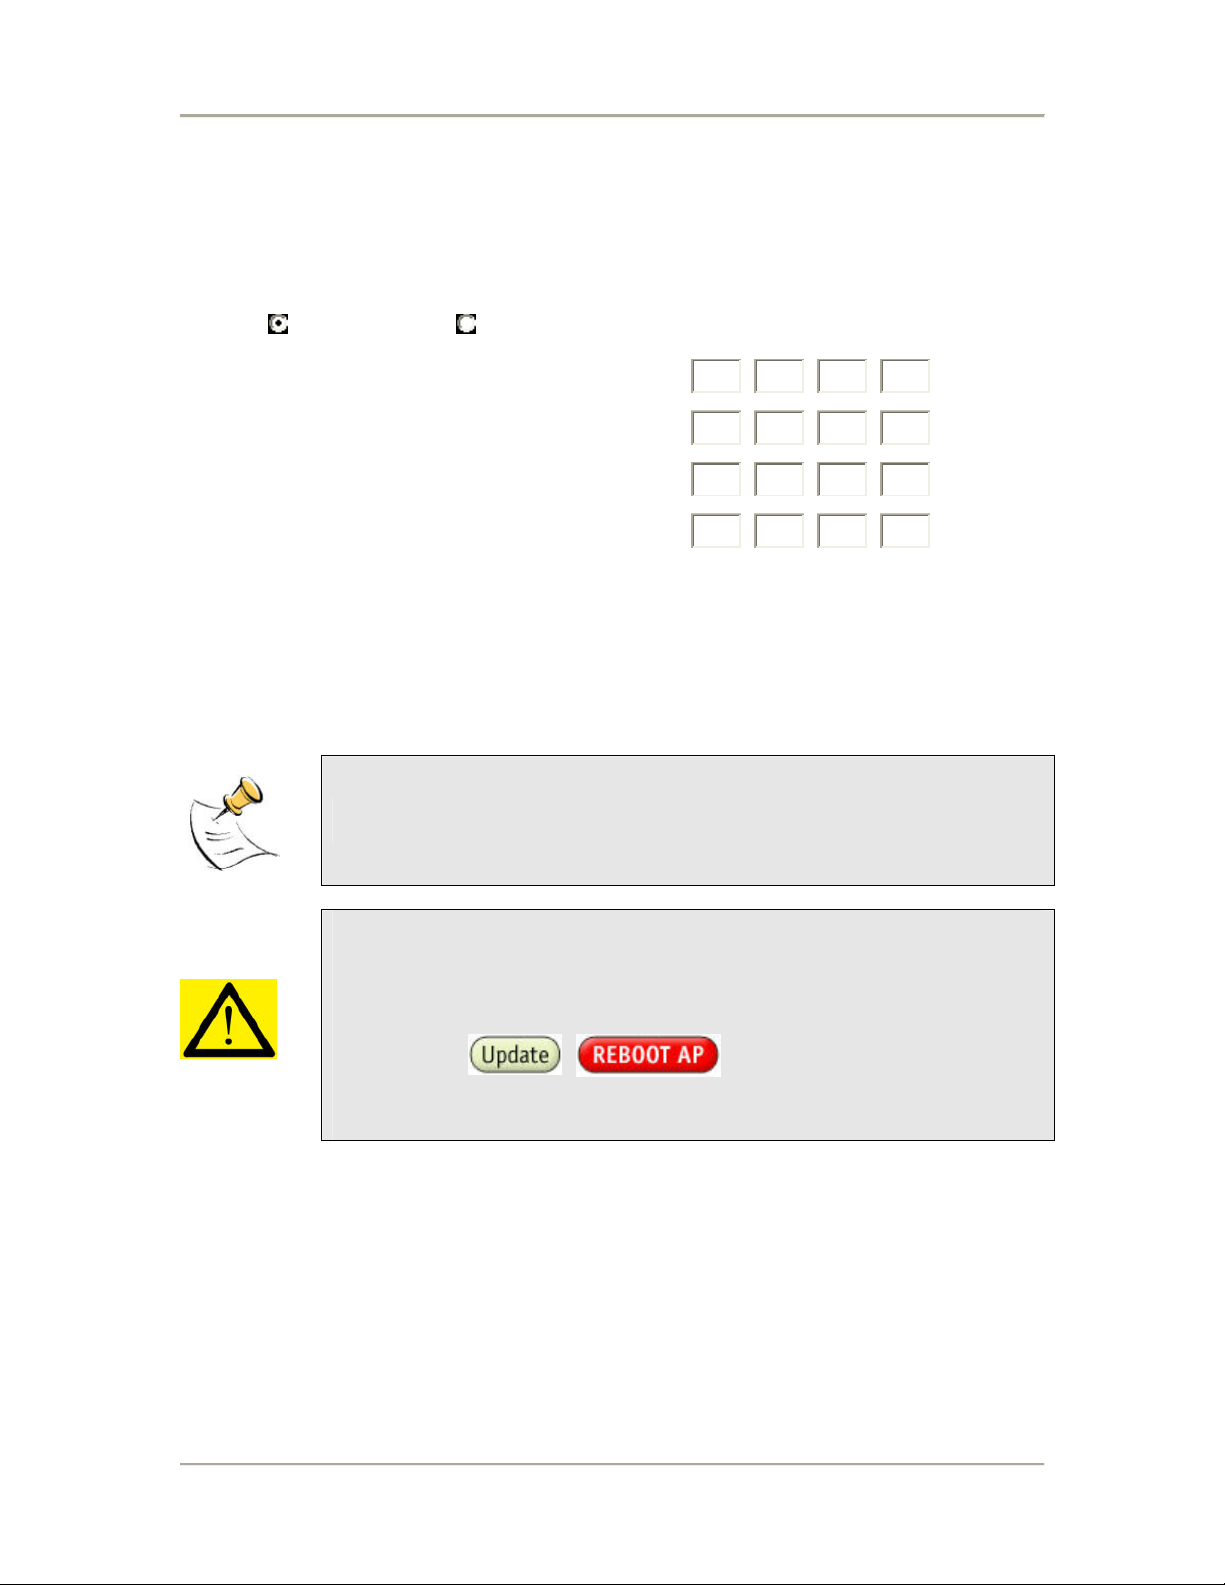
IP Configuration
This page allows you to choose the type of IP
Static IP mode DHCP mode
IP Address:
Subnet Mask:
Default Gateway Address:
Domain Name Server IP Address:
192. 168. 1
255. 255. 255. 0
0
0
0
.
.
.
0
.
0
0
20
.
0
.
.
0
Static IP mode: When you boot up the AP1001g for the first time, it is in Static mode. You assign
a Static IP to AP1001g. The default IP address, subnet mask and gateway mask are
192.168.1.20, 255.255.255.0 and 0.0.0.0.
DHCP mode: AP1001g will obtain an IP Address from an upstream DHCP Server.
When in DHCP client mode, these 4 columns show the IP settings obtained
from the network.
Remember that after every configuration change, it is necessary to:
- Click Update on the page.
- Reboot AP1001g.
The changes take effect only AFTER Reboot.
7
Page 12
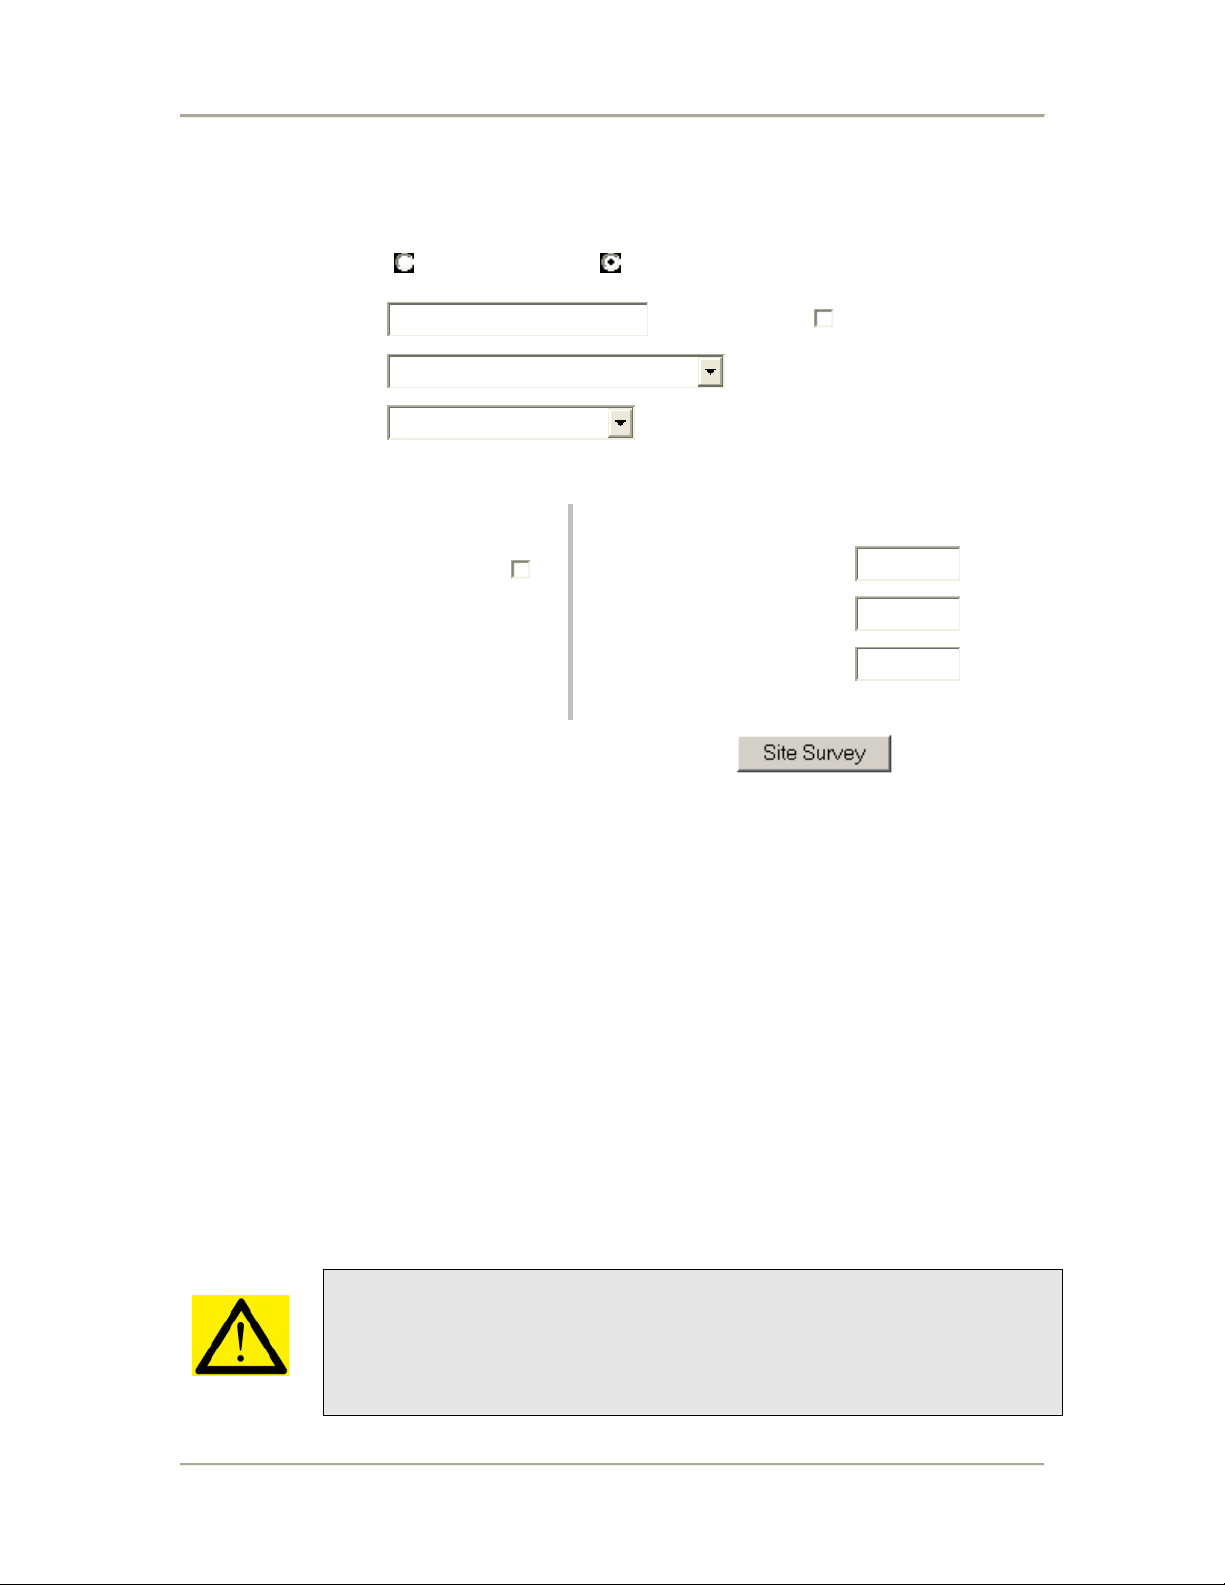
Operation Mode
Operation Mode:
SSID:
Wireless Mode:
Radio Frequency:
Access Point Bridge
Rf Net ec h
2.4GHz 54Mbps (802.11g)
SmartSelect
Suppress SSID:
Bridge Mode Settings:
Remote AP MAC List:
Enable 11b AP Support:
Notes:
Set only when remote
AP works at 11b mode
Current Associated: Not Associated!
Remote AP MAC 1:
Remote AP MAC 2:
Remote AP MAC 3:
Notes: All "00:00:00:00:00:00" means allow ANY
00:00:00:00
00:00:00:00
00:00:00:00
Operation Mode: AP1001g can be used as an Access Point or as a Wireless Bridge. Wireless
Bridge is used when it is not advisable to lay an Ethernet line over a distance. Two AP1001g can
be set up to connect over this distance, acting as the wired backbone.
SSID: Service Set Identifier. It is a sequence of characters that uniquely names a Wireless LAN.
This name allows PCs to connect to the correct Wireless Access Point when multiple Access
Points operate in the same location. The default SSID is ANY.
Supress SSID: When this is ticked, AP1001g will not broadcast the SSID. Unwelcome PCs will
not be able to scan for the SSID of this AP1001g, and they can only associate if they know
exactly what is the SSID.
Wireless Mode: To choose to operate the AP or Bridge in 802.11b or 802.11g. Both operate in
the frequency of 2.4GHz but 802.11g has a faster data rate of 54Mbps as compared to the
11Mbps of 802.11b.
Radio Frequency: There are 11 different frequency channels. You can choose to set the
frequency channel to use or use SmartSelect for automatic channel selection.
Enable 11b AP Support: This is use only if AP1001g is set to Bridge mode. Tick the box if the
AP that the bridge is associated to supports only 802.11b.
Remote AP MAC List: This is use only if AP1001g is set to Bridge mode. The Bridge will only
associate with AP whose MAC address is in the list. It is essential to type in the MAC address of
the AP without any spacing in front or behind it.
Site Survey: Display the MAC address, RSSI, SSID and the channel of other AP.
Do not insert any spacing in front or behind the MAC address when using
Remote AP MAC List. Failing to do so will cause the bridge unable to associate
with the intended AP.
8
Page 13
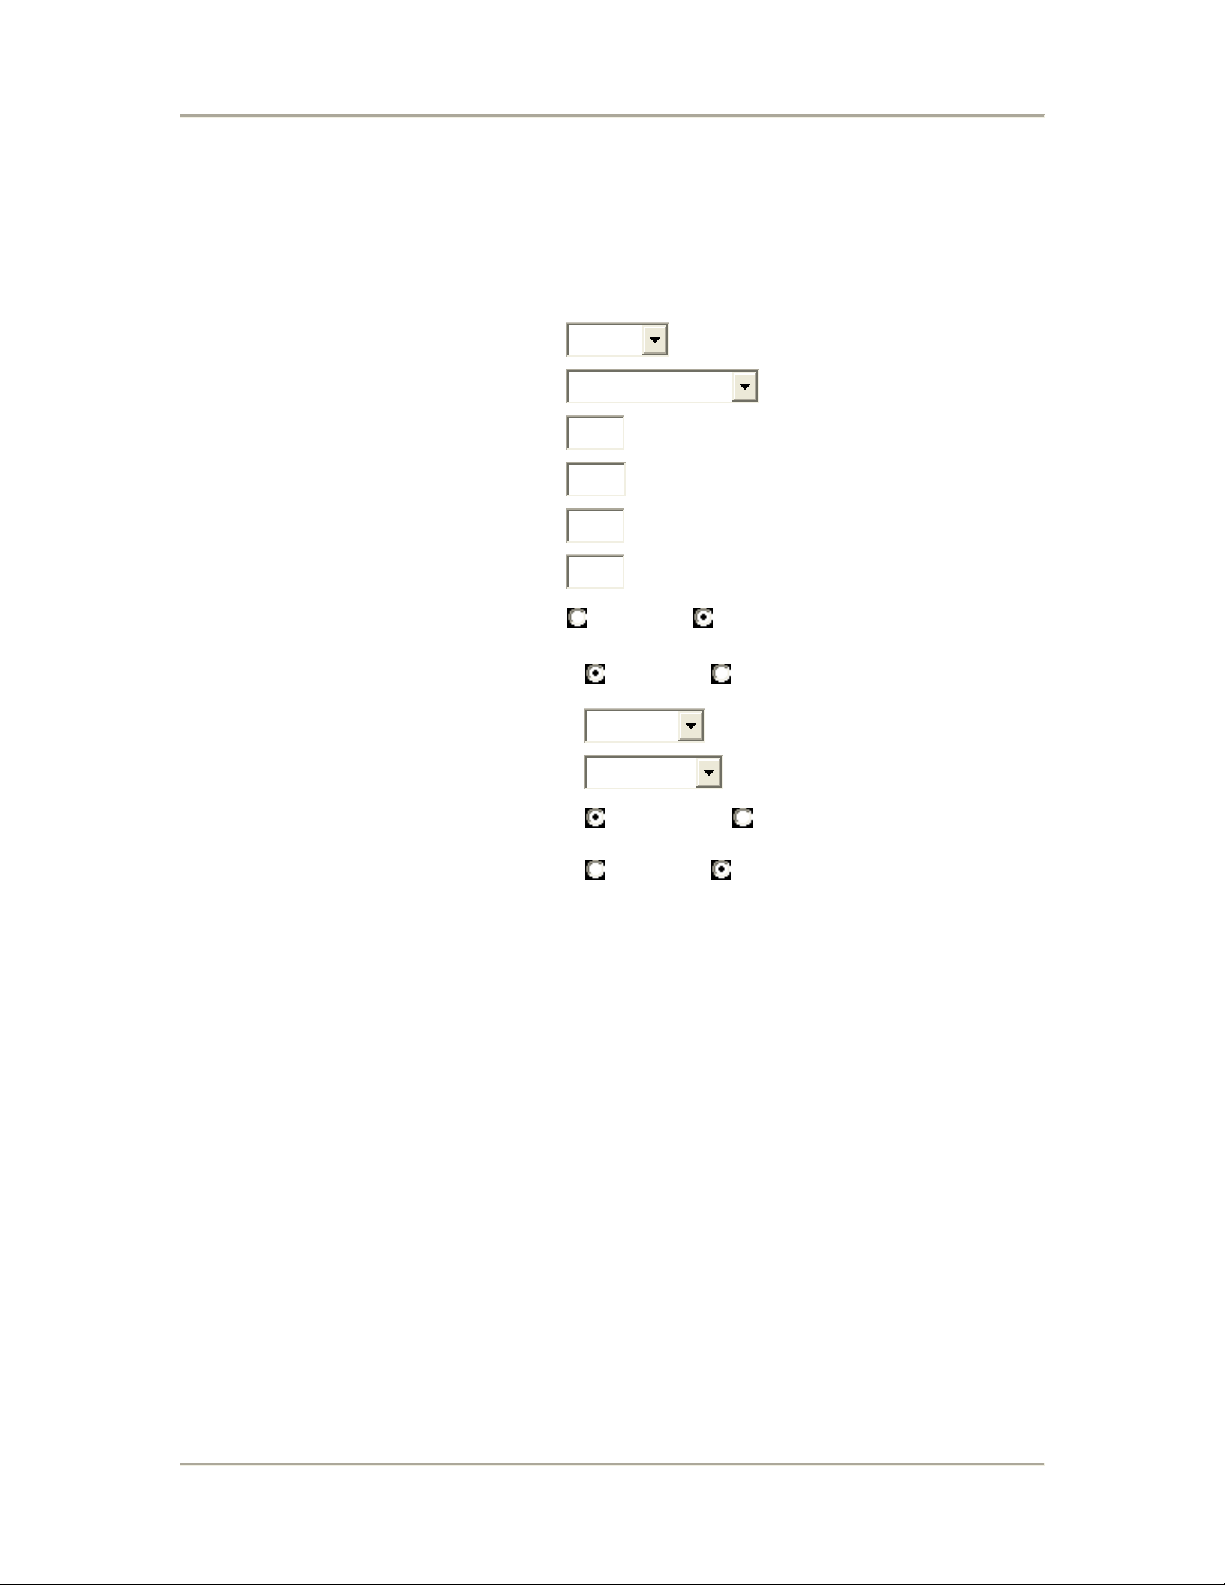
Advance Configuration
Radio Setting
Data Rate:
Transmit Power:
Beacon Interval (20 - 1000):
Data Beacon Rate (DTIM) (1 - 255):
Fragment Length (256 - 2346):
RTS/CTS Threshold (256 - 2346):
best
Half ( 50%)
100
1
2346
2346
Short Preamble:
Allow 2.4GHz 54Mbps Stations Only:
Protection Mode:
Protection Rate:
Protection Type:
Short Slot Time:
Disable Enable
Disable Enable
Auto
11 Mbps
CTS-only RTS-CTS
Disable Enable
Data Rate: You can fix the data rate to different values as 11Mbps or 24Mbps. However it is
recommended to set the setting to “Best” for AP1001g to determine the best data rate to be use.
Transmit Power: Sometimes, it is useful to decrease the coverage range of each AP1001g, so
that more AP1001g can be located together without interference to one another. The default
transmission power is 100%.
Beacon Interval
roaming process very responsive. However, throughput will decrease, so it is necessary to strike
a balance. Typical Beacon Interval is set to 100ms.
Data Beacon Rate (DTIM): Choose between 1 to 16384.This is always a multiple of the beacon
interval. It determines how often the beacon contains a delivery traffic indication message (DTIM).
The DTIM tells power-save client devices that a packet is waiting for them.
Fragment Length
RTS/CTS Threshold: Enter a value between 256 and 2346
Short Preamble
manufacturers implement long preambles. Even if there is a mismatch between AP1001g and the
client, they can still connect well and the mismatch may not be noticeable to most users. Do not
change this setting without seeking advice.
Allow 2.4GHz 54Mbps Stations Only
of 2.4 Ghz 54 Mbps STA only.
Protection Mode: Select None, Always or Auto
Protection Rate: Select 1Mbps, 2Mbps, 5.5Mbps or 11Mbps
: Choose between 20 to 1000.Low Beacon Interval will make the association and
: Specifies the fragment length. Enter a value between 256 and 2346.
: Enable to use Short Preamble in the Wireless LAN packet headers. Most
: Use this radio button to enable or disable the association
9
Page 14
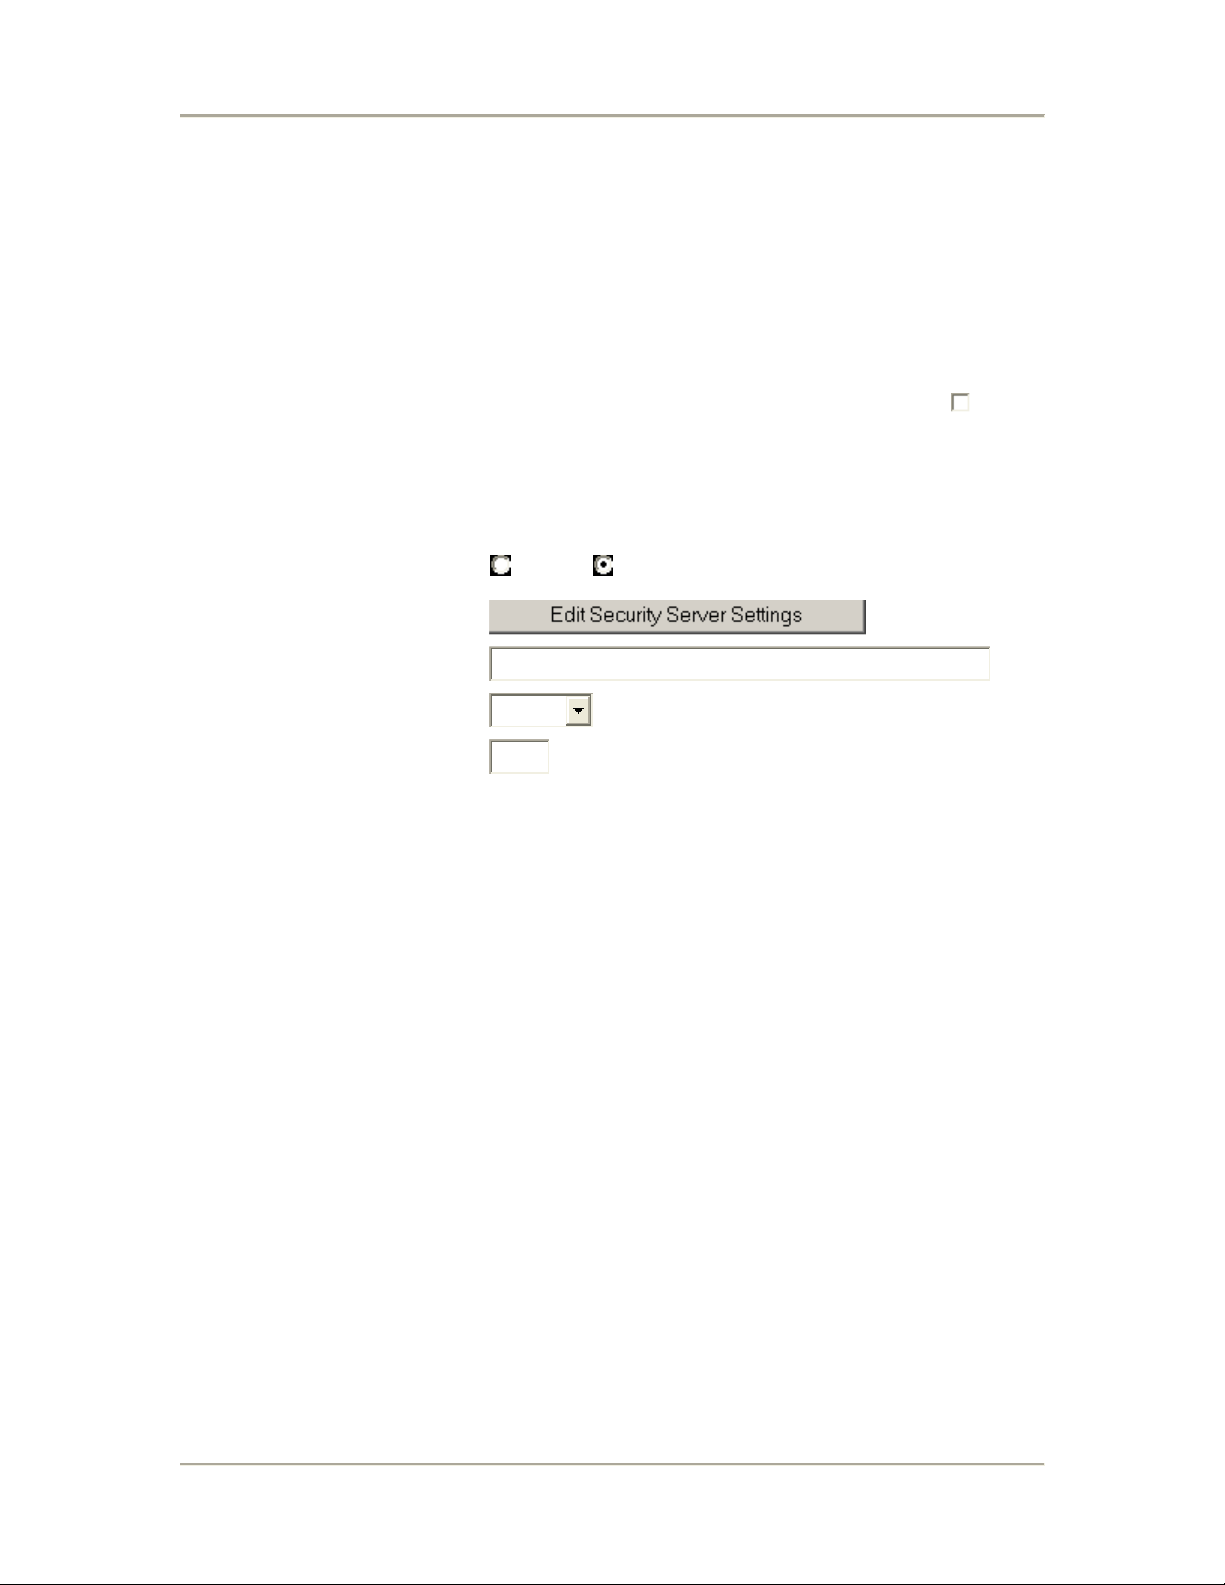
Protection Type: Select either CTS only or RTS-CTS
Short Slot Time: Enable or disable short time slot usage
WPA Security
This section allows you to configure wireless encryption to prevent unwelcome parties from
reading your traffic. Authentication can also be configured to block outsiders from accessing your
network.
Enable WPA Security:
Note: Enable WPA security will Disable the non-WPA security settings
Disable WPA security will Enable the non-WPA security settings
Mode:
Security Server:
PSK EAP
PassPhrase:
Cipher Type:
Group Key Update Interval:
Auto
300
Enable WPA Security: Tick the box to enable the following suite of Encryption and
Authentication features. Enabling WPA Security will disable the non-WPA security.
PSK: Pre-shared Key. PSK mode is less secure than EAP as it does not use a RADIUS Server.
To configure, key in an 8-64 character PassPhrase onto both AP1001g and the Client.
EAP: Extensible Authentication Protocol. When chosen, the RADIUS server is used for
authentication between AP1001g and Client. To configure, use the “Edit Security Server Settings”
feature.
Security Server: This is to edit the RADIUS Server.
PassPhrase: Key in the 8-64 character for PSK.
Cipher Type: Choose Auto, TKIP or AES
Group Key Update Interval: Specifies the interval in milliseconds
10
Page 15
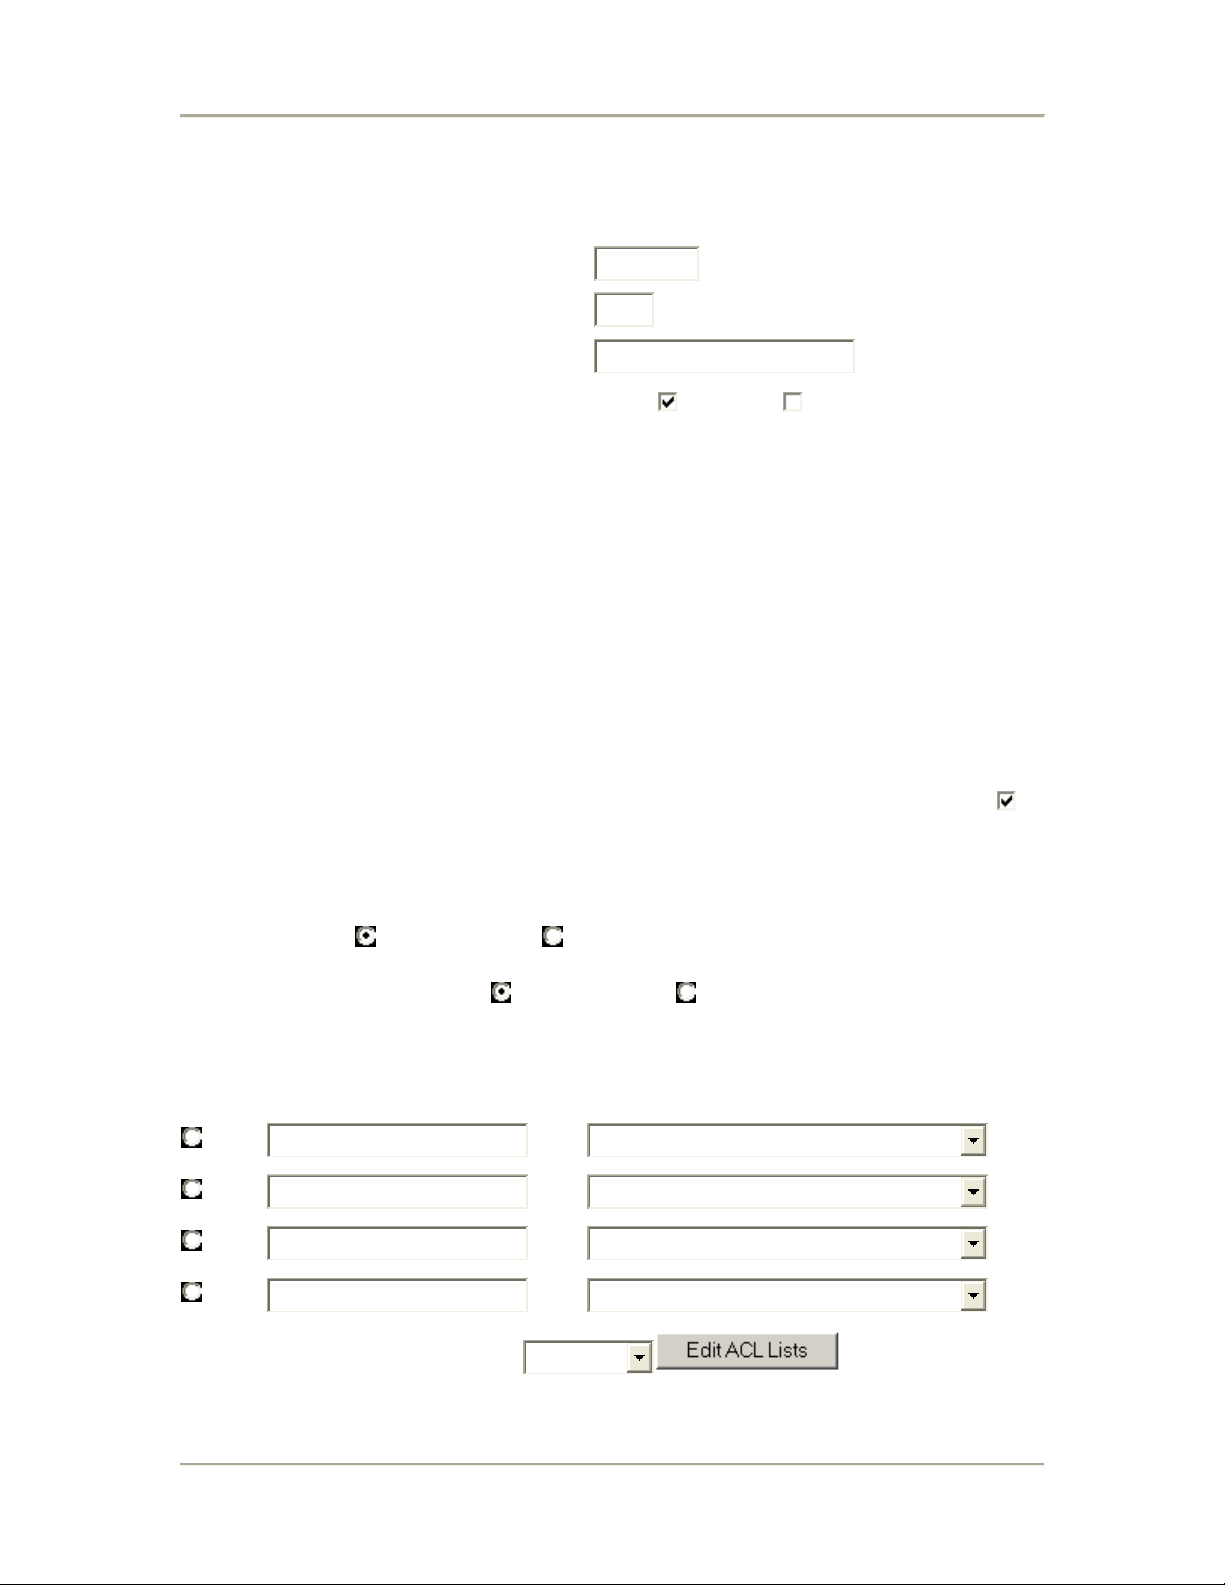
Security Server Settings
RADIUS Server:
RADIUS Port:
1812
RADIUS Secret:
2.4GHz Key Source:
Local Remote
RADIUS Server: Enter the IP Address of the RADIUS Server (for 802.1x authentication
purposes). This is used only when you have a RADIUS Server and want to use it for
authenticating the Wireless Clients. Almost all homes and many offices do not have a RADIUIS
Server. These settings are for advanced users only.
RADIUS Port
RADIUS Secret: Enter the Shared Secret of the RADIUS Server. (Only if 802.1x protocol is used)
2.4GHz Key Source: Specify the location of the key storage. (Only if 802.1x is used.) If you are
using PSK or Pre-shared key, select local.
: Enter the port number of the RADIUS Server.
NON-WPA Security
Enable Non-WPA Security:
Note: Enable Non-WPA security will Disable the WPA security settings
Disable Non-WPA security will Enable the WPA security settings
Mode:
Open System Pre-shared Key
Key Entry Method: Hexadecimal Ascii Text
Default
Shared
Encryption Key Key Length
Key
1.
2.
3.
4.
Access Control List: Enable
Disable
None
None
None
None
11
Page 16
Enable Non-WPA Security: Tick the box to enable the following suite of Encryption and
Authentication features. Enabling non-WPA security will disable WPA security.
Open System: No encryption and authentication features in this mode. When the AP1001g is in
this mode, any Client can associate with it. This is the default setting for the non-WPA Security
setting.
Pre-shared Key: When chosen, the encryption Key is also used for authentication between
AP1001g and Client. To configure, enter the encryption Key in the “Encryption Key” field.
Key Entry Method: Choose Hexadecimal if you want to enter the Keys in hexadecimal format.
Otherwise, choose Ascii Text to enter the Key in ASCII format. ASCII is also called Alphanumeric
in some systems. Use the same key format for AP1001g and Client!
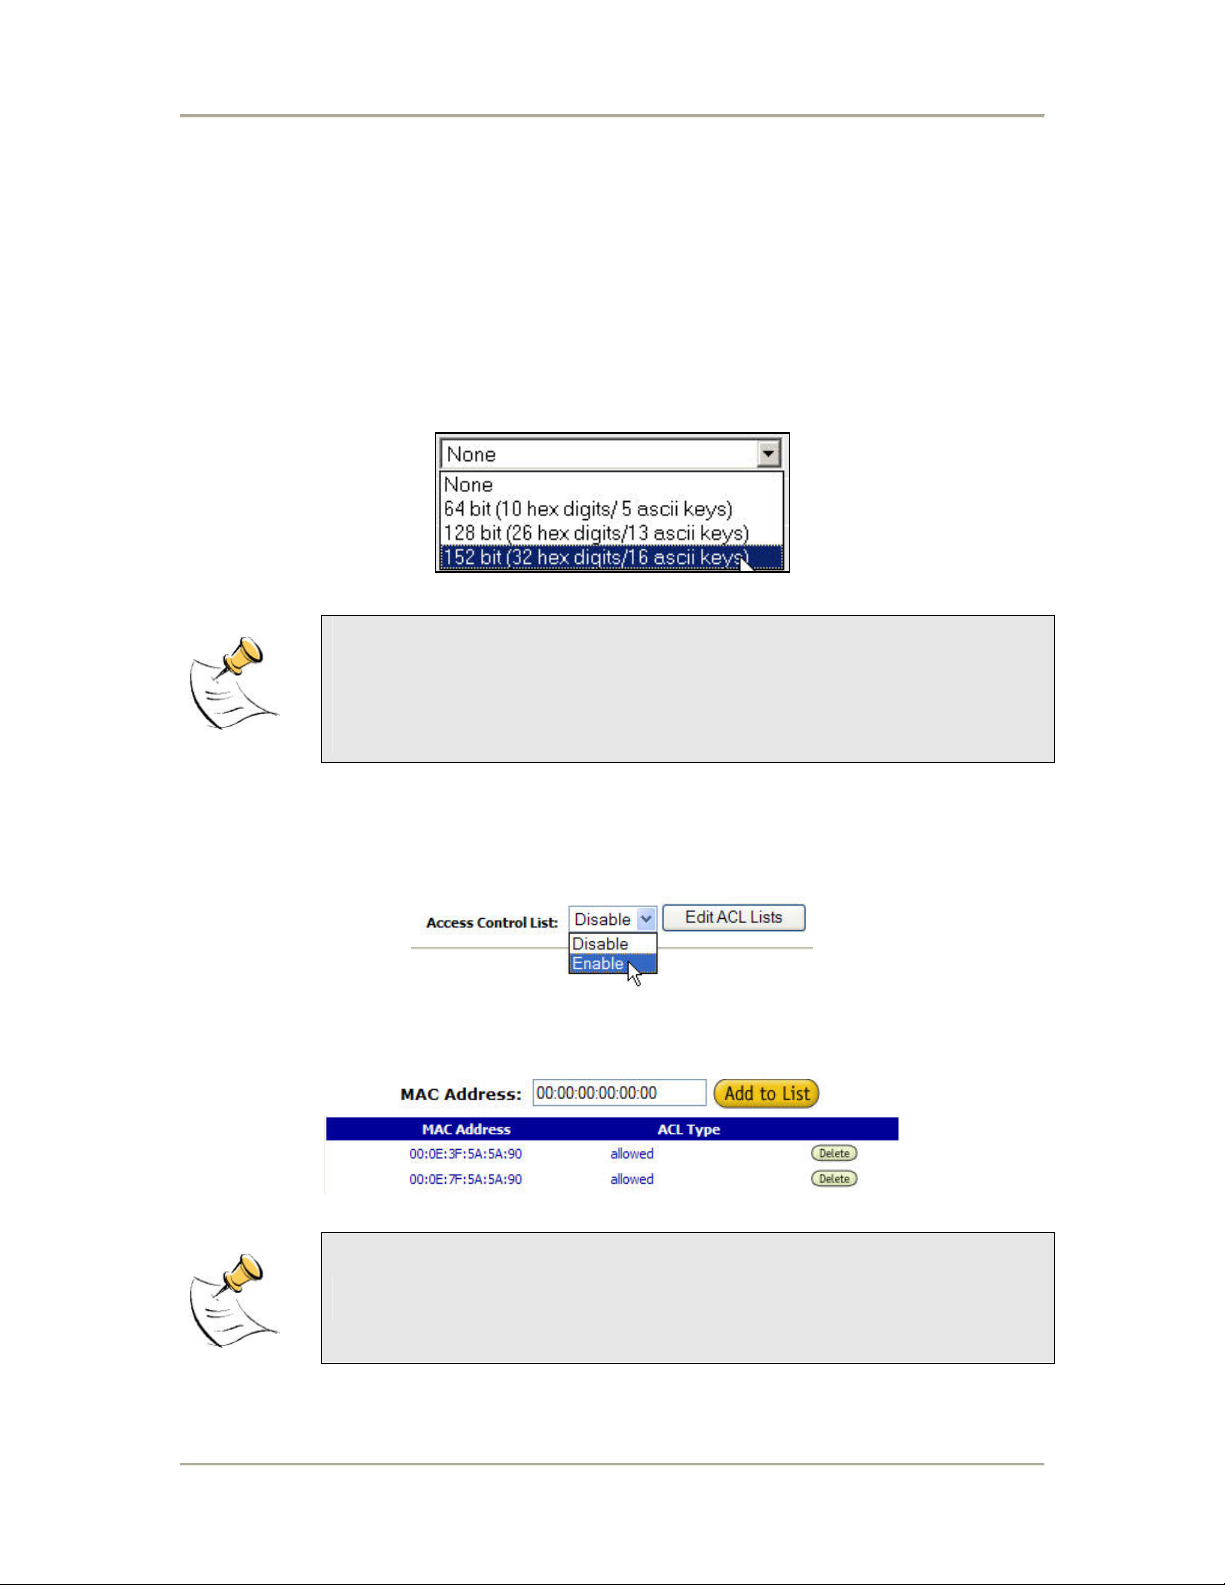
Key Length: Choose the number of bit for the encryption key.
Access Control List: To enable MAC Address Filtering, enable Access Control List. Only valid
computers (whose MAC addresses are in the MAC address table) would be allowed to access
AP1001g. Click on Edit ACL Lists to amend the MAC address table.
Hexadecimal Characters:
0,1,2,3,4,5,6,7,8,9 and a,b,c,d,e,f
ASCII Characters:
0,1,2,……8,9 and
a,b,c,d,………x,y,z
To add a MAC address, key in the MAC address in the format 00:11:22:33:44:55. The table
display all the MAC address currently allows.
Enabling WPA Security will disable the non-WPA Security setting.
Enabling non-WPA Security will disable the WPA Security setting.
12
Page 17
Protocol
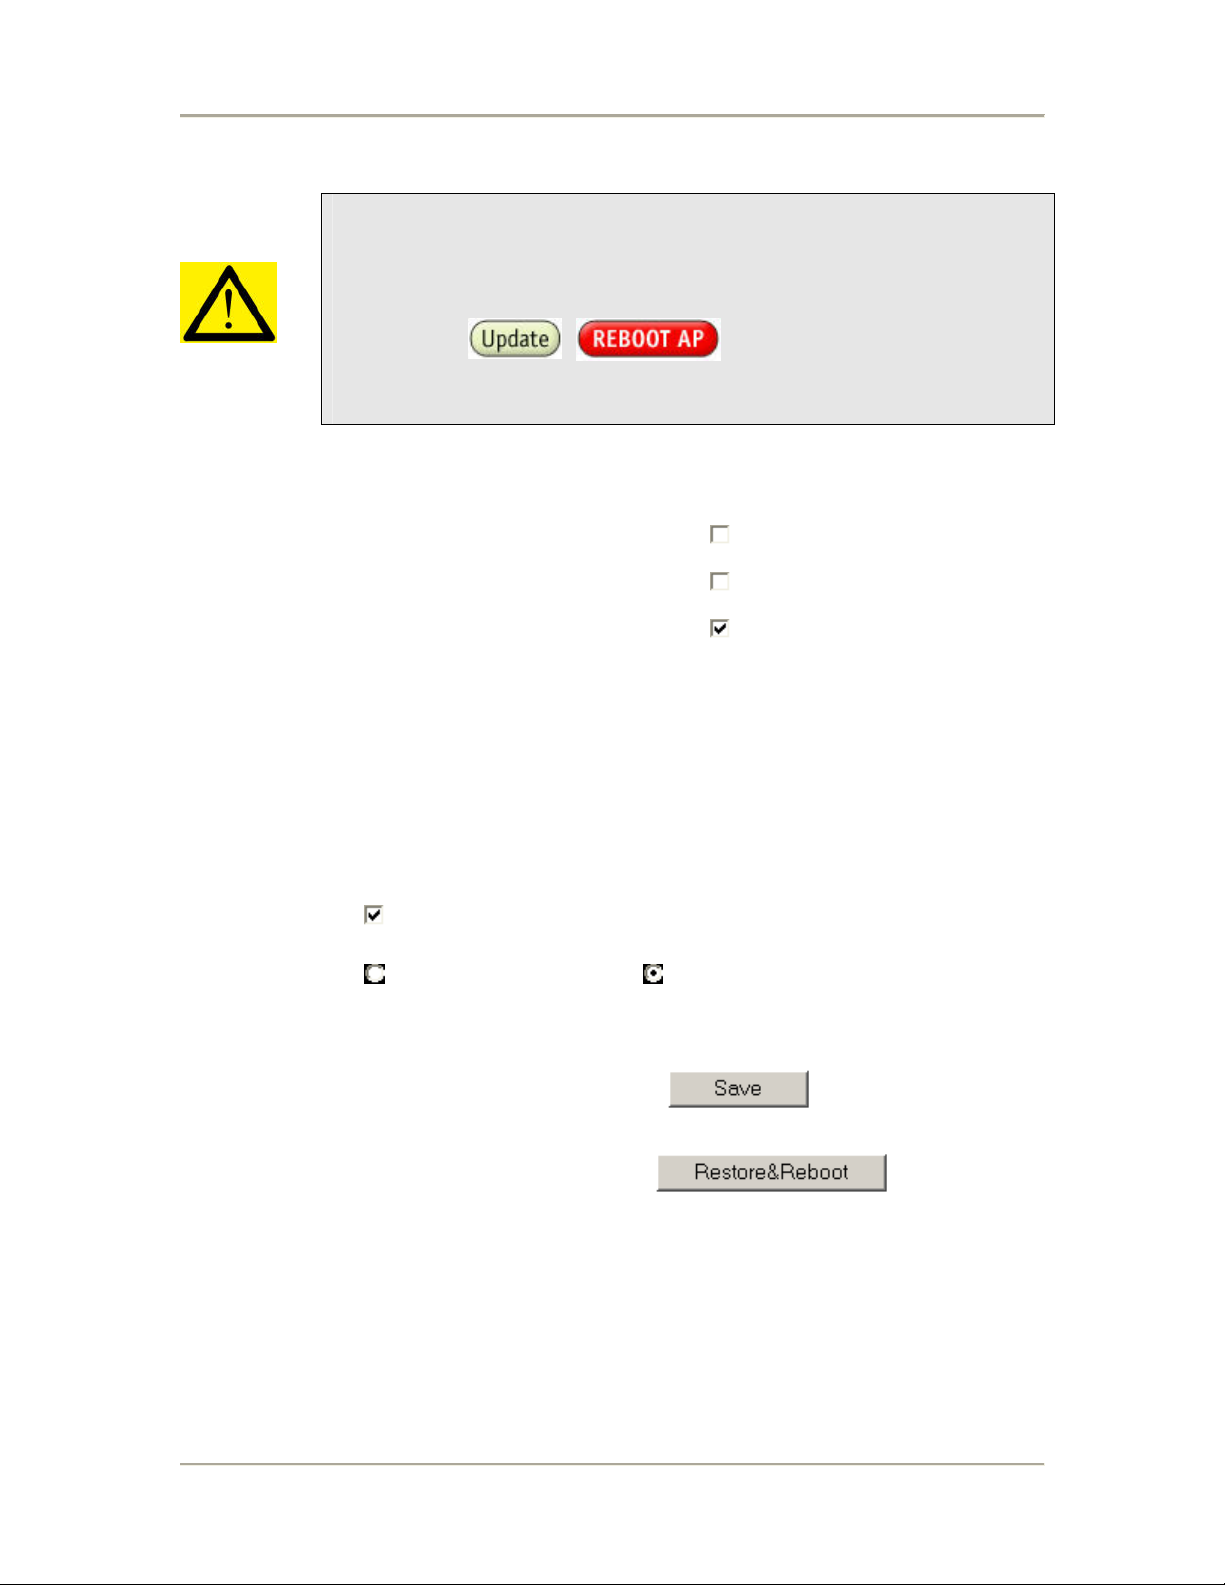
Remember that after every configuration change, it is necessary to:
- Click Update on the page.
- Reboot AP1001g.
The changes take effect only AFTER Reboot.
Filter AppleTalk Packet:
Filter IPX Packet:
Wireless Isolation:
Filter AppleTalk Packet: Selecting this option will disallow all AppleTalk packets to pass through
Filter IPX Packet: Selecting this option will disallow all IPX packets to pass through
Wireless Isolation: Selecting this option will disallow wireless clients associated with this device
to communicate with each other
Miscellaneous
Enable
Telnet:
Button Mode:
Save the current settings as a backup:
Request Internet Access Restore Good
Settings
Restore settings from the backup:
Enable Telnet: Disable/enable Telnet access to this device
Request Internet Access: TBA
Restore Good Setting: Restore last known good setting
Save the current setting as a backup: After you have successfully configured AP1001g, you
can save this “Good Config” into memory. You can retrieve this “Good Config” later, if you have
messed up some settings and do not know what was the previous working setting. If you have
even forgotten the password to get into the configuration pages, you would have to do a Factory
Reset to AP1001g.
13
Page 18
Restore settings from the backup: Allows you to retrieve the “Good Config” that you have
saved previously.
Remember that after every configuration change, it is necessary to:
- Click Update on the page.
- Reboot AP1001g.
The changes take effect only AFTER Reboot.
14
Page 19

Status
System Status
This page presents a convenient overview of the overall status of the AP1001g. The most
common configuration parameters are shown here, for a quick look.
IP Mode:
IP Address:
Subnet Mask:
Gateway Address:
SSID:
Wireless Mode:
Radio Frequency:
Operation Mode:
Security method:
Security Mode:
Wireless MAC Address:
Ethernet MAC Address:
DHCP mode
192.168.1.20
255.255.252.0
0.0.0.0
RfNetech
11g
2462
Access Point
Non-WPA security
Disabled
00:06:c7:14:07:bc
00:06:c7:14:07:bd
Association Status
This page presents an overview of the MAC address of all the Client connected to AP1001g
through Ethernet or wireless.
Connected Ethernet Stations
Connected Wireless Stations
00:03:7f:00:01:4e
15
Page 20
Super User
Super User
This page allows you to change the Username and Password for admin user. The default
username and password is admin / admin. After every factory reset, the Username and Password
reverts to this combination. AP1001g does not allow you to set the same Username for both
admin and super users.
User Name:
super
Password:
*****
The Username of super user cannot be the same as the Username of admin
user.
Firmware Upgrade
This page allows you to update the firmware (software) in AP1001g. New firmwares are issued to
improve the performance and add features to the product.
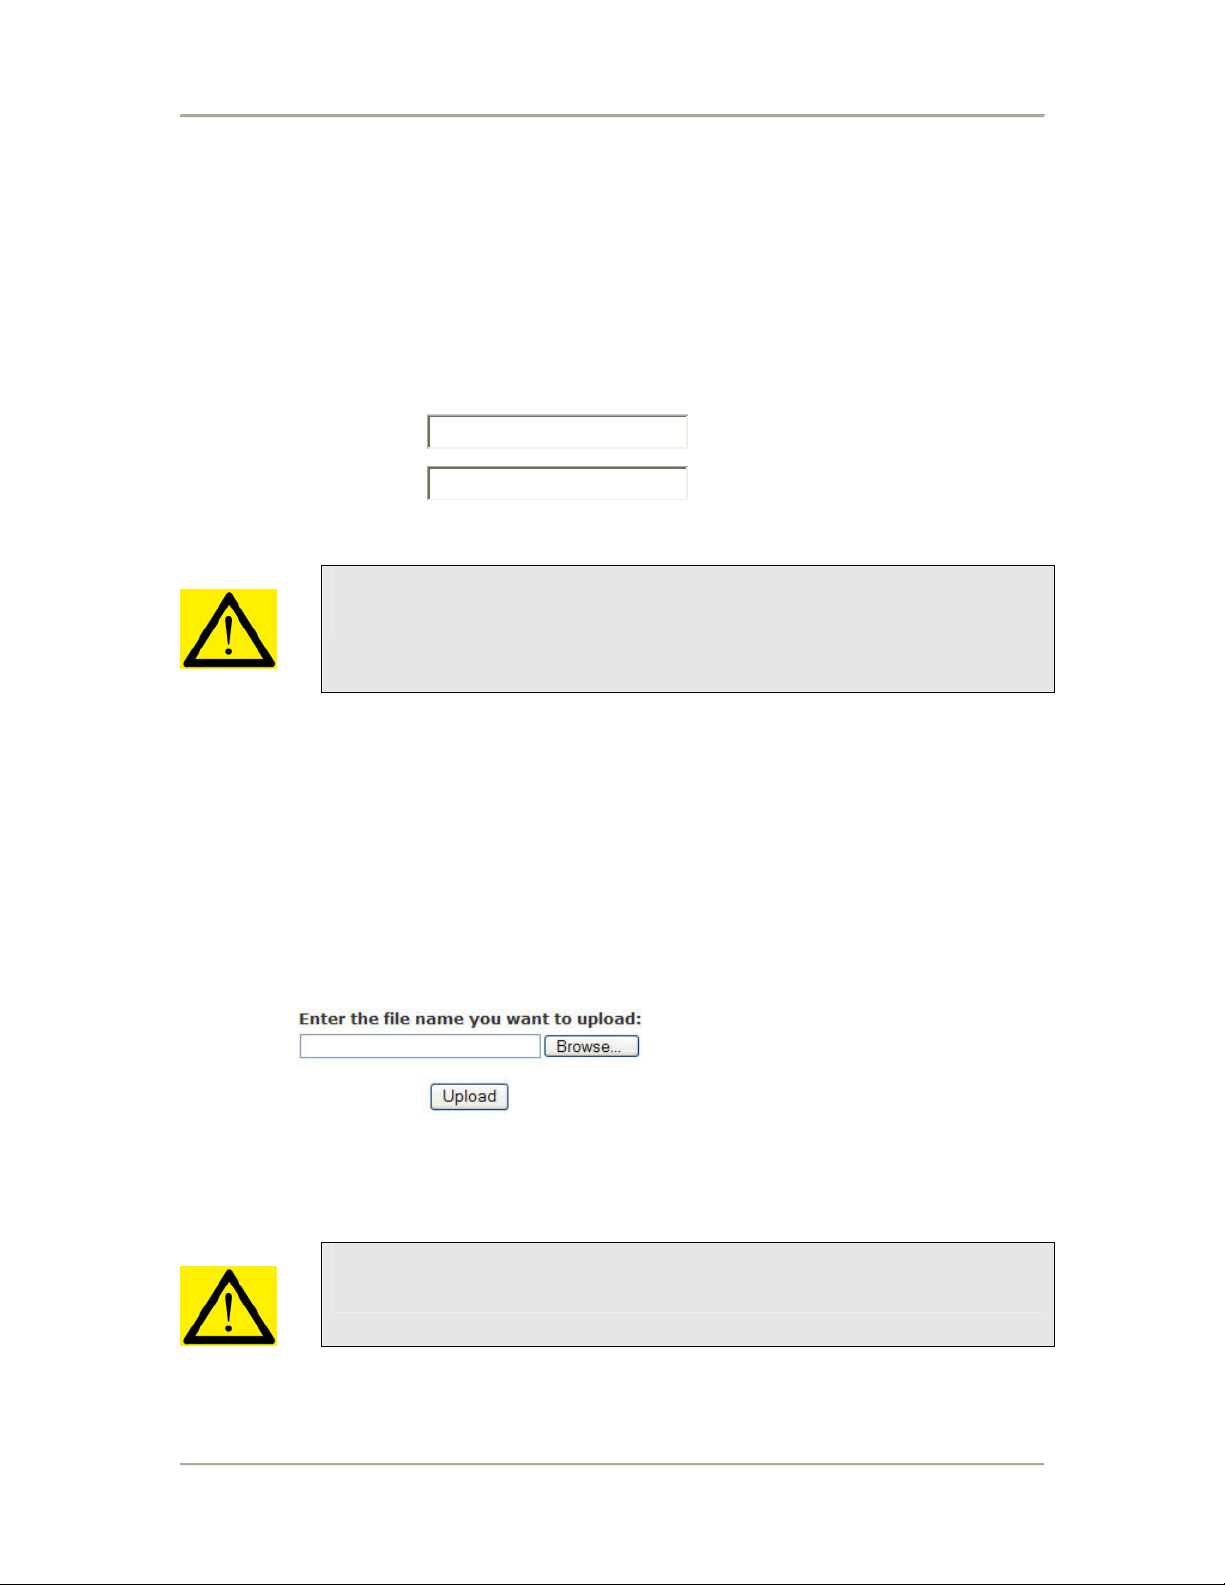
The new firmware will be name “apimg1”.
1. Save the file in your PC.
2. Browse to the file with the name “apimg1”.
3. Click on Upload.
4. Reboot the AP1001g and the process is complete.
Do not change the filename of the new firmware. New firmware with filename
other than “apimg1” will cause the process to fail.
16
Page 21
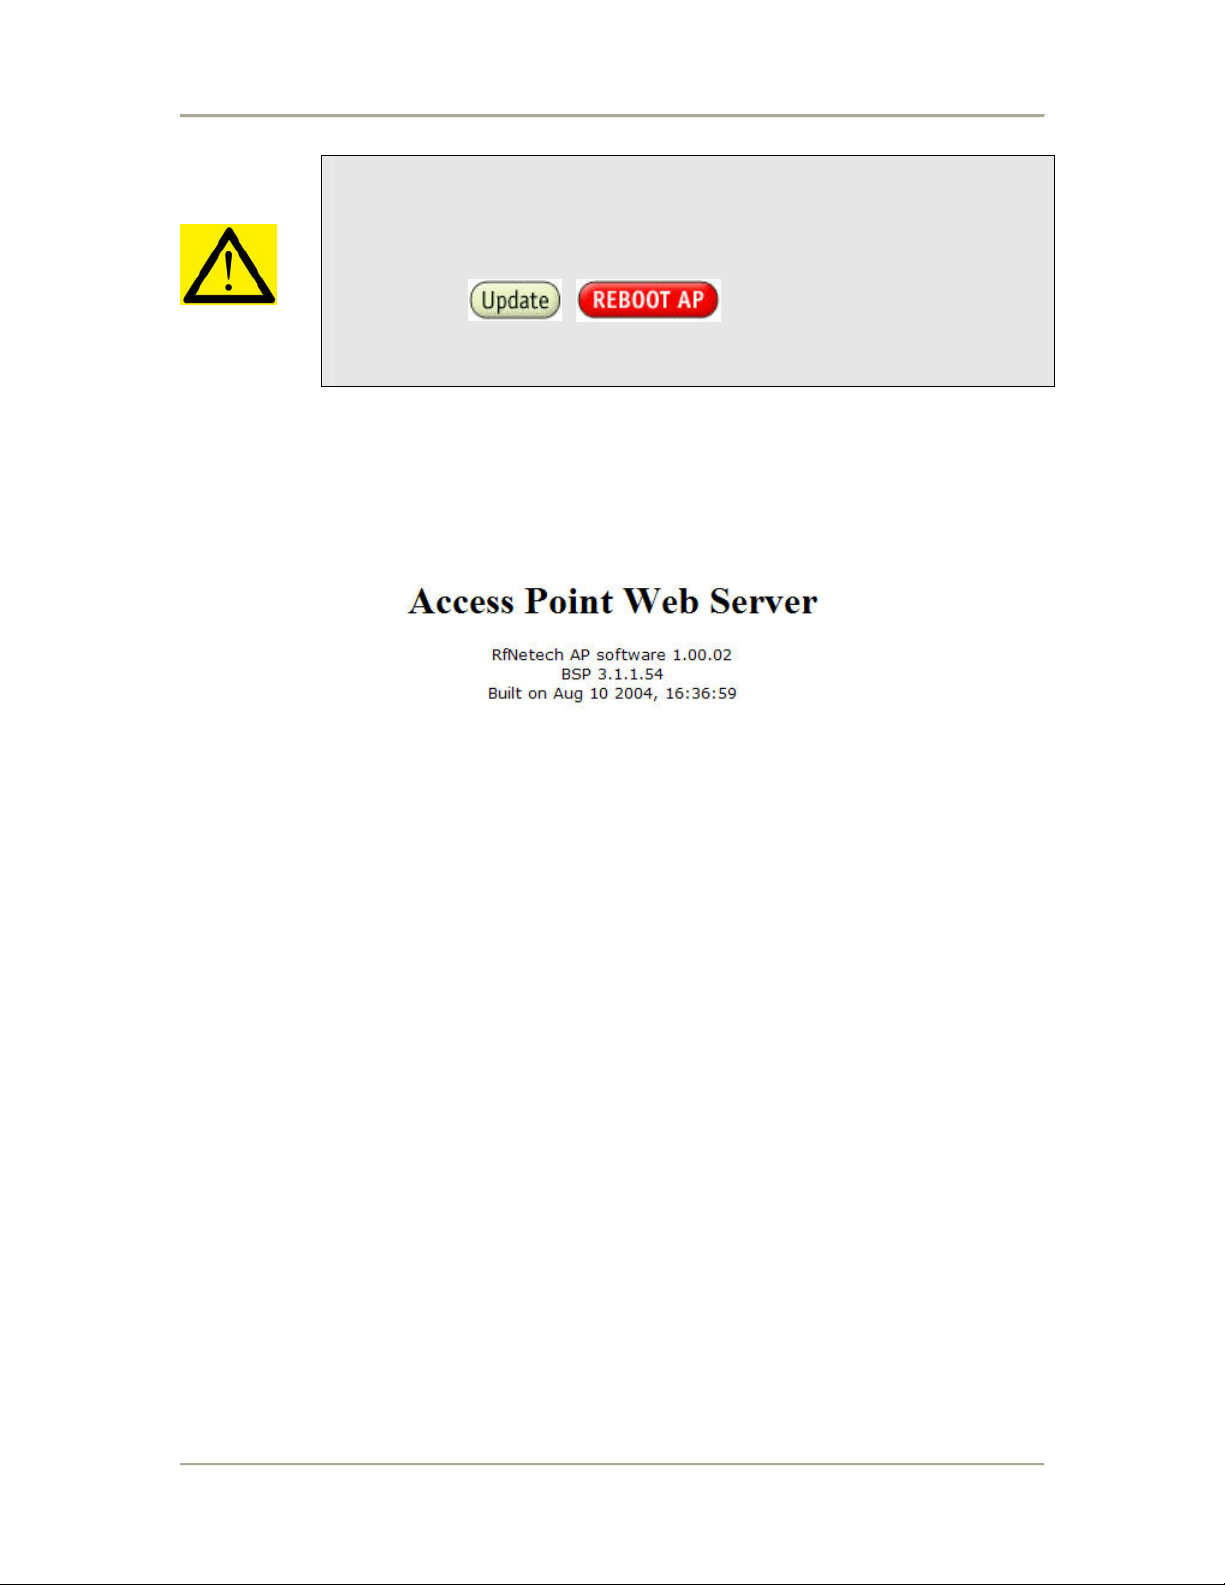
Remember that after every configuration change, it is necessary to:
- Click Update on the page.
- Reboot AP1001g.
The changes take effect only AFTER Reboot.
Firmware Version
This page presents information of the firmware version of AP1001g.
Factory Reset
In case you forget the password or IP address of the wireless bridge and is unable to configure
the wireless bridge, you can restore it back to factory setting by doing a factory reset. To restore
the wireless bridge to factory default setting, follow the following steps:
1. Power off the bridge.
2. Press the reset button.
3. Power on the bridge without releasing the reset button.
4. Keep on pressing the reset button for 10 sec then release it.
17
 Loading...