

Page 1
Digital
Wireless HDMI
Receiver
User’s Manual
Contents
1.Imp ortant Safety Information........................................ 1
2.Package Content........................................................ 2
3.Panel Layout and Function............ .............................. 3
4.Receiver Setup........................................................... 4
1.Important Safety Information
To prevent fire or shock hazard, do not expose this product to rain and
moisture. For example: do not use near a bathtub, washbowl, kitchen
sink, or laundry tub, in a wet basement, or nearby a swimming pool. To
avoi d elect ric shock, do not take apart t his pro duct, provided as an
accessory. This product should be operated only under power supply.
Do not overload wall outlets and extension outlets as this can result in
the risk of fire or electric shock.
FCC Statement
This device complies with part 15 of the FCC rules.
Operation is subject to the following two conditions:
(1) this device may not cause harmful interference,
and (2) this device must accept any interference
received, including interference that may cause
undesired operation.
Note:
This equipment has been tested and found to comply with the limits regulated
by FCC and CE. These limits are designed to provide reasonable protection
against harmful interference in a residential installation. This equipment
generates, uses and can radiate radio frequency energy and, if not installed
and used in accordance with the instruction, may cause harmful interference to
radio communications. The change or modifcations not expressly approved by
the party responsible for compliance could void the user ’s authority to operate
the equipment. To comply with the FCC RF exposure compliance requirements,
no change to the antenna or the device is permitted. Any change to the antenna
or the device could result in the device exceeding the RF exposure requirements
and void user’s authority to operate the device.
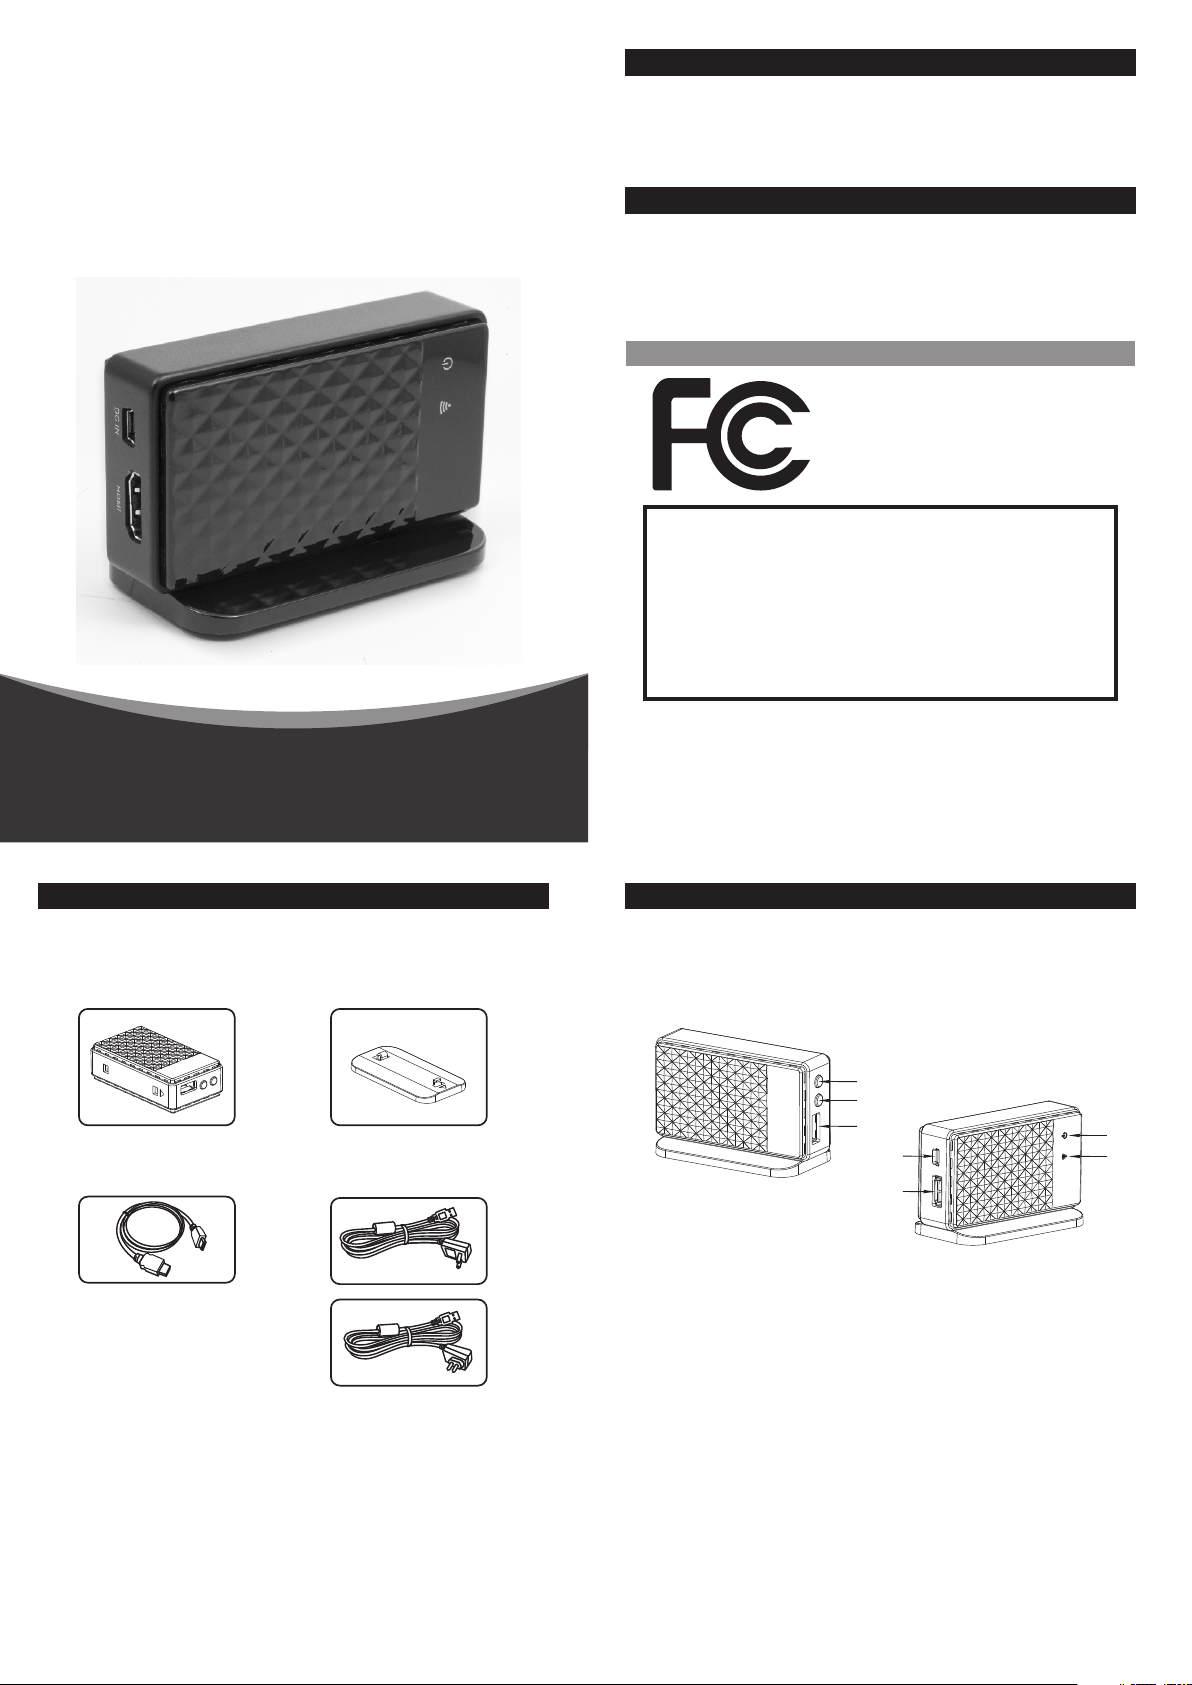
2.Package Contents
Check to make sure that all units shown as below are enclosed.
If something missed, please contact your dealer.
1. 5.0GHz Receiver x 1
UHF:433.92MHz
3. HDMI Cable x 1
2. Stand x1
4. Power Adapters x 1
USA Typ e
EUR OPE Type
1
2.Package Contents3.Panel Layout and Function
List of functions
Receiver unit
3
2
1
1.
USB port
2.
CH change / Reset button(*)
3.
On / Off switch
4.
HDMI port
5.
Mini-USB port (power only)
6.
Link LED (**)
7.
Power LED (***)
5
4
7
6
Press and ho ld this button within 3 seco nds to change the channel. K eep
*
pressing o ver 3 seconds is to restart th e system to default.
Ora nge LED i lluminate, when the tran smitter links up with rece iver and will
**
flash when t he data is under transmiss ion.
Gre en LED il luminate, when the power i s on.
***
2
3
Page 2
2.Package Contents4.Receiver Setup
CH
Driver installation
4.1
1. Insert the provided MD into your computer’s CD drive.
2. Open the MD’s file from “My Computer” . This will open up
to a selection of software to be installed.
3. Double-click the execution file (setup.exe), screen
will appear.
4. Follow the steps and click "Finish" to complete the
driver installation.
5. Now, you can link the receiver from your PC.
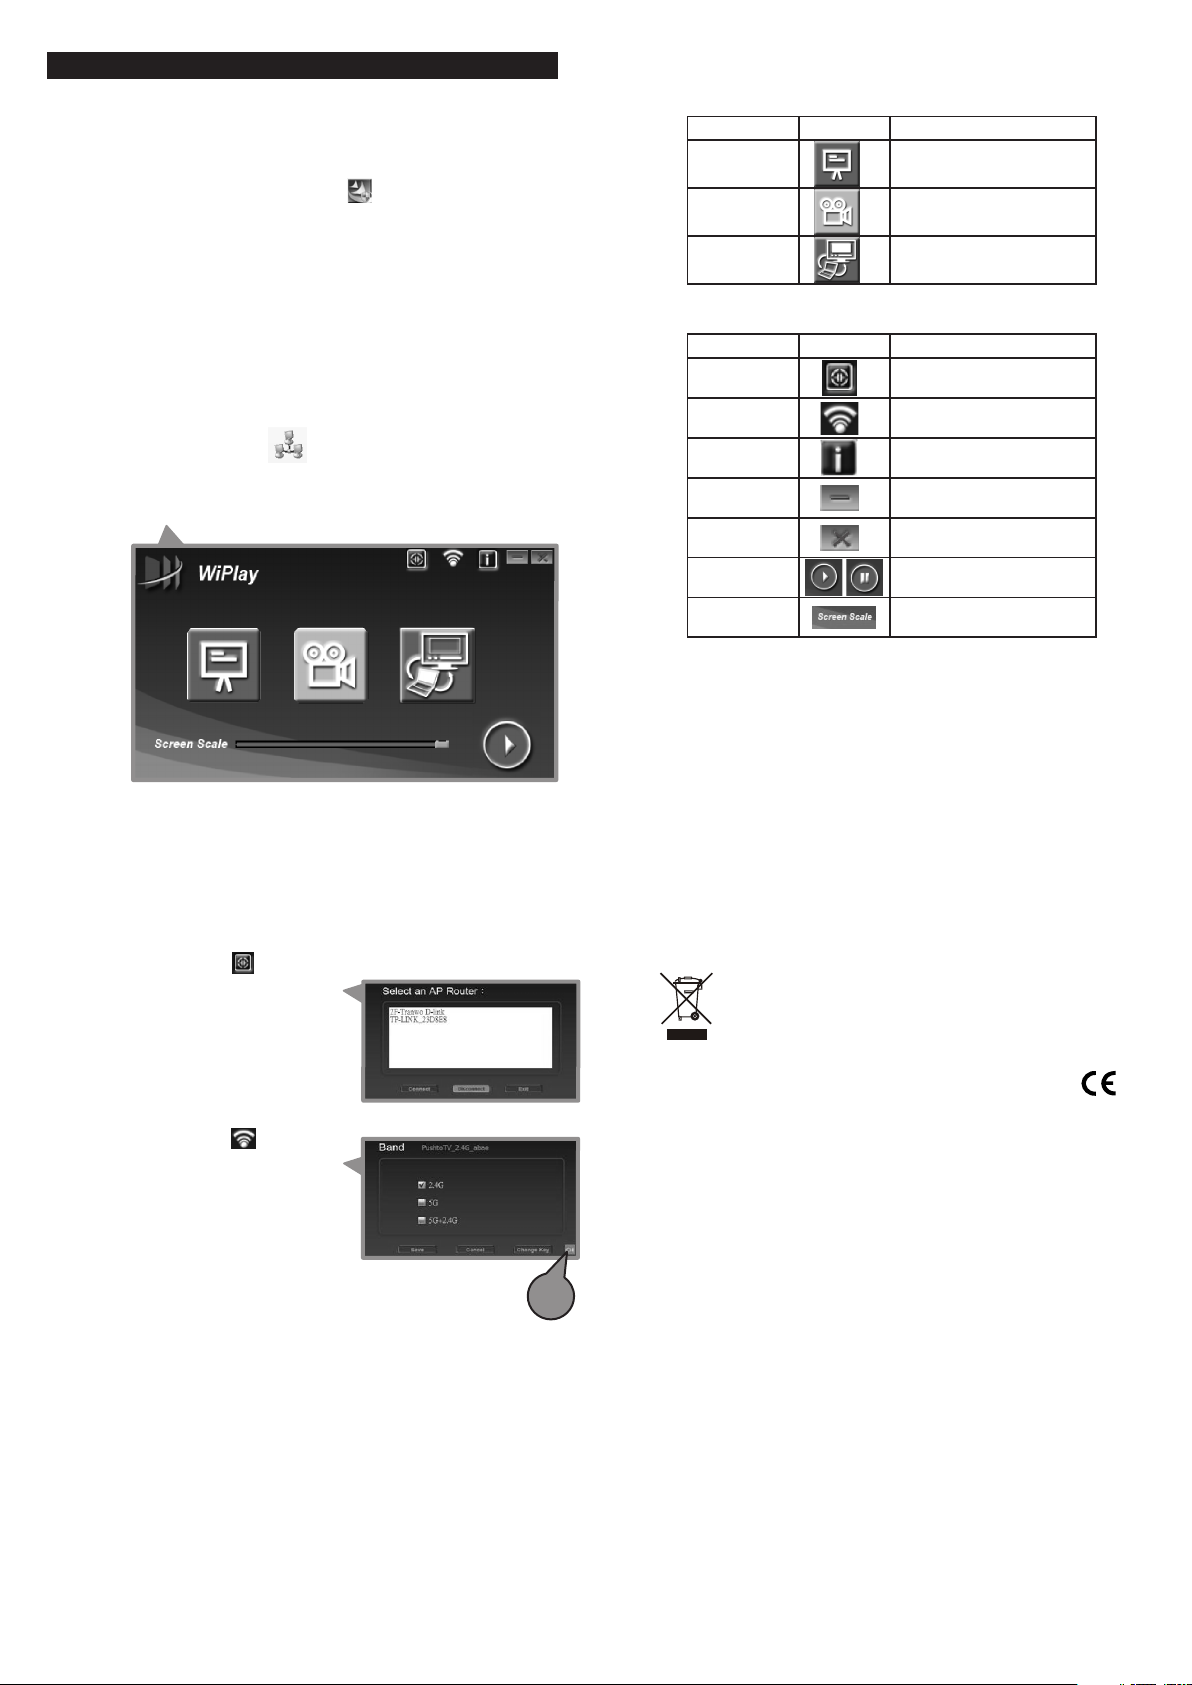
4.2
Utilities Operation
1. When starting to use the PC to TV HDMI receiver,
please make sure your Wi-Fi link is activated.
2. Open the selection of software list and double-click
the execution file (WiPlay.exe) and select your
Wi-Fi adapter which one you want to use.
Screen will be as follows:
Display Mode
4.3
Mode Icon Description
Presentation Presentation prefer
Video Video prefer
Extension Extension mode
4.4
Button Instruction
Items Icon Description
Internet Connect to AP/Router
Config Frequency option
About
Minimize Minimized video
Exit System On / Off wiplay
Start / Stop programStart / Stop
Adjust Adjust screen size
Program version and
firmware
4 5
Internet Shift
4.5
1. Choosing icon , it will take a few seconds to search AP/Router
2. Choosing AP/Router you need
3. Click “Connect”
4. The receiver will restart by itself.
Config Shift
4.6
1. Choosing icon
2. Choosing frequency you need
3. Click “Save”
4. Restart the receiver when
screen show “Save successful”
Channel selection button to
find optional reception.
Installation
4.7
1. Connect the output device (TV, monitor, home theatre, etc.)
through the HDMI cable.
2. Connect the power supply adapter
3. Turn on the device. The power LED will illuminate.
WEEE Directive & Product Disposal
At the end of its serviceable life, this product should
not be treated as household or general waste. It
should be handed over to the applicable collection
point for the recycling of electrical and electronic
equipment, or returned to the supplier for disposal.
6
TTD-D5006R
408-000708-00
 Loading...