

Page 1

Revolabs HD Single / Dual Channel System — LifeSize Team MP Setup Guide
This setup guide will guide you through the steps needed to properly connect a
Revolabs HD Single or Dual Channel System to a LifeSize Team MP video codec.
Note:
It is important to carefully follow these instructions in order and completely.
Otherwise your Revolabs Microphone System and/or the video codec may not function
properly. Please read through these instructions completely before proceeding.
Contact Revolabs technical support if you have any questions.
Requirements for connecting systems:
1. Revolabs HD Single or Dual Channel System
2. LifeSize Team MP video codec
3. QTY 1 3.5mm unbalanced male connector to dual RCA male connector
cable*
* 07-35MUTODRCA-01 6’ 3.5mm unbalanced male connector to dual RCA male
connector cable available from Revolabs
Page 2
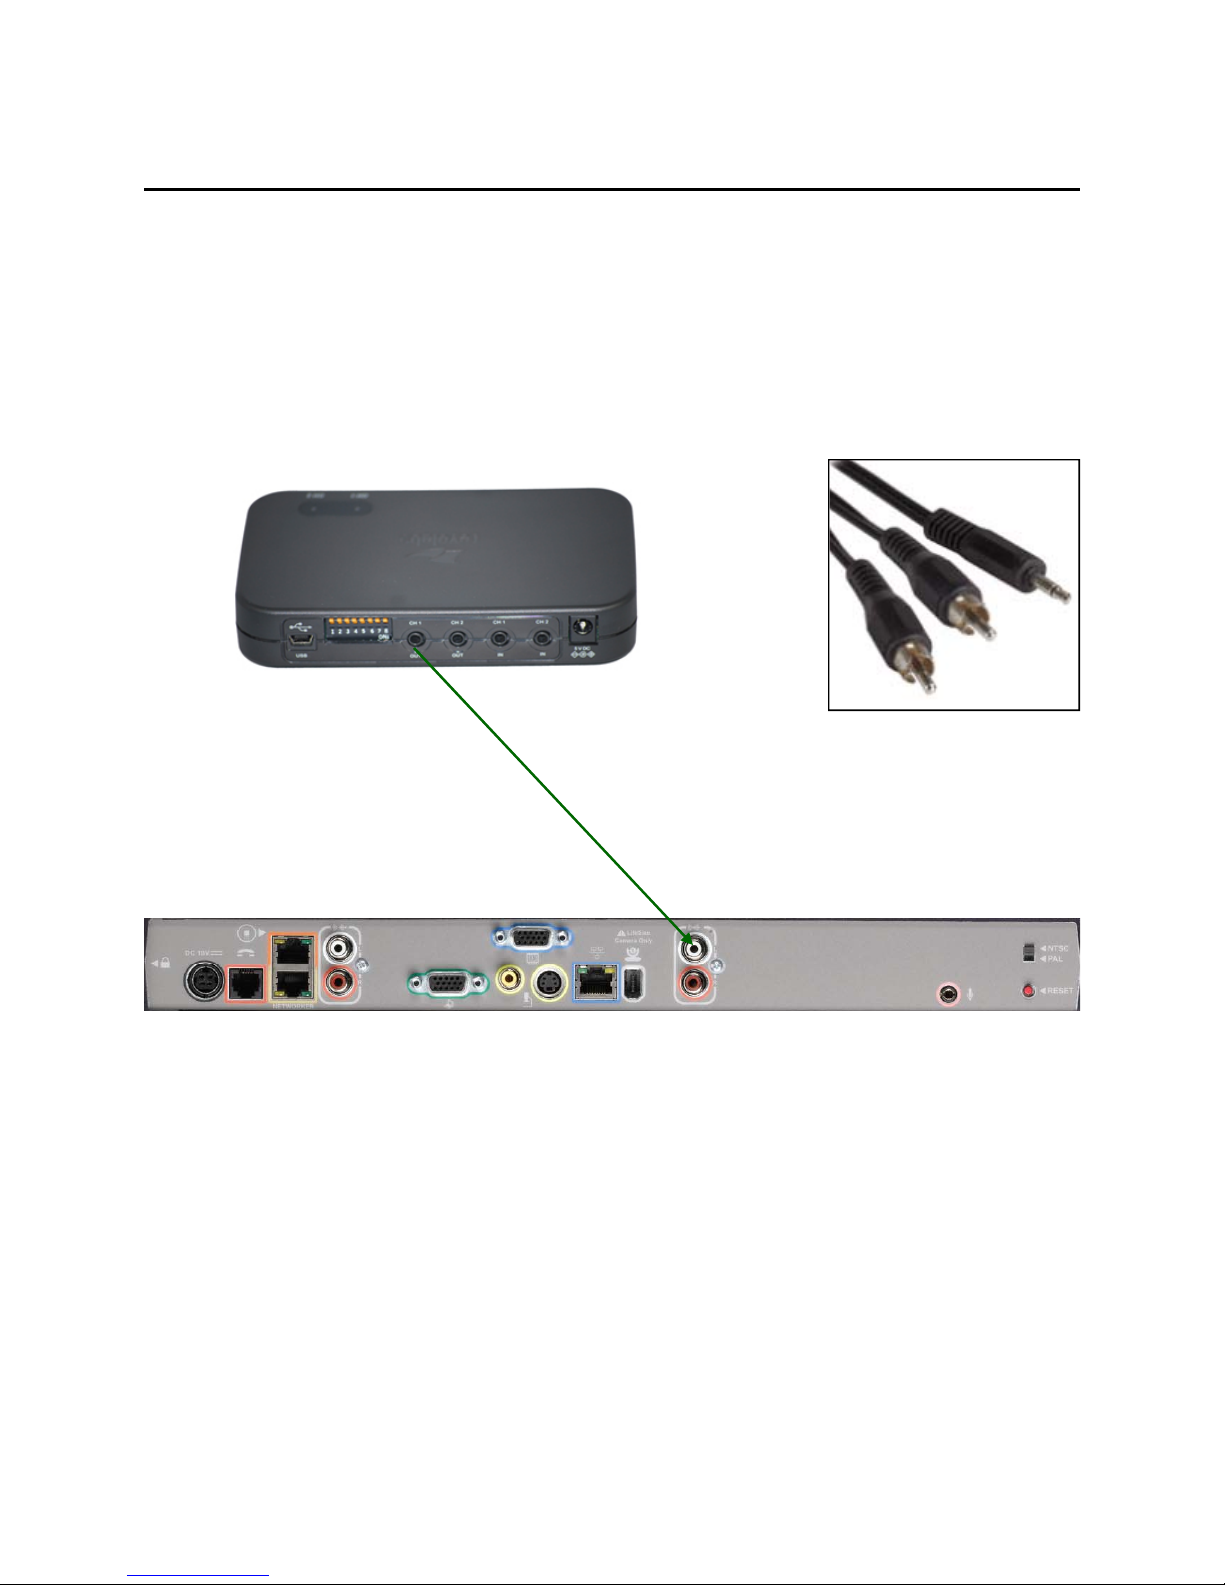
Connecting the Cables
1. Insert the unbalanced 3.5mm male connector to the CH 1 OUT port on the
Single or Dual Channel System. If using a Single Channel, DIP Switch #1
should be “OFF”. If using a Dual Channel, DIP Switch #1 should be “ON”.
2. Insert the dual RCA male connectors into the red and white LifeSize Team MP
LINE IN.
3. Verify that DIP Switch #3 (mic/line) is “OFF”
2
3
Configuring the LifeSize Team MP Video Codec
1. Push the BLUE button on the remote control for SYSTEM MENU
2. Select ADMINISTRATOR PREFERENCES and enter password (if necessary)
3. Select AUDIO
4. Select LINE IN (AEC)
5. Adjust ACTIVE MICROPHONE VOLUME to 10
 Loading...