

Page 1
Technical Note
FLX – VoIP Registering with Avaya IP Office 500
Date: April 5th, 2012
This technical note gives a detailed description on how to register a Revolabs FLX conference phone with
Avaya IP Office 500 PBX. On the IP Office a SIP extension and user has to be created using Avaya IP
Office Manager. Once that user is created, the FLX can be set up to register with the Avaya IP Office
PBX.
To perform the tasks described in this document, the user needs to have administrative rights on the IP
Office. While the steps in this document are not difficult, we recommend that a trained IP Office PBX
administrator perform these tasks.
The instructions and screen shots provided here were prepared using Avaya IP Office R7 Manager,
Version 9.0 (23); other versions of the IP Office manager may differ, though the general procedures are
the same.
Configuring Avaya IP Office for FLX Registration
To prepare the Avaya IP Office for the FLX Conference phone, a new user needs to be configured on the
PBX. This step is required for any third party SIP device.
To add a user and extension:
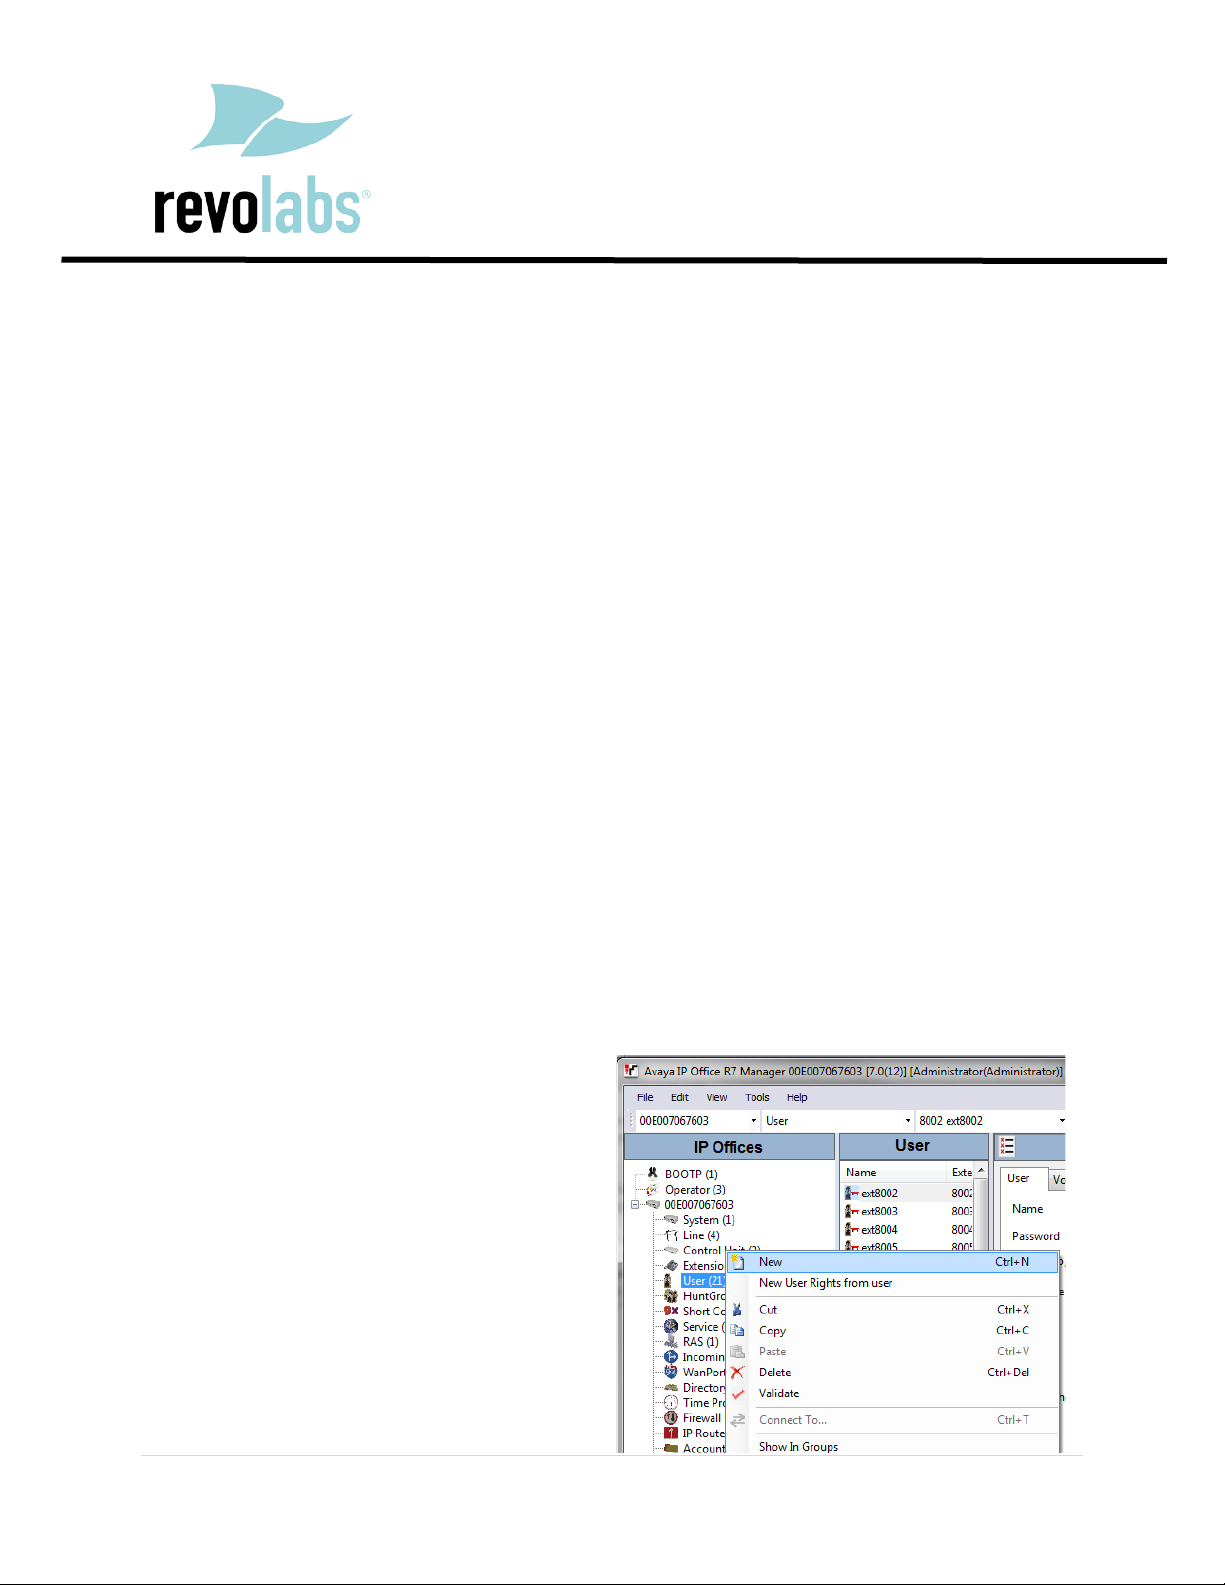
1. Start the Avaya IP Office R7 Manager and
login.
2. In the IP Offices panel on the left side, expand
the item for your IP Office, right click on User,
and choose New.
Revision 1.0 1 | Page
Page 2
FLX & Avaya IP Office 500 Technical Note
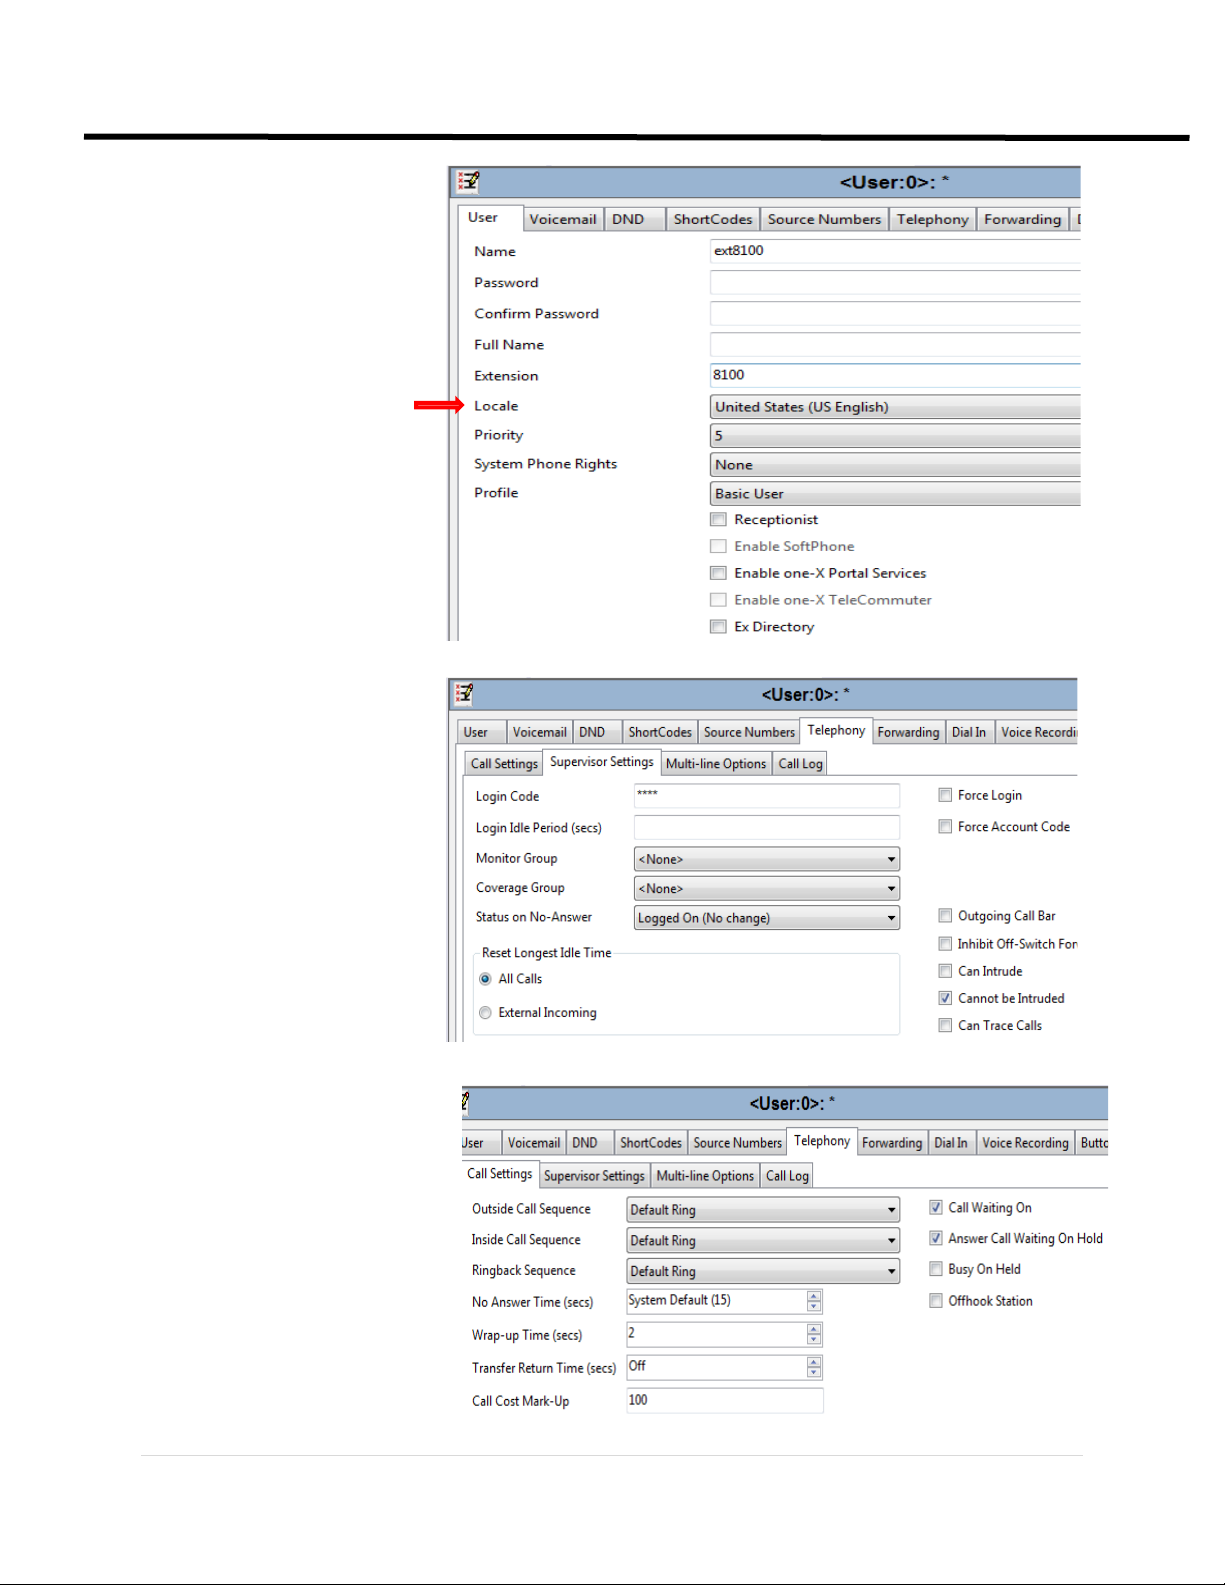
3. On the User tab enter
Name, Extension, and
Locale. (You must select
Locale in order for Transfer
to work properly.)
4. On the Telephony tab
select the Supervisor
Settings tab. Enter a
numeric password in the
Login Code field.
5. On the Telephony tab select
the Call Settings tab. Check
the option for Call Waiting
On. This setting will enable
use of two lines for incoming
calls.
2 | Page
Page 3

FLX & Avaya IP Office 500 Technical Note
6. Click OK. When prompted to create a new VoIP
extension, choose SIP Extension.
7. Click the disk on the toolbar to save settings.
3 | Page
Page 4

FLX & Avaya IP Office 500 Technical Note
Registering the FLX with the Avaya IP Office
Please use the FLX web UI to register the FLX with the Avaya IP Office.
1. IP address of the FLX.
a. If you are using DHCP in your environment, the FLX automatically receives an IP address.
From the FLX handset, choose Menu and “System Info” (the symbol with the “i”) and
select “About System”. The IP address (static or via DHCP) of your FLX is shown.
b. If you are using static IP, on the FLX handset chose “Setup” (the wrench symbol),
“Advanced Setup”, enter the administrator password (default password is “7386”),
enter “Network Settings”. Change “DHCP ON” to “DHCP OFF”. Then enter “IP Settings”.
In this menu you can enter the IP address, Subnet Mask, and other relevant information.
Once you have entered all information, select “Return”, and in the Network Settings
menu select “Load Settings. This will restart your phone with the new network settings.
2. In a web browser of your choice, enter the IP address of the FLX phone. This will open the web
interface for FLX. Enter the password (“7386”), and select “Administrator” in the right top of the
screen.
3. On the left side, select “SIP Registration”. The following screen will show:
4. Enter the registration info for your Avaya IP Office:
Registrar – the Avaya IP Office IP address, in our example 10.1.1.1
ID – User ID for the User added to the Avaya IP Office, in our example 8100
Display Name – this can be any friendly name for the user
Username – enter the same User ID as above
Password – the User’s password set in the IP Office.
4 | Page
Page 5

FLX & Avaya IP Office 500 Technical Note
5. Press “Save”. You will see the following screen.
6. On the left, select “Transport”.
7. For the TCP/UDP selection select the transport protocol you are using.
5 | Page
Page 6

FLX & Avaya IP Office 500 Technical Note
8. Press “Save”.
9. On the left side select “Restart”, and click on the “Restart” button. Your FLX phone will restart. You
can close the Web browser.
If registration is successful, the handset will show the user ID at the top of the home screen.
If there is a registration failure, the handset will show that the phone is not registered. Please verify that
the user ID and password are the same as the ones specified when configuring the Avaya IP Office. Also,
in the Avaya IP Office confirm that the device was correctly set up and associated with the user.
6 | Page
 Loading...