

Page 1

Revolabs FusionTM Microphone System — LifeSize Team 200 Setup Guide
This setup guide will guide you through the steps needed to properly connect a
Revolabs Fusion Microphone System to a LifeSize Team 200 video codec.
Note:
It is important to carefully follow these instructions in order and completely.
Otherwise your Fusion Microphone System and/or the video codec may not function
properly. Please read through these instructions completely before proceeding.
Contact Revolabs technical support if you have any questions.
Requirements for connecting systems:
1. Revolabs Fusion 4 or 8 channel Microphone System
2. LifeSize Team 200 video codec
3. QTY 2 male RCA — male RCA cable
4. QTY 2 RCA female to mono 1/8” adapters*
5. Amplified Speakers
* Optional Item
Page 2
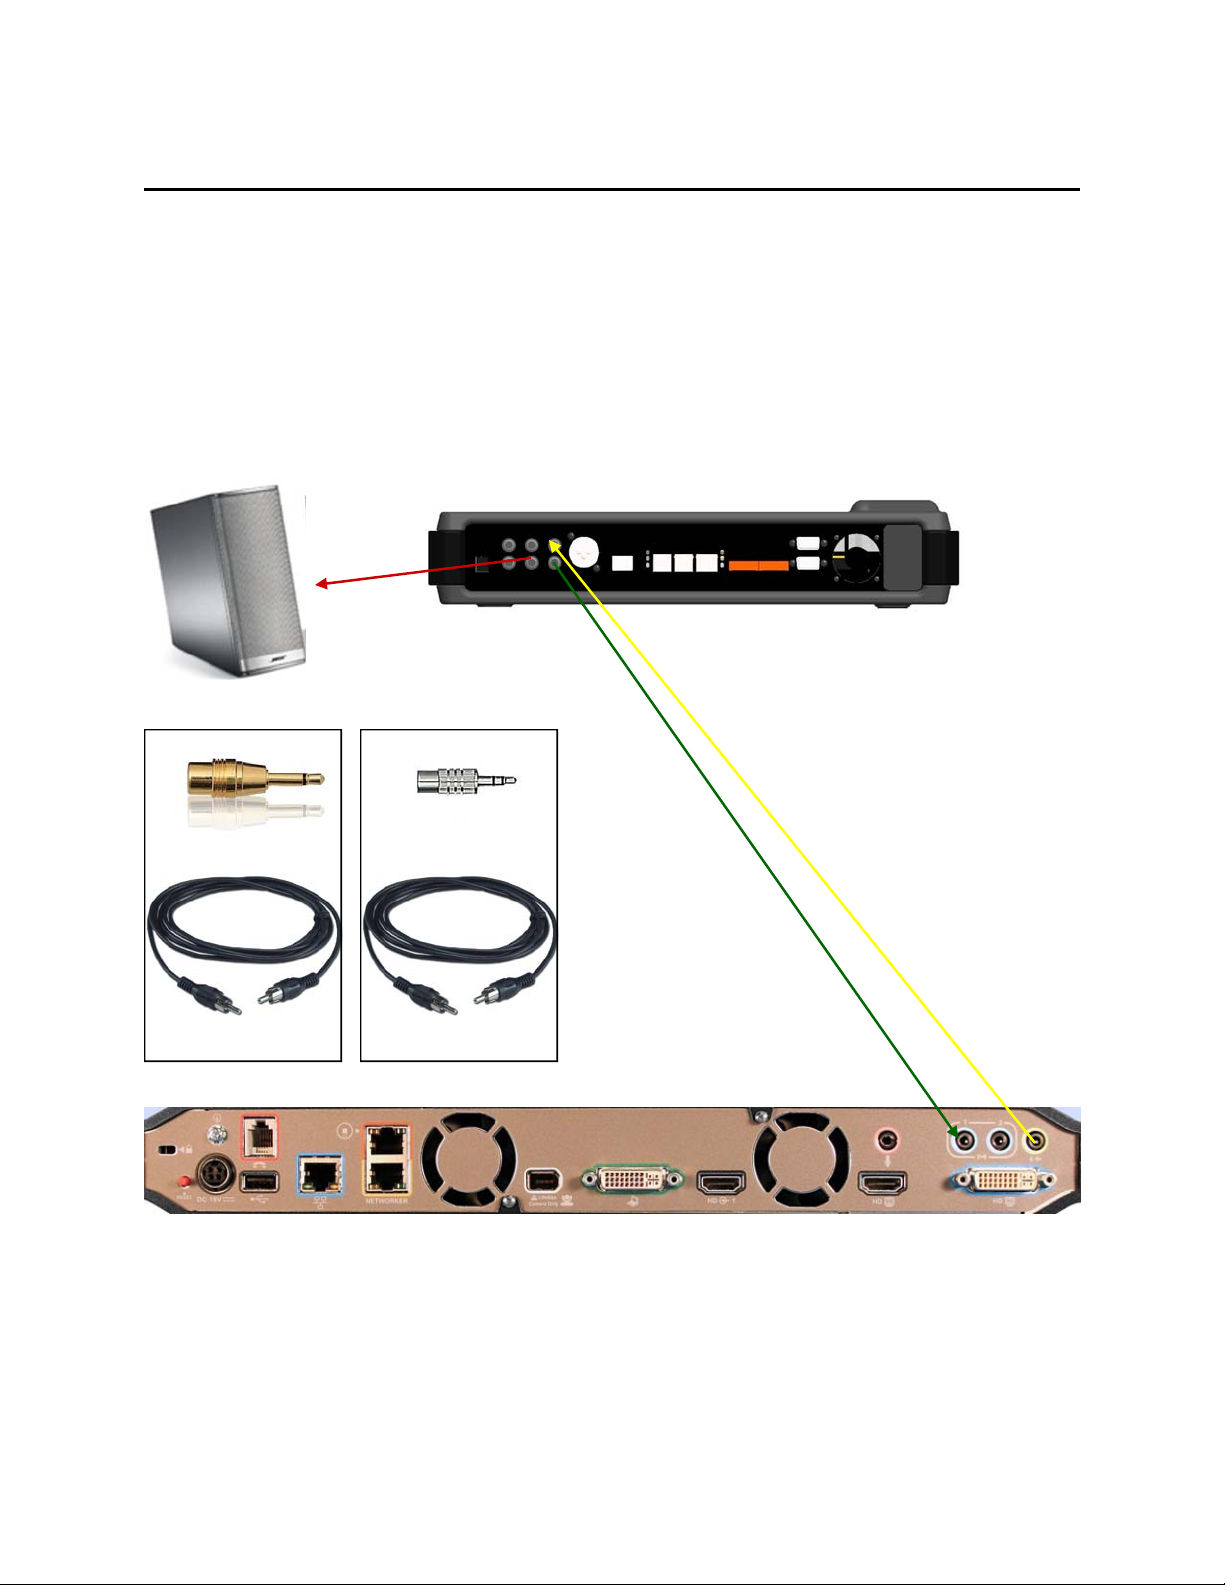
Connecting the Cables
1. Place the RCA to 1/8” adapters on one end of each RCA cable
2. Connect a RCA audio cable between the RCA “CONF OUT” port on the Fusion
and the blue 1/8” “LINE IN” port on the LifeSize Team 200.
3. Connect a RCA audio cable between the RCA “CONF IN” port on the Fusion and
the green 1/8” “LINE OUT” port on the LifeSize Team 200.
4. Connect a Male RCA audio cable between the “ROOM OUT” port on the Fusion
and the Amplified Speakers.
4
1
2
NOTE: You must use your Fusion remote control to control the Team 200
volume for both the audio and video conference calls. Adjusting the volume
in the video codec will cause echo.
3
1
2
3
Page 3

Configuring the LifeSize Team 200 Video Codec
1. Push the BLUE button on the remote control for SYSTEM MENU
2. Select ADMINISTRATOR PREFERENCES and enter password (if necessary)
3. Select AUDIO
4. Select LINE IN (no AEC)
5. Adjust ACTIVE MICROPHONE VOLUME to 10
6. Select VIDEO CALL AUDIO OUTPUT to LINE OUT
7. Select LINE IN TO LINE OUT as DISABLED (if using earlier than v4.0 of LifeSize
firmware)
8. Depending on the LifeSize firmware version, either set Line Output to 10
(maximum) or use the remote control to increase the LifeSize codec volume to
maximum at the home screen
NOTES:
1. You must use your Fusion remote control to control the Team 200
volume for both the audio and video conference calls. Adjusting the
volume in the video codec will cause echo.
2. Powered speakers must be connected to the Fusion ROOM OUT and used
instead of the TV speakers. The TV speakers must also be MUTED during
video conferencing use. Failure to do so may cause either echo
cancellation problems or audio clarity issues.
 Loading...