

Page 1
INSTRUCTION MANUAL
MODEL# CBT806
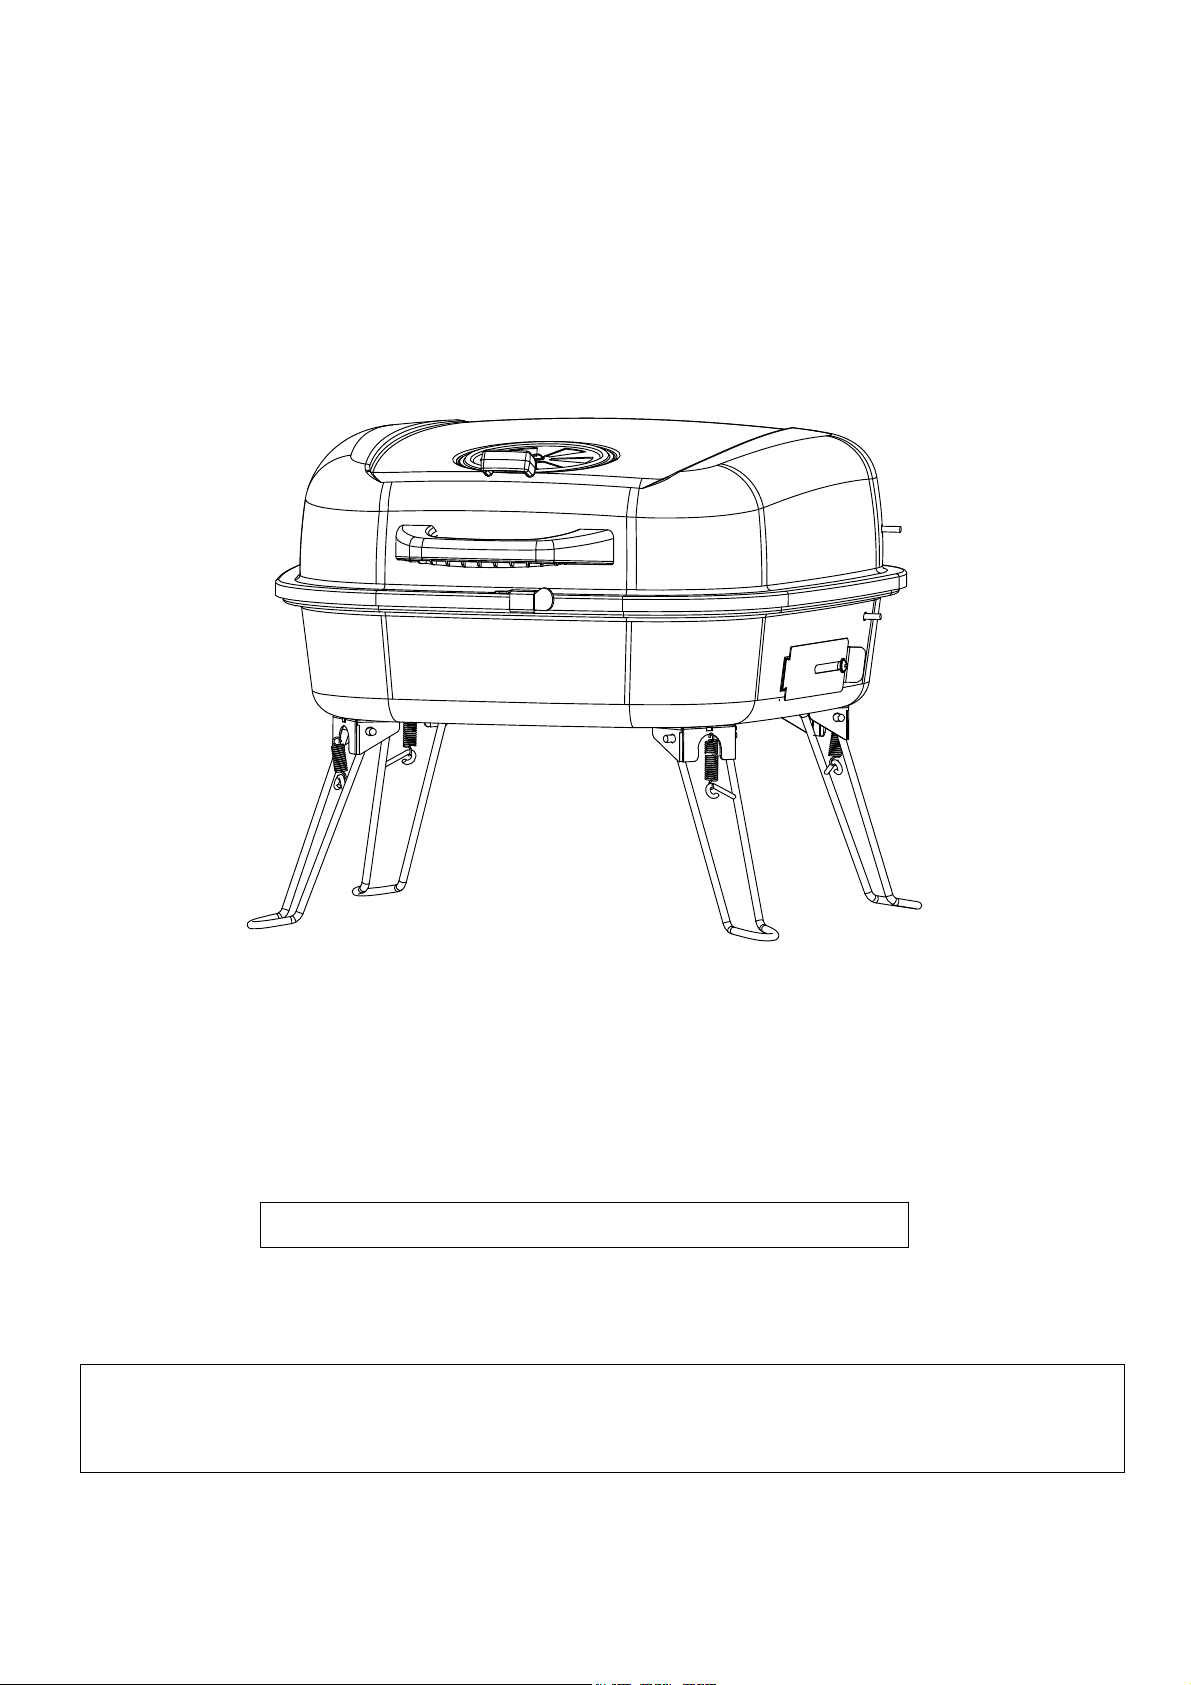
Outdoor Portable Charcoal Grill
For Outdoor Use Only!
Warning! Be careful of sharp edges during assembly.
Made In China
Save these instructions for future reference. If you are assembling this unit for someone
else, give this manual to them to read and save for future use.
Contact 1-800-694-0013 for assistance. Do not return to place of purchase.
Page 2
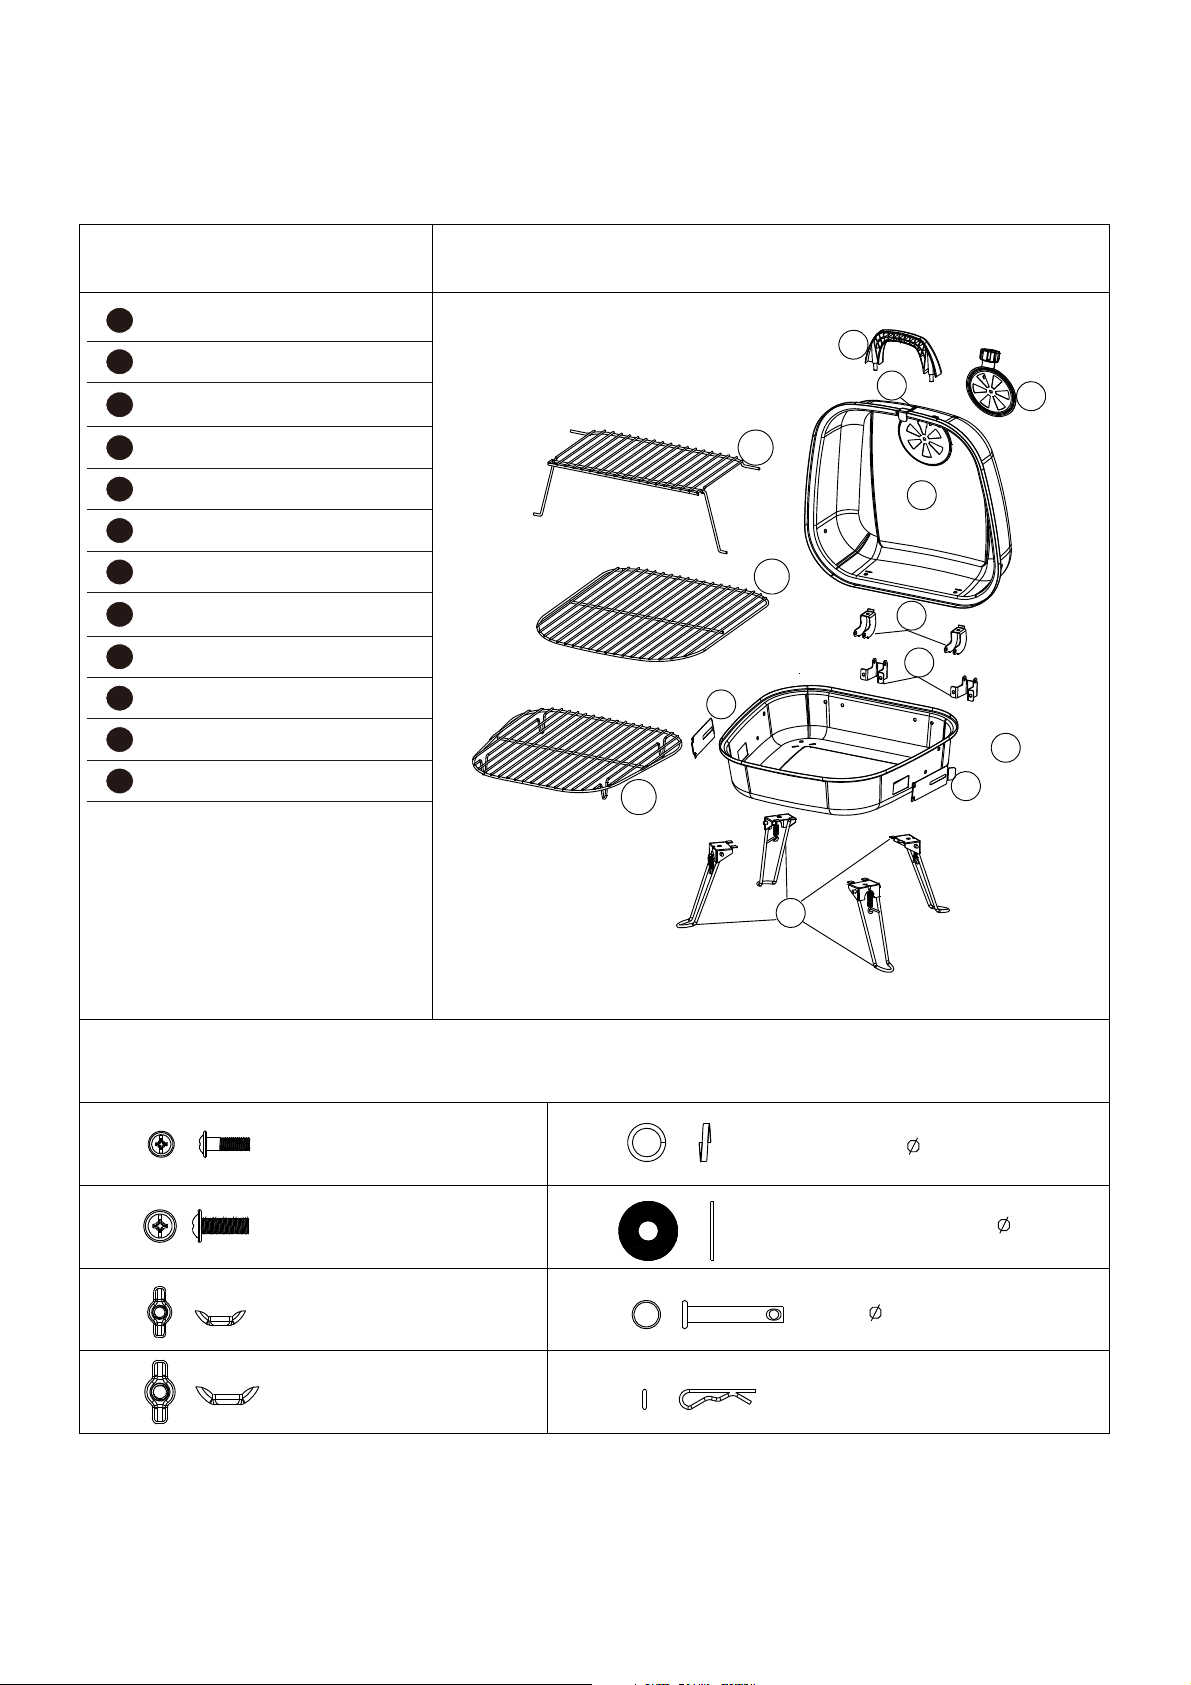
Parts & Hardware List
Parts List
1
Lid Handle C0806-020
2
Lid C0806-020
3
Air Vent B0105-A01
4
Top Hinge (2) B0120-C01
5
Bottom Hinge (2) B0120-C02
6
Bottom Bowl C0806-030
7
Air Damper (2) C0806-040
8
Leg Assembly (4) C0806-050
9
Charcoal Grid C0806-060
10
Cooking Grid C0806-070
11
Warming Rack C0806-080
12
Lock* C0806-090
* Pre-assembled
Expanded View
9
1
12
3
11
2
10
4
5
7
6
7
Hardware List (Included)
A
B
C
D
Screw M4X12 2Pcs
Screw M5X12 11Pcs
Wing nut M4 2Pcs
Wing nut M5 13Pcs
E
F
G
H
8
Lock washer
Heat Resistant Washer
Pin 5X30 2Pcs
Cotter Pin 65Mn 2Pcs
5.3 6Pcs
6.4 2Pcs
Page 3
Assembly Instructions Tools Required: Knife or scissors and Phillips head screwdriver
. To avoid losing any small components or hardware, assemble your product on a hard level surface that does not
have cracks or openings.
. Clear an area large enough to layout all components and hardware.
. When applicable, tighten all hardware connections by hand first. Once the step is completed, go back and fully
tighten all hardware.
. Follow all steps in order to properly assemble your product.
. The estimated assembly time is: 20-25 minutes.
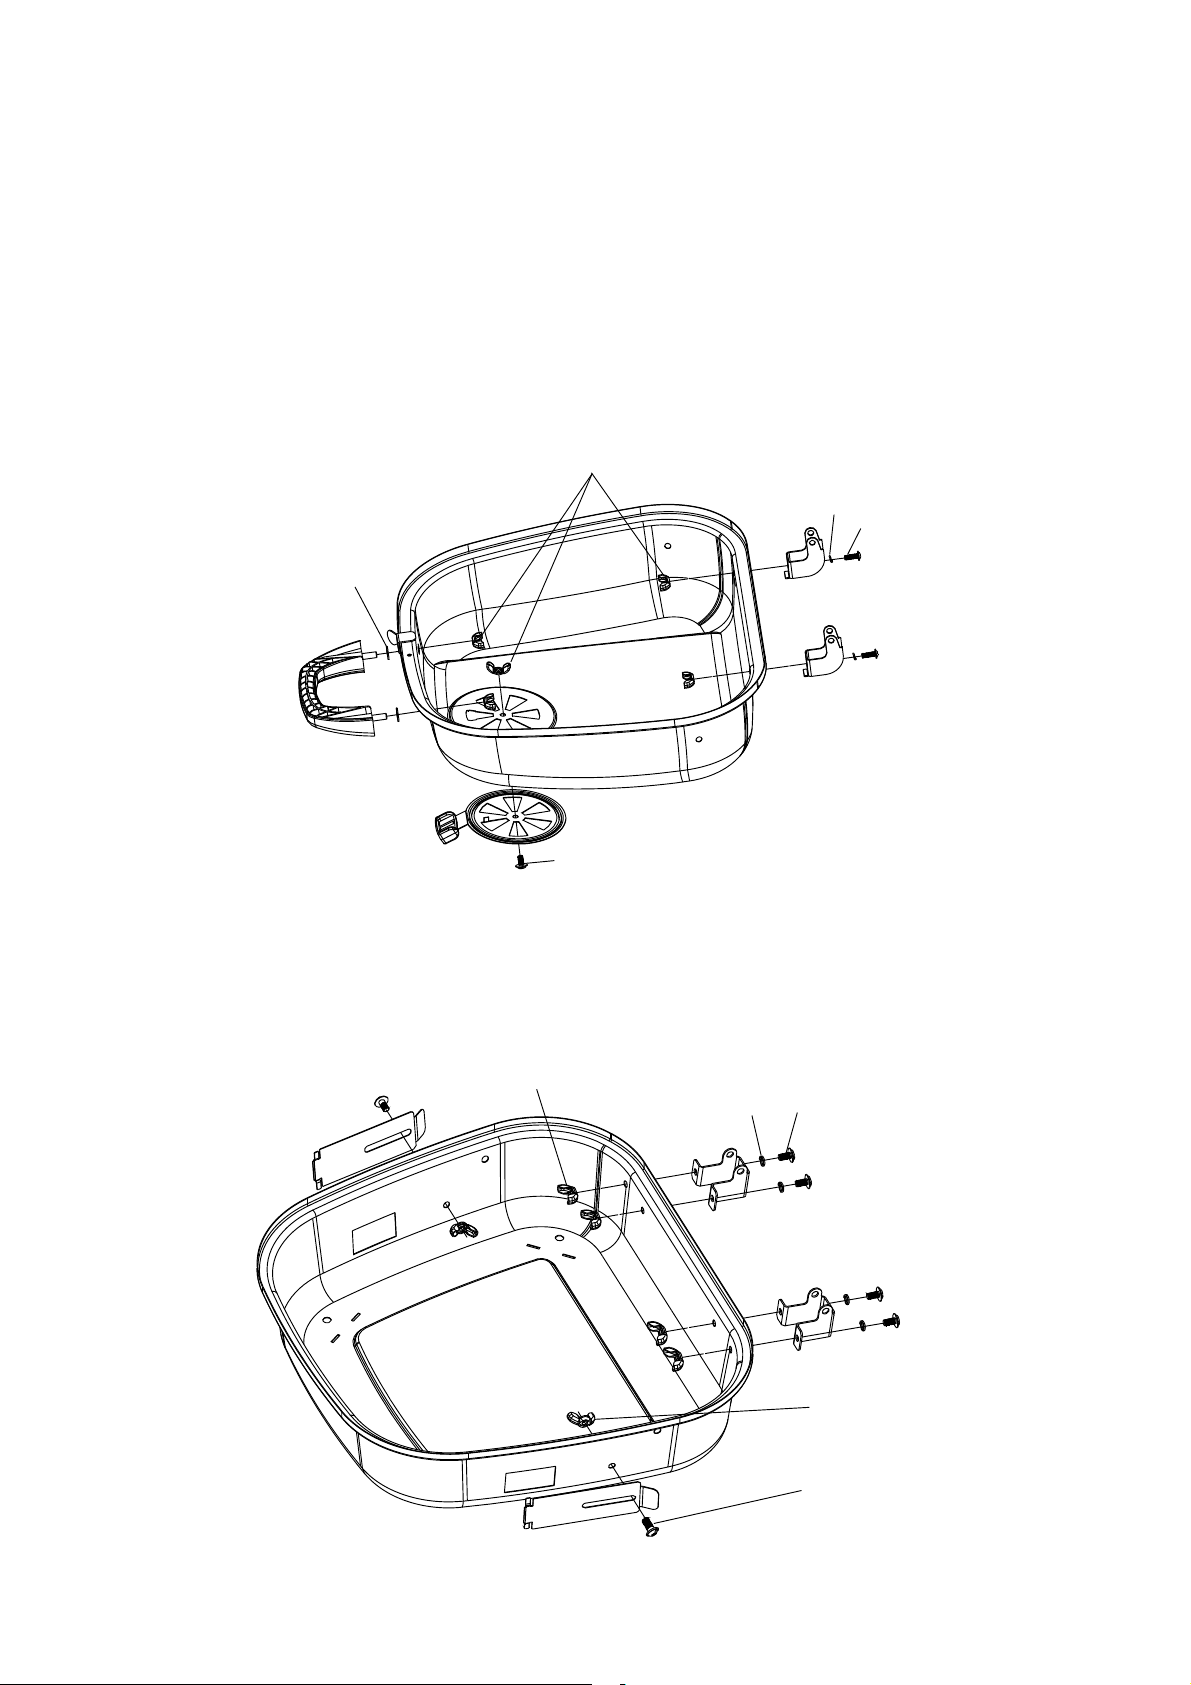
Step 1
Attach lid handle to lid (F Heat resistant washer 2Pcs / D Wing nut 2Pcs).
Attach air vent to lid (B Screw 1Pc / D Wing nut 1Pc).
Attach top hinge to lid (B Screw 2Pcs / E Lock washer 2Pcs / D Wing nut 2Pcs).
D
E
B
F
B
Step 2
Attach bottom hinge to bottom bowl (B Screw 4Pcs / E Lock washer 4Pcs / D Wing nut 4Pcs).
Attach air damper to bottom bowl (A Screw 2Pcs / C Wing nut 2Pcs).
D
B
E
C
A
2
Page 4

Step 3
Attach leg assembly to bottom bowl (B Screw 4Pcs / D Wing nut 4Pcs).
D
B
Step 4
Attach top hinge to bottom hinge (G Pin 2Pcs / H Cotter pin 2Pcs)
Note: If top hinge does not fit into bottom hinge, gently squeeze top hinge tabs together.
H
G
3
Page 5

Step 5
Slide warming rack into holes in lid and bottom bowl.
Note: Look for corresponding holes on side of lid, insert short wire ends into lid hole one side at a time. Position
warming rack legs into slots on bottom bowl sides.
Step 6
Insert charcoal grid and cooking grid into bottom bowl.
Step 7
Congratulations, your assembly is now complete. Read operating instructions before proceeding.
4
Page 6

Appendix
This grill can be folded for your easily take. Please refer to steps below:
Lock lid (Note: Lid must be locked before transporting)
To unlock: lift up on lock handle, remove lock bracket from rise on lid, push lock handle down.
Fold grill (Note: Always lock lid before fold grill).
Unfold grill (Note: Always open legs completely and are secured in place before lighting).
5
Page 7

Page 8

 Loading...