

Page 1
English
Owner’s Guide
v1.0
Deutsch
Français
Page 2
TECHNICAL SUPPORT
WARRANTY
Should you encounter problems using this product, please refer to the
troubleshooting section on page 41 of this owner’s guide.
Alternatively, call Revo technical support on :
UK 01555 666161
From outside the UK + 44 1555 666161
Alternatively, e-mail support@revo.co.uk or visit the troubleshooting
section of our website at: www.revo.co.uk/support
ENVIRONMENTAL INFO
PRODUCT DISPOSAL INSTRUCTIONS (WEEE DIRECTIVE)
The symbol shown here and on the product means that it is classed
as Electrical or Electronic Equipment and should not be disposed with
other household or commercial waste at the end of its working life.
The Waste of Electrical and Electronic Equipment (WEEE) Directive
(2002/96/EC) has been put in place to recycle products using best
available recovery and recycling techniques to minimise the impact
on the environment, treat any hazardous substances and avoid the
increasing landfi ll.
For more information please contact your local authority or the retailer
where the product was purchased.
RoHS COMPLIANT & CE MARK
This product has been designed to comply with international
directives on the Restriction of Hazardous Substances (RoHS) and has
been designed and type-tested to comply with EU
requirements and carries a CE mark.
Revo Technologies Ltd warrants to the end user that this product will
be free from defects in materials and workmanship in the course of
normal use for a period of one year from the date of purchase.
This guarantee covers breakdowns due to manufacturing faults and
does not apply in cases such as accidental damage, general wear
and tear, user negligence, modifi cation or repair not authorised by
Revo Technologies Ltd.
To register your purchase please visit www.revo.co.uk/register
COPYRIGHTS AND
ACKNOWLEDGEMENTS
Copyright 2015 Revo Technologies Ltd. All rights reserved.
No part of this publication may be copied, distributed, transmitted or
transcribed without the permission of Revo Technologies Limited.
REVO and SUPERSYSTEM and are trademarks or registered
trademarks of Revo Technologies Limited.
The Bluetooth® word mark and logos are registered trademarks
owned by Bluetooth SIG, Inc. and any use of such marks is under
license. aptX® is a trademark of CSR plc.
Revo Technologies Ltd
The Inox Building, Caldwellside, Lanark,
Scotland, United Kingdom, ML11 7SR
Tel: +44 (0) 1555 66 61 61 Email: enquiries@revo.co.uk
The Spotify software is subject to third party licenses found here:
www.spotify.com/connect/third-party-licenses
SAFETY WARNINGS
• Do not operate this radio near water
• Do not remove screws or casing parts
• Use only the power supply unit supplied
• Avoid small objects and liquids from entering the product
02
DISCLAIMER
Revo Technologies Limited makes no representation or
warranties with respect to the content of this publication, and
specifi cally disclaims any implied warranties of merchantability or
fi tness for any particular purpose. Further, Revo Technologies Limited
reserves the right to make changes to this publication from time to
time, without notifi cation to any person or organisation.
Page 3

CONTENTS
02 Technical Support
02 Environmental Info
02 Warranty
02 Copyrights and Acknowledgements
02 Disclaimer
03 Welcome / Unpacking
04 Anatomy
05 Remote Control
06 Power Supply
06 Set-Up
07 Control and Menu Structure
08 - 09 Setup Wizard
10 - 11 DAB Mode
12 - 13 DAB Mode Menu Options
14 FM Mode
15 FM Mode / AUX-IN Mode / Optical In Mode
16 - 17 Bluetooth
18 - 21 Internet Radio Mode
22 Internet Radio Portal
23 - 24 Setting Up A Music Server
24 - 27 Music Player Mode / USB Charging
28 - 30 Spotify Connect
31 - 33 UNDOK App Control and Multiroom
34 - 35 Alarm Clock
36 - 40 System Settings
41 - 42 Troubleshooting
43 Error Messages
WELCOME
Thank you for purchasing our SUPERSYSTEM digital music system,
we are sure that it will provide you with many years of enjoyment
and reliable service.
SUPERSYSTEM is a thoroughly modern music system, combining
traditional values of craftsmanship and material integrity with
next-generation all digital technology and superlative room-fi lling
acoustic performance.
SUPERSYSTEM beats at the heart of your musical ecosystem, providing
whatever soundtrack you need, whenever and wherever you want it.
Thanks to the inclusion of UNDOK technology, music can be wirelessly
distributed to other compatible devices in your home to establish a
sophisticated multiroom audio environment.
This guide has been designed to get you up-and-running with your
SUPERSYSTEM, offer guidance on the more complex features of this
product and provide information on safety, warranty details and
troubleshooting.
UNPACKING
The SUPERSYSTEM box should include the following items:
• SUPERSYSTEM
• Remote control
• Power supply with multi-country adaptors
• Screen cleaning cloth
• Warranty card
• Owner’s guide
Should any item be missing or damaged, please contact your point
of purchase or call Revo directly on +44 (0) 1555 66 61 61
NOTE: All packaging should be retained for possible future use,
it is the safest way to transport your device should it be necessary.
03
Page 4
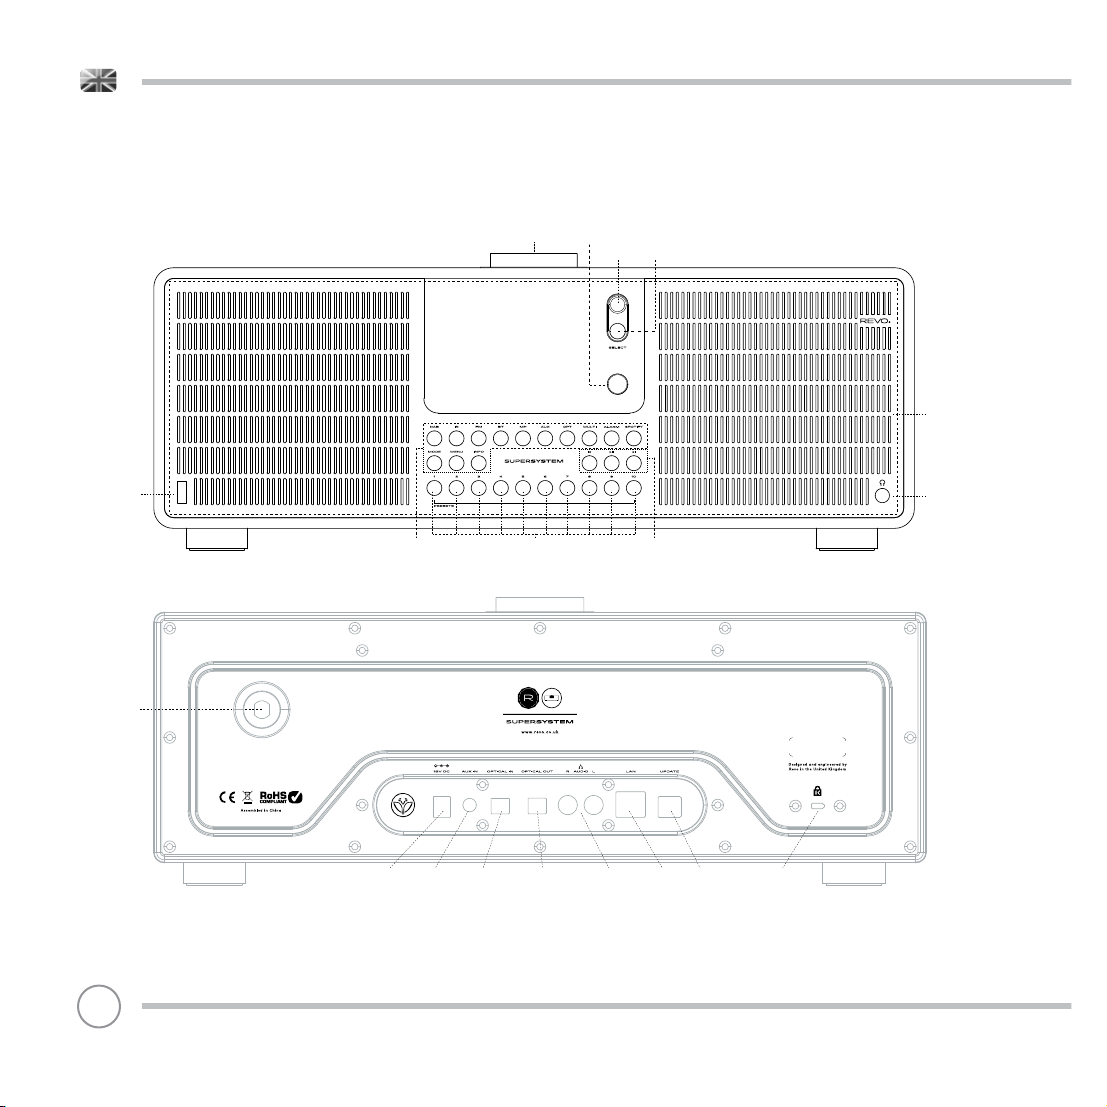
ANATOMY OF SUPERSYSTEM
Volume Dial
Power/Standby
Joystick Controller
Select Button
Touch-Snooze Area
USB Charging Port
Telescopic
Antenna
04
Quick Keys : Direct access buttons to prinipal modes and menus
DC Power Socket Aux-In Digital Optical In Digital Optical Out Stereo RCA Connectors Wired LAN Software Update Port Kensington Lock Slot
Station Presets 1 - 10
3.5 Headphone Connector
Media Keys
Page 5
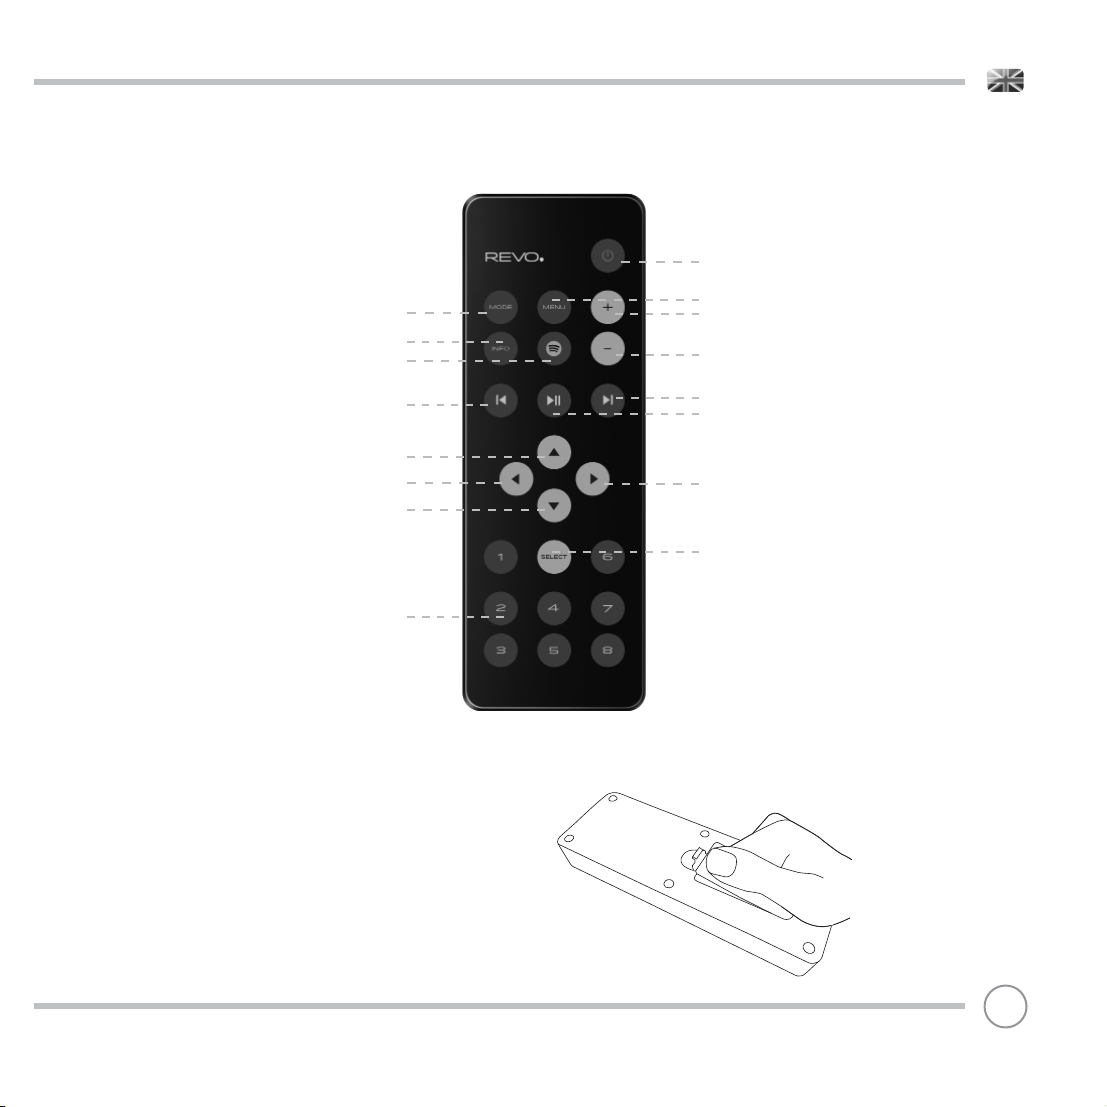
REMOTE CONTROL
Power
Mode
Info
Spotify Mode
Skip Back (Fast Rewind)
Scroll Up
Left (Back)
Scroll Down
Presets 1 - 8
BATTERY REPLACEMENT
The SUPERSYSTEM remote control is powered by two AAA
batteries. Depending on usage, the batteries should happily run for
between 1 and 2 years.
Menu
Volume Increase
Volume Decrease
Skip Forward (Fast Forward)
Play / Pause
Right (Forward)
Select
Replace the batteries when button presses seem sluggish, or when
the operating range appears to have reduced signifi cantly.
05
Page 6
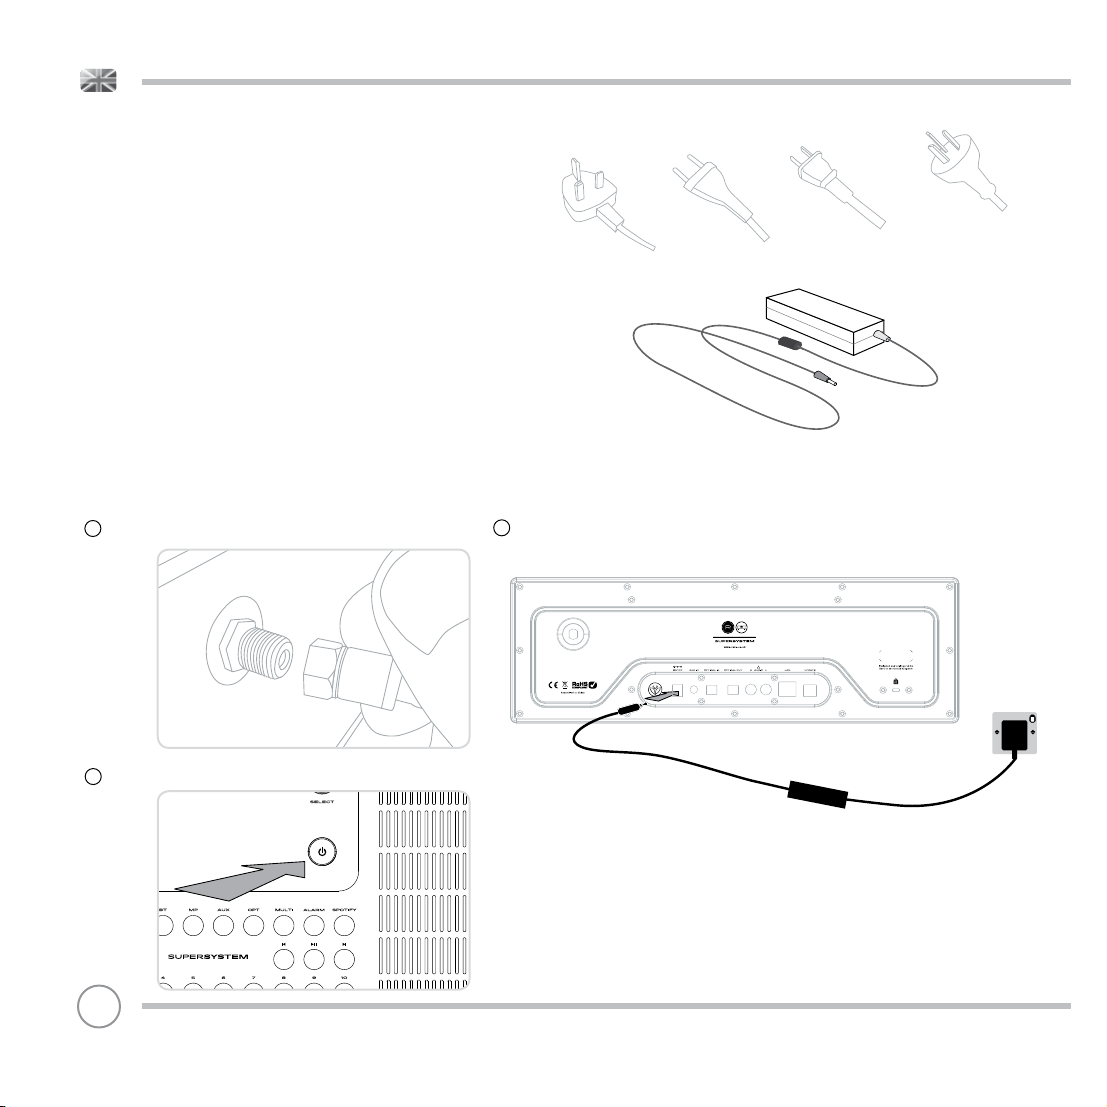
POWER SUPPLY (PSU)
Your SUPERSYSTEM is supplied with a multi-region power
supply, meaning that it can be operated in a number of
countries around the world.
Select the correct plug for your country then connect it to
the transformer block.
SET-UP
Attach, tighten and extend the antenna for DAB or FM operation
1
EU USA AUSTRALIAUK
Transformer Block
2
Using the PSU supplied, connect one end to the DC power socket found on the
rear of your device, then plug the opposite end into the mains socket on the wall.
3
Press the POWER button to enter the Setup Wizard (see page 08).
06
Page 7
CONTROLLING SUPERSYSTEM
In order for you to get the most from your device, it is important for
you to understand how its joystick and menu system operates.
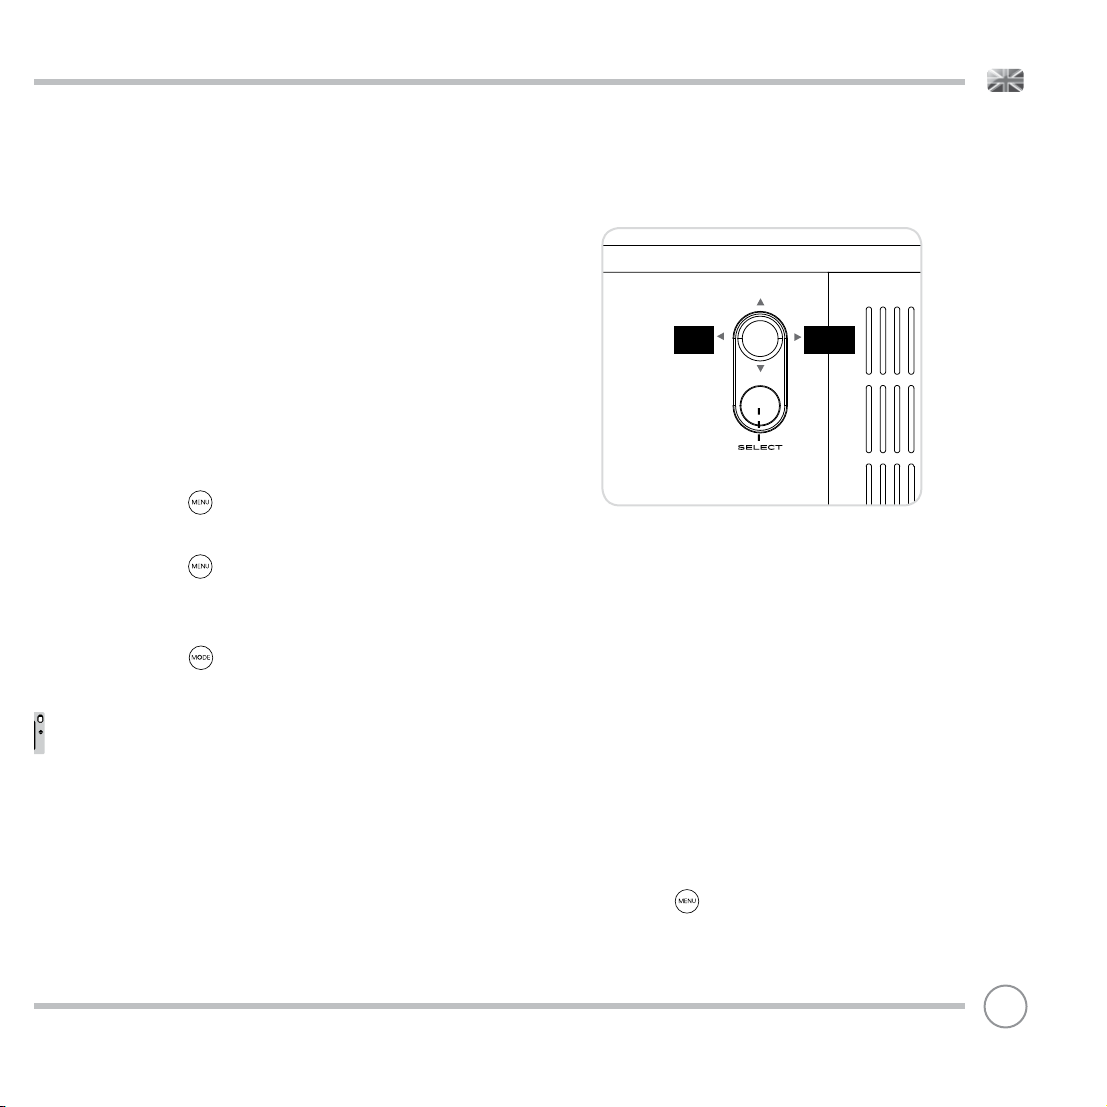
JOYSTICK CONTROL
SUPERSYSTEM uses a joystick based control system for ease of use.
The joystick controller has four functions and is used in conjunction
with a separate SELECT button.
UP Scrolls Up
DOWN Scrolls Down
LEFT Scrolls Left and moves back through menus
RIGHT Scrolls Right and moves forward through menus
SELECT Selects current option
MENU BUTTON
Pressing the button will take you to the Mode Menu for the
particular mode of operation you are in. For example, pressing
when in DAB Mode will take you to the DAB MODE MENU.
Pressing the button for a second time will return you to the
‘playing screen’ that you just left.
MODE BUTTON
Pressing the button will sequentially cycle through each of
SUPERSYSTEM’S modes of operation. However, each mode also has a
dedicated button on the front panel.
It is also possible to move between modes of operation via the MAIN
MENU (see below).
MENU STRUCTURE EXPLAINED
MAIN MENU
This is SUPERSYSTEM’S principle (top level) menu, and allows you to
enter different operating modes, change settings and view information such as the ‘Radio ID’ number and software version.
‘UP’
‘LEFT’
(Back)
‘DOWN’
MODE MENUS
The Mode Menus are so called because they show the functions
available within the currently selected mode.
Pressing the button at any time will take you to the Mode
Menu for the mode of operation your radio is currently in.
Each of the Mode Menus also includes a listing for MAIN MENU,
allowing you to return to the top level MAIN MENU.
‘RIGHT’
(Forward)
07
Page 8
SETUP WIZARD
USING THE SETUP WIZARD
The fi rst time you use SUPERSYSTEM you will be asked whether you would like to run the SETUP
WIZARD. The ‘WIZARD’ will run through a series of questions, and is the simplest way to get your
device up and running.
You can run the SETUP WIZARD again at any time, it can be found in the SYSTEM SETTINGS MENU.
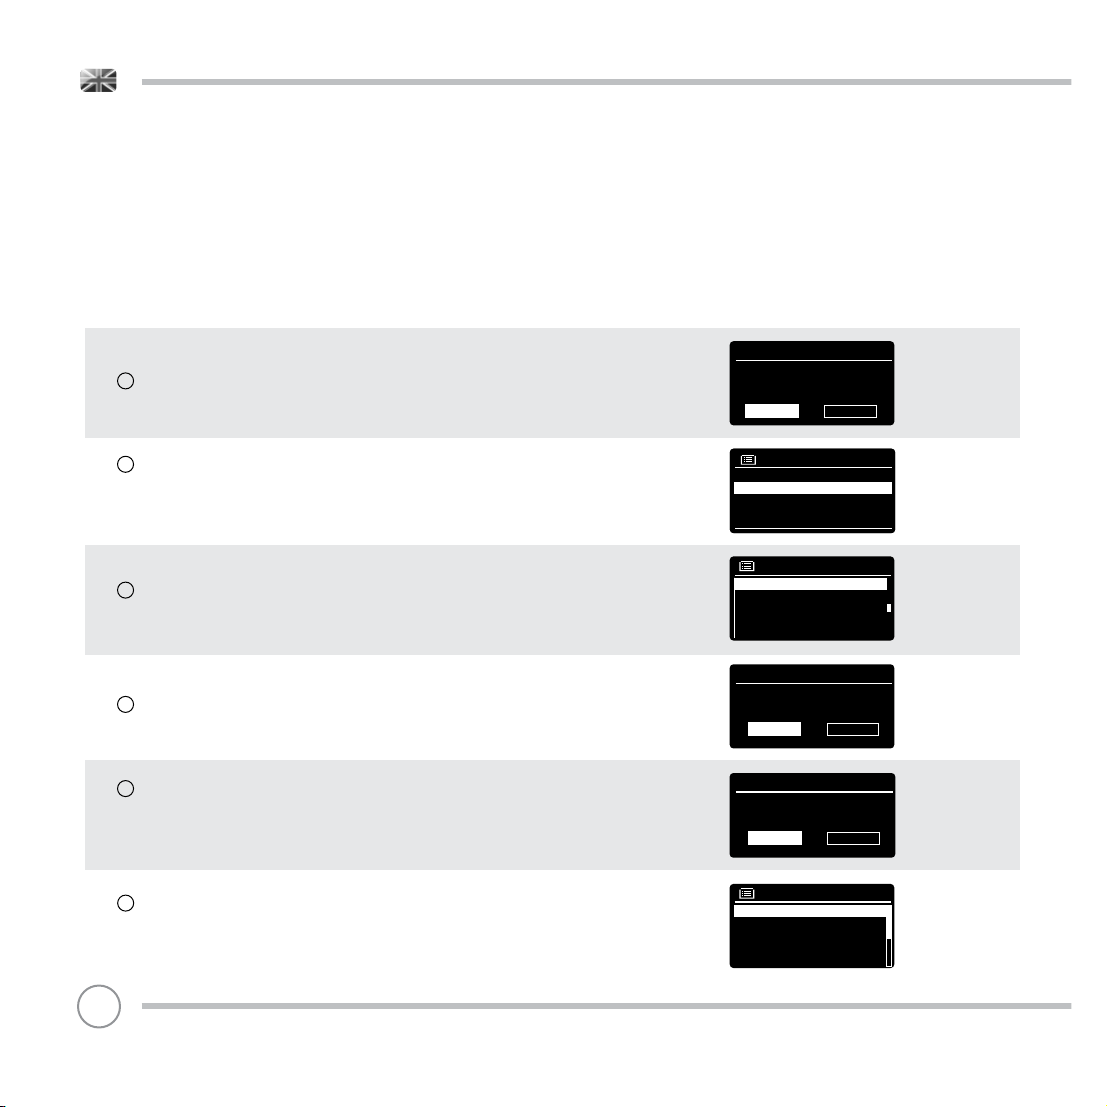
Press the SELECT button, and start the SETUP WIZARD procedure.
1
Choose and select your preferred hour format (12 or 24 hour).
Date/Time
12/24 hour format
12 24
*
Choose and select where you’d like SUPERSYSTEM to retrieve its clock
2
time from. (Note : If you’re using SUPERSYSTEM in a country where
DAB is broadcast, this is the simplest method to ensure the date/time
settings are correctly maintained.)
If you’ve chosen ‘Update from Network’ please Scroll and select your
3
local timezone from the menu.
If you’ve chosen ‘Update from Network’ please select your preferred
4
daylight savings status.
By selecting ‘Yes’ to ‘Keep Network Conected’, your SUPERSYSTEM will
5
remain connected to your WiFi network even when in non-internet
modes (DAB/FM) and when in standby. This allows you to access it
from the UNDOK app or SPOTIFY app at all times.
Scroll and select the region in which you are using SUPERSYSTEM.
6
This will enable the device to scan for the correct type of WiFi
network (WiFi frequencies vary worldwide)
08
Auto update
Update from DAB
Update from Network *
No update
Set Timezone
UTC + 00 : 00 : Dublin , London#
UTC + 00 : 30 :
UTC + 01 : 00 : Madrid , Ar
UTC + 01 : 30 :
UTC + 02 : 00 : Athens , Ci
Daylight savings
Daylight savings
YES NO
Network settings
Keep network connected ?
YES NO
Wlan region
Most of Europe
USA
Canada
Spain
France
Page 9
SETUP WIZARD
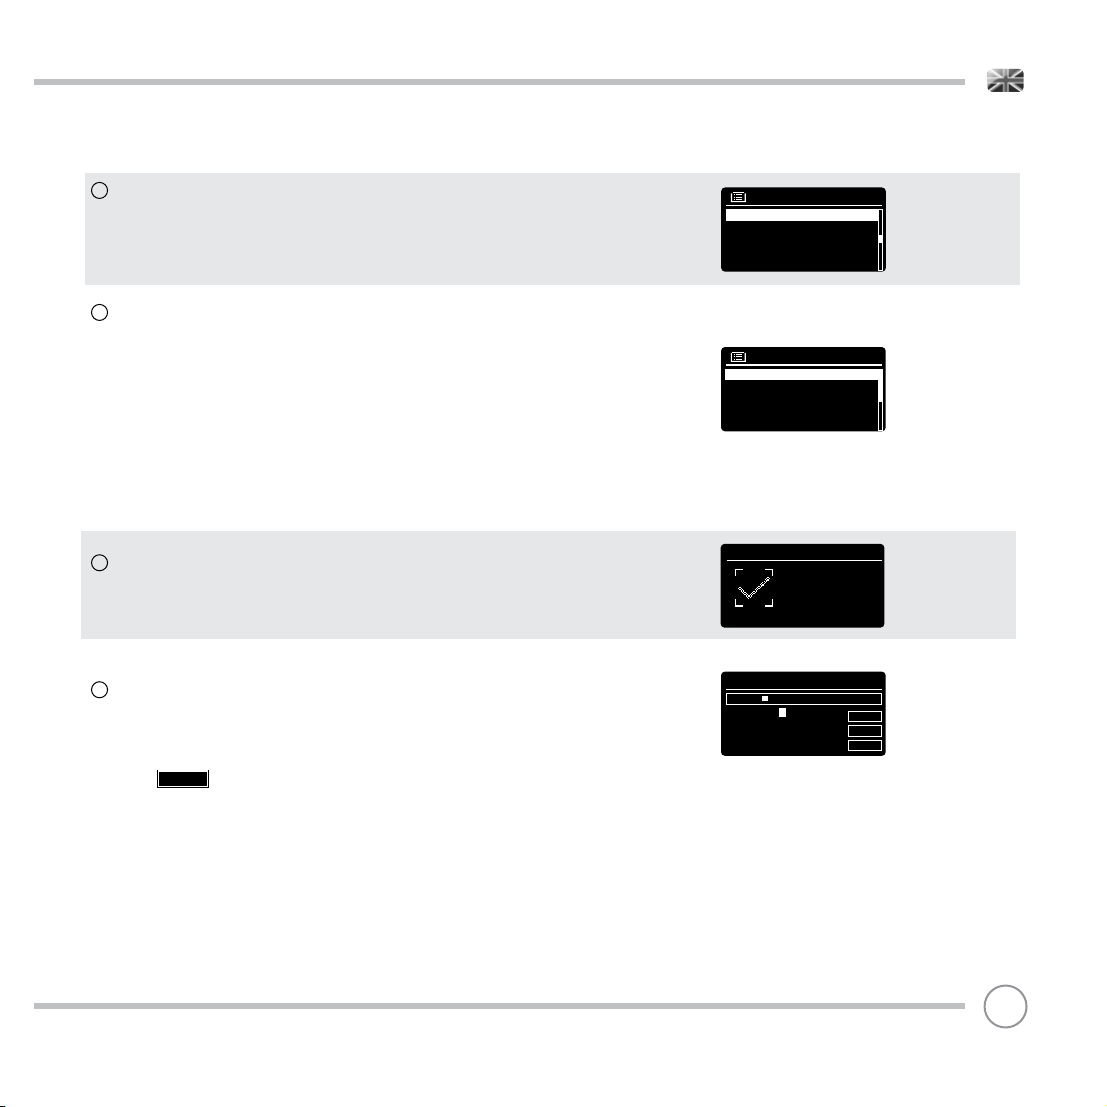
Scroll and select your NETWORK. In some cases your radio may fi nd
7
more than one. Simply choose the one you want to use.
If you would like to use your radio over a Wired connection, rather
than a wireless one, simply choose the Wired option from the SSID list.
Push Button - If your router supports WPS connectivity and has a WPS
8
or Wireless button, please select this option and follow the on-screen
instructions.
Pin - SUPERSYSTEM will display an identifi cation number which you
enter into your router using a web browser (please see your router’s
user documentation).
Enter Passkey - Select this option to simply enter your router’s Passkey
(also known as ‘Wireless Key’, ‘WPA Key’ or ‘Network Key’. Now see
point 10 below.
SSID
Homehub
FAMILY net
[Rescan]
[Wired]
[Manual config]
WPS Menu
Push Button
Pin
Enter Passkey
If your wireless network is not password protected, SUPERSYSTEM will
9
automatically connect, and the following screen will be displayed.
If you do use password protection, enter your network password
10
using the joystick controller to scroll through the alphanumeric
characters, pressing SELECT to enter each number or letter. When
you have correctly entered your entire password, select OK.
Select (back space) if you have entered an incorrect
BKSP
character.
SUPERSYSTEM will save the password into its memory. There will be no
need to re-enter the password again.
Setup wizard
Setup wizard
completed
Press SELECT to exit
Key:
xxxxx
0 1 2 3 4 5 6 7 8 9 . , a b
c d e f g h i j k l m n o p q
r s t u v w x y z A B C D E
F G H I J K L M N O P Q
BKSP
OK
CANCEL
09
Page 10
DAB RADIO MODE
GETTING READY FOR DAB OPERATION
Please ensure that the antenna is attached and extended before
operation in DAB Mode.
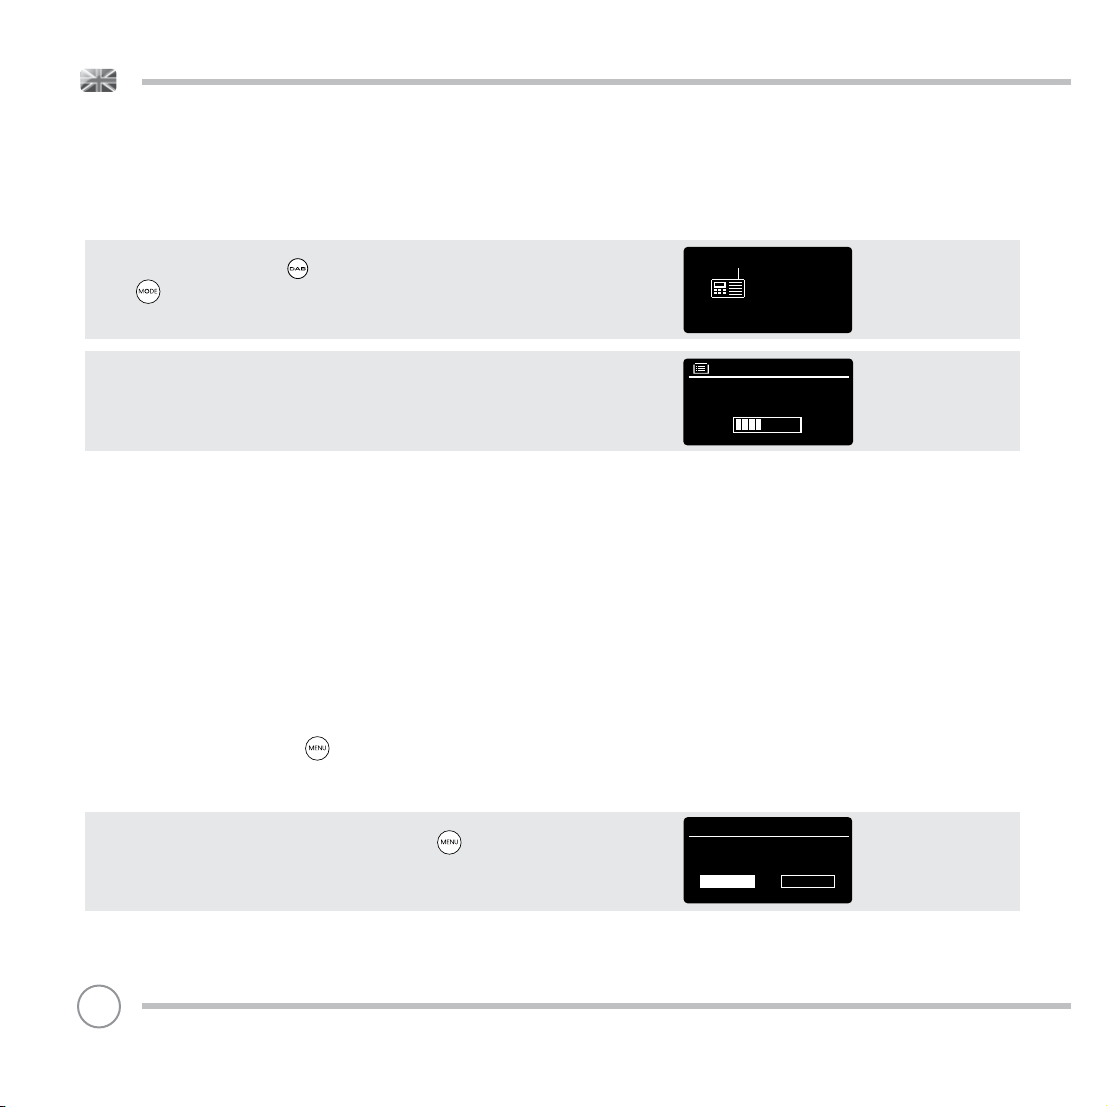
To enter DAB MODE, press the button on the front panel, or press
the button until the DAB Mode intro screen is displayed.
When in DAB MODE for the fi rst time, SUPERSYSTEM will automatically
perform a full scan to see what stations are being broadcast in your
area, before storing them alphabetically in the memory.
It may be necessary to perform a manual scan from time to time, in
order to update the station list. This may be required for any one of
the following reasons:
1. Station availability can change from time to time as new stations
appear, or existing stations cease broadcasting.
2. If reception was poor during the initial automatic scan, for
example the antenna was not attached or completely extended,
it may be that the station list is incomplete or even empty.
3. If you have poor reception on some of the stations (resulting in
broken or poor quality audio), you may wish to list only stations that
have a strong signal strength.
To start a manual scan, press the button then select SCAN from
the menu list.
When the scan is complete, SUPERSYSTEM will list all available stations.
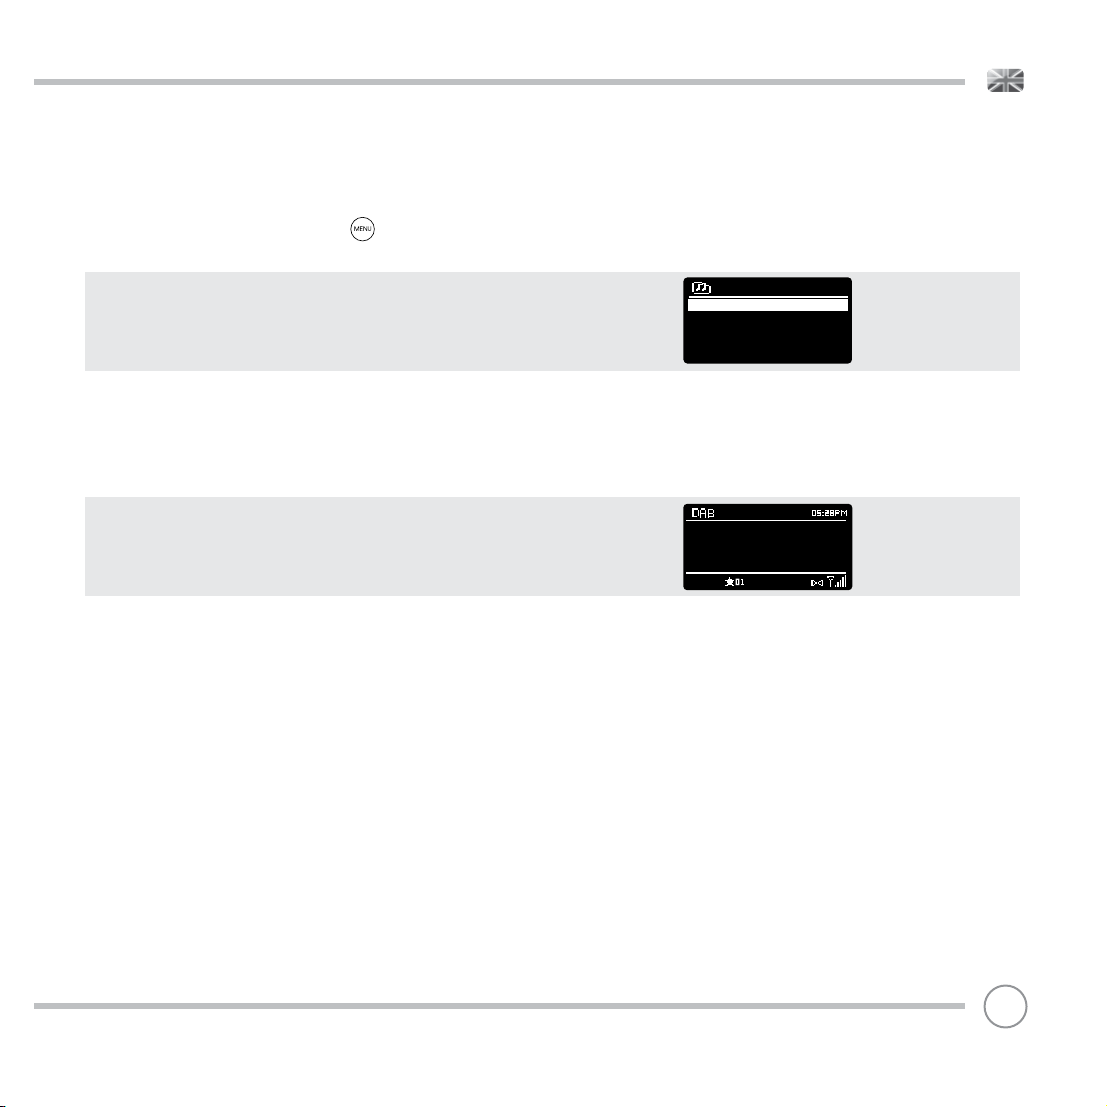
To remove stations that are listed but unavailable, press then
choose PRUNE INVALID. When asked whether you wish to “remove all
invalid stations”, select YES.
Scan
Stations : 21
Scanning
Prune Invalid
This removes all invalid
stations, continue?
YES NO
DAB
radio
10
Page 11
DAB RADIO MODE
SELECTING A STATION
To access the station list, press or tap UP, DOWN or LEFT on the joystick
controller at any time, alternatively press then select STATION LIST.
Scroll through the available stations using UP and DOWN on the
joystick controller, then either press the SELECT button to select your
station choice, or tap the joystick RIGHT.
FAVOURITE STATION PRESETS
SUPERSYSTEM allows you to store your favourite stations as presets,
either via its 10 front-panel mounted ‘hot-keys’, or the numbered
preset buttons located on the remote control.
To store the station you are currently listening to as a preset, simply
press and hold a preset button until “Preset Stored” is display on the
screen. The preset number that has been assigned to the station is
displayed at the bottom of the screen next to a star icon.
If you want to change a particular preset in the future, repeat the
process and the previously stored preset will be automatically
overwritten.
Station list
Absolute
Amazing
BBC 1Xtr
BBC 6Mus
BBC Gael
BBC Radio 6Music
u to vote for a track that
missed out on the 6:00 AM
Music playlist
11
Page 12
DAB MODE MENU OPTIONS
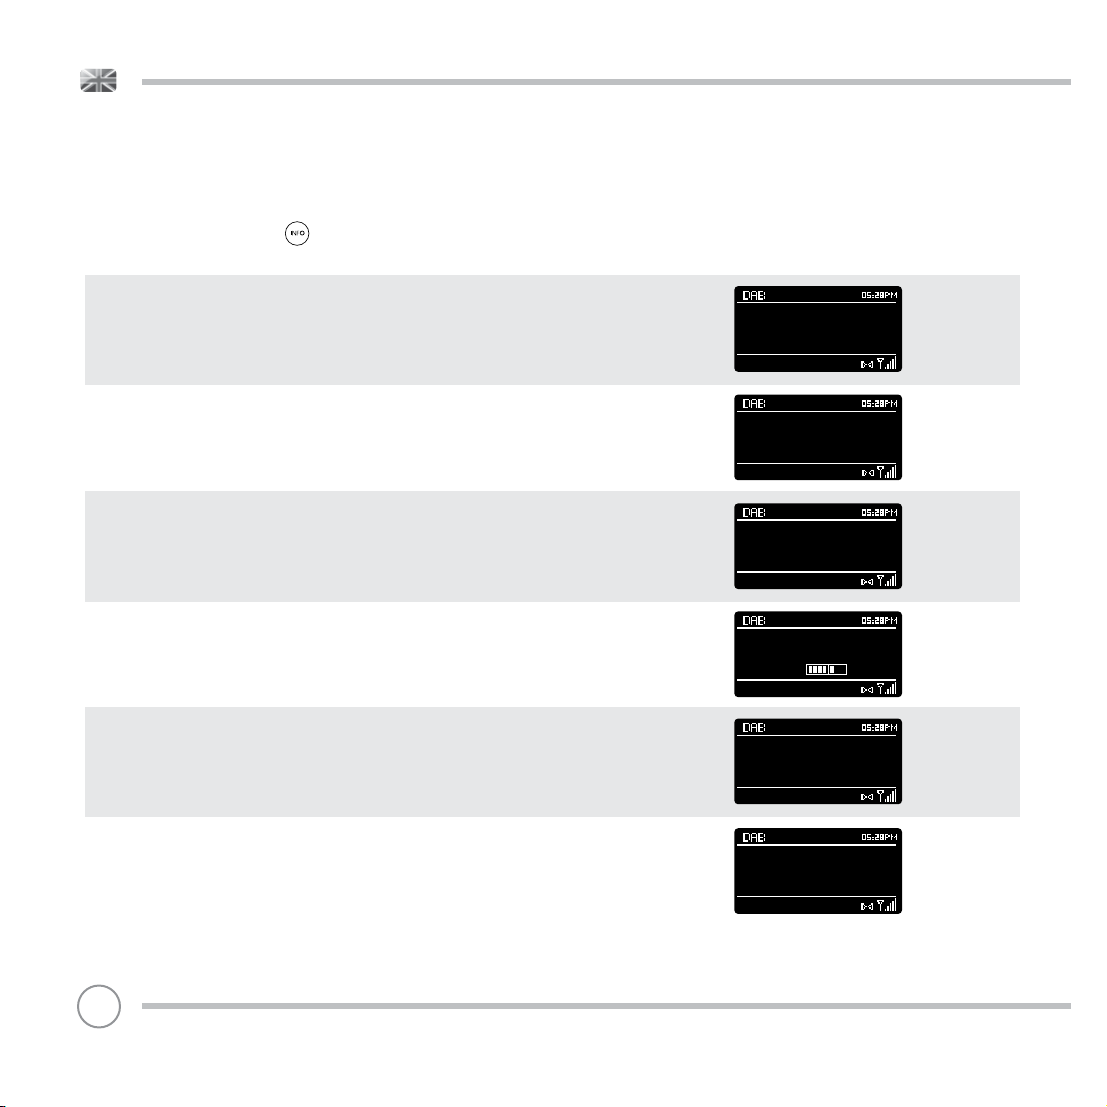
STATION INFO
In DAB MODE, SUPERSYSTEM is capable of displaying various pieces of information
on its screen. By pressing the button, you can sequentially cycle through the
following types of information.
STANDARD DAB SCREEN Shows scrolling text info from broadcaster
PROGRAMME TYPE For example News, Rock Music, Classical etc.
MULTIPLEX AND FREQUENCY Multiplex owner and station frequency
SIGNAL STRENGTH Station’s current signal strength
BBC Radio 6Music
Now Playing : Glasvegas
Go Square Go!
BBC Radio 6Music
Rock Music
BBC Radio 6Music
BBC National DAB
Freq: 225.648 MHz
BBC Radio 6Music
Signal Level : 90
Strength
BIT RATE AND CODEC Audio format, sample rate, mono or stereo
DATE Today’s date
12
BBC Radio 6Music
Bit rate: 128 kbps
Codec : MP2
Channels : Joint Stereo
BBC Radio 6Music
Today’s Date :
22/02/15
Page 13
DAB MODE MENU OPTIONS
DYNAMIC RANGE COMPRESSION (DRC)
If you are listening to music with a high dynamic range in a noisy
environment (for example, classical music while cooking), you may
wish to compress the audio’s dynamic range. This has the effect of
making quiet sounds louder, and loud sounds quieter.
To change the DRC setting, press then choose the DRC option,
before selecting OFF, LOW or HIGH.
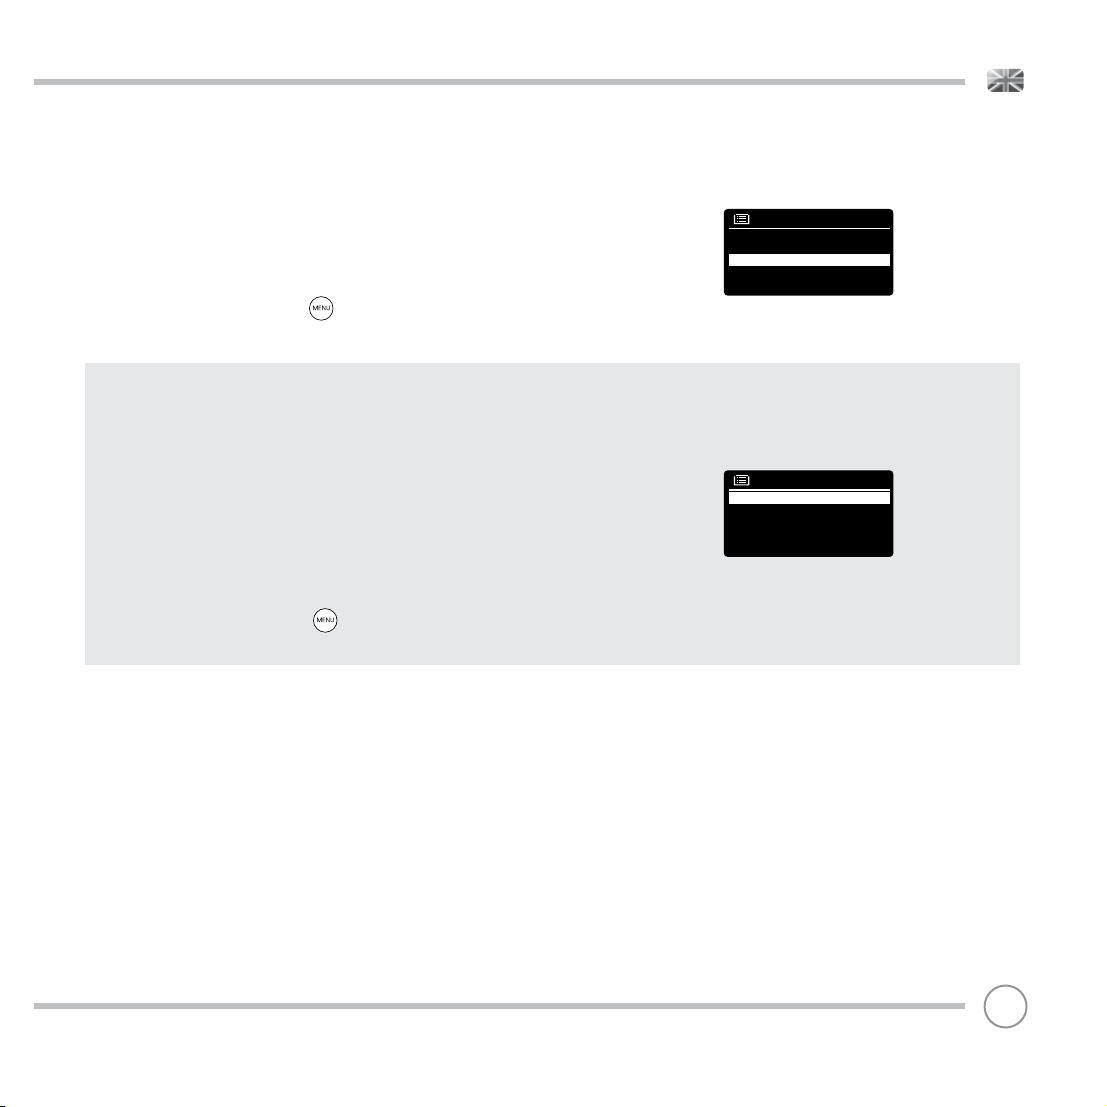
STATION ORDER
It is possible to choose the order of the DAB station list to be either
ALPHANUMERIC, ENSEMBLE or VALID.
DRC
DRC Low
DRC High
DRC Off #
As the name implies, ALPHANUMERIC lists stations in alphanumeric
order.
ENSEMBLE lists groups of stations that are broadcast together on the
same ensemble, for example BBC or Central Scotland Local.
VALID lists valid stations fi rst, alphanumerically, then off-air stations.
To change the station order, press then select STATION ORDER,
before choosing either ALPHANUMERIC, ENSEMBLE or VALID.
Station order
Alphanumeric #
Ensemble
Valid
13
Page 14
FM RADIO MODE
FM OPERATION
Please ensure that the antenna is attached and fully extended
before operation in FM MODE.
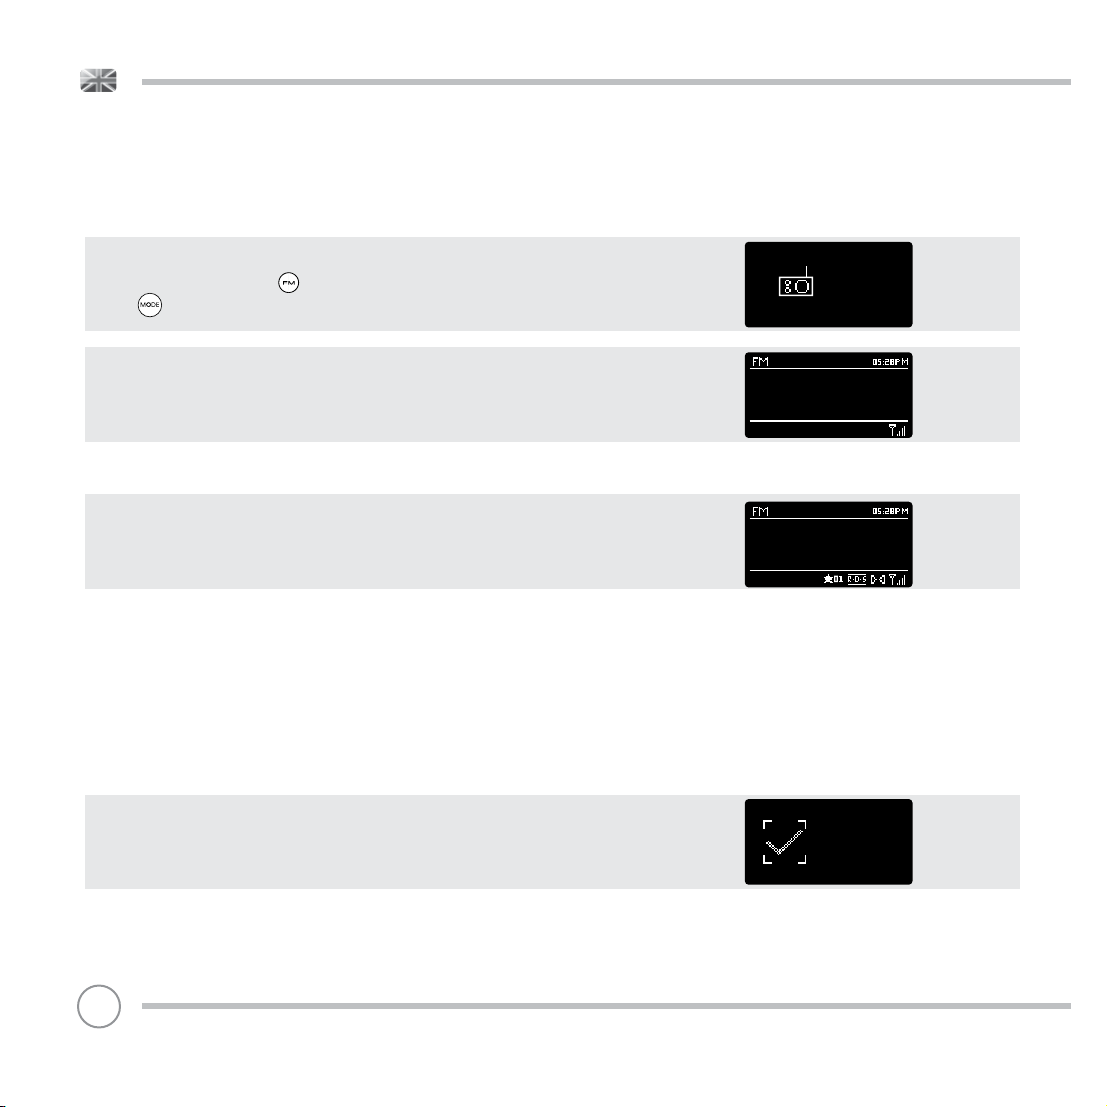
To enter FM MODE, press the button on the front panel, or press
the button until the FM Mode intro screen is displayed.
Pressing the SELECT button will start scanning for the next available
station. SUPERSYSTEM will automatically stop scanning when a station
is found.
To fi ne tune, use UP or DOWN on the joystick controller to
incrementally change the frequency.
When on an FM station that has a strong signal and is broadcasting
RDS information, SUPERSYSTEM will display the station name and other
pieces of text information on-screen.
FAVOURITE STATION PRESETS
SUPERSYSTEM allows you to store your favourite stations as presets, either via its 10 front panel-mounted ‘hot-keys’, or the numbered preset
buttons located on the remote control.
To store the station you are currently listening to as a preset, simply
press and hold a preset button until “Preset Stored” is display on your
radio’s screen. The preset number that has been assigned to the
station will be displayed at the bottom of the screen.
If you want to change a particular preset in the future, repeat
the process and the previously stored preset will be automatically
overwritten.
87.50 MHz
BBC R3
Composer of the Week
Coming next - Proms
Chamber Music 2009
Preset stored
FM
radio
14
Page 15
FM RADIO MODE
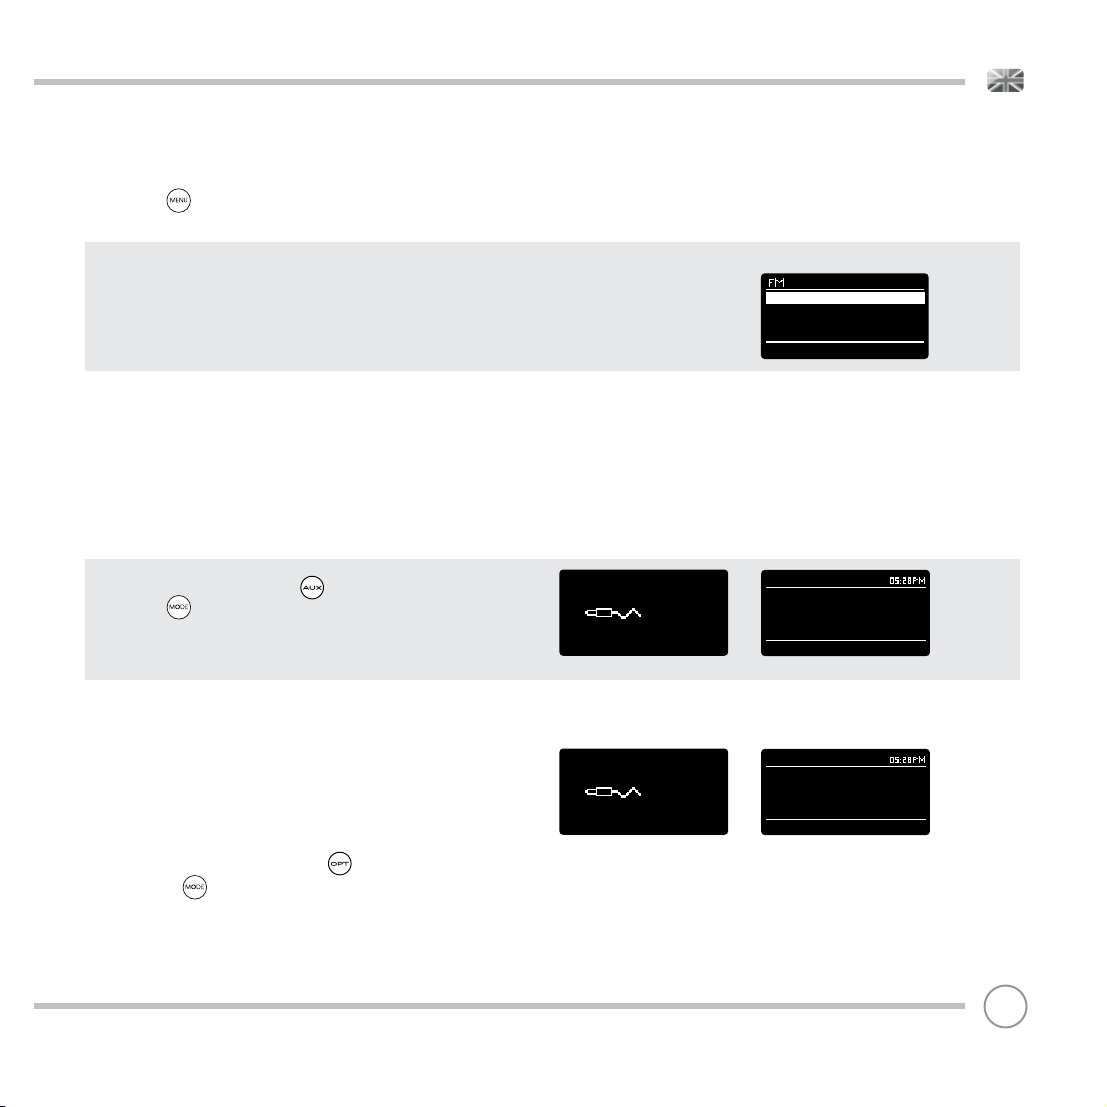
FM SETTINGS
Press the button to access the FM MODE MENU. From here you can
set some FM preferences such as SCAN SETTING and AUDIO SETTING.
SCAN SETTING allows you to decide whether the radio should stop
scanning only when it fi nds a station with a strong signal.
AUDIO SETTING gives you the option of listening to a station in mono,
should the signal strength not be suffi ciently strong to allow stereo
reception.
AUX IN MODE
AUX IN MODE allows you to play audio from an external source (such
as an MP3 player) through your SUPERSYSTEM. To do so, connect your
external audio source to the 3.5mm AUX IN connector on the rear of
SUPERSYSTEM.
Before connecting, Tur n the volume down low on both SUPERSYSTEM
and, if adjustable, the external device.
Scan setting
Audio setting
Main menu >
To enter AUX IN MODE, press the button on the front panel, or
press the button until the Aux In intro screen is displayed.
Adjust the volume of SUPERSYSTEM and, if necessary, the external
audio device as required.
OPTICAL IN MODE
OPTICAL IN MODE allows you to connect a digital audio source
(Television/Set Top Box, Computers/Laptops and CDs players etc.
might offer this type of output). To connect you will require a
”TOSLINK” cable plugged in to the external source and connected to
the OPT IN connector on the rear of SUPERSYSTEM.
To enter OPTICAL IN MODE, press the button on the front panel,
or press the button until the Optical In intro screen is displayed.
If applicable we recommend setting the volume to about 80% on
the source and use the volume control of SUPERSYSTEM to set your
desired level.
Aux in
Optical In
Auxiliary Input
Audio in
Today’s Date :
22/02/15
Optical Input
Optical in
Today’s Date :
15/10/15
15
Page 16
BLUETOOTH MODE
Wirelessly stream music from your Bluetooth smartphone, tablet, laptop or other
Bluetooth enabled device directly to SUPERSYSTEM, without the need for physical
docking or connection.
PAIRING WITH BLUETOOTH DEVICES
‘Pairing’ occurs when two Bluetooth devices talk to each other and establish a
connection. This connection is stored in the memory of both devices, meaning
that once you ‘pair’ a particular device with SUPERSYSTEM, you shouldn’t have to
go through the pairing process again.
HOW TO PAIR A BLUETOOTH DEVICE WITH SUPERSYSTEM
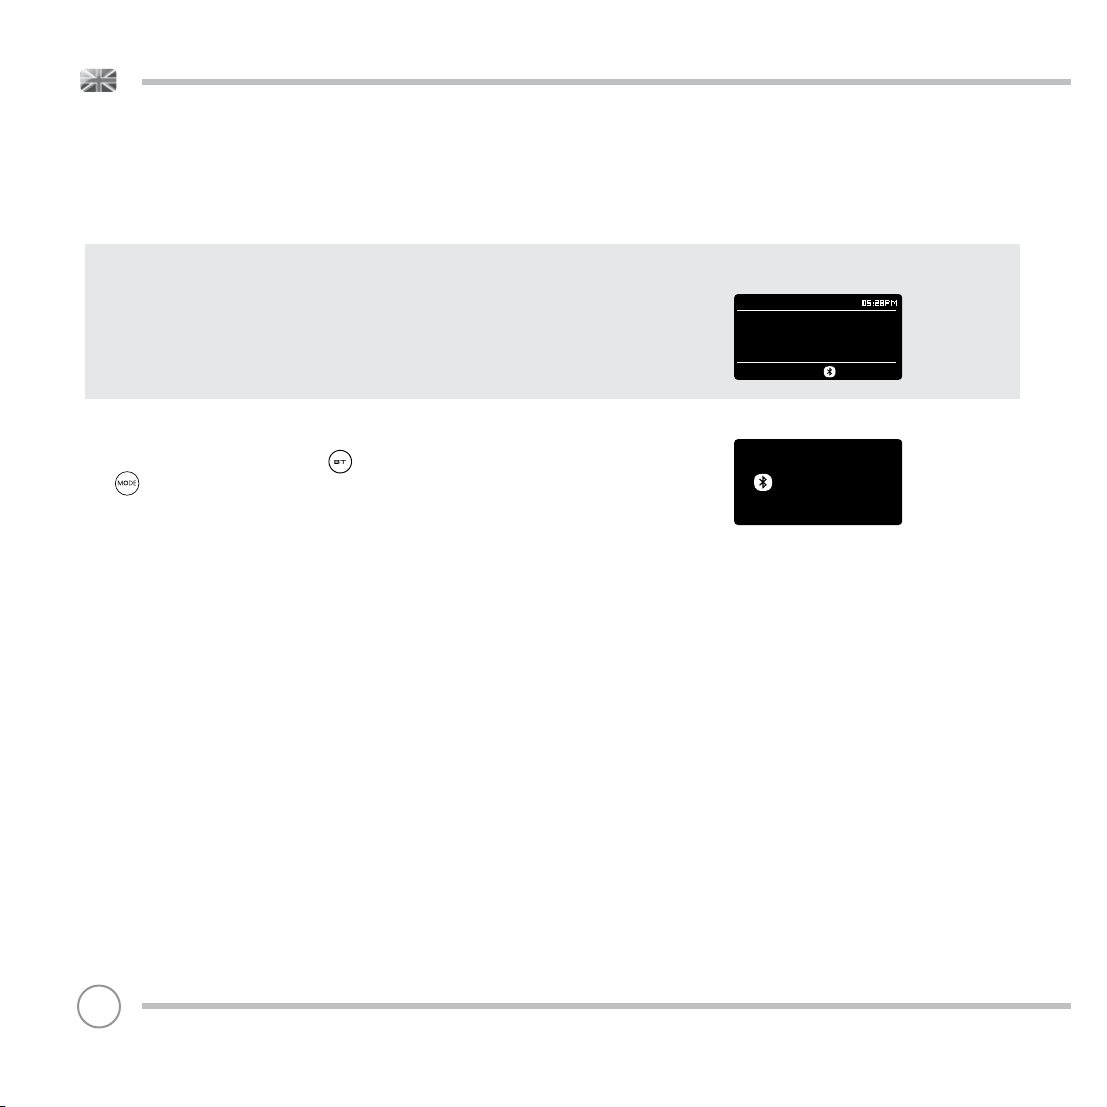
To enter BLUETOOTH MODE, press the button on the front panel, or press the
button until the BLUETOOTH Mode intro screen is displayed.
On your Bluetooth device, ensure that Bluetooth is enabled then initiate a ‘Search’
for a new device. When the search process has been completed, your device will
list all the available Bluetooth devices in your close proximity.
SELECT “SUPERSYSTEM” FROM THE LIST.
Your Bluetooth device will confi rm when pairing has been completed, and
SUPERSYSTEM will now display a static Bluetooth logo on screen.
PASSKEY
During the pairing process some Bluetooth devices may prompt you to enter a
Passkey. Should your device require a Passkey, enter 0000.
Should you experience problems when pairing your device with SUPERSYSTEM,
please see the Bluetooth Troubleshooting section on page 42.
Bluetooth Input
Bluetooth
Today’s Date:
05/11/14
Bluetooth
16
Page 17
BLUETOOTH MODE
STREAMING MUSIC
Selecting and controlling music playback can be done in one of two ways: either
directly from the source device (smartphone, tablet or laptop etc.), or by using
the buttons mounted on the front panel.
Please note, the playback volume level can be independently controlled from
either SUPERSYSTEM or the source device.
MANAGEMENT OF MULTIPLE BLUETOOTH DEVICES
If you have paired only one Bluetooth device, on entering Bluetooth mode
SUPERSYSTEM, will automatically seek to connect with this device.
Should you wish to pair another device, press then select ‘BT Disconnect’.
SUPERSYSTEM will now disconnect its current Bluetooth device and enter pairing
mode again. This will allow you to repeat the ‘Pairing with Bluetooth Devices’
procedure.
SUPERSYSTEM will remember up to 8 individual Bluetooth devices. When you reach
the point of having a 9th device you wish to pair, SUPERSYSTEM will pair with the
9th device and automatically erase the oldest-paired device from its memory.
You can continue to pair new devices and SUPERSYSTEM will always remember
the previous 8 devices it has paired with.
aptX®
SUPERSYSTEM’S Bluetooth solution is equipped with CSR’s patented aptX®
technology, meaning that when it is used in conjunction with a device that also
supports aptX®, the streamed audio will be of CD quality rather than the MP3
quality of a standard Bluetooth stream.
Bluetooth
BT disconnect
Main menu
17
Page 18
INTERNET RADIO MODE
GETTING STARTED
To enter INTERNET RADIO MODE, press the button on the front
panel, or press the button until the INTERNET RADIO Mode
intro screen is displayed.
On entering the INTERNET RADIO MAIN MENU you will be offered the
choice of accessing the LAST LISTENED station or selecting a new one.
To choose a new station select the STATION LIST menu entry, you will
then be offered the following options:
My Favourites: Used to navigate to your favourite stations. These can
be set up by visiting the Frontier Silicon Radio Portal (using your PC or
Mac). See page
22 for further information.
Local: A comprehensive list of all the stations being broadcast from
within your own geographical area (or country).
BBC: Used as a shortcut to all BBC stations broadcast worldwide.
Stations: Find stations using a number of search criteria such as:
location, genre, most popular etc.
Podcasts: Find Podcasts or ‘Listen-Again’ broadcasts by location,
genre or search by name.
My Added Stations: Shows stations that you have personally added
to your radio’s station list via the Frontier Silicon Radio Portal.
See page 22 for full details.
Help: Find your radio’s ACCESS CODE here. Required to access the
Frontier Silicon Radio Portal. See page 22.
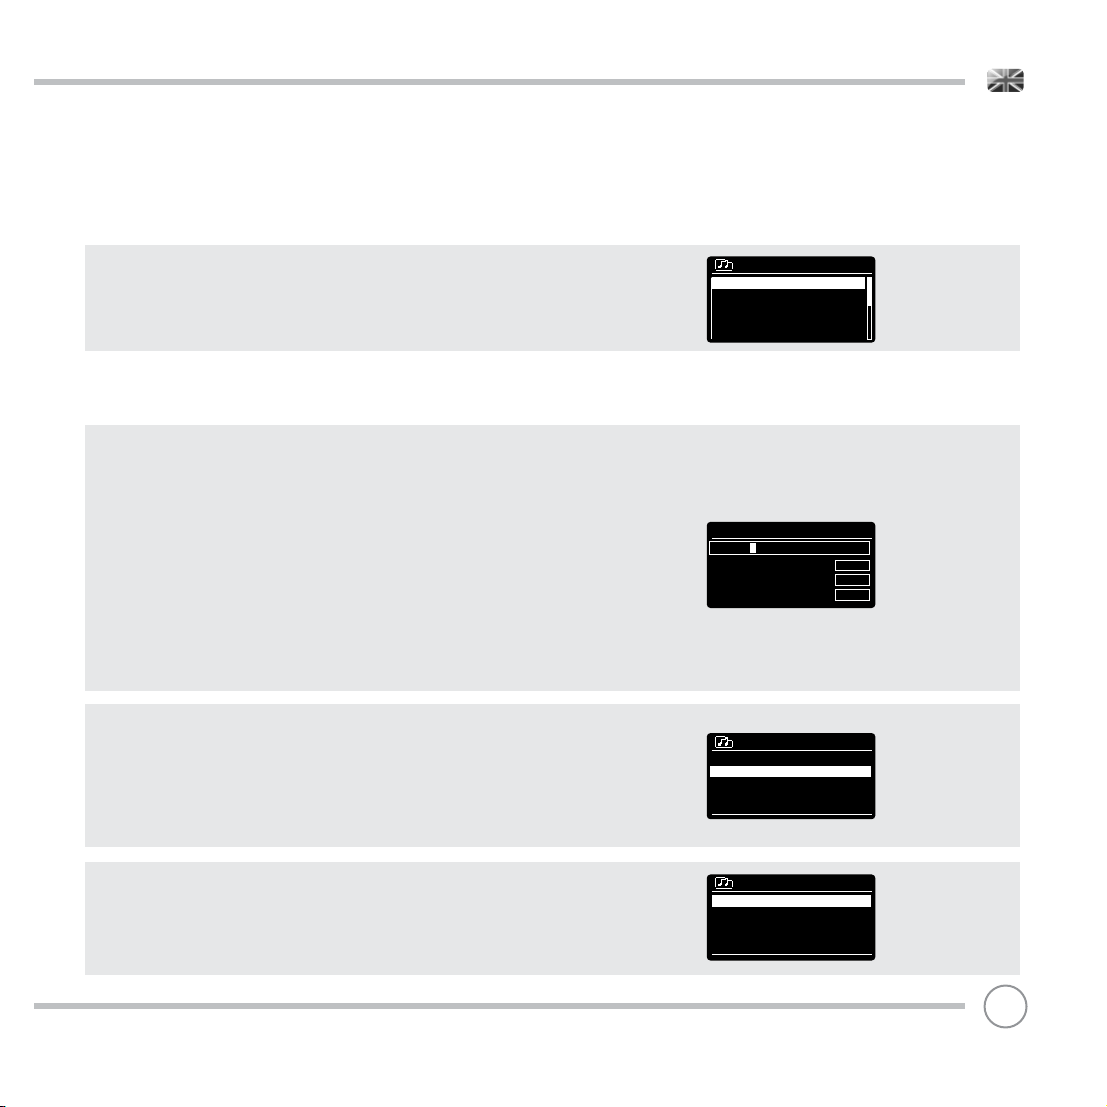
CHOOSING A STATION
To choose a station, select STATION LIST from the INTERNET RADIO
MENU, then select STATIONS using the joystick controller.
You now have the option to choose or fi nd a station using the
following search criteria:
LOCATION (country of origin) GENRE
SEARCH STATIONS (by name) POPULAR STATIONS
NEW STATIONS
Internet
radio
Internet radio
My Favourites >
Local United Kingdom >
BBC >
Stations >
Podcasts >
Stations
Location >
Genre >
Search Stations
Popular Stations >
New Stations >
18
Page 19
INTERNET RADIO MODE
CHOOSING A STATION (Continued)
Using the joystick controller, scroll through the options and press
SELECT to choose your search criteria.
For example, choosing LOCATION will give you an alphabetical list
of continents/regions, and then a list of countries. Use the joystick
controller to scroll through the list and press SELECT to choose your
chosen continent, then country. You will then be given the option of
choosing ALL STATIONS or a GENRE, to further refi ne your search.
After selecting your search criteria, you will be presented with a list of
stations. Simply select a station from the list to begin listening.
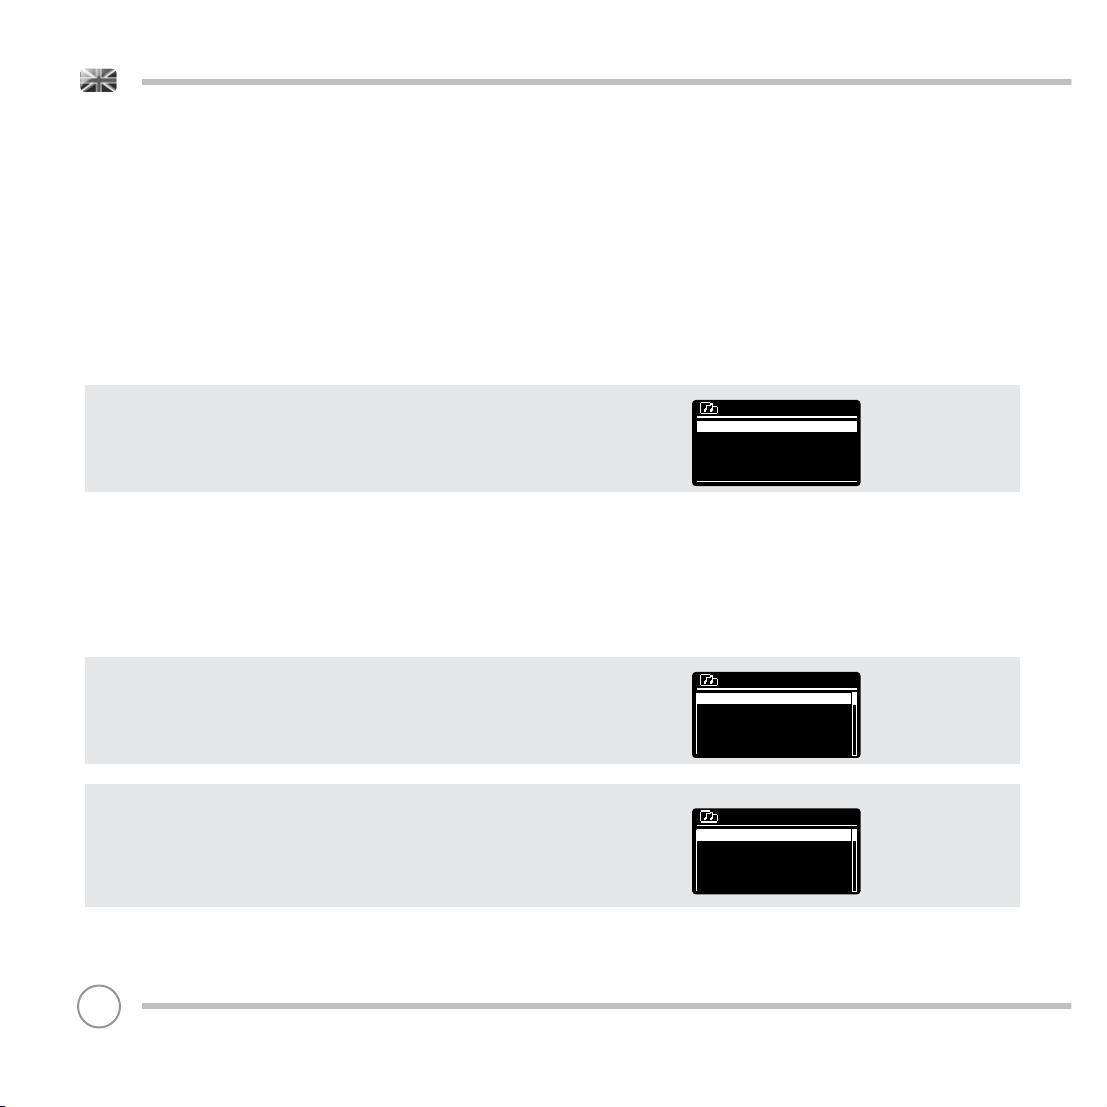
SEARCH
You can search for an internet radio station by name (if you know it),
or by using a keyword from within its title.
To SEARCH for a station, select SEARCH STATIONS from the STATIONS
MENU, then enter a keyword using the keyboard input screen (similar
to the keyboard screen you used for password input).
If your station is found, simply select to listen.
If you searched for a keyword, SUPERSYSTEM will list all the stations
found that contain that particular keyword. Scroll through the list and
select your station.
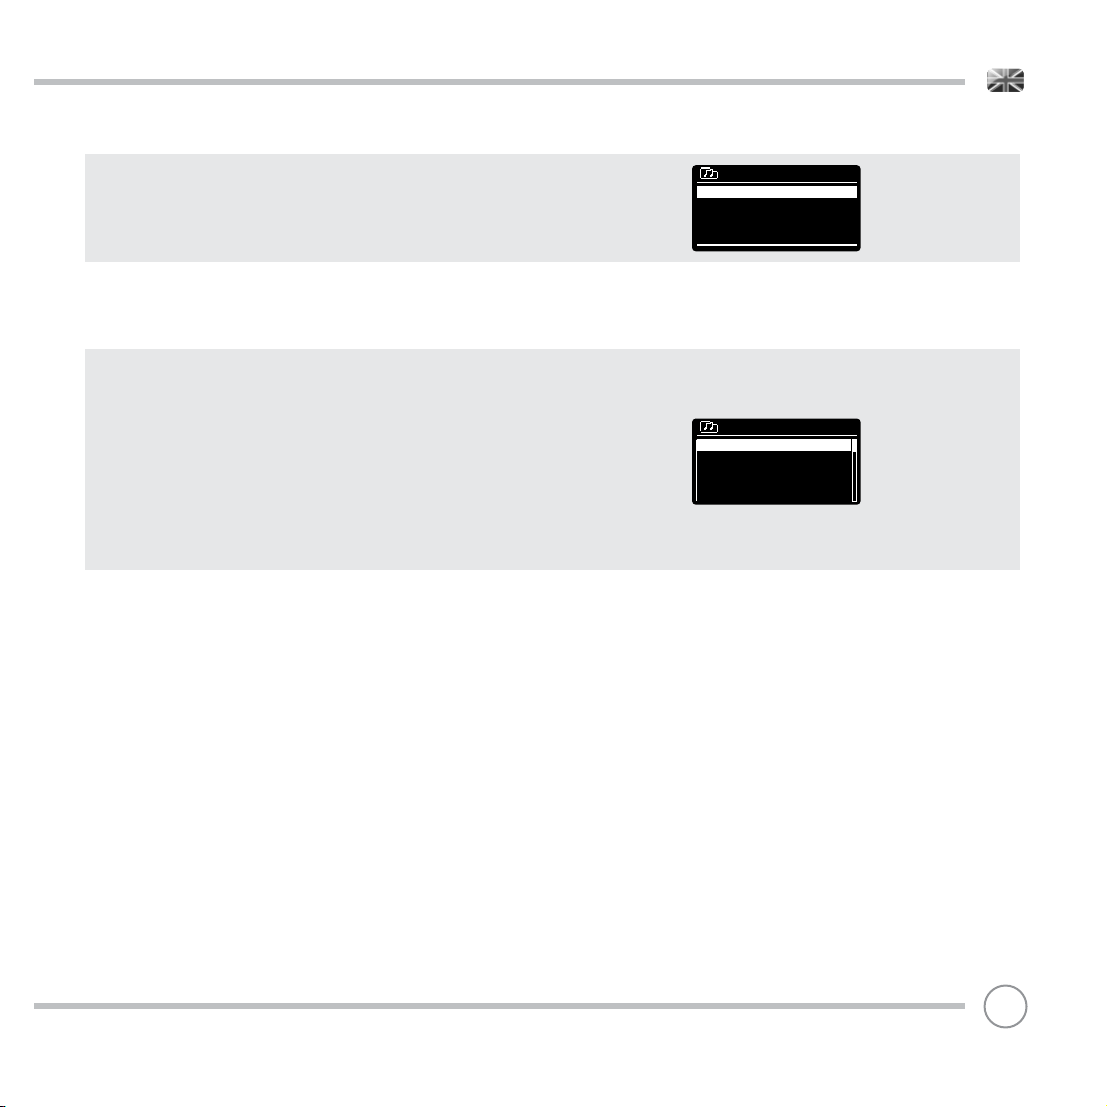
CHOOSING A PODCAST
Podcasts (also referred to as ‘Listen Again’) are searched and
selected in the same way as a regular station.
Select PODCAST from STATION LIST in the INTERNET RADIO MENU, then
search by location, genre or a combination of both.
Location
Africa >
Asia >
Caribbean >
Central America >
Europe >
Stations
ROCKF
0123456789 ABCD
EFGHIJKLMNOPQRS
TUVWXYZ
BBC Radio 1
BBC Radio 1
Podcasts >
CANCEL
BKSP
OK
The main difference when searching for a Podcast, is that when
you have selected a station, you will then be presented with a list of
Shows (or Podcasts) available from that station.
Simply select your choice from the list.
Podcasts
Adam and Joe
BBC Introducing
Bruce Dickinson
Chris Hawkins
Clare McDonnell
19
Page 20
INTERNET RADIO MODE
MY FAVOURITES
It is possible to compile a list (or lists) of your favourite stations,
allowing quick and easy access to a number of stations from different
countries and genres.
To do this you must fi rst register your radio with the Frontier Silicon
Radio Portal. See the INTE
To store a station as a favourite, press and hold the SELECT button
until FAVOURITE ADDED appears on the screen. The chosen station
will now appear in the default favourites stations list.
RNET RADIO PORTAL section on page 22.
To access the MY FAVOURITES list, select STATION LIST, then MY
FAVOURITES, followed by STATIONS. You can now scroll through and
select any station in the list.
MY ADDED STATIONS
If you have added any of your own stations to the internet radio
station list, they will be listed here. The MY ADDED STATIONS option
can be found under the STATION LIST MENU, in INTERNET RADIO MODE.
BBC
The BBC option is a shortcut to the entire BBC station list.
Simply select this option from the STATION LIST MENU, then scroll
through and select a station in the normal way.
LAST LISTENED
When you enter INTERNET RADIO MODE, the last-listened station is
automatically selected. To select another station that you’ve listened
to recently, select LAST LISTENED. A full list will be displayed (the most
recent being at the top).
Your Rock Favourites
Kerrang! >
North Sea Classic rock >
Rock FM >
Takeover Radio >
The Arrow >
BBC
BBC Radio 1 >
BBC Radio 1Xtra >
BBC Radio 2 >
BBC Radio 3 >
BBC Radio 3 >
Last Listened
Clyde 1 >
West FM >
BBC Radio6 >
BBC Radio 1 >
Chill >
20
Page 21
INTERNET RADIO MODE
HELP
The HELP option can be found in the STATIONS LIST MENU. Under HELP,
you will fi nd the ACCESS CODE that you require to register your radio
on the Frontier Silicon Radio Portal (see page 22 for full instructions).
A helpful FAQ audio track can also be found under the HELP
heading.
LOCAL
The LOCAL station list can be found under the STATION LIST MENU and
will differ depending on which country you are currently located in.
For example, if you are based in the UK, this selection will display
stations originating from the UNTIED KINGDOM. Likewise, if you are
using your SUPERSYSTEM in Germany, this selection will display only
stations that are being broadcast from Germany.
Select this option to navigate either all of the available local stations,
or alternatively you can search the list by genre.
Get access code
Access code
HEBZM0Z
Local United Kingdom
All Stations >
Highlighted Stations >
Alternative >
Ambient >
Big Band >
21
Page 22
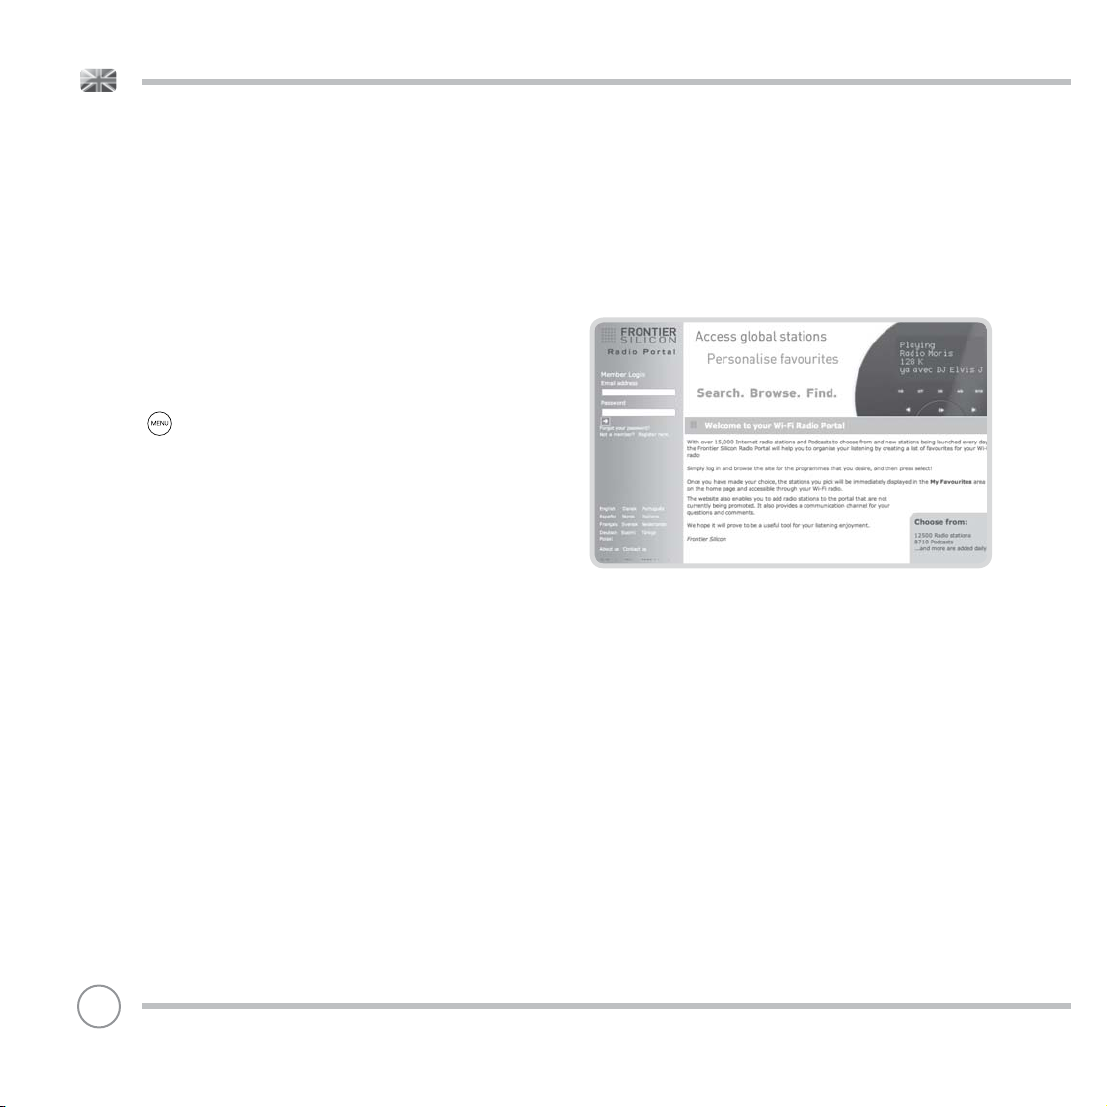
INTERNET RADIO PORTAL
ACCESSING ADDITIONAL FEATURES
Some of SUPERSYSTEM’s more advanced internet radio features can
only be accessed by visiting the Frontier Silicon Radio Portal.
In order to access these features you must fi rst register your radio.
REGISTERING YOUR SUPERSYSTEM
In order to register your SUPERSYSTEM, you will need your unique
access code.
To fi nd the access code, fi rstly enter INTERNET RADIO MODE, then
press . Select STATION LIST, then HELP. Now select GET ACCESS
CODE.
Write down the access code.
Now, using your PC or Mac, visit the portal website at -
www.wifiradio-frontier.com
Click on the REGISTER HERE link (located on the left hand panel) to
begin the registration process.
If you already have an account and wish to add an additional device, log in to your account and select MY PREFERENCES, then ADD
ANOTHER Wi-Fi RADIO.
When you have registered your SUPERSYSTEM with the portal, you can
immediately take advantage of various additional features and
services that it provides.
22
Page 23
SETTING UP A MUSIC SERVER
In order for SUPERSYSTEM to be able to play music fi les from a
connected computer, the computer must fi rst be set up for media
sharing.
UPnP media sharing allows devices like SUPERSYSTEM to play music
from a shared media library, navigating through tag menus such as
Artist, Album or Genre.
If you are running a PC with Windows Media Player 11 or later (WMP),
or an Apple Mac with OS X 10 or later and a UPnP application
installed, you can connect SUPERSYSTEM and stream audio.
NOTE: iTunes does not currently operate as a UPnP media server, but
there are a number of third party software add-ons available that will
allow you to access your iTunes library (see page 24 for details).
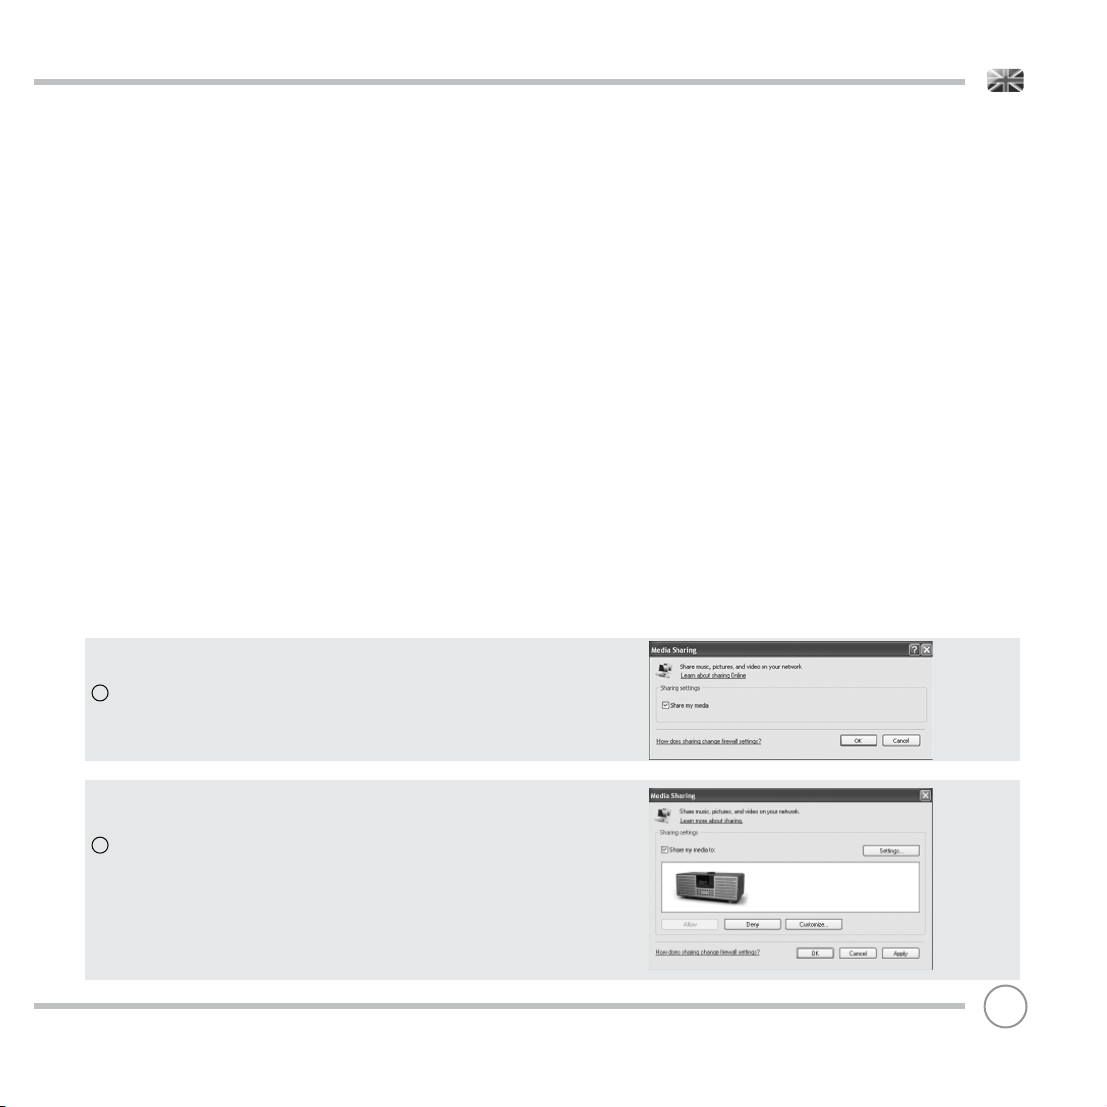
SHARING MEDIA WITH WINDOWS MEDIA PLAYER
The most common UPnP server is Windows Media Player (version11
or later) although other UPnP platforms and servers may be used.
To set up WMP for media sharing, performs the following steps:
Ensure that your PC and SUPERSYSTEM are connected to the same
wireless or wired network. SUPERSYSTEM will be recognised as
‘SUPERSYSTEM’ by your PC.
In WMP, add to the media library the audio fi les and folders you want
1
to share with SUPERSYSTEM (LIBRARY > ADD TO LIBRARY . . . .).
2
Make sure that the radio has access to the shared media by
selecting it and clicking ALLOW. You can also set a name for the
shared media settings.
The PC is now ready to stream music to your radio. The WMP UPnP
service runs in the background; there is no need to start WMP
explicitly.
23
Page 24
SETTING UP A MUSIC SERVER
SHARING MEDIA WITH A MAC
In order to connect SUPERSYSTEM to your Apple Mac, a third
party UPnP server application is required. There are a number of
applications available to download from the Internet.
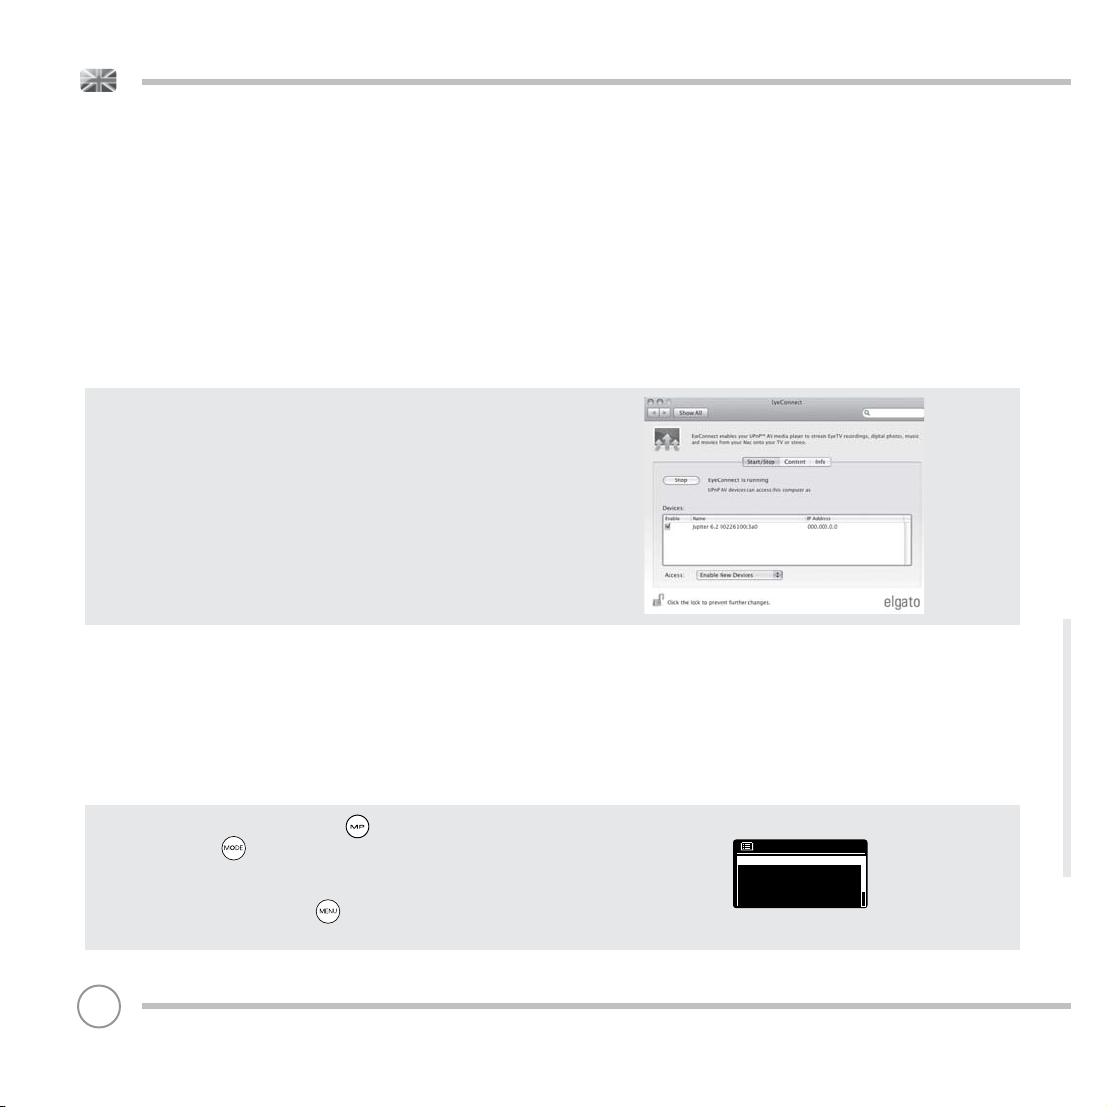
One such application is EyeConnect. This is an easy to install media
sharing application that enables SUPERSYSTEM to stream audio.
EyeConnect can be downloaded from:
http://www.elgato.com
Once installed, EyeConnect can be found on the System Preference
panel. When connecting SUPERSYSTEM, make sure EyeConnect is
shown as running on its setup screen.
SUPERSYSTEM will appear as ‘SUPERSYSTEM’ in the EyeConnect list of
devices. The ENABLE box must be checked and the ACCESS selection
set to ENABLE NEW DEVICES.
Your Mac is now ready to stream music to your radio. EyeConnect
will normally run automatically after boot up.
MUSIC PLAYER MODE
PLAYING AUDIO TRACKS IN THE MUSIC PLAYER
MUSIC PLAYER MODE allows you to play audio fi les such as MP3s,
AACs, WMAs or FLACs directly from a computer or music server on
your local network, or from a USB memory stick.
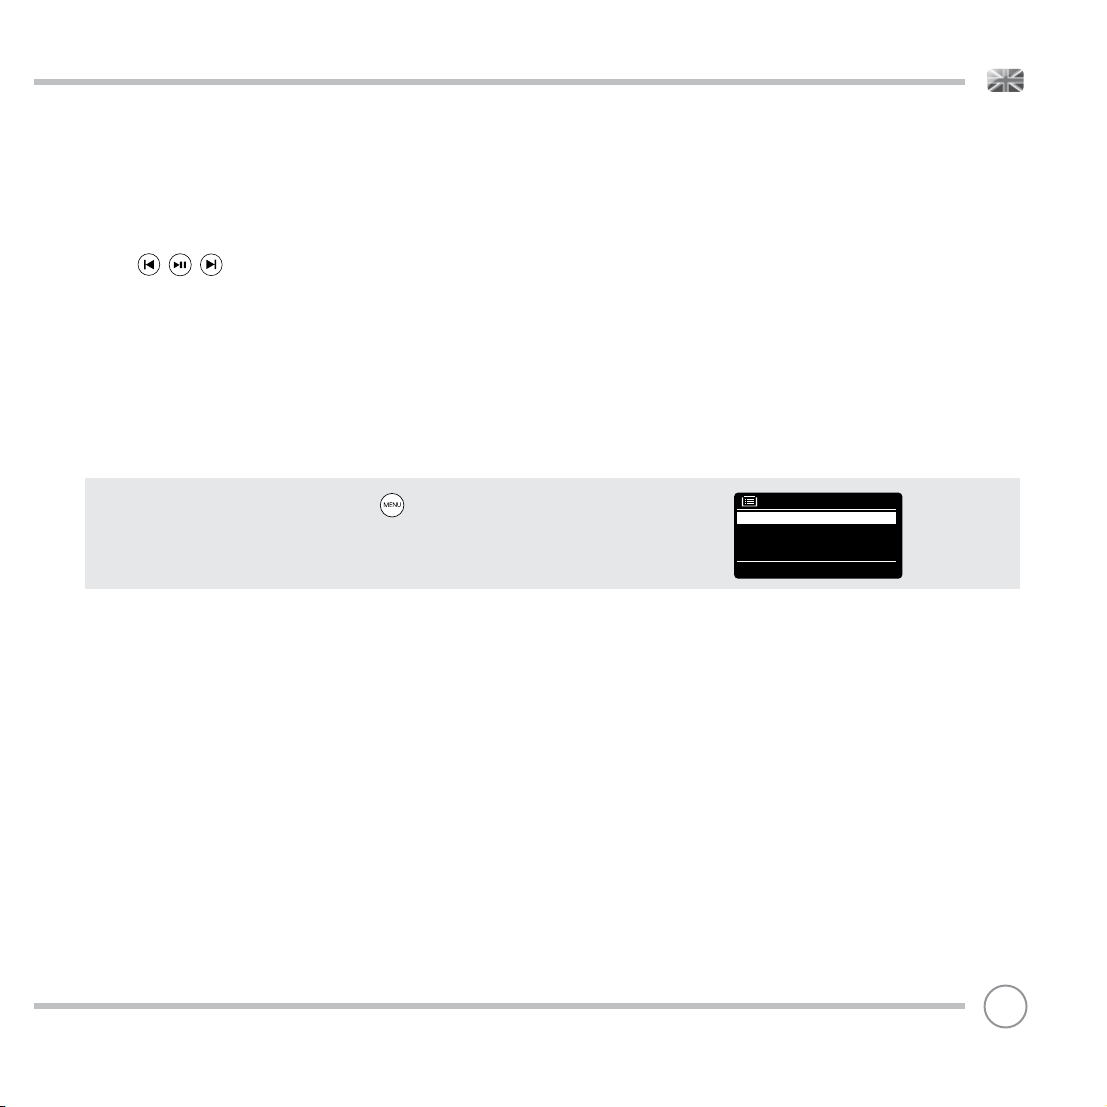
To enter MUSIC PLAYER MODE, press the button on the front
panel, or press the button until the MUSIC PLAYER Mode intro
screen is displayed.
Once in music player mode, press , then select either SHARED
MEDIA or USB PLAYBACK.
24
Music player
Shared media >
My playlist >
Repeat play: Off
Shuffle play: Off
Page 25
MUSIC PLAYER MODE
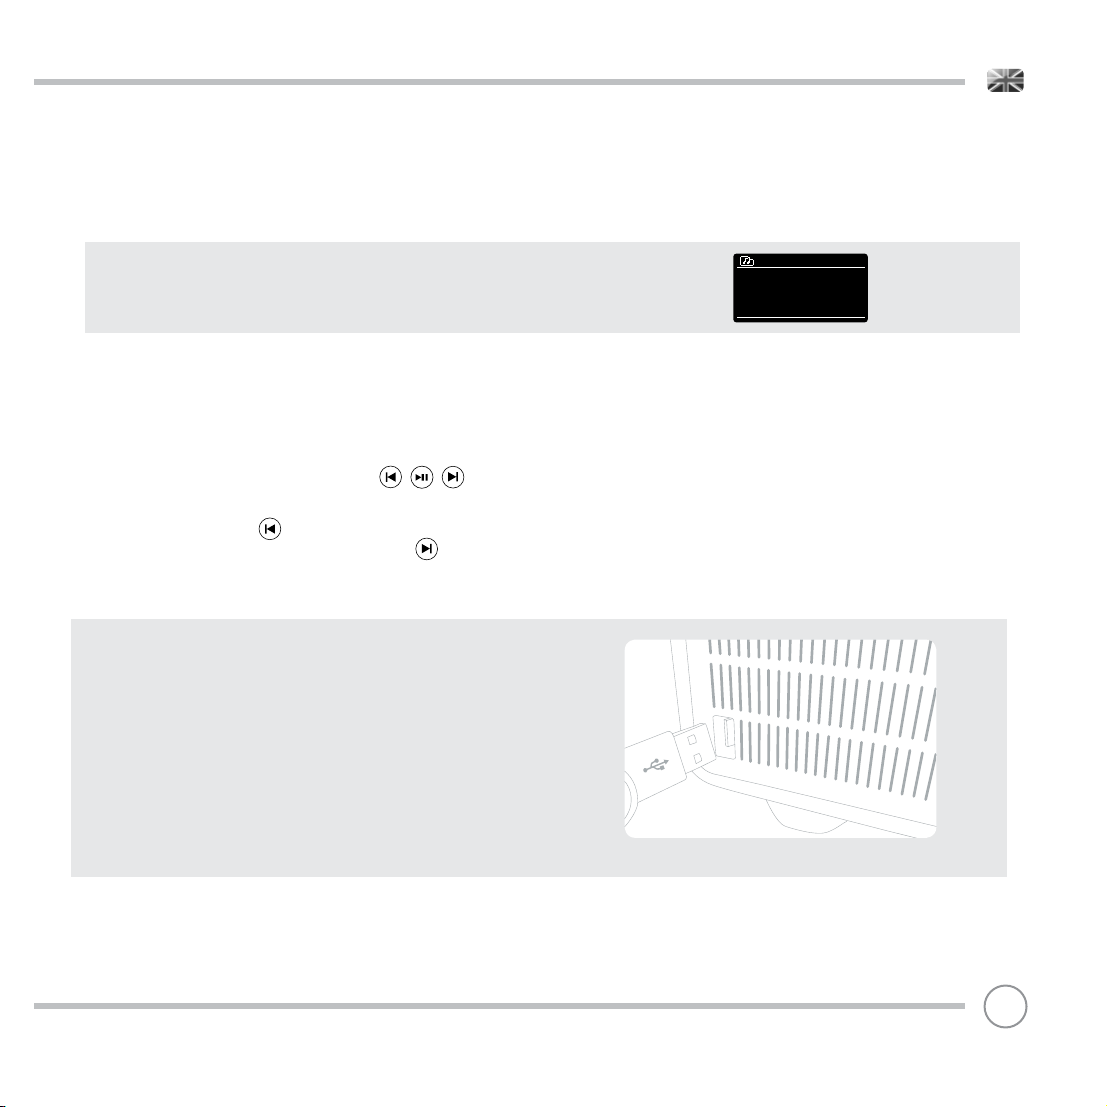
PLAYING MUSIC FROM A USB MEMORY STICK
Firstly plug your USB stick into the USB socket on SUPERSYSTEM’S front
panel.
Selecting USB PLAYBACK from the MUSIC PLAYER MENU will display
the contents of the memory stick in the form of a list of fi lenames.
You can navigate your way through the list using the joystick
controller, using UP and DOWN to scroll through the list, and either
press SELECT or RIGHT on the joystick to advance through folders.
When you reach your desired track, a short press of the SELECT
button will start the track playing, a long press will add the track to
the PLAYLIST (see PLAYLISTS on page 27 for more information).
Audio tracks can also be controlled using the buttons
mounted on your SUPERSYSTEM’s front panel.
Pressing and holding the button will fast-rewind the track your
are currently playing, while doing the same with the button will
fast-forward.
USB DEVICE CHARGING
SUPERSYSTEM provides standard USB charging (5V, up to 1000mA) for
a range of USB devices such as iPhones, Android smartphones - as
well as tablets.
The USB socket is positioned on SUPERSYSTEM’s front panel.
Friendly Fires
-01-Jump.MP3
-02-Paris.MP3
25
Page 26
MUSIC PLAYER MODE
SHARED MEDIA (From a UPnP Media Server)
In MUSIC PLAYER MODE select SHARED MEDIA. If you have set up
shared media (as described on page 23), you should see an entry,
for the server you set up, example “SB-Laptop: Audio”. If you have
more than one computer sharing media, the alternatives are listed.
Select the shared media you want to play.
From this point on, the menus are generated from the shared media
server (typically Windows Media Player). The fi rst menu shows a
list of media types, for example music, video, pictures and playlists.
SUPERSYSTEM, can only play music and playlists.
There is also a search function, which fi nds tracks in a similar way to
Internet radio search, as described on page 19.
SB-laptop: Audio
Music >
Video >
Pictures >
Playlists >
<Search>
For music there are numerous ways of selecting tracks, including:
Genre | Artist | Album | Composer | Rating
Once you have found a track you want to play, press the select
button to select. A short press plays the track immediately, while a
long press will add the track to the PLAYLIST.
26
Music
Music >
All Artists >
Contributing Artists >
Album Artists >
Composers >
Page 27
MUSIC PLAYER MODE
PLAYLISTS
SUPERSYSTEM is capable of holding a queue of up to 500 tracks in its
playlist. Playlist tracks can be mixed from multiple and UPnP servers
devices. To manage the playlist, select MY PLAYLIST from the MUSIC
PLAYER MENU.
To view the contents of the playlist, scroll through it using the joystick
control. To play the playlist from a certain track, give the select
button a short press. To delete a track from the playlist, give the
select button a long press, then confi rm YES to erase.
If you select a track/album/folder for instant playback, without using
the playlist feature, the playlist will be preserved and will continue to
be stored by your radio until you choose to delete it.
REPEAT/SHUFFLE
You can choose to repeat tracks or play them in random order by
selecting REPEAT PLAY or SHUFFLE PLAY from the MUSIC PLAYER MENU.
NOW PLAYING INFORMATION
While a track is playing, SUPERSYSTEM will display the track and artist
name (UPnP). There is also a progress bar with displays elapsed and
total track time.
To view further track information, press .
Each time you press , another piece of information is displayed
as follows:
TRACK NAME CODEC
ARTIST SAMPLING RATE
PROGRESS BAR PLAYBACK BUFFER
TRACK TIMES TODAY’S DATE
My playlist
Human >
Just My Imagination.wma
Back At One
Can’t Fight This Feelng. . . . . .
Three birds.mp3
Music player
Human.mp3
1:01 3:08
Music player
Letter To Me
Album:
5th Gear
27
Page 28
SPOTIFY CONNECT EXPLAINED
Spotify Connect is a home audio experience that provides
effortless control and enjoyment of your music across a range of
devices, from your phone, to your tablet, to your SUPERSYSTEM
radio. SUPERSYSTEM owners with a Spotify Premium account can
now enjoy instant access to over 30 million songs from the Spotify
archive, all at superior audio sampling rates, simply download
the Spotify app for smartphone or tablet.
How It Works – You’ve just walked through the door, listening
to your favourite playlist on your phone. With Spotify Connect,
simply hit play on your SUPERSYSTEM (when in Spotify mode) and
the music instantly fi res up, right where you left off – ensuring you
never miss a beat. Now pick up your phone or tablet to keep
controlling the music from your sofa, or seamlessly switch the
sound to another Spotify Connect enabled product in another
room.
The Beat Goes On – With Spotify Connect you don’t need to rely
on unstable connections to stream music between your devices.
You can make calls, play a game, or watch a video – you can
even take your phone or tablet out of range and the music will
just keep playing.
To use Spotify Connect, Revo SUPERSYSTEM owners are required
to download the Spotify app for their smartphone or tablet (iOS
or Android), and have an active Spotify Premium account. A free
30-day trial is available, for more details visit www.spotify.com/
freetrial/
*For service availability in your country, check www.spotify.com
28
Page 29
SPOTIFY CONNECT
To initiate Spotify on SUPERSYSTEM, fi rstly ensure that both your
SUPERSYSTEM and iOS/Android device are on the same wifi network and
that you are running the latest version of the Spotify app on your device.
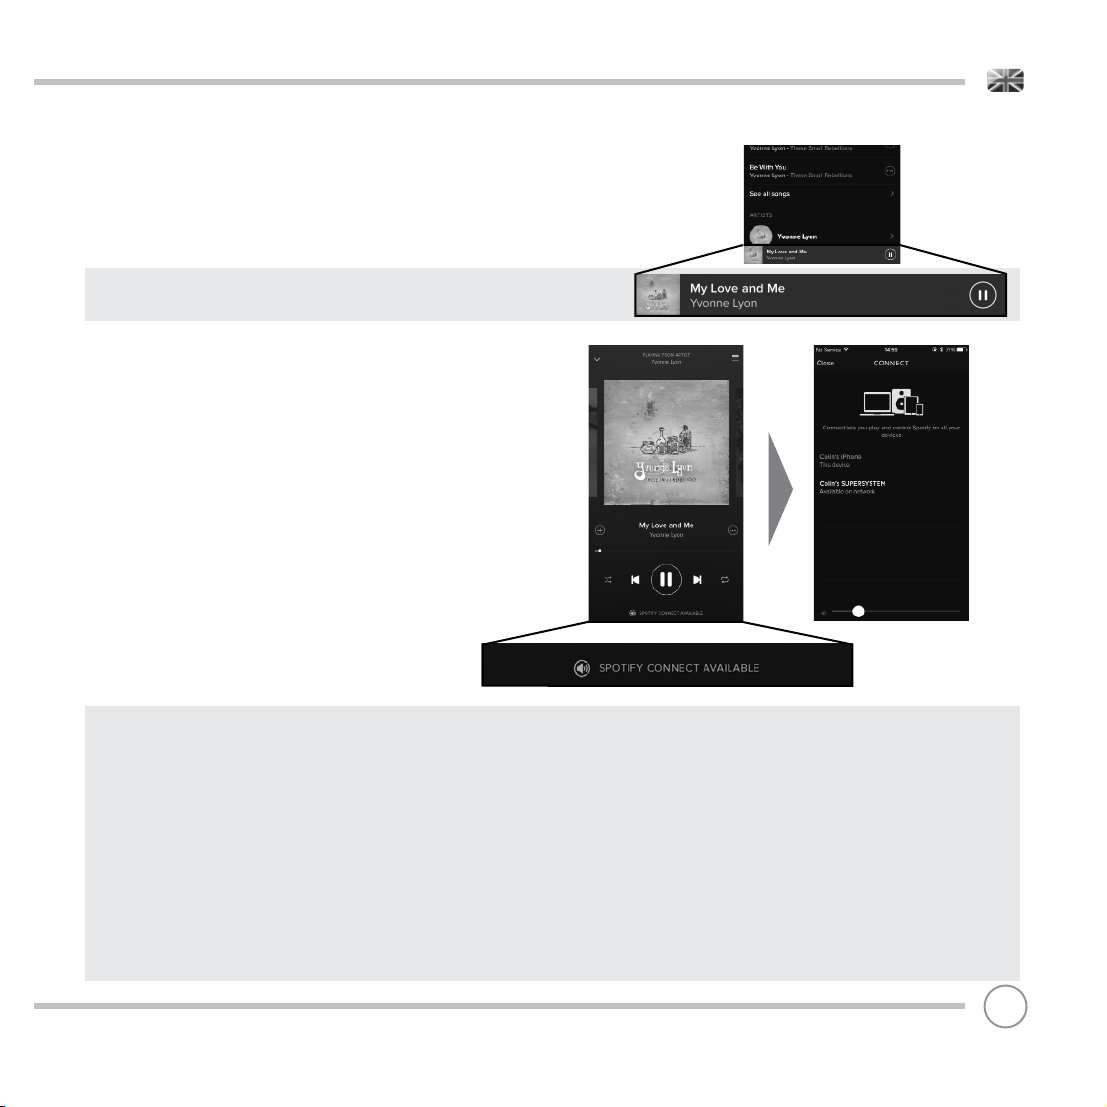
As a song is playing on your device, tap the Now Playing bar to bring
up the Playing screen.
When the Spotify app recognises SUPERSYSTEM on your network, the
text ‘Spotify Connect Available’ will appear at the bottom of the app’s
playing screen.
Tap on the text to display all available Spotify Connect enabled
devices, then select your radio from the list.
The text colour at the bottom of the playing screen will change
to green and will now display the name of your radio (example
‘SUPERSYSTEM 002261D1718E0’).
You will notice that your SUPERSYSTEM is currently listed as “Revo
SUPERSYSTEMxxxxxxxxxxxx” (the 12 digit alphanumeric code is the MAC
address of your radio) in the Spotify App. If you would like to change this
name to something more personal (‘John’s SUPERSYSTEM’ for example),
you can do so using the UNDOK app (see page 31). Alternatively, do
as follows:
On the SUPERSYSTEM: Press Menu and select System Settings -> Network
-> View Settings. Scroll down and take a note of the ‘IP address’.
On your computer : Ensure that your computer is on the same network
as the radio, then enter the IP address into your browser’s address
bar (example: 192.168.0.34). This will allow you to view some of
SUPERSYSTEM’s diagnostics, but also change its name.
29
Page 30

SPOTIFY CONNECT
Controlling Spotify Connect
You can now control Spotify from the app like normal; search for
and play your tracks, change the volume and add to playlists even
though playback is through SUPERSYSTEM. The next time you open
the Spotify app, playback will continue through SUPERSYSTEM.
The music can also be controlled using the buttons
mounted on your SUPERSYSTEM.
The audio is streaming directly from Spotify to SUPERSYSTEM, and the
Spotify app is only being used as a remote control for the service.
This means that your phone/tablet can be used for making calls and
can even be switched off without any disruption to the music.
Spotify Connect is a cloud-based service, therefore after activation
on SUPERSYSTEM, your iOS/Android device no longer needs to be on
the same wifi network to control audio playback.
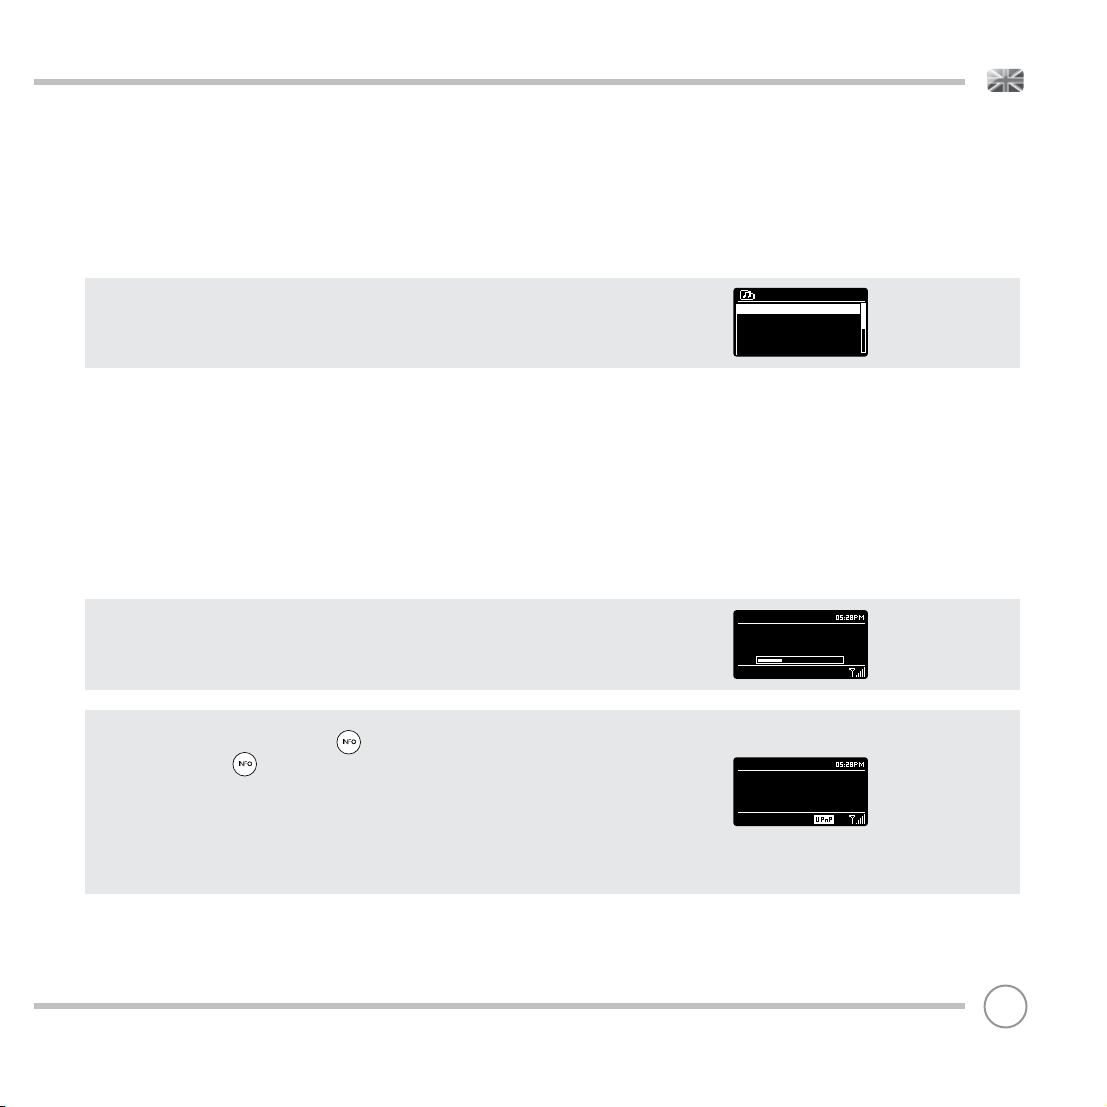
SUPERSYSTEM also features a dedicated Spotify Connect mode. To enter
SPOTIFY MODE, press the SPOTIFY button on the front panel, or press the
MODE button until the SPOTIFY intro screen is displayed.
Use another Spotify account with SUPERSYSTEM
Your Spotify account details are now stored on SUPERSYSTEM.
To overwrite this with another Spotify account, simply follow the
activation steps again (see page 29) whilst running the Spotify app
using your desired account. Please remember that both your iOS/
Android device and SUPERSYSTEM need to be on the same wifi
network for the overwriting to occur.
Please note:
Your Spotify app will only recognise SUPERSYSTEM when the radio
is connected to the internet (i.e. in Internet Radio or Music player
modes)
To use Spotify when your radio is in non-internet modes (DAB, FM) you
need to select ‘KEEP NETWORK CONNECTED’ in the radio’s ‘NETWORK
SETTINGS’ menu. This also allows you to wake the radio from standby
using your Spotify app.
30
Page 31

APP CONTROL AND MULTIROOM
You should now have an understanding of SuperSystem’s various
modes of operation.
Now, thanks to the inclusion of UNDOK technology, audio can be
wirelessly distributed to other compatible devices in your home
to establish a sophisticated multiroom audio environment.
If you own more than one UNDOK-enabled product, two
SuperSystems for example, you can wirelessly connect these
devices to create a multiroom system.
Multiroom can be setup by using the UNDOK app, or on the
SuperSystem itself.
UNDOK App
This innovative and easy-to-use application not only acts as a full
remote control for a single SuperSystem, but is also the control
hub for your entire multriroom system if you’re using more than
one UNDOK-enabled device.
Firstly, download the ‘UNDOK’ app from the Apple App Store (iOS
devices) or the Google Play Store (Android Devices).
Ensure that your phone or tablet is connected to the same
wireless network as your SuperSystem. Load the UNDOK app
and your UNDOK-enabled devices should appear in the ‘Audio
Systems’ opening screen. Using the app you can control
individual devices or create groups of devices to provide a
multiroom system.
The UNDOK system is constantly being updated and improved.
For the latest information and quick-start guides, please visit
www.revo.co.uk
31
Page 32

MULTIROOM
UNDOK MULTIROOM SETUP
If you are running more than one SuperSystem (or other
UNDOK-enabled device) on the same network you can create
a multiroom system without using the UNDOK app.
To begin, press the button on the front panel to enter the
multroom setup menu.
Select ‘Create New Group’ to create and name a new
multiroom group (e.g. Ground Floor). SuperSystem will then
promt you to add other devices to this group.
Multi-room
View details >
Create new group
Add to group >
List current clients >
Leave group
MULTIROOM MENU OPTIONS
View the details of your multiroom group - if the device is a
server or client and the group’s name.
As the server (master) you can add more devices to your
multiroom group.
NB This function can only be performed by the server.
List current clients (slaves) in the group, and remove them if
required.
If the device you’re using is a client (slave), you can opt to
leave the mulitroom group.
If the device you’re using is the server (master), you can dissolve
the multrioom group entirely.
32
Multi-room
View details >
Create new group
Add to group >
List current clients >
Leave group
Multi-room
View details >
Create new group
Add to group >
List current clients >
Leave group
Multi-room
View details >
Create new group
Add to group >
List current clients >
Leave group
Multi-room
View details >
Create new group
Add to group >
List current clients >
Leave group
Multi-room
Create new group
Add to group >
List current clients >
Leave group
Dissolve group
Page 33

MULTIROOM
UNDOK MULTIROOM OPERATION
Once you have created your multiroom system, you can fully
control it using the UNDOK app for iOS or Android (see page
31).
You can also control the system from your Revo device as
follows:
USING THE SERVER DEVICE
Once your muliroom group is active, the server device will
dictate what mode is being played. If you change the mode,
the other client devices will follow.
USING THE CLIENT DEVICE
In a multiroom environment, all client devices simply act as
slaves to the server device.
If you select to change the mode being played on a client
device, this device will then become the group’s server.
VOLUME CONTROL
Adjusting the volume directly on any multiroom device (even
the server) will only effect that one device.
To control the volume on an entire multiroom system
simultaneously please use the UNDOK app.
SPOTIFY CONNECT - MULTIROOM
If you are using the Spotify app with your SuperSystem (see
page 28) it is also compatible with the UNDOK mulitroom
environment. If you have created a mulitroom group (named
e.g. Ground Floor), the Spotify app will recognise this and you
can take control of the group from within the Spotify App.
33
Page 34

ALARM CLOCK
SETTING AN ALARM
SUPERSYSTEM is able to store two individual alarm settings. To set or
change an alarm, either press the button, or select MENU, then
MAIN MENU, then ALARMS. Select which of the ALARM SETTINGS
(Alarm 1 or Alarm 2) you would like to modify or enable.
Using the joystick controller, scroll through the options below, setting
your preferences.
• Enable: ‘Off’ or ‘Daily’, ‘Once’, ‘Weekends’ or ‘Weekdays’.
• Time
• Mode: Buzz, Internet Radio, DAB or FM
• Preset: Last listened or favourite station preset 1-10
• Volume: 0 - 32
When your preferences have been set, remember to select SAVE.
SUPERSYSTEM shows any active alarms by displaying an icon at the
bottom of its standby screen.
When in STANDBY MODE, by simply pressing the button, you can
turn any alarms held in memory ON or OFF. Pressing will cycle
through ALARM 1 and ALARM 2 settings, enabling, and disabling
them. If the ALARM icons are displayed, the alarm is enabled.
If no alarm icon is shown, the alarms are switched off.
STOPPING AN ALARM
When an alarm is sounding, pressing POWER or will STOP the
alarm.
Alarms
Alarm 1: Off [06:55AM]
Alarm 2: Off [07:50AM]
Alarm 1
Enable : Daily
Time : 7:30AM
Mode : internet radio
Preset : last listened
Volume : 6
12/10/2014
14:30
06:55AM 07:50AM
When the alarm has been cancelled, an ALARM OFF message will be
displayed on SUPERSYSTEM’s screen.
34
Alarm off
Page 35

ALARM CLOCK
SLEEP MODE
By using the SLEEP function, you can set SUPERSYSTEM to
automatically switch itself into STANDBY mode.
Press then select MAIN MENU, then SLEEP. You can now set the
SLEEP timer to any one of the following; 15, 30, 45 or 60 minutes.
When you have selected a sleep duration, SUPERSYSTEM will return to
the MAIN MENU.
Press to return to the NOW PLAYING screen.
SNOOZE FUNCTION
SUPERSYSTEM includes a TOUCH-SNOOZE feature which is
incorporated into the aluminium front panel. SNOOZE is activated
by tapping anywhere on the metal area during an alarm. SNOOZE
allows you to temporarily silence the alarm for a period of up to 30
minutes.
The SNOOZE duration can only be set when the alarm is actually
sounding. At this point, simply tap the FRONT PANEL to cycle through
a range of pre-set SNOOZE durations, either 5, 10, 15 or 30 minutes.
Please note: that the Snooze function will only register a touch for
a period of 60 seconds from the commencement of the alarm,
meaning that after 60 seconds the front panel can be touched
without the Snooze function being activated.
When SNOOZE is activated, SUPERSYSTEM will return to standby for the
set period with the icon of the SNOOZED alarm shown on-screen.
Set sleep time
15 MINS
Set snooze
5 MINS
35
Page 36

SYSTEM SETTINGS
EQUALISER
SUPERSYSTEM provides the user with a signifi cant degree of control
over its standard (factory default) audio settings. This includes control
over BASS and TREBLE, LOUDNESS and the ability to use one of a
number of preset EQ settings. It is also possible to create your own
personalised EQ setting - known as “My EQ”.
To adjust the audio settings , press then select MAIN MENU,
followed by SYSTEM SETTINGS. Now select EQUALISER from the menu.
SUPERSYSTEM will display a list of nine EQ options as follows:
Normal, Flat, Jazz, Rock, Movie, Classic, Pop, News and My EQ.
Simply select your preference from the list by highlighting your
option and pressing the select button. SUPERSYSTEM will now store
this setting in its memory. For reference, the current EQ setting is
highlighted by an asterisk (*) in the EQ list.
Equaliser
Classic
Pop
News
My EQ
My EQ profile setup >
To confi gure your own personal EQ setting, select MY EQ PROFILE
SETUP from the EQUALISER menu. Now adjust the BASS and TREBLE
levels, decide whether you would like the LOUDNESS function OFF or
ON - before selecting SAVE. Your personalised EQ setting can now be
selected by choosing MY EQ from the EQUALISER menu.
36
My EQ profile
Bass : 0
Treble : 0
Loudness : Off
Bass
Bass
0
dB
Page 37

SYSTEM SETTINGS
NETWORK
The NETWORK MENU can be found under SYSTEM SETTINGS in the
MAIN MENU.
For the more experienced user, a variety of manual settings can also
be accessed from here, as follows:
NETWORK WIZARD :
Simplifi es the setup of SUPERSYSTEM’S internet connection by taking
you through step-by-step instructions.
PBC WLAN SETUP :
Used to pair your SUPERSYSTEM with a router that uses WPS security.
VIEW SETTINGS :
View the MAC address, Wlan region, etc.
WLAN REGION :
Where you are using your SUPERSYSTEM - Europe, USA etc.
MANUAL SETTINGS :
Detailed control of Wired and Wireless connections.
NETWORK PROFILE :
Shows the names of the last four wireless networks SUPERSYSTEM has
been connected to.
CLEAR NETWORK SETTINGS :
Clears the saved network profi le.
KEEP NETWORK CONNECTED :
By selecting ‘Yes’ to this, your SUPERSYSTEM will remain connected to
your WiFi network even when in non-internet modes (DAB/FM) and
when in standby. This allows you to access it from the UNDOK app or
SPOTIFY app at all times.
Internet Setup
Network Wizard
scanning/
Internet Setup
Internet Wizard
PBC Wlan setup
View settings
Wlan region >
Manual settings
Network settings
Wlan region
Manual settings
NetRemote PIN Setup
Network profile
Keep network connected
NOTE: SUPERSYSTEM remembers the last four wireless networks it has
connected to, and automatically tries to connect to whichever
one of them it can fi nd. It’s possible however to delete unwanted
networks, simply select SYSTEM SETTINGS, then NETWORK, then
NETWORK PROFILE. Now select the network profi le you’d like to
delete and select it.
37
Page 38

SYSTEM SETTINGS
TIME / DATE
Found in the SYSTEM SETTINGS menu, this menu offers you the option
of changing a number of time/date related settings. The TIME/DATE
menu has three listings as follows:
SET TIME / DATE : Allows you to manually set the time/date.
AUTO UPDATE : Choose from three different automatic setting options.
SET FORMAT : Choose whether you would like to use 12hr or 24hr
formats.
Update from DAB :
Automatically takes time/date from the DAB signal. SUPERSYSTEM
needs to have been operated in DAB MODE (and have received a
signal) before this information can be extracted.
Update from Network :
Takes time/date from your internet connection.
LANGUAGE
The default language on your radio is English, though 12 other
languages are supported as follows:
Danish Dutch Finnish French German Italian
Norwegian Polish Portuguese Spanish Swedish Turkish
To change the current language setting, select SYSTEM SETTINGS from
the MAIN MENU, then LANGUAGE, then select your choice.
Time/Date
Set Time/Date
Auto update >
Set format
Set timezone >
Daylight savings
Auto update
Update from DAB
Update from Network *
No update
Language
English *
Danish
German
Italian
Norweigian
38
Page 39

SYSTEM SETTINGS
FACTORY RESET
By selecting FACTORY RESET from the SYSTEM SETTINGS menu, you can
reset SUPERSYSTEM to its default factory values, erasing any personal
settings that may have been confi gured (time/date, network
confi guration and presets will be erased). However, the current software version is maintained, as is its registration with the internet radio
portal. Internet radio favourites (not presets) are therefore retained,
unless you re-register your radio with another account on the portal.
To perform a factory reset, press then select MAIN MENU,
followed by SYSTEM SETTINGS, then FACTORY RESET. Now answer YES.
SOFTWARE UPDATES
From time to time we will make software updates available for your
SUPERSYSTEM. These are necessary for general maintenance reasons,
as well as for adding additional functionality. Software updates are
carried out ‘over-the-air’, via your broadband connection.
SUPERSYSTEM will check for software updates each time it is switched
on, and if an update is available, will ask you to confi rm that you’d
like to go ahead and commence the download.
Please note that after a software upgrade, all user settings are
maintained.
If you’d prefer to manually check for software updates, press
then select MAIN MENU. Now choose SYSTEM SETTINGS, then
SOFTWARE UPDATES. Select AUTO-CHECK SETTING then choose NO
when prompted.
To manually check for updates, select CHECK NOW from the
SOFTWARE UPDATES menu.
CAUTION: Before commencing a software upgrade, ensure that
SUPERSYSTEM is plugged into a stable mains power connection.
Disconnecting power during a software update may permanently
damage your device.
Factory Reset
Proceed?
YES NO
Software update
Auto-Check setting *
Check now
39
Page 40

SYSTEM SETTINGS
SETUP WIZARD
The SETUP WIZARD automatically runs when you fi rst power up your
SUPERSYSTEM, and it can be accessed again in this menu. It simplifi es
the set-up of both time/date and internet settings, by running
through a series of questions.
To access the SETUP WIZARD, press then select MAIN MENU,
followed by SYSTEM SETTINGS. Now select SETUP WIZARD from the
menu list.
INFO
System settings
Language
Factory reset
Software Update
Setup Wizard >
Info
When dealing with a technical support issue, you may be asked for
the SOFTWARE VERSION or RADIO ID number. Both these pieces of
information can be found under the INFO heading, in the SYSTEM
SETTINGS menu.
Press then select MAIN MENU, followed by SETTINGS, then INFO.
BRIGHTNESS
SUPERSYSTEM allows a degree of control over the brighnress of its
OLED display.
SUPERSYSTEM’s ON LEVEL, for use in normal operation, can be set to
LOW, MEDIUM or HIGH.
SUPERSYSTEM’s DIM LEVEL, for use in Standby mode, can be set to OFF,
LOW, MEDIUM or HIGH.
It is also possible to set the TIMEOUT duration - a delay on the screen
brightness changing when you enter Standby mode.
Note: If ‘OFF” is selected, SUPERSYSTEM’s display will switch off whilst
in Standby mode. You can wake the display by simply pressing any
button or touching the front metal panel.
Info
SW version:
domino_V2.0.16.25756-5
Radio ID:
00226100C3D6
Brightness
Timeout >
On level >
Dim level >
40
Page 41

TROUBLESHOOTING
PROBLEM CAUSE SOLUTIONS
FM: HISS
DAB: Burbling/Intermittent
Cut-Out
DAB: ‘No stations available’ Low signal strength. As above, then rescan stations.
Cannot connect to network Network down. Check that network is working
Low signal strength. Check/move antenna.
Router restricts access to listed
MAC addresses.
Insuffi cient Wi-Fi signal strength. Check distance to router.
Unknown encryption method. Change encryption method on
Unusual network confi guration. Setup network manually through
Firewall preventing access. Check the following ports are open
Move radio to another location.
Re-scan local (high-strength)
stations only.
For DAB, check local coverage at
www.ukdigitalradio.com/coverage
between computer and the router.
Obtain the SUPERSYSTEM MAC
address from MENU > SYSTEM
SETTINGS > NETWORK > VIEW
SETTINGS and add to router list
NOTE: SUPERSYSTEM has separate MAC addresses
for wired and wireless networks; only the current
network adaptor method address is displayed,
but the other address can be obtained by
changing the fi rst pair of digits between ‘00’
(wireless) and ‘02’ (wired)
See if a computer can connect to
the network in this location.
router. SUPERSYSTEM supports WEP,
WPA and WPA2.
MENU > SYSTEM SETTINGS >
NETWORK > MANUAL SETTINGS
on the router:
UDP and TCP ports 80 and 123
DNS port 53
Windows shares: ports 135 - 139
and 445
Windows media player: varies Non-Microsoft fi rewalls may require
confi guration for UPnP.
41
Page 42

TROUBLESHOOTING
PROBLEM CAUSE SOLUTIONS
Cannot connect to Internet Internet connection down Check that the Internet is working
Firewall preventing access Check the following ports are
Cannot play particular Internet
radio station
Bluetooth Mode: Can’t connect to
a paired device
Bluetooth Mode: Poor audio
quality
Station not broadcasting
Overloaded or insuffi cient
bandwidth.
Station broadcasting using
unknown codec.
Link out of date.
• Your Bluetooth device may be
out of range
• Electromagnetic interference
for a computer connected to the
same network.
open:
UDP and TCP ports 80 and 123
DNS port 53.
Some Internet radio stations may
require additional ports to be
opened.
Try other stations.
Try listening on computer via
Internet radio portal website.
Try later.
Select BT DISCONNECT from
the Bluetooth Menu and delete
SUPERSYSTEM’s profi le from your
Bluetooth device, then re-pair the
devices as normal
Move your Bluetooth device closer
to SUPERSYSTEM
Move your Bluetooth device away
from other sources of interference
such as other Bluetooth devices,
wireless routers etc.
42
Page 43

ERROR MESSAGES
MESSAGE DESCRIPTION EXAMPLE
Failed to connect Correct key entered, but router
rejects request.
Format error Cannot recognise fi le format -
independent of network.
Network error Problem byeond router - incorrect
data being received from network.
Network timeout Problem beyond router - no
response being received from
network.
No UPnP media found No UPnP servers found.
Service not available (DAB) No DAB reception.
Unauthorised Access not grated by UPnP server. Allow access for SUPERSYSTEM
Update failed Software upgrade failed.
Network not ready problem with connection to router. Router switched off.
No Media or Waiting for Spotify Spotify connection has been
broken or connection has been
transferred to another device.
MAC fi ltering enabled on router.
Received .wma, but found that the
stream wasn’t WMA when trying to
decode.
Data obtained from server is
unreadable.
Streaming IR station and suddenly
station becomes unavailable.
in UPnP server settings.
43
Page 44

Page 45

Owner’s Guide
v1.0
Deutsch
Page 46

TECHNISCHE HILFE
GARANTIE
Sollten Sie Schwierigkeiten beim Gebrauch des Produktes haben,
konsultieren Sie das Fehlerbehebungskapitel auf Seite 41 dieser Gebrauchsanweisung.
Andernfalls rufen Sie den technischen Kundendienst von Revo unter:
UK 01555 666161
Aus dem Ausland + 44 1555 666161
In Alternative senden Sie eine e-mail an support@revo.co.uk oder besuchen Sie unser Fehlerbehebungskapitel in unserer Website:
www.revo.co.uk/support.
UMWELT INFO
PRODUKTBESTIMMUNGEN (Richtlinie WEEE)
Das hier und auf dem Produkt angegebene Symbol bedeutet, dass es
sich um ein elektrisches oder elektronisches Gerät handelt und das dieses nach Gebrauchsende nicht mit anderen Haushaltsgeräten entsorgt
werden darf.
Der Abfallrichtlinie (2002/96/EC) für elektrische oder elektronische
Geräte (WEEE) garantiert das Recycling von Produkten unter höchstmöglicher Weiterverwendung deren Bestandteile, um die Umweltverschmutz mit giftigen Substanzen so gering wie möglich zu halten.
Für weitere Informationen kontaktieren Sie Ihr für den Umweltschutz
verantwortliches Amt oder wenden Sie sich an den Einzelhändler, bei
dem Sie das Produkt gekauft haben.
RoHs-Zertifi kat und CEE-Kennzeichen
Das Produkt wurde entsprechend den internationalen Richtlinien über
die Beschränkung gefährlicher Substanzen (RoHS) entwickelt und wurde
getestet um den EU-Vorschriften zu entsprechen, die für das CEE-Kennzeichen erforderlich sind.
SICHERHEITSINFORMATIONEN
• Das Radio nicht in der Nähe von Wasser betreiben
• Keine Schrauben oder Gehäuseteile entfernen
• Nur das mitgelieferte Netzteil verwenden
• Das Eindringen von Gegenständen oder Flüssigkeiten in das Produkt
vermeiden
02
Revo Technologies Ltd garantiert gegenüber dem Endverbraucher,
dass das Produkt frei von Defekten ist, was die verwendeten
Materialien und den Herstellungsprozess anbelangt und bei
normalem Gebrauch für den Zeitraum von einem Jahr ab
Kaufdatum. Die Garantie deckt Fabrikationsfehler, jedoch keine
Gebrechen aufgrund unachtsamer Handhabung, normaler
Abnutzung und nicht seitens Revo Technologies Ltd. autorisierten
Änderungen oder Reparaturen.
Den Kauf in unserer Website www.revo.co.uk/register eintragen
URHEBERRECHTE UND
URHEBERSCHUTZ
Copyright 2015 Revo Technologies Ltd. Alle Rechte vorbehalten.
Kein Teil dieser Drucksache darf ohne die Genehmigung von Revo
Technologies Limited kopiert, verteilt oder übertragen werden.
REVO und SUPERSYSTEM sind registrierte Marken der Revo
Technologies Ltd.
Die Bluetooth-Weltmarke und deren Logos sind registrierte
Handelsmarken, Besity von Bluotooth SSIG.Inc. und deren Anwendung
erfolgt unter Lizenz. aptX ist eine Handelsmarke von CST plc.
Revo Technologies Ltd
The Inox Building, Caldwellside, Lanark,
Scotland, United Kingdom, ML11 7SR
Tel: +44 (0) 1555 66 61 61 Email: enquiries@revo.co.uk
Die angewendete Spotify Software ist Lizenzeigentum Dritter:
www.spotify.com/connect/third-party-licenses-
GARANTIEAUSCHLUSS
Revo Technologies Limited garantiert nicht für den Inhalt dieses
Dokuments und schließt ausdrücklich alle damit verbundenen
Garantie der Verkäufl ichkeit für jeden anderen Gebrauch aus.
Revo Technologies Limited schließt jede Garantie für einen
Produktgebrauch außerhalb der in diesem Handbuch angegebenen
Verwendungsart aus. Desweiteren räumt sich Revo Technologies
Limited das Recht ein, Änderungen dieses Handbuchs vorzunehmen,
ohne hiervon weder Personen noch Firmen zu verständigen.
Page 47

INHALT
02 Technische Hilfe
02 Umweltschutzinformationen
02 Garantie
02 Urheberrechte und Urheberschutz
02 Garantieausschluss
03 Begrüßung/Verpackungsentfernung
04 Gerätaufbau
05 Fernbedienung
05 Netzanschluss
06 Einstellungen
07 Kontroll- und Menüaufbau
08-09 Setup Wizard
10-11 DAB-Modus
12-13 Dab-Modus Menüoptionen
14 FM-Modus
15 FM-Modus/AUX-IN Modus/Optical in Mode
16-17 Bluotooth
18-21 Internetradio-Modus
22 Internetradio-Portal
23-24 Einstellung eines Musicservers
25-27 Musicplayer-Modus
28-30 Spotify-Connect
31-33 App Control und Multiroom
34-35 Wecker
36-40 Systemeinstellungen
41-42 Fehlerbehebung
43 Fehlermeldungen
WILLKOMMEN
Wir danken wir für den Kauf unseres SUPERSYSTEM DigitalMusiksystems und sind sicher, dass sie viele Jahre lang Freude daran
haben werden.
SUPERSYSTEM ist ein komplettes Modem-Musiksystem, das traditionelle
Handwerksarbeit und Materialintegrität mit der letzten Generation
aller digitalen Technologien und superlativer Raumfüllung
hochwertiger Akustik verbindet.
SUPERSYSTEM folgt dem Herzschlag Ihres musikalischen Ecosystems
und bietet Ihnen jede Art von Musik, wo und wann immer Sie diese
wünschen. Dank der enthaltenen UNDOK-Technologie kann Musik
kabellos an andere kompatible Geräte in Ihrem Heim übertragen
werden, um somit eine Multiroom-Audioumgebung zu schaffen.
Dieses Handbuch soll Ihnen eine schnelle Inbetriebnahme
ermöglichen und gibt Anleitungen über die vielfältigen
Anwendungsmöglichkeiten, enthält Sicherheitsinformationen,
Garentiedetails und Unterstützung bei der Fehlerbehebung.
AUSPACKEN
Die SUPERSYSTEM-Packung sollte folgende Bestandteile enthalten:
• SUPERSYSTEM
• Fernbedienung
• Netzstecker mit Adaptern für verschiedene Staaten
• Bildschirm-Reinigungstuch
• Garantiekarte
• Bedienungshandbuch
Sollte einer dieser Bestandteile fehlen oder fehlerhaft sein,
kontaktieren Sie bitte Ihren Händler oder rufen Sie direkt Revo unter
+44 (0) 1555 666161.
ACHTUNG: die Verpackung sollte für eine zukünftigen
Wiederverwendung aufbewahrt werden. Es ist die sicherste Art,
Ihr Gerät, falls erforderlich zu transportieren.
03
Page 48

GERÄTAUFBAU VON SUPERSYSTEM
USB Ladeanschluss
Teleskopantenne
Schnellwahltasten für die wichtigsten Funktionen
Lautstärke-Regler
Stationstasten 1 - 10
Ein/Standby
Joystick Regler
Wähltaste
Media-Tasten
Berührungsempfindlicher
Snooze-Bereich
3,5 Klinke Kopfhörer-Auschluss
04
DC-Netzbuchse Aux-Eingang Optischer
Digital-Eingang
Optischer
Digital-Ausgang
Stereo
RCA/Cinch Buchse
LAN Software-Update
Anschluss
Kensington Lock Slot
Page 49

FERNBEDIENUNG
Power
Modus
Info
Spotify Mode
Züruck (Schnellrücklauf)
Durchlauf
Links (zurück)
Durchlauf nack unten
Voreinstellung 1 - 8
BATTERIEAUSTAUSCH
Die SUPERSYSTEM-Fernbedienung wird mit zwei Batterien AAA
betrieben. Je nach Gebrauch sollte die Batterie zwischen 1 und 2
Jahre funktionieren.
Menu
Lautstärke höher
Lautstärke niedriger
Vorwärts (Schnellvorlauf)
Play / Pause
Rechts (vorwarts)
Bestätigen
Ersetzen Sie die Batterie wenn der Tastendruck schlecht reagiert oder
wenn sich der Gebrauch der Tastatur als wesentlich schwieriger
erweist.
05
Page 50

NETZANSCHLUSS (PSU)
Ihr SUPERSYSTEM verfügt über einen Adapterstecker und
kann somit in allen Ländern der Weltbetrieben werden.
Wählen Sie einfach den passenden Adapter für Ihr Landund folgen Sie den nachstehenden Anweisungen.
SET-UP
Bringen und die Antenne vollständig heraus für DAB oder FM-Modus .
1
EU USA AUSTRALIAUK
Transformer Block
2
Verbinden Sie mit dem mitgelieferten PSU ein Ende mit der Steckdose Ihres Radios
und das andere mit Ihrer Netzzufuhr.
3
Drücken Sie die POWER-Taste ein Mal, um den Setup Wizard zu starten.
06
Page 51

KONTROLLE SUPERSYSTEM
Um Ihnen eine einfache Bedienung Ihres Radios zu ermöglichen, ist
es für Sie wichtig zu wissen, wie der Joystick und das Menüsystem
funktioniert.
JOYSTICKKONTROLLE
SUPERSYSTEM verwendet zur Vereinfachung dessen Bedienung ein
Kontrollsystem, das auf einem Joystick basiert.
Der Joystickcontroller hat vier Funktionen und wird gemeinsam mit
einer SELECT-Taste angewendet.
UP Durchlauf nach oben
DOWN Durchlauf nach unten
LEFT Durchlauf nach links und Rücklauf durch die Menüs
RIGHT Durchlauf nach rechts und Vorwärtslauf durch die Menüs
SELECT Bestätigung der aktuellen Wahl
MENU BUTTON
Ein Drücken der Taste bringt sie in den Menümodus für den
Modus, in dem Sie sich gerade befi nden. Z.B. ein Drücken von DABModus führt Sie in das DAB MODE MENU.
Wenn Sie die Taste ein weiteres Mal drücken, kehren Sie in den
vorherigen „playing screen“ zurück.
MODETASTE
Das Drücken der Taste führt Sie nacheinander durch alle SUPERSYSTEM Funktionsweisen. Man kann die Funktionsmodus auch vom
MAIN MENU aus durchlaufen (siehe unten).
‘LEFT’
(Back)
‘UP’
‘DOWN’
‘RIGHT’
(Forward)
MENUSTRUKTUR
HAUPTMENU
This is SUPERSYSTEM’S principle (top level) menu, and allows you to
enter different operating modes, change settings and view information such as the ‘Radio ID’ number and software version.
MODE MENUS
Die ModeMenus heißen so, weil sie die verfügbaren Funktionen
innerhalb des derzeit gewählten Modus anzeigen.
Bei Drücken von kehren Sie in das Modusmenu zurück, in dem
sich Ihr Radio befi ndet.
Jedes dieser Modemenus enthält auch die Wahlmöglichkeit in das
übergeordnete MAIN MENU.
07
Page 52

SETUP WIZARD
ANWENDUNG DES SETUP WIZARD
Bei der ersten Anwendung des SUPERSYSTEM werden sie gefragt, ob Sie den SETUP WIZARD
anwenden wollen. Der „WIZARD“ führt Sie durch einige Fragen und ist die einfachste Weise zur
Einstellung und Inbetriebnahme Ihres Geräts.
Sie können jederzeit neuerlich SETUP WIZARD wählen, -Sie fi nden ihn im SYSTEM SETTINGS MENU.
Die SELECT-Taste drücken und so di SETUP WIZARD-Prozedur beginnen.
Wählen und bestätigen Sie Ihr bevorzugtes Stundenformat (12 oder
1
24 Std.).
Date/Time
12/24 hour format
12 24
*
Wählen und bestätigen Sie von wo Ihre SUPERSYSTEM-Uhr die Uhrzeit
2
beziehen soll (Wenn sie SUPERSYSTEM in Ländern verwenden, wo DAB
ausgestrahlt wird, ist dies die einfachste Methode um zu garantieren,
dass die Datum/Uhrzeiteinstellungen korrekt beibehalten werden).
Wenn Sie „Update from Network“ gewählt haben, durchlaufen und
3
wählen Sie ihre Zeitzone aus diesem Menü.
Wählen und bestätigen Sie ihren bevorzugten Tageslichtstatus.
4
BLEIBEN SIE MIT DEM NETZ VERBUNDEN: durch Auswahl von „Yes“
5
bleibt Ihr SUPERSYSTEM mit Ihrem WiFi-Netzwerk verbunden, auch
wenn es nicht im Internetmodus (DAB/FM) oder im Standby ist. Dies
ermöglicht jederzeit Ihren Zugriff von einer UNDOK oder SPOTIFY-app.
Wählen und bestätigen Sie die Region, in der sie SUPERSYSTEM
6
verwenden. Auf diese Weise kann das Gerät die korrekte Type von
Wifi netz scannern (Wifi -Frequenzen ändern sich weltweit).
08
Auto update
Update from DAB
Update from Network *
No update
Set Timezone
UTC + 00 : 00 : Dublin , London#
UTC + 00 : 30 :
UTC + 01 : 00 : Madrid , Ar
UTC + 01 : 30 :
UTC + 02 : 00 : Athens , Ci
Daylight savings
Daylight savings
YES NO
Network settings
Keep network connected ?
YES NO
Wlan region
Most of Europe
USA
Canada
Spain
France
Page 53

SETUP WIZARD
Wählen und bestätigen Sie ihr NETWORK. In einigen Fällen kann Ihr
7
Radio mehrere fi nden. Einfach das gewünschte Network auswählen.
Wenn Sie möchten, dass Ihr Radio über eine Kabelverbindung verwenden , anstatt eine drahtlose einem , wählen Sie einfach die Wired
-Option aus dem SSID -Liste.
Push-Taste – Falls Ihr Router WPS-Verbindungen erlaubt und eine WPS
8
oder Wireless-Taste hat, wählen Sie bitte diese Option und folgen Sie
den On-Screen-Anweisungen.
Pin - SUPERSYSTEM wird eine Identifi zierungsnummer anzeigen, die
Sie in den Router des Web-Browsers eingeben (hierzu konsultieren Sie
bitte die Gebrauchsanweisung Ihres Routers).
Enter Passkey - Wählen Sie diese Option um einfach Ihren RouterPasskey einzugeben (auch als „Wireless Key“, „WPA-Key“ oder
„Network-Key“ genannt. Nun weiter zum nachfolgenden Punkt 9
gehen.
SSID
Homehub
FAMILY net
[Rescan]
[Wired]
[Manual config]
WPS Menu
Push Button
Pin
Enter Passkey
Falls Ihr Wireless-Network nicht durch Password geschützt ist, wird sich
9
SUPERSYSTEM automatisch verbinden und es erscheint der folgende
Bildschirminhalt.
Falls Sie mit Password schützen, geben Sie dieses mittels Joystick Con-
10
troller ein und durchlaufen Sie die alphanumerischen Zeichen und
bestätigen Sie alle Zahlen und Buchstaben mit select. Nach korrekter
Eingabe Ihres Passwords wählen Sie OK.
Wählen Sie (Rücktaste) bei Eingabe falscher Zeichen.
BKSP
SUPERSYSTEM speichert das Password ein und es muss nicht wieder
eingegeben werden.
Setup wizard
Setup wizard
completed
Press SELECT to exit
Key:
xxxxx
0 1 2 3 4 5 6 7 8 9 . , a b
c d e f g h i j k l m n o p q
r s t u v w x y z A B C D E
F G H I J K L M N O P Q
BKSP
OK
CANCEL
09
Page 54

DAB RADIO MODE
VORBEREITUNG VON DABVORGÄNGEN
Versichern Sie sich, dass Ihre Radioantenne vor diesem Vorgang im
DAB-Modus ausgezogen ist.
Zur Einstellung des DAB MODUS drücken Sie die Taste auf dem
Frontpaneel oder so lange, bis auf dem Bildschirm DAB Mode
erscheint.
Falls SUPERSYSTEM sich das erste Mal im DAB MODE verbindet , erfolgt
ein komplettes Screening, um zu prüfen, welche Stationen in Ihrer
Zone ausgestrahlt werden, bevor sie in alphabetischer Reihenfolge im
Gerät eingespeichert werden.
Es kann sich manchmal ein manueller Scanvorgang als erforderlich
erweisen, um Ihre Stationenliste auf den neuesten Stand zu bringen.
Dies kann aufgrund einer der folgenden Gründe erforderlich sein:
1. Verfügbare Stationen können sich manchmal ändern, wenn neue
Stationen erscheinen oder bestehende Stationen Ihre Übertragungen einstellen.
2. Falls der Empfang während des automatischen Scandurchlaufs
schwach war, z.B. wenn die Radioantenne nicht komplett herausgezogen war, kann es sein, dass die Stationenliste unkomplett oder
sogar leer ist.
3. Bei schlechtem Empfang einiger Ihrer Stationen (erkennbar durch
unterbrochene oder schlechte Audioqualität) könnten Sie den Wunsch haben, nur Stationen mit gutem Empfang einzuspeichern.
Zum manuellen Scan die Taste drücken, dann SCAN aus der
Menüliste wählen.
Scan
Stations : 21
Scanning
DAB
radio
Nach Beendigung des Scans zeigt SUPERSYSTEM die verfügbaren
Stationen an.
Zur Entfernug von aufgelisteten jedoch nicht verfügbaren Stationen
drücken, dann wählen Sie PRUNE INVALID. Auf die Frage
„remove all invalid stations“ wählen Sie YES.
10
Prune Invalid
This removes all invalid
stations, continue?
YES NO
Page 55

DAB RADIO MODE
AUSWAHL DER RADIOSTATIONEN
Zum Zugang zu Ihrer Stationsliste drücken jederzeit Sie UP, DOWN oder
LEFT auf dem Joystick-Controller oder und dann STATION LIST.
Durchlaufen Sie die verfügbaren Stationen mittels UP und DOWN auf
dem Joystick-Controller, dann drücken Sie entweder die SELECT-Taste
zur Bestätigung Ihrer Wahl oder drücken Sie auf dem Joystick RIGHT.
VOREINSTELLUNG BEVORZUGTER STATIONEN
SUPERSYSTEM ermöglicht die Speicherung der Lieblingsstationen durch
drücken der PRESET-Taste.
Zur Speicherung der soeben gehörten Station als Bevorzugte, einfach
PREST drücken und halten. Die Presetliste wird auf dem Bildschirm
erscheinen und Sie können mittels Joystick wählen, mit welcher
Presetnummer Sie die Station speichern möchten.
Zur Aktivierung einer Presetstation, einfach PRESET drücken (kurz).
Die Presetliste erscheint auf dem Bildschirm und ermöglicht so Ihre
Auswahl.
Station list
Absolute
Amazing
BBC 1Xtr
BBC 6Mus
BBC Gael
BBC Radio 6Music
u to vote for a track that
missed out on the 6:00 AM
Music playlist
11
Page 56

DAB MODE MENU OPTIONS
SENDERINFORMATION
Im DAB-Mode kann SUPERSYSTEM mehrere Informationen am Bildschirm aufzeigen.
Durch drücken der Taste können Sie nacheinander folgende Informationen
aufrufen:
STANDARD DAB-BILDSCHIRM Zeigt laufende Textinformationen des Senders
PROGRAMME TYPE Z.B. Nachrichten, Rock Music, Klassik, usw.
MULTIPLEX AND FREQUENCY Multiplex-Besitzer und Senderfrequenz
SIGNAL STRENGTH Derzeitige Signalstärke
BBC Radio 6Music
Now Playing : Glasvegas
Go Square Go!
BBC Radio 6Music
Rock Music
BBC Radio 6Music
BBC National DAB
Freq: 225.648 MHz
BBC Radio 6Music
Signal Level : 90
Strength
BIT RATE AND CODEC Audioformat, Bitanzahl, mono oder stereo
DATE Aktuelles Datum
12
BBC Radio 6Music
Bit rate: 128 kbps
Codec : MP2
Channels : Joint Stereo
BBC Radio 6Music
Today’s Date :
22/02/15
Page 57

DAB MODE MENU OPTIONS
DYNAMISCHE Bereichkompression (DRC)
Wenn Sie Musik mit einem hohen Dynamikbereich in einem lauten
Umfeld hören (z.B. klassische Musik während des Kochens), könnte
für sie eine Kompression des Dynamikbereichs vorteilhaft sein. Dies
hat den Effekt, ruhige Töne lauter zu machen zu machen und laute
Töne leiser.
Zum Umschalten in die DRC-Einstellung drücken, dann die
DRC-Option auswählen, bevor sie OFF, LOW oder HIGH wählen.
SENDERANORDNUNG
Es kann die Senderanordnung so gewählt werden, dass diese
entweder ALPHANUMERISCH, ENSEMBLE oder VALID ist.
Nach Aufscheinen der Liste sehen Sie ALPHANUMERISCH gelistete
Sender auf alphanumerische Weise.
ENSEMBLE listet Gruppen von Sendern auf, die zusammen auf diesem
Ensemble aufscheinen.
VALID listet gute Stationen zuerst, dann alphanumerische und am
Ende die off-air Sendern auf.
Um die Senderanordnung zu ändern, drücken, dann STATION
ORDER wählen, bevor die Auswahl zwischen ALPHANUMERISCH,
ENSEMBLE oder VADID getroffen wird.
DRC
DRC Low
DRC High
DRC Off #
Station order
Alphanumeric #
Ensemble
Valid
13
Page 58

FM RADIO MODE
FM-BETRIEB
Bitte, versichern Sie sich, dass die Radioantenne vor dem FM-Betrieb
ganz herausgezogen ist.
Zur Einstellung des FM MODUS drücken Sie die Taste auf dem
Frontpaneel oder so lange, bis auf dem Bildschirm FM Mode
erscheint.
Drücken der SELECT-Taste hat das Durchscannern bis zur
nächsten gültige Station zur Folge. SUPERSYSTEM unterbricht den
Scannerdurchlauf sobald eine Station gefunden wurde.
Zur Feineinstellung UP oder DOWN auf dem Joystickcontroller verwenden, um die Frequenz ansteigend zu ändern.
Falls eine FM-Station mit starkem Signal RDS-Informationen überträgt,
zeigt SUPERSYSTEM den Sendernamen und andere Textinformationen
auf dem Bildschirm an.
SPEICHERUNG VON LIEBLINGSSENDERN
SUPERSYSTEM ermöglicht die Speicherung Ihrer Lieblingssender
mittels PRESET-Taste, etnweder über die 10 auf dem Frontpaneel
angebrachten „hot-keys“ oder die numerierte Preset-Taste auf der
Fernbedienung
Zur Speicherung der Sendestation, die Sie soeben hören, einfach
PRESET drücken und gedrückt halten. Die Presetliste wird auf dem
Bildschirm aufscheinen und Ihnen mittels Joystick die Möglichkeit
bieten, unter welcher Presetnummer Sie diesen Sender speichern
möchten.
Zum Abrufen einer Einstellung PRESET drücken (kurz). In der
aufscheinenden Liste kann dann die gewünschte Sendestation
gewählt werden.
87.50 MHz
BBC R3
Composer of the Week
Coming next - Proms
Chamber Music 2009
Preset stored
FM
radio
14
Page 59

FM RADIO MODE
FM-EINSTELLUNGEN
Taste drücken, um in das FM MODE MENU zu gelangen. Dort können
einige FM-Präferenzen wie SCAN SETTING und AUDIO SETTING gewählt werden.
SCAN SETTING ermöglicht Ihnen zu entscheiden, dass das Radio die
Scannerfunktion unterbrechen soll, sobald ein Sender mit starkem
Signal gefunden wurde.
AUDIO SETTING erlaubt es, eine Station in mono zu hören, falls die
Signalstärke nicht ausreichend sein sollte, um einen Stereoempfang
zu erlauben.
AUX IN MODE
AUX IN MODE ermöglicht Ihnen Audios aus einer externen Quelle
(wie MP3-player) auf Ihrem SUPERSYSTEM zu hören. Hierzu verbinden
Sie Ihre externe Audioquelle mit der 3,5 mm Buchse AUX IN auf der
Rückseite Des SUPERSYSTEMS.
Drehen Sie die Lautstärke auf niedrig und, falls einstellbar, auf dem
externen Gerät.
Scan setting
Audio setting
Main menu >
Zur Eingabe des AUX IN MODE drücken Sie die Taste auf dem
Frontpaneel Oder Sie drücken so lange, bis der Aux Info-Screen
erscheint.
Regeln Sie die Lautstärke auf SUPERSYSTEM und, falls erforderlich auch
jene des externen Audiogeräts ein.
OPTICAL IN MODE
OPTICAL IN MODE ermöglicht es Ihnen eine digitale Audioquelle (TV/
Set Top Box, Computers,Laptops und CD-Plazer, usw) anzuschließen.
Hierzu müssen Sie ein „TOSUNK“-Kabel in die externe Audioquelle
stecken und diese in die OPT IN-Buchse auf der Rückseite von
SUPERSYSTEM stecken.
Um OPTICAL IN MODE einzustellen, drücken Sie die Taste auf dem
Frontpaneel oder drücken Sie die Taste so lange, bis die Optical
In Info-Anzeige erscheint.
IFalls möglich, raten wir Ihnen, die Lautstärke auf etwa 80% auf
der Audioquelle einzustellen und die Lautstärkenkontrolle von
SUPERSYSTEM zu verwenden, im die gewünschte Lautstärke
einzustellen.
Aux in
Optical In
Auxiliary Input
Audio in
Today’s Date :
22/02/15
Optical Input
Optical in
Today’s Date :
15/10/15
15
Page 60

BLUETOOTH MODE
Kabellolse Musik aus Bluotooth Smartphone, Tablet, Laptop oder anderen
Bluotoothgeräten ermöglichen SUPERSYSTEM direkten Zugang zu diesen, ohne
jegliche Anschlüsse.
PAARUNG MIT BLUETOOTH-GERÄTEN
„Paarung“ ist erforderlich, wenn zwei Bluotooth-Geräte miteinander dialogieren
und eine Verbindung herstellen. Diese Verbindung ist im Speicher beider
Geräte eingetragen, was bedeutet, dass, sobald ein gewisses Gerät einmal
mit SUPERSYSTEM verbunden war, dieses erkannt wird und die „Paarung“ nicht
neuerlich durchgeführt werden muss.
WIE VERBINDET MAN EIN BLUOTOOTHGERÄT MIT SUPERSYSTEM
Zur Aktivierung des BLUETOOTH-MODE drücken Sie die - Taste auf dem
Frontpaneel oder drücken Sie die Taste so lange, bis der BLUETOOTH Mode
Intro-Screen erscheint.
Auf Ihrem Bluetoothgerät versichern Sie sich, dass Bluetooth freigegeben ist und
beginnen Sie eine „Search“ nach einem neuen Gerät. Nach Beendigung der
Suche, gibt Ihr Gerät eine Liste der in Ihrer Nähe befi ndlichen Bluetoothgeräte an.
AUSWAHL VON „SUPERSYSTEM“ AUS DER LISTE
Ihr Bluotoothgerät wird nach der Paarung bestätigen, diese komplettiert wurde
und SUPERSYSTEM wird nun eine statische Bluetooth-Logo anzeigen.
PASSKEY
Bluetooth Input
Bluetooth
Today’s Date:
05/11/14
Bluetooth
Während des Paarungsvorgangs können einige Bluetoothgeräte aufscheinen, die
einen Passkey verlangen. Sollte Ihr Gerät diesen verlangen, geben Sie 0000 ein.
Sollten Sie Probleme bei der Paarung Ihres Geräts mit SUPERSYSTEM haben,
konsultieren Sie das Fehlerbehebungskapitel auf Seite 42.
16
Page 61

BLUETOOTH MODE
MUSIKSTREAMING
Musik-Playback kann auf zwei Möglichkeiten gewählt und kontrolliert werden;
entweder direkt aus dem Quellengerät (Smartphone, Tablet, Laptop, usw.) oder
mittels der auf dem Frontpaneel.
Achten Sie darauf, das die Playback-Lautstärke unabhängig entweder von
SUPERSYSTEM oder dem Quellgerät geregelt werden kann.
VERWALTUNG MEHRERE BLUETOOTH-GERÄTE
Falls Sie nur mit einem Bluotooth-Gerät gepaart habe, wird SUPERSYSTEM sich
automatisch mit diesem verbinden.
Sollten Sie mehrere Geräte paaren wollen, drücken Sie , dann wählen Sie „BT
Disconnect“. SUPERSYSTEM das derzeitige Bluetooth-Gerät ausschalten und den
Paarungsvorgang neuerlich vornehmen. Dies ermöglicht Ihnen die Wiederholung
des Paarungsvorgangs mit einem anderen Gerät
SUPERSYSTEM speichert bis zu 8 individuelle Bluetoothgerät ein. Wenn Sie das 9.
Gerät mit Ihrem SUPERSYSTEM paaren wollen, wird automatisch das als erstes
gespeicherte Gerät gelöscht.
Sie können weitere Geräte mit SUPERSYSTEM paaren und es werden jeweils darin
die letzten 8 Geräte eingespeichert.
aptX®
Die Bluetooth-Lösung von SUPERSYSTEM verfügt über CSR patentierte aptXTechnologie, d.h. wenn diese mit einem Gerät arbeitet, dass ebenfalls aptX
vorsieht, wird das ausgegebene Audio eher CD-Qualität, als MP3-Qualität eines
Standard-Bluetoothstreams aufweisen.
Bluetooth
BT disconnect
Main menu
17
Page 62

INTERNET RADIO MODE
INBETRIEBNAHME
Zur Einstellung des INTERNET RADIO MODUS drücken Sie die Taste
auf dem Frontpaneel oder so lange, bis auf dem Bildschirm DAB
Mode erscheint.
Durch Eingabe des Internet Radio Hauptmenüs erhalten sie Zugriff zu
den ZULETZT GELISTETEN Sendern oder zu Neuen.
Lieblingssender: dient zur Schnellwahl Ihrer Lieblingsstationen. Diese
können durch das Frontier Silicon Radio Portal (mittels PC oder Mac)
eingestellt werden. Detailliertere Informationen auf Seite 22.
Local: eine umfassende Aufl istung der in Ihrem Umfeld (oder Nation)
verfügbaren Sender.
BBC: abgekürzte Aufl istung aller BBC-Sender weltweit.
Stations: fi ndet Sender nach einer Reihe von Suchkriterien wie:
Gebiet, Art, beliebteste Sender.
Podcasts: fubdet Oidcasts oder „Listen-Again“ Sender nach
Gebieten, Art oder Namensuche.
My Added Stations: zeigt ihrerseits persönlich dem Radioapparat
mittels Frontier Silicon Radio Portal zugefügte Sender. Nähere Details
auf Seite 22.
Help: zum Auffi nden ihres ACCES CODES (Zugangscodes) hier. Dient
für den Zugriff zum Frontier Silicon Radio Portal (siehe Seite 22).
SENDERWAHL
Zur Senderwahl die STATION LIST vom INTERNET RADIO MENU aufrufen,
dann SENDER mittels Joystick-controller auswählen.
Nun haben Sie die Wahl Sender mit folgenden Suchkriterien zu fi nden
oder auszuwählen:
NATION (Herkunfsland) ART
SENDERSUCHE (namentlich) BELIEBTE SENDER
NEUE SENDER
Internet
radio
Internet radio
My Favourites >
Local United Kingdom >
BBC >
Stations >
Podcasts >
Stations
Location >
Genre >
Search Stations
Popular Stations >
New Stations >
18
Page 63

INTERNET RADIO MODE
SENDERAUSWAHL (kontinuierlich)
Mittels Joystick-Controller die Optionen durchlaufen und das gewünschte Suchkriterium durch drücken von SELECT bestätigen.
Z.B. die Auswahl von Nation gibt Ihnen eine alphabetische Liste von
Kontinenten/Regionen an und dann eine Liste der Nationen. Mit dem
Joystick-Controller diese Liste durchlaufen und Ihre Auswahl des Kontinents, dann der Nation durch drücken von SELECT bestätigen. Dann
kann zwischen ALL STATIONS, HIGHLIGHTED STATIONS oder einem GENRE
gewählt werden, um spätere Sendersuchen spezifi scher zu gestalten.
Nach der Wahl der Suchkriterien erscheint eine Senderliste. Einfach
einen Sender aus der Liste zur Aktivierung auswählen.
SUCHE
Sie können eine internationale Radiostation namentlich suchen(wenn
Sie den Namen wissen), oder ein Schlüsselwort innerhalb des Titels.
Zur Sendersuche SEARCH STATIONS aus dem STATIONS MENU wählen
, dann ein Schlüsselwort mittels Tastatur eingeben (ähnlich wie für die
Passworteingabe).
Sobald Ihr Sender gefunden wurde, auswählen und hören.
Falls Sie eine Schlüsselwort gesucht haben, listet SUPERSYSTEM alle
Sender auf, die dieses Schlüsselwort enthalten. Diese Liste durchlaufen
und Ihren Sender auswählen.
CHOOSING A PODCAST
Podcasts (dh. „wiederholen“) werden wie ein regulärer Sender
gesucht und ausgewählt.
PODCAST aus der STATION LIST im INTERNET RADIO MENU auswählen,
dann nach Ort, Art oder einer Kombination Beider suchen.
Location
Africa >
Asia >
Caribbean >
Central America >
Europe >
Stations
ROCKF
0123456789 ABCD
EFGHIJKLMNOPQRS
TUVWXYZ
BBC Radio 1
BBC Radio 1
Podcasts >
CANCEL
BKSP
OK
Der hauptsächliche Unterschied wenn Sie ein Podcast suchen ist,
wenn Sie einen Sender ausgewählt haben, dass eine Liste aller Shows
(oder Podcasts) aufscheint, die von diesem Sender verfügbar sind.
Einfach Ihre Auswahl aus der Liste bestätigen.
Podcasts
Adam and Joe
BBC Introducing
Bruce Dickinson
Chris Hawkins
Clare McDonnell
19
Page 64

INTERNET RADIO MODE
MEINE LIEBLINGSSENDER
Es kann eine Liste (oder mehrere Listen) der Lieblingssender erstellt
werden, die einen schnellen und einfachen Zugang zu einer Anzahl
von Sendern verschiedener Länder und Sendertypen ermöglicht.
Hierzu müssen Sie vorerst Ihr Radio mit dem Frontier Silicon Radio
Portal registrieren. Siehe hierzu INTERNET RADIO PORTAL-Abschnitt auf
Seite 22
.
Zur Speicherung eines Senders als Lieblingssender die SELECT-Taste
drücken und festhalten, bis FAOURITE ADDED auf dem Bildschirm
erscheint. Der gewählte Sender erscheint dann in der Standardliste
der Lieblingssender.
Für den Zugriff in die Liste MY FAVORITES STATION LIST auswählen,
dann MY FAVORITES, gefolgt von STATIONS. Nun können Sie die Liste
durchlaufen und alle gelisteten Sender auswählen.
MEINE ZUGEFÜGTEN SENDER
Wenn Sie der Internet Radio Station List (mittels Frontier Silicon Radio
Portal, siehe Seite 22) irgendwelche eigene Sender zugefügt haben,
erscheinen diese auf dieser Liste. Die Option MY ADDED STATIONS
befi ndet sich im STATION LIST MENU im INTERNET RADIO MODE.
BBC
Die BBC-Option ist eine Abkürzung der gesamten BBC-Sender-Liste.
Einfach diese Option aus dem STATION LIST MENU wählen, dann
durchlaufen und den Sender ganz wie üblich auswählen.
ZULETZT GEHÖRTE SENDER
Im INTENET RADIO MODE erscheint der zuletzt gewählte Sender
automatisch. Zur Wahl eines anderen, letztlich gehörten Senders LAST
LISTENED wählen. Es erscheint eine komplette Senderliste (die Letzten
ganz oben in der Liste).
20
Your Rock Favourites
Kerrang! >
North Sea Classic rock >
Rock FM >
Takeover Radio >
The Arrow >
BBC
BBC Radio 1 >
BBC Radio 1Xtra >
BBC Radio 2 >
BBC Radio 3 >
BBC Radio 3 >
Last Listened
Clyde 1 >
West FM >
BBC Radio6 >
BBC Radio 1 >
Chill >
Page 65

INTERNET RADIO MODE
HILFE
Die HELP-Option befi ndet sich im STATIONS LIST MENU. Unter HELP
Finden Sie den ACCESS CODE, den Sie erfragen, um Ihr Radio im
Frontier Silicon Radio Portal (siehe Seite 22) zu registrieren.
Eine hilfreiche FAQ Audioanweisung fi nden Sie auch unter der HELPÜberschrift.
LOCAL
Die Liste der LOKALSENDER befi ndet sich im STATION LIST MENU und
ist je nach Land in dem Sie sich befi nden ändern. Z.B. wenn Sie in
UK sind, werden im Display Sender von UK angegeben. Wenn Sie Ihr
SUPERSYSTEM in Deutschland betreiben, wird diese Liste nur Sender
anzeigen, die in Deutschland ausgestrahlt werden.
Wählen Sie diese Option, um unter allen verfügbaren Sendern zu
wählen oder wählen sie aus einer Liste einer gewissen Musikart.
Get access code
Access code
HEBZM0Z
Local United Kingdom
All Stations >
Highlighted Stations >
Alternative >
Ambient >
Big Band >
21
Page 66

INTERNET RADIO PORTAL
HINZUFÜGEN ZUSÄTZLICHER FUNKTIONEN
Einige fortgeschrittene Internet Radiofunktionen des SUPERSYSTEM
können nur Über Frontier Silicon Radio Portal hinzu gefügt werden.
Zu dessen Nutzung müssen Sie Ihr Radio vorerst registrieren.
REGISTRIERUNG IHRES SUPERSYSTEMS
Zur Registrierung Ihres Radios benötigen Sie Ihren persönlichen
Zugangscode. Sie fi nden diesen Code, indem Sie folgendermaßen
vorgehen:
INTERNET RADIO MODE auswähen, dann drücken, die STATION
LIST Auswählen, dann HELP. Nun GET ACCESS CODE auswählen.
Notieren Sie sich diesen Zugangscode.
Nun konsultieren Sie mit Ihrem PC oder Mac die Website at –
www. wifi radio-frontier.com
Klicken Sie auf den REGISTER HERE Link (auf der linken Bildschirmseite),
zur Durchführung der Registrierung.
Falls Sie bereits ein Account besitzen und diesem dieses Radio
zufügen möchten, führen Sie das Login durch und wählen Sie MY
PREFERENCES, dann ADD ANOTHER Wi-Fi RADIO.
Sobald Sie Ihr SUPERSYSTEM im Portal registriert haben, können Sie
sofort über die zahlreichen zusätzlichen Funktionen und Dienstleistungen verfügen.
22
Page 67

EINRICHTUNG EINES MUSIC-SERVERS
Um mit SUPERSYSTEM Musik aus einem angeschlossenen Computer
hören zu können, muss der Computer zur Medienfreigabe eingestellt
werden.
UPnP media sharing ermöglicht es Geräten wie SUPERSYSTEM Musik
aus geteilten Media-Bibliotheken zu spielen, indem man tag-menus
wie Artist Album oder Genre durchsucht.
Wenn Sie über einen PC mit Windows Media Player 11 oder späteren
Datums verfügen (WMP), oder eine Apple Mac mit OS X 10 oder
späteren und eine UPnP-Applikation installiert haben, können Sie
PÖIXIS RX anschließen und Audiodateien abspielen.
ACHTUNG: ITUNES arbeitet derzeit nicht als UPnP-Media-Server, es
gibt jedoch eine Reihe von anderen Softwares add-ons, die Ihnen
Zugriff zu den iTunes-Speichern gewähren.
MEDIA MIT WINDOWS MEDIA PLAYER TEILEN
Der üblichste UPnP-Server ist Windows Media Player, Version 11 oder
spätere (WMP), es können jedoch auch andere Plattformen oder
Servers verwendet werden.
Zur Einrichtung von WMP zum Media-Sharing, folgen Sie den
nachstehenden Anweisungen:
Versichern Sie sich, dass Ihr PC und Radio an das selbe Netzwerk
angeschlossen sind. SUPERSYSTEM wird als „SUPERSYSTEM“ durch Ihren
PC erkannt.
In WMP: fügen Sie der Media Library die Audiodateien und Ordner zu,
1
die sie mit SUPERSYSTEM (LIBRARY >ADD TO LIBRARY…) teilen wollen.
2
Versichern sie sich, dass das Radio Zugriff zu dem gewählten Gerät
hat, indem ALLOW gewählt und angeklickt wurde. Sie können auch
einen Namen für die gewählte Mediaeinrichtung wählen.
23
Page 68

EINRICHTUNG EINES MUSIC SERVERS
MEDIATEILUNG MITTELS MAC
Um eine Verbindung zwischen SUPERSYSTEM und Ihrem Apple Mac
herzustellen, ist eine dritte UPnPserver-Applikation erforderlich. Sie
können eine von vielen im Internet verfügbaren herunterladen.
Eine dieser Applikationen ist EyeConnect. Diese ist eine einfach zu
installierende Media-Sharing-Applikation, die SUPERSYSTEM befähigt,
Audio zu hören. EyeConnect kann von: http://www.elgato.com
heruntergeladen werden.
Sobald installiert, fi ndet man EyeConnect in den System
Preference-Paneel. nach Anschließen von SUPERSYSTEM fi nden Sie
die EyeConnect-Liste des Geräts. versichern Sie sich nach dem
Anschließen des SUPERSYSTEM, dass EyeConnect sich in Ihrem Setup
Screen befi ndet.
SUPERSYSTEM erscheint als „SUPERSYSTEM“ in der Eyeconnect-Liste
des Geräts. Die Aktivierungsbox muss geprüft werden und es muss
ACCESS auf ENABLE DEW DEVICES aktiviert sein.
Ihr Mac ist nur bereit Musik auf Ihrem Radio zu spielen. EyeConnect
aktiviert sich normalerweise automatisch nach dem Einschalten.
MUSIC PLAYER MODUS
ABSPIELEN VON AUDIO-TRACKS IM MUSIC PLAYER
Der MUSIC PLAYER MODUS ermöglicht Ihnen das Abspielen von
Audiodateien, wie MP3, AAC, WMA oder FLAC, direkt von einem
Computer oder Musikserver Ihres lokalen Netzwerks.
Zur Einstellung des MUSIC PLAYER MODUS drücken Sie die Taste
auf dem Frontpaneel oder so lange, bis auf dem Bildschirm
MUSIC PLAYER Mode erscheint.
Sobald Sie sich im Music Player Mode befi nden, drücken Sie ,
dann wählen Sie SHARED MEDIA oder USB-Wiedergabe.
24
Music player
Shared media >
My playlist >
Repeat play: Off
Shuffle play: Off
Page 69

MUSIC PLAYER MODUS
MUSIKABSPIELEN VON EINEM USB MEMORY STICK
DEN USB-Stick in das Frontpaneel von SUPERSYSTEM einstecken.
Wenn Sie USB PLAYBACK aus dem MUSIC PLAYER SYSTEM wählen,
erscheint der Inhalt des Sticks mit der Liste der Dateinamen.
Sie können nun Ihrem Wunsch entsprechend die Liste mittels Joystick
Controller mit UP und DOWN durchlaufen und entweder SELECT oder
RIGHT mit dem Joystick für den Vorwärtslauf wählen. Wenn Sie das
gewnschte Stück erreicht haben, drücken Sie kurz SELECT und das
Stück wird abgespielt; einlanger Druck fügt es der PLAYLIST hinzu
(siehe PLAYLISTS auf Seite 27 dieses Handbuchs für weitere Details).
Musikstücke können auch mittels der Tasten auf dem
Frontpaneel von SUPERSYSTEN gesteuert werden.
Durch drücken und gedrückt halten von erfolgt der Schnellrücklauf und mit der Schnellvorlauf.
AUFLADUND DES USB-GERÄTS
Friendly Fires
-01-Jump.MP3
-02-Paris.MP3
SUPERSYSTEM ermöglicht die Aufl adung einer Vielzahl von Geräten
(5V bis 1000mA),wie iPhones,Android Smartphones nd Tablets.
Due USB-Buchse befi ndet sich auf dem Frontpaneel von
SUPERSYSTEM.
25
Page 70

MUSIC PLAYER MODE
SHARED MEDIA (Von einem UPnP Media Server)
Im MUSIC PLAYER MODE wählen Sie SHARED MEDIA. Falls Sie dies
getan haben ( wie auf Seite 23 beschrieben), sollten Sie dies für den
Server, den Sie gewählt haben, sehen, z.B. „SB-Laptop: Audio“ Sollten
Sie Media aus mehr als einen Computer beziehen, sind diese
Alternativenaufgelistet. Wählen Sie das Media, aus dem Sie Musik
hören möchten.
Von diesem Punkt ab sind die Menüs aus dem gewählten
Mediaserver bezogen (z.B. Windows Media Player). Das erste Menü
zeigt eine Liste von Mediatypen, z.B. Musik, Video, Bilder und Playlists.
SUPERSYSTEM kann nur Musik und Playlists abspielen.
SB-laptop: Audio
Music >
Video >
Pictures >
Playlists >
<Search>
Zur Musikwahl gibt es folgende Auswahlmöglichkeiten:
Genre | Künstler | Album | Komponist | Rating
Sobald Sie den gewünschten Musiktrack gefunden haben, den Sie
abspielen möchten, drücken Sie die entsprechende Wähltaste.
Kurzer Druck hat das sofortige Abspielen zur Folge, langer Druck fügt
den Track der PLAYLIST hinzu.
26
Music
Music >
All Artists >
Contributing Artists >
Album Artists >
Composers >
Page 71

MUSIC PLAYER MODE
PLAYLISTS
SUPERSYSTEM kann bis zu 500 Tracks in der Playlist speichern. Playlist
tracks können aus mehreren UPnP-Server-Geräten gemixt werden.
Zur Verwaltung Der Playlist MY PLAYLIST aus dem MUSIC PLAYER MENU
wählen.
Zur Ansicht der Playlist durchlaufen Sie diese mit der Joystick-Control.
Um die Playlist von einem bestimmten Track ab zu hören, drücken Sie
kurz die entsprechende Wähltaste. Zum Löschen eines Tracks aus der
Playlist, halten Sie diese Taste gedrückt und bestätigen Sie dann mit
YES die Löschung.
Falls Sie einen Track/Album/Ordner für sofortiges Wiederhören
wählen, ohne die Playlist zu verwenden, wird die Playlist beibehalten
und wird im Radio weitergespeichert, bis Sie entscheiden, diese zu
löschen.
REPEAT/SHUFFLE
Sie können Tracks wiederholen oder diese im Randomreihenfolge
durch Auswählen von REPEAT PLAY oder SHUFFLE PLAY aus dem
MUSIC PLAYER MENU neuerlich hören.
NOW PLAYING INFORMATION
Während ein Track abgespielt wird zeigt SUPERSYSTEM den Titel und
den Namen des Künstlers (UPnP) an. Es gibt auch eine Leiste, in der
die abgelaufene und die gesamte Trackdauer angezeigt wird.
Zur Anzeige weiterer Trackinformationen drücken Sie .
Jedes drücken von hat die Anzeige einer weiteren Information
über das Musikstück Zur Folge, wie folgt:
TRACK NAME CODEC
ARTIST SAMPLING RATE
PROGRESS BAR PLAYBACK BUFFER
TRACK TIMES TODAY’S DATE
My playlist
Human >
Just My Imagination.wma
Back At One
Can’t Fight This Feelng. . . . . .
Three birds.mp3
Music player
Human.mp3
1:01 3:08
Music player
Letter To Me
Album:
5th Gear
27
Page 72

SPOTIFY CONNECT-ERKLÄRUNG
Spotify Connect ist eine Heimaudio-Erfahrung, die eine
problemlose Kontrolle und einen uneingeschränkten Genuss
Ihrer Musik über eine Reihe von Geräten ermöglicht, - von Ihrem
Telefon, über Ihr Tablet bis zu Ihrem SUPERSYSTEM. SUPERSYSTEM
Besitzer mit einem Spotify Premium-Account können nun einen
sofortigen Zugang zu mehr als 30 Millionen Liedern aus dem
Spotify-Archiv mit ausgezeichnetem Audio-Samplingraten
genießen, indem Sie einfach die Spotify-App für Smartphone
oder Tablet herunterladen.
Wie es funktioniert – Sie sind eben durch die Türe eingetreten
und haben Ihre Lieblingsplaylist auf Ihrem Telefon gehört. Mit
Spotify Connect drücken Sie einfach Play auf Ihrem SUPERSYSTEM
Radio (wenn sich dieses im Spotify-Modus befi ndet) und die
Musik spielt sofort dort weiter, wo Sie soeben unterbrochen
haben und Sie verlieren so keinen einzigen Takt. Nun nehmen
Sie einfach Ihr Telefon oder Tablet mit aufs Sofa zur Kontrolle der
Musik oder zum nahtlosen Übergang zu einem anderen Produkt
in einem anderen Raum, der Spotify Connectfähig ist.
The Beat Goes ON – Mit Spotify Connect benötigen sie keine
unstabilen Verbindungen, um Musik unter Ihren Geräten zu teilen.
Sie können telefonieren, ein Spiel machen oder ein Video sehen
– Sie können Ihr Telefon oder Tablet sogar außer Reichweite
bringen und die Musik wird einfach weiterspielen.
Um Spotify Connect genießen zu können, müssen Besitzer von
Revo SUPERSYSTEM die Spotify-App auf deren Smartphone oder
Tablet herunterladen (IOS oder Android) und über einen aktiven
Spotify Premium Account verfügen. Es ist eine kostenlosen
Testversion für 30 Tage verfügbar. Für nähere Details konsultieren
Sie www.spotify.com/freetrial.
*Um zu prüfen, ob dieser Dienst in Ihrem Land verfügbar ist,
konsultieren Sie www.spotify.com.
28
Page 73

SPOTIFY CONNECT
Zur Einstellung von Spotify in Ihrem SUPERSYSTEM versichern Sie sich, dass
sowohl Ihr SUPERSYSTEM als auch Ihr iOS/ANdroid-Gerät sich im selben
Netzwerk befi nden und dass Sie die letztgültige Version der Spotify App
auf Ihrem Gerät installiert haben.
Sobald ein Lied auf Ihrem Gerät läuft, drücken Sie den Now PlayingBalken, um den Playing-Bildschirm zu sehen.
Sobald die Spotify App auf Ihrem Netzwerk SUPERSYSTEM erkennt,
erscheint die Meldung “Spotify Connect Available” im unteren
Seitenbereich der App.
Drücken Sie auf diesen Text um alle verfügbaren Spotify ConnectGeräte aufzurufen und wählen Sie dann Ihr Radio aus der Liste.
Die Textfarbe am unteren Bildschirmende ändert sich auf grün und es
erscheint der Name Ihres Radios ( z.B. SUPERSYSTEM 002262D178E0”
Sie werden bemerkt haben, dass Ihr SUPERSYSTEM derzeit als „Revo
SUPERSYSTEMXXXXX“ (der 12-stellige alphanumerische Code ist die
MAC-Adresse Ihres Radios) in der Spotify-App gelistet ist. Falls Sie diesen
Namen ändern möchten und persönlicher gestalten wollen („Johns
SUPERSYSTEM“ z.B.) können Sie dies mittels UNDOK-App tun (siehe Seite
28). Andernfalls folgendermaßen vorgehen:
Auf dem SUPERSYSTEM: drücken Sie Menu und wählen Sie SYSTEM
SETTINGS > Network > View Settings. Durchlaufen Sie die Liste und
notieren sie die „IP-Adresse“.
Auf Ihrem Computer: versichern Sie sich, dass sich Ihr Computer
im selben Netzwerk befi ndet, wie das Radio, dann geben Sie die
IP-Adresse in den Balken Ihres Browsers ein (z.B.: 192.168.0.34). Dies
ermöglicht die Einsicht in einige der Diagnostikfunktionen von
SUPERSYSTEM, erlaubt jedoch auch die Änderung des Namens.
29
Page 74

SPOTIFY CONNECT
Kontrolle von Spotify Connect
Sie können nun Spotify von der App aus, wie üblich kontrollieren; suchen
Sie und spielen Sie Ihre Tracks ab, ädern Sie die Lautstärke und fügen
Sie Ihrer Playlist Lieder zu, obwohl Playbacks über SUPERSYSTEM laufen.
Nächstes Ma, wenn Sie Spotify öffnen, Playback wird über SUPERSYSTEM
weiterlaufen.
Die Musik kann auch über die Tasten kontrolliert werden, die
sich auf Ihrem SUPERSYSTEM befi nden.
Das Audio strömt direkt von Spotify zu SUPERSYSTEM und die Spotify-App
wird nur als eine Fernbedienung verwendet. Dies bedeutet, dass Ihr Telefon
oder Tablet weiterhin zum telefonieren verwendet werden kann. Es kann
sogar abgeschaltet werden, ohne die Musik zu unterbrechen.
Spotify connect ist ein Cloudbased Service. Somit muss sich Ihr iOS/
Android-Gerät nach Einschaltung Ihres SUPERSYSTEMS nicht mehr auf dem
selben Netzwerk befi nden, um das Audio-Playback zu kontrollieren.
SUPERSYSTEM verfügt auch über einen eigenen Spotify-Connect-Mode. Um
diesen einzurichten, drücken Sie die SPOTIFY-Taste auf dem Frontpaneel oder
die MODE-Taste, so lange bis SPOTIFY Info auf dem Bildschirm erscheint.
Verwendung eines anderen Spotify Accounts mit SUPERSYSTEM
Die Details Ihres Spotify Accounts sind nun in Ihrem SUPERSYSTEM
gespeichert. Um diese durch einen anderen Spotify-Account zu
überschreiben, folgen Sie einfach den Aktivierungsschritten und Spotify
App wird Ihren gewünschten Account verwenden. Vergessen Sie nicht,
dass sich hierzu sowohl Ihr iOS/Androis-Gerät als auch Ihr SUPERSYSTEM sich
im selben Netzwerk befi nden müssen.
Achtung:
Ihre Spotify-App wird SUPERSYSTEM nur erkennen, wenn das Radio mit
Internet verbunden ist (z.B. Internet Radio oder Music player Modus).
Zur Verwendung von Spotify, wenn Ihr Radio sich nicht im Internet Modus
befi ndet (DAB, FM), müssen Sie „KEEP NETWORK CONNECTED“ in Ihrem
Radio im Menü „NETWORT SETTINGS“ wählen. Dies ermöglicht Ihnen auch,
das Radio mit Ihrer Spotify-App aus dem Standbymodus zu „wecken“.
30
Page 75

APP CONTROL AND MULTIROOM
Nun kennen Sie die unterschiedlichen Funktionsweisen von
SUPERSYSTEM.
Dank der Zufügung der UNDOK-Technologie, kann das
Audio nun zu anderen kompatiblen Geräten in Ihrem Heim
weitergegeben werden und so eine komplette Musikumgebung
herstellen.
Falls Sie mehr als ein UNDOKfähiges Produkt besitzen, z.B. zwei
SUPERSYSTEMS, können Sie diese Geräte drahtlos verbinden und
ein Multiraumsystem schaffen.
Multiroom kann mit einer UNDOK-App. Oder auf dem
SUPERSYSTEM selbst eingerichtet werden.
UNDOK App
Diese innovative und einfach anzuwendende App arbeitet nicht
nur als full remote control (Fernbedienung) für eine einziges
SUPERSYSTEM, sondern ist auch das Kontrollgerät für Ihr gesamtes
Multiraumsystem, falls Sie mehr als ein UNDOKfähiges Gerät
verwenden.
Vorerst müssen Sie die „UNDOK“ App vom Apple App Store
(iOS-Geräte) oder Google Play Station (Androidgeräte)
herunterladen.
Versichern Sie sich, dass Ihr Telefon oder Tablet mit dem selben
Wirelessnetzwerk arbeitet wie Ihr SUPERSYSTEM. Laden Sie die
UNDOK App und auf Ihren UNDOKfähigen Geräten müsste
eine „Audio Systems“ Öffnungsbildschirm aufscheinen. Die App
ermöglicht Ihnen die Kontrolle persönlicher Geräte oder kann
Gerätegruppen schaffen und so ein Mulitraumsystem schaffen.
Das UNDOK-System wird andauern updated und verbessert. Für
Informationen und Schnellstartanweisungen, konsultieren Sie
bitte: www.revo.co.uk
31
Page 76

MULTIROOM
UNDOK MULTIRAUM SETUP
Falls mehr als ein SuperSystem auf dem selben Netzwerk in
Betrieb ist, (oder ein anderes UNDOK-fähiges Gerät) können Sie
so ein Multiraum-System ohne UNDOK-App schaffen.
Drücken Sie die Taste auf dem Frontpaneel für den Zugriff in
das Multiraum-Setupmenü.
Wählen Sie nun „Schaffe neue Gruppe“ zur Schaffung und
Benennung einer neuen Multiraum-Gruppe (z.B. Erdgeschoß).
SuperSystem fordert Sie dann auf, dieser Gruppe andere
Geräte zuzufügen.
MULTIRAUM MENÜOPTIONEN
Sie sehen die Details Ihrer Multiraumgruppe, z.B. ob das
Gerät ein Server (master) oder Client (slave) ist, sowie den
Gruppennamen.
Als Server können Sie Ihrer Multiraumgruppe weitere Geräte
zufügen.
Achtung: diese Funktion kann nur der Server ausführen.
Listen Sie die laufenden Clients in der Gruppe oder löschen Sie
diese dort, falls gewünscht.
Falls das soeben verwendete Gerät ein Client (slave) ist, könne
Sie wählen, die Multiraumgruppe zu verlassen.
Falls das laufende Gerät ein Server ist, können Sie die
Multiraumgruppe komplett löschen.
Multi-room
View details >
Create new group
Add to group >
List current clients >
Leave group
Multi-room
View details >
Create new group
Add to group >
List current clients >
Leave group
Multi-room
View details >
Create new group
Add to group >
List current clients >
Leave group
Multi-room
View details >
Create new group
Add to group >
List current clients >
Leave group
Multi-room
View details >
Create new group
Add to group >
List current clients >
Leave group
Multi-room
Create new group
Add to group >
List current clients >
Leave group
Dissolve group
32
Page 77

MULTIROOM
UNDOK MULTIRAUM VORGANG
Sobald Sie ein Multiraumsystem geschaffen haben, können Sie
dieses komplett über di e UNDOK-App für iOS oder Android
(siehe Seite 31) kontrollieren.
Sie können das System auch über Ihr Revogerät
folgendermaßen kontrollieren:
VERWENDUING DES SERVER-GERÄTS
Sobald Ihre Multiraumgruppe aktiviert ist, wird das Servergerät
vorgeben, welcher Modus spielt. Falls Sie den Modus ändern,
werden die anderen Geräte diesem folgen.
VERWENDUNG DES CLIENT-GERÄTS
In einem Multiraum-System funktionieren alla Clientgeräte
als Slaves des Servergeräts. Sollten Sie den Abspielmodus auf
einem Clientgerät ändern wollen, wird dieses Gerät dann der
Gruppenserver werden.
LAUTSTÄRKENKONTROLLE
Die Laufstärkenregelung (auch des Servers) erfolgt für jedes
Gerät einzeln.
Zur Lautstärkenkontrolle des gesamten Multiraumsystems
gleichzeitig, verwenden Sie bitte die UNDOK-App.
SPOTIFY CONNECT – MULTIRAUM
Wenn Sie mit Ihrem SUPERSYSTEM die Spotify-App verwenden
(siehe Seite 28), können Sie diese auch mit dem UNDOK
Multiraum-System nutzen. Sobald eine Multiraumgruppe
geschaffen wurde (z.B. „Erdgeschoß“), wird die Spotify-App
dies erkennen und Sie können die gesamte Gruppe mittels der
Spotify-App verwalten.
33
Page 78

WECKER
WECKEREINSTELLUNG
SUPERSYSTEM speichert die Weckereinstellung auf zwei Arten ein.
Zur Einstellung oder Weckeränderung drücken oder
aus dem MENU wählen, dann MAIN MENU, dann ALARMS.
Wählen welche WECKEREINSTELLUNG (Alarm 1 oder Alarm 2)
Sie ändern oder aktivieren möchten.
Mittels Joystick Controller die Anwendungen unten durchlaufen
und Ihre Präferenzen auswählen:
• Aktivierung: on/off ODER „täglich“, „Wochenenden“ oder „Werktage“
• Uhrzeit
• Modus: Buzzer, Internet Radio, DAB oder FM
• Preset: zuletzt gehörte Musik oder Lieblingssender Preset 1-10
• Lautstärke: 0 - 32
Sabald Ihre Präferenzen eingestellt sind, bestätigen Sie bitte mit SAVE.
SUPERSYSTEM zeigt alle aktiven Wecker mittels einer Ikone am unteren
Bildschirmende an.
Im STANDBY MODE und durch drücken von können Sie alle
gespeicherten Wecker ON oder OFF schalten. Drücken von
durchläuft ALARM 1 und ALARM 2 und ermöglicht Einstellungen,
Aktiverung und Löschungen. Wenn die Weckerikonen angezeigt sind,
ist der Wecker aktiviert. Falls keine Ikone aufscheint,sind die Wecker
deaktiviert.
WECKERABSCHALTUNG
Wenn der Wecker läutet, STOPPT diesen ein Drücken von POWER oder
.
Alarms
Alarm 1: Off [06:55AM]
Alarm 2: Off [07:50AM]
Alarm 1
Enable : Daily
Time : 7:30AM
Mode : internet radio
Preset : last listened
Volume : 6
12/10/2014
14:30
06:55AM 07:50AM
Nach Abschalten des Weckers erscheint eine Meldung ALARM OFF auf
Ihrem SUPERSYSTEM-Bildschirm.
34
Alarm off
Page 79

WECKER
SLEEP MODUS
Über diese Funktion können Sie SUPERSYSTEM so einstellen, dass es
sich automatisch In den STANDBY-Modus schaltet.
Drücken Sie , dann wählen Sie MAIN MENU, dann SLEEP. Sie
können nun den SLEEP-Timer folgendermaßen einstellen: 15, 30, 45
oder 60 Minuten. Sobald Sie die Schlafdauer eingestellt haben, kehrt
SUPERSYSTEM in das MAIN MENU Zurück.
SNOOZEFUNKTION
SUPERSYSTEM verfügt über eine SNOOZE-Funktion, die sich im
Aluminium-Frontpaneel befi ndet. SNOOZE wird durch die Berührung
irgendeines Metallteils während des Weckerläutens aktiviert.
SNOOZE erlaubt Ihnen die Stillstellung des Weckers für einen Zeitraum
bis zu 30 Minuten.
Die SNOOZE-Dauer kann nur eingestellt werden, während Ihr Wecker
läutet. Nun berühren Sie einfach auf das Frontpaneel, um die
gewünschte SNOOZE-Dauer, entweder 5, 10, 15 oder 30 Minuten
einzustellen.
Achtung: die Snooze-Funktion kann nur bis 60 Sekunden nach dem
Beginn des Weckerläutens aktiviert werden, - dies bedeutet dass
wenn Sie das Frontpaneel nicht innerhalb von 60 Sekunden berühren,
die Snooze-Funktion nicht aktiviert.
Wenn SNOOZE aktiviert ist kehrt SUPERSYSTEM in Standby für die
Einstellzeit zurück und zeigt eine Ikone mit den SNOOZED-Wecker an.
Set sleep time
15 MINS
Set snooze
5 MINS
35
Page 80

SYSTEMEINSTELLUNGEN
EQUALISER
SUPERSYSTEM bietet dem Anwender eine Reihe wichtiger
Kontrollmöglichkeiten dessen Standards (Fabrikeinstellung) der
Audioeinstellungen. Dies beinhaltet die komplette Kontrolle über BASS
und TREBLE, LOUDNESS und die Abilitierung einer der verfügbaren
EQ-Einstellungen. Es kann auch eine persönliche EQ-Einstellung
geschaffen werden, auch als „My EQ“ bekannt.
Zur Nachstellung der Audioeinstellungen drücken sie , dann
wählen Sie MAIN MENU, gefolgt von SYSTEM SETTINGS. Nun wählen Sie
EQUALISER aus dem Menü.
SUPERSYSTEM zeigt nun eine Liste von neun EQ-Optionen an, wie folgt:
Normal, Flat, Jazz, Rock, Movie, Classic, Pop, News und My EQ.
Wählen Sie nun einfach Ihre Präferenz aus der Liste. Hierzu Ihre Option
beleuchten und die Wahltaste drücken. SUPERSYSTEM WIRD NUN
Ihre Einstellung einspeichern. Zur Erleichterung: die laufenden EQEinstellungen sind durch Stern (*) in der EQ-Liste hervorgehoben.
Zur Konfi gurierung Ihrer persönlichen EQ-Einstellungen wählen Sie MY
EQ PROFILE SETUP aus dem EQUALISER-Menü. Regeln Sie nun BASS
und TREBLE-Höhen, entscheiden Sie ob Sie die LOUDNESS-Funktion auf
OFF oder ON stellen wollen, bevor Sie mit SAVE Ihre Wahl bestätigen.
Ihre persönlichen EQ-Einstellungen können nun durch wählen von MY
EQ aus dem EQUALISER-Menu angezeigt werden.
My EQ profile
Bass : 0
Treble : 0
Loudness : Off
Equaliser
Classic
Pop
News
My EQ
My EQ profile setup >
Bass
Bass
0
dB
36
Page 81

SYSTEMEINSTELLUNGEN
NETZWERK
Das NETZWERKMENÜ befi ndet sich unter SYSTEM SETTINGS IM MAIN
MENU.
Für erfahrenere Anwender sind auch mehrere manuelle Einstellungen
verfügbar, wie hier in der Folge aufgelistet:
NETWORK WIZARD :
Vereinfacht die Einrichtung der Internet-Verbindung Ihres Radios,
indem Sie Ihnen Schritt für Schritt Anweisungen gibt.
PBC WLAN SETUP :
Dient zur Verbindung Ihres Radios mit einem Router, der WPS-Sicherheit anwendet.
EINSTELLUNGSANSICHT:
Zeigt die MAC-Adresse, Wlan-Region, usw.
WLAN REGION :
Wo Sie Ihr SUPERSYSTEM verwenden- Europa, USA, usw.
MANUELLE EINSTELLUNGEN :
Detaillierte Kontrolle von Netz- und Wirelessverbindungen.
NETWORK PROFIL:
Zeigt die Namen der letzten vier Wireless-Netzwerke an, mit denen
SUPERSYSTEM zuletzt verbunden war.
CLEAR NETWORK SETTINGS :
Löscht die eingestellten Netzwerkeinstellungen.
Internet Setup
Network Wizard
scanning/
Internet Setup
Internet Wizard
PBC Wlan setup
View settings
Wlan region >
Manual settings
Network settings
Wlan region
Manual settings
NetRemote PIN Setup
Network profile
Keep network connected
KEEP NETWORK CONNECTED :
KEEP NETWORK CONNECTED: durch Auswählen von „Yes“ bleibt Ihr
Radio mit dem WiFi-Netzwerk verbunden, auch wenn es sich nicht im
Internet-Modus (DAB/FM) oder in Standby befi ndet. Dies ermöglicht
Ihnen jederzeit Zugriff von UNDOK App oder SPOTIFY-App.
ACHTUNG: SUPERSYSTEM behält die letzten vier Wireless-Netzwerke
eingespeichert, mit denen es verbunden war und versucht automatisch, sich mit einem davon zu verbinden. Sie können jedenfalls
unerwünschte Netzwerke einfach löschen, indem Sie SYSTEM SETTINGS, dann NETWORK, dann NETWORK PROFILE wählen. Nun das zu
löschende Netzwerk auswählen und die Auswahl mit YES bestätigen.
37
Page 82

SYSTEM SETTINGS
UHRZEIT/ DATUM
Im SYSTEM SETTINGS-Menü fi nden Sie die Optionen zur Änderung
einiger Zeit/Datumeinstellungen. Das Menü UHRZEIT/DATUM enthält
folgende drei Listen.
UHRZEITEINSTELLUNG/DATUM : zur manuellen Einstellung von Uhrzeit/
Datum
AUTO UPDATE : wählt zwischen drei verschiedenen, automatischen
Einstellungsoptionen
SET FORMAT : zur Auswahl zwischen 12 oder 24 Stunden Format.
Aktualisierung mittels DAB :
Bezieht die Uhrzeit/Datum vom DAB-Signal. SUPERSYSTEM muss hierzu
im DAB-Modus funktionieren (und ein Signal empfangen haben) bevor
diese Information erhalten werden kann.
Aktualisierung vom Netzwerk:
Bezieht Uhrzeit/Datum aus Ihrer Internetverbindung.
SPRACHE
Die Vorzugssprache Ihres Radios ist Englisch. Es können jedoch auch
folgende 12 Sprachen gewählt werden:
Deutsch Finnisch Holländisch Französich
Italienisch Dänisch Spanisch Portugiesisch
Norwegisch Schwedisch Türkisch Polnisch
Zur Sprachänderung wählen Sie SYSTEM SETTINGS aus dem MAIN MENU,
dann SPRACHE und bestätigen dann mittels select.
Time/Date
Set Time/Date
Auto update >
Set format
Set timezone >
Daylight savings
Auto update
Update from DAB
Update from Network *
No update
Language
English *
Danish
German
Italian
Norweigian
38
Page 83

SYSTEM SETTINGS
FABRIKEINSTELLUNG
Durch Auswahl von FACTORY RESET aus dem SYSTEM SETTINGS-MENU
können Sie SUPERSYSTEM wieder in die Fabrikeinstellung bringen und
so alle persönlichen Einstellungen Löschen (Uhrzeit/Datum, Netzwerk,
alle Konfi gurationen werden gelöscht). Die aktuelle Software Ihres
Radios wird beibehalten, da es im Internetportal registriert wurde.
Internetradio-Lieblingssender werden somit beibehalten, falls Sie Ihr
Radio nicht mit einem anderen Account im Portal registrieren.
Zur Fabrikeinstellung drücken Sie , dann wählen Sie MAIN MENU;
gefolgt von SYSTEM SETTINGS, dann FACTORY RESET. Nun antworten
Sie mit YES.
SOFTWARE UPDATES
Von Zeit zu Zeit führen wir Software-Updates für Ihr SUPERSYSTEM
durch. Dies sind sowohl aufgrund allgemeiner Wartungsgründen erforderlich als auch um Ihrem Radio zusätzliche Funktionen zuzufügen.
Software-Updates erfolgen „over-the-air“ über Ihre Senderverbindung.
SUPERSYSTEM sucht fortlaufend bei jeder Einschaltung nach SoftwareUpdates und wird Sie fragen, ob Sie diese wüschen oder nicht, - falls
Sie akzeptieren, beginnt der Download.
Nach dem Software-Upgrade bleiben alle Bedienereinstellungen
erhalten.
Sollten Sie eine manuelle Softwaresuche nach Updates vornehmen
wollen, drücken Sie und wählen Sie MAIN MENU. Nun wählen Sie
SYSTEM SETTINGS, dann MENU, SOFTWARE UPDATES. Wählen Sie AUTOCHECK-SETTING, dann NO.
Zur manuellen Suche nach Updates wählen Sie CHECK NOW aus
dem SOFTWARE UPDATES-Menü.
ACHTUNG: vor jedem Software-Upgrade versichern Sie sich, dass
SUPERSYSTEM an ein stabiles Stromnetz angeschlossen ist. Eine
Stromunterbrechung während des Software-Updates könnte Ihr Gerät
unwiderrufl ich beschädigen.
Factory Reset
Proceed?
YES NO
Software update
Auto-Check setting *
Check now
39
Page 84

SYSTEM SETTINGS
SETUP WIZARD
Der SETUP WIZARD aktiviert sich automatisch bei der ersten
Einschaltung Ihres SUPERSYSTEMS und man kann auch durch das
Menü neuerlich zugreifen. Es vereinfacht die Einstellung von Uhrzeit/
Datum und von Internet, mittels Durchlaufen einiger Fragen.
Für den SETUP WIZARD drücken, dann MAIN MENU wählen,
gefolgt von SYSTEM SETTINGS. Nun wählen Sie SETUP WIZARD aus
der Menüliste.
INFO
System settings
Language
Factory reset
Software Update
Setup Wizard >
Info
Falls Sie den technischen Kundendienst in Anspruch nehmen, könnte
man Sie nach der SOFTWARE VERSION oder RADIO-Gerätenummer
fragen. Beide Informationen fi nden Sie in der INFO-Überschrift im
Menü SYSTEM SETTINGS.
Drücken Sie und wählen dann MAIN MENU, gefolgt von SETTINGS,
dann INFO.
HELLIGKEIT
SUPERSYSTEM ermöglicht die Einstellung der Bildschirm-Helligkeit.
SUPERSYSTEM ON LEVEL für den normalen Gebrauch, kann auf LOW,
MEDIUM und HIGH geregelt werden.
SUPERSYSTEM DIM LEVEL für den Standbymodus kann auf OFF, LOW,
MEDIUM oder HIGH geregelt werden.
Es ist auch eine TIMEOUT-Einstellung möglich – eine Verspätung der
Bildschirmhelligkeit, wenn Sie in den Standby-Modus gehen.
Achtung: wenn „OFF“ gewählt ist, schaltet sich der Bildschirm von
SUPERSYSTEM ab, wenn es sich im Standbymodus befi ndet. Sie
können den Bildschirm wecken, indem sie einfach irgendeine Taste
drücken oder das Metall-Frontpaneel.
Info
SW version:
domino_V2.0.16.25756-5
Radio ID:
00226100C3D6
Brightness
Timeout >
On level >
Dim level >
40
Page 85

TROUBLESHOOTING
PROBLEM URSACHE LÖSUNGEN
FM: HISS
DAB: kratzend/intermittent
Unterbrechung
Schwaches Signal Antenne prüfen/bewegen.
Radio woanders hinstellen.
Senderdurchlauf (starken Empfang
suchen) auf starken Empfang.
DAB: keine Sender verfügbar Schwaches Signal Wie oben, dann Sender
durchscannen.
Keine Networkverbindung möglich Kein Networt verfügbar. Prüfen, ob Network zwischen
Computer und Router arbeitet.
Router verhindert Zugriff zu den
aufgelisteten MAC-Adressen.
Entnehmen Sie die SUPERSYSTEM
MAC-Adresse aus MENU>SYSTEM
SETTINGS>NETWORK>VIEW SETTINGS
und fügen Sie den Router der Liste
hinzu.
ACHTUNG: SUPERSYSTEM hat eigene MACAdressen für netzgebundene und netzlose
Networks. Es wird nur die laufende Network
Adapter-Methode angezeigt, es können jedoch
die anderen Adressen durch Ändern der ersten
beiden Zeichen zwischen „00“ (wireless) und „02“
(Netz) geändert werden.
Unzureichende WiFi-Signal-Stärke Abstand zum Router prüfen.
Kontrollieren, ob ein Computer in
diesem Raum mit dem Network
verbunden werden kann.
Unbekannte Verschlüsselungsmethode
Verschlüsselungsmethode auf dem
Router ändern. SUPERSYSTEM arbeitet mit WEP, WPA und WPA2.
Ungewöhnliche Networkkonfi guration
Network manuell einstellen,
mittels MENU >SYSTEM
SETTINGS>NETWORK>MANUAL SETTINGS.
Firewall verhindert Zugang Prüfen Sie dass folgende Ports auf
dem Router geöffnet sind:
UDP und TCP Ports 80 und 123
DNS port 53
Windows shares: ports 135-139 und
445
Windows media player: unterschiedlich. Falls keine Microsoft
Firewalls in Verwendung können
andere UPnP-Konfi gurationen
verlangt werden.
41
Page 86

TROUBLESHOOTING
PROBLEM URSACHE LÖSUNGEN
Internet-Verbindung nicht möglich Keine Internetverbindung vorhan-
Bestimmte Intenet-Radiosender
können nicht gespielt werden
Bluetooth Mode: verbindet nicht
mit einem vorgesehenen Gerät
Bluotooth Mode: schlechte Audioqualität
den.
Firewall unterbindet Zugriff Prüfen ob folgende Ports geöffnet
Sender überträgt nicht. Überladene oder nicht ausreichende
Bandbreite.
Übertragender Sender verwendet
unbekannten Kodex.
Link verfallen.
Ihr Bluetoothgerät ist außer Reichweite
Elektromagnetische Störungen
Prüfen, ob Internet mit einem verbundenen Computer arbeitet, der
an das selbe Netzwerk angeschlossen ist.
sind:
UDP und TCP ports 80 und 123
DNS port 53.
Einige Internet-Radiosender benötigen zusätzliche ports, um geöffnet
werden zu können.
Versuchen Sie andere Sender.
Versuchen Sie, am Computer über
das Internet Radioportal die selbe
Website.
Versuchen Sie es später noch
einmal.
Wählen Sie BT DISCONNECT aus
dem Bluetooth-Menü und löschen
Sie das SUPERSYSTEM-Profi l von
Ihrem Bluetooth-Gerät, dann
verbinden Sie die Geräte wie
üblich.
Nähern Sie Ihr Bluetoothgerät
Ihrem SUPERSYSTEM.
Stellen Sie Ihr Bluotoothgerät weiter
weg von anderen Quellen, die
stören könnten, wie z.B. andere
Bluotoothgeräte , Wireless-Routers,
usw.
42
Page 87

FEHLERMELDUNGEN
MELDUNG BESCHREIBUNG BEISPIEL
Keine Verbindung hergestellt Korrekter Code eingegeben,
Formatfehler Erkennt Dateiformat
Networkfehler Problem an vergangenem Router
Network timeout Problem mit vergangenem Router
Kein UPnP Media gefunden Keine UPnP-Servers gefunden.
Dienst nicht verfügbar (DAB) Kein DAB-Empfang
Nicht autorisiert UPnP-Server verbietet Zugriff. Genehmige Zugriff für SUPERSYSTEM
Update nicht gelungen Software-Upgrade nicht gelungen
Network nicht bereit Problem mit der Verbindung zum
Kein Media oder Warten auf
Spotify
Router akzeptiert Anfrage nicht.
nicht- unabhängig vom Network
– unkorrekte Daten von Network
erhalten.
– keine Antwort vom Network
erhalten.
Router.
Spotify-Verbindung ist
unterbrochen oder Verbindung
wurde an ein anderes Gerät
übertragen.
MAC-Filter auf Router aktivieren.
Empfängt .wma aber Sender
war nicht WMA während der
Dekodierung.
Vom Server erhaltene Daten können nicht gelesen werden.
IR-Sender läuft, - wird jedoch auf
einmal unverfügbar.
in den UpnP Server-Einstellungen
Router abgeschaltet.
43
Page 88

44
Page 89

Owner’s Guide
v1.0
Français
Page 90

SUPPORT TECHNIQUE
GARANTIE
Si vous deviez rencontrer des problèmes en utilisant ce produit,
veuillez vous référer à la section Résolution des problèmes à la page
41 de cette notice d’utilisation. Sinon, merci de bien vouloir appeler
l’assistance technique de Revo au:
UK 01555 666161
De l’étranger: + 44 1555 666161
Sinon, e-mail support@revo.co.uk ou bien rendez-vous à la section
Résolution des problèmes de notre site Web : www.revo.co.uk/support
INFORMATIONS
ENVIRONNEMENTALES
INFORMATIONS SUR L’ÉLIMINATION DU PRODUIT (Directive WEEE)
Le symbole représenté ici-même ainsi que sur le produit signifi e que
celui-ci est classé comme équipement électrique ou électronique et
ne doit pas être jeté avec les déchets ménagers ou commerciaux à la
fi n de sa durée de vie.
L’élimination des équipements électriques et électroniques (WEEE)
Directive (2002/96 / CE) a été mise en place pour recycler les produits
utilisant les meilleures techniques de récupération et de recyclage
disponibles afi n de minimiser l’impact sur l’environnement, de traiter les
substances dangereuses et d’éviter les décharges.
Pour plus d’informations, veuillez contacter votre autorité locale ou bien
le point de vente où le produit a été acheté.
CONFORMITÉ À LA NORME RoHS & CE MARK
Ce produit a été conçu conformément aux directives internationales
sur la restriction des substances dangereuses (RoHS) et a été conçu et
homologué conformément aux exigences de l’UE et porte la marque
CE.
Revo Technologies Ltd garantit au consommateur fi nal que ce
produit sera exempt de défauts de matériaux et de fabrication
dans le cadre d’une utilisation normale pour une période d’un an à
compter de la date d’achat.
Cette garantie couvre les pannes dues à des défauts de fabrication
et n’est pas valable en cas de dégâts accidentels, de détérioration
et d’usure habituelle, de mauvaise utilisation, de modifi cation ou de
réparation non autorisée par Revo Technologies Ltd.
Pour enregistrer votre achat, veuillez vous rendre sur
www.revo.co.uk/register
COPYRIGHTS ET
REMERCIEMENTS
Copyright 2015 Revo Technologies Ltd. Tous droits réservés.
Aucune partie de cette publication ne peut être copiée, distribuée,
transmise ou transcrite sans la permission de Revo Technologies
Limited.
REVO et SUPERSYSTEM sont des marques ou des marques déposées
de Revo Technologies Limited.
La marque Bluetooth® et les logos sont des marques enregistrées
possédées par Bluetooth SIG, Inc. Toute utilisation de cette marque
doit être faite sous License. aptX® est une marque de CSR plc.
Revo Technologies Ltd
The Inox Building, Caldwellside, Lanark,
Scotland, United Kingdom, ML11 7SR
Tel: +44 (0) 1555 66 61 61 Email: enquiries@revo.co.uk
Le logiciel Spotify est soumis à des licences de tiers : www.spotify.
com/connect/third-party-licenses
AVERTISSEMENTS DE SÉCURITÉ
• Ne pas faire fonctionner cette radio près de l’eau
• Ne pas retirer les vis ou éléments du boîtier
• Utilisez uniquement le bloc d’alimentation fourni
• Faites en sorte que de petits objets et des liquides n’entrent
pas dans l’objet.
02
NON-RESPONSABILITÉ
Revo Technologies Limited ne fait aucune déclaration ni ne donne
aucune garantie sur le contenu de cette publication et rejette
expressément toute garantie implicite de qualité marchande ou
d’adéquation à un usage particulier.
De plus, Revo Technologies Limited se réserve le droit d’apporter des
modifi cations à cette publication périodiquement, sans notifi cation
préalable à toute personne ou organisation.
Page 91

CONTENUS
02 Support technique
02 Info environnementale
02 Garantie
02 Copyrights et acceptations
02 Non-responsabilité
03 Bienvenue / Déballage
04 Anatomie
05 Télécommande
05 Alimentation
06 Installation
07 Structure du menu et du contrôle
08-09 Assistant de confi guration
10-11 Mode DAB
12-13 Mode DAB Menu Options
14 Mode FM
15 Mode FM / Mode AUX-IN / Mode Optical In
16-17 Bluetooth
18-21 Mode Radio Internet
22 Portail Radio Internet
23-24 Installation d’un serveur de musique
24-27 Mode lecteur de musique / recharge USB
28-30 Spotify Connect
34-35 Réveil
36-40 Paramètres Système
41-42 Résolution des problèmes
43 Messages d’erreur
BIENVENUE
Merci d’avoir acheté notre système de musique digitale
SUPERSYSTEM, nous sommes certains qu’elle vous satisfera pendant
de nombreuses années et qu’elle vous offrira un service fi able.
SUPERSYSTEM est un système de musique tout à fait moderne, qui
associe des valeurs traditionnelles de l’artisanat et de l’intégrité
matérielle avec la technologie numérique de dernière génération et
la performance acoustique enveloppante.
SUPERSYSTEM frappe en plein coeur de votre écosystème musical,
vous offrant toutes les bandes sonores que vous désirez, quand vous
le voulez et où vous le voulez. Grâce à l’inclusion de la technologie
UNDOK, la musique peut être diffusée en Wireless vers d’autres
appareils compatibles qui se trouvent chez vous, afi n de créer une
atmosphère audio multiroom et sophistiquée.
Ce guide a été conçu pour vous familiariser rapidement avec
votre SUPERSYSTEM, vous offrant des conseils sur les fonctions les
plus complexes de ce produit et vous donne des informations sur la
sécurité, les détails de la garantie et la résolution des problèmes.
DÉBALLAGE
La boîte SUPERSYSTEM inclut les pièces suivantes:
• SUPERSYSTEM
• Télécommande
• Alimentation avec adaptateurs multi-pays
• Chiffon de nettoyage
• Fiche de garantie
• Guide de l’utilisateur
Si un élément est manquant ou endommagé, veuillez contacter
votre point de vente ou appelez Revo directement au +44 (0) 1555
66 61 61
REMARQUE: Tous les emballages doivent être conservés pour une
utilisation future et éventuelle ; c’est le moyen le plus sûr pour
transporter votre radio en cas de nécessité.
03
Page 92

ANATOMIE DE SUPERSYSTEM
Port de remplissage d'USB
Telescopic
Antenna
touches d’accès direct aux principaux modes et menus
réglage du volume
Stations prédéfinies 1-10
Marche/ Veille
contrôle du joystick Touche SELECTION
arrêt momentané
3.5 connecteurs écouteurs
touche média
04
alimentation DC Aux-In entrée numérique
optique
sortie numérique
connecteurs stéréo RCA LAN câblé Port de mise à jour
optique
software
Protection Kensington
Page 93

TÉLÉCOMMANDE
Power
Mode
Info
Spotify Mode
Skip Back (retour rapide en arrière)
défi ler vers le haut
gauche (en arrière)
défi ler vers le bas
Prédéfi ni 1 - 8
REMPLACEMENT BATTERIE
La télécommande SUPERSYSTEM se charge avec deux batteries AA.
Selon l’utilisation que vous en faites, les batteries devraient durer de
1 à 2 ans.
Menu
augmentation du volume
diminution du volume
aller en avant
Marche / Pause
droite (en avant)
Selection
Remplacez les batteries lorsqu’il est plus diffi cile d’appuyer sur la
touche ou bien lorsque l’autonomie a visiblement diminué.
05
Page 94

ALIMENTATION (PSU)
Votre SUPERSYSTEM est fourni avec une alimentation
multi- région, ce qui signifi e qu’il peut être utilisé dans de
nombreux pays dans le monde.
Il suffi t de choisir l’adaptateur correspondant à votre pays
puis de suivre les instructions ci-dessous :
INSTALLATION
Attachez, serrez et tirez l’antenne pour un fonctionnement en DAB ou FM.
1
EU USA AUSTRALIAUK
Transformateur
2
Utilisez le PSU fourni et connectez une extrémité à l’alimentation DC située à
l’arrière de votre radio, puis branchez l’autre extrémité à la prise de courant du mur.
3
Appuyez sur la touche POWER pour appeler l’assistant de confi guration (voir page 08).
06
Page 95

CONTRÔLE DE SUPERSYSTEM
Afi n de profi ter au maximum de votre appareil, il est important de
comprendre comment son joystick et son menu fonctionnent.
CONTRÔLE DU JOYSTICK
SUPERSYSTEM utilise un système de contrôle basé su un joystick.
Le joystick a quatre fonctions et est utilisé conjointement à un bouton
SELECTION qui en est séparé.
UP défi le vers le haut
DOWN défi le vers le bas
LEFT défi le vers la gauche et va en arrière dans le menu
RIGHT défi le vers la droite et va en avant dans la menu
SELECT sélectionne l’option actuelle
TOUCHE MENU
En appuyant sur la touche , vous arriverez au menu Mode qui
concerne le mode d’opération dans lequel vous vous trouvez. Par
exemple, si vous appuyez sur la touche lorsque vous êtes en mode
DAB, vous arriverez au MENU DAB MODE.
En appuyant une deuxième fois sur la touche, vous retournerez à
l’écran de lecture que vous venez de quitter.
TOUCHE MODE
Appuyer sur la touche pour parcourir chacun des modes de
fonctionnement de SUPERSYSTEM. Cependant, chaque mode a aussi
une touche dédiée sur la face avant. Il est également possible de se
déplacer entre les modes via le MENU PRINCIPAL (voir ci-dessous).
‘LEFT’
(Back)
EXPLICATION DE LA STRUCTURE DU MENU
MENU PRINCIPAL
C’est le menu principal de SUPERSYSTEM, qui vous permet d’entrer
dans différents modes et de changer les paramètres et affi cher
des informations telles que la version du logiciel de numéro
d’identifi cation de votre radio.
MODE MENUS
Les Menus Mode portent ce nom car ils montrent les fonctions
disponibles dans le mode actuellement sélectionné.
En appuyant sur la touche à n’importe quel moment, vous
arriverez au Menu Mode pour le mode de fonctionnement dans
lequel est votre radio.
Chacun des Menus Modes comprend également une liste pour le
MENU PRINCIPAL, vous permettant de revenir au MENU PRINCIPAL.
‘UP’
‘DOWN’
‘RIGHT’
(Forward)
07
Page 96

ASSISTANT DE CONFIGURATION (SETUP WIZARD)
UTILISATION DE L’ASSISTANT DE CONFIGURATION
La première fois que vous utilisez SUPERSYSTEM, on vous demandera si vous souhaitez ouvrir l’ASSISTANT DE CONFIGURATION.
L’ « ASSISTANT » vous posera une série de questions ; c’est le moyen le plus simple pour mettre votre appareil en marche.
Vous pouvez relancer SETUP WIZARD quand vous le souhaitez ; vous le trouverez dans le MENU PARAMÈTRES DE SYSTÈME.
Appuyez sur la touche SELECTION puis commencez la procédure d’ASSISTANCE DE CONFIGURATION.
Date/Time
Choisissez et sélectionnez votre format préféré pour l’heure
1
(12 ou 24 heures).
12/24 hour format
12 24
*
Choisissez et sélectionnez où vous aimeriez que SUPERSYSTEM base
2
son heure. (Remarque : Si vous utilisez SUPERSYSTEM dans un pays où
DAB est transmis, c’est la méthode la plus simple pour s’assurer que
les paramètres de date et heure sont correctement maintenus).
Si vous avez choisi « Mise à jour à partir du Réseau », veuillez faire
3
défi ler et sélectionner votre fuseau horaire à partir du menu.
If you’ve chosen ‘Update from Network’ please select your preferred
4
daylight savings status.
En sélectionnant « Oui » à « rester connecté au réseau », votre
5
SUPERSYSTEM restera connecté à votre réseau Wi-Fi, même dans
les modes non-internet (DAB/ FM) et en veille. Ceci vous permet
d’y accéder à partir de l’app UNDOK ou SPOTIFY à n’importe quel
moment.
Défi lez et sélectionnez la région où vous utilisez SUPERSYSTEM. Ceci
6
permettra de faire un scan du bon réseau Wi-Fi (les fréquences Wi-Fi
varient dans le monde entier).
08
Auto update
Update from DAB
Update from Network *
No update
Set Timezone
UTC + 00 : 00 : Dublin , London#
UTC + 00 : 30 :
UTC + 01 : 00 : Madrid , Ar
UTC + 01 : 30 :
UTC + 02 : 00 : Athens , Ci
Daylight savings
Daylight savings
YES NO
Network settings
Keep network connected ?
YES NO
Wlan region
Most of Europe
USA
Canada
Spain
France
Page 97

ASSISTANT DE CONFIGURATION (SETUP WIZARD)
Défi lez et sélectionnez votre RÉSEAU. Dans certains cas, votre radio
7
pourra en trouver plus d’un. Choisissez tout simplement celui que
vous souhaitez utiliser.
Si vous souhaitez utiliser votre radio avec une connexion câblée,
plutôt qu’en Wireless, il vous suffi t de choisir l’option Câblé dans la
liste SSID.
Touche Push - Si votre routeur supporte la connectivité WPS et
8
dispose d’une touche WPS ou Wireless, veuillez sélectionner cette
option et suivre les instructions à l’écran.
Pin - SUPERSYSTEM affi chera un numéro d’identifi cation que vous
insérerez dans votre routeur à l’aide d’un browser (veuillez voir la
documentation d’utilisation de votre routeur).
Enter Passkey - Sélectionnez cette option pour saisir la clé de votre
routeur (également appelée « clé Wireless», « Clé WPA » ou « clé
réseau » Maintenant, allez au point 9 ci-dessous.
SSID
Homehub
FAMILY net
[Rescan]
[Wired]
[Manual config]
WPS Menu
Push Button
Pin
Enter Passkey
Si votre réseau Wireless n’est pas protégé par un mot de passe,
9
SUPERSYSTEM se connectera automatiquement et l’écran suivant
s’affi chera.
Si vous utilisez un mot de passe de protection, insérez votre mot de
10
passe de réseau en utilisant le joystick pour défi ler sur les caractères
alphanumériques, et en appuyant sur SELECTION pour insérer
chaque nombre ou lettre. Lorsque vous avez correctement inséré
votre mot de passe complet, sélectionnez OK.
Sélectionnez (retour en arrière) pour corriger un caractère
BKSP
en allant en arrière. Une fois que vous avez inséré le bon mot de
passe, l’assistant de confi guration sera complété (voir point 9 cidessus).
SUPERSYSTEM mémorisera le mot de passe. Vous n’aurez nul besoin
de réinsérer le mot de passe.
Setup wizard
Setup wizard
completed
Press SELECT to exit
Key:
xxxxx
0 1 2 3 4 5 6 7 8 9 . , a b
c d e f g h i j k l m n o p q
r s t u v w x y z A B C D E
F G H I J K L M N O P Q
BKSP
OK
CANCEL
09
Page 98

MODE RADIO DAB
SE PRÉPARER POUR UN FONCTIONNEMENT EN DAB
Veuillez vous assurer que l’antenne de la radio est allongée avant
d’opérer en Mode DAB.
Pour entrer en MODE DAB, appuyez sur la touche sur la face
avant, ou bien appuyez sur la touche jusqu’à affi cher l’écran
d’introduction du DAB MODE.
Lorsque vous êtes en MODE DAB pour la première fois, SUPERSYSTEM
effectuera automatiquement un scan complet pour voir quelles
stations sont diffusées dans votre région, avant de mémoriser dans
l’ordre alphabétique dans la radio.
Il peut être nécessaire d’effectuer une analyse manuelle de temps
à autre, afi n de mettre à jour la liste des stations de radio. Cela peut
être nécessaire pour l’une des raisons suivantes:
1. La disponibilité des stations peut parfois changer, étant donné
que de nouvelles stations apparaissent ou que des stations existantes
peuvent cesser d’émettre.
2. Si la réception est mauvaise pendant le scan automatique initial, si
par exemple l’antenne de la radio n’a pas été complètement étirée,
il se peut que la liste des stations soit incomplète ou même vide.
3. Si vous avez une mauvaise réception de certaines stations
(résultant en une qualité audio discontinue ou médiocre), vous avez
la possibilité de lister seulement les stations qui ont un signal fort..
Pour lancer un scan manuel, appuyez sur la touche puis
sélectionnez SCAN de la liste de menu.
Lorsque le scan est terminé, SUPERSYSTEM va lister toutes les stations
disponibles.
Scan
Stations : 21
Scanning
DAB
radio
Pour éliminer des stations qui sont présentes dans la liste mais pas
disponibles, appuyez sur puis sélectionnez « PRUNE INVALID ».
Lorsque l’on vous demande si vous souhaitez « éliminer toutes les stations non disponibles », sélectionnez OUI.
10
Prune Invalid
This removes all invalid
stations, continue?
YES NO
Page 99

MODE RADIO DAB
SELECTIONNER UNE STATION
Pour accéder à la liste de vos stations radio, appuyez sur les touches
HAUT et BAS du joystick, ou bien appuyez sur puis sélectionnez
LISTE DES STATIONS.
Faites dérouler les stations disponibles en utilisant les touches HAUT
et BAS du joystick, puis soit appuyez sur la touche SELECTION pour
sélectionner la station de votre choix, soit cliquez DROIT sur le joystick.
STATIONS DE RADIO PRÉDÉFINIES
SUPERSYSTEM vous permet d’enregistrer vos stations préférées comme
prédéfi nies, soit via les 10 touches des stations prédéfi nies qui se
trouvent sur la face avant, soit en utilisant les touches énumérées de la
télécommande.
Pour enregistrer comme prédéfi nie la station que vous êtes en train
d’écouter, appuyez simplement sur « prédéfi ni » en maintenant
appuyé sur la touche jusqu’à ce que « prédéfi ni mémorisé » s’affi che
sur l’écran. Le numéro prédéfi ni qui a été attribué à la station s’affi che
en bas de l’écran, près de l’icône étoile.
Pour changer une prédéfi nition dans le futur, répéter l’opération :
les données auparavant enregistrées seront automatiquement
remplacées.
Station list
Absolute
Amazing
BBC 1Xtr
BBC 6Mus
BBC Gael
BBC Radio 6Music
u to vote for a track that
missed out on the 6:00 AM
Music playlist
11
Page 100

OPTIONS DU MENU DAB MODE
En MODE DAB, SUPERSYSTEM peut affi cher diverses informations sur son écran. En
appuyant sur la touche , vous pouvez faire défi ler les types d’informations
suivants :
ÉCRAN DAB STANDARD Montre le défi lement des informations de la
radio
TYPE DE PROGRAMME Par exemple les Infos, le Rock, la Musique
classique, etc .
MULTIPLEX ET FRÉQUENCE Multiplex et fréquence des stations
FORCE DU SIGNAL Force du signal de la station en cours
BBC Radio 6Music
Now Playing : Glasvegas
Go Square Go!
BBC Radio 6Music
Rock Music
BBC Radio 6Music
BBC National DAB
Freq: 225.648 MHz
BBC Radio 6Music
Signal Level : 90
Strength
DÉBIT ET CODEC Format audio, fréquence d’échantillonnage,
mono ou stéréo
DATE Date d’aujourd’hui
12
BBC Radio 6Music
Bit rate: 128 kbps
Codec : MP2
Channels : Joint Stereo
BBC Radio 6Music
Today’s Date :
22/02/15
 Loading...