

REVELL SUMMER ACTION CIRCLER Assembly Manual
23715
Free Flying ELECTRIC PLANE
CirCler
LIEFERUMFANG / CONTENTS / CONTENU DE LA LIVRAISON /
OMVANG VAN DE LEVERING / CONTENIDO / CONTENUTO
8+
V01.10
© 2015 Revell GmbH, Henschelstr. 20-30,
D-32257 Bünde. A subsidiary of Hobbico, Inc.
REVELL IS THE REGISTERED TRADEMARK OF
REVELL GMBH, GERMANY. Made in China.
D
Nicht für Kinder unter 36 Monaten geeignet.
GB
Not suitable for children under 36 month.
F
Ne convient pas aux enfants de moins de 36 mois.
NL
Niet geschikt voor kinderen jonger dan 36 maanden.
E
No apropiado para niños menores de 36 meses.
I
Non adatto a bambini di età inferiore a 36 mesi.
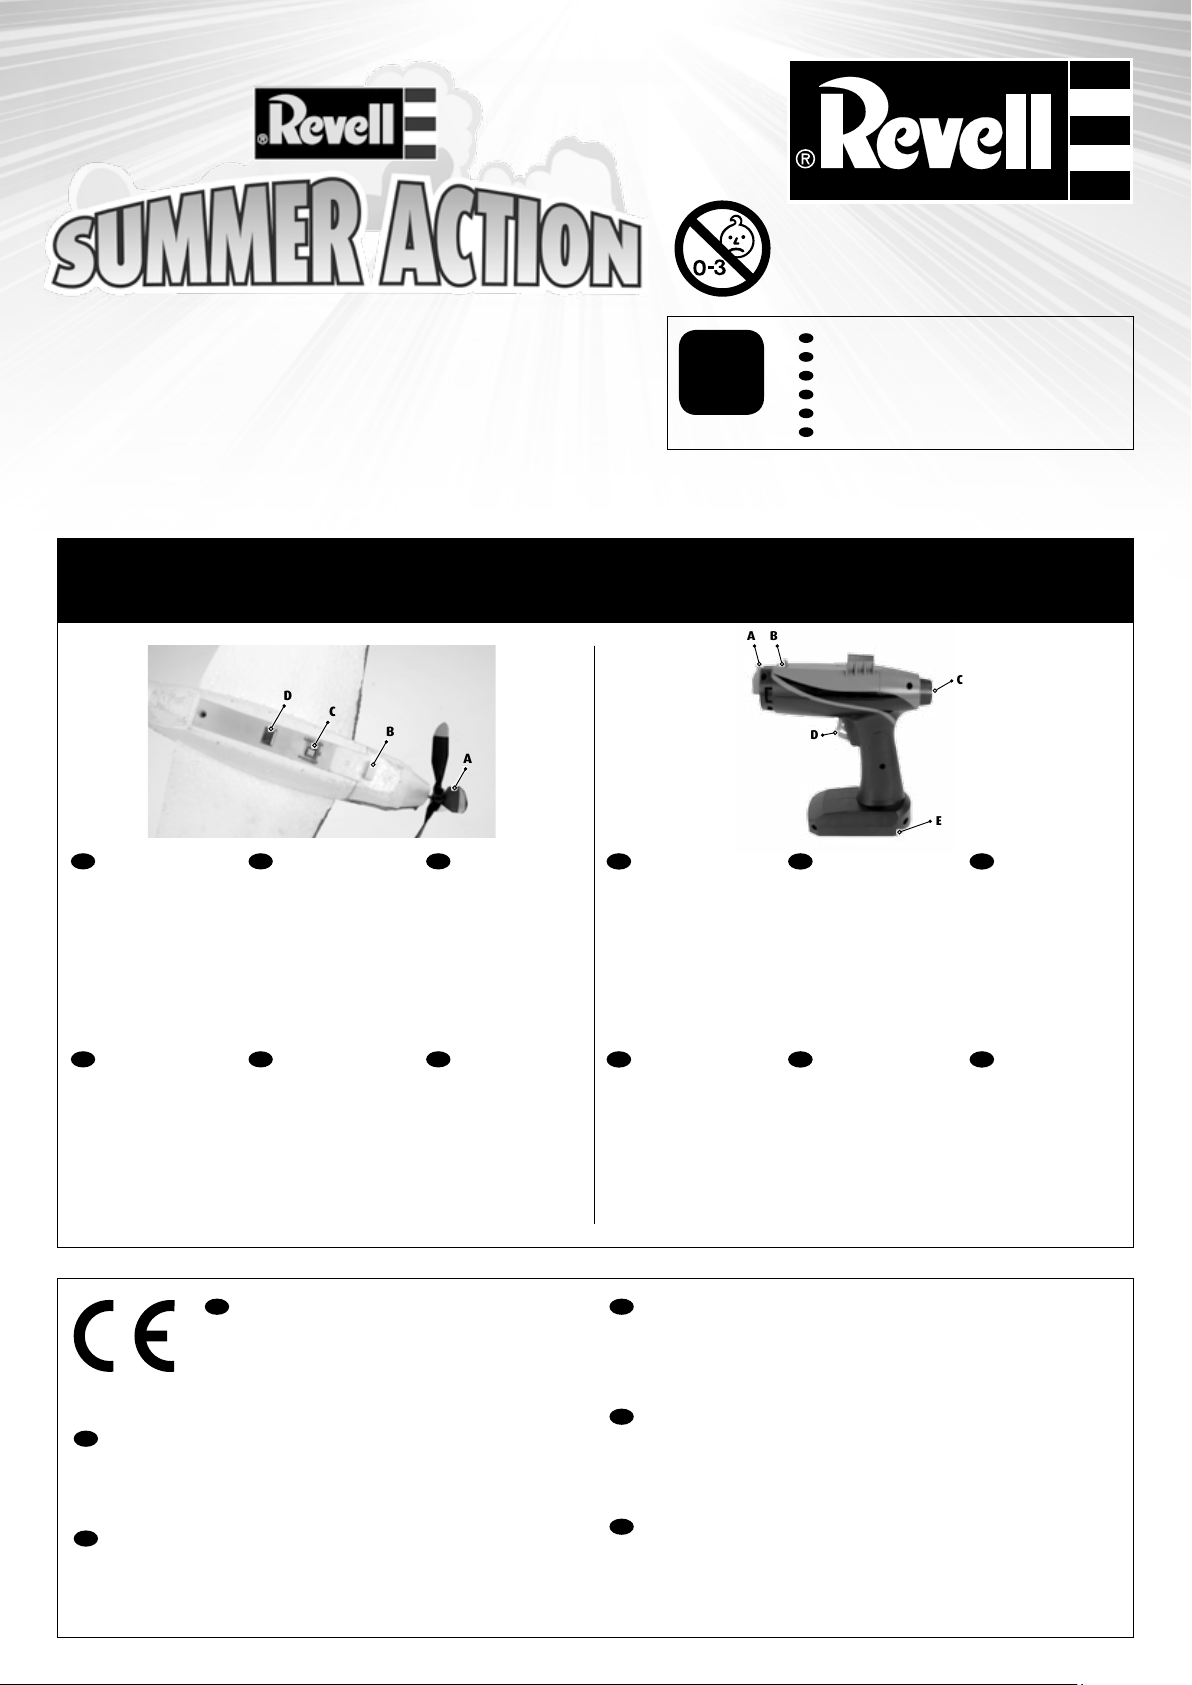
A
B
D
A: Propeller
B: Starthaken
C: Ladeanschluss
D: Befestigungs-
magnet
GB
A: Propeller
B: Start hook
C: Charging
connection
D: Fastening magnet
D
C
B
F
A: Hélice
B: Crochet de
décollage
C: Port de charge
D: Aimant de xation
NL
A: propeller
B: starthaak
C: laadaansluiting
D: bevestigings-
magneet
A
E
A: Hélice
B: Gancho de disparo
C: Conexión de carga
D: Imán de jación
I
A: Elica
B: Gancio di avvio
C: Connettore
di caricamento
D: Magnete
di ssaggio
D
A: Abschussrampe
B: Ladestation
C: LED-Ladeanzeige
D: Abzug
E: Batteriefach
GB
A: Launch ramp
B: Charging station
C: LED charging light
D: Trigger
E: Battery compartment
D
e
F
A: Rampe de lancement
B: Station de charge
C: Témoin de charge
D: Détente
E: Compartiment
à piles
NL
A: lanceerplatform
B: laadstation
C: laadindicatie-led
D: trekker
E: batterijvak
C
E
A: Rampa de disparo
B: Estación de carga
C: LED de indicador
de carga
D: Gatillo
E: Compartimento
de baterías
I
A: Rampa di lancio
B: Stazione di
caricamento
C: Indicatore di
caricamento LED
D: Grilletto
E: Vano batteria
D
Hiermit erklärt die Revell GmbH, dass sich dieses
Produkt in Übereinstimmung mit den grundlegenden
Anforderungen und den übrigen einschlägigen
Bestimmungen der Richtlinie 1999/5/EC bendet.
Die Konfor mi tätserklärung ist unter www.revell.de zu nden.
GB
Revell GmbH hereby declares that this product conforms with
the basic equirements and the additional applicable provisions of
Directive 1999/5/EC. The Declaration of Conformity can be found at
www.revell.de.
F
Revell GmbH déclare par la présente que ce produit est
conforme aux exigences et autres dispositions de la directive
1999/5/CE. La déclaration de conformité est consultable sur le
site www.revell.de.
NL
Hiermee verklaart Revell GmbH, dat dit product in overeen-
stemming is met de funda
bepalingen van de richtlijn 1999/5/EC. Op www.revell.de vindt u de
conformiteitsverklaring.
E
Revell GmbH declara que este producto cumple los requisitos
esenciales y cualesquiera otras disposiciones aplicables o exigibles
de la Directiva 1999/5/CE. La declaración de conformidad puede
consultarse en www.revell.de.
I
Con la presente Revell GmbH, dichiara che questo prodotto
rispetta i requisiti di base e le ulteriori clausole applicabili della
direttiva 1999/5/CE. La dichiarazione di conformità è disponibile
all’indirizzo www.revell-control.de.
mentele eisen en de overige toe passelijke
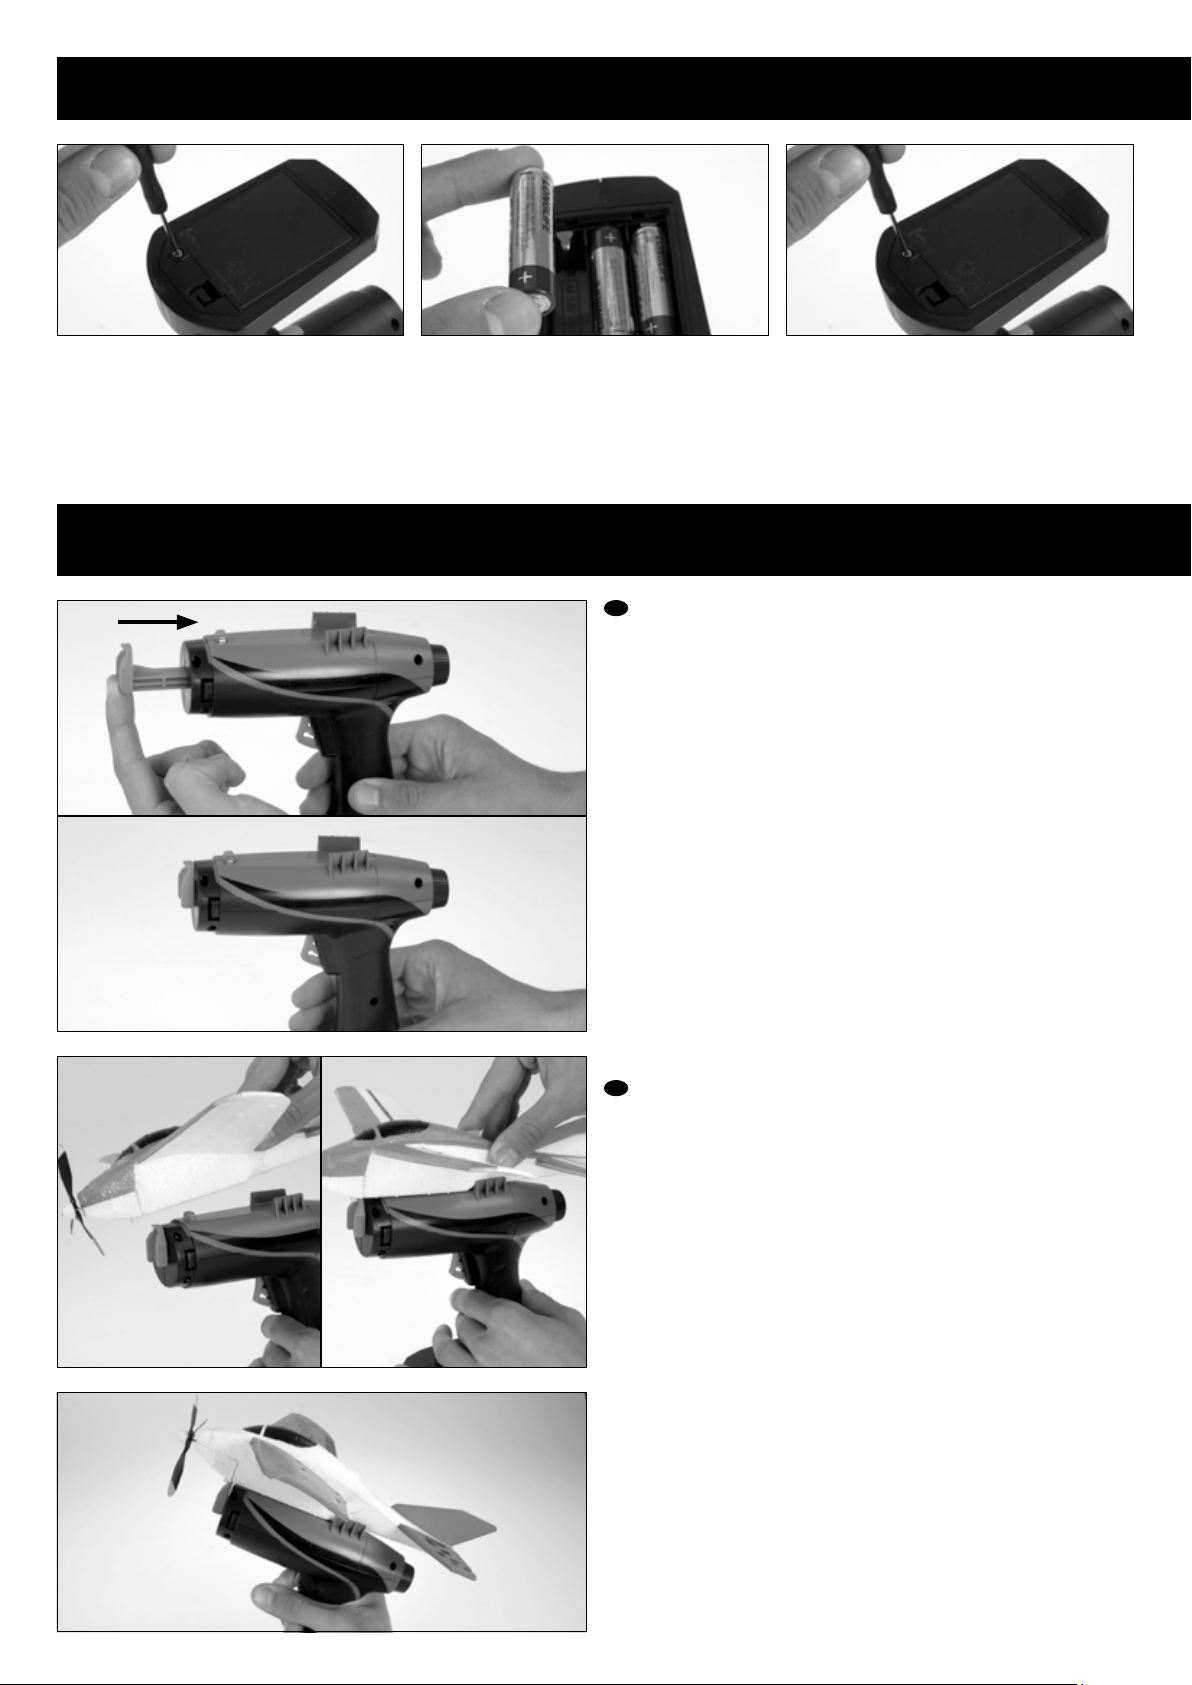
MONTAGE / ASSEMBLY / ASSEMBLAGE / MONTAGE / MONTAJE / MONTAGGIO
1
1 2
3
STARTBESCHREIBUNG / STARTING DESCRIPTION / DESCRIPTION DU DÉCOLLAGE / STARTBESCHRIJVING / DESCRIPCIÓN DEL DISPARO / DESCRIZIONE AVVIO
D
1. Die Abschussrampe zurückschieben, bis sie einrastet.
2. Zuerst haken Sie den Starthaken in die Abschussrampe ein. Danach
legen Sie vorsichtig das Model, indem der Ladeanschluss verbaut ist,
langsam auf die Abschusspistole. KEINE GEWALT ANWENDEN. Wird der
Ladeanschluss nicht richtig auf die Ladestation gesteckt, kann der Circler
beschädigt werden und unter Umständen Verletzungsgefahr bestehen.
Nun lädt das Flugzeug ca. 10-15 Sek. Währenddessen leuchtet die
LED - Ladeanzeige hinten an der Startpistole und unten am Modell.
Sobald die LED an der Startpistole erlischt, ist das Flugzeug geladen.
Hinweis: Das Flugzeug ist nach dem Auaden direkt startbereit.
Sobald dieses die Abschussrampe verlässt, startet der Propeller.
3. Bitte die Startpistole ein wenig nach oben geneigt halten. Nun den
Abzug drücken und das Modell gegen den Wind abschießen.
ACHTUNG: Das Flugzeug iegt automatisch im Kreis, bis zur Landung.
BITTE DARAUF ACHTEN: Bei Nichtnutzung bitte das Flugzeug auf gar
keinem Fall auf die Startpistole setzten. Bitte nicht auf Menschen
oder Tiere zielen. Wählen Sie ein großes Feld, da der Flugradius bis zu
50m betragen kann. Schießen Sie das Modell nur bei guter Sicht ab.
Versuchen Sie nicht, das Modell im Flug zu fangen, sondern warten
Sie bis zur automatischen Landung.
2
3
GB
1. Pull the launch ramp back until it locks in place.
2. First hook the start hook in the launch ramp. Then slowly and carefully
place the model, in which the charging connection is installed,
on the launch pistol. DO NOT USE FORCE If the charging connection is
not correctly inserted on the charging station, the Circler may become
damaged and, under certain circumstances, become an injury risk.
Now the aircraft charges approx. 10-15 seconds. During this time, the
LED charge lights on the rear of the start piston and on the bottom of
the model illuminate. Once the LED on the launch pistol goes out, the
aircraft is charged. Note: The aircraft is ready for use immediately after
charging. The propeller starts once it leaves the launch ramp.
3. Please hold the launch pistol tilted slightly upward.
Now press the trigger and launch the model against the wind.
ATTENTION: The aircraft automatically ies in a circle until it lands.
PLEASE NOTE for the launch of the aircraft: When not in use, please be
sure to never place the aircraft on the launch pistol. Please do not aim
at people or animals. Fly in a large eld, because the ight radius can
be up to 50 m. Only launch the model when you have clear sight.
Do not attempt to catch the model in ight. Wait until it lands on its own.
 Loading...