

REVELL Concerta M10 Owner's Manual
®
Revel
M10
Owner’s Manual

Revel®Concerta
™
M10 Owner’s Manual
Table of Contents
3 Introduction
4 Planning Your System
4 Placement
4 Installation
5 Tabletop/Shelf Placement Assembly
8 Wall-Mounting the M10,
Using the Included Wall Bracket
9 Wiring the Speaker
9 Maintenance and Service
10 Specifications
2
Introduction
Revel®Concerta™M10
The Revel®Concerta™M10 satellite speaker continues
the longstanding Revel commitment to accurate sound
reproduction. The proprietary transducers utilizing Micro
Ceramic Composite (MCC) diaphragms, precision dividing
networks, sophisticated high-frequency waveguides and
rigid enclosures all combine to deliver uncompromising
performance in any stereo or multichannel home theater
system. In addition, these speakers are magnetically
shielded for safe placement near a CRT television.
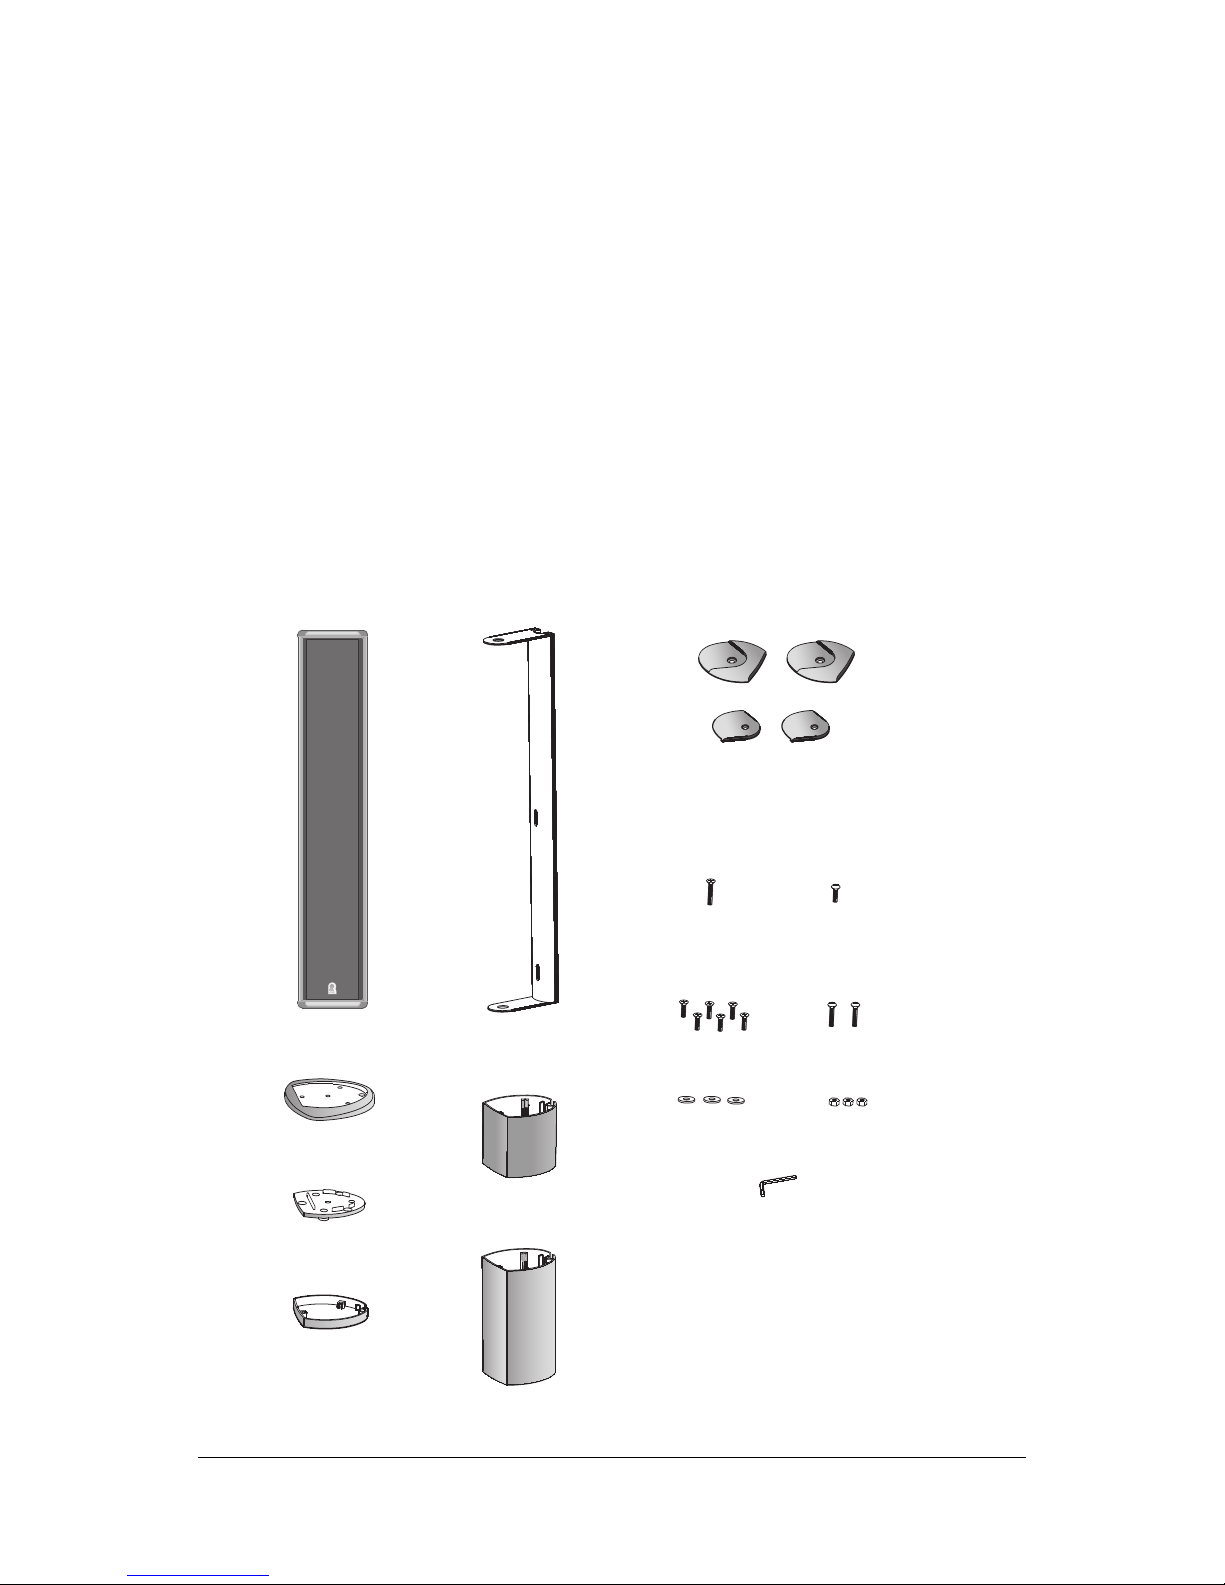
Unpacking the Speaker
Carefully unpack the speaker. If you suspect damage
from transit, report it immediately to your dealer and/or
delivery service. Keep the shipping carton and packing
materials for future use. Open the package and verify
the following contents:
Part A
Part B
(2) Wall-mount end caps
(attached to satellite)
(1) Satellite speaker
(1) Bottom foot
(1) Table stand
plate
(1) Small collar
(1) Wall bracket
with wall
bracket cover
(1) Medium collar
(1) Large collar
(1) Flat-head Phillips screw
1/4-20 x 1-1/4"
(6) Flat-head Phillips screws
1/4-20 x 7/8"
(3) 1/4-20 Flat washers (3) 1/4-20 Nuts
(1) Pan-head Phillips screw
1/4-20 x 3/4"
(2) Pan-head Phillips screws
1/4-20 x 1"
(1) Allen wrench
3
Planning Your System
Listening Position
Center Channel
(above or below video screen)
Left
Front
Channel
Right
Front
Channel
Subwoofer
Right
Surround
Channel
Left
Surround
Channel
Listening Position
Left
Front
Channel
Right
Front
Channel
Subwoofer
Right
Surround
Channel
Left
Surround
Channel
Left
Surround
Channel
Right
Surround
Channel
Center
Surround
Channel
Center Channel
(above or below video screen)
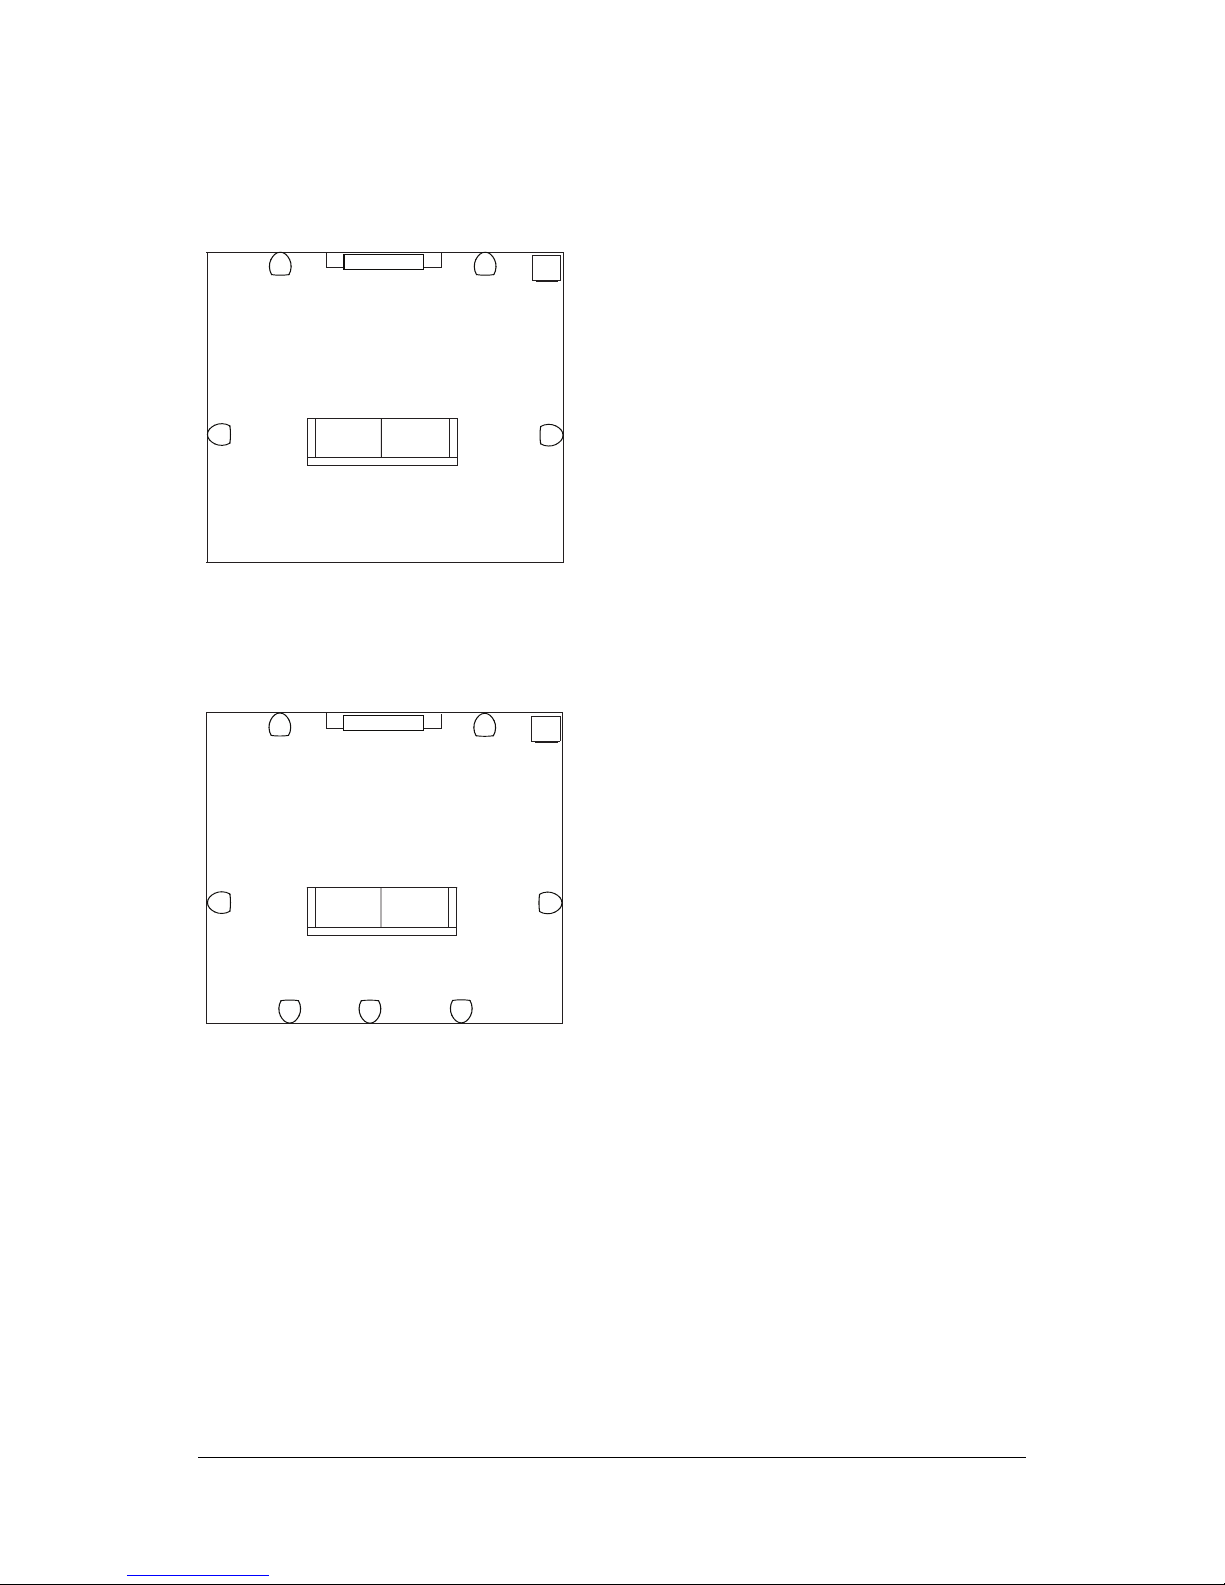
Placement
Before deciding where to best place your speakers,
survey your room and study Figures 1 and 2.
Figure 1: In this overhead view of a typical 5-channel
installation, satellites are used to reproduce sound
for the front and surround channels. A dedicated
loudspeaker reproduces the center channel, and a
subwoofer reproduces low frequencies below the
crossover point.
Note: The satellite speakers can be placed
directly on a shelf or tabletop, using one of
the three included shelf stands, or mounted
on a wall using the included wall brackets.
Optional floor stands are also available.
Please contact your dealer.
Left and Right Front Channels
For left and right front channels, place one satellite to the
left and another to the right of the television, as shown in
Figure 1. Since the speakers are magnetically shielded,
you can place them close to a CRT TV without worrying
about the magnetic field distorting the picture.
Surround Channels
For left and right surround channels, place one speaker
on the left and another on the right, to the side of or
slightly behind the listening area. The surround speakers
should ideally be mounted at a height of between 4 feet
and 7 feet.
In 6- or 7-channel configurations, place the rear channel(s)
behind the listening position, as shown in Figure 2.
Installation
Figure 2: This overhead view shows a typical home
theater plan. Left/right rear channels are for a
7-channel system. The center rear channel is for
a 6-channel system.
Note: The Revel Concerta M10 is ideally suited
for use with a subwoofer. Contact your Revel
dealer for recommendations on subwoofer
models for your application.
Please read through this owner’s manual completely
before attempting to install or connect the speakers.
It is understandable that you may be anxious to play your
new system, so every effort has been made to simplify
the installation and connections of the Revel Concerta
M10 loudspeakers.
Before proceeding, you should decide how you would like
to install the M10 loudspeakers. They may be mounted on
the included tabletop/shelf stands, mounted on the wall
using the included wall bracket, or mounted to the
optional floor stands.
4
 Loading...