

REVELL Concerta IC65, RIB 6C, RIB 8C User Manual
Revel® RIB 6C/RIB 8C Rough-In Bracket
Installation
Thank you for purchasing the Rough-In Bracket for your Revel® 6-1/2” or 8” In-Ceiling Loudspeaker.
Follow the instructions below to install the rough-in bracket. Please note that the bracket installation
must be done before the wall board is put up.
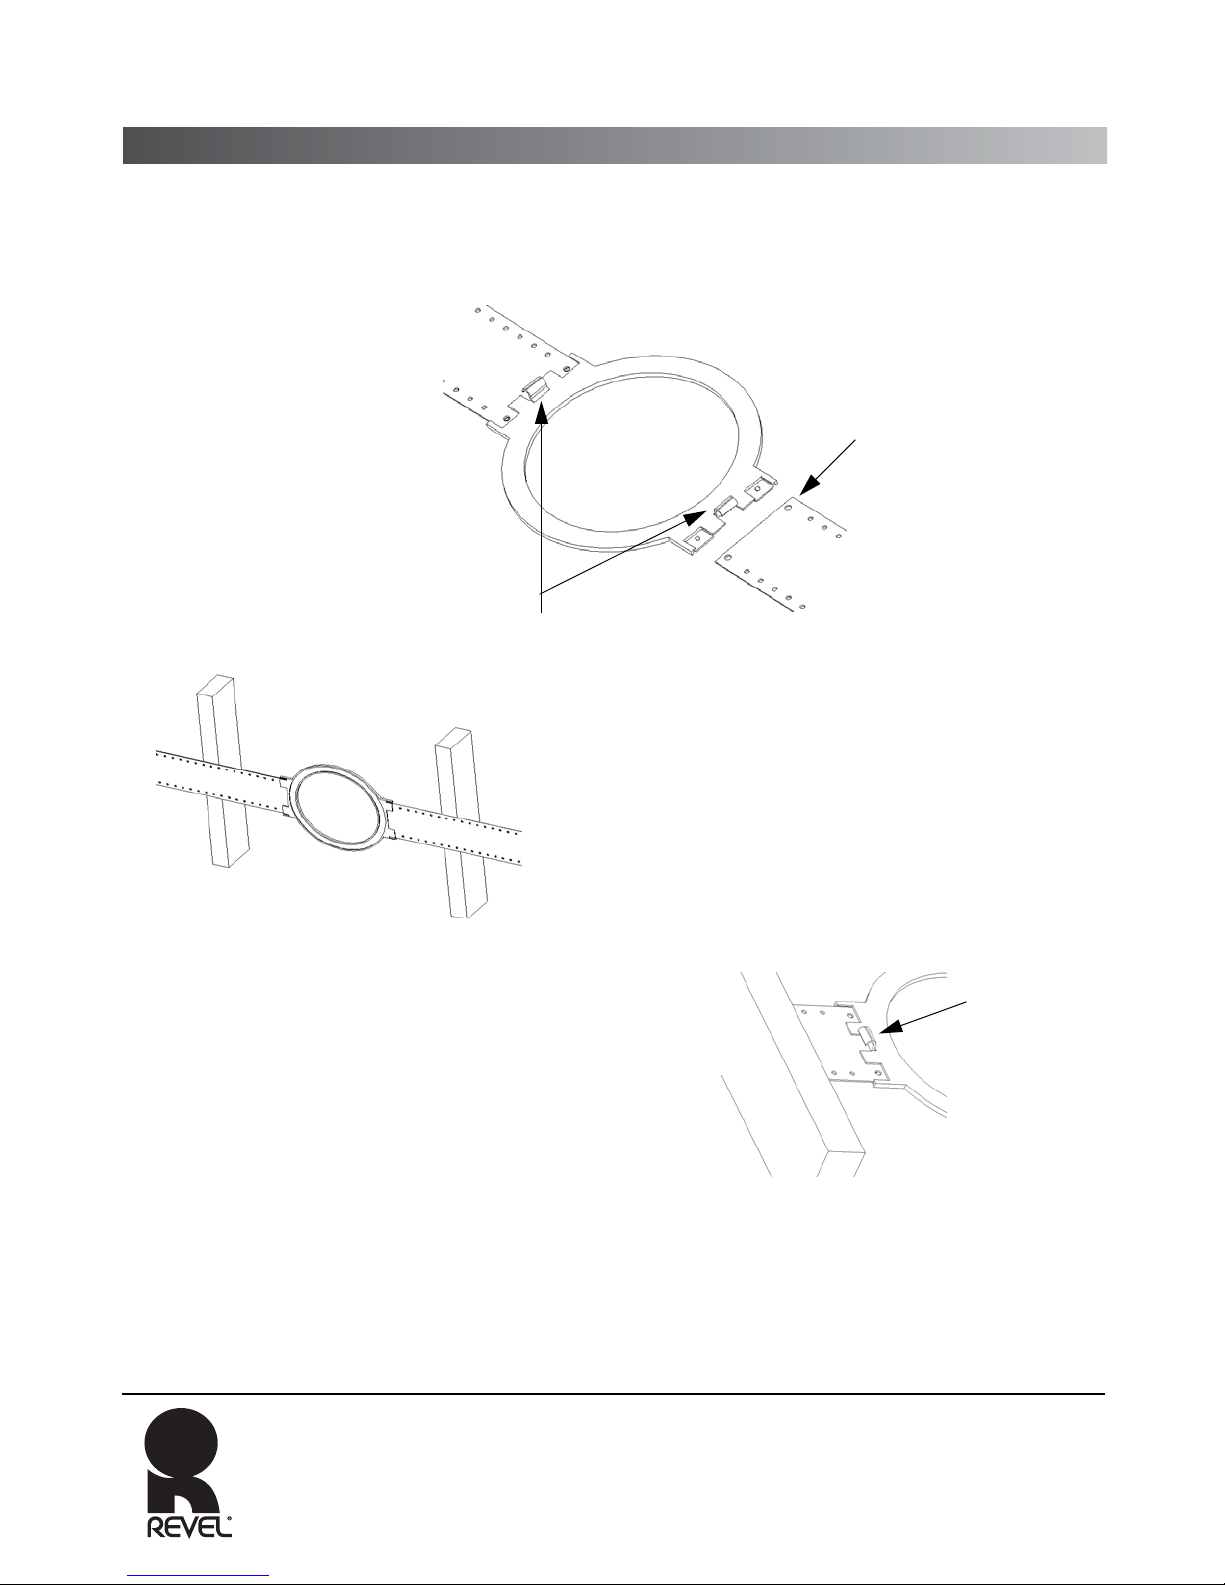
Step 1: Snap the two flat wing
sections onto the frame as shown.
Use the wing edge with
the two larger holes.
WIRE TABS
Step 2: Position the Rough-In Bracket/Wing assembly between
the wall studs so that the bracket is in the correct position for the
final speaker placement. Nail the assembly into place, making
sure that the nail heads are as flush against the wings as possible.
Note:
Make sure that the wire tabs on the assembly are in the back, so
they are on the inside of the wall.
Step 3: Use the wire tabs to hold pre-routed speaker wires in place.
Ensure that no wire remains exposed on the front (wall board) side
of the assembly.
WIRE
TABS
Step 4: After the wall board is installed, cut out the hole for the
speaker using the inside cut-out of the frame as a guide. The
speaker wire can then be run through the opening in the wall board and attached to the speaker system - refer
to the Owner’s Manual of the loudspeaker for more information on system setup.
Harman Specialty Group
3 Oak Park Drive
Bedford, MA 01730-1413
USA
Revel Part No. 406-000-05370-E | Rev 0| 02/07
Revel Part No. 170-0096 | Rev 0 | 02/07
Tel 781-280-0300
Fax 781-280-0490
www.revelspeakers.com
Customer Service
Tel 781-280-0300
Fax 781-280-0495 (Sales)
Fax 781-280-0499 (Service)
 Loading...