

REVELL A-26B Invader User Manual [en, fr, nl, it, gr, da, no, fi, sv, es, pt, de, en, hr, et, fi, hu, lv, lt, nl, pl, ro, ru, sr, sk, sl, cs, tr, gr, bg, uk, ch, he, ar, ja, ch, ch, ko, hi, id, kk, ms, fa, pt, es, th, vi, sq, mk]
Page 1
The first A-26 Invader rolled off the
assembly line in 1943 and it has the
distinction of being the only combat
aircraft used by the United States in
World War II, Korea and Vietnam. There
are still some A-26's being used today
in civil duties such as fire fighting and
air shows. It's sixty-plus years of service attest to it's excellent design, versatility and rugged combat durability.
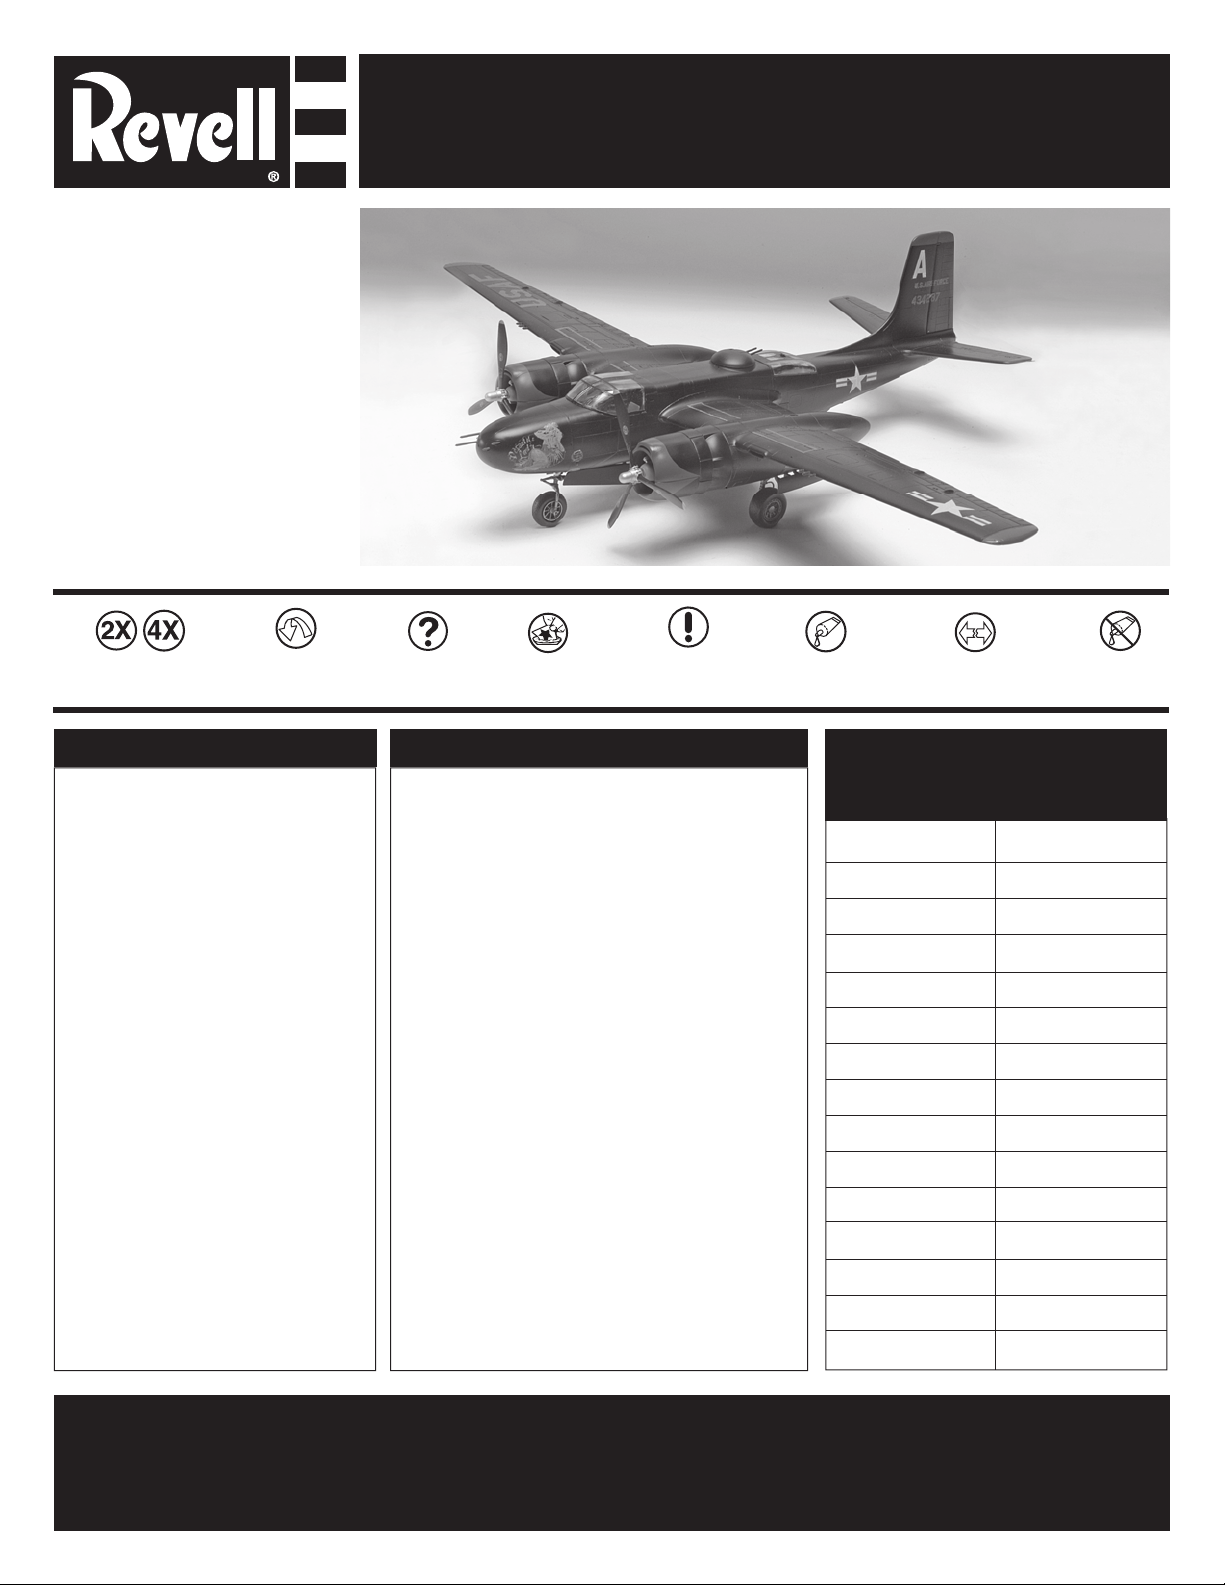
Your Revell A-26B Invader model
includes a optional open or closed
canopy, wheel chocks, three crew
figures and eight 300 LB bombs.
authentic decals for military A-26B
"Versatile Lady" and civil A-26C "Dragon
Lady" fire fighter are also included.
KIT 5524 85552410200
A-26B INVADER
* REPEAT SEVERAL TIMES
* A REPETER PLUSIEURS FOIS
READ THIS BEFORE YOU BEGIN LIRE CE QUI SUIT AVAN T DE COMMENCER
* Study the assembly drawings.
* Each plastic part is identified by a number.
* In the assembly drawings, some parts will be
marked by a star (H) to indicate chrome
plated plastic.
* For better paint and decal adhesion, wash
the plastic parts in a mild detergent solution.
Rinse and let air dry.
* Check the fit of each piece before cementing
in place.
* Use only cement for polystyrene plastic.
* Scrape plating and paint from areas
to be cemented.
* Allow paint to dry thoroughly before
handling parts.
* Any unused parts may be discarded.
DECAL APPLIC ATION INSTRUCTIONS
1. Cut desired decal from sheet.
2. Dip decal in water for a few seconds.
3. Place wet decal on paper towel.
4. Wait until decal is movable on paper backing.
5. Place decal in position on model, face up and
slide backing away.
6. Press out air bubbles with a soft damp cloth.
7. Milkiness that may appear is for better decal
adhesion and will dry clear. Wipe away any
excess adhesive.
8. Do not touch decal until fully dry.
9. Allow the decals 48 hours to dry before
applying clear coat.
NOTE: D ecals are compatible with setting
solutions or solvents.
* REPEAT PROCEDURE
* REPETEZ LE PROCEDE
* OPTIONAL PARTS
``` ` ``
* PIECES EN OPTION
* Etudier les schémas de montage.
* Chaque pièce en plastique est identifiée par un numéro.
* Sur les schémas de montage, certaines pièces sont
marquées d'une étoile (H) pour indiquer qu'elles sont en
plastique chromé.
* Pour une meilleure prise de la peinture et des autocollants,
laver les pièces en plastique avec une solution détergente
peu concentrée. Les rincer et les laisser sécher à l'air.
* Vérifier que chaque pièce s'ajuste bien avant
de la coller en place.
* N'utiliser que de la colle pour polystyrène.
* Gratter les parties à coller pour enlever le chrome et la peinture.
* Laisser la peinture bien sécher avant de manipuler les pièces.
* Toute pièce inutilisée peut être jetée.
DIRECTIVES D'APPLICAT ION DES AUTOCOLLANTS
1. Découper l'autocollant désiré de la feuille.
2. Tremper l'autocollant dans de l'eau pendant quelques secondes.
3. Placer l'autocollant mouillé sur une serviette en papier.
4. Attendez que l'autocollant puisse être déplacé sur son support
en papier.
5. Mettre l'autocollant en position sur le modèle face sur
le dessus et faire glisser le support pour l'enlever.
6. Appuyer avec un chiffon doux humide pour éliminer les bulles d'air.
7. La substance laiteuse qui peut apparaître est destinée à
améliorer l'adhésion de l'autocollant et devient incolore au
séchage. Essuyer pour enlever tout excédent d'adhésif.
8. Ne pas toucher l'autocollant tant qu'il n'est pas bien sec.
9. Laisser l'autocollant sécher pendant 48 heures avant
d'appliquer une couche transparente.
REMARQUE: L es autocollants sont compatibles avec les
* DECAL
* DECAL COMANIE
solutions de fixage ou les solvants.
*ATTENTION D ASSEMBLEE
* ASSEMBLY CAUTION
* CEMENT TOGETHER
* A COLLER
This paint guide is provided to complete this kit
Ce guide de peintures est fourni pour reproduire le modèle
Semi Gloss Black
Yellow
Aluminum
Insignia Red
Interior Green
Gloss Green
Gloss Red
Olive Drab
Flat Black
Steel
Silver
Gunmetal
Flesh
Dark Brown
Flat White
* REMOVE AND THROW AWAY
* A RETIRER ET JETER
as shown on the box.
réduit qui apparaît sur la boîte.
Noir satiné
Jaune
Aluminium
Rouge embléme
Interieur vert
Vert brillant
Rouge brillant
vert olive
Noir mat
Acier
Argent
Bronz
Chair
Brun foncé
Blanc mat
* DO NOT CEMENT
* NE PAS COLLER
If you have any questions or comments, call our hotline at: (800) 833-3570
or, please write to:
Revell Inc Consumer Service Department, 1850 Howard Street Unit A, Elk Grove Village, Illinois 60007
Be sure to include the plan number (85552410200), part number, description, your return address and phone number.
Visit our website: www.revell.com
Revell Inc Elk Grove Village, IL. Copyright © 2010. All rights reserved.
Page 2

1
COCKPIT ASSEMBLY
DOORS ARE
TO FIT ON
INSIDE OF
LONG RIBS.
23
COCKPIT FLOOR
INTERIOR GREEN
(UNDERSIDES)
FORWARD BULKHEAD
LEFT NOSE GEAR DOOR
21
INTERIOR GREEN
FIRST
37
INTERIOR GREEN
RIGHT NOSE GEAR DOOR
36
INTERIOR GREEN
NAVIGATORS SEAT
OLIVE DRAB WITH
BROWN BELTS
CONTROL COLUMN
SEMI GLOSS BLACK
WITH FLAT BLACK
51
PILOT'S SEAT
OLIVE DRAB
50
WHEEL
INSTRUMENT PANEL
49
(INSTRUMENTS ARE
GLOSS BLACK WITH
WHITE NEEDLES AND
NUMBERS, SWITCHES
ARE STEEL COLOR)
18
NOSE BULKHEAD
INTERIOR GREEN
CUT ALONG
DOTTED
LINE.SNAP
OFF BACK
PIECE.
2
UPPER TURRET FOR MILITA RY
VERSION
217
GUN BARRELS
GUNMETAL
(BARRELS ARE
FLAT BLACK)
216
TURRET COVER
INTERIOR GREEN
(INSIDE )
SEMI GLOSS
BLACK
30
TURRET RING
INTERIOR GREEN
BROWN
PEG
HOLDS
GUN
BARRELS
IN PLACE
TURRET ASSEMBLY
LOWER TURRET FOR MILITA RY
VERSION
217
GUN BARRELS
GUNMETAL
(BARRELS ARE
FLAT BLACK)
221
TURRET COVER
INTERIOR GREEN
(INSIDE )
SEMI GLOSS
BLACK
218
TURRET RETAINER
INTERIOR GREEN
(INSIDE )
UPPER TURRET FOR
AIR TANKER VERSION
218
TURRET
RETAINER
LOWER TURRET FOR AIR
TANKER VERSION
REMOVE GUN
BARRELS
TURRET COVER
INTERIOR GREEN
(INSIDE )
USE #218 AS COVER FOR
TOP OF UPPER TURRET
(SEE STEP 4)
217
GUN
BARRELS
221
Kit 5524 - Page 2
Page 3

3
FUSELAGE ASSEMBLY
1
LEFT
FUSELAGE HALF
INTERIOR GREEN
57
FORWARD
BOMB RACK
INTERIOR
GREEN
62
LEFT SIDE
300 LB BOMB
OLIVE DRAB
2
RIGHT
FUSELAGE HALF
INTERIOR GREEN
58
FORWARD
BOMB RACK
INTERIOR GREEN
61
RIGHT SIDE
300 LB BOMB
OLIVE DRAB
71
AFT BOMB RACK
INTERIOR GREEN
73
AFT BOMB RACK
INTERIOR GREEN
INTERIOR OF BOTH: INTERIOR
PAINT NOTE:
GREEN. COVER THE GUNNER'S
COMPARTMENT, BOMB
BAY,AND COCKPIT.
105
RIGHT
GUNNER'S DOOR
WINDOW
CLEAR
COMPLETED
UPPER TURRET
106
RIGHT
INSPECTION WINDOW
CLEAR
107
LEFT
INSPECTION
WINDOW
CLEAR
COMPLETED
LOWER TURRET
28
GUNNER'S
AFT BULKHEAD
INTERIOR GREEN
( FORWARD SIDE )
22
BOMB BAY'S
AFT BULKHEAD
INTERIOR GREEN
( BOTH SIDE )
20
WING SPAR
BULKHEAD
INTERIOR GREEN
( BOTH SIDE )
COMPLETED
COCKPIT
THE WORD "FRONT"
ON THIS PIECE FACES
THE FRONT OF THE
AIRCRAFT
Kit 5524 - Page 3
Page 4
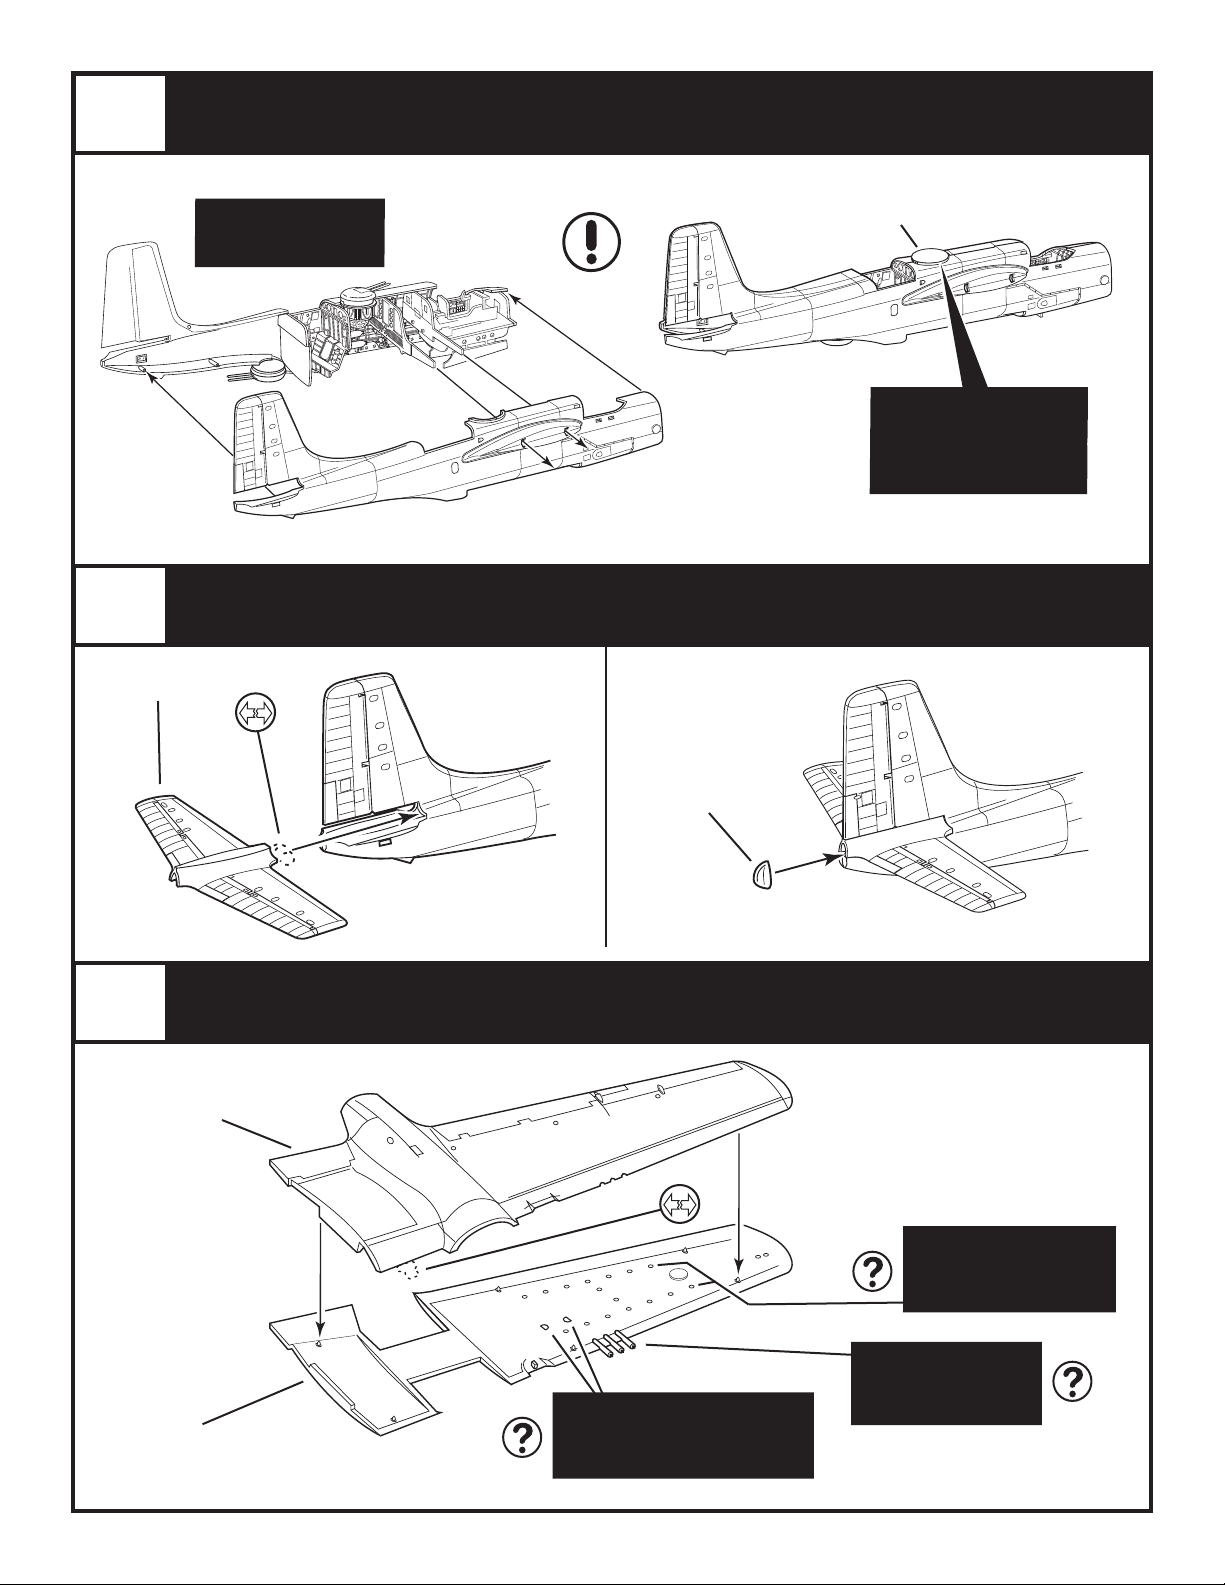
4
FUSELAGE ASSEMBLY CONTINUED
218
COMPLETED
FUSELAGE HALVES
(MILITARY VERSION)
TURRET
RETAINER
5
STABLIZER
FOR AIR TANKER
USE PART #218 TURRET
RETAINER AS TOP COVER
VERSION :
STABLIZER ASSEMBLY
25
103
POSITION LIGHT
COVER
CLEAR
6
3
WING TOP
WING BOTTOM
Kit 5524 - Page 4
LEFT WING ASSEMBLY
OPEN UP TWO ROWS OF
SEVEN "FLASHED OVER"
HOLES FOR MILITARY
VERSION ONLY
REMOVE WING GUNS
FOR AIR TANKER
5
OPEN UP TWO "D" SHAPED
"FLASHED OVER" HOLES FOR
MILITARY VERSION ONLY
VERSION ONLY
Page 5

7
RIGHT WING ASSEMBLY
OPEN UP TWO ROWS OF
SEVEN "FLASHED OVER"
HOLES FOR MILITARY
VERSION ONLY
REMOVE WING GUNS
FOR AIR TANKER
VERSION ONLY
4
WING TOP
8
210
RIGHT
FRONT BULKHEAD
INTERIOR GREEN
NACELLE ASSEMBLY
OUTER MAIN GEAR DOOR
(INSIDE OF DOOR ONLY)
76
INNER MAIN GEAR DOOR
REAR BULKHEAD
INTERIOR GREEN
LEFT
ZINC CHROMATE
(INSIDE OF DOOR ONLY)
212
RIGHT
OPEN UP TWO "D" SHAPED
"FLASHED OVER" HOLES FOR
MILITARY VERSION ONLY
42
LEFT
ZINC CHROMATE
OUTER MAIN GEAR DOOR
RIGHT
ZINC CHROMATE
(INSIDE OF DOOR ONLY)
41
INNER MAIN GEAR DOOR
ZINC CHROMATE
(INSIDE OF DOOR ONLY)
75
RIGHT
WING BOTTOM
211
LEFT
REAR BULKHEAD
INTERIOR GREEN
209
LEFT
FRONT BULKHEAD
INTERIOR GREEN
LEFT
OUTER NACELLE
INTERIOR GREEN
(INSIDE ONLY)
7
LEFT
INNER NACELLE
INTERIOR GREEN
(INSIDE ONLY)
6
9
8
RIGHT
OUTER NACELLE
INTERIOR GREEN
(INSIDE ONLY)
10
RIGHT
INNER NACELLE
INTERIOR GREEN
(INSIDE ONLY)
Kit 5524 - Page 5
Page 6

9
LEFT
MAIN GEAR STRUT
STEEL
NACELLE ASSEMBLY CONTINUED
INSTALL FROM BOTTOM.
FRONT BULKHEADS NOT
SHOWN FOR CLARITY
38
39
RIGHT
MAIN GEAR STRUT
STEEL
27
LEFT
MAIN GEAR BRACE
STEEL
MAIN GEAR BRACE
40
RIGHT
STEEL
10
12
NACELLE FRONT
BRIGHT SILVER
BRIGHT SILVER
ENGINE ASSEMBLY
11
COWL FLAPS
WITH ENGINE
FLAT BLACK
13
COWLING
Kit 5524 - Page 6
14
PROPELLER PIN
ENGINE PA INTING DETAIL
CRANKCASE..DARK GRAY
RODS.............FLAT BLACK
CYLINDERS..............STEEL
Page 7

11
COMPLETED
ENGINE AND NACELLE
NACELLE / ENGINE / WING ASSEMBLY
WING ASSEMBLY
ASSEMBLY
LEFT
WING ASSEMBLY
RIGHT
COMPLETED
ENGINE AND NACELLE
ASSEMBLY
12
FOR MILITARY VERSION ONLY
REAR VIEW
ROCKET ASSEMBLY
220
ROCKET FINS
STEEL
PAINT RAILS TO MATCH
EXTERIOR OF AIRCRAFT
219
ROCKET BODY
STEEL
OLIVE DRAB
SILVER
Kit 5524 - Page 7
Page 8

13
FOR MILITARY VERSION
53
UNDERWING GUN PACK
LEFT
AIRCRAFT COLOR
LEFT UNDERWING ASSEMBLY
69
RIGHT HALF
UNDERWING GUN PACK
AIRCRAFT COLOR
FLAT BLACK
206
OUTER MAIN
WHEEL
FLAT BLACK
STEEL STEEL
207
INNER MAIN
WHEEL
FLAT BLACK
102
LANDING LIGHT
CLEAR
(PAINT UNDERSIDE SILVER)
ASSEMBLED
FUSELAGE
Kit 5524 - Page 8
FOR MILITARY
VERSION ONLY
Page 9

14
RIGHT UNDERWING ASSEMBLY
207
INNER MAIN
WHEEL
FLAT BLACK
ASSEMBLED
FUSELAGE
206
OUTER MAIN
WHEEL
FLAT BLACK
FOR MILITARY VERSION ONLY
FLAT BLACK
70
RIGHT HALF
UNDERWING GUN PACK
AIRCRAFT COLOR
52
UNDERWING GUN PACK
LEFT
AIRCRAFT COLOR
FOR MILITARY
VERSION ONLY
102
LANDING LIGHT
CLEAR
(PAINT UNDERSIDE SILVER)
Kit 5524 - Page 9
Page 10

15
NOSE WHEEL ASSEMBLY
205
OUTER NOSE
WHEEL
FLAT BLACK
NOSE GEAR STRUT
33
STEEL
OLEO
(SILVER)
STEEL
204
INNER NOSE
WHEEL
FLAT BLACK
STEEL
45
NOSE GEAR
BRACE
STEEL
LEFT SIDE DOOR
OMITTED FOR CLARITY
FRONT
16
BOMB BAY DOOR
ZINC CHROMATE (INSIDE ONLY)
OUTSIDE, AIRCRAFT COLOR
46
LEFT
BOMB DOOR ASSEMBLY
BOMB BAY DOOR
ZINC CHROMATE (INSIDE ONLY)
OUTSIDE, AIRCRAFT COLOR
47
RIGHT
Kit 5524 - Page 10
Page 11

17
NOSE ASSEMBLY
NOTE:
FOR AIR TANKER VERSION FILL-IN GUN
HOLES IN #200 NOSE W ITH MODELER PUDDY
AND SAND SMOOTH
LEFT SIDE
201
GUNS
GUNMETAL
24
PITOT TUBE
ALUMINUM
(Military Version)
200
NOSE
RIGHT SIDE
C
(Military Version)
GUNS
GUNMETAL
NOTE:
ADD WEIGHT INSIDE
OF NOSE TO BALANCE
MODEL ON LANDING
GEAR
202
203
GUNS
GUNMETAL
18
54
DIRECTION FINDER
"FOOTBALL"
ANTENNA
FOR MILITA RY
VERSION ONLY
GUNSIGHT ASSEMBLY
19
GUNNER'S
104
GUNNER'S
CANOPY
CLEAR
ARMOR PLATE
INTERIOR GREEN
56
GUNSIGHT
INTERIOR
GREEN
55
GUNNER'S
SEAT
OLIVE DRAB
FOR MILITA RY
VERSION ONLY
Kit 5524 - Page 11
Page 12

19
231
CANOPY HATCH
CLEAR
CANOPY ASSEMBLY
59
ANTENNA
MAST
230
CANOPY
CLEAR
OPEN CANOPY
TABS
COMPLETED
CANOPY ASSEMBLY
IF YOU CHOOSE TO HAVE A CLOSED CANOPY,
NOTE:
YOU MUST FIRST REMOVE THE TWO TABS IN
FRONT.
PAINT NOTE:
FRAMEWORK OF CANOPY
IS THE SAME COLOR AS
THE EXTERIOR OF THE
AIRCRAFT
Kit 5524 - Page 12
Page 13

20
PROPS / WHEEL CHOCKS ASSEMBLY
15
PROPELLERS
21
PHONES
FLAT BLACK
FLESH
HEAD
KNOT
WHEEL CHOCKS
YELLOW
THREAD
(NOT INCLUDED)
FLAT BLACK
FLESH
OLIVE DRAB,
GRAY
OR KHAKI
FLAT WHITE
FLESH
208
GOLD
FLAT WHITE
FLESH
HOLSTER
DARK BROWN
YELLOW
FIGURES
OLIVE DRAB,
FLESH
GRAY
OR KHAKI
MAE WEST
LIFE VEST
YELLOW
FLESH
SEMI GLOSS
BLACK
SEMI GLOSS
BLACK
OLIVE DRAB,
GRAY
OR KHAKI
FLESH
SILVER
YELLOW
YELLOW
FLESH
OLIVE DRAB,
OR KHAKI
GRAY
HOLSTER
DARK BROWN
BOOTS
BROWN OR
BLACK
#214 PILOT
FLAT WHITE
PARACHUTE
PACK
OLIVE DRAB,
GRAY
OR KHAKI
BOOTS
BROWN OR
BLACK
#213 NAVIGATOR
SILVER
MAP BOARD
DARK BROWN
TOOLBOX
OLIVE DRAB
#215 MECHANIC
Kit 5524 - Page 13
SHOES
BROWN OR
BLACK
Page 14

22
decal placement
Kit 5524 - Page 14
Page 15

23
DECAL PLACEMENT
Kit 5524 - Page 15
Page 16

24
DECAL PLACEMENT
Kit 5524 - Page 16
 Loading...