

Page 1
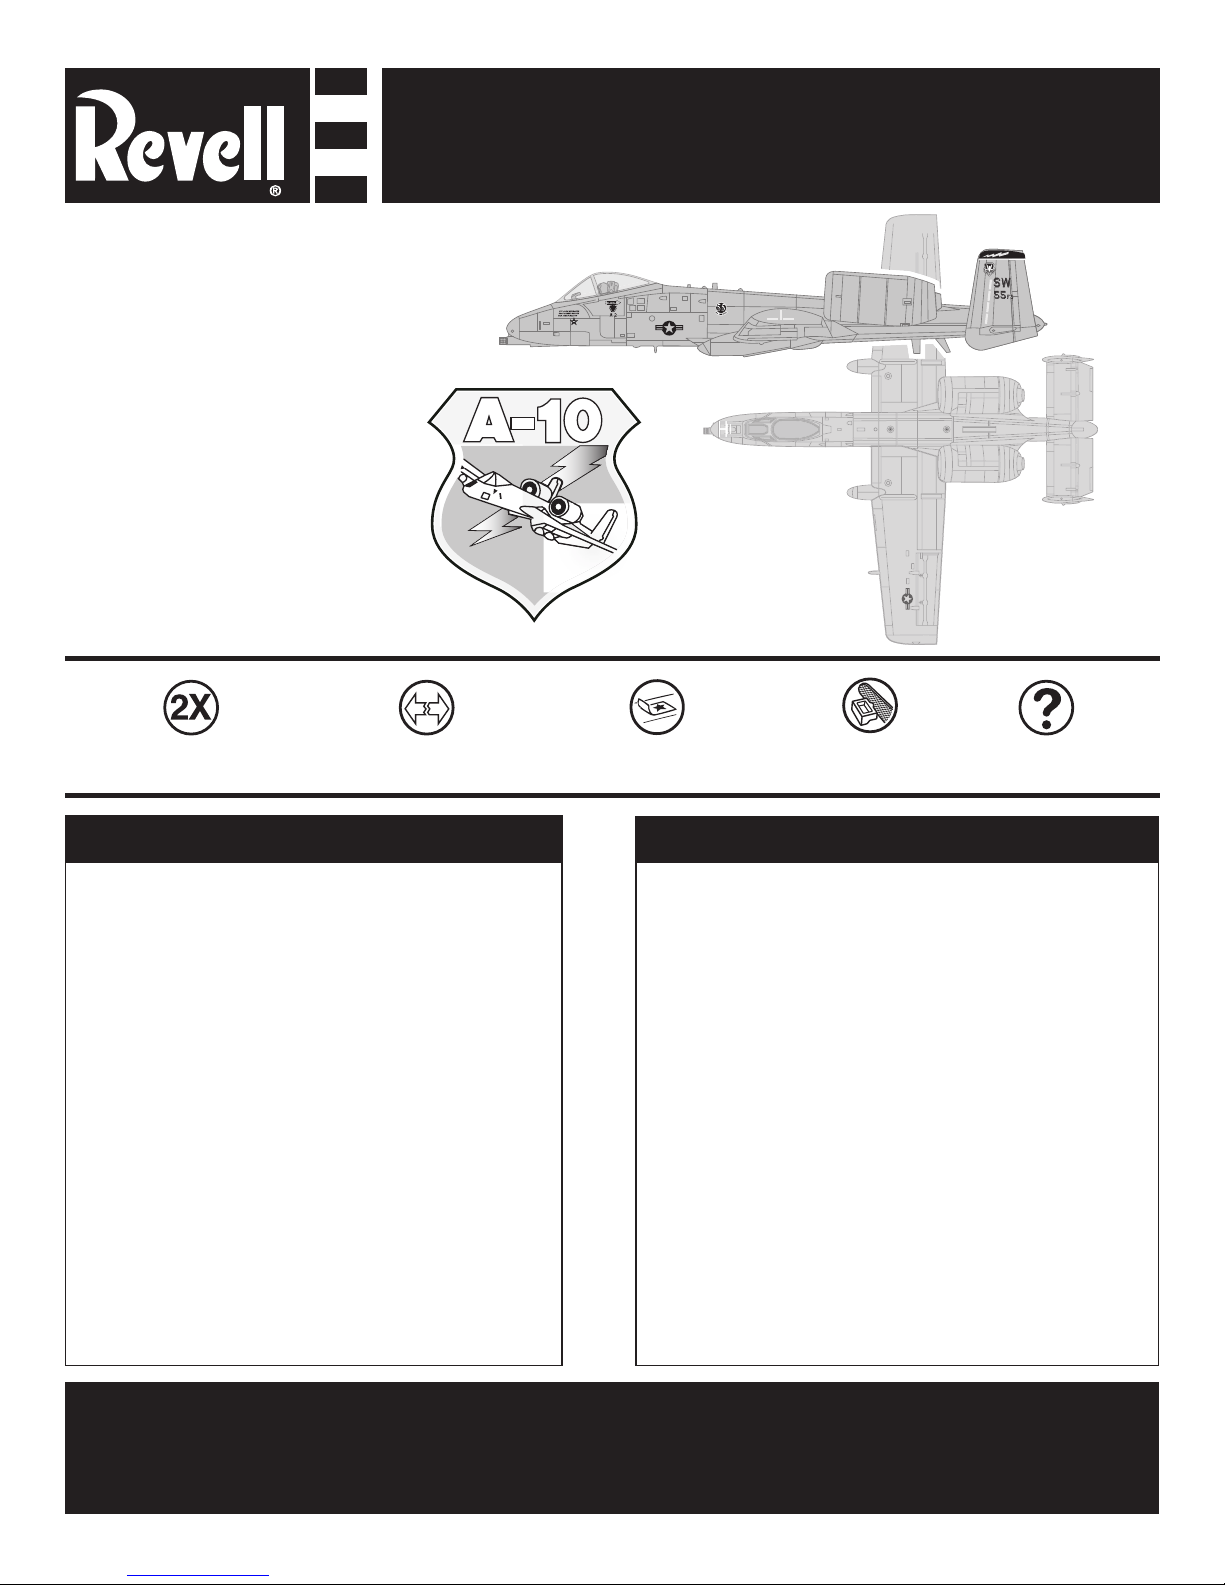
A-10 WARTHOG
KIT 1181 85118110200
The Thunderbolt II carries the official name of
one of the most famous fighters in history, but
its unofficial name of “Warthog” is a more apt
description. The A-10's "Thunder" comes from
it's powerfull GAU-8/A 30 mm nose cannon.
Although the shape of the A-10 borders on the
grotesque, it’s actually the result of some careful
engineering. The pilot sits in the extreme nose
of the airplane for visibility. He is protected from
ground fire by an armored titanium “bucket”.
The twin 9,055 lb. thrust General Electric TF34 turbofan engines are separated from the
fuselage to reduce the possibility of damage
to both engines from one hit. Even when the
landing gear is retracted, a portion of the main
tires extend out of the airplane to make a “belly
landing” less dangerous. The A-10 is designed
to remain flyable even if large areas have been
damaged or blown off.
Created specifically to support troops in
a ground attack role, the A-10 is incredibly
maneuverable. It is slow for a modern jet aircraft,
with a top speed of only 423 mph, but it can
carry up to eight tons of ordinance to deliver the
knockout punch to enemy armored vehicles.
If you have any questions or comments, call our hotline at: (800) 833-3570
or, please write to:
Revell Inc Consumer Service Department, 1850 Howard Street Unit A, Elk Grove Village, Illinois 60007
Be sure to include the plan number (85118110200), part number, description, your return address and phone number.
Visit our website: www.revell.com
Revell Inc Elk Grove Village, IL. Copyright © 2008. All rights reserved.
* REPEAT SEVERAL TIMES
* A REPETER PLUSIEURS FOIS
* REMOVE AND THROW AWAY
* A RETIRER ET JETER
* OPTIONAL PARTS
* PIECES EN OPTION
* APPLY STICKERS
*APPLIQUEZ LES AUTO-COLLANTS
* TRIM
*D´ECOUPER
Á LIRE AVANT DE COMMENCER
• DÉGAGGEZ UN ESPACE POUR TRAVAILLER.
• ÉTUDIEZ LES ÉTAPES DE MONTAGE
AVANT DE COMMENCER.
• CHAQUE PIÉCE EN PLASTIQUE PORTE UN
NUMÉRO
DE PIÉCE.
• CETTE MAQUETTE L´ASSEMBLAGE PAR SIMPLE
PRESSION, MAIS VOUSPOUVEZ COLLER LES PIECES SI
VOUS LE PREFEREZ.
•
D´ECOUPER POUR ENLEVER LE
PLASTIQU
SUPERFLU ET BIEN LIMER
AVANT L´ASSEMBLAG
DES PI´ECES
MISE EN GARDE:
POSITIONNEZ AVEC PRÉCAUTION TOUTES LES PIÉCES
DE CE MODÉLE RÉDUIT, CAR VOUS NE POUVEZLES
EMBOîTER QU’UNE SEULE FOIS.
READ BEFORE YOU BEGIN
• CLEAR A SPACE TO WORK ON.
• STUDY THE ASSEMBLY DRAWINGS
BEFORE YOU BEGIN.
• EACH PLASTIC PART IS IDENTIFIED BY
A PART NUMBER.
• THIS KIT MAY BE SNAPPED TOGETHER BUT
PARTS MAY BE CEMENTED IF YOU PREFER.
• TRIM TO REMOVE EXTRA PLASTIC AND FILE
SMOOTH BEFORE PART ASSEMBLY.
CAUTION:
POSITION ALL PARTS IN THIS KIT CAREFULLY.
PARTS WILL ONLY SNAP TOGETHER ONCE.
Page 2

Step 1
Step 2
C
BA
Kit 1181 - Page 2
2
RIGHT FUSELAGE
1
STICKER
1
LEFT FUSELAGE
14
COCKPIT PILOT
9
ENGINE BOTTOM
(SHOWN IN PLACE)
10
ENGINE BOTTOM
6
ENGINE FAN
7
ENGINE NOZZLE
7
ENGINE NOZZLE
(SHOWN IN PLACE)
6
ENGINE FAN
(SHOWN IN PLACE)
8
ENGINE TOP
NOTE: INSERT THE FRONT TAB
OF THE COMPLETED ENGINE
ASENBLY INTO THE FUSELAGE,
THEN SNAP INTO PLACE.
1
st
2
nd
Page 3

Step 4
Step 5
Step 3
BA
Kit 1181 - Page 3
12
RIGHT RUDDER
(SHOWN IN PLACE)
3
LEFT TOP WING
4
RIGHT TOP WING
5
WING BOTTOM
13
STABILIZER BOTTOM
21
LEFT STABILIZER TOP
22
RIGHT STABILIZER TOP
11
LEFT RUDDER
15
BOMB
28
BOMB
23
BOMB
25
BOMB
27
CANOPY
19
PAVE PENNY
B
C
A
25
BOMB
(SHOWN IN PLACE)
23
BOMB
(SHOWN IN PLACE)
26
BOMB
(SHOWN IN PLACE)
24
BOMB
(SHOWN IN PLACE)
NOTE: INSERT THE FRONT TAB OF THE COMPLETED STABILZER
ASENBLY INTO THE FUSELAGE, THEN SNAP INTO PLACE.
NOTE: INSERT FRON TAB OF WING BOTTOM
INTO FUSELAGE, THEN SNAP INTO PLACE.
1
st
2
nd
Page 4

12
14
5
INSIDE OF
LEFT FIN
6
INSIDE OF
RIGHT FIN
4
11
7
12 9
2 10 12
8
11
3
13
12
NOTE: INSERT REAR HOOK
INTO SLOT FIRST.
Step 6
Step 7
Kit 1181 - Page 4
17
BASE ARM
16
BASE
NOTE: When applying stickers, avoid touching the “sticky” side to prevent finger prints on stickers. Bend sticker sheet slightly to lift edge of sticker & use a finger nail
to lift sticker from sheet. Line up sticker on body and press an edge into place, slowly working sticker with a finger nail until sticker is fully on model.
REMARQUE : Pendant l’application des autocollants, éviter de toucher à la face collante pour ne pas laisser d’empreintes. Plier légèrement la feuille d’autocollants
pour relever le bord d’un autocollant, et le détacher de la feuille avec le bout d’un ongle. Aligner l’autocollant sur la carrosserie, appuyer pour coller un de ses bords, et
continuer de l’appliquer lentement du bout de l’ongle jusqu’à ce qu’il soit complètement collé sur le modèle réduit.
Bonus stickers are included
on the sticker sheet. You
may place them wherever
you like on your model or
wherever you want!
NOTE: AFTER SLIDING PART # 17 INTO
PART #16, SLIDE
BACK TO LOCK INTO PLACE.
 Loading...