

Page 1

English
Instruction and Service Manual
Model 950
Finger Pulse Oximeter
0459
Page 2

About the Manual
Shaded boxes draw attention to contraindications, warnings, cautions
and notes.
The boxed messages are important. Be sure to read them.
The information in this manual has been carefully checked and is
believed to be accurate. In the interest of continued product
development, RESPIRONICS, INC. reserves the right to make
changes and improvements in this manual and the products it
describes at any time, without notice or obligation.
Caution: Federal Law (USA) restricts this device to sale by or on the
order of a physician.
Respironics Georgia
175 Chastain Meadows Court
Kennesaw, Georgia 30144-3724
USA
Telephone: 1-770-499-1212
Fax: 1-770-499-0117
Customer Service Telephone: 1-800-345-6443 (USA and Canada)
Customer Service Fax: 1-800-886-0245 (USA and Canada)
www.respironics.com
Respironics Deutschland
Gewerbestrasse 17
82211 Herrsching
Germany
Telephone: 49 815 293 060
Fax: 49 815 293 0618
Respironics Asia Pacific
3/F, Microtron Building
38 Hung To Road
Kwun Tong, Kowloon, Hong Kong
Telephone: 852-2771-1886
Fax: 852-2770-7557
Copyright © 2002 Respironics, Inc. All rights reserved.
is a registered trademark of Respironics, Inc.
English
iii
Page 3

Table of Contents
Contraindications, Warnings, and Cautions ........................ 1
Introduction ............................................................................. 3
Description................................................................................... 3
The 950 at a Glance ..................................................................... 4
Intended Use ................................................................................ 6
Operating Instructions............................................................ 7
Getting Started ............................................................................. 7
Lanyard and Lanyard Lock.......................................................... 8
Battery Requirements .................................................................. 9
Inserting New Batteries.............................................................. 10
Activating the 950...................................................................... 11
Verifying Operation................................................................... 12
Conditions That May Affect Use............................................... 13
Maintenance........................................................................... 14
Storage Requirements ................................................................ 14
Theory of Operation ............................................................. 16
Oximetry.................................................................................... 16
950 Averaging............................................................................ 18
Specifications ......................................................................... 19
Parts and Accessories............................................................ 20
Parts ........................................................................................... 20
Accessories ................................................................................ 20
Technical Support ...................................................................... 20
Warranty................................................................................ 21
Troubleshooting Guide ......................................................... 22
English
v
Page 4
Figures
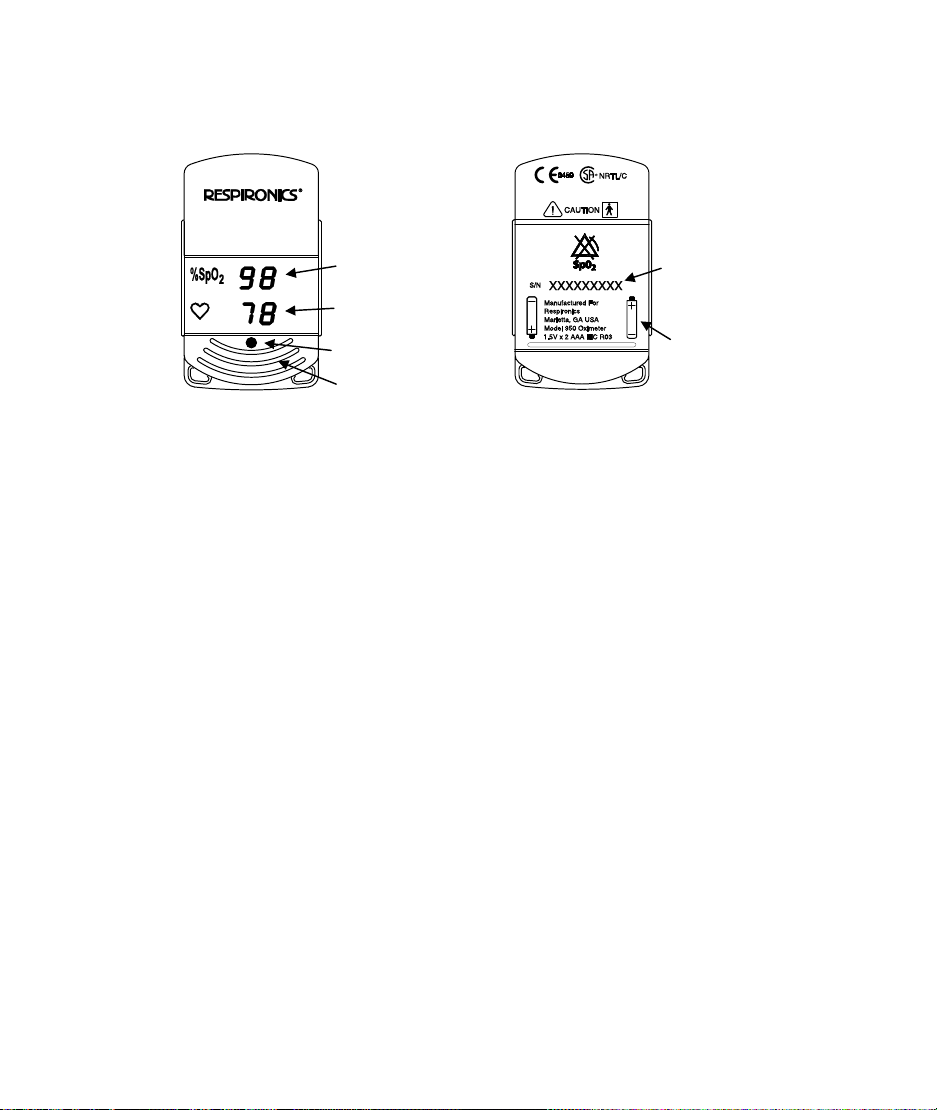
Figure 1. Top digital display illustration and bottom label. .... 4
Figure 2. Lanyard and lock. .................................................... 8
Figure 3. Inserting new batteries...........................................10
Figure 4. Applying the 950. .................................................. 11
Figure 5. Maintenance choices.............................................. 15
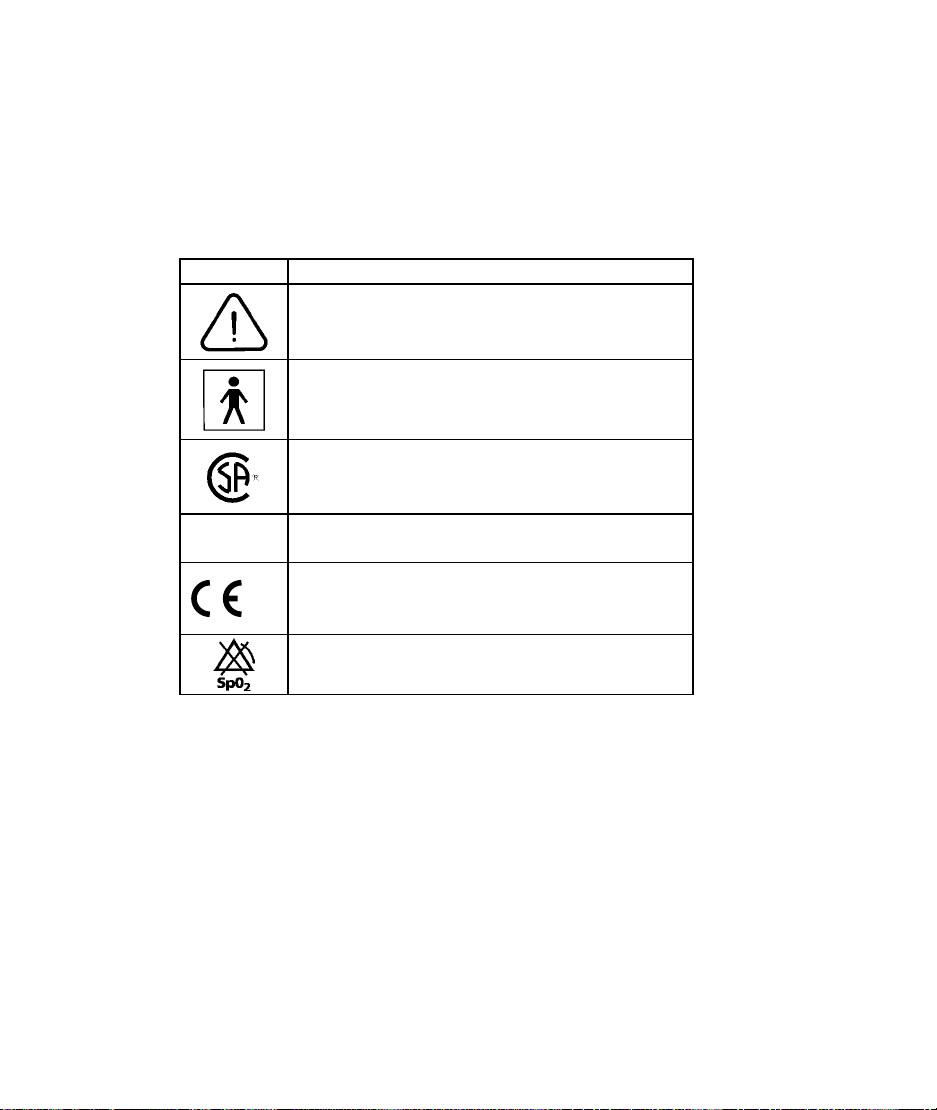
SYMBOL DEFINITION OF SYMBOL
NRTL/C
0459
Glossary of Symbols
Attention, Consult ACCOMPANYING
DOCUMENTS
Type BF Applied Part:
(Patient isolation from electrical shock).
Canadian Standards Association
Meets both Canadian and United States
Standards.
CE Marking indicating conformance to EC
directive No. 93/42/EEC concerning medical
devices.
Not for Continuous Monitoring
(No Alarm for SpO2)
vi
Page 5

Contraindications, Warnings, and Cautions
Do not use the 950 in an MRI environment.
Do not operate the 950 in an explosive atmosphere.
Do not use the 950 on infant or neonatal patients.
Batteries may leak or explode if used or disposed of improperly.
Federal Law (USA) restricts this device to sale by or on the order
of a physician.
Read this entire manual carefully before using the Respironics 950
Pulse Oximeter.
The 950 determines the percentage of arterial oxygen saturation of
functional hemoglobin. Significant levels of dysfunctional
hemoglobin such as carboxyhemoglobin or methemoglobin may
affect the accuracy of the measurement.
Cardiogreen and other intravascular dyes, depending on the
concentration, may affect SpO2 accuracy.
The 950 must be able to measure the pulse properly to obtain
accurate SpO2 measurement. Verify that nothing is hindering the
pulse measurement before relying on the SpO2 measurement.
Some situations that may contribute to erroneous pulse
measurement are:
• inadequate perfusion,
• excessive patient movement,
• pulse oximeter and blood pressure measurement on the
The 950 may interpret motion artifact of sufficient amplitude and
regularity as good perfusion (green).
Do not use the 950 in situations where alarms are required. The
950 has no audible alarms.
The 950 is intended for spot-checking or continuous monitoring by
an attending health care professional. Because the 950 has no
audible alarms, international labeling requirements (ISO 9919)
dictate it be labeled, “Not for continuous monitoring”.
CONTRAINDICATIONS:
WARNINGS:
CAUTIONS:
same limb, etc.
English
1
Page 6

CAUTIONS: (Continued)
Check application site periodically (at least every thirty minutes) to
determine circulation, positioning and skin sensitivity.
The 950 may not work for all patients. If you are unable to achieve
stable readings, discontinue use.
Finger nail polish may reduce light transmission and thereby affect
SpO2 accuracy.
A flexible circuit connects the two halves of the 950. Do not twist or
pull on the connection.
Do not use different types of batteries at the same time. Do not mix
fully charged and partially charged cells at the same time. These
actions may cause the batteries to leak.
Batteries must be removed if the 950 is going to be stored for more
than one month or batteries may leak.
Do not immerse the 950 in liquid to clean.
2
Page 7

Introduction
Description
Respironics, Inc. has integrated the finger clip sensor and the
electronics of the Respironics Model 920 hand held Pulse Oximeter
into one unit, the Model 950. The 950 is very small (1.3 inch W x 1.3
inch H x 2.2 inch L) and lightweight (2 ounces).
The 950 displays numerical values for functional arterial hemoglobin
oxygen saturation (%SpO2) in percentage and pulse rate (
beats per minute on light emitting diode (LED) digital displays.
With each detected pulse, the Perfusion Display blinks. Patient
perfusion signals are graded as good, marginal or inadequate and are
indicated as such by the perfusion indicator changing color from green
to yellow or red respectively. This sophisticated, yet simple technique
provides a pulse-by-pulse visual indication of waveform signal
quality, without requiring the user to perform complex signal analysis
during critical patient care situations.
Two AAA battery cells power the 950 and operate it for
approximately 1,600 spot checks
between battery replacement. When the batteries are low, the digital
displays will blink once per second. (Refer to page 9 for battery
specifications and page 10 for battery replacement instructions.)
a
or 18 hours of continuous operation
) in
English
a
Calculated at 40 seconds per spot check using two AAA alkaline battery
cells.
3
Page 8
N
The 950 at a Glance
%SpO2 Display
Heart Rate Display
Perfusion Display
Finger Grip
Figure 1. Top digital display illustration and bottom label.
Serial
umber
Battery
Polarity
Markings
4
Page 9

• %SpO
Numeric LEDs display the value of percent oxygen saturation,
calculated using a four beat exponential averaging technique.
(Refer to page 16, Theory of Operation, for information on
averaging.)
Display
2
• Heart Rate Display
Numeric LEDs display the pulse rate in beats per minute,
calculated by an eight beat sliding averaging technique. (Refer
to page 18 for information on averaging.)
• Perfusion Display
Provides a visual indication of the signal quality, while
blinking at the corresponding pulse rate. It is a method of
alerting the user to changes in the pulse waveform signal that
may affect the SpO2 data.
Green = good signal amplitude
Yellow = artifact or marginal signal amplitude
Red = inadequate signal amplitude
CAUTION:
The 950 may interpret motion artifact of sufficient amplitude and
regularity as good perfusion (green).
•
Battery Low
Numeric LEDs flash once per second when batteries are low.
Replace the batteries as soon as possible. Refer to page 10,
Inserting New Batteries.
• Finger Removal
A minus (-) sign appears in the left most digit of the %SpO2
display when the 950 senses that the finger has been removed.
The last measured SpO2 and pulse rate values freeze for ten
seconds, then the displays go blank.
• The label on the bottom of the 950 lists the model number,
serial number, CAUTION statement, and battery polarity
indicators.
English
5
Page 10

Intended Use
The 950 is a portable device for spot-checking or attended-care
monitoring of adult or pediatric patients. Use the 950 with finger
thickness between 0.3 to 1.0 inches. The 950 is not recommended
where motion is expected or for relatively long-term monitoring, e.g.,
greater than 30 minutes.
CONTRAINDICATION:
Do not use the 950 on infant or neonatal patients.
CAUTION:
Do not use the 950 in situations where alarms are required. The
950 has no audible alarms.
CAUTION:
It is intended for spot-checking or continuous monitoring by an
attending health care professional. Because the 950 has no audible
alarms, international labeling requirements (ISO 9919) dictate it be
labeled, “Not for continuous monitoring”.
CAUTION:
Check application site periodically (at least every thirty minutes) to
determine circulation, positioning and skin sensitivity.
CAUTION:
The 950 may not work for all patients. If unable to achieve stable
readings, discontinue use.
6
Page 11

Operating Instructions
Getting Started
1. Read this entire manual.
2. Thread the lanyard through the lanyard holes on the 950 following
the instructions on page 8, Lanyard and Lanyard Lock.
3. Insert the batteries following the instructions on page 10, Inserting
New Batteries.
4. Activate the 950 by inserting a finger.
5. Verify operation following the instructions on page 12, Verifying
Operation.
English
7
Page 12

Lanyard and Lanyard Lock
A lanyard is provided for the convenience of wearing the 950 around
the neck or wrist. The 950 will function with or without the lanyard.
1. Thread the ends of the lanyard through the lanyard holes as shown
below in Figure 2.
2. Push in the lanyard lock button, slide the lock onto the lanyard up
to the desired length.
3. Release the lock button to secure its position.
4. Reverse this procedure to remove the lanyard.
Figure 2. Lanyard and lock.
NOTE:
The lanyard must cross over the top of the 950 to permit full
opening of the sensor.
8
Page 13

Battery Requirements
Respironics recommends using AAA alkaline batteries to power the
950. Two of these batteries are included with each new system.
Concerning the Use of Rechargeable Batteries:
Rechargeable nickel cadmium or nickel-metal hydride batteries may
be used. However, rechargeable batteries need more frequent
replacement as they have less capacity than non-rechargeable alkaline
batteries.
WARNING:
Batteries may leak or explode if used or disposed of improperly.
CAUTION:
Do not use different types of batteries at the same time or mix fully
charged and partially charged cells at the same time, as the
batteries may leak.
CAUTION:
Batteries must be removed if the 950 is going to be stored for more
than one month or batteries may leak.
English
9
Page 14

Inserting New Batteries
1. Loosen the screw at the end of the 950 using a coin or a standard
flat screwdriver and remove the battery door.
2. Remove the old batteries and dispose of them properly.
Figure 3. Inserting new batteries.
3. Insert two new AAA batteries following the polarity markings
indicated on the battery door or bottom label of the 950. Proper
positioning of the batteries is critical.
4. Carefully position the battery door and firmly, but gently tighten
the screw. Do not force the door into place. The door only fits
when properly oriented. To avoid stripping screw threads, do not
tighten excessively.
5. Insert your finger into the 950 and verify operation. If the unit
does not turn on, remove the finger and wait two seconds before
reinserting a finger.
6. If the 950 still does not work, reinstall the batteries.
10
Page 15

Activating the 950
Activate the 950 by inserting the patient's finger into the pulse
oximeter as shown in Figure 4. (The 950 determines that a finger has
been inserted and then automatically activates the display.)
English
Figure 4. Applying the 950.
1. Insert the patient's finger into the 950 as shown above, until the
fingertip touches the built-in stop guide.
2. Center the finger.
3. Verify operation. Turn to page 12, Verifying Operation.
NOTE:
The 950 performs best when used on fingers other than the thumb.
NOTE:
If 950 does not turn on, remove the finger and wait 2 seconds
before reinserting a finger.
11
Page 16

Verifying Operation
1. When a finger is first inserted, the 950 executes an initialization
sequence.
2. After completing this sequence, the 950 begins sensing the pulse
(indicated by the blinking Perfusion display).
3. Allow the system to stabilize by observing at least ten seconds of
continuous green-colored Perfusion display pulses (consistent
with the patient's pulse) before relying on the displayed values.
4. If the Perfusion display blinks yellow or red, make sure
perfusion is not restricted. Try another finger.
5. If you are unable to achieve consistent green perfusion pulses and
stable readings, remove the 950 from the patient's finger and refer
to page 22, Troubleshooting Guide.
CAUTION:
The 950 may interpret motion artifact of sufficient amplitude and
regularity as good perfusion (green).
CAUTION:
Finger nail polish may reduce light transmission and thereby affect
SpO2 values.
NOTE:
If the pulse signal is inadequate for a 2-minute period the 950 will
automatically power down.
12
Page 17

Conditions That May Affect Use
•
Environmental
Fluctuating or flickering light may affect measurements.
Use of the 950 outside stated temperature and humidity
specifications may affect measurements. Refer to page 1,
Contraindications, Warnings, and Cautions.
• Motion
Excessive or rapid movement may affect measurements.
• Sensor Position
Sensor position is critical for accurate SpO2 measurements.
All emitted sensor light must pass through the finger before
reaching the detector. Do not allow positioning such that
some or all of the emitted light can by-pass the finger as
this will result in inaccurate SpO2 values.
While on the finger, do not press the 950 against any surface
and do not squeeze or hold the 950. The external spring
provides the correct pressure on the finger; additional
pressure may affect measurements.
• Perfusion
The finger must have perfusion adequate to cause the
Perfusion Indicator to blink green in order to give
accurate readings.
• Nail Polish
Fingernail polish may reduce light transmission which may
affect SpO2 values.
In addition, the following factors may degrade performance:
• an arterial catheter • moisture in the 950
• a blood pressure cuff • a finger outside the 0.3-1.0” size range
• an electrosurgical procedure • venous pulsations
• an infusion line • anemia or a low hemoglobin count
• cardiovascular dyes • the 950 not at heart level
English
13
Page 18

Maintenance
The advanced digital circuitry within the Respironics 950 requires no
calibration or periodic maintenance other than battery replacement.
Field repair of the 950 circuitry is not possible. DO
open the 950 case or repair electronics. Opening the case will damage
the 950 and void the warranty. If the 950 is not functioning properly,
refer to page 22, Troubleshooting Guide.
CAUTION:
A flexible circuit connects the two halves. Do not twist or pull on
the flex circuit.
CAUTION:
Do not immerse the 950 in liquid to clean.
NOTE:
The 950 may be sterilized using ethylene oxide (EtO) (cold cycle).
Remove
Follow the instructions on page 10, Inserting New Batteries.
NOTE:
Hold the 950 top and bottom together when the spring is released.
The two halves are held together by the flex circuit only.
the battery door and batteries before EtO sterilization.
Storage Requirements
Store the 950 within the stated temperature and humidity storage
specifications. Refer to page 19, Specifications.
CAUTION:
Batteries must be removed if the 950 is going to be stored for more
than one month or batteries may leak.
NOT attempt to
14
Page 19

y
y
Top
Half
Gripping
Flex
Circuit
SURFACES:
TO CLEAN THE INNER
soft cloth dampened with an
isopropyl alcohol solution or a
mild detergent solution.
to air dry.
• Wipe exposed surfaces with a
• Dry with a soft cloth or allow
Retaining
groove
BOTTOM
Insert
thoroughly dry before
• Surfaces should be
BACK
FRONT
re-engaging the spring.
Bottom
Half
1.14"
TOP
Finger
cavit
Pivot hole
e.
(Top
Half)
(Top
TO REPLACE THE SPRING:
TO REPLACE THE GRIPPING INSERT:
emove the old spring, carefully pulling the ends from the pivot holes on either sid
past the finger cavity, then seat the spring into the retaining groove.
R
Insert the ends of the new spring into the pivot holes and swing the spring up and
RE-ENGAGE THE SPRING
assembly.
design for proper
Distinguish spring
Retaining
SPRING DESIGN A
A gripping insert adhered to the upper interior surface of the 950 provides a more
secure fit to the finger. The 950 will function with or without the gripping insert,
however Respironics recommends that the insert be in place during normal
operation.
BACK
TOP
groove
BOTTOM
FRONT
Pivot hole
SPRING DESIGN B
Finger
cavit
Front
Edge
Half)
Carefully
peel from
surface
1.39"
TO DISENGAGE THE SPRING:
• Turn the 950 bottom side up.
spring up (to get it out of the retaining groove)
• Following the arrows on the label, gently pull the
• Carefully peel the old gripping insert away from the surface.
• Remove any residual adhesive with an isopropyl alcohol solution.
• Peel the backing paper off the new gripping insert, uncovering the adhesive back.
• Position the new insert as shown above and gently press it in place.
• To clean the inner surfaces.
• To replace the spring.
• To replace the gripping insert.
Figure 5. Maintenance choices.
Cleaning and replacing the spring and the gripping insert.
and then swing it forward, bringing the spring
past the finger cavity.
English
15
Page 20

Theory of Operation
Oximetry
The pulse oximeter shines red and infrared light through the tissue and
detects the fluctuating signals caused by arterial blood pulses. The
ratio of the fluctuation of the red and infrared light signals received
determines the oxygen saturation content. Conditions such as steady
venous blood flow, skin thickness, fingernail thickness, etc., do not
affect the saturation reading because they are constant and do not
cause fluctuations.
The function, f, depends on the physical properties of the LEDs
producing the light. These physical properties are fixed by the
manufacturing material and processes.
Note that the pulse oximeter readings do not depend upon the absolute
light intensity, rather upon the fluctuations in light intensity.
Characteristics such as thick skin or skin pigmentation will affect the
min and max proportionally, thus the ratio min/max does not
change. However, if too little light passes through, the pulse oximeter
will not display values. Pulse oximeters use two different wavelengths
of light (red and infrared), providing the ability to determine one
component of blood. The pulse oximeter is calibrated to closely
approximate functional oxygen saturation values. These values will
closely approximate laboratory instrument fractional saturation values
if the dysfunctional hemoglobin saturation levels are negligible.
In summary, because the pulse oximeter performs all computations
from the internal software and there are no critical parts to drift, no recalibration is needed.
16
Page 21

If the dysfunctional hemoglobin is carboxyhemoglobin or
methemoglobin, the difference between the oxygen saturation value
displayed by the pulse oximeter and the oxygen saturation values
determined by the laboratory instrument will be greater as the
dysfunctional hemoglobin levels rise approximately in accordance
with the following formulas, where:
Example 1
O2Hb = 96 O2Hb = 88
COHb = 0.5 COHb = 8
MetHb = 0.6 MetHb = 2
SpO2 = 97 SpO2 = 98
SaO2 = 97.07 SaO2 = 97.78
SpO2 = 950 determined and numerically
O2Hb = Fractional oxyhemoglobin
COHb =
MetHb =
SaO2 = Functional oxygen saturation in
displayed oxygen saturation in
percent
saturation in percent
Carboxyhemoglobin saturation
in percent
Methemoglobin saturation in
percent
percent
Example 2
English
17
Page 22

950 Averaging
For pulse rates below 112 BPM the averaging calculation is based on
a 4-beat exponential average for SpO2 (see below) and an 8-beat
sliding average for pulse rate. For pulse rates above 112 BPM the
averaging is doubled and then re-doubled above 225 BPM. The pulse
oximeter will not include questionable pulses in the average. Marginal
pulses may count less in the average than good pulses.
All averages are updated on a beat-by-beat basis. The display is
updated every 1 ½ seconds with the most recent value.
Also, if the pulse oximeter signal is “noisy” or missing, the display
will hold the last value for 10 seconds before showing dashes. With
the 4-beat exponential average, the effect of each measurement
gradually decreases beat by beat. Each measurement initially counts
for ¼ of the average. This weight is decreased by multiplying by ¾ on
each succeeding beat:
Beat Effect (weighting in average)
1 ¼ = 0.250
2 x ¾ = 0.1875
3 x ¾ = 0.1406
4 x ¾ = 0.1055
5 x ¾ = 0.0791
The SpO2 4-beat exponential average is fast enough to follow
physiological changes.
For the pulse rate sliding 8-beat average, each beat counts 1/8 for 8
beats and thereafter has no affect on the average.
18
Page 23

Specifications
1. Oxygen Saturation
Range
2. Pulse Rate Range
3. Displays
a) Patient Indicators Tri-color perfusion light emitting diode (LED)
b) Digital Displays Two 3-digit 7-Segment LEDs
4. Measurement
Wavelengths
a) Red: 660 nanometers @ 3 mw nominal
b) Infrared: 910 nanometers @ 3 mw nominal
5. Accuracy
a) %SpO2 Accuracy
(+
1 S.D.)a
b) Rate Accuracy +
6. Temperature
a) Operating
b) Storage/
Transportation
7. Humidity
a) Operating 10 to 90% non-condensing
b) Storage/
Transportation
8. Power Requirements
9. Battery Life
a) Operating
b) Storage 9 months typical
12. Dimensions
13. Weight
Classifications per IEC 60601-1 / CSA601.1 / UL2601-1
Type of Protection Internally powered (on battery power)
Degree of Protection Type BF-Applied Part
Mode of Operation Continuous
0 to 100%
18 to 300 pulses per minute
70 to 100% +
3% + 1 digit
+32°F to +122°F (0° to +50°C)
-4°F to +122°F (-20° to +50°C)
10 to 95% non-condensing
2 AAA Batteries
Approximately 18 hours of continuous
operation
1.3 inch W x 1.3 inch H x 2.2 inch L
(3.3 cm x 3.3 cm x 5.7 cm)
2 ounces (60 grams), including 2 AAA
alkaline batteries
b
2 digits
c
English
a
Standard Deviation (S.D.) is a statistical measure; up to 32% of the readings
may fall outside these limits.
b
Using 2 AAA alkaline batteries; based on approximately 1,600 spot checks
calculated at 40 seconds per spot check.
c
Using 2 AAA alkaline batteries.
19
Page 24

Parts and Accessories
Parts
Part Number Description
100-0337-00 950 Battery Door and Contact
100-0338-00 Gripping Insert
100-0339-00 950 External Spring
100-0340-00 Lanyard Cord and Lock (Black)
Accessories
The following accessories function with the Respironics 950:
• Model 960 Finger Phantom (pulse oximeter testing device)
For information regarding parts and accessories, contact your
local sales representative or distributor.
For the sales representative or distributor in your area contact
Respironics.
Technical Support
For technical support and before returning any equipment, call
Respironics:
Technical Support Telephone: 1-800-421-8754 (USA and Canada)
Technical Support Telephone: 1-770-499-1212 (International)
Customer Service Telephone: 1-800-345-6443 (USA and Canada)
Customer Service Fax: 1-800-886-0245 (USA and Canada)
www.respironics.com
20
Page 25

Warranty
RESPIRONICS, INC. (RESPIRONICS) warrants to the purchaser that
the Model 950 (excluding batteries, lanyard and lanyard lock) will be
free from defects in material and/or workmanship for one year from
the date of delivery. During the warranty period, RESPIRONICS will
correct any defects in material or workmanship to conform to
specifications, free of charge. RESPIRONICS reserves the right to
replace the Model 950 with a comparable unit. Shipping costs are the
responsibility of the purchaser. Any replacement parts or units are
warranted for the remainder of the original warranty period. The
purchaser must notify RESPIRONICS of a defect within the
applicable warranty period, and return the Model 950 in question.
Proof of purchase may be required before any warranty consideration
by RESPIRONICS occurs. This warranty is not transferable.
Any sign of tampering with the Model 950, voids the warranty in
its entirety.
This warranty shall be the sole and exclusive remedy by the purchaser
thereunder for any units or accessories delivered to the purchaser that
are found to be defective in any manner, whether such remedies be in
contract, tort or by law.
DISCLAIMER AND EXCLUSIVITY OF WARRANTY:
THE EXPRESS WARRANTIES SET FORTH IN THIS MANUAL
ARE EXCLUSIVE AND NO OTHER WARRANTIES OF ANY
KIND, WHETHER STATUTORY, WRITTEN, ORAL, OR
IMPLIED INCLUDING WARRANTIES OF FITNESS FOR A
PARTICULAR PURPOSE OR MERCHANTABILITY SHALL
APPLY.
The purchaser agrees to pay a $100.00 (USD) service charge for a
warranty repair request on any Model 950 sent to RESPIRONICS that
is determined to be within specification.
Non-warranty work is charged at the minimum repair rate effective at
the time of the Model 950 return to RESPIRONICS. All repairs
include a complete functional test using factory test fixtures.
English
21
Page 26

Troubleshooting Guide
Symptoms Possible Cause Possible Solution
Numeric displays
blinking at one second
intervals.
950 will not activate. Batteries incorrectly
Depleted batteries. Replace batteries. See
950 not attached to
950 turned off while on
Minus (-) sign in left
most digit of the
%SpO2 display.
Finger removal. Reinsert finger.
950 not functioning. Call RESPIRONICS
Unable to obtain green
perfusion.
Finger poorly perfused. Reposition 950 on
Finger not correctly
Possible interference
Batteries are low. Replace batteries
inserted.
patient.
finger.
Poor signal. Reposition finger.
Low patient pulse
strength.
positioned.
from:
immediately. See page
10.
Check batteries. See
page 9 and 10.
page 10.
Apply 950 to patient.
See page 11.
Remove 950 from
finger, then reinsert
finger.
Technical Support.
Reposition 950 on
finger.
finger.
Reposition 950 on
finger.
Reduce or eliminate
interference.
• arterial catheter
• blood pressure cuff
• electrosurgical
procedure
• infusion line
Circulation reduced
because of excess
pressure between 950
and hard surface after
inserting finger.
Excessive ambient light. Reduce ambient light.
Excessive patient
motion.
950 applied to polished
fingernail.
Allow 950 and finger
to rest comfortably on
surface.
Reduce patient motion.
Remove fingernail
polish.
22
 Loading...