

Page 1
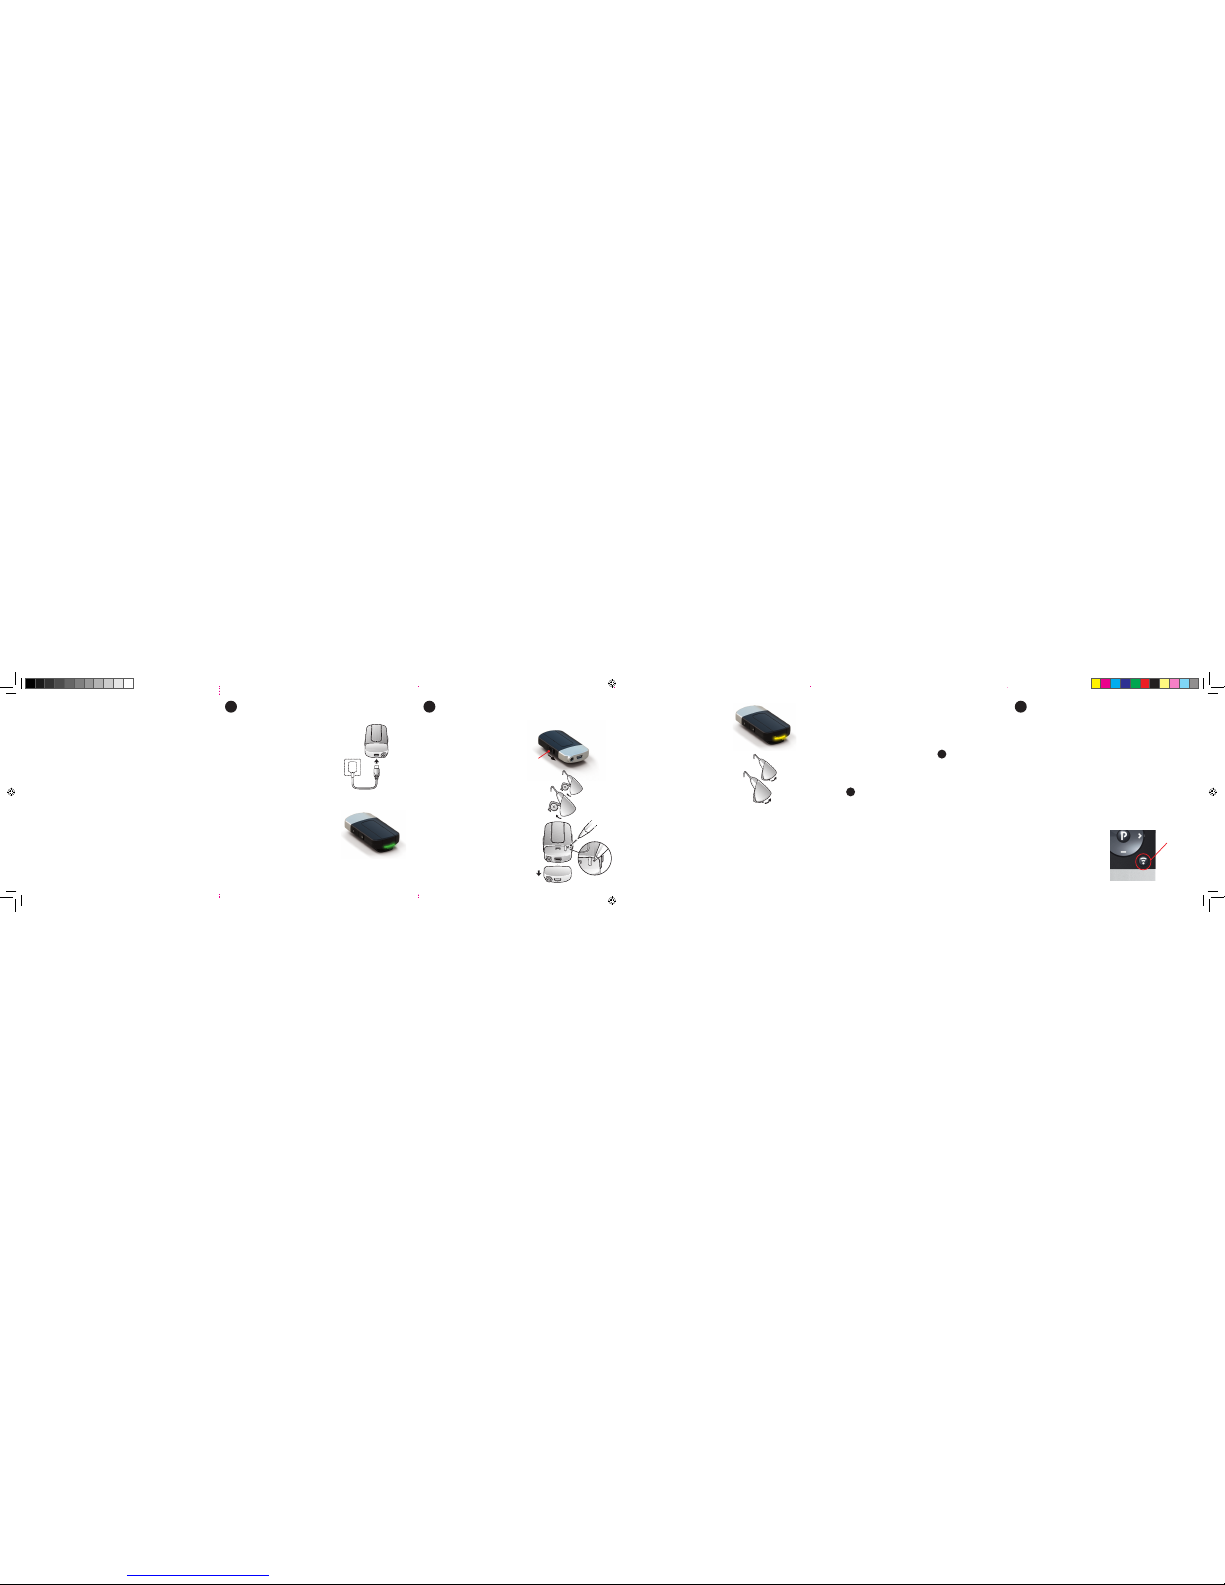
1. Turn on your Clip-On
Microphone by sliding the
ON/OFF switch down to
the ON position.
2. Open the battery doors
on both hearing instruments.
3. Remove the cover from
the Clip-On Microphone.
Press the pairing button
once to put the Clip-On
Microphone in pairing
mode for 20 seconds.
PAIR WITH YOUR HEARING INSTRUMENTS
LISTENING TO SOUND FROM YOUR
CLIP-ON MICROPHONE
1. Plug one end of the
charging cable into the
Clip-On Microphone.
2. Plug the other end of
the charging cable into
a power outlet.
3. Generally, charging is
complete when the red
LED indicator turns solid
green interrupted by a red
blink every 2 seconds.
However, when charging
for the first time allow it
to charge for at least 3
hours, even if the battery
indicator indicates that the
battery is fully charged.
4. The LED indicator will
now blink yellow once
every 2 seconds to indicate that it is ready to be
paired in channel 1.
5. While in pairing mode
close the battery doors
on both hearing instruments.
6. Successful pairing
will be indicated by an
audible melody played in
both hearing instruments.
Replace the cover on
the Clip-On Microphone
once pairing is complete.
CHARGE YOUR CLIP-ON MICROPHONE
Turn on the Clip-On Microphone and make sure your
hearing instruments are
turned on. Streaming may
be started in one of two
ways:
OPTION A: Press and hold
the push button on both
hearing instruments for
about 3 seconds;
OR:
OPTION B: If you have a
compatible Remote Control
(optional), simply press the
streaming button.
Once the Clip-On Microphone has been connected
an audible melody will play
in your hearing instruments.
This will be followed by either the sound coming from
the Clip-On Microphone or
the sound coming from a
connected auxiliary audio
device (See section D).
A
B
C
GETTING STARTED (Quick guide)
Clip-On Microphone
Before you can use your
Clip-On Microphone it is
necessary to:
• Charge your Clip-On
Microphone for at least
3 hours.
• Pair with your hearing
instruments.
NOTE! Check with your
hearing healthcare professional to determine if your
instruments have been
pre-paired. Instruments
that have been pre-paired
do not need to be paired
again.
1.
2.
5.
4.
1.
On/Off
switch
3.
3.
It is possible to pair up to
three streaming accessories
with a given pair of hearing
instruments.
To pair a Clip-On Microphone in channel 2:
• Follow steps 1 and 2
under .
• Then press the pairing
button of the Clip-On
Microphone TWO times.
The LED indicator will
now blink yellow twice
every 2 seconds to indicate that it is ready to be
paired in channel 2.
To pair a Clip-On Microphone in channel 3:
• Follow steps 1 and 2
under .
• Then press the pairing
button THREE tim es.
The LED indicator will blink
yellow three times every
2 seconds.
Finish by closing the battery
door on both hearing instruments.
PAIRING THE CLIP-ON MICROPHONE IN CHANNELS 2 OR 3
PAIRING THE CLIP-ON MICROPHONE IN CHANNEL 1
Streaming
button
2.
B
B
17766144-US-13.08-Rev.A.indd 1 16-08-2013 11:53:58
Page 2
MM
A
TV
B
LISTENING TO SOUND FROM A SECOND OR THIRD
STREAMING ACCESSORY
TO STOP LISTENING TO A STREAMING PROGRAM
Your hearing instruments
can be paired to as many as
three compatible streaming
accessories. Each time you
press and hold the push
button on the hearing instruments or press the streaming button on the compatible
Remote Control (optional),
you will advance to the next
streaming program. In doing so, you can access a
second or third streaming
accessory.
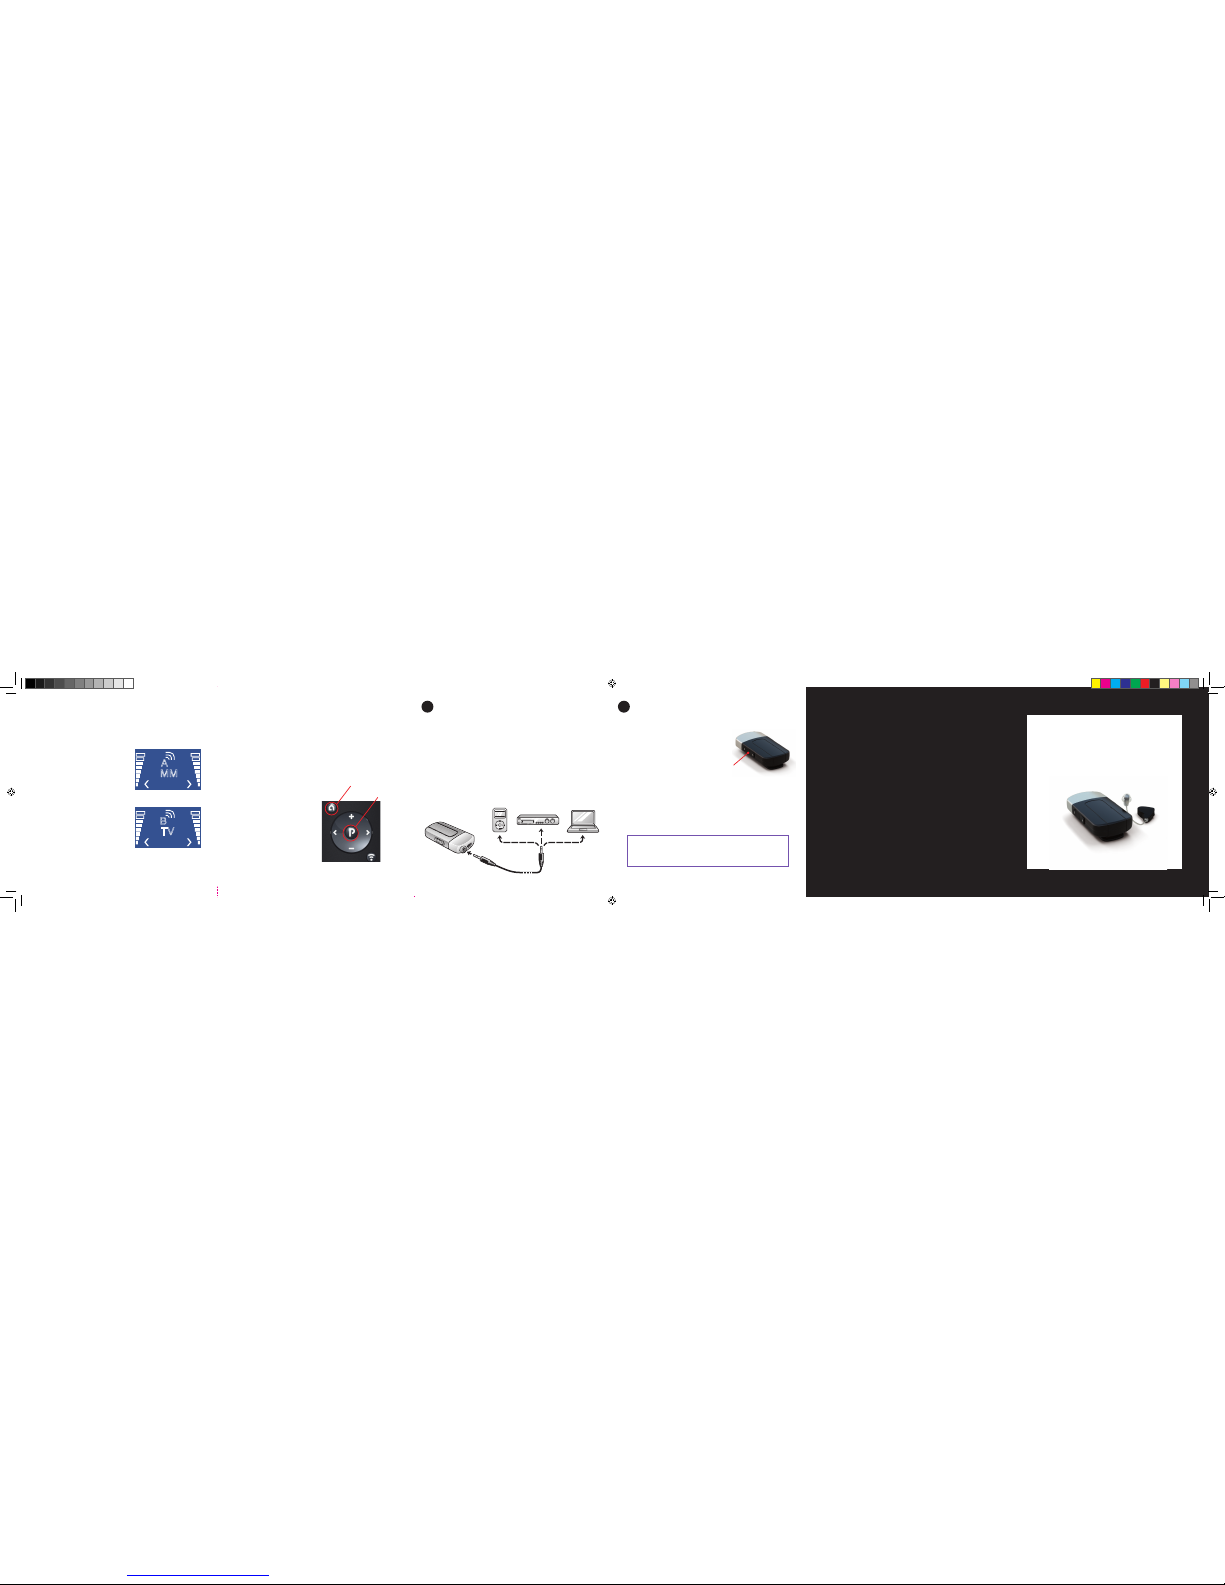
To stop listening to a
streaming program and
return to the last listening
program used:
OPTION A: Quickly press
and release the push button
on both hearing instruments;
OR:
OPTION B: Press the “P”
button, located in the center
of the Remote Control key
pad. You may also press the
“Home” button to return to
your default settings.
“P” button
“Home” button
USING THE LINE-IN
VOLUME CONTROL—MICROPHONE
AND LINE-IN
The line-in can be used to
stream audio signals from
most audio devices directly
to your hearing instruments.
1. Insert the included cable
into the line-in jack on the
Clip-On Microphone.
2. Plug the other end of the
cable into the AUDIO OUT
on the audio device from
which you wish to stream.
1. Use the “+” and “-“ keys
to adjust volume to a
comfortable level. Make
sure that your hearing instruments are comfortably
adjusted before changing
the volume on the Clip-On
Microphone.
D E
1.
2.
Volume
control
Tips and Support
For more details on the Clip-On Microphone, refer
to the user guide.
USER GUIDE
GETTING STARTED
(Quick Guide)
Clip-On Microphone
17766144-US-13.08-Rev.A
ReSound North America
8001 Bloomington Freeway
Bloomington, MN 55420
phone: 1-888-735-4327
ReSound Canada
303 Supertest Road
Toronto, Ontario M3J 2M4
phone: 1-888-737-6863
17766144-US-13.08-Rev.A.indd 2 16-08-2013 11:54:01
 Loading...