

Resolution RE656 CryptiX Installation Manual
RE656_Helix-Compatible_HeliPAD_Instructions.doc Page 1 of 4 26-Feb-15
24-Hour Tech Support Line: (715)808-0164
www.ResolutionProducts.com
Installation Guide
RE656 CryptiX™-Compatible Helipad™
Features
• Secure, 4 to 10 digit code to disarm
• 1-button arming
• 2-way RF, Shows system status
• Mounts on wall via VHB® tape, or screws
• Low Battery indication
• 1-2 year battery life
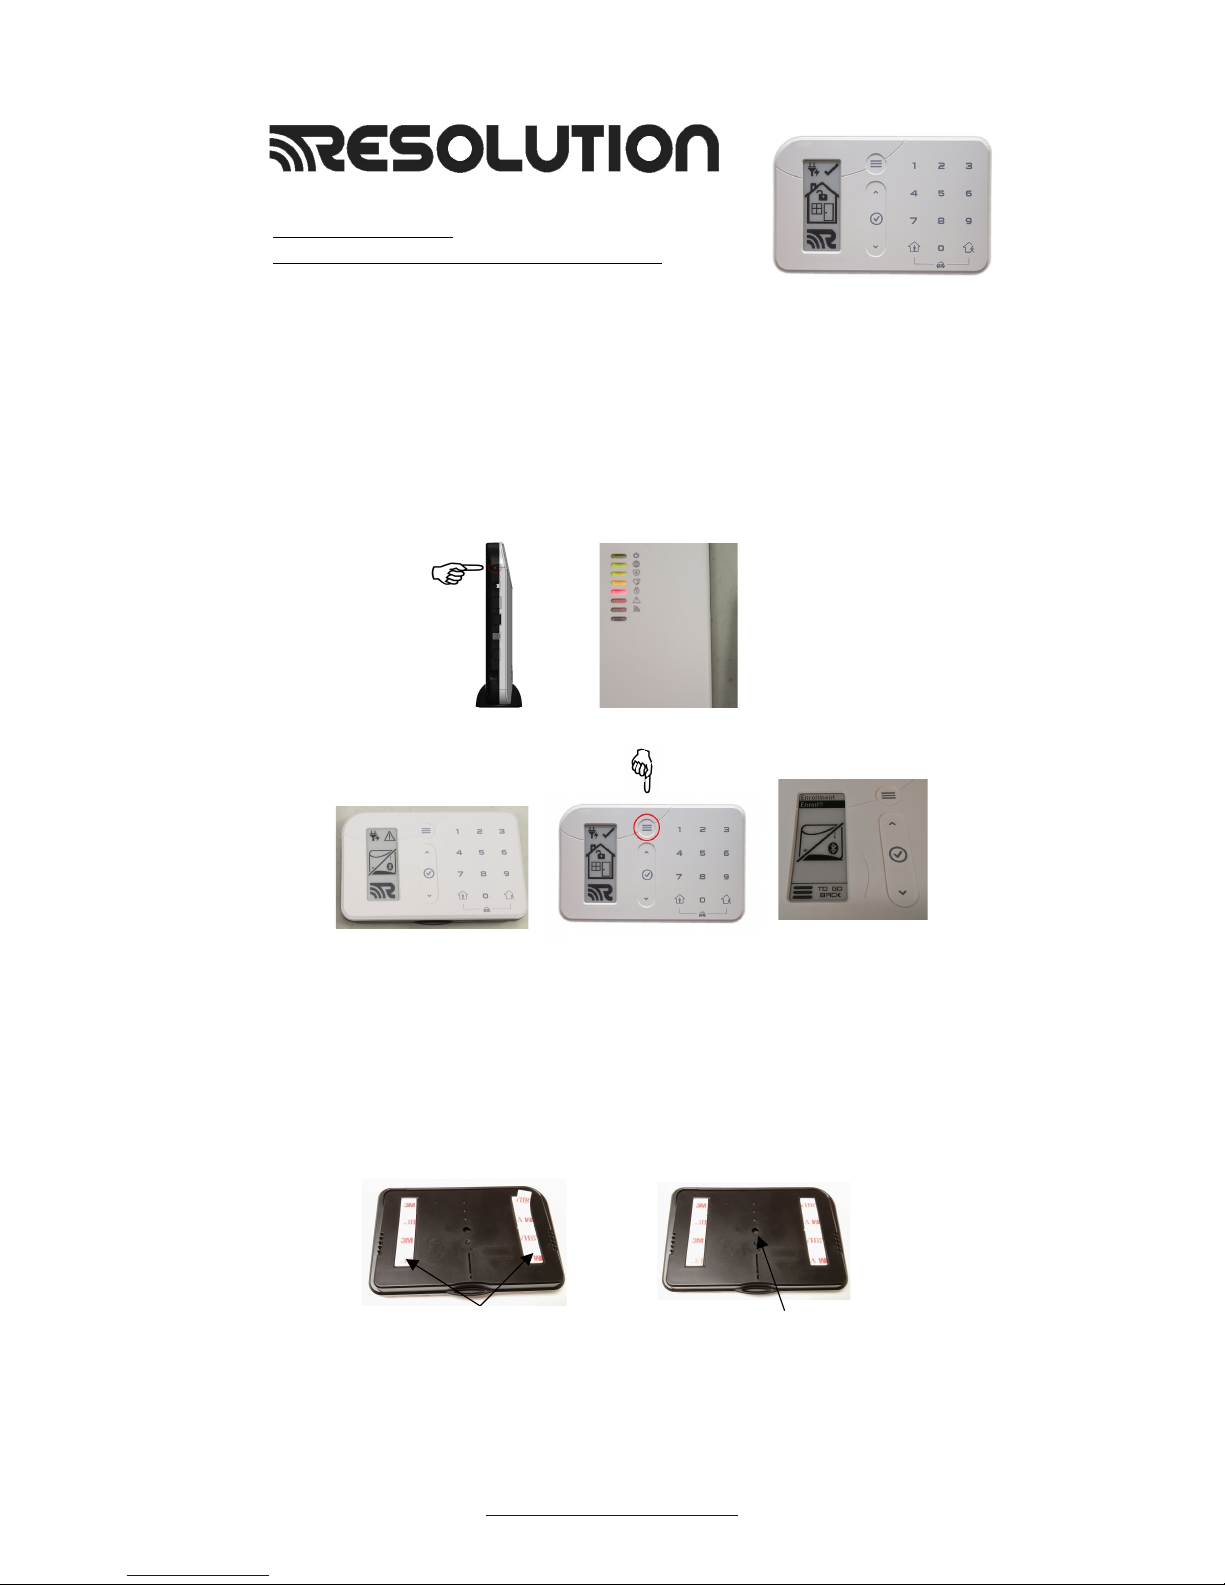
Enrollment
• Place panel into Bluetooth enrollment mode.
• Hold the pair button on the side of Helix for 3 seconds (until it
beeps).
• Place Helipad into Bluetooth enrollment mode by following the below
steps.
• To configure the Helipad, log into the web based dealer portal
Installation
• Place Helipad near exit or entry doors. Use either the VHB tape or a
mounting screw (#4 or #6) to mount the Helipad in place
Mounting hole
Press the Helipad menu
button to enter the
settings menu.
Press the select button
to enroll the Helipad.
Helix with beep once it
accepts enrollment.
VHB tape
Arming LED will flash
green and red.
An unenrolled HeliPAD
screen will appear as
such.
RE656_Helix-Compatible_HeliPAD_Instructions.doc Page 2 of 4 26-Feb-15
24-Hour Tech Support Line: (715)808-0164
www.ResolutionProducts.com
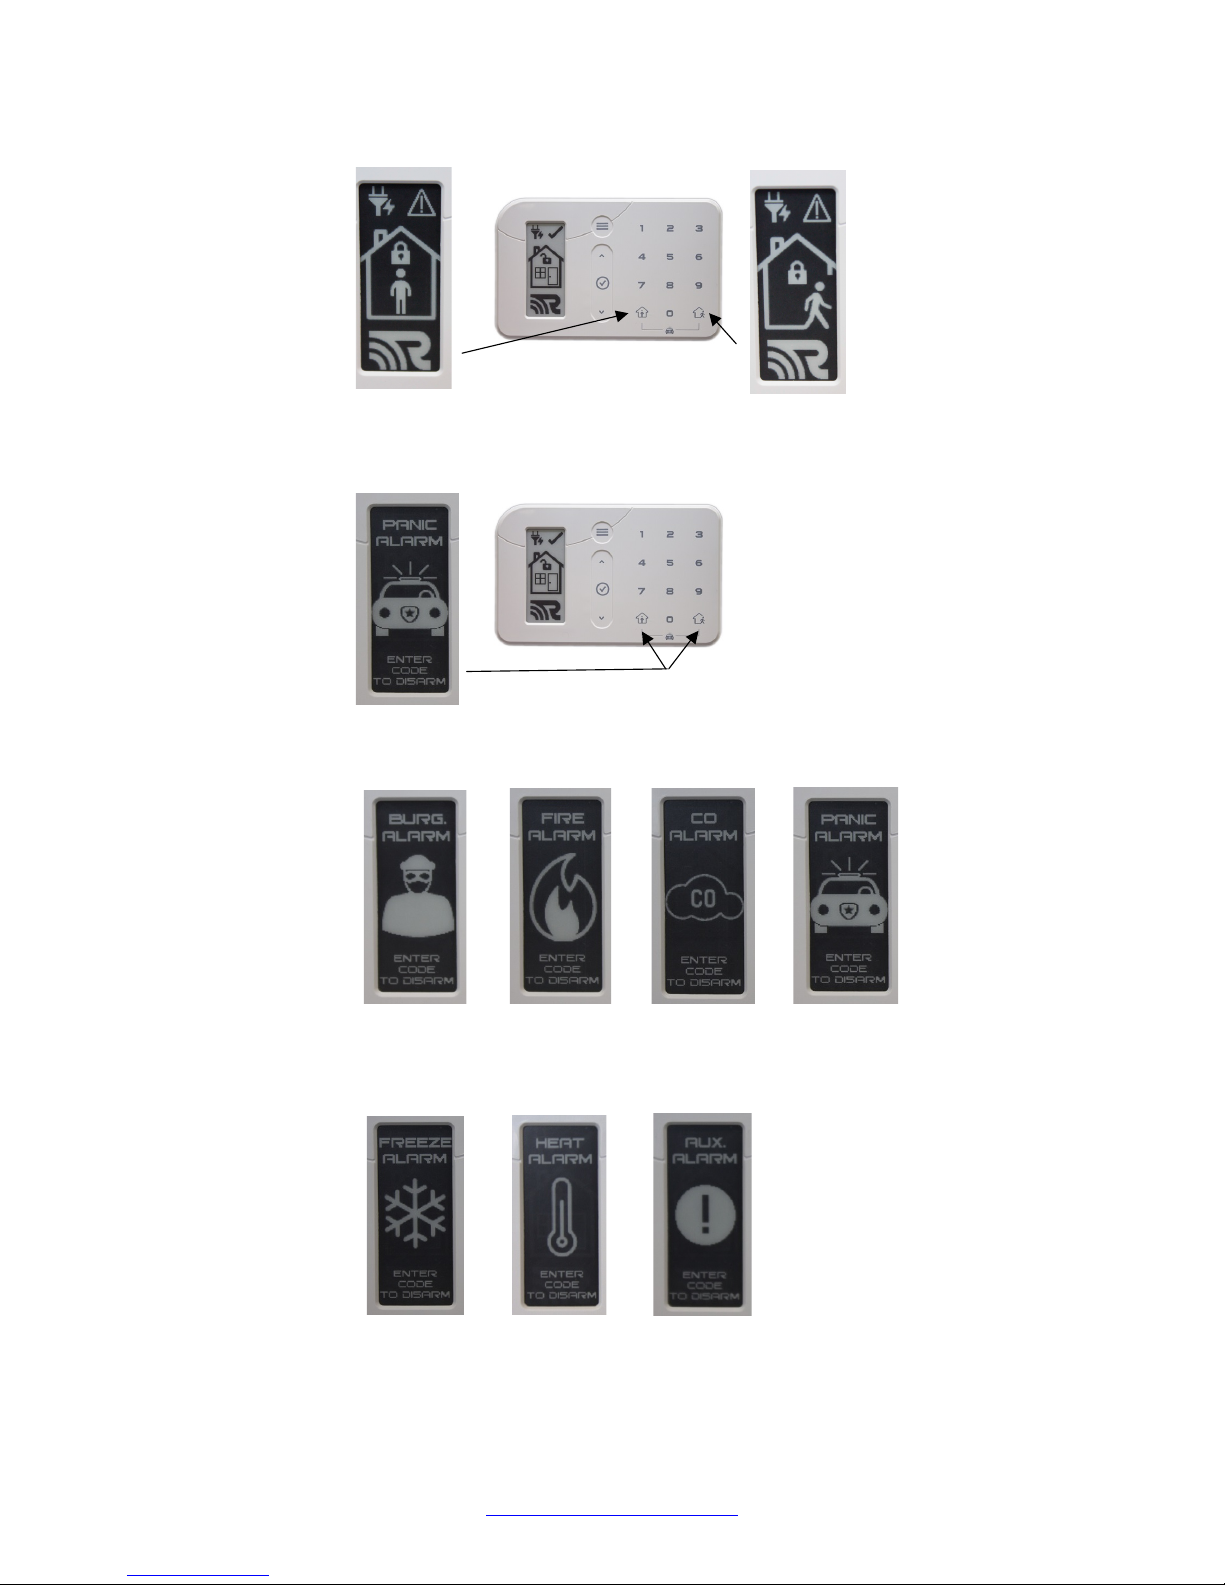
Operation
• Arm Stay or Arm Away
• Panic Alarm
• Alarm Types
Arm Stay: Arm while
home is occupied
Arm Away: Arm while
home is unoccupied
Panic Alarm: Authorities
will be alerted.
Activated by
pressing Arm
Stay button
Activated by
pressing Arm
Away button
Activated when Arm
Stay & Arm Away are
pressed simultaneously.
Burglar Alarm
Fire Alarm
CO Alarm
Freeze Alarm
Heat Alarm
Panic Alarm
Auxiliary Alarm
 Loading...