

Resolution RE328, RE228, RE128 User Manual
Adaptive Bed Sensor Pad
Steps to Install the Adaptive Bed Sensor
1. Check the sensor for any visible defects or
damage. If damage is visible the sensor pad
should be replaced.
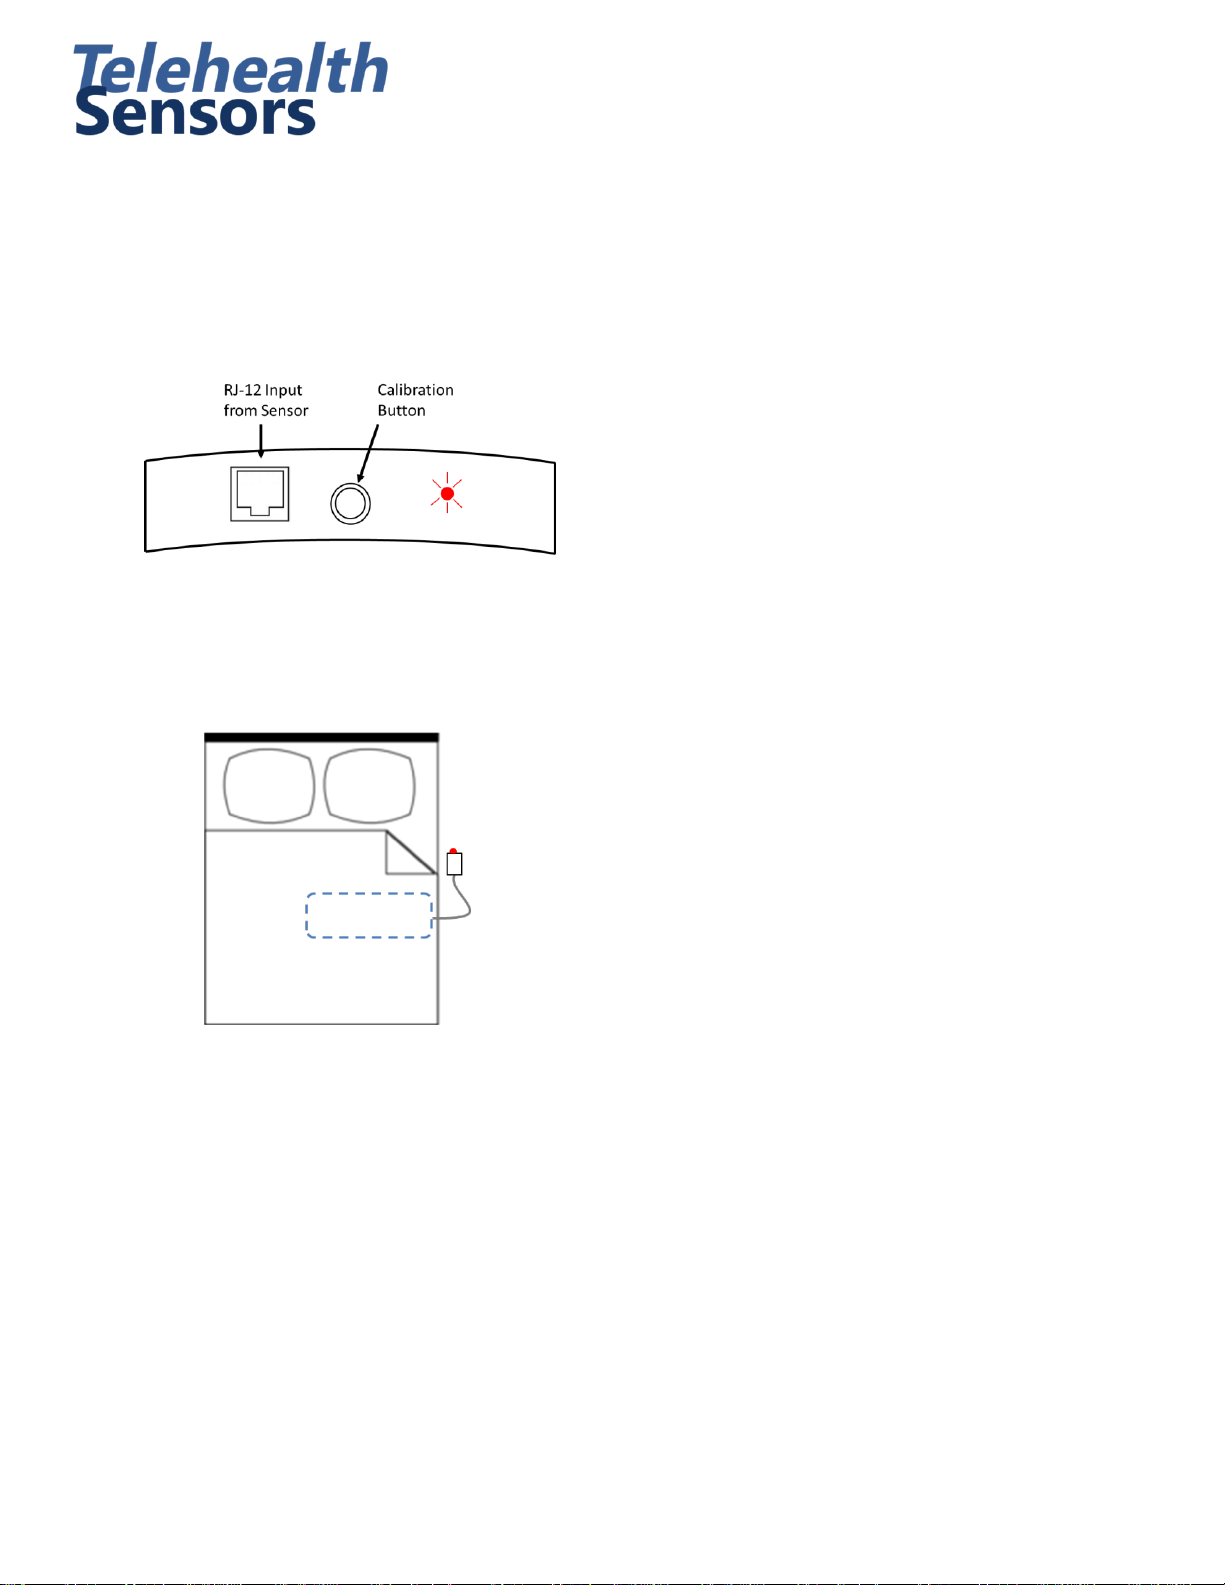
2. Verify that the pad is attached to the correct
port on the white control box (shown below).
3. Lift mattress and place the pad (blue side up)
between the box spring and mattress. The
sensor should be located below the hips or
lower back of the patient (shown below).
Cleaning the Sensor Pad
1. Use a damp (not soaked) cloth with a
mild disinfectant and wipe down the
sensor pad.
2. Carefully wipe down and clean the
cable, checking for any damage that
may have occurred.
3. DO NOT immerse the pad in any liquid.
4. After cleaning the sensor, repeat all of
the installation steps when replacing
the sensor (including calibration).
Storage
1. Store the sensors flat and DO NOT bend
or roll the sensors.
2. The sensors are intended for normal
indoor use in relatively low humidity
environments.
4. Release the mattress, allowing the weight of the
mattress to be applied to the pad.
5. To calibrate the sensor, press and hold the
white button on the control box for 5 seconds.
The red light will turn on signaling that the
calibration was completed.
6. Secure the control box to the bed by either (a)
adhering it to the side of the bed or (b) tucking
the control box between the mattress and box
spring.
7. Verify that all cables have been secured to
eliminate tripping hazard.
Care and Use
1. Never pull on or jerk on the cable.
Doing so may damage the connector or
the mat.
2. Verify that the pad is lying flat under
the mattress and that it is not bent or
folded over.
3. Replace the batteries every two years
by removing the top cover of the white
control box. The device takes (2) AAA
batteries.
 Loading...