

Resolution RE261, RE261T, RE361, RE661, RE159 User Manual
...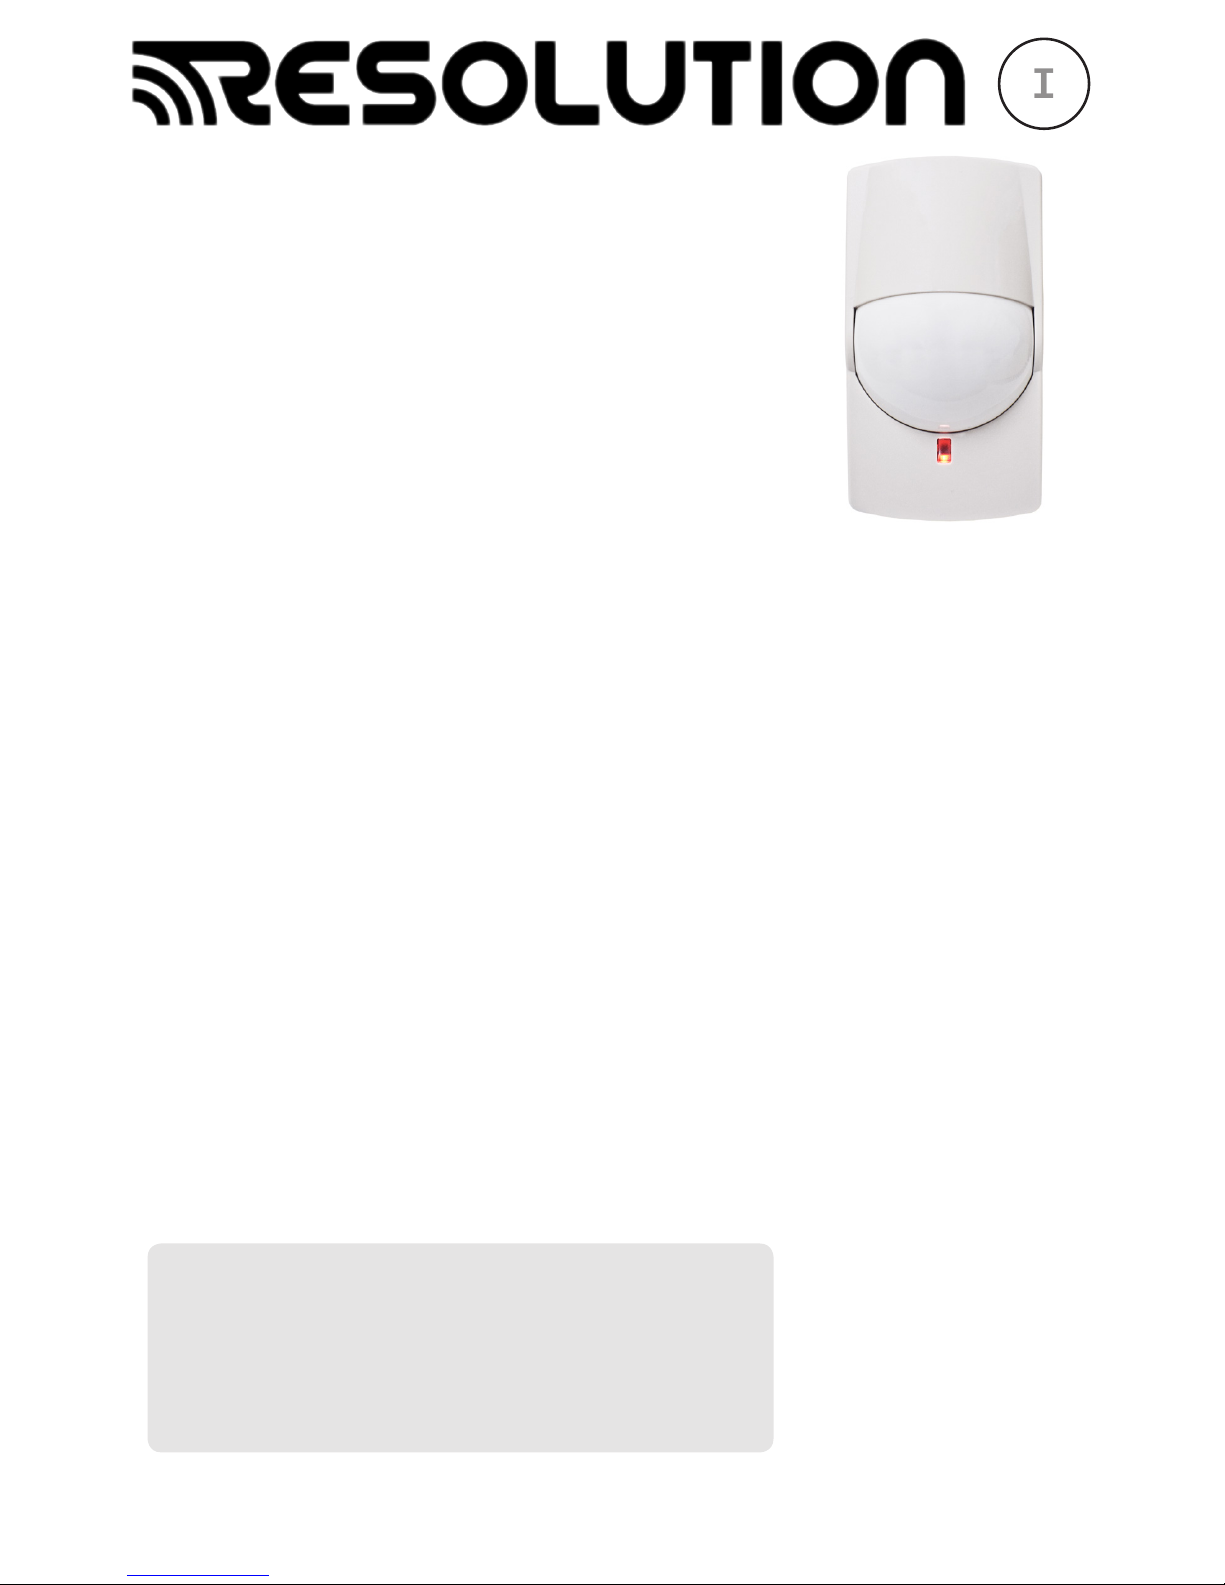
Indoor 40 PIR Motion Sensor
PIR Motion Sensor alarms when motion is sensed. It is a
commercial battery-powered wall mount sensor with an 85
degree detection range.
Features
• 85° detection range with 78 distinct detection zones
• Range up to 40 feet
• Selectable pulse count 2 or 4
• Designed for commercial applications
• 5 year warranty
Enroll all variants by entering their serial numbers into the
security panel. Alternatively, the sensor can be enrolled in
one of the following ways:
Cryptix™, DSC®, Qolsys® and Interlogix® variants are
enrolled by placing the panel into enrollment mode, and
then pulling the battery tab or tampering the device.
Honeywell® and 2GIG™ variants are enrolled by placing
the panel into wireless enrollment mode and either
removing the battery tab while holding the tamper, or by
tripping the device three times. These sensors must be
enrolled as a “Loop 1” sensor.
Install by screwing two #5 screws through the unit’s mounting
knockouts. Use 2 of the 3 mounting knockouts in the center
of the unit’s back to mount on a at wall. Use 2 of the 4
corner knockouts to mount the unit in the corner of a room.
Mount the sensor 5ft to 8 ft (1.5m-2.4m) high. Screw the
third #8 screw through the wall tamper knockout into the
wall, ensuring that the wall tamper screw is attached to
something solid. Tighten all screws until snug. Enroll the
sensor using the instructions above. Close the cover and
conduct a walk test. After testing, take the unit out of walk
test mode and close the cover again. Finally, nish threading
the white #4 screw until it is snug.
Use your panel’s installation guide to verify proper system setup.
I
N
S
T
A
L
L
G
U
I
D
E
I
Mounting Tips
• Avoid direct sunlight
• Avoid facing directly to AC or heating vents
• Avoid vapor or high humidity
• Avoid curtains, screens, etc. from blocking detection
• Do not install outdoors
• Mounting height 5ft-8ft (1.5m-2.4m)
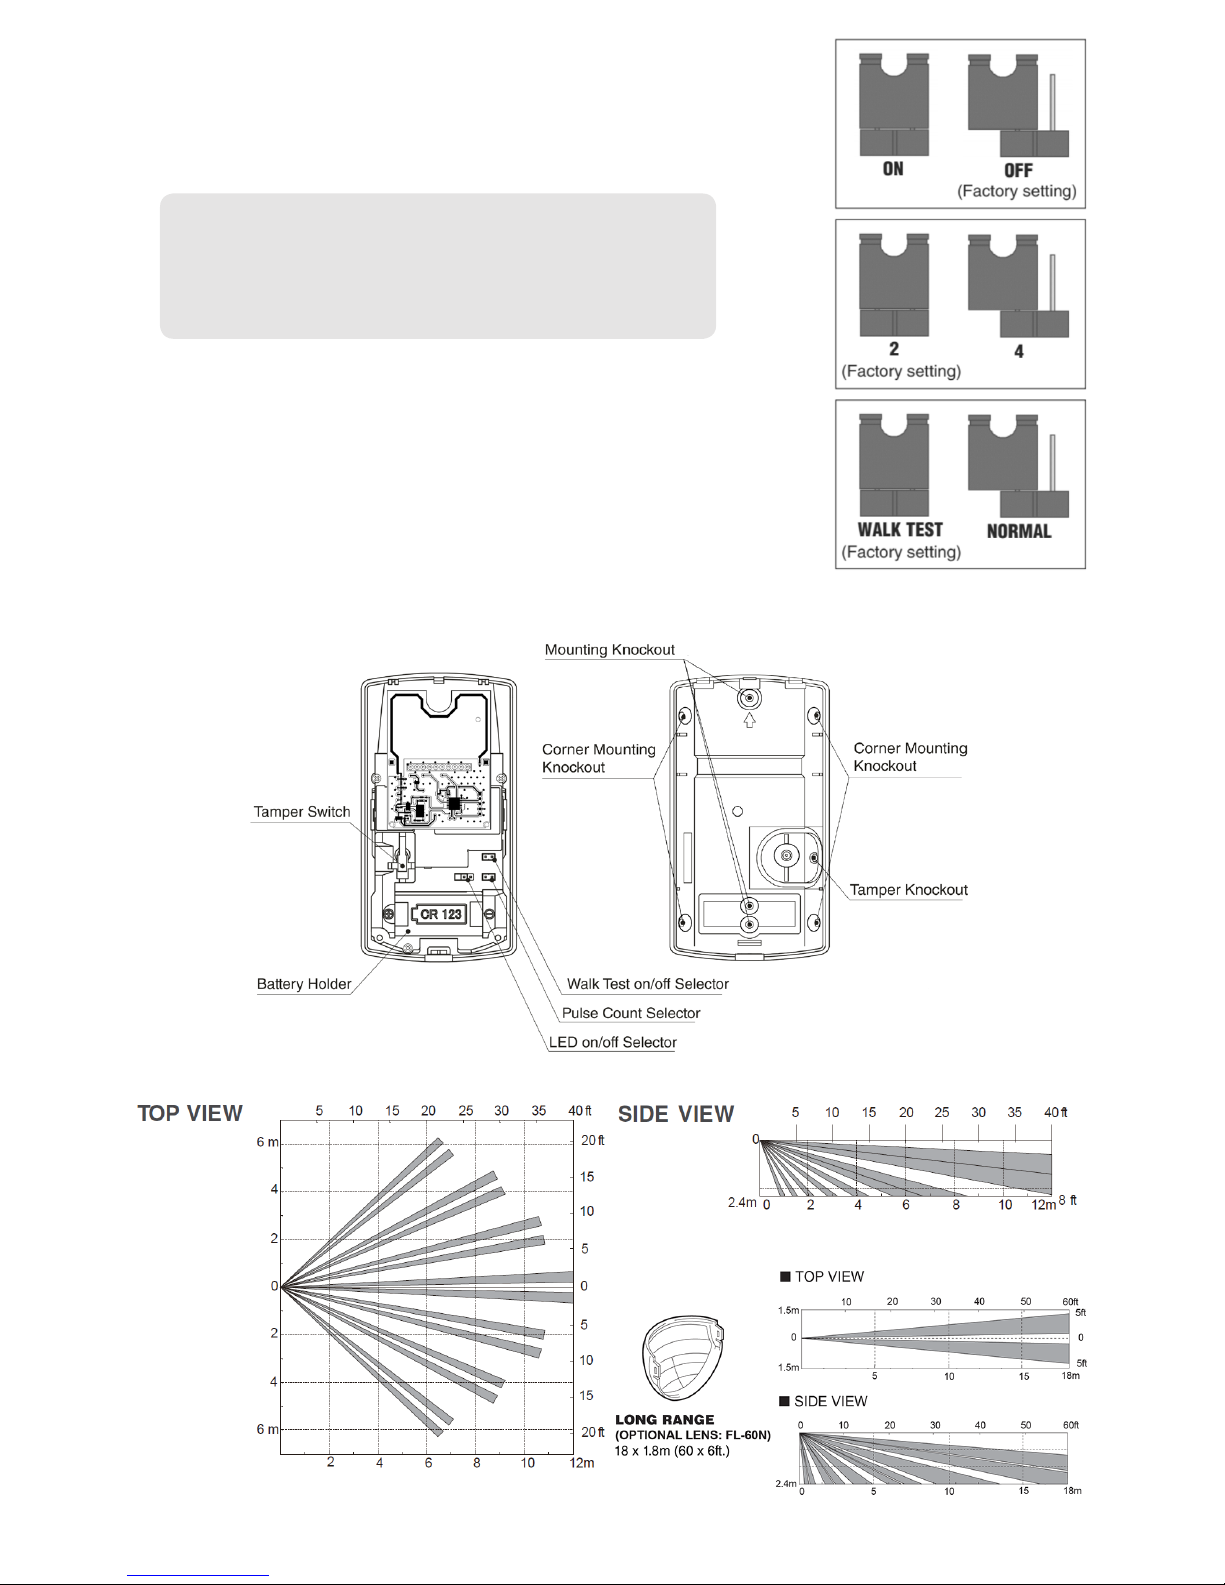
Sensor Functions
Alarm LED can be switched either “ON” or “OFF”.
Pulse Count can be switched to either “2” or “4” pulse
mode depending on the environmental conditions
of the installation.
Walk Test Jumper puts sensor in Walk Test Mode when
connected or Normal Mode when not connected. The
LED will light up and an alarm will be sent whenever
motion is detected if the unit is in Walk Test Mode. In
Normal Mode, the unit will only send an alarm every 2
minutes, and the LED will only light up if the “LED ON”
jumper is connected.
Detection Range
Pulse Count
• Select “2” for normal applications.
• Select “4” for use in areas where there may be
movement by small animals or other objects,
such as fax machines or curtains.
Mounting and Jumper Locations
LED
Pulse Count
 Loading...