

Page 1
RE027: Resolution’s Outdoor IP HD Camera Quick Set-Up Guide
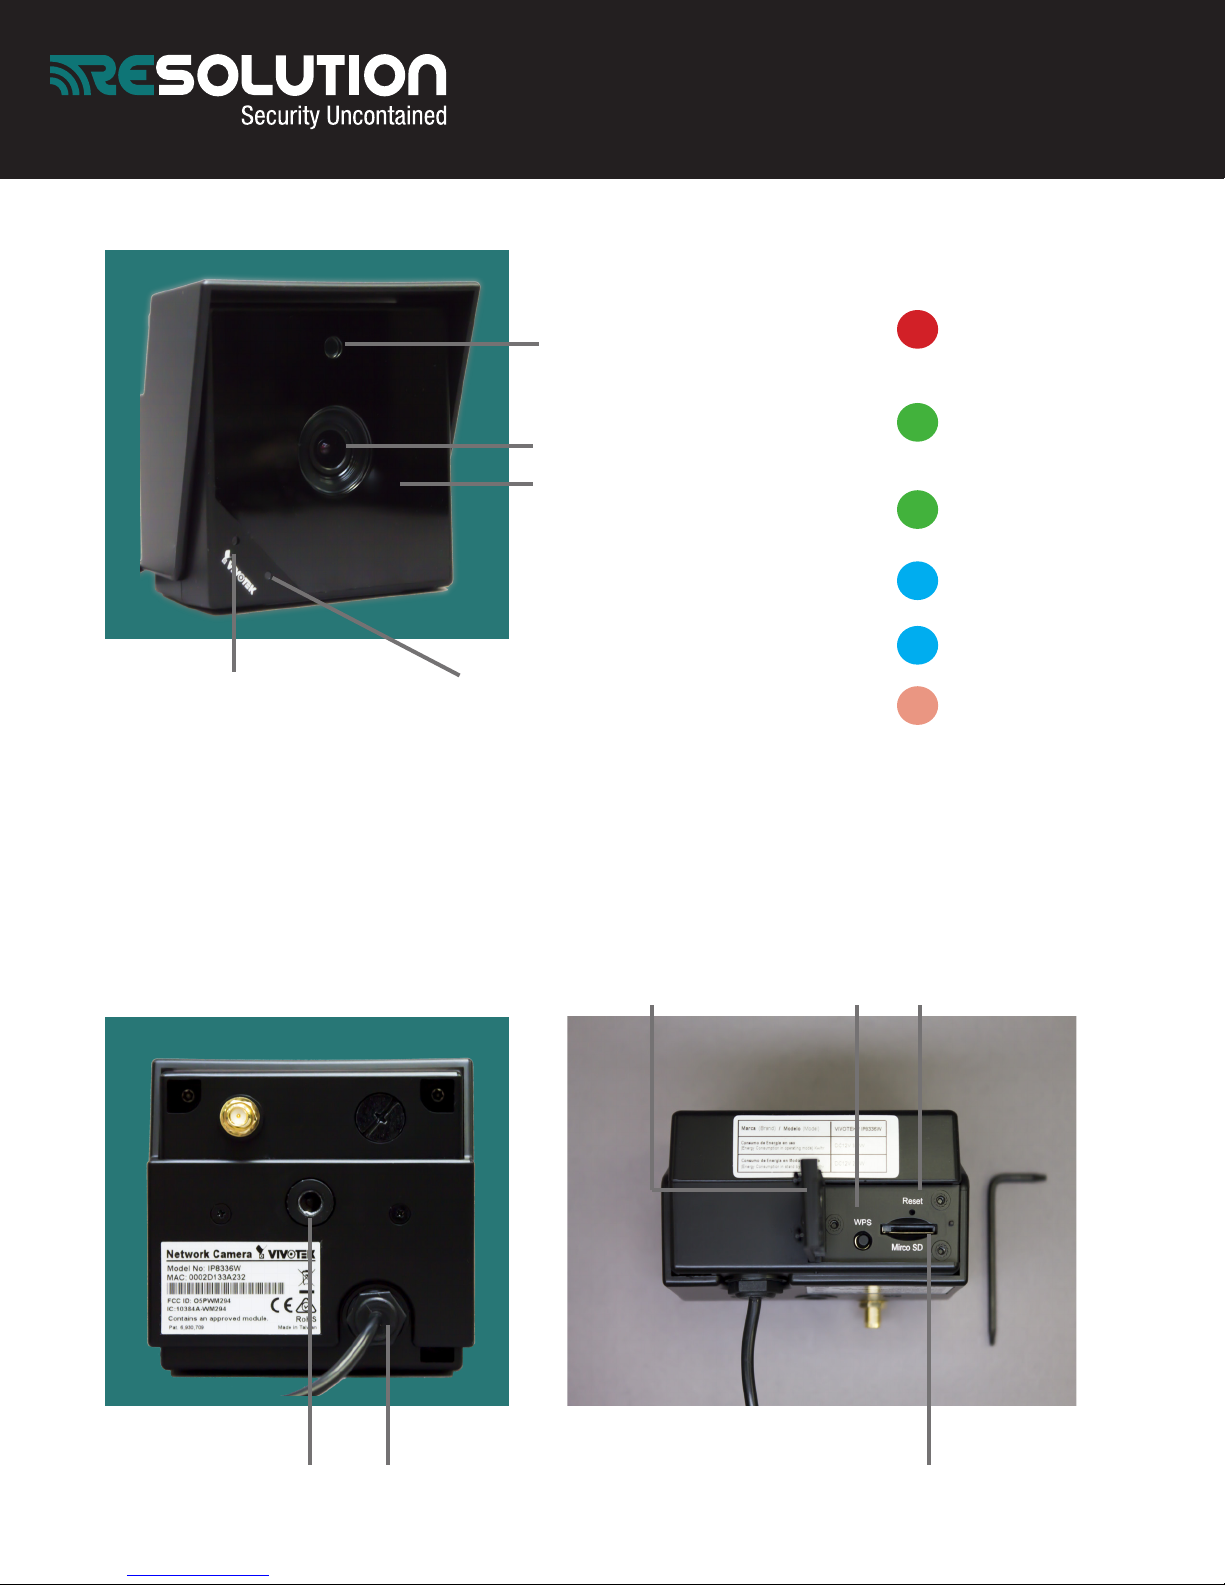
LED Colors:
RED SOLID Power
Light Sensor
Lens
up. Or Network
failed.
GREEN & RED
FLASHING upgrading
firmware.
Microphone Status LED
IR LEDs behind panel
In your package, you should find:
• (1) Security camera
• (1) Antenna
• (1) Software CD
• (1) AC power adapter
• (1) Mounting bracket set
• (1) Camera stand
Open door
with screw
driver
(bottom right)
WPS Button Reset Button
FLASHING GREEN
Network connectivity
to AP.
BLUE SOLID operating
in default AP mode.
FLASHING BLUE WPS
discovery mode.
ORANGE FLASHING
restoring defaults.
NO LEDs powered off.
Mounting Hole Power & I/O Combo Cable
Micro SD Card
Page 2
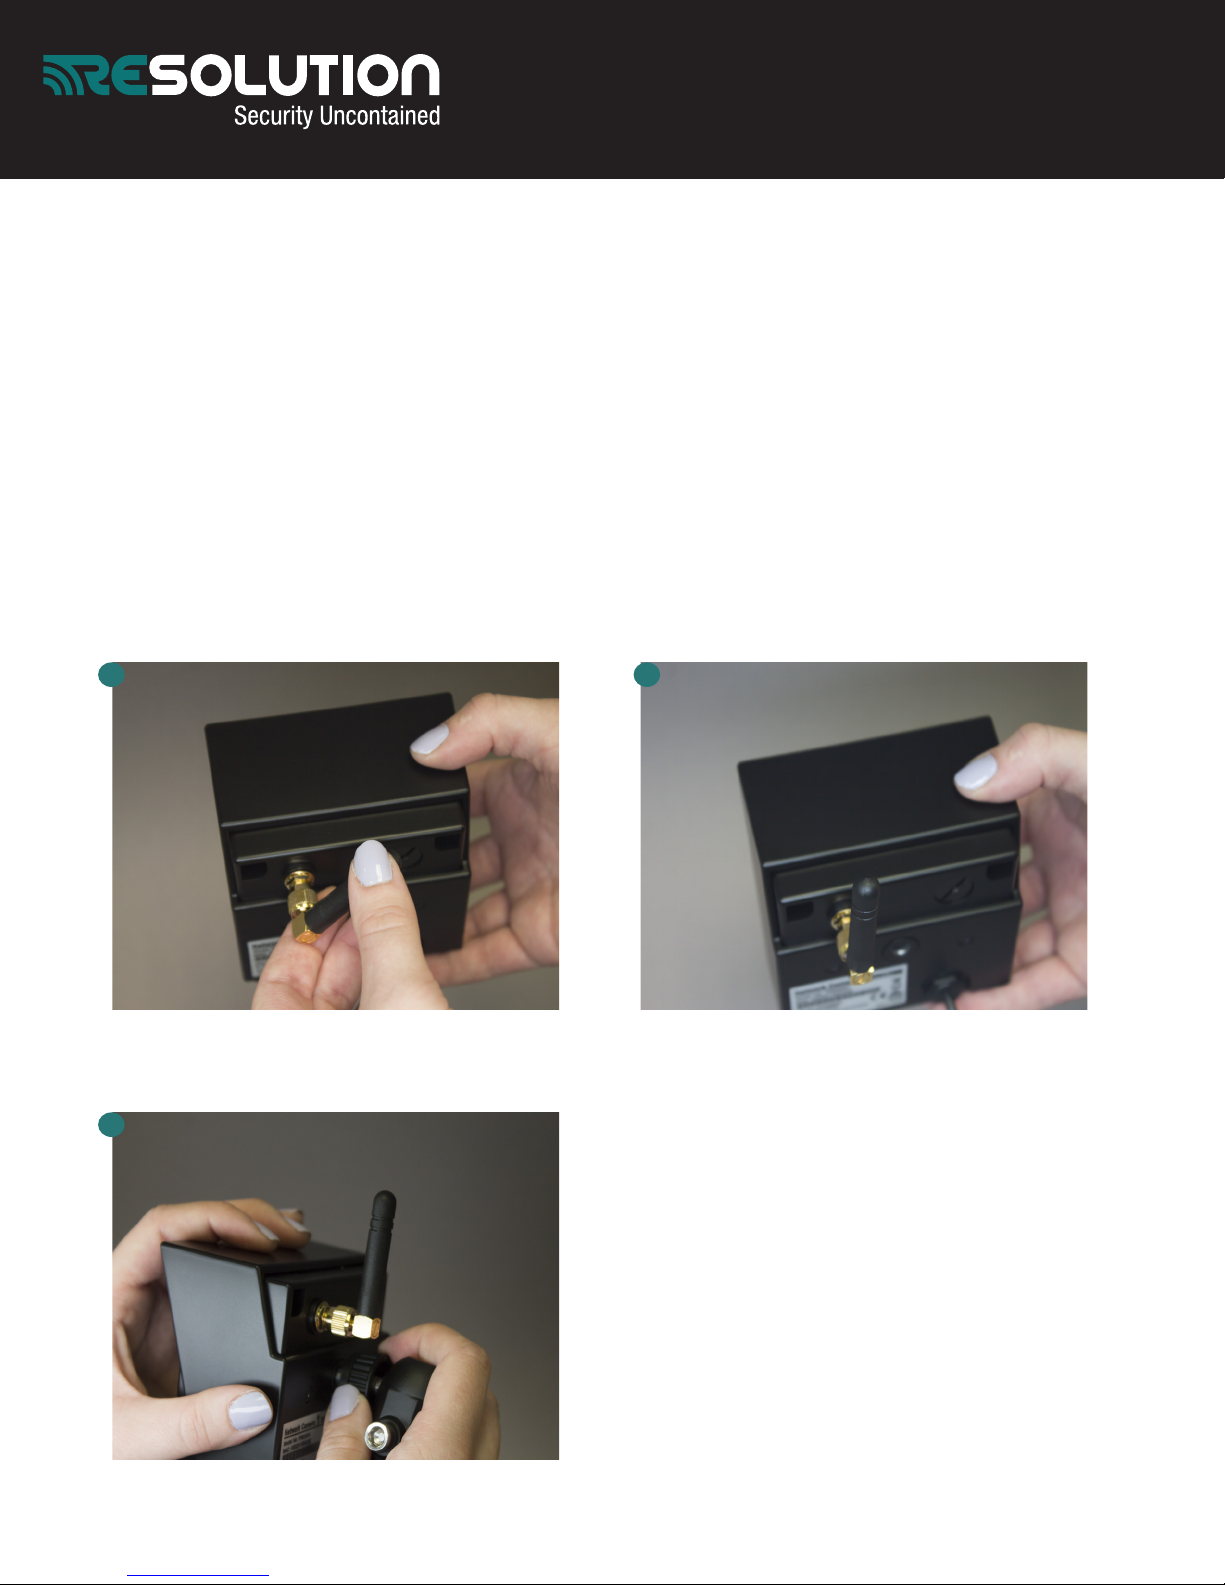
Camera assembly: (POWER UP AFER
REGISTERING MAC ID-NEXT PAGE)
• Connect camera antenna (1 & 2)
• Install camera stand (3)
• Connect AC power into I/O power cable and
then into selected outlet
• Wireless connection: open bottom camera
slot exposing the WPS button (previous
page) press & hold WPS button on camera &
router. LED will flash green.
• Drill holes where installing. Insert plastic
anchors. Mount camera stand to anchors
with included screws.
1
2
3
Page 3

Dealer portal setup:
• Ensure camera is powered down
• Select “Accounts” on left side. Load
customer’s account
•
Select “Camera” on left side. Select
“Add” to add a camera
1
•
Select camera type from drop down
menu. Select: “vivotek IP8336W”.
Enter name and description if desired
•
Enter camera MAC address. This is
located on back of camera
• Enter the following user name and
password: UN: root PW: Camera’s
MAC ID
• Select “Add”
• Power camera back up
• Camera LED will be red then blink
green and blue
Wi-Fi Setup when router has no WPS button:
• You will need a smartphone or computer
• In your devices wifi settings find the
network named TCSN-(last 6 of MAC
XX:XX:XX)
• Once connected, camera will be flashing blue
and green. This indicates the camera is in
access point mode (AP mode)
• On your smartphone or computer open a
web browser. Enter "http://192.168.1.1"
without quotes
• The page will open to a login screen.
• Username: root
• Password : (MAC address all upper case)
• Select "Search your AP"
• Select your WiFi network
• Enter the WiFi password in the Pre-shared
key field, removing the string of 0's
• Save, image number 4 will appear
• After a moment the camera light will go
from solid green to blinking green, this will
indicate the camera is connected
2
3
1 2
3
4
For complete camera manual visit: www.resolutionproducts.com/camerasetup
24/7 TECH SUPPORT: 715-808-0164
 Loading...