

Resolution CryptiX RE610P Series Install Manual
Ceiling
Floor
RE610P Series CryptiX™ PIR Motion Sensor
CryptiX PIR Motion Sensor alarms when motion is sensed
or when the external contact is opened. It is battery
powered and requires no installation tools. A Pyroex™
sensor with HighBar™ signal processing allows for industryleading pet immunity and catch performance.
Features
• Industry-leading pet immunity and catch performance
• Supports both motion zone and an external contact zone
• Mountable on walls or in corners
• 5 year warranty
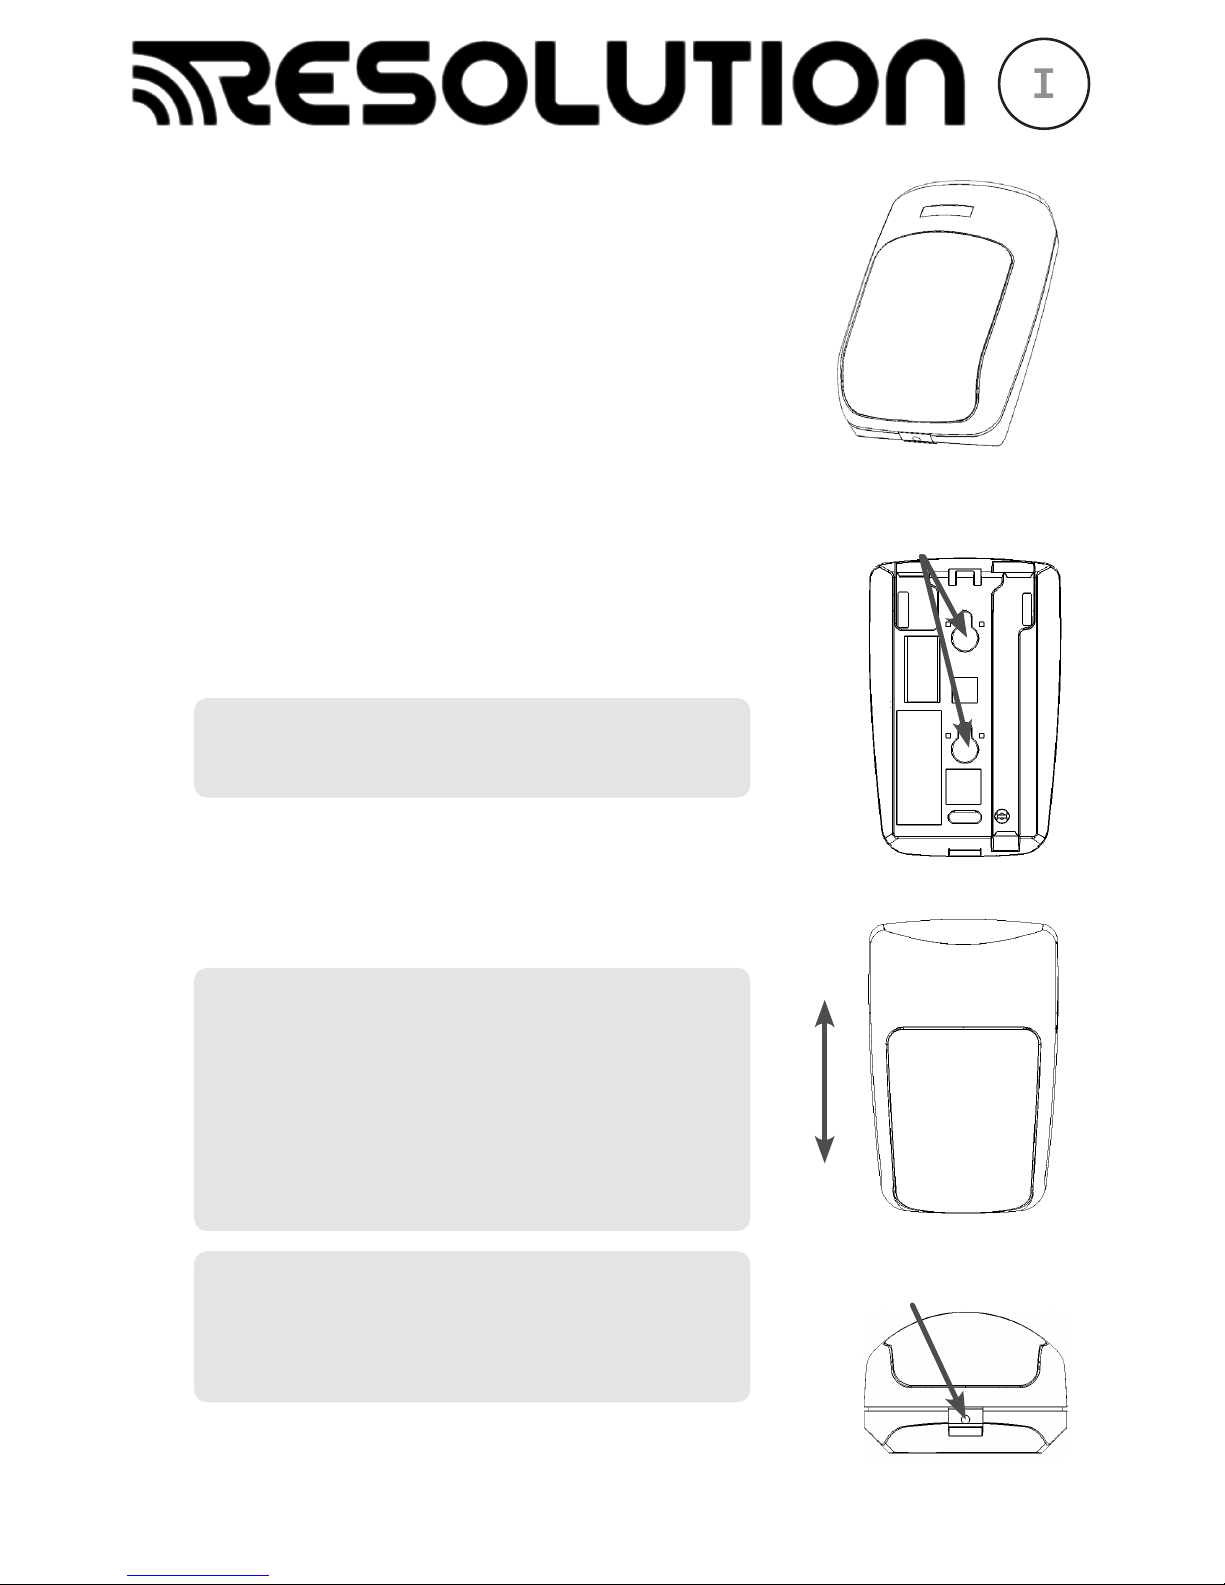
Enroll by placing the panel into wireless enrollment mode
and then sending an enrollment signal from the motion
sensor. Alternatively, the motion sensor can be enrolled by
scanning its bar code using the HeliLink app or by entering
its 8-character serial number on the interactive service
provider’s web portal.
Options for sending an Enrollment Signal
• Remove the battery tab, OR
• Remove the cover to trip tamper
Install using the included 3M VHB
®
tape to adhere the motion
sensor on a wall or in a corner. The tape should be applied
to the back when wall mounting or to the back bevels when
corner mounting. Alternatively, screw mounting can be
done by punching out the screw mounting holes.
Installation Tips
• Mount 7.5 to 9.5 feet from the oor for an
optimal balance between catch performance
and pet immunity.
• Remove the cover and circuit board before
trying to punch out the screw mounting holes.
• Ensure the bug foam stays intact and snug
around the IR sensing element when reinstalling the circuit board.
External Contact (not evaluated by ETL)
• Use a normally-closed contact because the
motion sensor will transmit an alarm when it
sees the external contact open.
• Do not use end-of-line resistors.
CE installations must use a cover-securing screw.
Mounting Screw Holes
Cover-Securing Screw Hole
Use the Helix installation guide to verify proper system setup.
I
N
S
T
A
L
L
G
U
I
D
E
I
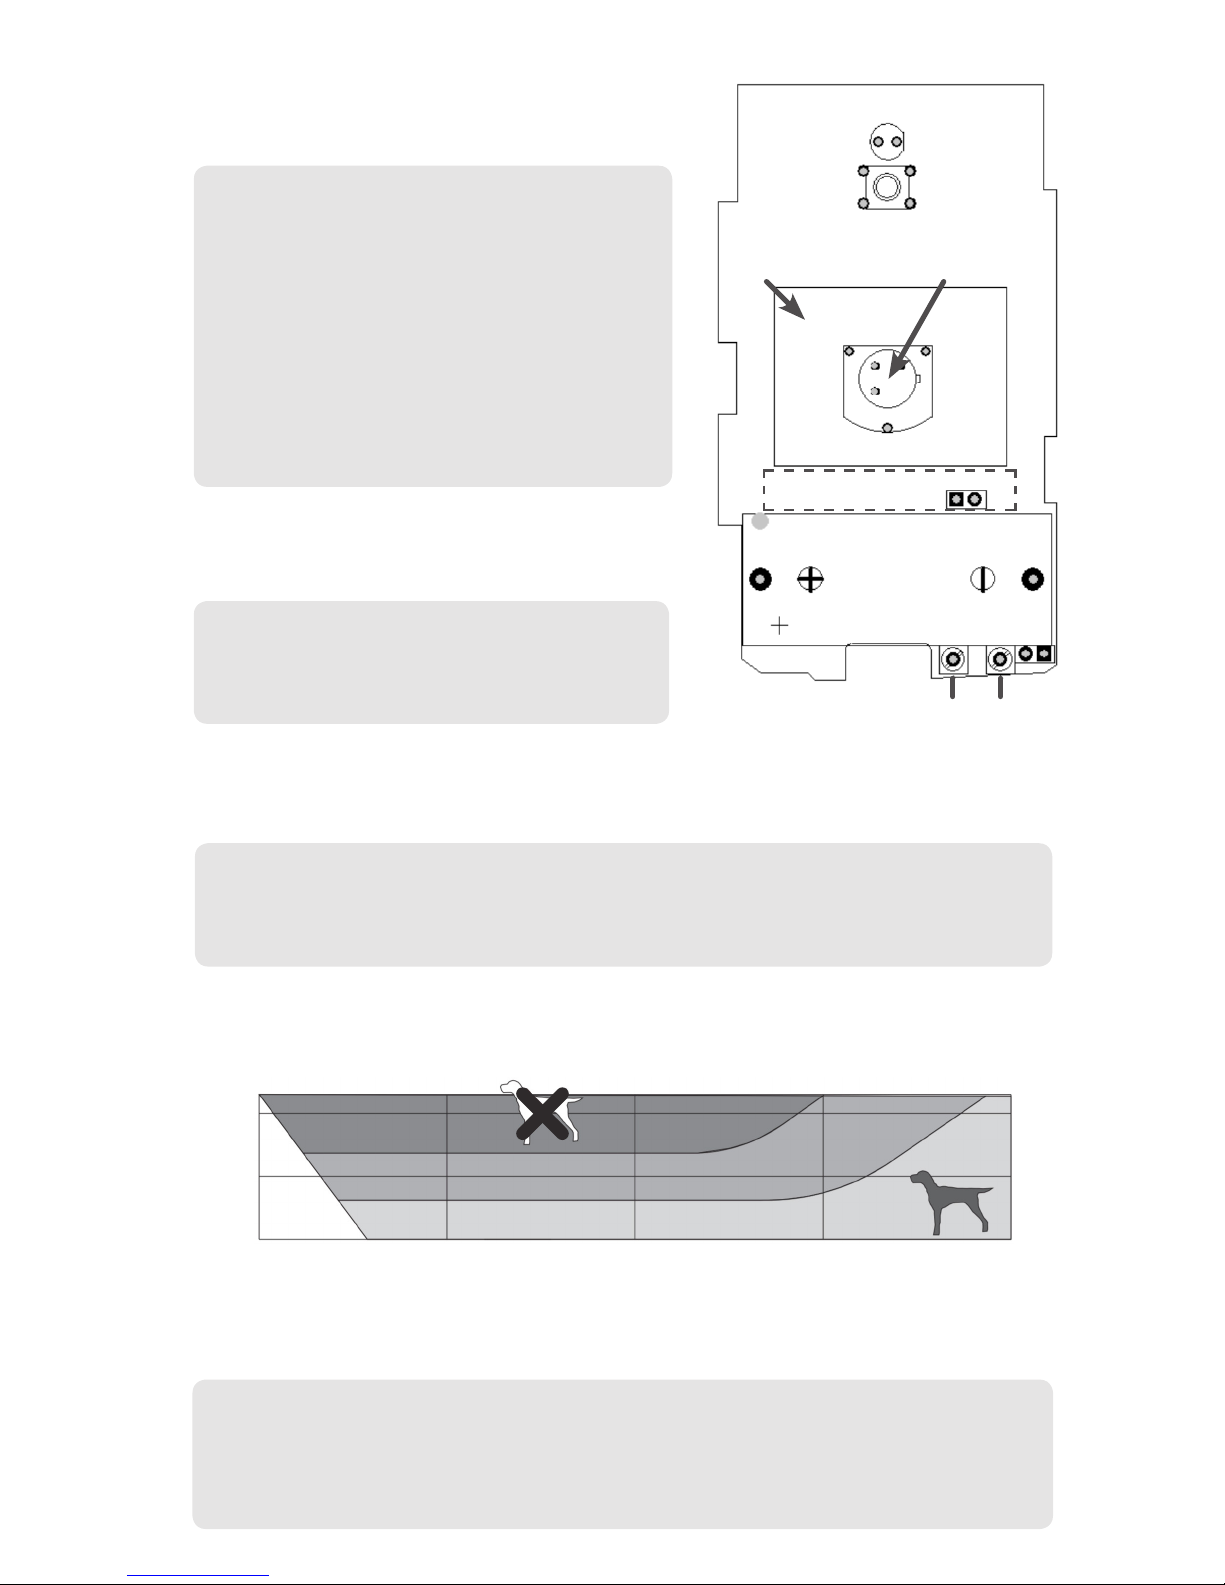
Pro Tips
Walk test mode is entered by pressing the motion
sensor’s tamper button. The walk test lasts three
minutes.
Walk Test Operation
• The walk test LED turns on when motion
is sensed.
• The motion sensor performs a
re-calibration after each activation. The
re-calibration takes about 30 seconds.
The sensor will NOT sense motion
during the re-calibration.
• Wireless transmissions are sent for each
detection, so walk test mode can also
be used to test the panel.
3M VHB Tape works great if the surface is properly
prepared and rm pressure is applied for over 10
seconds.
Surface Preparation
• Clean the surface
• Ensure the mounting surface
temperature is above 50 °F
Motion lockout is active for three minutes after a motion event is detected. During the
motion lockout period, motion events will be ignored.
Motion sensitivity can be adjusted by the sensitivity jumper on the circuit board.
• Jumper Installed (lower sensitivity): Detects person in 3 to 5 steps.
Increases pet immunity. Usually for security applications.
• Jumper NOT Installed (higher sensitivity): Detects person in 2 to 4 steps.
Usually for occupancy applications.
Pet immunity is optimized when the motion sensor is mounted at 7.5 to 9.5 feet high
and aimed away from house features that could allow pets to be high in the detection
eld (e.g. stairs, counter tops, tall furniture).
Motion catch performance is best when the motion sensor is positioned so a person
would typically walk across the front of the motion sensor instead of directly toward
the motion sensor.
Motion Detection Tips
• Provide a clear line-of-sight to the monitored area and remember that glass
blocks infrared energy (PIR = Passive InfraRed).
• Aim away from windows and sunlight.
• Aim away from air conditioners, heaters or heating/cooling vents.
Walk Test LED
Cover Tamper Switch
Battery
Bug Foam IR Sensing Element
Sensitivity
Low - Jumper ON
High - Jumper OFF
External Contact
7.5ft
0
0 10ft 20ft 30ft 40ft
3.2ft
 Loading...