


resi-linx.com Page 1
INSTALLATION & CONFIGURATION MANUAL
resi-linx RL-IP1000
HD IP Streaming Server
TABLE OF CONTENTS
SAFETY PRECAUTIONS...........................................................................................2
PACKAGE CONTENTS..............................................................................................2
PRODUCT DESCRIPTION.........................................................................................3
SPECIFICATIONS......................................................................................................4
INSTALLATION, UNPACKING and INSPECTION....................................................5
HARDWARE INSTALLATION and CONNECTIONS.................................................5
Front‐Panel.................................................................................................................6
Streaming Methods………………………………………………………………………..6
Procedure to connect to the Streaming Server via the Network port...................7
Case 1: DLNA...........................................................................................................16
Case 2: UDP/RTP Multicasting...............................................................................18
Case 3: TCP/UDP/RTP Unicasting..........................................................................20
HDIP Streaming Server Notes................................................................................22

resi-linx.com Page 2
SAFETY PRECAUTIONS
The presence of this symbol is to alert the installer and user to the
presence of uninsulated dangerous voltages within the product’s
enclosure that may be of sufficient magnitude to produce a risk of
electric shock.
TO REDUCE THE RISK OF FIRE OR ELECTRIC SHOCK, DO NOT EXPOSE THIS
DEVICE TO RAIN OR MOISTURE. DO NOT OPEN THE UNIT. REFER SERVICING TO
QUALIFIED PERSONNEL ONLY.
DO NOT apply power to the unit until all connections have been made, all components
have been installed and all wiring has been properly terminated.
DO NOT terminate, change or uninstall any wiring without first disconnecting the unit’s
power adapter from the device.
This device is supplied with the appropriately rated 12VDC power supply with the centre
pin positive.
The use of any other power supply could cause damage and invalidate the manufacturer’s
warranty.
DO NOT power on the unit until all cables and connections to the device have been
properly connected.
The device should be installed in an environment consistent with its operating
temperature specifications. Placement next to heating devices and ducts is to be avoided as
doing so may cause damage. The device should not be placed in areas of high humidity.
DO NOT cover any of the device’s ventilation openings.
If the device has been in a cold environment allow it to warm to room temperature for at
least 2 hours before connecting power.
PACKAGE CONTENTS
This package contains:
One RL-IP1000 IP Streaming Server
One 12V 1.5mA Power Adaptor
One installation / configuration manual
Inspect the package before starting installation to ensure there is no damage and all
supplied contents are present. Contact your distributor or dealer should the device be
damaged or package contents are incomplete.
resi-linx.com Page 3
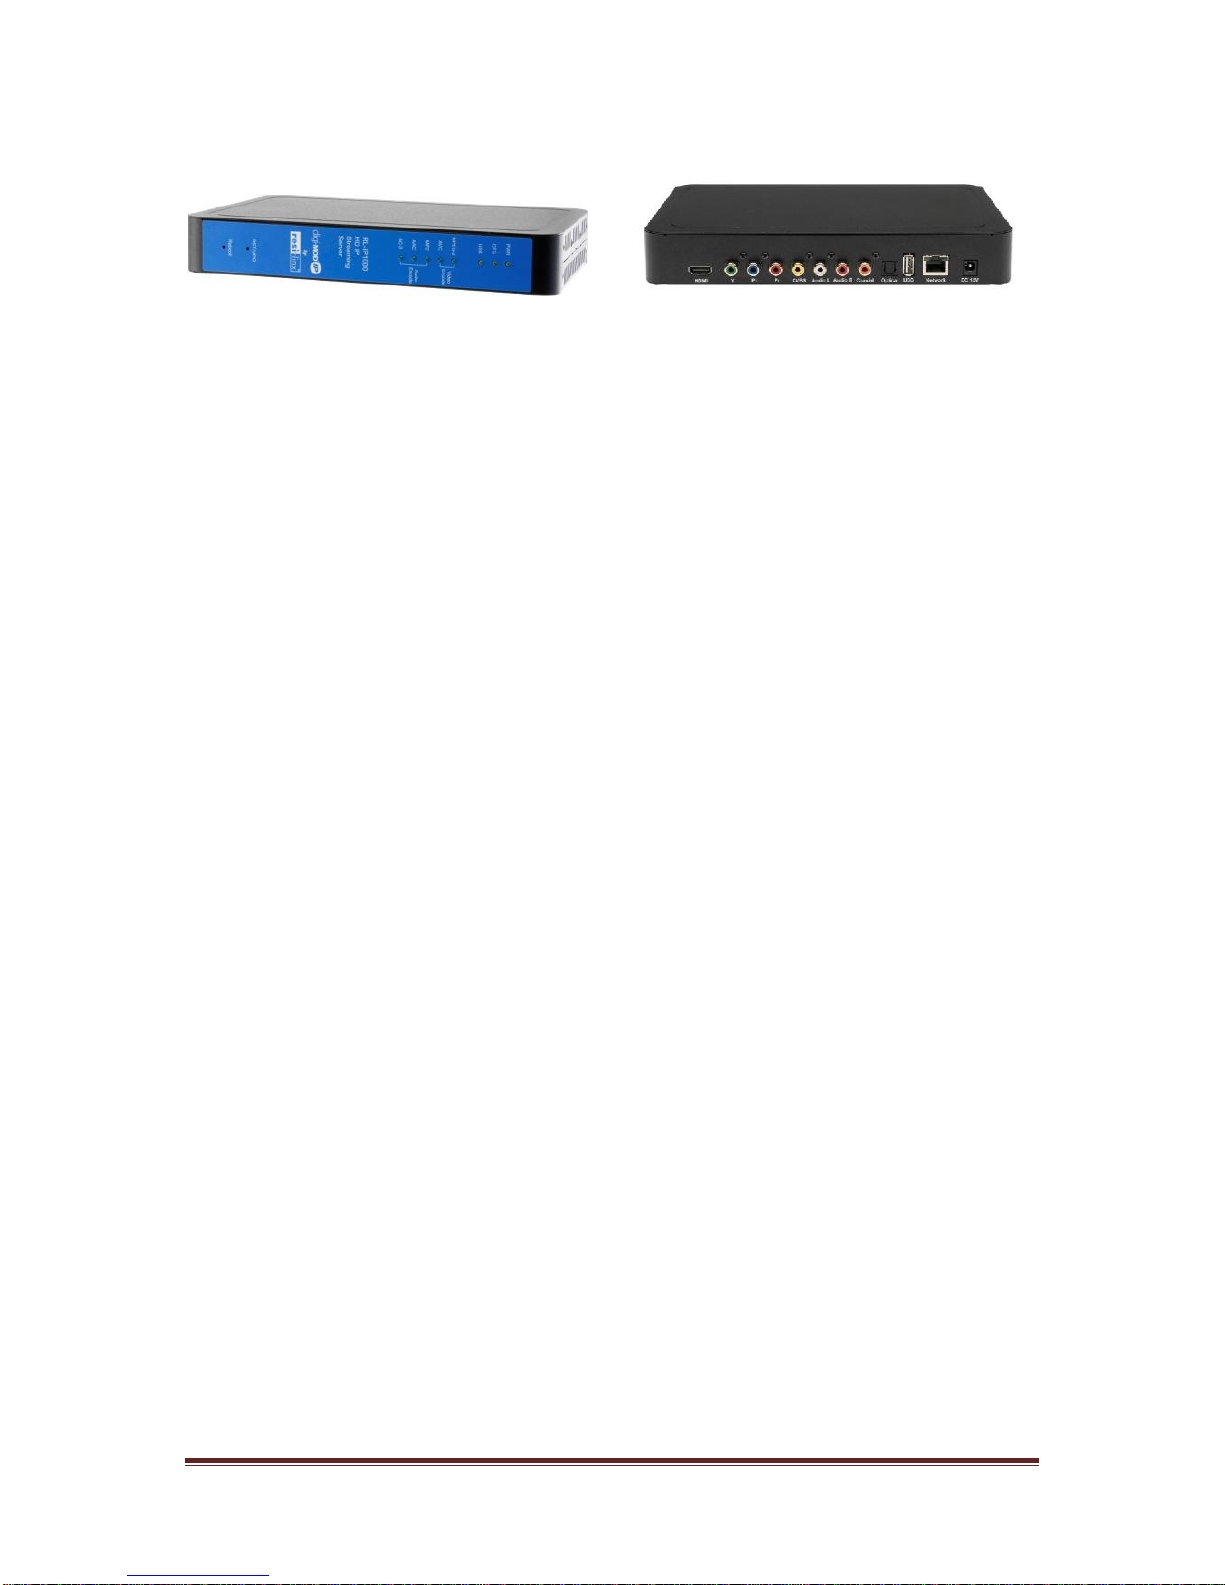
PRODUCT DESCRIPTION
resi-linx RL-IR1000 HD IP Streamer allows the user to stream any one
audio/video source over a IP Network to up to any 16 Smart HDTV's or
connected computers within the IP Network. The IP Streamer accepts a
HDMI, Component, or Composite video input and the unit is designed to
deliver a rich HD/SD Streaming experience for its users deploying MPEG-2 or
MPEG-4 standards.
Combine any sources and stream them over the network for multiple sources.
The RL-IP1000 HD Streaming server enables high-definition streaming with
resolutions up to 1080p, providing a high quality viewing experience for your
customer. The unit is MPEG2 or MPEG4 switchable and supports UDP/RTP
Streaming. The compact design saves space and is easily controlled via a
GUI for rapid deployment.
The RL-IP1000 series features:
Front panel LED Status Display
Video resolution: Up to 1080p
HDMI, Component, Composite inputs with auto detection
Dual Mode H.264 AVC / MPEG-2 selectable
Variable Bit Rate Control
Closed Captioning Support
Audio format : MPEG1-Layer2(MP2)
AAC
AC-3 Pass through
Easy installation and use
GUI for setup and control
GigE output port
Light weight and compact design
Please note: not all DLNA supported Smart TV’s are able to process full
HD 1080p signals. Please refer to your TV manufacture to see if your TV
supports this. If not, please revise your resolution and frame rate to the
appropriate settings to suit your TV

resi-linx.com Page 4
SPECIFICATIONS
Interfaces
Ethernet (output)
1Gbps, RJ-45
USB (optional)
USB 2.0
Video Input
HDMI, YPbPr, CVBS
Audio Input
Analog, Coaxial, Optical
Encoding
Video Format
MPEG-2, AVC
Audio Format
MPEG-1 Layer2(MP2) AAC, AC-3
passthrough
Resolution
480i, 480p, 576i, 576p, 720p, 1080i,
1080p
Video bitrate
MPEG-2 HD: 10 to 20Mbps
MPEG-2 SD: 2 to 8Mbps
AVC HD: 2 to 10Mbps
AVC SD: 1 to 4Mbps
Audio Rate
128, 256, 384, 448, 512Kbps
Streaming Protocols
HTTP Server (DLNA) UDP/RTP
multicasting, UDP/RTP unicasting, TCP
unicast
MISC
Digital Living Network
Alliance (DLNA)
MediaServer 1.5
Closed Caption
Yes
Power Supply
12VDC 1.5Amp.
Consumption
500mA
Dimension
236mm x 155mm x 35mm
Weight
940g
*Specifications subject to change without prior notice

resi-linx.com Page 5
INSTALLATION
System Installer must adhere to Article 820-40 of the NEC that provides
guidelines for proper grounding and specifies that the cable ground
shall be connected to the grounding system of the building, as close to
the point of cable entry as possible.
UNPACKING and INSPECTION
Each unit is shipped factory tested. Ensure all items are removed from the container prior to
discarding any packing material.
Thoroughly inspect the unit for shipping damage with particular attention to connectors and
controls. If there is any sign of damage to the unit or damaged or loose connectors contact
your distributor immediately. Do not put the equipment into service if there is any indication
of defect or damage.
HARDWARE INSTALLATION and CONNECTIONS
It is highly recommended that quality cables and connectors be used for all
video and audio source connections
1. Connect the media source (Satellite STB, Media player, or other media
device) to the HDIP streaming server by HDMI, YPbPr, or CVBS cables.
2. Connect the HDIP streaming server to local area network (LAN)
3. Plug the power adapter to the device and power up
4. Network Setup
5. In the same network segment, find the HDIP streaming server from
Windows XP/7 “My Network Places”
a. ** Note: For Windows XP enable UPnP.
6. Open the streaming server’s configuration web page by double-clicking the
device icon(XP)
7. There are three (3) use cases supported by HDIP streamer: DLNA media
server, UDP/RTP multicasting and TCP/UDP/RTP unicasting.
Limitations:
1. All UPnP/DLNA devices, including the HDIP streaming server (mediaserver), mediaplayers, the SmartTV, the set-top-box, and the controlling
PC, should be located within same network segment/LAN.
2. If a DHCP server is present in the private network, the HDIP streaming
server will use the IP address assigned by the DHCP server.
3. If no DHCP server is present, the HDIP streaming server will use an
assigned IP address (169.254.xxx.x).

resi-linx.com Page 6
Front‐Panel
Buttons/LEDs
Description
Reboot button
Reboots the device (unsaved settings will be lost)
RST / UPG button
To reset all the settings of the device to factory default:
1.Press and hold the RST/UPG button and boot-up the device
2.Hold the button until CFG led to flashes 10 times (about 10 seconds)
3.After the CFG led stops flashing release the button
To upgrade firmware using the USB port:
1.Plug-in the USB drive with the upgraded firmware image
(“hdip_upg.img”)
2.Press and hold the RST/UPG button and boot-up the device
3.USB led will flash while copying the image from USB drive (about 3~5
seconds)
4.Wait until the CFG led stop flashing
5.Release the RST/CFG button and wait for the device to reboot and
upgrade the firmware (about 1 minutes)
PWR
Power is ON
CFG
Indicates device is in configuration mode
USB
Indicates USB drive is mounted
MPEG-2
Indicates device is encoding video using MPEG-2
AVC
Indicates device is encoding video using AVC
MP2
Indicates device is encoding audio using MPEG-1 Layer 2
AAC
Indicates device is encoding audio using AAC
AC-3
Indicates device is encoding audio using AC-3

resi-linx.com Page 7
Procedure to connect to the Streaming Server via the Network port
The following procedure will allow the installer to setup the Streaming Server via the
GUI
1. Connecting a standard CAT5e cable from HDIP Network port to to a switch then
connecting from the switch to TV and PC.
2. Set the PC via the Control Panel to “Obtain an IP address automatically”
Start- Control Panel ==> View Network Status and Tasks
3. Select 'Change Adapter Settings' from the left plane

resi-linx.com Page 8
4. Select Local Area Connection Icon
Then Right Click – Select Properties
Internet Protocol Version 4(TCP/IPv4) Properties
5. Select “Obtain an IP address automatically” & “Obtain DNS server address
automatically”

resi-linx.com Page 9
6. After setting the PC to obtain IP address & Obtain DNS server automatically
Select Start ==> Computer ==> Network
7. After selecting Network- the HDIP Icon will show up on the right side under Media
Devices. Each device found will be displayed by the Device Address.

resi-linx.com Page 10
8. Right Click on the icon, Select 'View Device Webpage'
9. Overview Welcome page will be displayed

resi-linx.com Page 11
On the Welcome Screen, we have added a tool to help the installer locate a unit in a
rack or headend. Press the LED ON button (shown below). This will cause the CFG
LED light to flash continuously for the installer to identify and locate the HDIP. To
turn off, simply press the LED tool again.

resi-linx.com Page 12
Encoder Setup : User Name: admin Default Password: Admin123
Once the Welcome Page is displayed select the Encoder Setup tab and the below
Login “Authentication Required” screen will be presented. Enter the User Name and
Password then click Login.
resi-linx.com Page 13
Enable Closed Caption:
1. Connect Video source to HDMI or YPbPr port.
2. Connect Video with supporting Closed Caption source to CVBS port.
3. A supporting Closed Caption Player/TV must be used for this function.
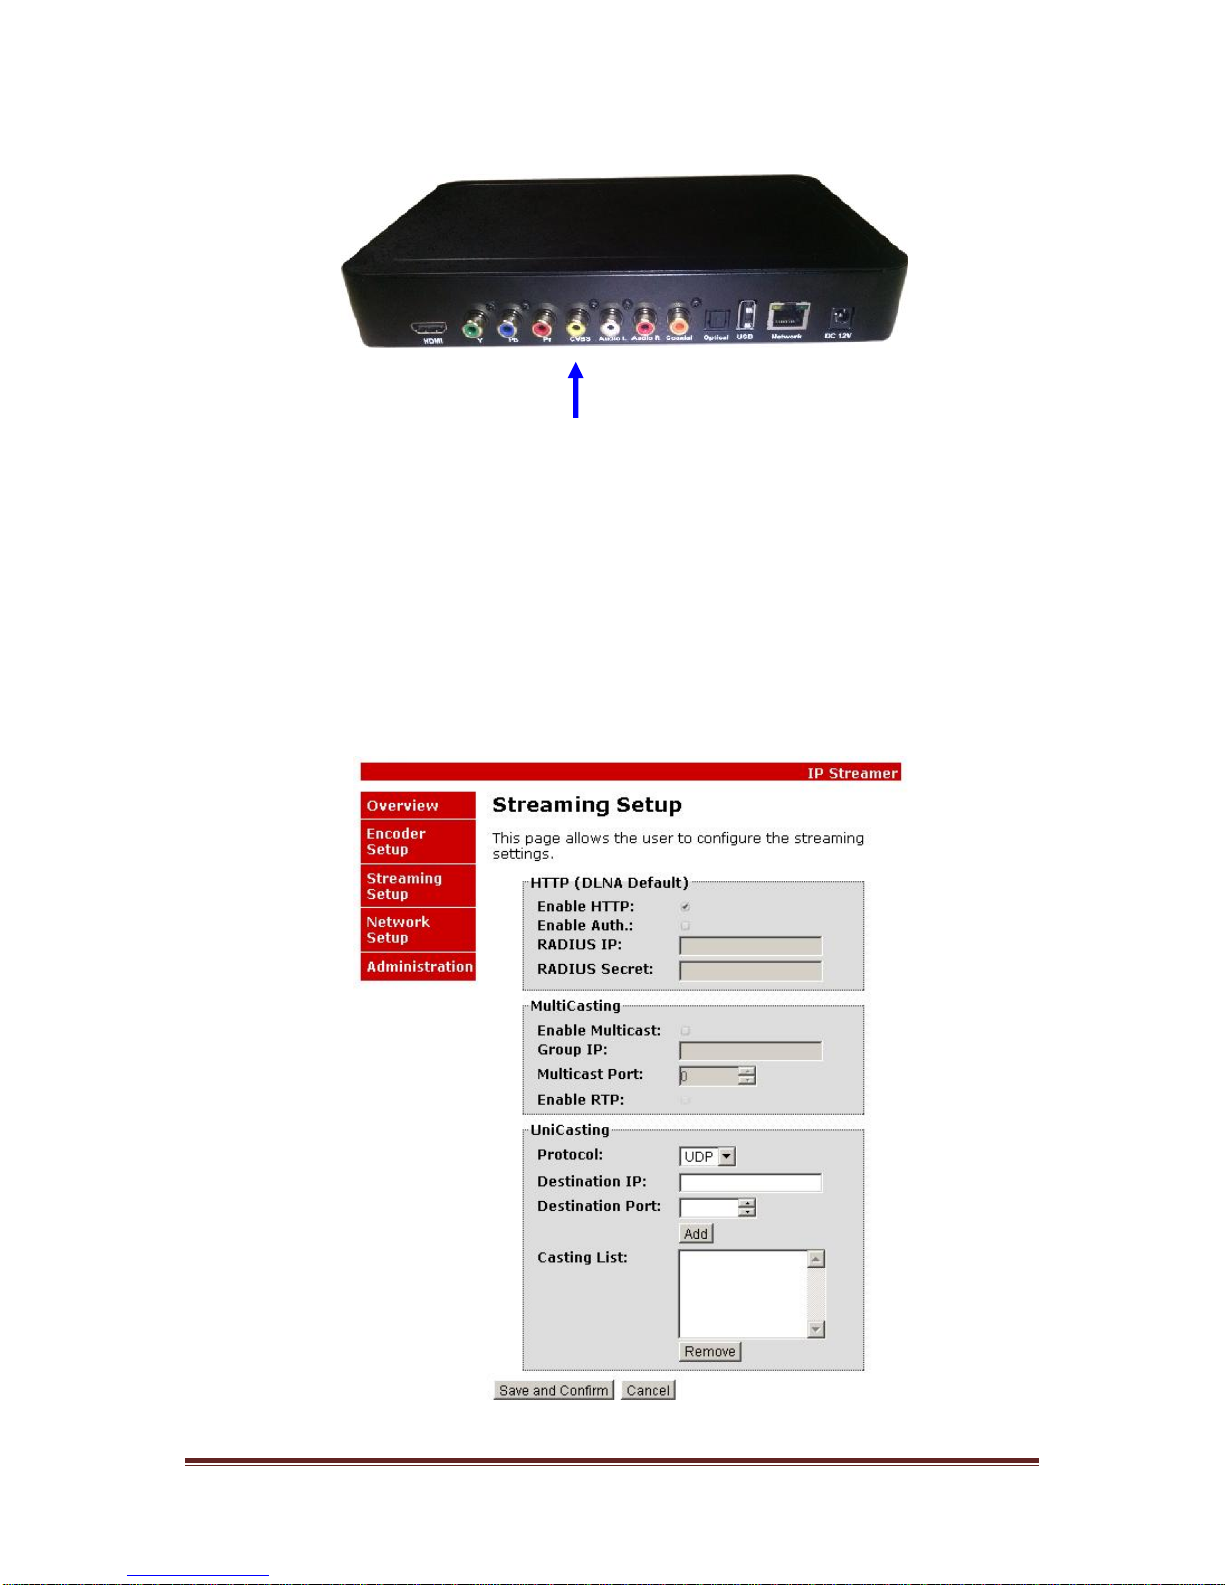
Streaming Setup:
Allows the user to configure the streaming settings: HTTP (DLNA default), UDP/RTP
Multicasting, UDP/RTP Unicasting, and/or TCP Unicasting. HDIP Streaming Server
accepts concurrent streaming; you can set multiple streaming at the same time.
Closed Caption input

resi-linx.com Page 14
Network Configuration:

resi-linx.com Page 15
Administration:
Saving your configuration files:
We highly recommend you save your encoder configuration files. Simply Click the
“Backup” button and the config files will be saved to your computer.
To upload a configuration file- simply click “Choose File” then locate the file you want
to upload. Click “Upload Settings” to install the configuration files. This function is
helpful to the installer when installing a large number of encoders in a single system.
We highly recommend saving the settings of your encoder.
A “config.cfg” file will be created. Locate the file My Computer> C Directory >
Documents and Settings> User>My Documents>Downloads>configs.cfg.

resi-linx.com Page 16
Streaming methods: (Note: If using VLC player, please install version 2.0.8 or
newer version)
Case 1: DLNA

resi-linx.com Page 17
Using VLC media player, select Media ==> Open Network Stream...
On the Network Protocol, key in the Output IP address and Output Port as following
example,
ex. http://172.21.6.88:8888/VideoInput/play.ts
Press Play button to view the video

resi-linx.com Page 18
Case 2: UDP/RTP Multicasting

resi-linx.com Page 19
Using VLC media player, select Media ==> Open Network Stream...
On the Network Protocol, key in the Output IP address and Output Port as following
example,
ex. rtp://@224.1.1.8:1234
Press Play button to view the video.

resi-linx.com Page 20
Case 3: TCP/UDP/RTP Unicasting

resi-linx.com Page 21
Using VLC media player, select Media ==> Open Network Stream...
On the Network Protocol, key in Output Port as following example,
ex. udp://@1234
Press Play button to view the video.

resi-linx.com Page 22
HDIP Streaming Server Notes
PRODUCT NOTES:
ITEM
VALUE
USER NAME / PASSWORD
SERIAL NUMBER
INSTALLATION DATE
PURCHASE DATE
DEVICE NAME
FIRMWARE VERSION
STREAMING METHOD
 Loading...