

Page 1

Wireless IP Camera
Technical Support
For Windows Client & Mac Client, please download the PC software:
https://reolink.com/software-and-manual/
For advanced setup, please download the user manual:
https://reolink.com/software-and-manual/
For more troubleshooting, please go to FAQs on our website:
https://reolink.com/faqs/
For other technical support, please contact us at
support@reolink.com
Quick Start Guide
QG1_A
Page 2
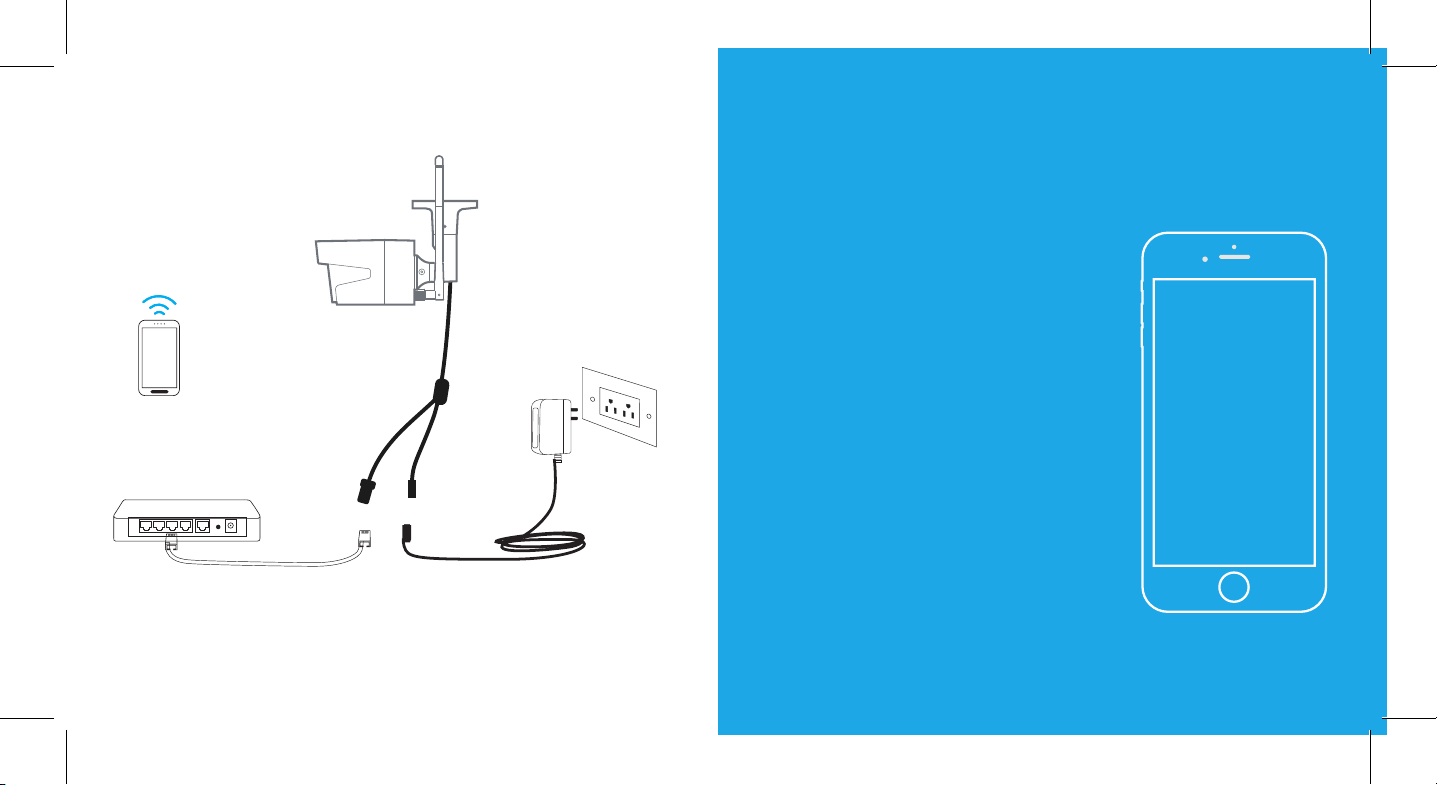
Camera Connection Diagram
Wireless IP Camera
Your Smart
Device
Router
For initial setup, please connect the camera to your router LAN port with an Ethernet
cable, and then follow the steps below to set up your camera. Make sure that your
camera and your smart devices are in the same network.
This Quick Start Guide is applied to Reolink C1, C1 Pro, C2, RLC-410WS, RLC-411WS,
RLC-422W & RLC-423WS.
Power Adapter
Power CableNetwork Cable
01.
Access the
Camera by
Smartphones
Page 3
Install Reolink App
There are two ways to get the Reolink App:
1. Search “Reolink” in App Store (for iOS), or Google Play (for Android), download and
install the app.
2. Scan the QR code below to download and install the app.
1
In LAN
C1 Pro
Available on the
Add the Device
When in LAN
1
(Local Area Network)
The camera will be automatically added. You need to add the camera either by
When in WAN
2
(Wide Area Network)
scanning the QR code on the camera or
by entering the UID number manually.
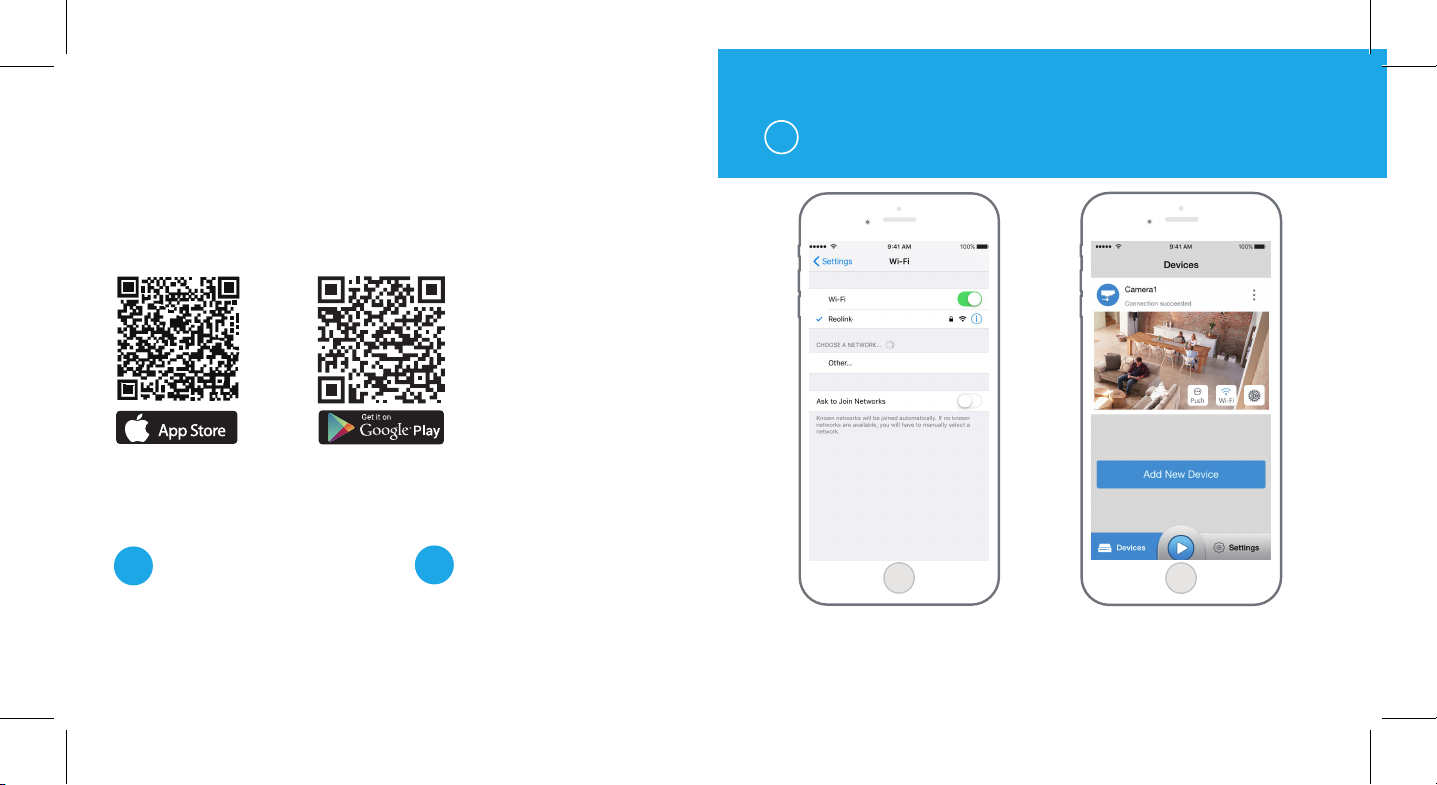
1. Connect your smartphone to
the WiFi network of your router.
lnit
2. Launch Reolink App. The camera
will automatically display in the
camera list in LAN.
Page 4

2
In WAN
Add New Device
lnit
lnit
3. Tap to sync the time
and create your password.
4. Start live view or go to “Device
Settings” for more configurations.
1. Click “Add New Device” on the app. 2. Scan the QR code on the camera, and
then tap “Login”. (There is no password at
the factory default status.)
Page 5

Camera 1
Wi-Fi Settings
3. Name your camera, create a password, and then start live view.
This icon only displays if the camera supports 2-way audio.
This icon only displays if the camera supports pan & tilt (zoom).
Tap the Wi-Fi settings icon
WiFi
to enter the Wi-Fi settings page.
1. Choose the Wi-Fi network you
want to join in, enter the password
of the Wi-Fi network, and then click
“OK”.
2. Wi-Fi Test:
a) If the Wi-Fi test succeeds, press
the “Save” button to save the
settings.
b) If the Wi-Fi test fails, please
check your Wi-Fi password and the
network connection, and then try
again.
3. Remove the Ethernet cable and
then you can access the camera via
the wireless connection.
Reolink
Page 6

02.
Access the
Install Reolink Client
Please install the client software from the recourse CD or download it from our official
website: https://reolink.com/software-and-manual.
Camera by
Computer
Start Live View
Launch the Reolink Client software on the PC. By
default, the client software will automatically search
the cameras in your LAN network and display them in
the “Device List” on the right-side menu.
Click the “Start” button, and you can view the live
streaming now.
Device list
Camera1
State: login success
Page 7

Add the Device
Alternatively, you can manually add the camera to the client.
Please follow the steps below.
Wi-Fi Settings
Click the “Basic Settings” button, and go to Network >> Wi-Fi Settings.
Device list
Camera1
Add Device
Device Basic Infomation
Camera1
Device Name
IP Address
Register Mode
User Name
2
NO. Device Name IP Address Port Mac Addr UID
Camera11
5
admin
9000
192.168.10.10 EC:71:DB:B1:6D:85
Media Port
IP Address
Password
9000
192.168.10.10
******
CancelOKScan Device In LAN
Stae: login success
4
1
Add Device
3
1. Click “Add Device” on the right-side menu.
2. Click "Scan Device in LAN".
3. Double click on the camera you want to add. The information will be filled in automatically.
4. Input the password for the camera. The default password is blank. If you have created
the password on Reolink App, you need to use the password to log in.
5. Click “OK” to log in.
Device list
Camera1
Stae: login success
1
Add Device
Note:
The SD card icon only displays after you’ve inserted the SD card into your camera.
Page 8

Device Settings
Device Settings Wifi Settings
Wifi Settings
SSID
Password
Wi-Fi Test
SSID
Reolink
TP-LINK_5G_F8F4
ASUS 2.4G
3
Reolink
******
4
Wi-Fi Test
2
1
Scan
Show Password
Wi-Fi Signal
5
OK
Scan succeed!
1. Scan the SSID.
2. Double click the SSID which you choose. Enter the password.
3. Click “Wi-Fi Test” to test the password.
4. Wi-Fi Test
a) If the Wi-Fi test succeeds, please go to step 5.
b) If the Wi-Fi Test fails, please check your Wi-Fi password and the network connection,
and then try again.
5. Click “OK”.
Remove the Ethernet cable and you can access the camera via Wi-Fi on computer now.
Page 9

FCCCaution
Thisdevicecomplieswithpart15oftheFCCRules.Operationissubjecttothe
followingtwoconditions:(1)Thisdevicemaynotcauseharmfulinterference,and(2)
thisdevicemustacceptanyinterferencereceived,includinginterferencethatmay
causeundesiredoperation.
AnyChangesormodificationsnotexpresslyapprovedbythepartyresponsiblefor
compliancecouldvoidtheuser'sauthoritytooperatetheequipment.
Note: ThisequipmenthasbeentestedandfoundtocomplywiththelimitsforaClass
Bdigitaldevice,pursuanttopart15oftheFCCRules.Theselimitsaredesignedto
providereasonableprotectionagainstharmfulinterferenceinaresidentialinstallation.
Thisequipmentgeneratesusesandcanradiateradiofrequencyenergyand,ifnot
installedandusedinaccordancewiththeinstructions,maycauseharmfulinterference
toradiocommunications.However,thereisnoguaranteethatinterferencewillnot
occurinaparticularinstallation.Ifthisequipmentdoescauseharmfulinterferenceto
radioortelevisionreception,whichcanbedeterminedbyturningtheequipmentoff
andon,theuserisencouragedtotrytocorrecttheinterferencebyoneormoreofthe
followingmeasures:
-Reorientorrelocatethereceivingantenna.
-Increasetheseparationbetweentheequipmentandreceiver.
-Connecttheequipmentintoanoutletonacircuitdifferentfromthattowhichthe
receiverisconnected.
-Consultthedealeroranexperiencedradio/TVtechnicianforhelp.
ThisequipmentcomplieswithFCCradiationexposurelimitssetforthforan
uncontrolledenvironment.Thisequipmentshouldbeinstalledandoperatedwith
minimumdistance20cmbetweentheradiator&yourbody.
 Loading...