

Page 1
RENIST
WIDESPREAD FAUCET INSTALLATION
BEFORE YOU BEGIN
We recommend consulting a professional if you are
unfamiliar with installing plumbing fixtures.
Observe all local plumbing and building codes.
GETTING STARTED
Ensure that you have gathered all the required
materials that are needed for the installation.
For these instructions, it is assumed that the old
faucet has been completely removed and any
necessary repairs or modifications to the water
supply have been completed.
INSTALLATION
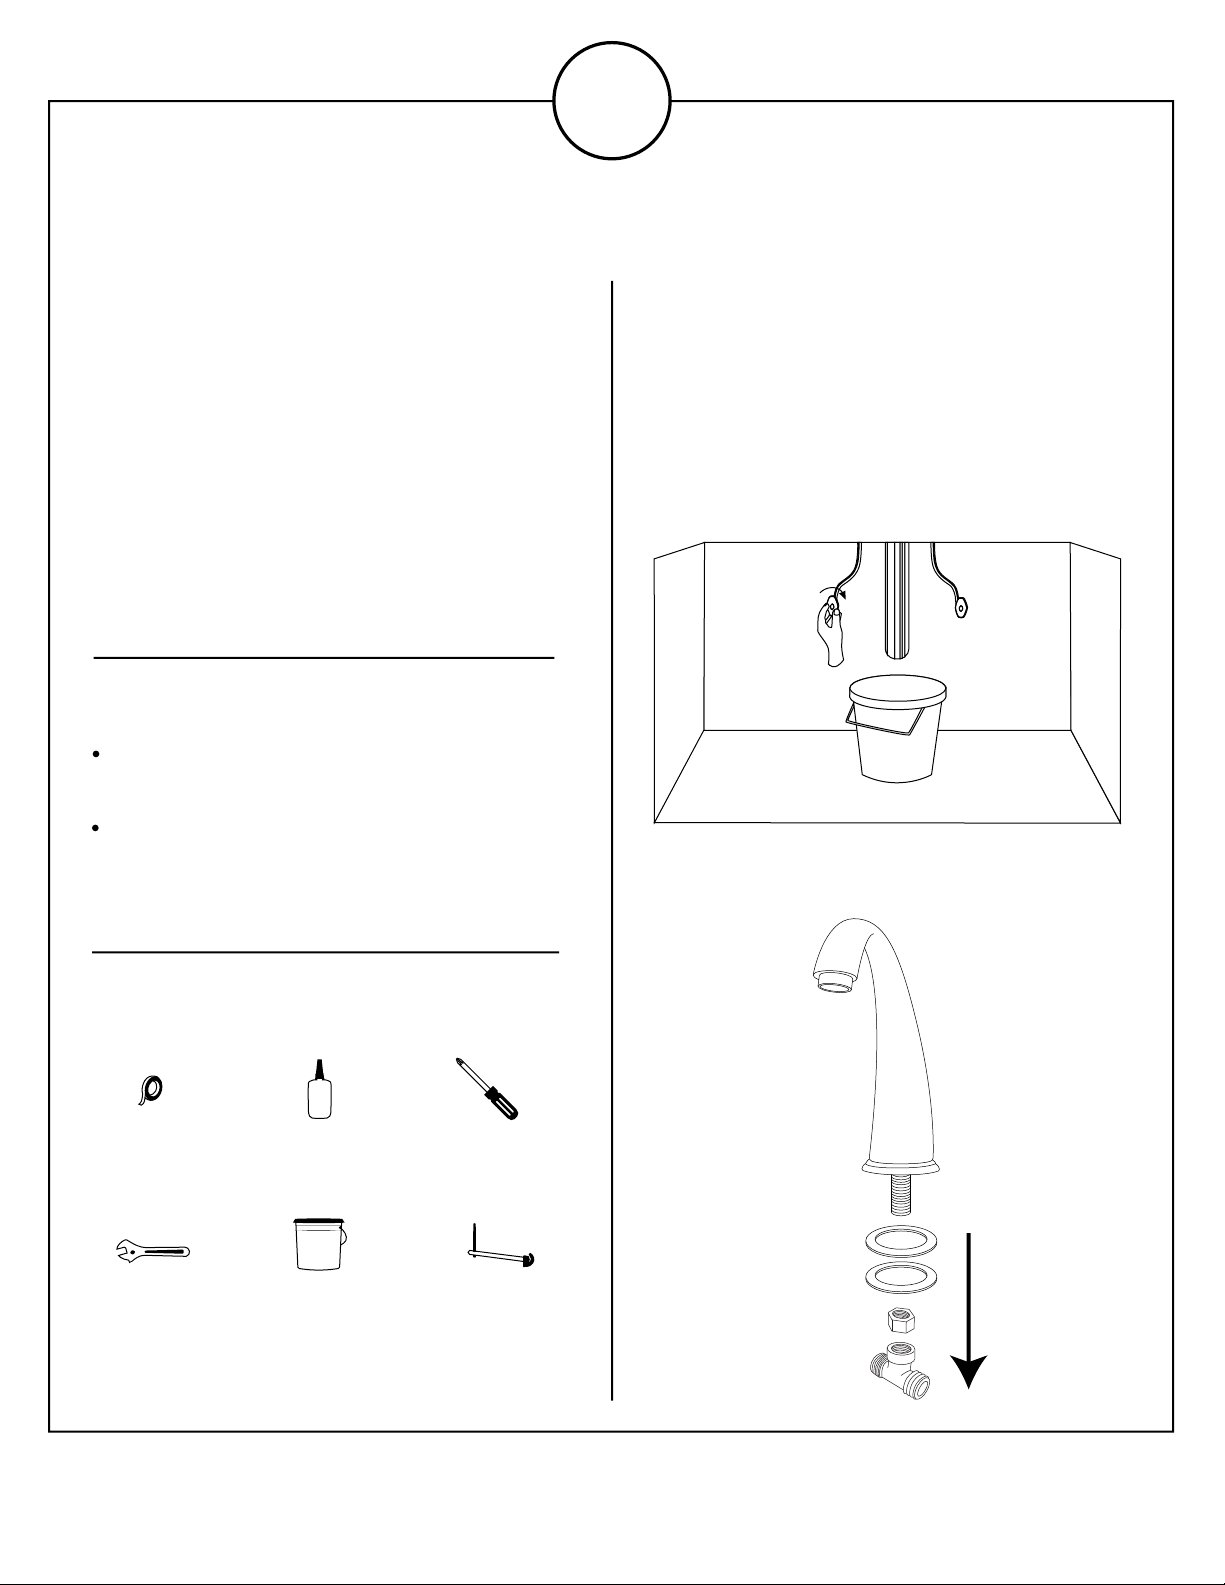
1. Ensure that the water supply below your sink is
completely shut off by turning the shutoff valves all the
way to the right.
Tip: Place a small bucket below your workspace to
catch any water that may drip during the installation
process.
OFF
2. Remove the T-connector, lock nut, and rubber
washer from the spout body. Set the spout into the
center faucet hole.
TOOLS AND MATERIALS:
Plumbers
Tape
Adjustable
Wrench
Thread
Sealant
Small
Bucket
Phillips
Screwdriver
Basin
Wrench
RENIST Widespread Faucet Installation Instructions
1
Page 2
RENIST
WIDESPREAD FAUCET INSTALLATION
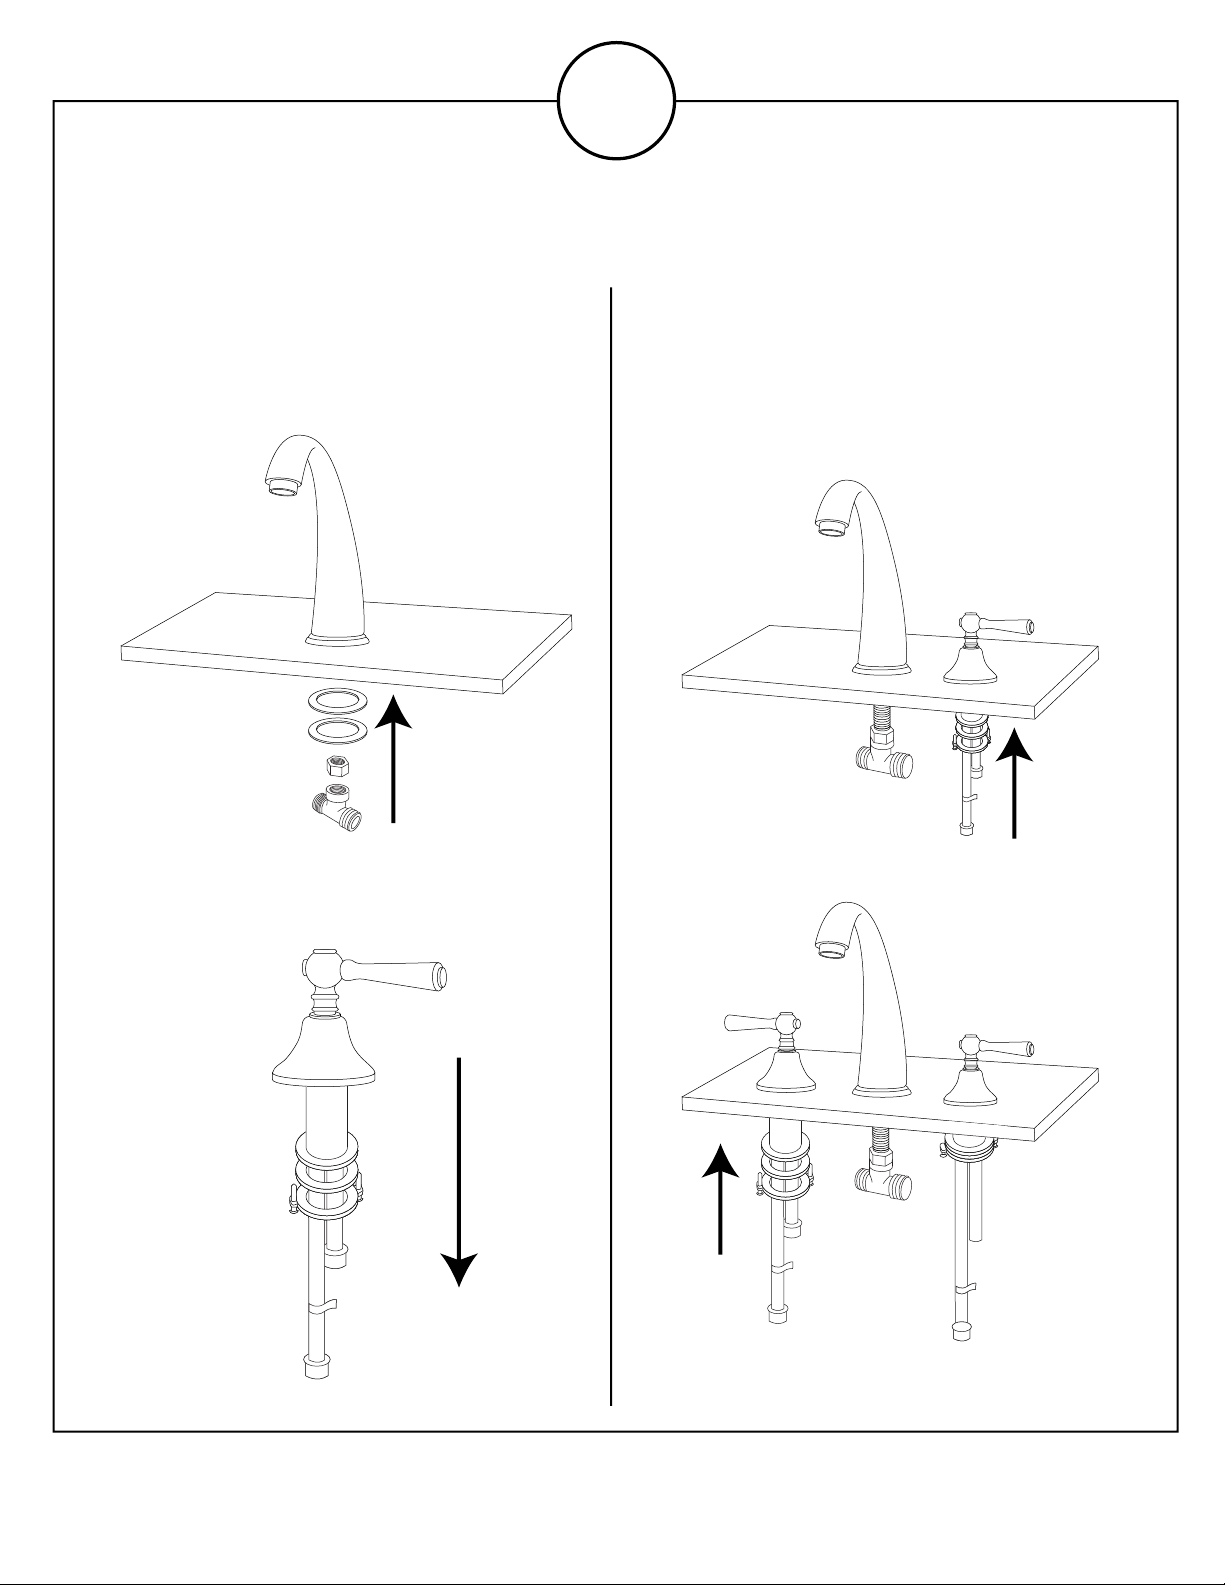
3. From below slide the rubber washer back onto the
spout and secure using the lock nut. Hand tighten the
lock nut, then use a basin wrench to finish tightening.
4. Remove the lock nut, metal washer, and rubber
waasher from the valve stem labeled ‘cold.’ Insert the
stem into the faucet hole on the right.
5. From under the counter, slide the rubber washer back
onto the valve stem followed by the metal washer.
Secure to the counter by hand- tightening the lock nut.
Finish securing by tightening the screws on the lock nut
using a Phillip’s screwdriver.
COLDCOLD
6. Repeat steps 4 and 5 for installing the ‘hot’ valve
stem into the left faucet hole.
HOT
COLDCOLD
RENIST Widespread Faucet Installation Instructions
COLDCOLD
2
Page 3
RENIST
WIDESPREAD FAUCET INSTALLATION
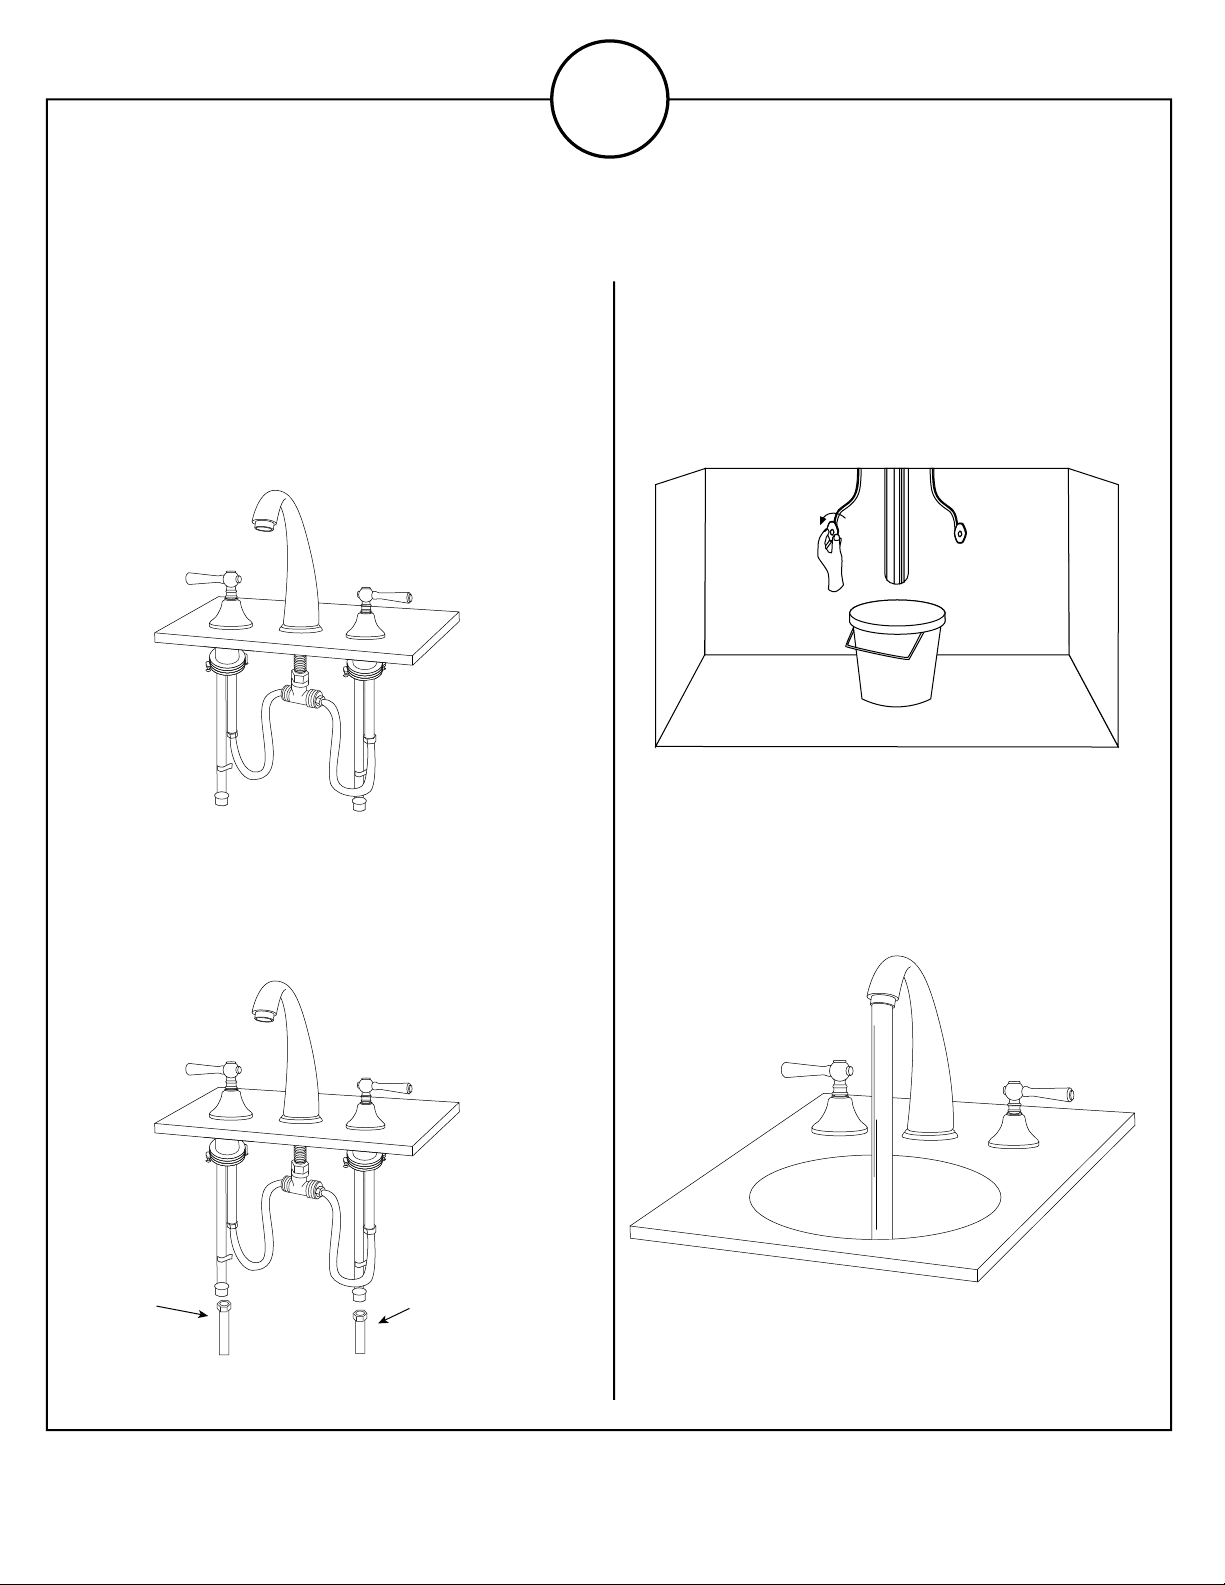
7. Use the provided braided water lines to connect the
valve stems to the faucet body’s T-connector. Use an
adjustable wrench to tighten, but be careful not to
overtighten. Apply thread sealant or plumber’s tape to
each threaded connection before attaching.
COLDHOT
COLDCOLD
8. Attach the valve stems to the main water supply.
Use an adjustable wrench to tighten, but be careful
not to overtighten. Apply thread sealant or plumber’s
tape to each threaded connection. Ensure that you
are connecting the hot and cold lines accordingly.
9. Once installation is complete, turn the main water
supply back on. Check for any leaks underneath.
ON
10. Proceed to sink drain installation. Once the drain is
installed, turn the faucet on for approximately 60
seconds. Check for any leaks. Test both hot and cold
water to ensure they are running properly.
hot
COLDHOT
COLDCOLD
cold
RENIST Widespread Faucet Installation Instructions
3
Page 4
WIDESPREAD FAUCET INSTALLATION
DRAIN INSTALLATION
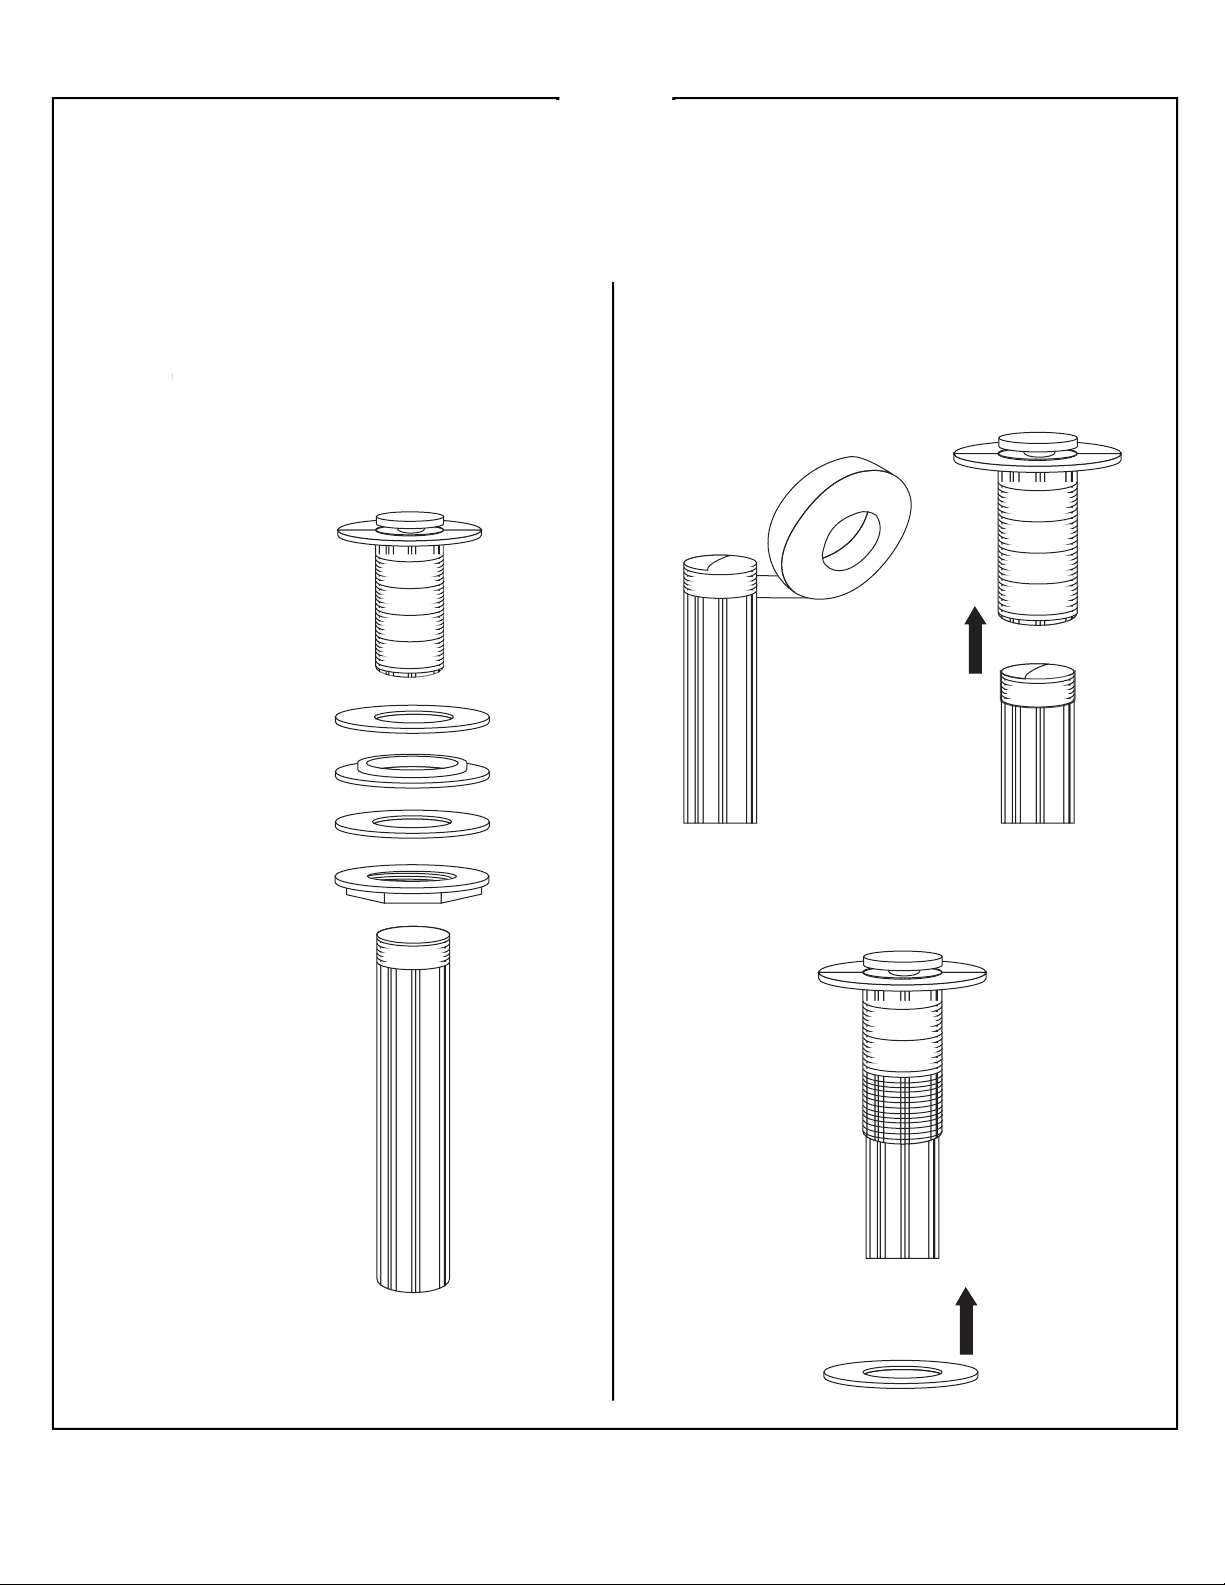
1. Dissasemble the drain assembly and lay the parts
aside, in the same order they were removed. See the
illustration below as a reference if needed.
Pop-Up Drain Flange
RENIST
2. Apply plumber’s tape to the threading on the
tailpiece, then reattach the tail piece to the pop-up
drain flange.
Flat Rubber Gasket
Tapered Rubber Gasket
Plastic Friction Washer
Lock Nut
Tailpiece
3. Slide the flat rubber gasket up the tailpiece until it
meets the lip of the pop-up drain flange.
RENIST Widespread Faucet Installation Instructions
4
Page 5
RENIST
WIDESPREAD FAUCET INSTALLATION
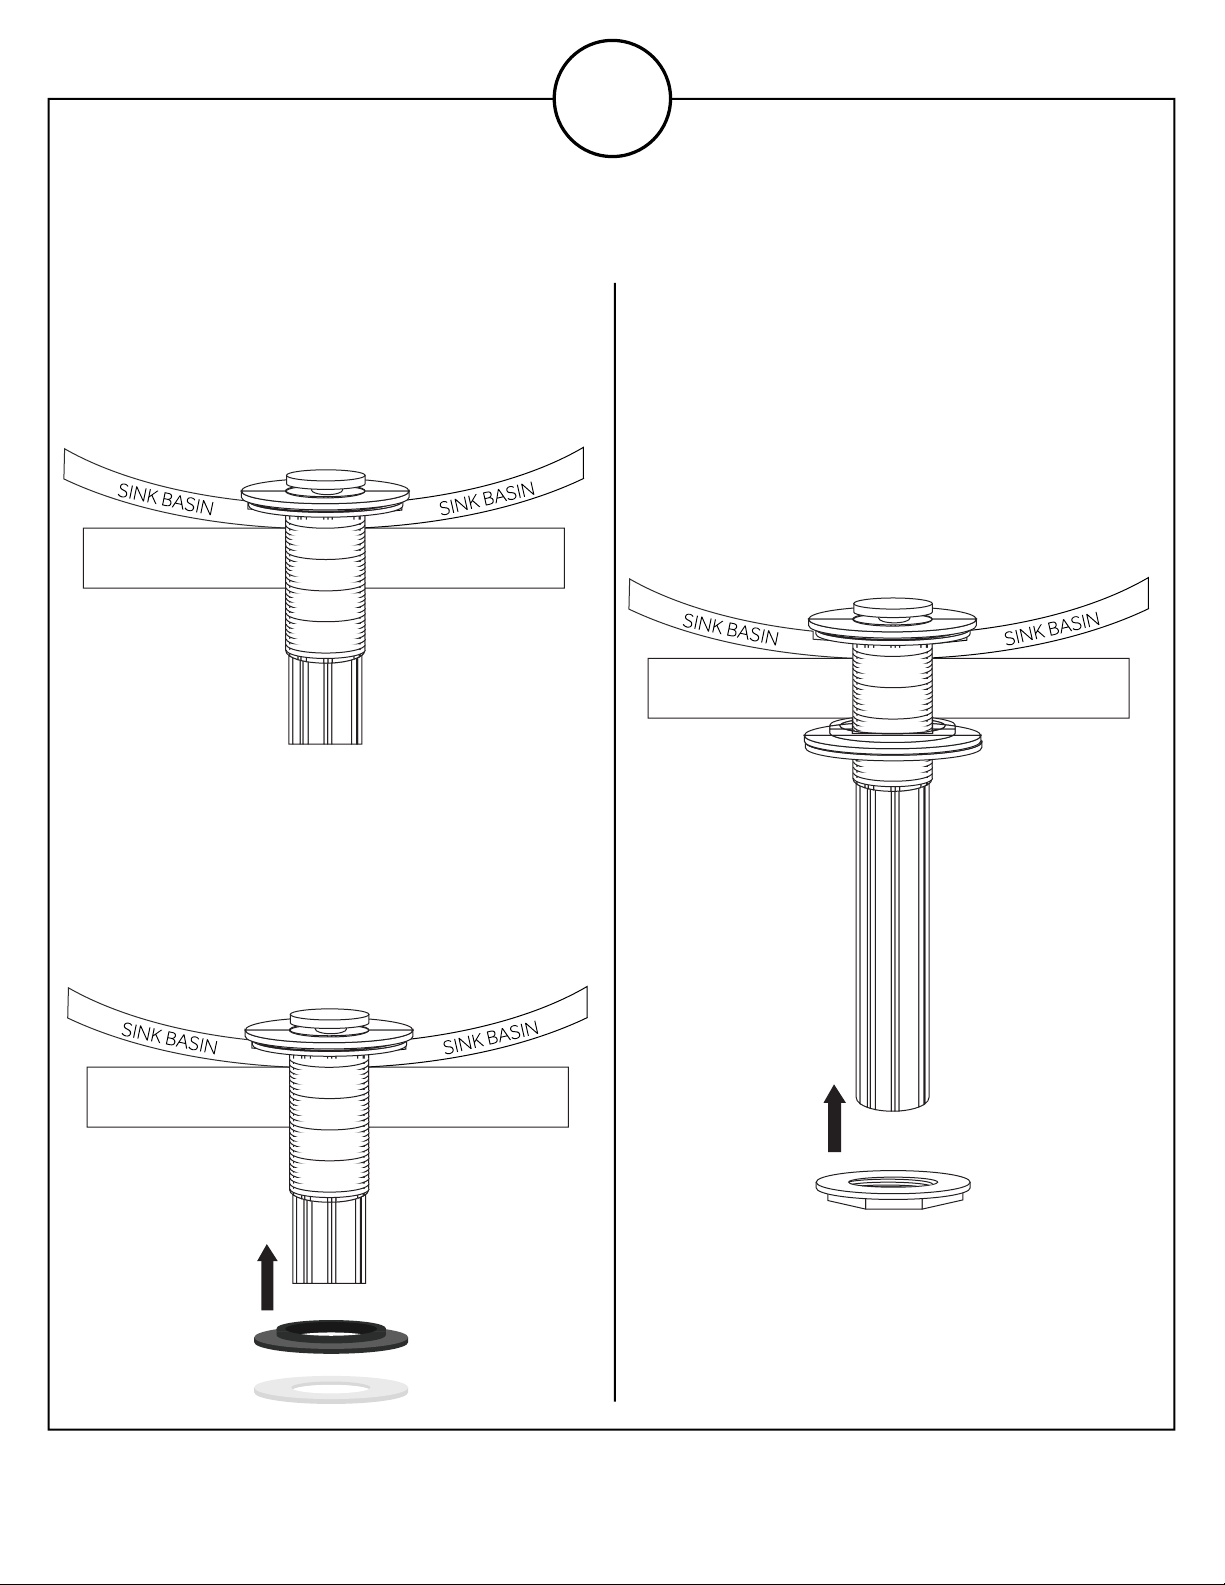
4. Insert the drain flange and tailpiece through the top
of your sink’s drain hole.
COUNTERTOP COUNTERTOP
5. From under your counter, slide the tapered rubber
gasket followed by the plastic friction washer onto the
tailpiece until they meet your sink or countertop. Be
sure that the tapered side of the rubber washer is
facing up.
6. Thread the lock nut onto the drain flange. Hand
tighten until secure, then finish tightening with a basin
wrench once the drain is properly aligned.
Important: Be careful not to overtighten, which could
crack a porcelain sink or stone countertop.
COUNTERTOP COUNTERTOP
COUNTERTOP COUNTERTOP
RENIST Widespread Faucet Installation Instructions
5
 Loading...