

Page 1

Data sheet
H-1000-5300-03-A
MAPS Manual Autojoint Probe Stand
www.renishaw.com
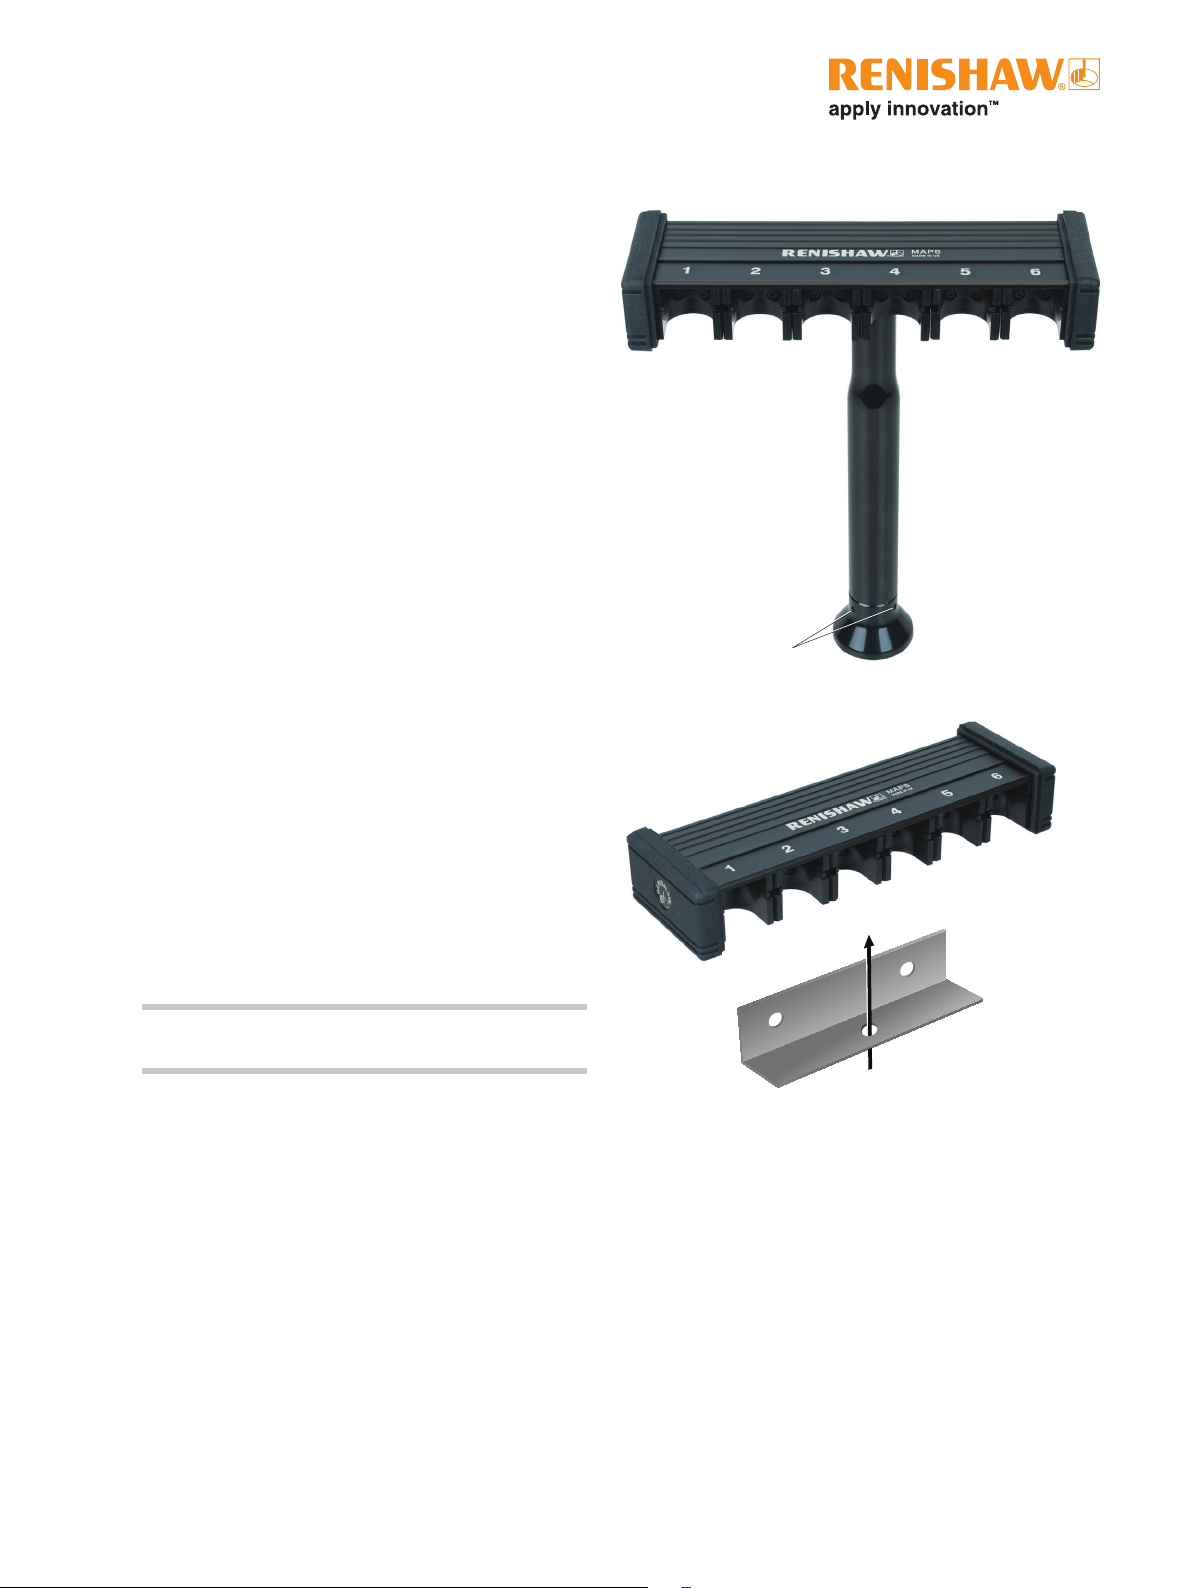
The Renishaw Manual Autojoint Probe Stand (MAPS) is
a compact storage rack for up to six autojointed probe
combinations.
Mounting can be either direct to the CMM table or work bench
using a pillar and base assembly, or to a vertical surface by
means of a mounting bracket.
The pillar and base mounting will allow rotational alignment of
the stand without marking the mounting surface.
Additional clearance for longer probing combinations (up to
440 mm) can be achieved using pillar extensions. These can
be ordered separately.
100 mm pillar extension - Part number M-1051-0147
200 mm pillar extension - Part number M-1051-0148
Maximum length probing combinations
Standard pillar 100 mm pillar 200 mm pillar
240 mm 340 mm 440 mm
The Renishaw autojoint
The Renishaw autojoint is a system designed for exchanging
probe combinations. This is a highly repeatable kinematic
joint, one half of which is attached to the probe head, the
other half of which is attached to an adaptor, extension bar
or probe. The Autojoint is locked or unlocked using a joint key
and the connection repeatability eliminates the need for probe
redatuming after a change.
Head or
extension bar
Clamping mechanism
Locking / unlocking screw
Kinematic location
Electrical contacts
PAA1 adaptor
Page 2
Renishaw plc
New Mills, Wotton-under-Edge,
Gloucestershire, GL12 8JR
United Kingdom
T +44 (0)1453 524524
F +44 (0)1453 524901
E uk@renishaw.com
www.renishaw.com
Assembly instructions
Surface mounting the MAPS to the CMM table, or any other
suitable surface is achieved by using the mounting pillar and
base and by carrying out the following procedure;
1. Secure the base to the mounting suface using a suitable
bolt (not supplied)
2. Locate and screw the threaded end of the mounting
pillar securely into the sliding nut located on the underside
of the storage rack
3. Locate the assembly into the base, adjust the position to
suit and secure with the three grub screws using the key
supplied
Wall mounting the MAPS is achieved using the mounting
bracket and by carrying out the following procedure;
1. Secure the mounting bracket to the wall or any other
suitible vertical surface via the two bolt holes
2. Fit the storage rack onto the mounting bracket with the
mounting bolt supplied
Storage rack
Mounting pillar
Base
Grub screws
Loading the storage ports
Each storage port is numbered (1 to 6) so that the probe tip
data for each probing combination can be easily selected.
To load each port, simply rotate the autojoint until the key
slot faces the back of the port then locate the top face of the
autojoint under the storage rack lid and insert.
NOTE: Do not use excessive force as this may cause damage
to the autojoint mounting.
For worldwide contact details, please visit our
main web site at www.renishaw.com/contact
Mounting bracket
Mounting bolt attaches through hole
RENISHAW HAS MADE CONSIDERABLE EFFORTS TO ENSURE THE CONTENT OF THIS DOCUMENT IS CORRECT
AT THE DATE OF PUBLICATION BUT MAKES NO WARRANTIES OR REPRESENTATIONS REGARDING THE CONTENT.
RENISHAW EXCLUDES LIABILITY, HOWSOEVER ARISING, FOR ANY INACCURACIES IN THIS DOCUMENT.
© 2011 Renishaw plc. All rights reserved. Part no. H-1000-5300-03-A Issued 08.11
*H-1000-5300-03*
 Loading...