

Page 1
Quick Start
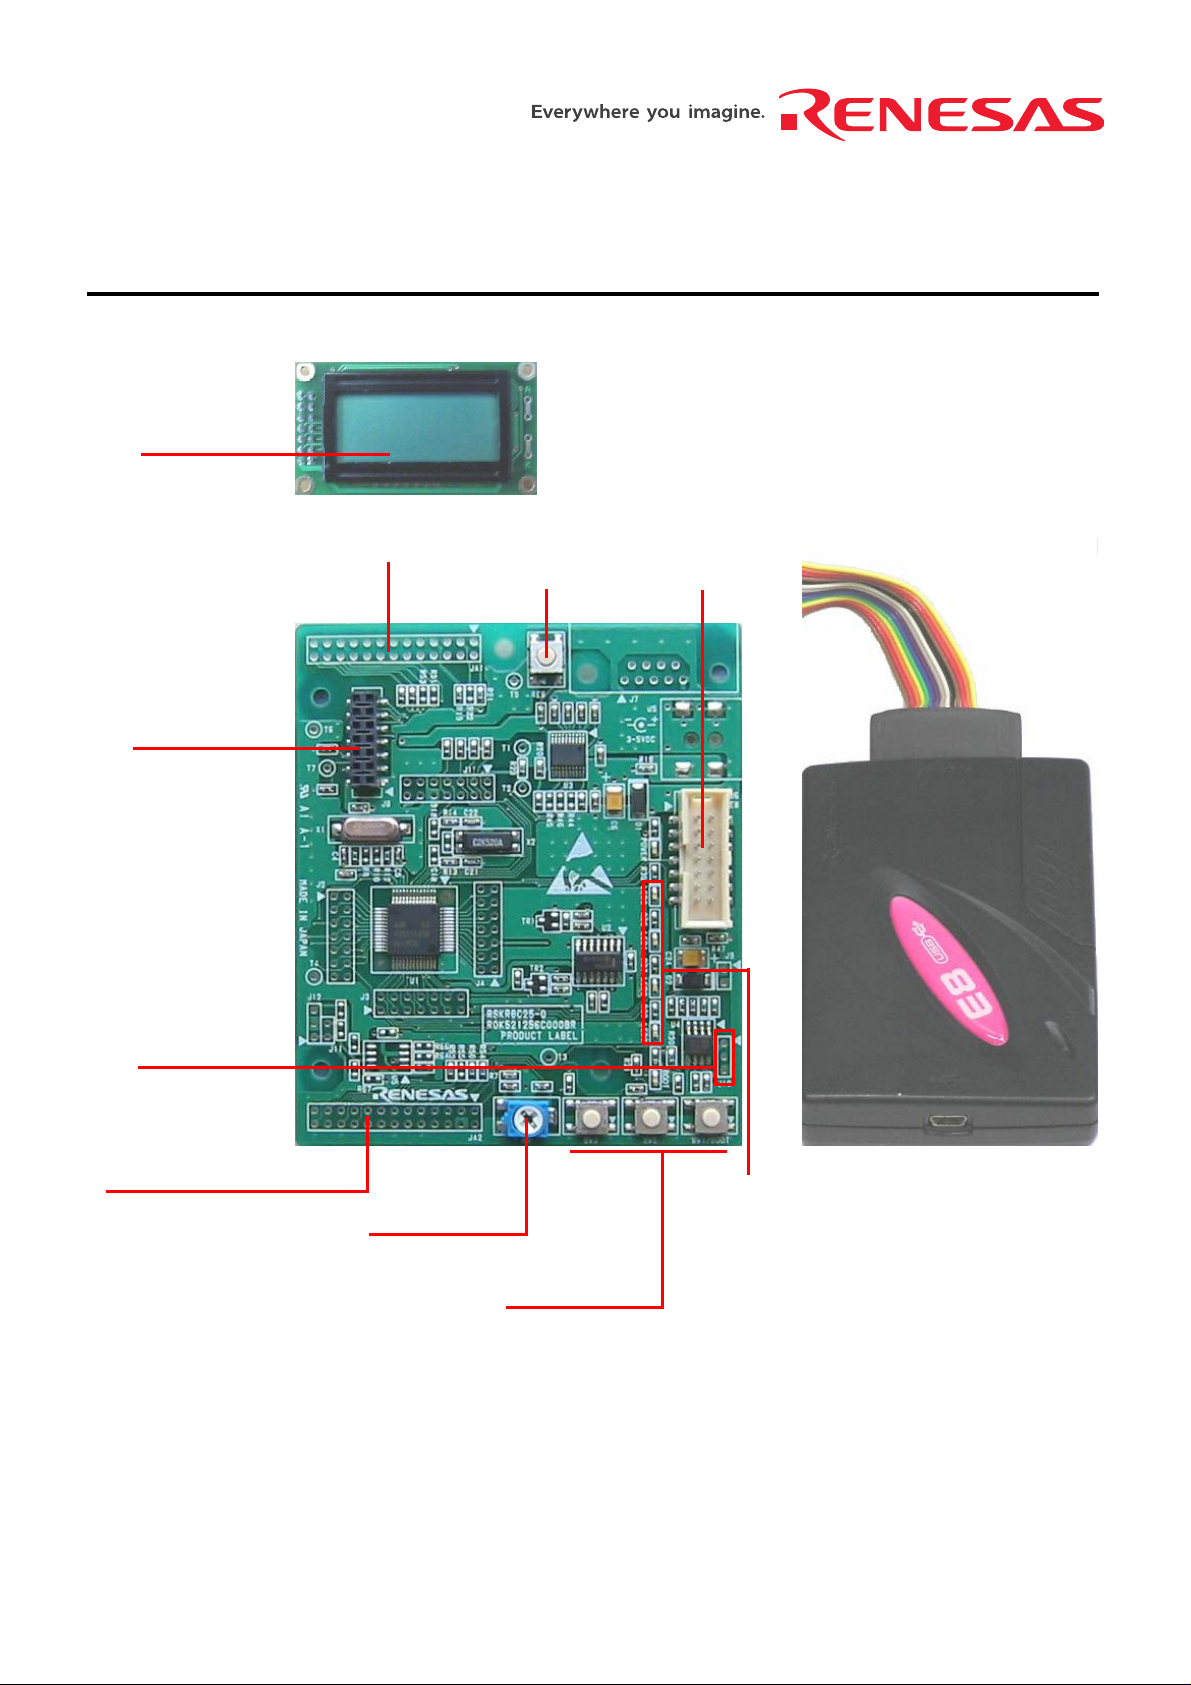
LCD module
Application Board Interface
Reset switch E8 header
LCD module
connector
Renesas Starter Kit for R8C/25
LIN connector
Application Board Interface
E8 emulator
User LEDs
Analog adjust
User switches
Page 2
1. Installation
Do not connect the E8 emulator hardware until the software support has been installed.
1. Insert the CD into your computer’s CD-ROM drive. The CD should automatically run the installation program. If
the installer does not start, browse to the RSK directory from the CD root folder and double click on “setup.exe”.
2. The software license a gree m ent will be displayed. Please sel ect th e appr opriat e r adio b utton a nd c lick <Next >
to continue.
3. Select the software components to install. New users are strongly recommended to accept the default settings.
Click <Next> to continue.
4. The destination folder is specif ied on the next s creen. It is rec ommended to ac cept the def ault settings. Cl ick
<Next> to continue.
5. Click <Install>.
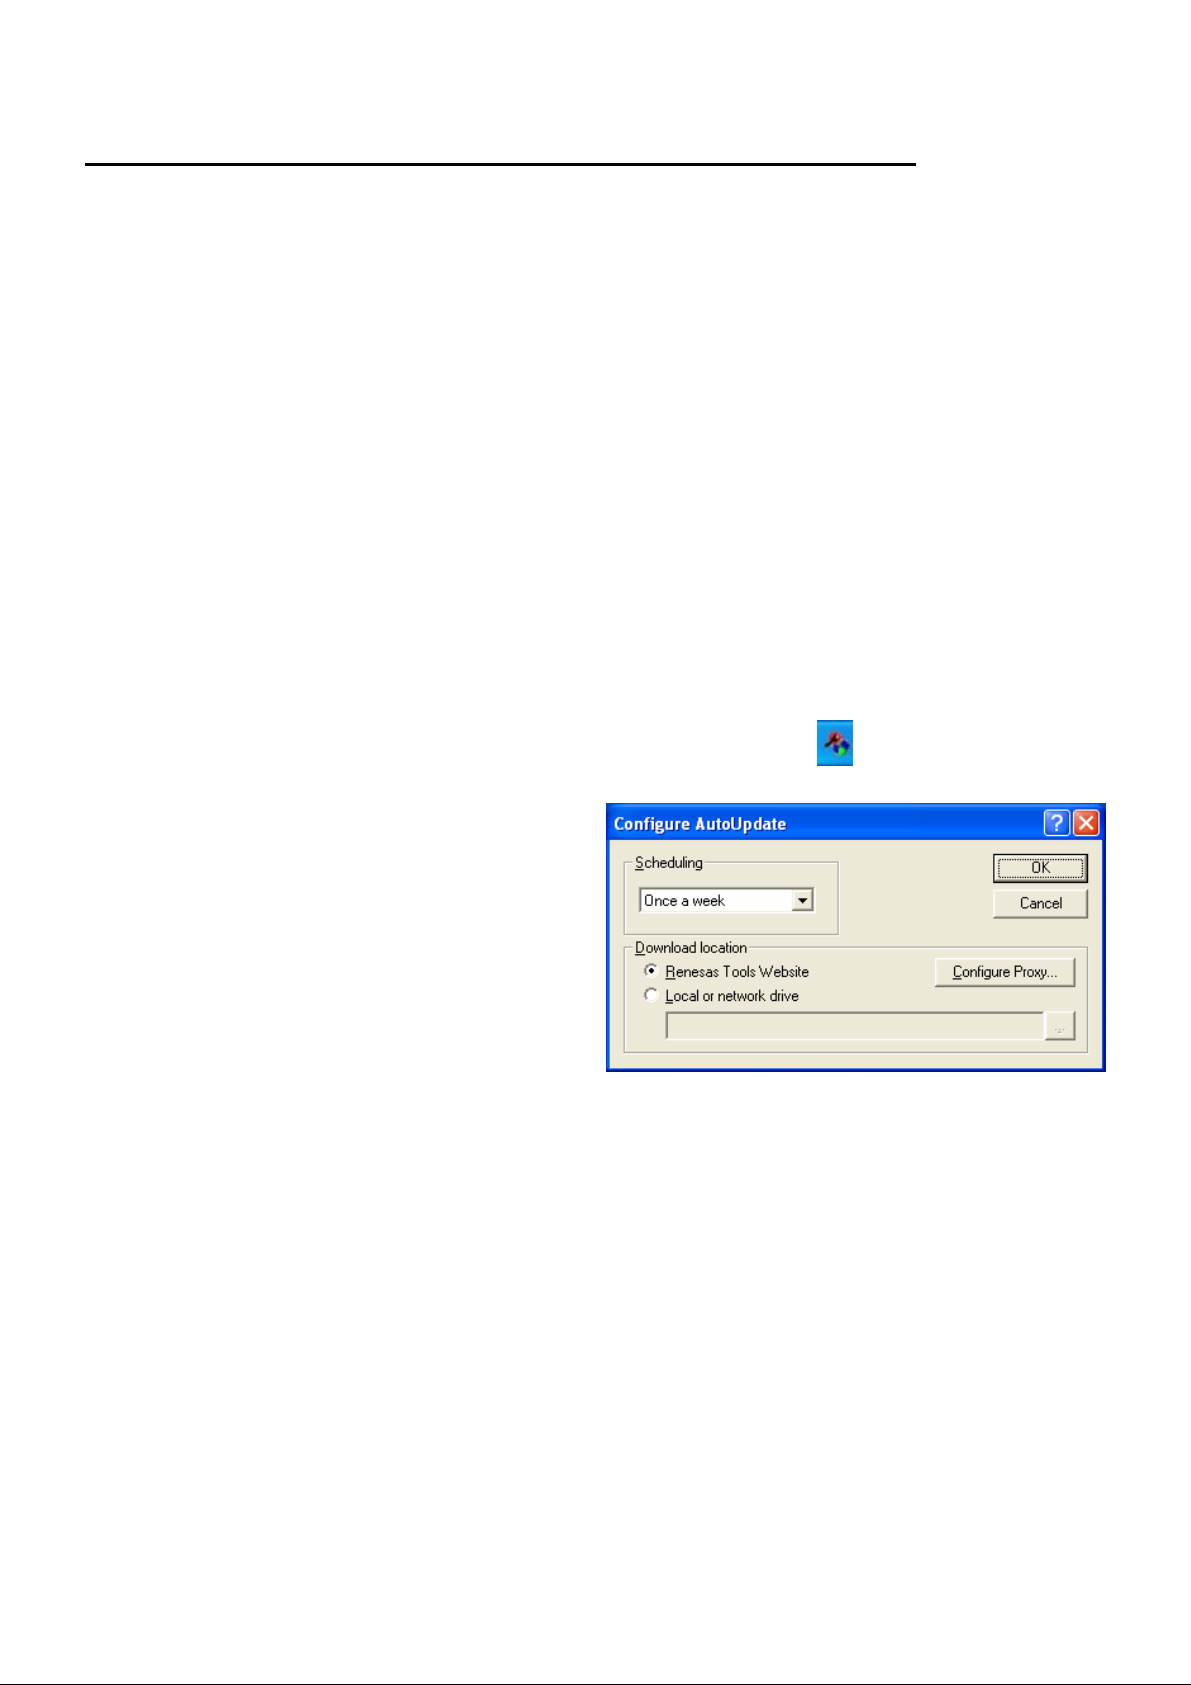
During the installation t he Auto-U pda te dialog will be dis pla yed. Do not conf igure Auto-Up date at this tim e, it will b e
completed in the next section.
Please wait for the installation wizard t o complete. Thi s will take a few m inutes during which the pr ogress bar will
stop for long periods, this is normal operation.
6. Click <Finish>.
2. Auto-update
After the installation has completed.
If the system was rebooted then double click the icon to configure Auto-Update.
Configure the Auto-Update settings dialog to allow your installation to be checked for required updates.
3. Connection
7. Now connect the E8 to J6 on the R SK us ing t he ribb on cab le, als o co nnect the LCD m odule t o J8 on the R SK
ensuring that the pin 1 designation corresponds to the marking on the RSK.
8. Connect the E8 emulator to a spare USB port.
The “Found New Hardware” Wizard will appear. Please follow the steps below to install the drivers. Note that
administrator privileges are required for a Windows
9. Verify the “Recommended” option is selected and click <Next>.
10. If using Windows XP, skip to step 12; otherwise click <Next>.
11. Click <Next> to install the driver.
12. Click <Finish> to close the wizard.
Note: The Windows driver signing dialog may be displayed. Please accept the driver to continue.
TM
2000/XP machine.
Page 3

4. HEW Workspace
HEW integrates various tools such as compiler, assembler, debugger and editor into a common graphical user
interface. To learn more on how to user HEW, open the HEW manual instal led on your com puter (Start Menu > A ll
Programs > Renesas > High-performance Embedded Workshop > Manual Navigator).
13. Launch HEW from the Start Menu. (Start Menu > All Program s > Renesas > High-performance Em bedded
Workshop > High-performance Embedded Workshop)
14. In the “Welcome” dialog box: Verify “Create New Workspace” is selected. Click <OK>.
15. In the “New Project Workspace” dialog box: Set the “CPU Family” to “M16C”, and verify the “T ool chain” is set to
“Renesas M16C Standard”. Select “RSKR8C25” from the left hand pane.
16. Enter a name for the workspace. T he projec t nam e will be autom atical ly com pleted with t he Works pace nam e.
You can change this name to “Tutorial” if required. Click <OK>.
17. On the “RSKR8C25- Step 1” window: Select “Tutorial” and click <Next>.
18. On the “RSKR8C25- Step 2” window: Click <Finish>.
19. On the Project Generator Information window: Click <OK>.
The project that is created has two configurations. The Release configuration can be used for the final release code
version. The Debug configuration allows modifications to the configuration for debugging.
20. Select the Debug build configuration in the left hand drop down list on the toolbar.
21. Click on the “Build” icon to compile, assemble and link the project.
5. Programming and Debug
22. Ensure the “SessionR8C_E8_SYSTEM” session in the right hand drop down list on the toolbar is selected.
23. Click the <Connect> button on the debug toolbar.
24. Select the correct device type (e.g. R5F21256 for RSKR8C25).
25. Select “Download emulator firmware”.
26. Click <OK>.
Page 4

27. The first time the E8 is used the following dialog appears: Otherwise skip to step 31.
28. Click <OK>.
29. Select “Renesas E-Series USB Driver”. Select “USB Interface”. The channel number will vary.
30. Click <Close>.
31. Accept any dialog ue warning that an older version of E8 firm ware is necessary to work with the applicatio n.
Allow download of firmware to complete, this may take several seconds.
32. Select “Power supply is carried out” if the E8 is to provide the power to the RSK board. Otherwise connect a 5V
center positive supply.
33. Select “5V” then click <OK> if “Power supply is carried out” is selected, otherwise click <OK>.
34. Enter “User Flash Area” for the firmware location. Click <OK>. The flash memory write program and E8 monitor
are then downloaded to the microcontroller.
Page 5

35. Right click on the download module listed in the left hand pane and select “Download module”.
D007074_11_S01_V01
The code will be downloaded to the microcontroller. This may take several seconds.
36. Click the <Reset Go> button.
The code will run and you will see the LEDs flash on the board.
37. Click the <Stop> button.
The code will stop and the source code will be opened at the current program counter.
6. Next Step
After you have completed this quick start procedure, please review the tutorial code and sample code that came with
the kit. You can add projec ts to the current workspace b y selecting (Pro ject > Insert Project) from the main m enu.
The tutorials will help you understand the device and development process using Renesas Development Tools.
The Hardware manual sup plied with th is RSK is current at the t ime of publication . Please chec k for any updates to
the device manual from the Renesas website at:
www.renesas.com/rsk
7. Renesas M16C Compiler
The version of the com piler pr ovided with this RSK is full y func tional b ut tim e lim ited. You have 60 days to evaluate
the full product bef ore the com piler will lim it the code li nker to 64k bytes. Full lic ensed M16C compiler version s are
available from your Renesas supplier.
8. Support
Online technical support and information is available at: www.renesas.com/rsk
Technical Contact Details
America:
Europe: tools.support.eu@renesas.com
Japan: csc@renesas.com
© Renesas Soluti on s Cor pora t io n. 200 6 .
© Renesas Technology Eu rope Lt d. 20 06 .
© Renesas Technology Corporation. 2006.
techsupport.rta@renesas.com
 Loading...