

RELM Communications RPV599A Users Manual
User Manual
For RPV599A Programming Software
Version 1.00
² Introduction
RPV599A Programming Software described in this user manual is applicable to RPV599A
Transceiver. This software is mainly used for writing data to your transceiver or reading data from
your transceiver via your computer and copyrighted by Relm Corporation.
² Statement
“It is forbidden to transmit this device on marine frequencies 156.10 MHz (Marine Channel 02), 156.20
MHZ (Marine Channels 04 and 04A), 156.025 MHz (Marine Channel 60), and 156.125 MHz (Marine
Channel 62).”
Programming software, accessories, and procedures are issued only to authorized distributors and
repair facilities. The radio cannot be programmed for any frequency change, including channel
spacing (12.5/15 kHz vs. 25/30 kHz), by a user in the field.
² Install Software
In your disk, which is presented to you together with your transceiver, you can see one setup file of
our software, which is named by RPV599ASetup.EXE. By clicking the setup file, installing will run
automatically. During the installing process, you can do something according to the setup wizard.
When finished, the software has been installed in your computer.
² Connect a Cable
After installing the software, but how to use it with your transceiver
You will have a cable that connects your computer with your transceiver . You can connect your
computer to your transceiver according to the following steps.
Insert one end of the cable to the serial port (COM1 or COM2) of your computer, the other end to
the Speaker/Microphone “ port of the transceiver. Before operating the transceiver, you are
required to open the power switch of the transceiver.
² Run Software
There is a shortcut to it on your computer Desktop and Program Manager group. Execute this
shortcut “RPV599A Programming Software“ to run the program. The Main Interface displays as
follow.
Figure 1
² Select Communication Port
When changing the connecting serial port, you must select the corresponding communication
settings. To select a different communication port, click Communication of Option Menu and set a
new port.
Figure 2
When popuping the dialog, you can choose either COM1 or COM2 as your communication port.
Figure 3
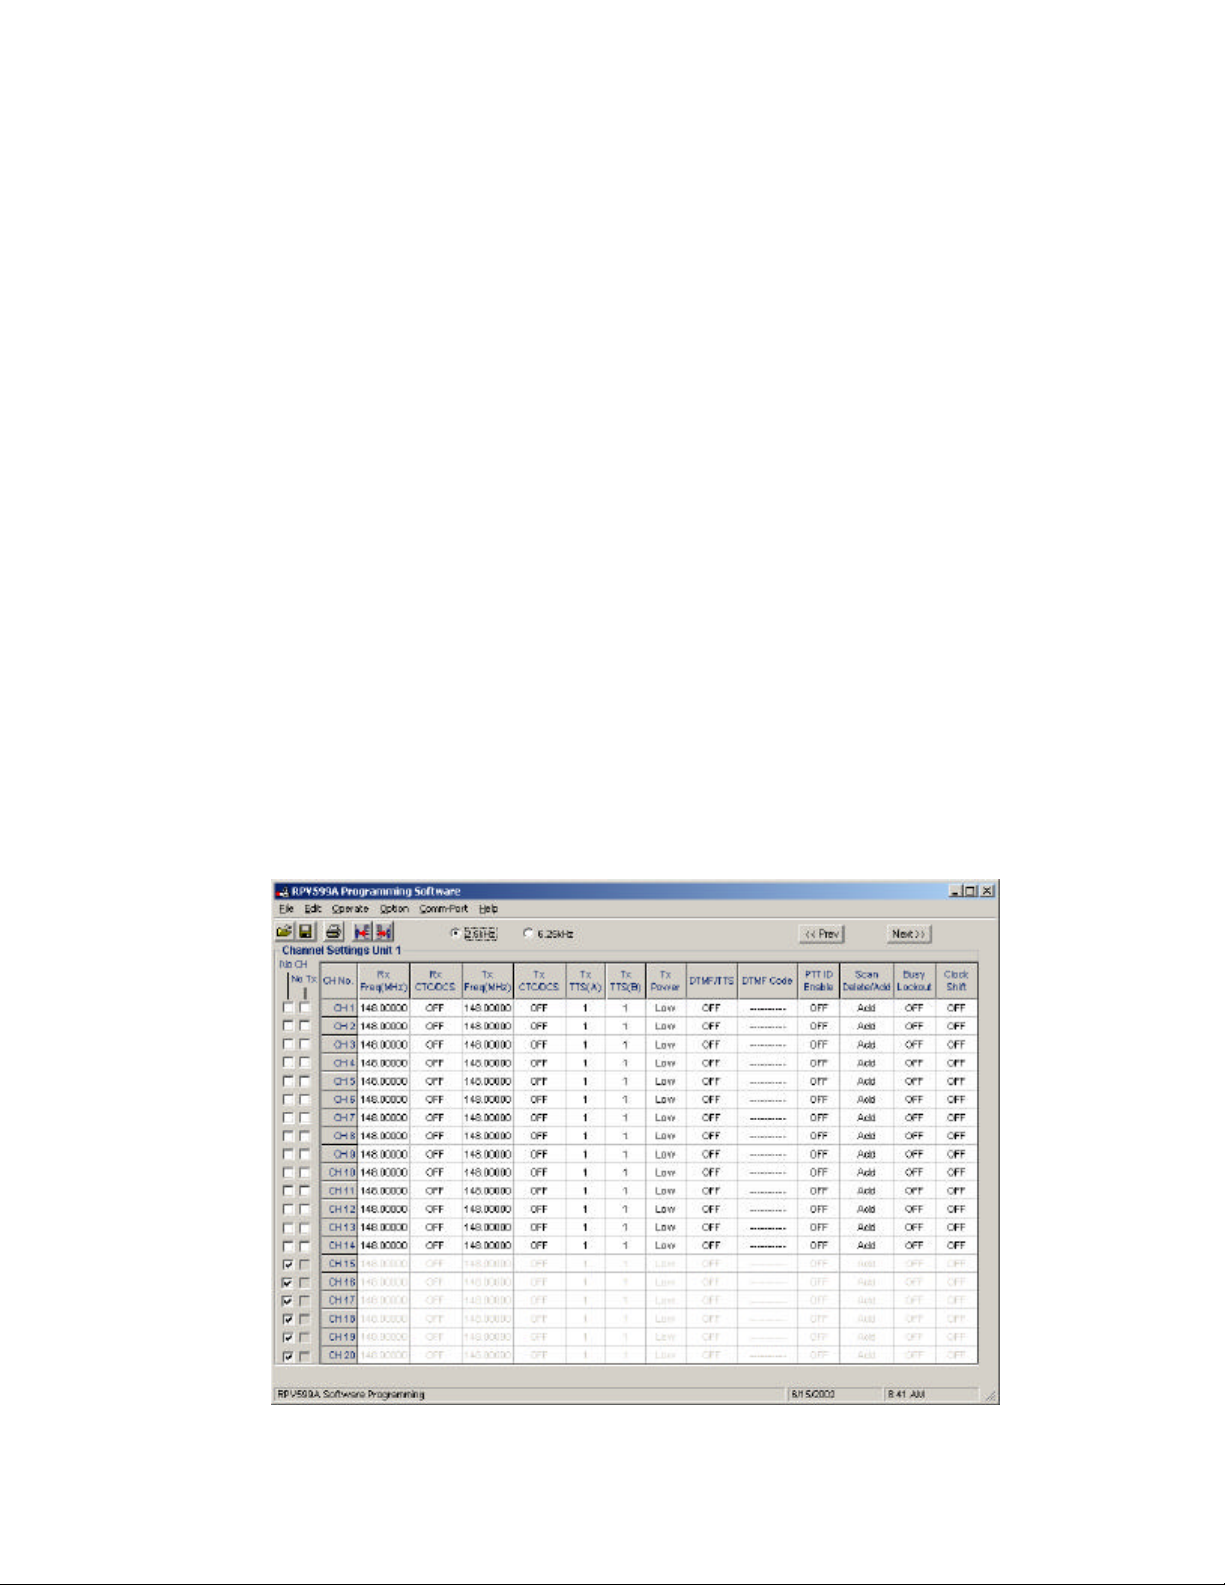
² Set the data
Channel Unit Settings
When you run the program, you can see three different interfaces by clicking the Option menu
item. The first submenu of Channel Settings is for setting the channels data; the second submenu
of Radio Configuration is for setting the whole radio function data and scan data; the last submenu
of Set DTMF/TTS is just for setting radio signals: DTMF or TTS(Two-Tone Signaling).
In the main interface, you can see a form of the first 20 channels. There are fives group and each
group has 20 channels except for the fifth group. In each main interface you can set the channel
data. There are 13 columns for each channel. You can set each column with your wanted value. In
the top of the main interface, you can see two buttons which are named Prev and Next.
By clicking either button, the main interface will be changed to the next group of 20 channels.
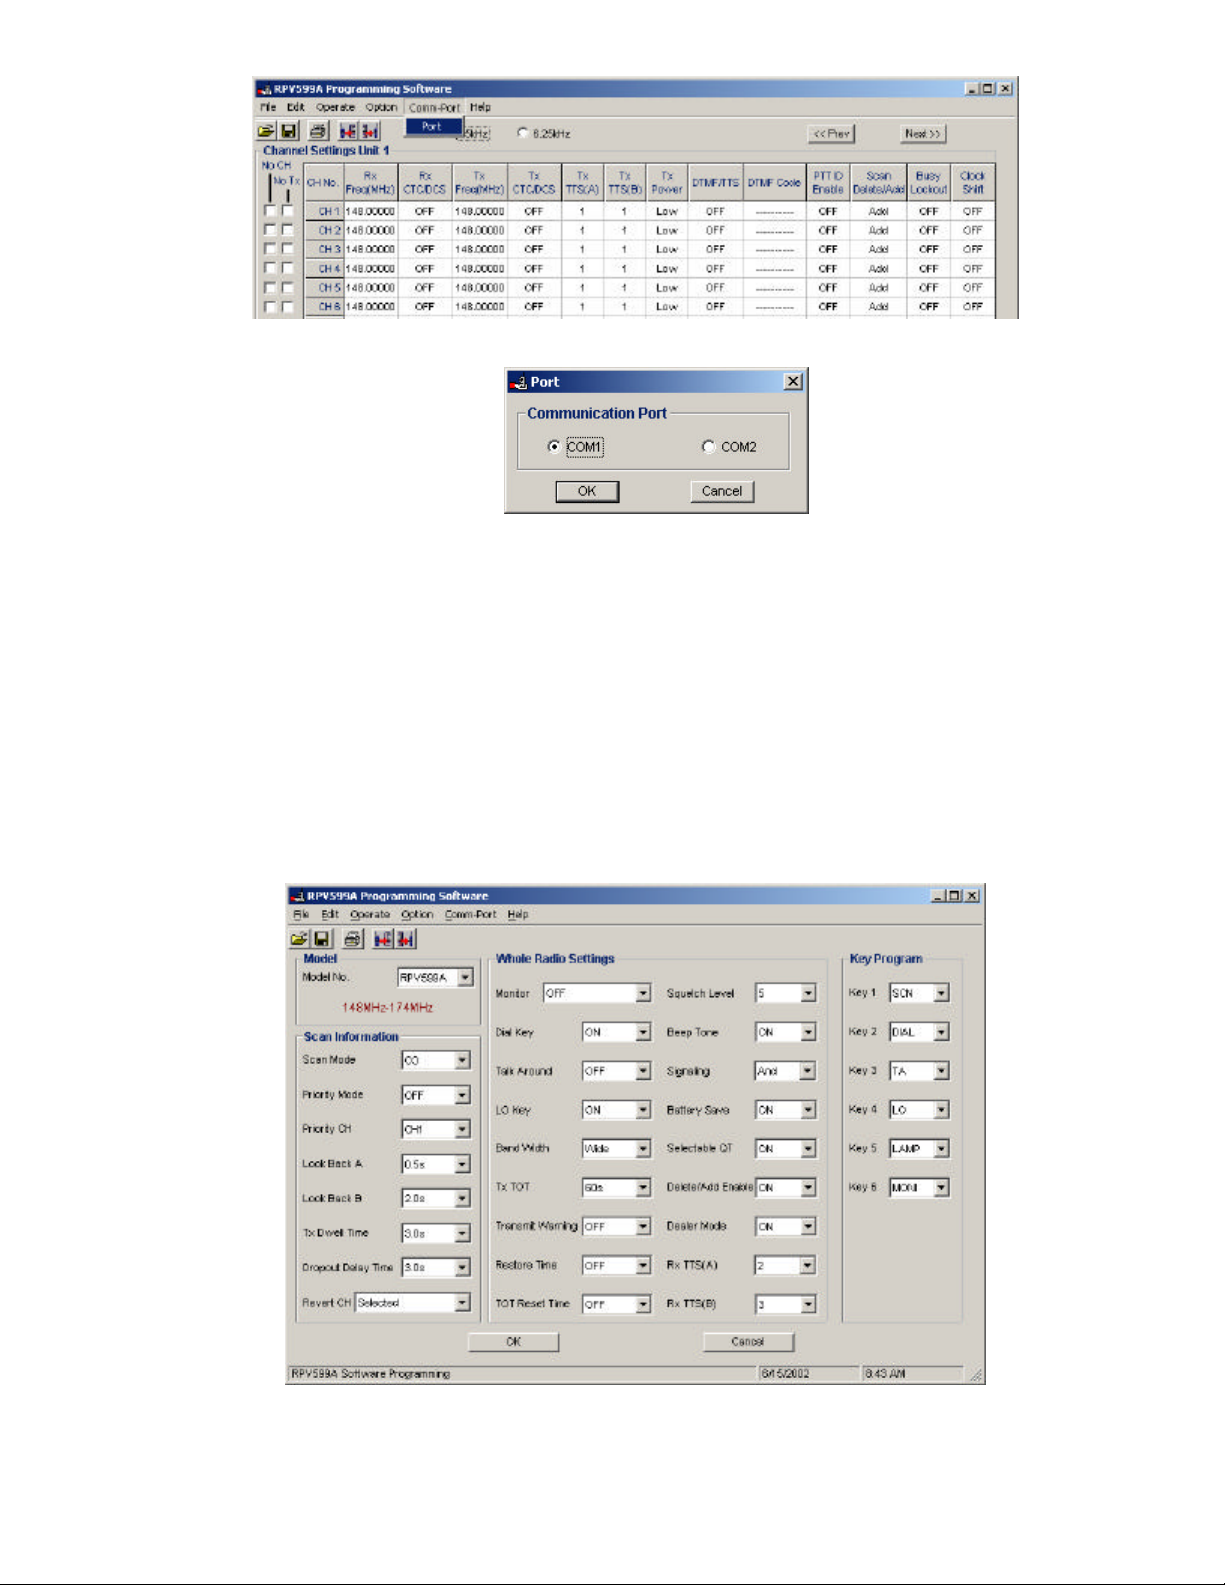
Radio Configuration
Now if you click the submenu item of Radio Configuration under Option menu item, you will see a
new interface. In this interface you can set all the whole radio settings as bellows.
Figure 4
Ÿ Model
There are two items. This program is just for one model of transceiver RPV599A. The frequency
band is 148MHz~174MHz.
Ÿ Scan Information
You can set all the data relevant to scan. The value of each item is listed in the Combo Box.
 Loading...