

Page 1
24
Radio Engineering Industries, Inc.
www.radioeng.com
Rev 0.1 Date: 12-22-14
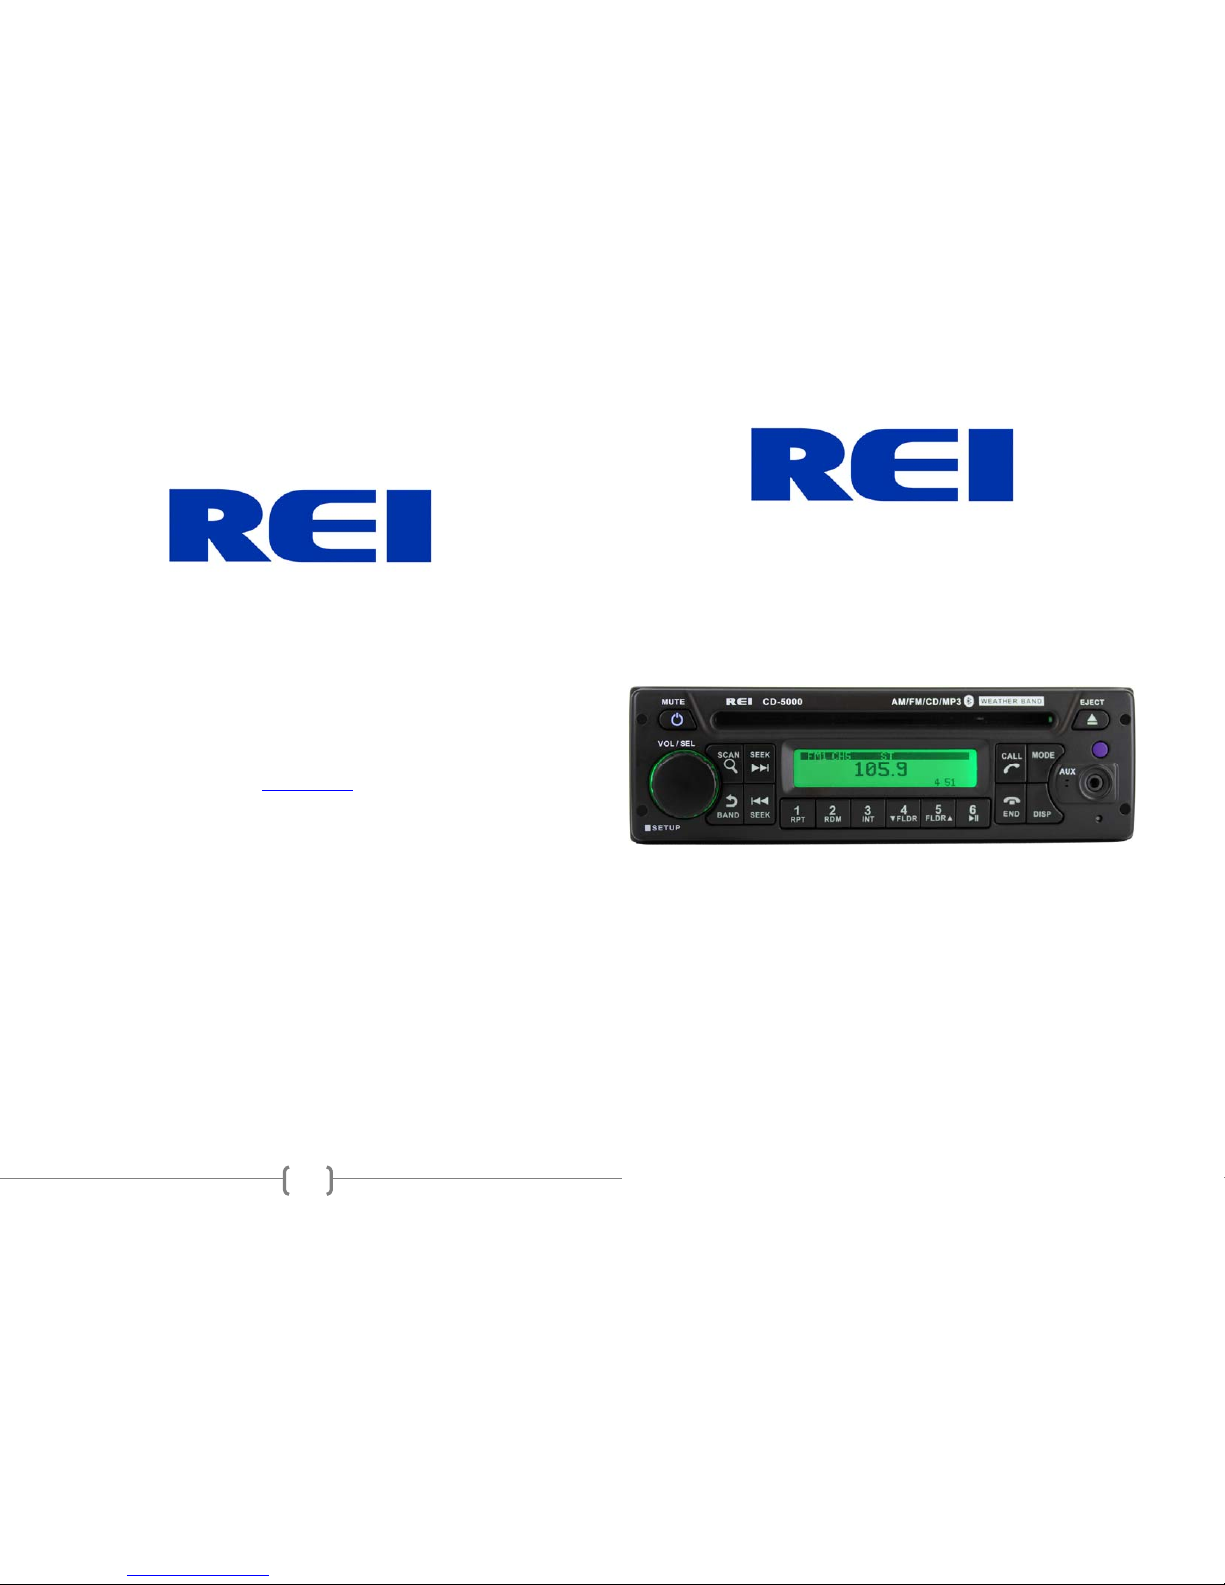
Heavy Duty AM/FM/CD Stereo Weather Band Radio, USB iPod® Control
and Charging, Bluetooth® Hands Free Calling and Wireless Audio
Streaming, Front/Rear Auxiliary Inputs and built in PA
Installation/ Operation Manual
50W x 4 CD-5000
Page 2

2
Thank you for purchasing CD-5000 AM/FM/CD Receiver from REI. This product is
designed and tested to with stand temperature and vibration extremes. Please read the
owner’s manual carefully before attempting to install this unit.
If you have an installation question or need installation assistance, please call the:
SERVICE HOT LINE
1-877-726-4617 Toll Free USA & CANADA
FEATURES:
Heavy Duty construction for Tough Environments
Non-volatile memory back-up stores user settings when battery is disconnected
30 Day Clock back-up
Output Power 50W x 4
Full Dot Matrix LCD display
10s Anti-skip Gear driven CD Mechanism
7 channel NOAA® Weather Band Tuner
Electronic AM/FM Stereo Tuner
Preset Up to 30 Radio Stations (18 FM, 12 AM)
EURO and USA frequency bands
MP3/WMA playback w/ ID3 Tag Support
2 Aux Inputs (Front 3.5mm Stereo Jack/Rear RCA)
iPod® /iPhone® Charging and Playback Control via USB
Bluetooth® audio Streaming w/ support for Hands Free calling
Integrated Bluetooth® Microphone input
Rear Channel Pre-amp outputs
Built in PA input (Microphones & Adapter Sold Separately)
ISO Connector for vehicles manufactured with the ISO connect harness
IF ADDITIONAL INSTALLATION COMPONENTS ARE NECESSARY, CONTACT YOUR
REI SALES REP FOR:
** OEM /FACTORY WIRING HARNESS ADAPTERS
** ANTENNAS & ANTENNA ADAPTERS
** SPEAKERS & GRILLS
Radio Engineering Industries, Inc.
6534 “L” Street
Omaha, Nebraska 68117
(800)228-9275
www.radioeng.com
23
NOTES:
Page 3
22
NOTES:
3
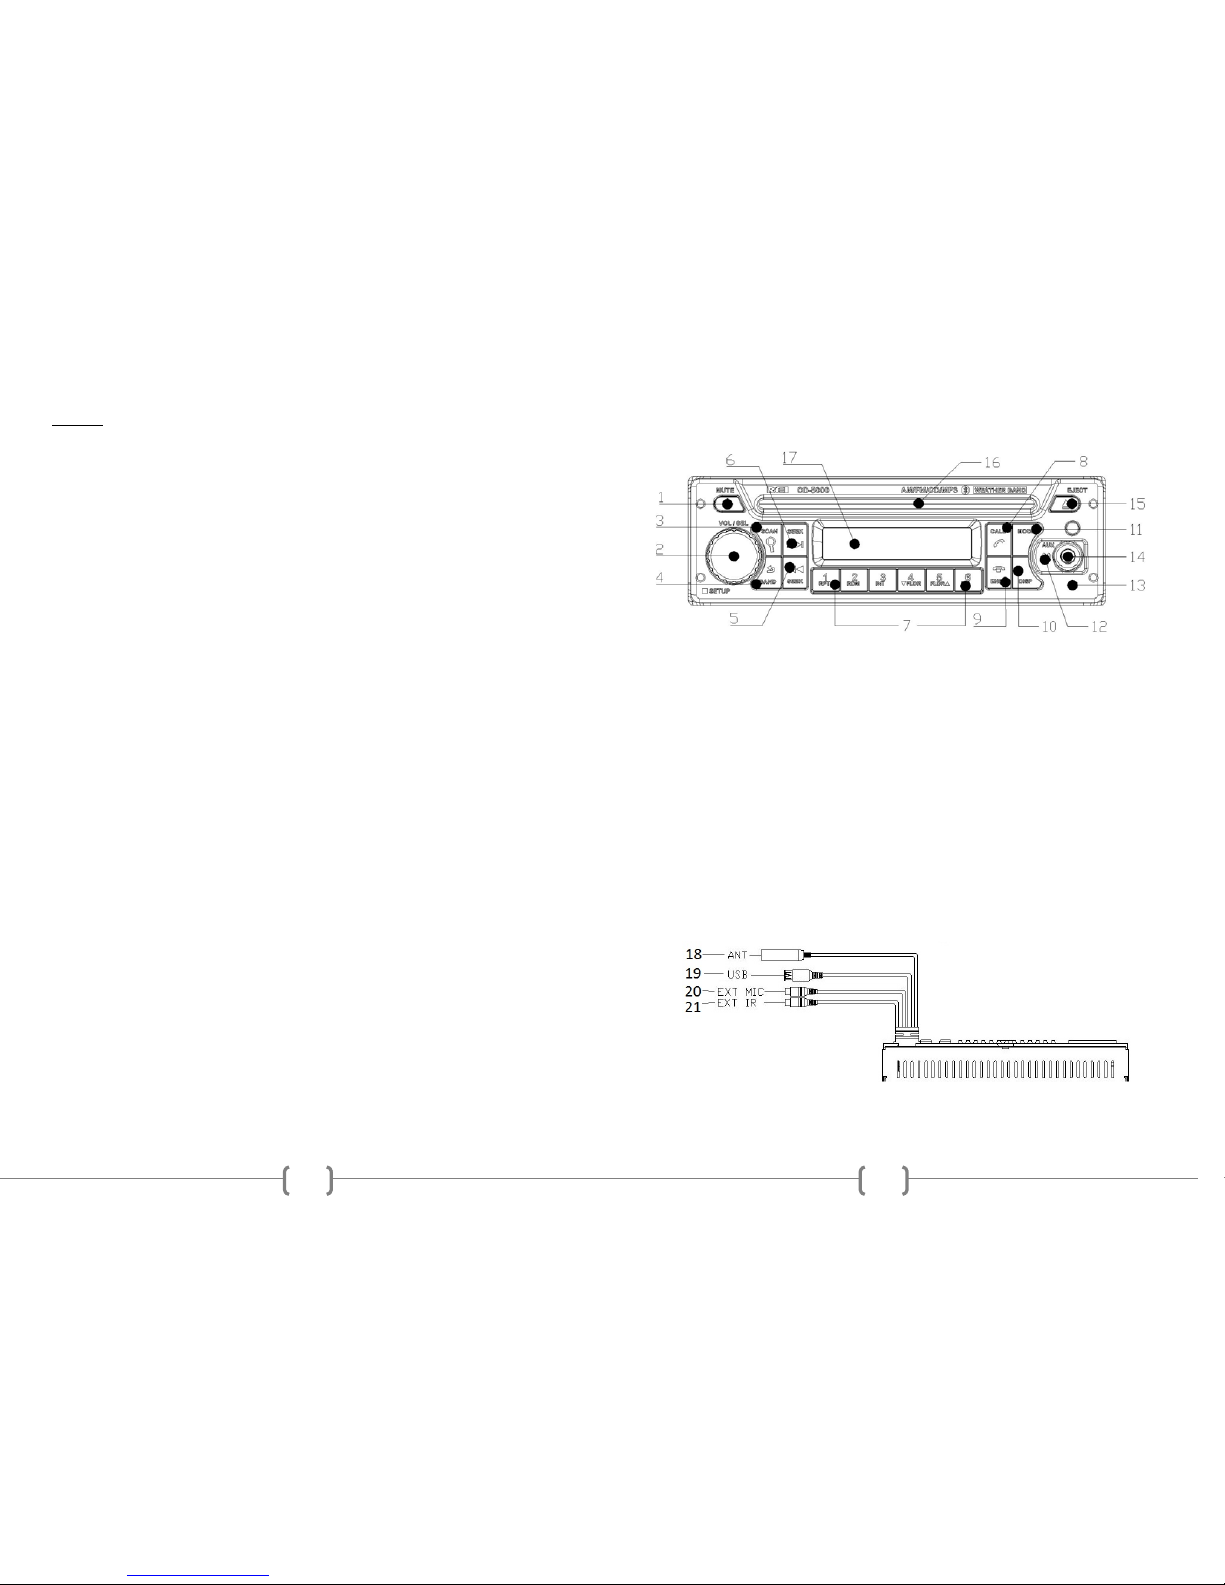
CONTROLS AND INDICATORS
1. Power/Mute Button
2. Volume/Select Knob
3. Scan /Search Button
4. Band /Back Button
5. Tune /Seek Down Button
6. Tune /Seek Up Button
7. Preset Memory/Recall, Media Control Buttons
8. Call Connect/Transfer Button
9. Call End Button
10. Display Button
11. Mode Select Button
12. Internal Bluetooth Microphone
13. Reset switch
14. Front AUX1 Input Jack
15. Disc EJECT Button
16. Disc Slot
17. Dot Matrix Display
REAR INPUTS SHOWN
18. Antenna input
19. Rear USB input
20. Rear EXTERNAL Bluetooth Microphone input
21. Rear IR Remote extension input
Page 4

4
OPERATION
1) Power/Mute Button
Press the Power Button to turn the unit ON or hold to turn the unit OFF. The button
will illuminate RED when OFF and BLUE when ON. When ON, press to MUTE the
audio on/off. Note: Radio can also be powered on by pressing any front button.
2) Volume/Select Knob
Rotate the knob left or right to change the volume level.
Press the knob to select one of the following functions:
VOL---BASS---TREB---BAL--FAD
Upon choosing the function, rotate the knob to adjust the desired setting.
PLEASE NOTE: If the Volume/Select Knob has not been adjusted for 3 seconds it
will automatically revert back to the previous informational display.
Press and hold this button to access the radio SETUP MENU.
3) Scan/Search Button
Press and hold this button for 2 seconds to auto program available stations into the
preset memory buttons. This function will erase previous memorized stations and
store the newly searched stations. Once completed, the radio will scan for 5 seconds
through each of the preset stations of either the AM or FM band and stop.
4) BAND/Back Button
Press this button to change radio bands as follows:
FM1—FM2—FM3—AM1—AM2
5) TUNE/SEEK DOWN Button
Under Radio mode, press this button momentarily to manually tune downward. Press
and hold a button and the radio will automatically seek to the previous radio station.
When playing digital media, use this button to track backwards to the previous track.
This button also functions as Weather Band Channel access. Under Weather Band
mode, press this button to select Weather Band channels 1-7.
6) TUNE/SEEK UP Button
Under Radio mode, press this button momentarily to manually tune upward. Press
and hold a button and the radio will automatically seek to the next radio station.
When playing digital media, use this button to track forwards to the next track.
This button also functions as Weather Band Channel access. Under Weather Band
mode, press this button to select Weather Band channels 1-7.
7) Preset Memory/Recall Buttons 1-6
Press these buttons momentarily to select the preset stations.
Press and holding a button will set the current station to the button being pressed.
**Preset buttons are pre-assigned frequencies in Weather Band Mode.
21
USB INTERFACE
USB Standard……………………………………………….USB1.1/2.0 (Full Speed)
Maximum Supply ……….………………………………………………...5V/500mA
File System…………………………………………………………………..Fat16/32
AUXILIARY INPUT SPECIFICATIONS
Input Voltage Maximum Voltage………………………………………………...1.2V
Input impedance………………………………………………………………..10K
DIMENSIONS
Chassis (W x H x D) ………...…………….178mm (7”) x 50mm (2”) x 154mm (6”)
Nosepiece (W x H x D) ……….….188mm (7-3/8”) x 58mm (2-1/4”) x 17mm (5/8”)
Weight ……………………………………………….…………………………3.5Ibs
*Due to continuous product improvement, specificat ions and design are subject to
change without notice.
Page 5

20
SPECIFICATIONS
AUDIO SECTION
Power supply voltage (negative ground) ……………….……….12V DC (10V-18V)
Standby Current…...……………………..…………..…………………………20mA
Max Current Consumption……….……………………….……….….……….....10A
Speaker impedance …………………….……………….……4-8 Ohms per channel
Maximum Pre-output Voltage……….…........................................2.0Vrms/10k ohms
POWER OUTPUT
Continuous Output into 4, @1KHz at 10 % THD …………..…...……4 x 25Watts
Maximum Power Output (Volume control Maximum)……….…...50W×4 (at 1kHz)
FM TUNER
Range …………………………………………………..….(USA) 87.5 – 107.9 MHz
(EUR) 87.50 – 108.00 MHz
Usable Sensitivity (S/N = 30dB)…………………………...7.34dBf.(0.6uV/75ohms)
Signal to noise ratio ………………………………….………………...58dB (Mono)
Stereo separation (@ 1K Hz) ………………………….……..……………..…42 dB
AM TUNER
Range …………………………………………………..….…(USA)530 – 1,710 kHz
(EUR) 522 – 1,620 kHz
Usable Sensitivity (S/N = 20dB)………………………..………....23dBuV (14.4uV)
Signal to noise ratio (LEVEL60dbuV)…….………………...………………... 60 dB
WEATHER BAND TUNER
Range …………………………………………………..…….162.400 –162.550MHz
Usable Sensitivity (S/N = 20dB)……………………..………………0.7uV(-9dBuV)
Signal to noise ratio (LEVEL40dbuV)…….…………………...……………….42dB
CD/PLAYER
Signal/Noise Ratio (1kHz)……………………………………………………..120dB
Frequency Response (+/- 1dB)………………………………10 – 20,000Hz (+/-1dB)
Total Harmonic Distortion (1kHz)…………………………...less than 0.20% (1Khz)
MP3 decoding format……………………………………MPEG-1 & 2 Audio layer 3
WMA decoding format………………………………….Ver. 7, 7.1,8,9 (2ch audio)
(Windows Media Player)
BLUETOOTH®
Version……………………………………………………...Bluetooth® 2.0 Certified
Frequency Range………………………………………………….2.402 – 2.480 GHz
Output power……………………………………………………………+4dBm Max
Profiles supported ………………………..HFP 1.5, A2DP 1.2, AVRCP 1.0, & PBAP
5
8) CALL Button
Press this button to Place or Answer an incoming call when successfully paired using
the Hands Free Profile on a Bluetooth® enabled phone. Press this button to transfer
the call from the radio to the phone and vise versa.
9) END Button
Press this button to END a call when successfully paired using the Hands Free Profile
on a Bluetooth® enabled phone. Press this button to quickly disconnect a paired
device from the radio when in BT PHONE mode.
10) DISP Button
Press this button to change between Clock and Mode Information display.
Setting the Time:
With the radio’s BLUE power light ON, press and hold this button until the hour
display begins to flash. Rotate Volume/Select Knob to adjust the hour. Press the DISP
button again, and the minute display will flash. Rotate VOL/SEL Knob to adjust the
minute. Press either the DISP or VOL/SEL button to save the time on the LCD.
11) Mode Button
Press this button to navigate between modes:
TUNER—WB—CD—BT PHONE—BT MUSIC (if paired)—AUX1—AUX2.
12) Internal Bluetooth® Microphone
Internal Microphone for Hands Free Bluetooth calling.
13) Reset Switch
In the unlikely event that the radio is not operating correctly, press the RESET button
to restart the operating system of the radio.
14) Front AUX 1 Input Jack
The unit is equipped with a front panel 3.5mm auxiliary input (AUX 1) so you can
connect your external portable audio player or portable satellite radio receiver. A
second REAR (AUX 2) RCA jack is also included on the rear of the radio.
15) Disc EJECT button
With the radio ON, press this button to EJECT the Compact Disc from the radio.
16) Disc Slot
Insert a Compact Disc label side up here. The radio will switch modes and begin
playback after the file is loaded.
17) Dot Matrix Display
LED Dot Matrix display shows the radios operational information.
*It may be necessary to adjust the volume level of your portable devise to achieve an
optimal volume level.
Page 6

6
WEATHER BAND MODE
NOAA National Weather Radio Broadcasts from over 380 Locations throughout
the U.S. on seven VHF/FM frequencies. Tune to receive continuous weather
information 24 hours a day on one of the following frequencies.
For local station listing see: http://www.nws.noaa.gov/nwr/nwrbro.htm
Press preset 1 to select weather band channel 1 - 162.400MHZ
Press preset 2 to select weather band channel 2 - 162.425MHZ
Press preset 3 to select weather band channel 3 - 162.450MHZ
Press preset 4 to select weather band channel 4 - 162.475MHZ
Press preset 5 to select weather band channel 5 - 162.500MHZ
Press preset 6 to select weather band channel 6 - 162.525MHZ
**Press SEEK UP/DOWN to select weather band channel 7 - 162.550 MHz
SETUP MENU
With the unit ON, press and hold the VOL/SEL button for 2 seconds. LCD will
display MENU. Rotate the VOL/SEL knob to choose the option, then press to make
a selection:
SCROLL ON/OFF/ONCE
Choose how RDS, iPod®, and ID3 tag information is displayed on the LCD. With the
scroll set to ON, information is repeated continuously on the front display. When set
to ONCE, information is displayed only one time. When set to OFF, information is
not displayed unless the user presses the DISPLAY button.
WBALERT ON/OFF
Choose to turn the Weather Band Alert ON or OFF.
RDS ON/OFF
Choose to turn the RDS (Radio Broadcast Data System) ON or OFF.
BT SET
BLUETOOTH ON/OFF (Must be set to ON to access further)
PAIR DEV
SEL DEV
DISCOVER ON/OFF
ANSWER AUTO ON/OFF
DELETE ALL NO/YES
RINGER VOL SET
SPEAKER SET FRONT ON/FRONT LEFT/FRONT RIGHT/ALL
MIC CARBON/DYNAMIC
The first option is to select a correct PA input based on the microphone type you are
using. Rotate VOL/SEL button to choose type:
DYNAMIC
Microphone does NOT have on on-board volume control. PA volume
control is built into the radio. Key the microphone to make adjustments.
19
TROUBLE SHOOTING
Problem Cause Solution
Backlighting is on, but no LCD display No power to BATTERY wire or blown 10A
main fuse.
Check for both ACC & BATTERY voltage
with Multi-meter, check all fuses.
No sound Speakers not connected; speakers connected
with bad splices; Speakers shorted to ground;
speaker load is not within 4-8 .
Connect speakers to harness; check all
spliced wires; verify speakers not shorted to
chassis; verify total speaker impedance.
Check volume level.
Public Address can NOT be au d i bl e o ver
speakers
PA setting in MENU is wrong; microphone is
pinned wrong; wrong microphone type is used.
Microphone is defective.
Turn the volume up on the microphone or
radio when the LCD display’s MIC; Check
that the correct microphone type is
connected. Check the PA setting’s in the
radio’s menu.
LCD Display says MIC and front controls
are locked
PA system is triggered Remove microphone connection and verify
correct pinning and or type, replace
microphone. Reset the unit.
Cannot tune radio stations The antenna cable is not connected. The signal
is too weak. The radio is in the wrong
frequency steps.
Connect the antenna cable. Check the
frequency spacing in the radio’s SERVICE
menu.
USB media not playing, or says loading. Media is the wrong file type. Convert files to a usable format, see file
requirements section of the manual.
Audio is distorted or low. Source audio level is too weak or overdriven.
Bitrate of audio file is too large.
Adjust the volume level of the auxiliary
source. Change the sample frequency or
Bitrate of the file.
iPod® screen displays “loading” for a
long period of time.
Device is not a supported device. The radio
supports a majority of iPod® models, but not all
are guaranteed.
Wait for iPod® to load or reconnect 30-pin
plug. If still loading, then device is not
supported, or has low battery. Use the
AUX input or a Bluetooth® connection
instead.
The Radio does NOT respond to the front
buttons
An error in operation has occurred Reset the unit from the front panel.
The Radio does not charge my device The device requires additional current via the
USB to charge the device
Unplug and try again. Th e USB cannot
support more than 5V/500mA.
Page 7

18
3. If additional support is needed, bend the included support bracket, and secure it
to the vehicle using a screw. Secure the opposite end to the radio’s rear stud using the
nut and washer provided.
4. To remove the radio, insert the two release keys into the holes on the front face of
the radio. The tools must be inserted with the notched side facing the radio. Slide the
keys foreword until you hear a click. Then pull the radio out, releasing it from the
DIN collar.
7
CARBON
Microphone has on on-board volume control. Radio will not control the
volume.
Press VOL/SEL knob to make the desired selection.
BRIGHTNESS 0-35
Rotate the VOL/SEL knob to choose the desired CONTRAST level of the display.
Press the VOL/SEL knob to select.
VER 1.00
This is the firmware version present on the radio. Not all features described
in this manual may be available on the radio at this time.
To save and exit MENU mode, press and hold the VOL/SEL button.
Note: Menu will exit automatically after 5 continuous seconds without saving any
selections.
RADIO OPERATION
1. AM/FM Preset Mode
Press the BAND button to switch from FM-1, FM-2, FM-3, AM-1, or AM-2.
2. Preset Number
Displays the Preset Channel of the frequency.
3. Frequency Display
Displays the Frequency of the current tuned station.
4. St ereo Indicator
Displays when the FM frequency is tuned in Stereo.
Page 8

8
Radio Broadcast Data System
1. RDS Display Indication
When RDS is set to ON in the MENU, FM station’s receiving RDS data will
display this indicator.
2. RDS Text Information
Press the radios button to choose a preferred display option.
RT (Radio Text)
Information such as the title and artist of the currently playing song.
PS (Programe Service)
Information such as the call letters or station identity name.
3. FM Frequency Display
Displays the alternate location of the FM frequency when RDS is set to ON.
WEATHER BAND ALERT
1. Weather Band ALERT Status Indication
When Weather Band alert is set to ON, ALERT is displayed in the LCD window. The
National Weather Service will send a 1050 Hz tone alarm before most warning and
many watch messages are broadcast. The tone will activate and switch to the alert
frequency even if the audio is turned off. After the alert message has completed, the
radio will return to the previous mode.
17
ISO INSTALLATION
1. For installations that do NOT require the use of the DIN collar. The radio has
threaded holes in the chassis side panels for ISO mount applications. If necessary, four
M5x10mm screws are included with the hardware pack to assist you.
INSTALLING THE RADIO
1. Place the DIN collar into the dash opening. Bend the tabs outward as shown on
the drawing below to lock into place.
2. Pass the harness and antenna cable through the DIN collar, and connect to the
back of the radio. Verify clearance; then gently insert the radio into the DIN Collar
until both spring clips are locked into place.
Page 9

16
ELECTRICAL CONNECTIONS
Follow this easy wiring diagram when installing Radio and Speakers.
Warning:
*This radio is designed for 12V DC Negative Ground Systems Only.
**Shorting or grounding any of the speaker wires can damage the radio and is not
covered by warranty.
**NOTE: BOTH THE RADIO’S BA TTERY +12V & ACC +12V POWER
WIRES MUST BE CONNECTED FOR OPERATION.
REQUIRED RADIO DIMENSIONS
Verify the radio will fit by following the suggested dimensions below. Carefully cut or
file as necessary until the sleeve easily slides into the opening.
9
CONNECTING A NEW BLUETOOTH® DEVICE
To connect your Bluetooth® device to the Radio, the device must first be paired.
You will need to verify that “BLUETOOTH” is set to “ON”. (See BT SET menu),
and verify that “DISCOVERY” is set to “ON”. (See BT SET menu).
Pairing the Your mobile device with the Head Unit
Your mobile phone can initiate a search for new devices and pair to the unit. The
following paragraph describes the pairing process:
NOTE: Procedures for pairing mobile phones may vary slightly from
manufacturer to manufacturer.
1. Verify that the Radio is powered up and ON.
2. Set the Bluetooth® function of the Mobile Device to ON.
3. Access the” Look for devices” feature of the Mobile device and begin
searching. After searching, the Radio should appear in the list of devices
as CD-5000BT. Press to accept.
4. A prompt to bond should appear on your Mobile device. Press to accept
and continue the process. The device will then ask for the passkey, enter it
on the mobile device.
NOTE: Some mobile devices require the passke y to con n ect. If you r moblie
device requires the passkey, you will need to enter it now. The default code is
“0000”.
5. After entering the passkey, press OK. The Mobile device should display
connected. The Radio’s Bluetooth® icon should appear in the upper
right hand corner of the screen.
NOTES:
Only ONE mobile device can be paired with the Radio at a time.
Turn “DISCOVERY OFF” to disable any unwanted Bluetooth® devices.
After turning off the ignition, the Radio will automatically search for the
last-connected Bluetooth® device, and if possible, restore the connection.
This Radio does NOT support HSP (Head Set Profile)
Page 10

10
BLUETOOTH® PH ONE MODE
1. Bluetooth Phone ID
Displays the ID of previously paired Bluetooth Phones. Rotate to the VOL/SEL
knob to display other paired devices and press the VOL/SEL to initiate
re-connection.
2. Display information
Shows the connection status and phone number of the incoming or outgoing call.
3. Options Menu
When connected to a Bluetooth Enabled phone, Rotate the VOL/SEL knob to
access DIALED, RECEIVED, MISSED, or PHONEBOOK.
DIALED Displays all dialed calls from the currently connect phone.
RECEIVED Displays all answered incoming calls from the currently
connect phone.
MISSED Displays all missed calls from the currently connect phone.
PHONEBOOK Displays the contacts currently stored on the connected
phone. Some phones require the user to accept the radio’s permission
to view contacts before displaying them on the radio.
The use can rotate and choose using the VOL/SEL button and press it to also
select the desired number. Use the button to return to the previous menu.
Once the phone number is displayed, press the CALL button to place the call.
4. Connection Status
Displays the Bluetooth® icon connection status of the radio.
15
7
6
1
2
5
3
4
9
8
OPTIONAL REMOTE CONTROL
*Requires 2AA Batteries
(1) Power Button
(2) Language Button (N/A)
(3) Menu Button (N/A)
(4) Volume Up/Down Buttons
(5) Enter Button (N/A)
(6) Scroll Buttons (N/A)
(7) Setup Button (N/A)
(8) Mode Button
(9) Playback Buttons
Page 11

14
PA OPERATION (microphone sold separately)
Connect a PA microphone into the 4-pin connector. Microphone has priority over
all other audio modes and mute’s the source audio being played when keyed.
When the PA is triggered, the front display will show MIC, until the trigger is
un-keyed. Once released, it will return to the previous source mode at the
previous volume level
The PA operates regardless of radio status, as long as both ACC and Battery
power is applied to the radio.
When set to CARBON mode, the volume of the PA is only adjustable on the
microphone itself. When set to DYNAMIC mode, the volume level is adjustable
only when keyed from the front using the VOL/SEL button. A rear view of the
radio’s PA pin connection option is shown below:
Carbon PA Dynamic PA
NOTE:
For easy viewing at night, the backlighting will always be on when ACC +12V
DC switched power is applied. Backlighting will only shut off when the
switched ACC +12V DC power is removed. If the radio’s LCD does NOT
come on and display the clock, verify that the BATTERY +12V DC power wire
is installed correctly.
iPod® and iPhone® are trademarks of Apple Inc., registe re d in the U.S. and
other countries. Functionality may var y by model number, operation is not
guaranteed.
The Bluetooth® word mark and logos are registered trademarks owned by
Bluetooth SIG, Inc. and any use of such marks by REI under license.
11
BLUETOOTH® STREAMING AUDIO MODE
The unit allows you to play back audio files from your mobile device using a
Bluetooth® connection. The Radio can control a Bluetooth® audio player via
Advanced Audio Distribution Profile (A2DP) or Audio/Video Remote Control
Profile (AVRCP). Bluetooth® audio players (or Bluetooth® adapters) compatible
with these profiles can be connected to this Radio. Verify the device is
connected via Bluetooth®, then Touch the MODE button on the front to access
BT AUDIO.
1. Bluetooth Phone ID
Displays the ID of the paired Bluetooth Phone you are trying to stream audio
from.
2. Connection Status
Displays the Bluetooth® icon connection status of the radio
Press the PLAY/PAUSE button to listen to audio. While listening to audio the
following functions are available:
SEEK UP button: Touch to play the next track.
PLAY/PAUSE button: Touch to pause playback. Touch again to resume
playback.
SEEK DOWN button: Touch to play the previous track.
NOTE:
When there is an incoming call, the song will be paused. After the incoming call is
finished, the screen will return to the music function screen and playback will
continue.
Functionality may vary depending on the profile or device used.
Page 12

12
iPod®/iPhone® OPERATION
To listen to audio through your apple device, verify that a 30-pin USB extension is
connected to the USB pigtail on the rear of the radio. Next, connect the 30-pin
cable to the Apple device. Once connected, the radio will automatically switch
the source to iPod® and begin charging the device. If the device has enough
battery power. It will begin playback.
1. Operational Mode
2. Shows the elapse time of the audio track.
3. Indicates the file number and number of files in the folder.
4. Displays the Track Title, Artist, and Album information of the file if
available.
When connected, the user can playback specific files or folders. First press the
SEARCH button. The user can then rotate the VOL/SEL knob to select one
of the following search options:
Playlists
Podcasts
Audiobooks
Songs
Albums
Artists
Press the VOL/SEL knob to choose. To return to a previous menu, press
the RETURN button and choose again using the VOL/SEL knob. Use the
radio’s SEEK up/down buttons to change tracks, or the button to PAUSE or
PLAY the track.
To return to the iPod® source from any other source menu, touch MODE on the
front panel until the iPod® icon is shown on the front display.
AUX OPERATION
Press the MODE button on the front panel until the display shows either AUX 1
or AUX2. AUX 1 uses the front 3.5mm audio input while AUX 2 uses the rear
RCA L/R audio inputs. It may be necessary to adjust the VOLUME level of the
AUXILARLY input device if too little or too much signal is present.
13
USB/CD OPERATION
Insert a CD into the disc slot, or connect a USB storage device to the unit. The
radio will automatically switch MODE’S and begin playback after the media is
successfully loaded. Use the SEEK UP/DOWN buttons to change tracks.
If playing compressed digital media, use the FOLDER UP/DOWN
buttons to select the desired folder for playback.
Press and hold this button to REPEAT Track, Folder, All, or Off
Press and hold this button to turn RANDOM on/off
Press and hold this button to select INTRO on/off during playback
Press this button to PAUSE/PLAY the media
1. Operational Mode
2. Compressed media file format
Displays either WMA or MP3 Compressed media file format file formats.
3. Playback Mode of Operat ion
Displays either RDM, INT, RPT or nothing at all
4. Shows the Track number of the ID3 tag information of the MP3 file.
Press the DISPLAY button to switch from Title, Artist, or Album information
5. Shows the elapse time of the aud io track.
6. File number and number of files in the folder.
AUDIO FILE REQUIREMENTS (.MP3/.WMA using ISO9660 formatting)
• The MP3 files with a sampling rate between 16 kHz & 48 kHz. And bitrates between 32 to
384 kbps. (44.1khz/128kbps or higher is recommended)
• The WMA file with a sampling rate of 32, 44.1, or 48 kHz. And a bitrates between 62 to 192
kbps. (44.1khz/128kbps is recommended)
•
NOTE:
This Radio does not support playback of aac (.m4a, MPEG-4) audio.
 Loading...