

Page 1
B
Harrison Swivel Chair • 5125 • INSTRUCTIONS
Organize your parts and hardware before you begin.
F
C
D
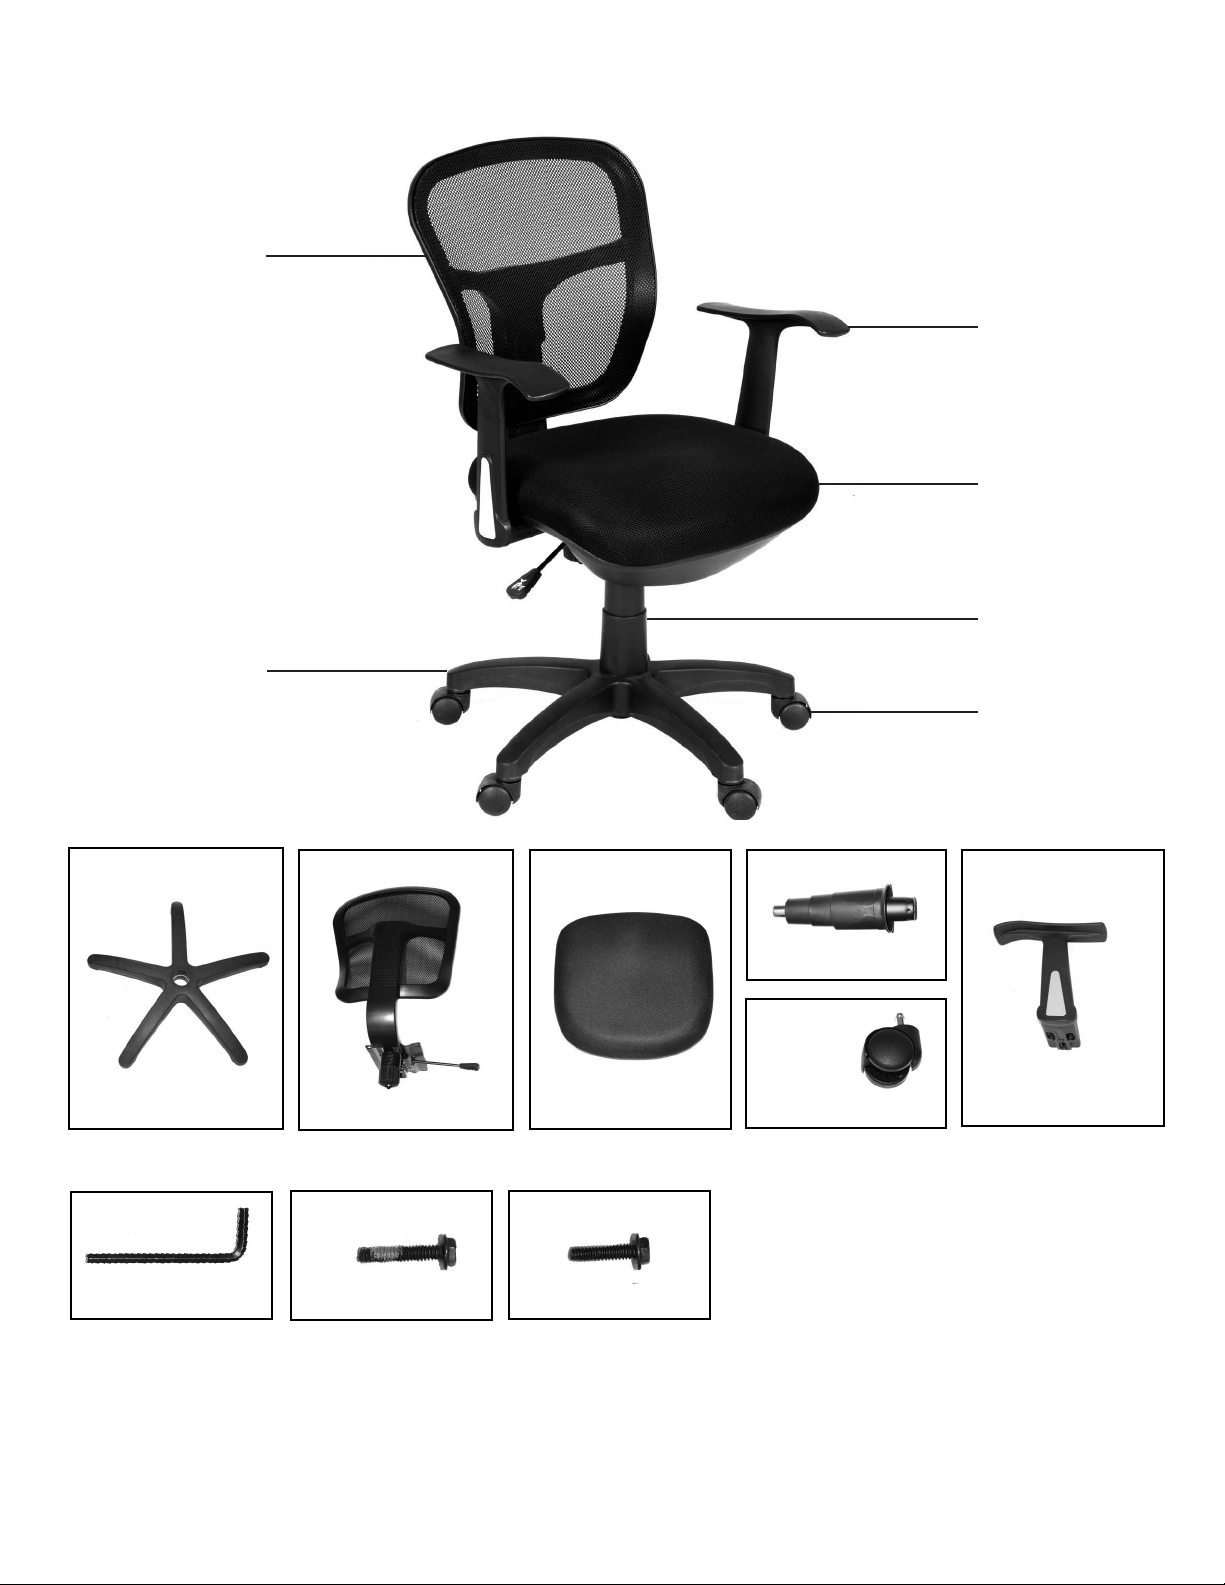
Parts :
A: Base
Quantity: 1
Hardware :
G: Allen Key
A
H: Long Bolts
B: Back
Quantity: 1
C: Seat
Quantity: 1
I: Short Bolts
D: Gas Cylinder
Quantity: 1
E: Casters
Quantity: 5
E
F: Arms (Left, Right)
Quantity: 2
Quantity: 1
IMPORTANT NOTICE:
Place all wooden parts on a clean and smooth surface such as a rug or carpet to avoid the parts from being scratched.
Check to be sure that you have all parts and hardware.
Remove all wrapping materials, including staples & packing straps before you start to assemble.
Do not tighten all screws/bolts until completely assembled.
Keep all hardware and packaging out of reach of children.
Quantity: 6
Any problems or questions call Regency Ofce Furniture at 1-866-816-9822
Quantity: 4
Page 2
Harrison Swivel Chair • 5125 • INSTRUCTIONS
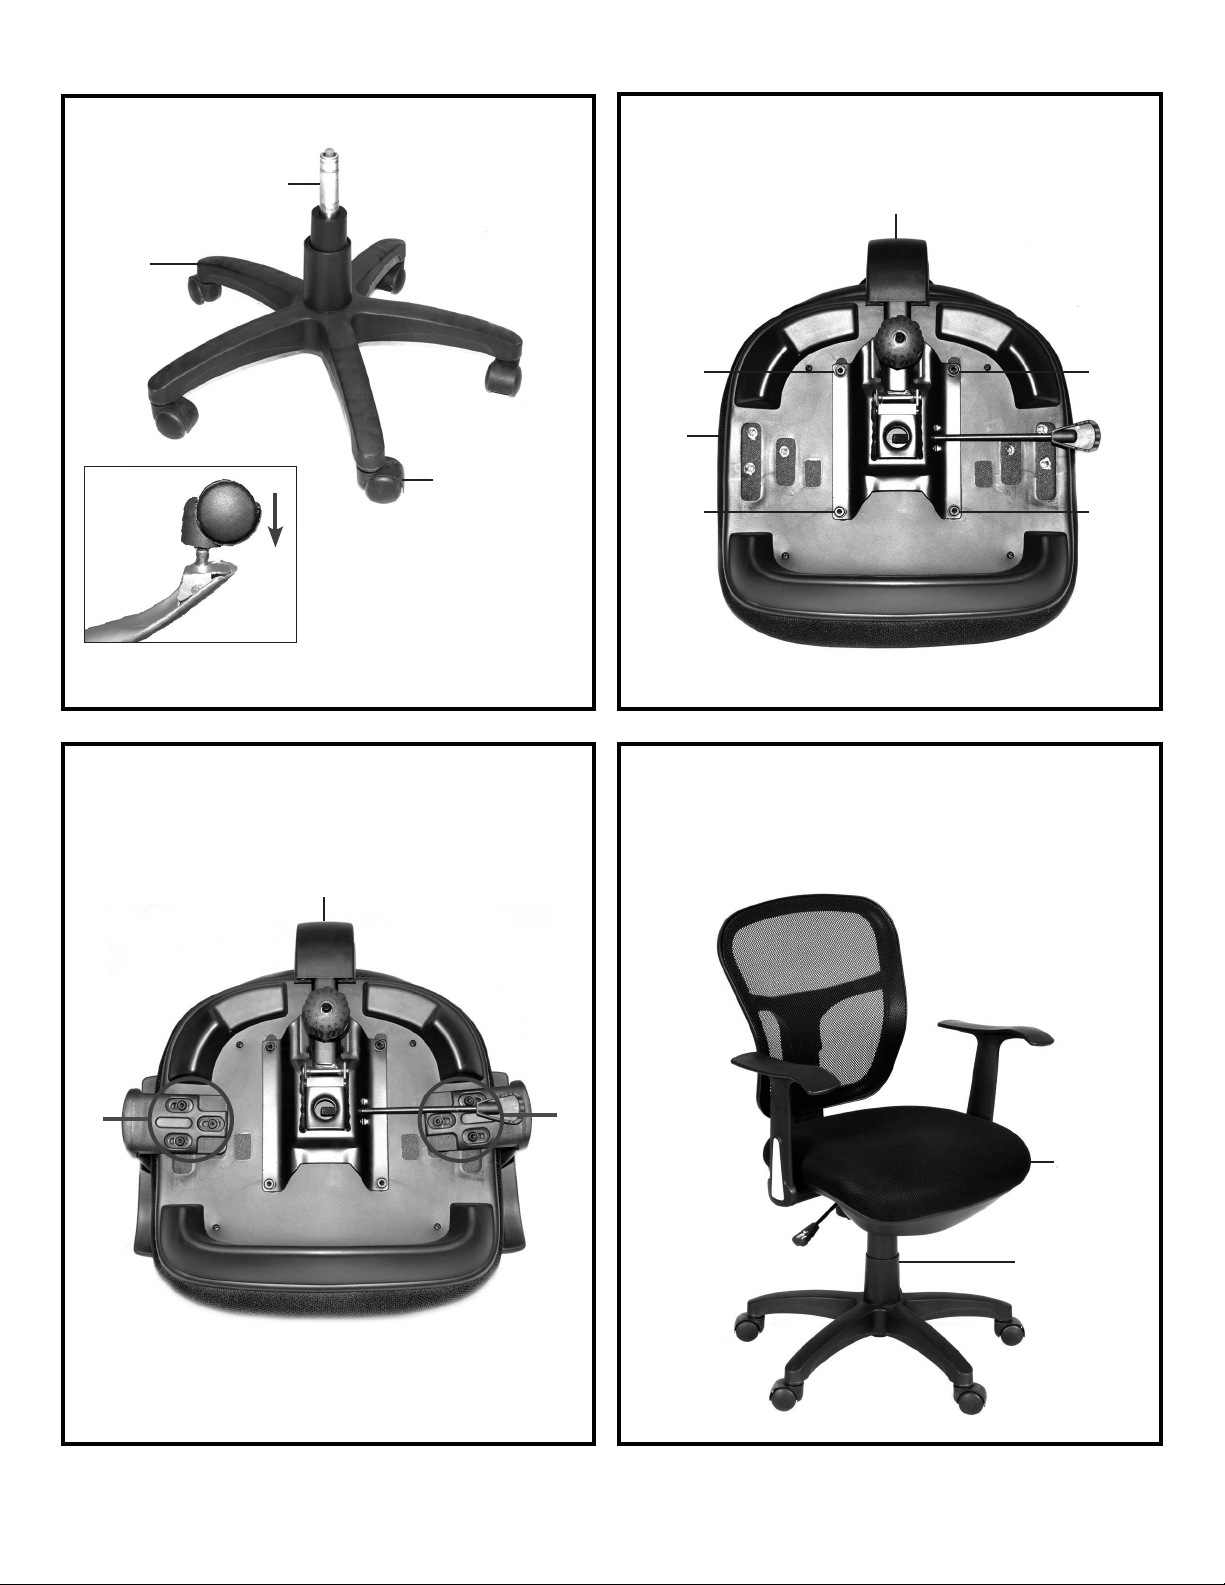
STEP 1A: Insert 5 Casters(E) into Base(A) (gure 1).
D
A
gure 1
STEP 1B: Slide Gas Cylinder(D) into Base(A).
E
STEP 2: Attach the Back(B) to the bottom of Seat(C)
using 4 Short Bolts(I).
B
I
I
C
I
I
STEP 3: Attach the Arms(F) to the bottom of Seat(C)
using 3 Long Bolts(H) per arm.
B
H
STEP 4: Place assembled Seat/Back onto Gas
Cylinder(D) of Chair Base.
NOTE: APPLY PRESSURE TO THE SEAT TO ENSURE
CONNECTION BEFORE USE.
H
B
D
Any problems or questions call Regency Ofce Furniture at 1-866-816-9822
 Loading...