

Page 1
1100 - INSTRUCTIONS
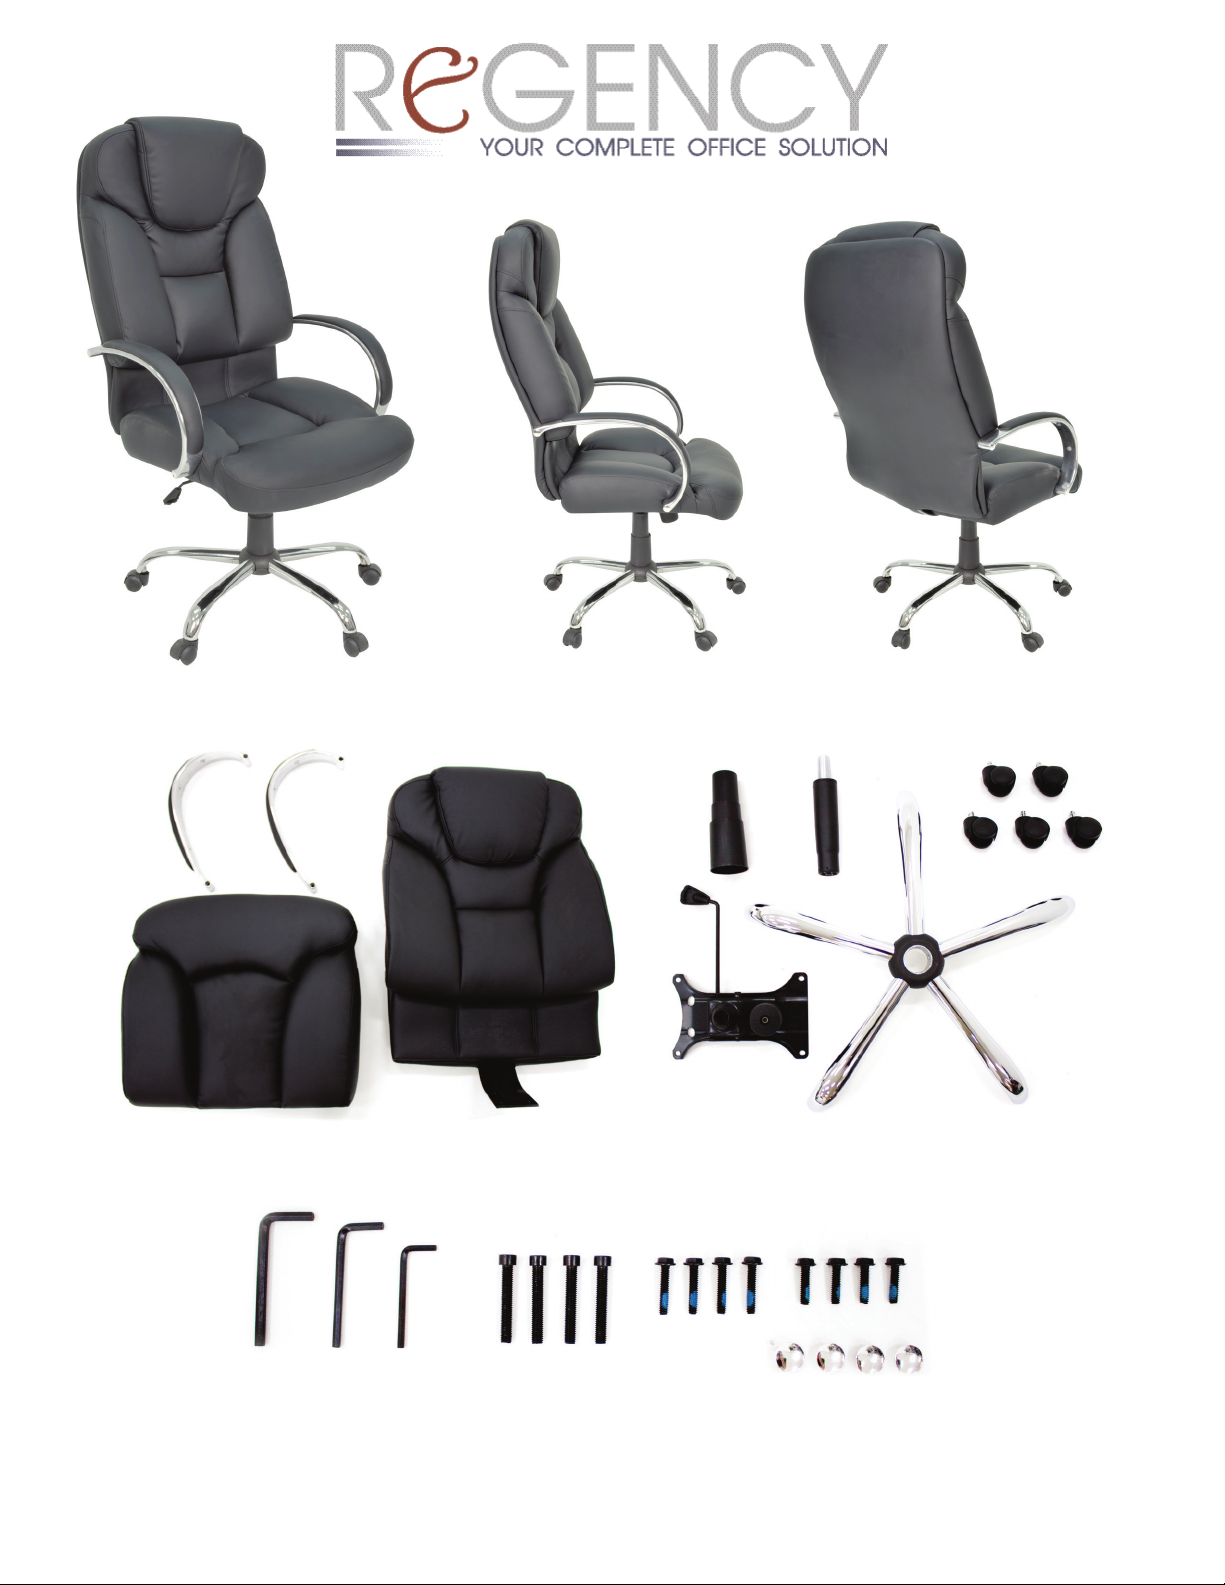
Parts:
A) Arms(2) ● B) Seat ● C) Back ● D) Mechanism ● E) Sleeve ● F) Cylinder ● G) Base ● H) Casters(5)
A
B
Hardware:
I) Large Assembly Key ● J) Medium Assembly Key ● K) Small Assembly Key ● L) Long Bolts(4) ● M) Medium Bolts(4)
N) Small Bolts(4) ● O) Caps(4)
I
J
C
E
D
K L M N
F G
H
O
IMPORTANT NOTICE:
● Check to be sure that you have all parts and hardware.
● Remove all wrapping materials, including staples & packing straps before you start to assemble.
● Do not tighten all screws/bolts until completely assembled.
● Keep all hardware parts out of reach of children.
Any problems or questions call Regency Ofce Furniture at 1-866-816-9822
Page 2
1100 - INSTRUCTIONS
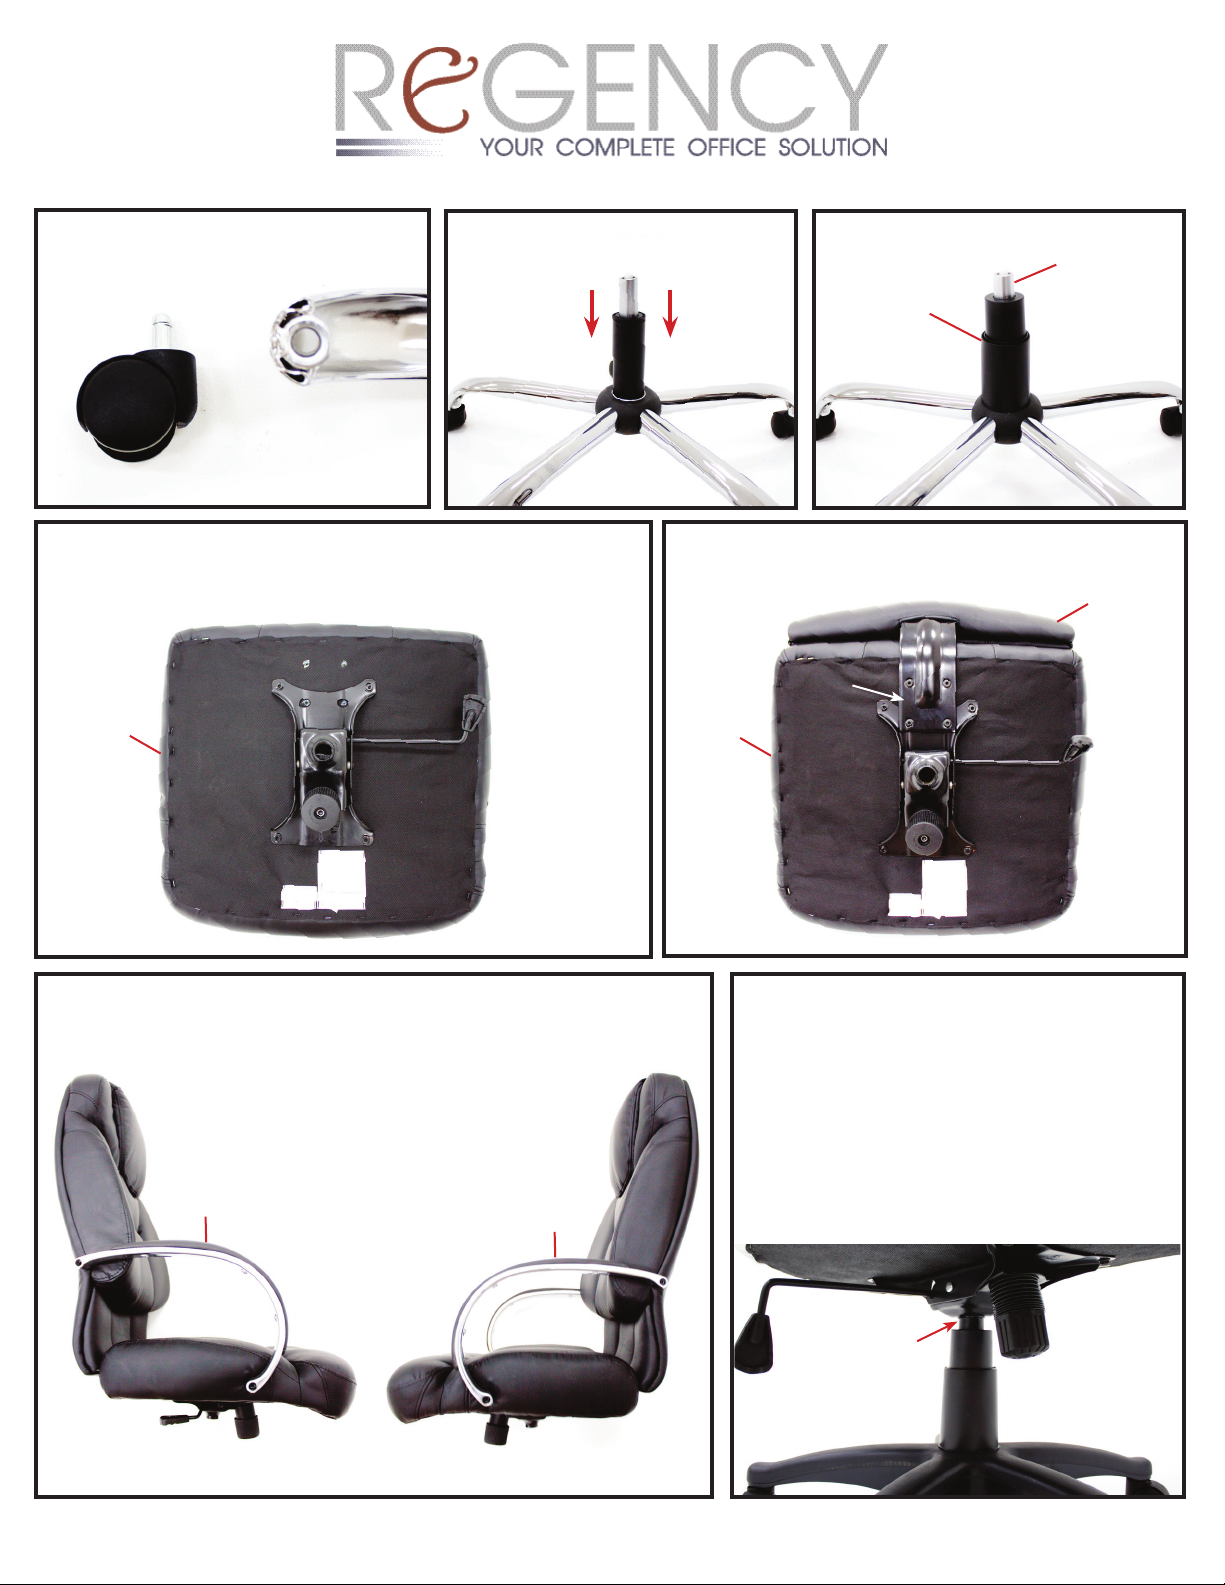
STEP 1: Insert 5 Casters(H) into Base(G).
H G
STEP 4: Attach the Mechanism(D) to the Seat(B) using 4 Short Bolts(N).
Be sure that the tilt tension knob is facing the front of the seat.
Note: Do NOT tighten bolts until all bolts have been started.
STEP 2: Insert Cylinder(F) into Base(G).
G
N N
D
B
STEP 3: Insert Sleeve(E) over Cylinder(F).
F
E
STEP 5: Attach Back(C) to Seat(B) using 4 Medium Bolts(M).
Note: Do NOT tighten bolts until all bolts have been started.
F
C
M(4)
B
N
STEP 6: Attach the Arm(A) to the Right side with 2 Long Bolts(L). Repeat this
step for the Left Side. Place Caps(O) over inserts.
Note: Do NOT tighten bolts on each arm until all bolts have been started.
A
N
A
L
L
L
L
STEP 7: Finish by placing Cylinder(F) into
Mechanism(D) and apply force to the seat to ensure
connection.
Right Side Left Side
Any problems or questions call Regency Ofce Furniture at 1-866-816-9822
 Loading...