

Reflecta X1-SCAN User guide
User manual

For customers in North and South America
For customers in USA
This device complies with Part 15 of the FCC rules. Operation is subject to the following two
conditions:
For customers in Canada
This Class B digital apparatus meets all requirements of the Canadian Interference-Causing
Equipment Regulations.
(1) This device may not cause harmful interference.
(2) This device must accept any interference received,
including interference that may cause undesired
operation.
For customers in Europe
“CE” mark indicates that this product complies with the European
requirements for safety, health, environment and customer protection. “CE”
mark cameras are intended for sales in Europe.
-
1-

1. Name of parts
Cleaning brush
Note: This film scanner supports Windows XP and Vista via USB 2.0 only.
Please make sure your film negatives/mounted slides and cover trays are clean before inserting into the scanner as well. Dust or
dirt from the negatives and cover trays will affect the quality of your scanned images.
We strongly suggest using a clean, dry, non-alcohol cotton swab or the cleaning brush that is included with your unit to insert
into the film scanner slot and clean the glass surface periodically to produce a clear image.
-
2-
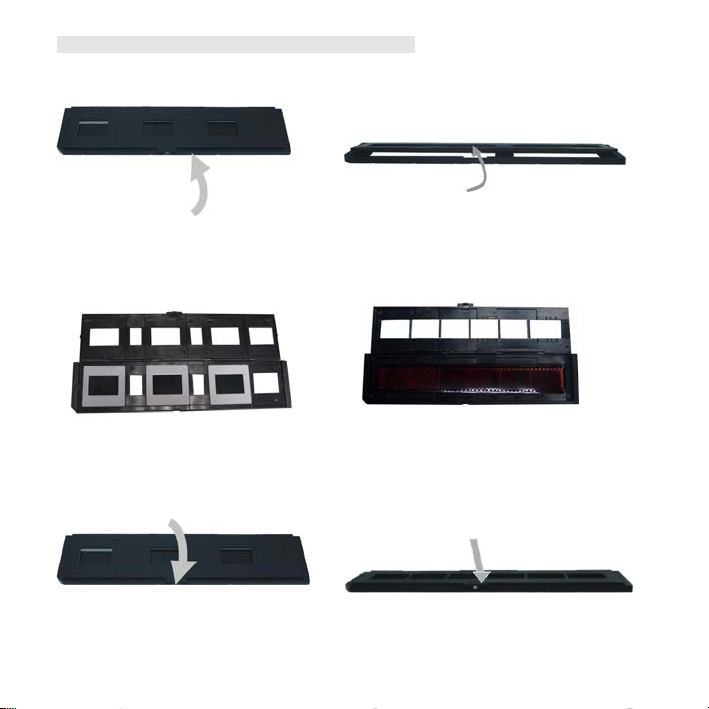
2 How to install slides and film into the tray holder
a. Open the film holder as illustrated
b. Put a negative in the film slot as shown.
Note: Do not flip negatives, if flipped, the pictures will be scanned backwards.
c. Close the film holder
-
3-
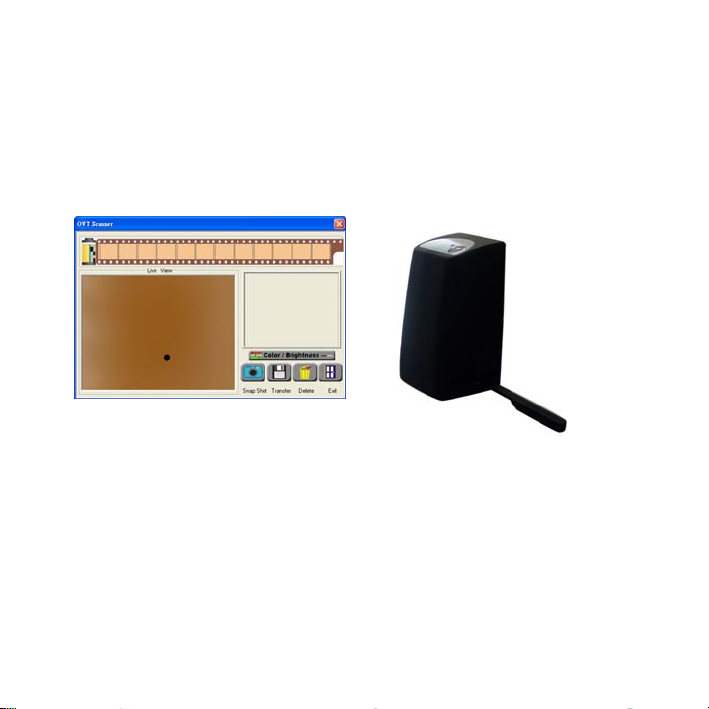
Cleaning the dust from the film scanner lens:
Open the PhotoImpression 6 software as if you were about to convert a picture.
Do not insert any slides or negatives into the film converter slot. You will be able to see the
dust that is on the lens from the PhotoImpression 6 live v iew window. (S ee the example shown
below) Then you can use the cleaning brush to wipe the dust.
We strongly suggest using a clean, dry, non-alcohol cotton swab or the cleaning brush that is
included with your unit to insert into the film scanner slot and clean the glass surface
periodically to produce a clear image.
-
4-
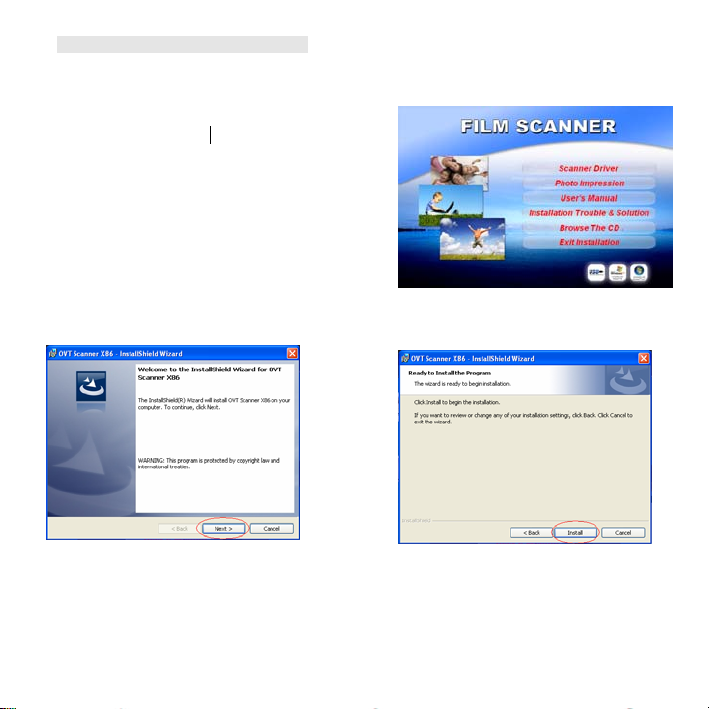
3. Installing the software and driver
To use the film converter you must install the film converter driver and ArcSoft
PhotoImpression 6 in advance.
• Installing the driver.
1. Turn on the computer.
2. Insert the installation CD into the CD-ROM
drive and the installation CD menu will
appear.
3. When you see the following screen, choose
“Scanner Driver”.
Windows XP directions:
3.1. Click Next to start the installation process. 3. 2. Click Install.
-
5-
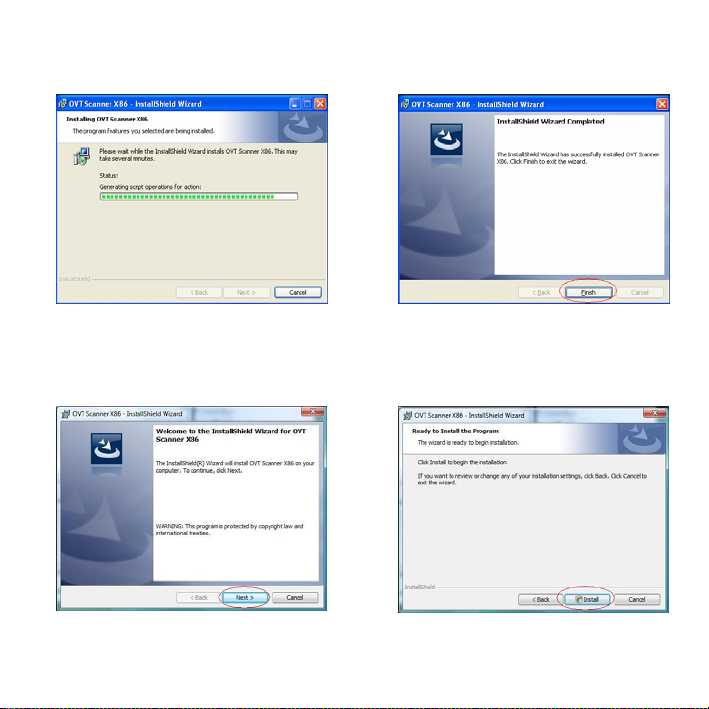
3.3. Installation process will begin. 3.4. Once installation is complete. Click
Finish.
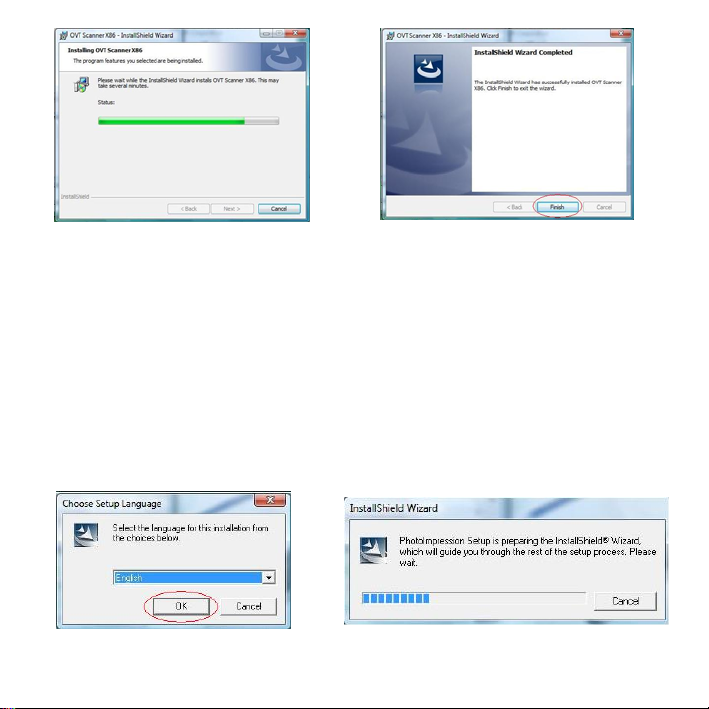
Windows Vista directions:
3.1. Click Next to start the installation process. 3.2. Click Install.
→
3.3. Installation process will begin. 3.4.Once installation is compl ete. Click Fi nish.
-
6-
3.5. Take out the inst alla tion disk and restart the computer.
• Installing the software
1. Insert the installation CD into the CD-ROM drive and the installation CD menu should
appear.
2. When you see the following screen, choose
“Arcsoft Software Suite” to install the software.
Windows XP and Windows Vista directions:
1. Select the language you wish to be 2. PhotoImpression will start the installation.
displayed. Then click OK
-
7-
 Loading...