


Table of Contents
1. Precaution.........................................................................2
2. Preparation.......................................................................5
EN
Standard Accessories
Part Names
....................................................................
Start the Image Copier
...................................................
.................................................
5
6
8
3. Place Film Into The Holder.......................................... 10
4. Using the reflecta x120
5. Playback Mode
6. Delete Mode
..............................................................
...................................................................
.................................................
11
16
18
7. Install the software........................................................19
8. To Link the Card to Computer
9. Viewing Images from TV
10. Edit the Pictures
..........................................................
..............................................
.....................................
21
24
25
11. Appendix.......................................................................32
Specifications
...............................................................
32
Icon & Indicators
..........................................................
System Requirements
................................................
33
34
-1-

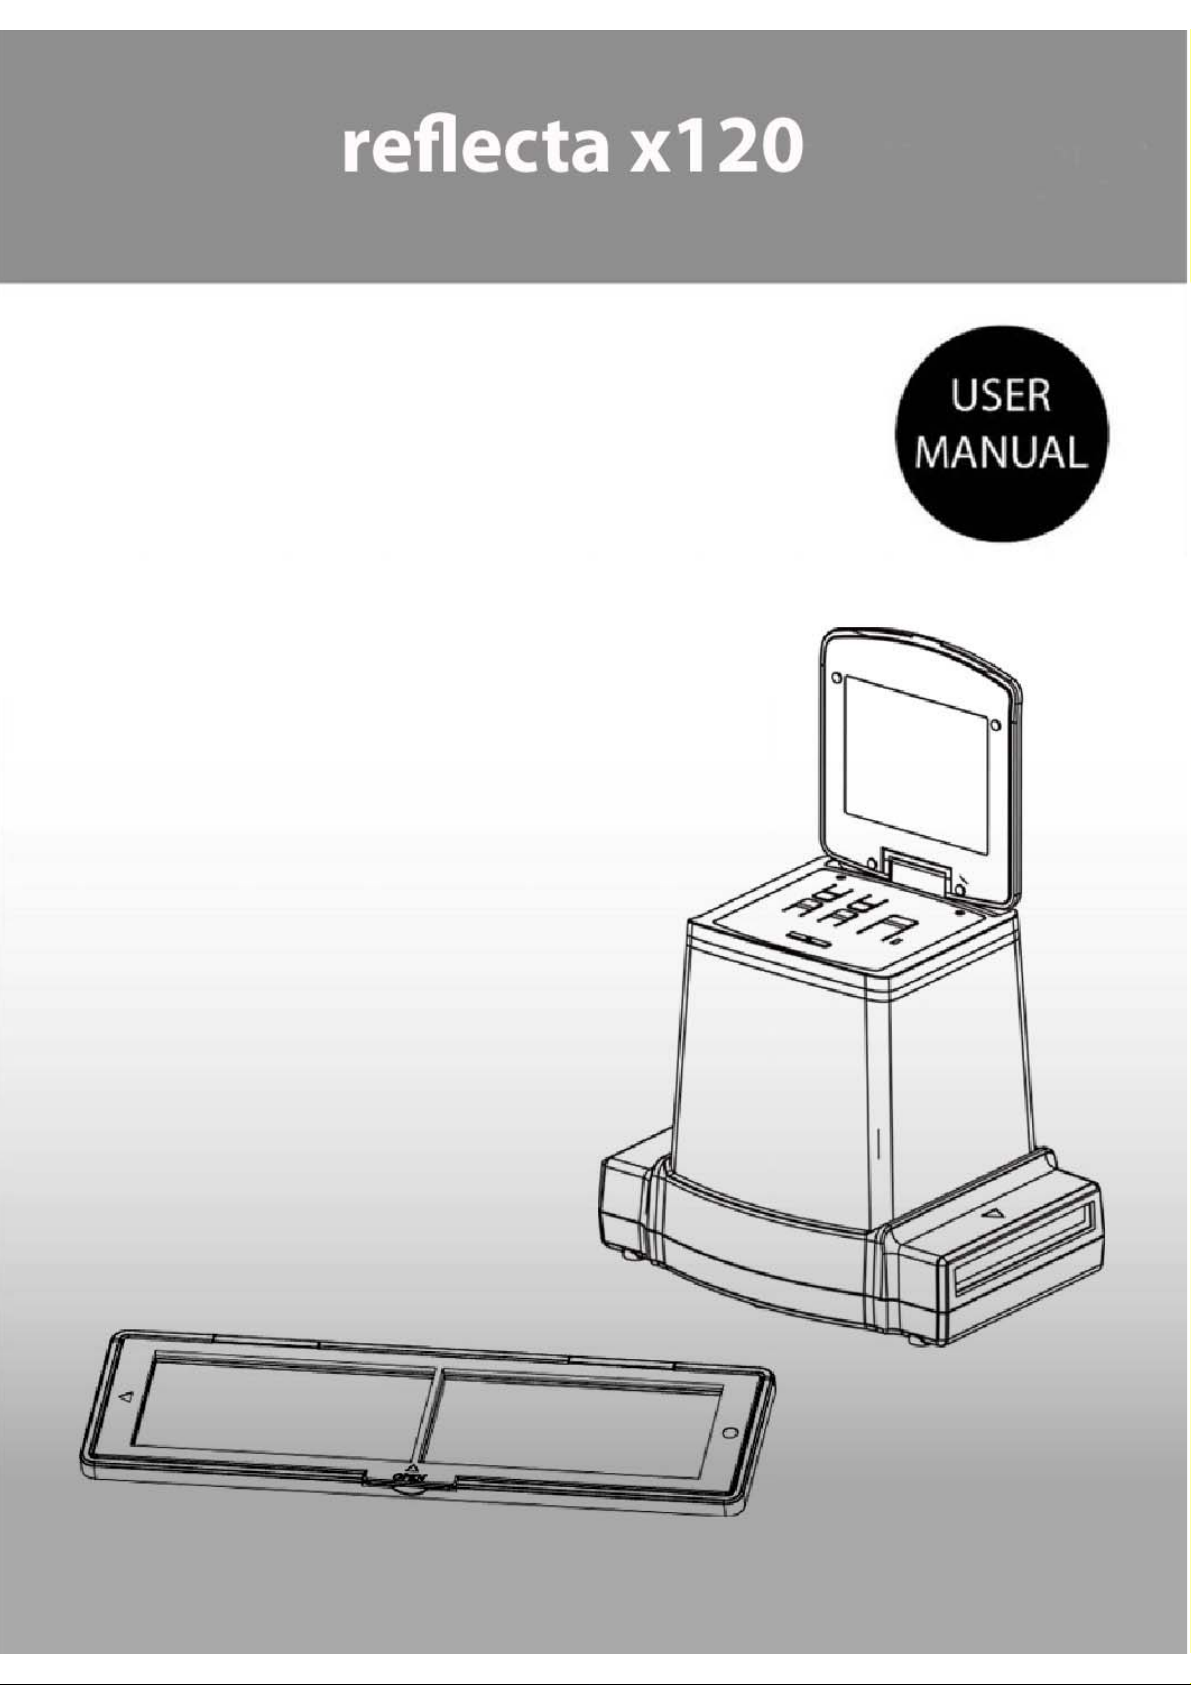
Welcome
Thank you for purchasing a reflecta x120.
Please take a moment to read through this manual. Its
contents will send you on an educational journey into your
copier multiple capabilities.
1. Precaution
Before using reflecta x120, please ensure that you read
and understand the safety precautions described below.
Always ensure that the reflecta x120 is operated correctly.
Never operate reflecta x120 inside of an aircraft or
anywhere else where operation of such devices is
restricted. Improper use creates the risk of serious
accident.
Do not try to open the case of reflecta x120 or attempt
to modify reflecta x120 in any way. High-voltage
internal components create the risk of electric shock
when exposed. Maintenance and repairs should be
performed only by authorized service providers.
Keep reflecta x120 away from water and other liquids.
Do not use reflecta x120 with wet hands. Never use
reflecta x120 in the rain or snow. Moisture creates
the danger of fire and electric shock.
Keep reflecta x120 and its accessories out of the reach
of children and animals to prevent accidents or
damage to the reflecta x120.
-2-

If you notice smoke or a strange odor coming from
reflecta x120, turn the power off immediately. Take the
reflecta x120 to the nearest authorized service center
for repairing. Never attempt to reflecta x120 on your
own.
Use only the recommended power accessories. Use of
power sources not expressly recommended for
reflecta x120 may lead to overheating, distortion of
the equipment, fire, electrical shock or other
hazards.
reflecta x120 may become slightly warm during use.
This does not indicate malfunction.
If the exterior of reflecta x120 needs cleaning, wipe it
with a soft, dry cloth.
EN
-3-

FCC Notice
r
r
r
This equipment has been tested and found to comply with
the limits for a Class B Digitize device, pursuant to Part 15
of the FCC Rules. These limits are designed to provide
reasonable protection against harmful interference in a
residential installation. This equipment generates, uses
and can radiate radio frequency energy. If not installed
and used in accordance with the instruction, it may cause
harmful interference to radio communication. However,
there is no guarantee that interference will not occur in a
particular installation. If this equipment does cause
harmful interference to radio or television reception, which
can be determined by turning the equipment on to off, the
use
is encouraged to try to correct the interference by
one or more the following suggestion.
z Reorient or relocate the receiving antenna.
z Increase the distance between the equipment and
the receiver.
z Connect the equipment to a different power outlet
other than the one where the receiver is connected.
z Consult an experienced television o
radio
technician for help.
CAUTION
To comply with the limits for a Class B Digitize device,
pursuant to Part 15 of the FCC Rules, this device must
only be installed on computer equipment certified to
comply with the Class B limits.
This unit may contain a microcomputer for signal
processing and control function. In very rare situations,
severe interference, noise from an external source, o
static electricity may cause it to lockup. In the unlikely
event that this should happen, turn off the unit, wait at
least five seconds, and then turn it back on again.
-4-
2. Preparation
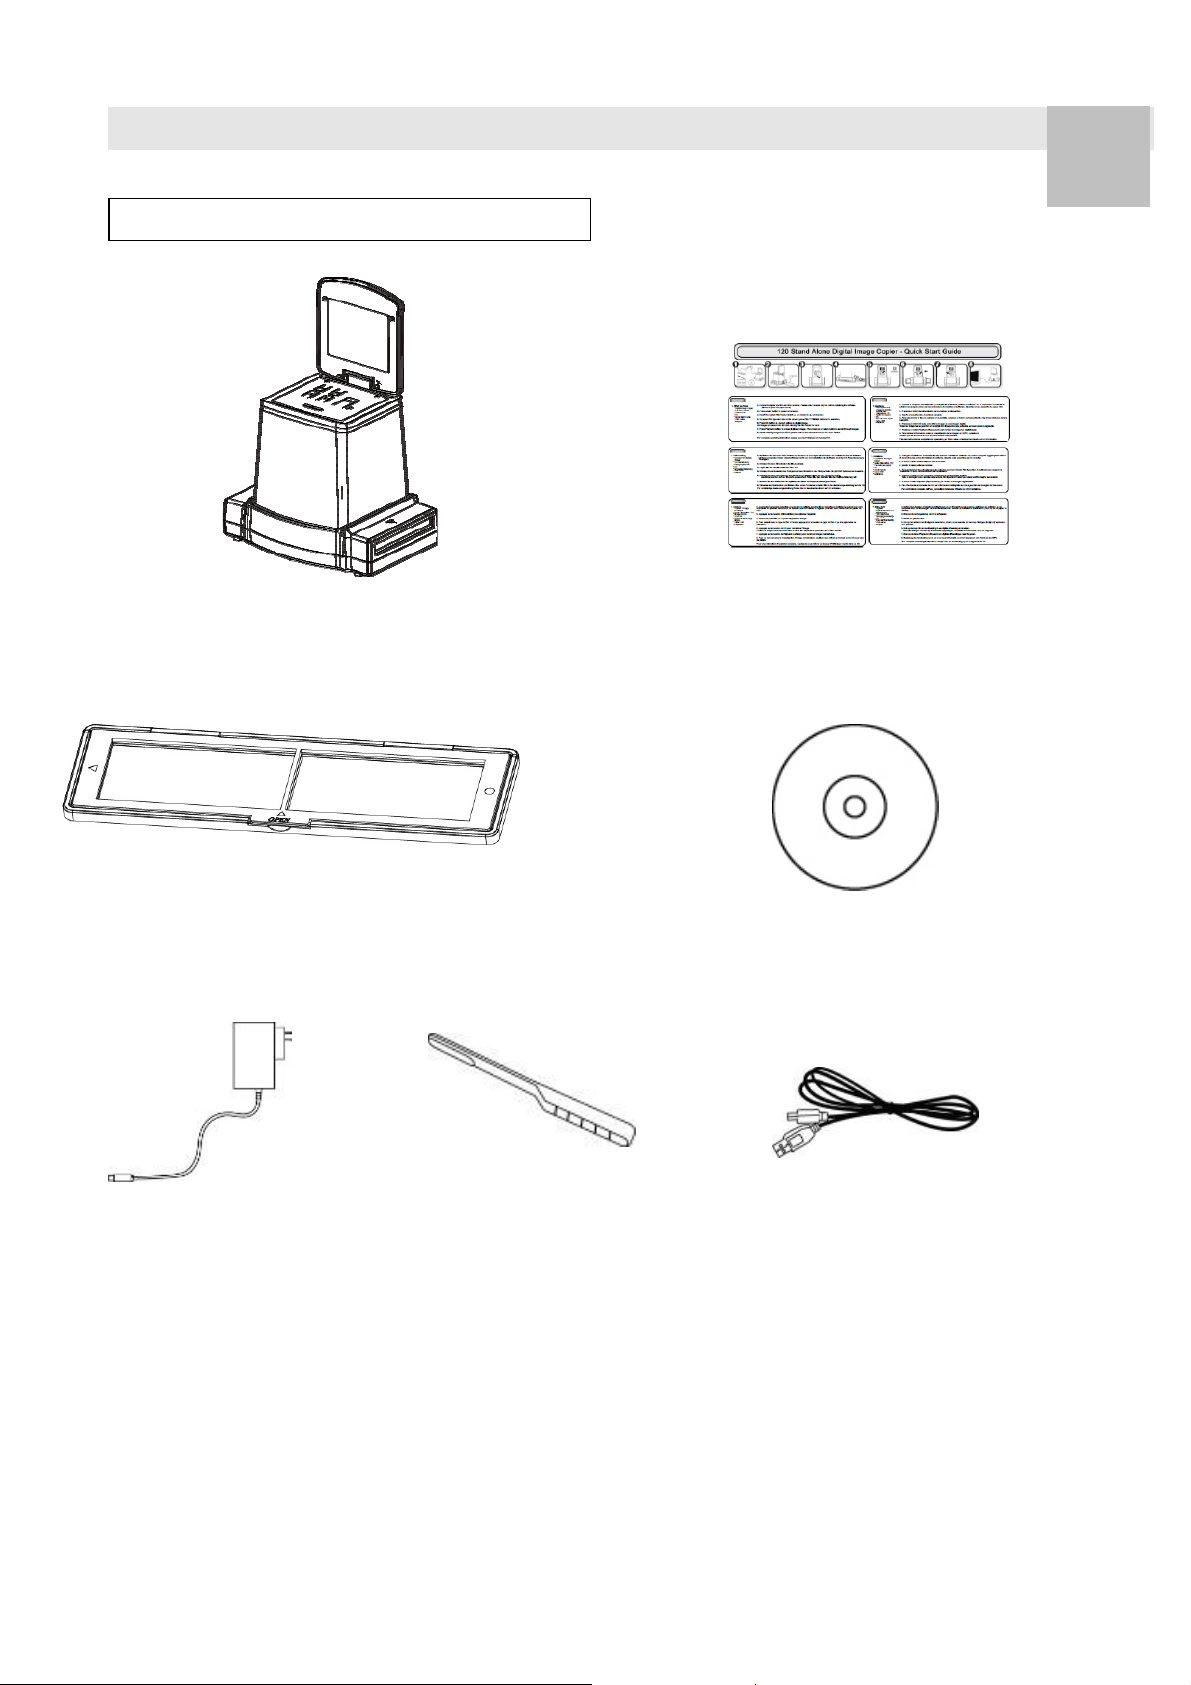
Standard Accessories
reflecta x120 Quick Guide
EN
120 Film Holder CD
Adaptor Clean brush USB cable
-5-
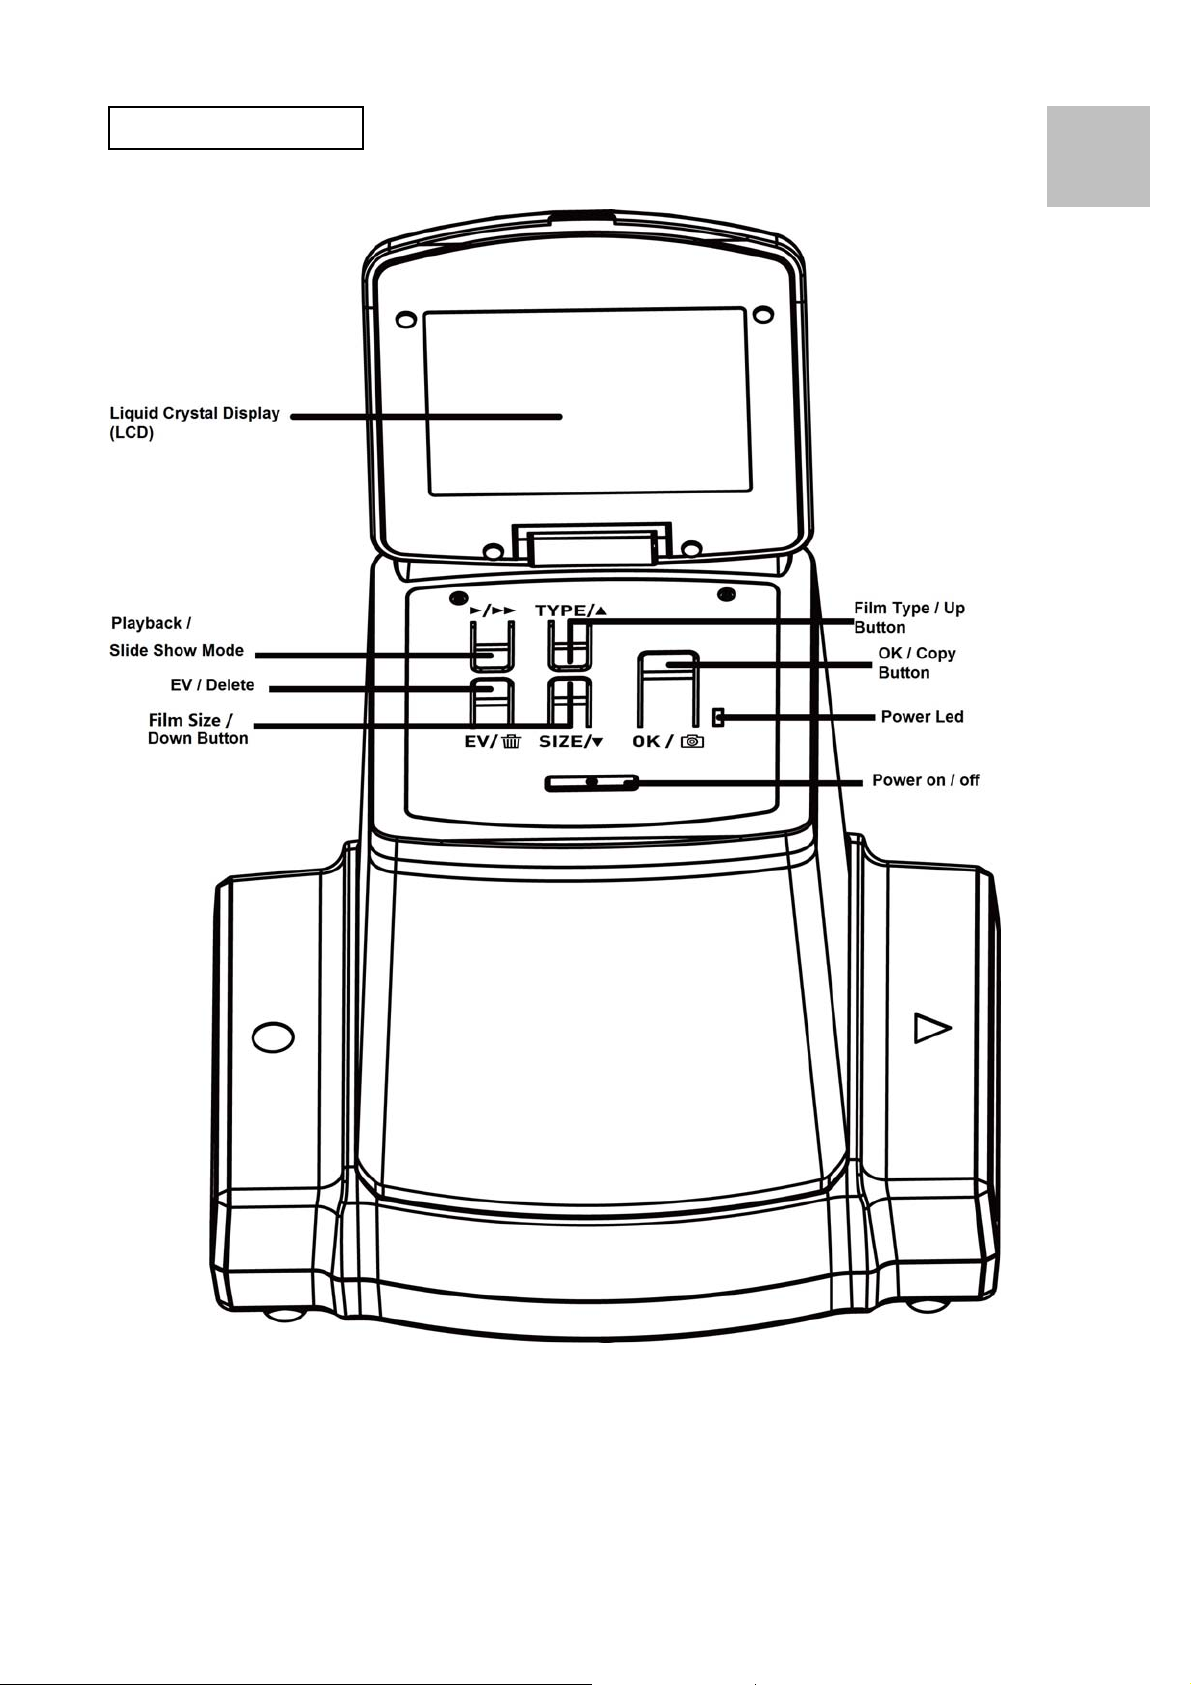
Part Names
EN
-6-
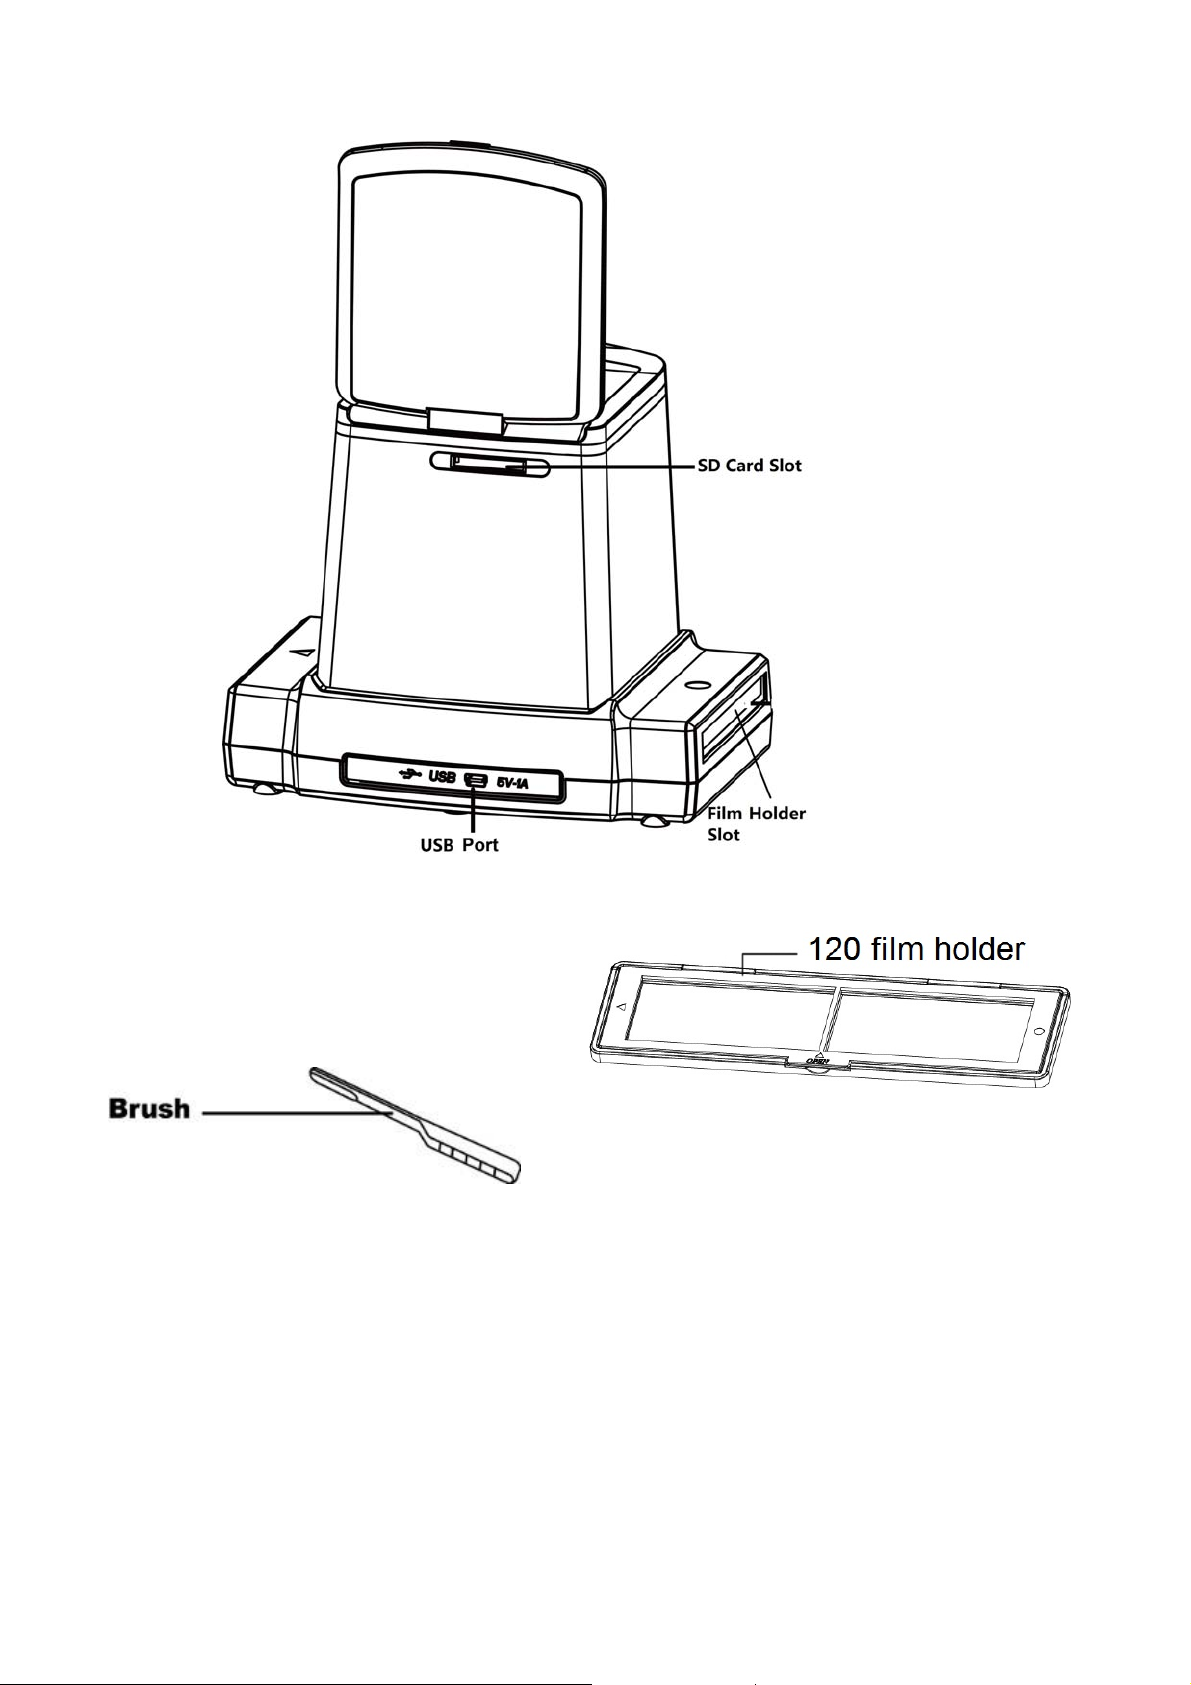
Note: We suggest using bundled brush to insert into
reflecta
x120
clear image. Please make sure your film Holder and cover tray
are clean before inserting into the
dirt from the film and cover tray will affect the quality of your
scanned images.
slot and clean the glass surface periodically to produce a
reflecta x120 as well. Dust or
-7-
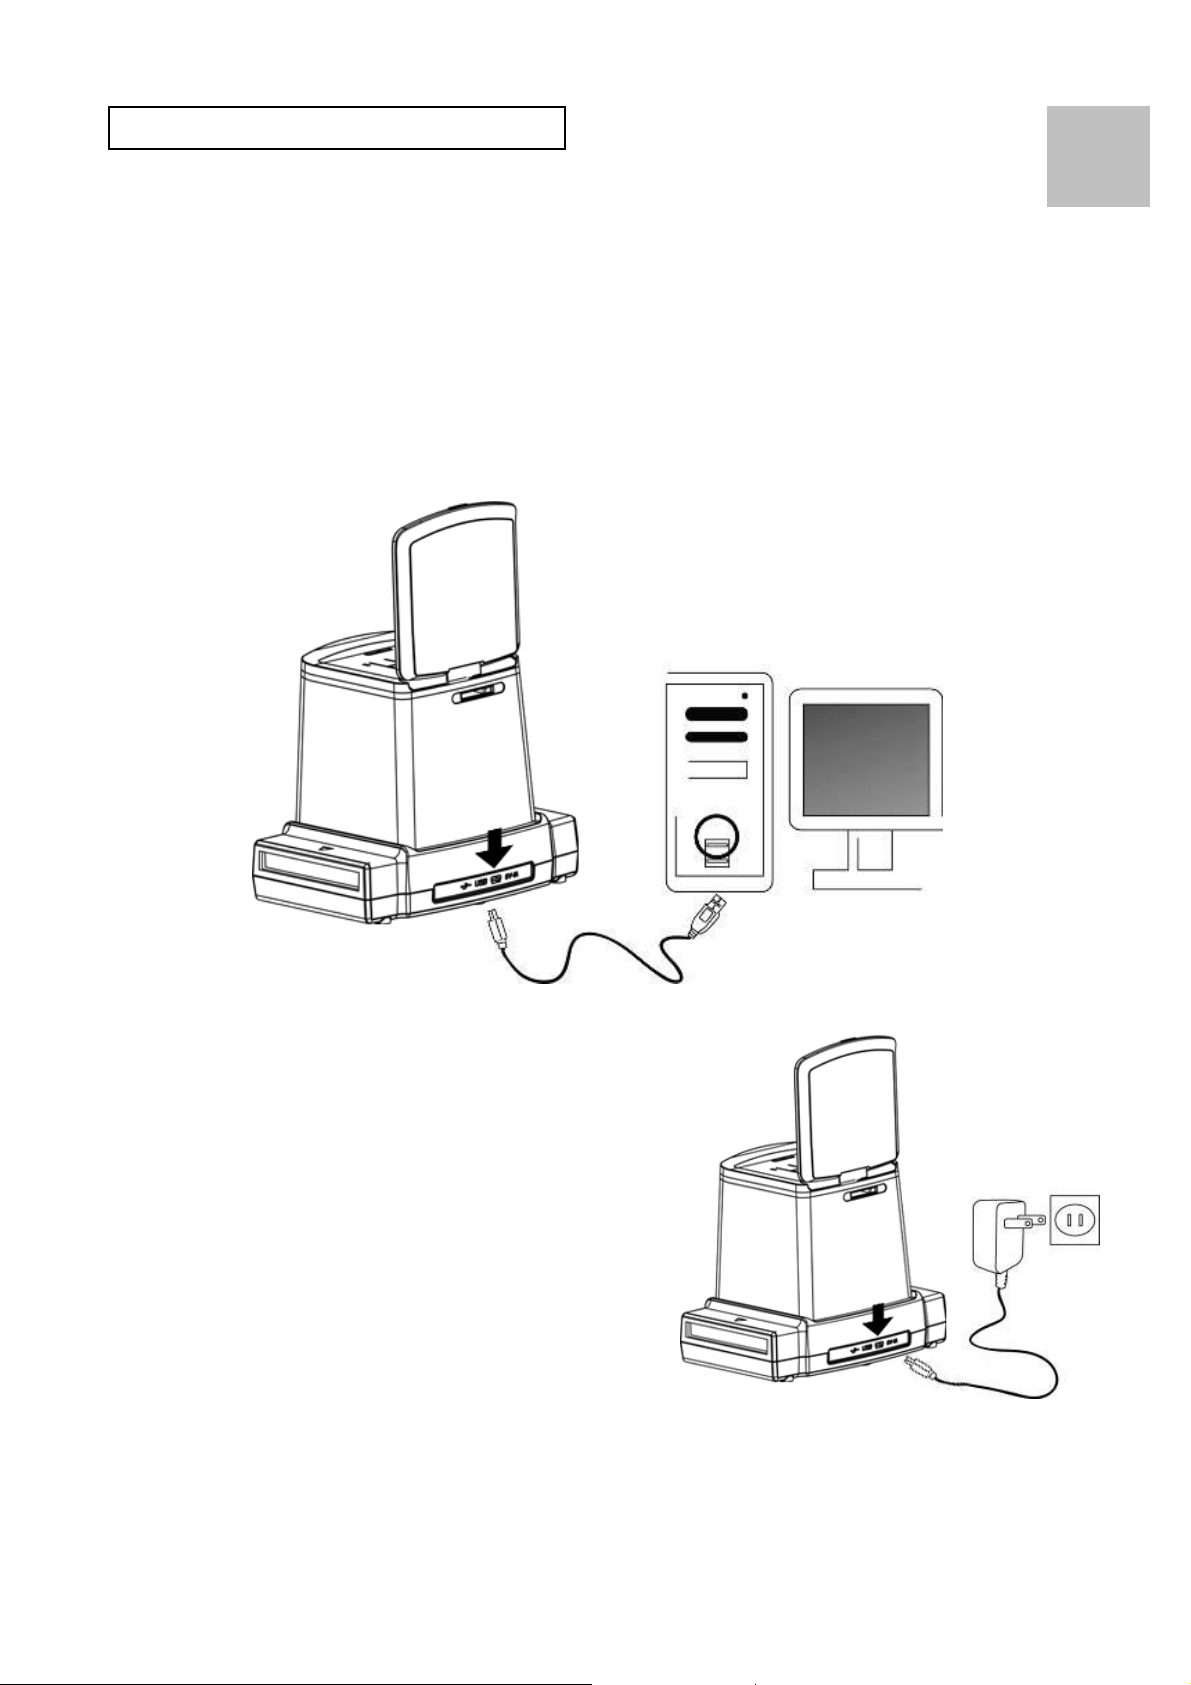
Starting the reflecta x120
Connecting Electric Power to the Copier
(a) From Computer USB port:
Plug the USB mini B of the supplied USB cable to the
USB port of the copier, and plug the other USB end
into the USB port of your computer/notebook.
EN
(b) From Power Adaptor:
Plug the USB mini B of the
supplied AC adaptor to the
USB port of the copier, and
plug the adaptor to the
power outlet.
-8-
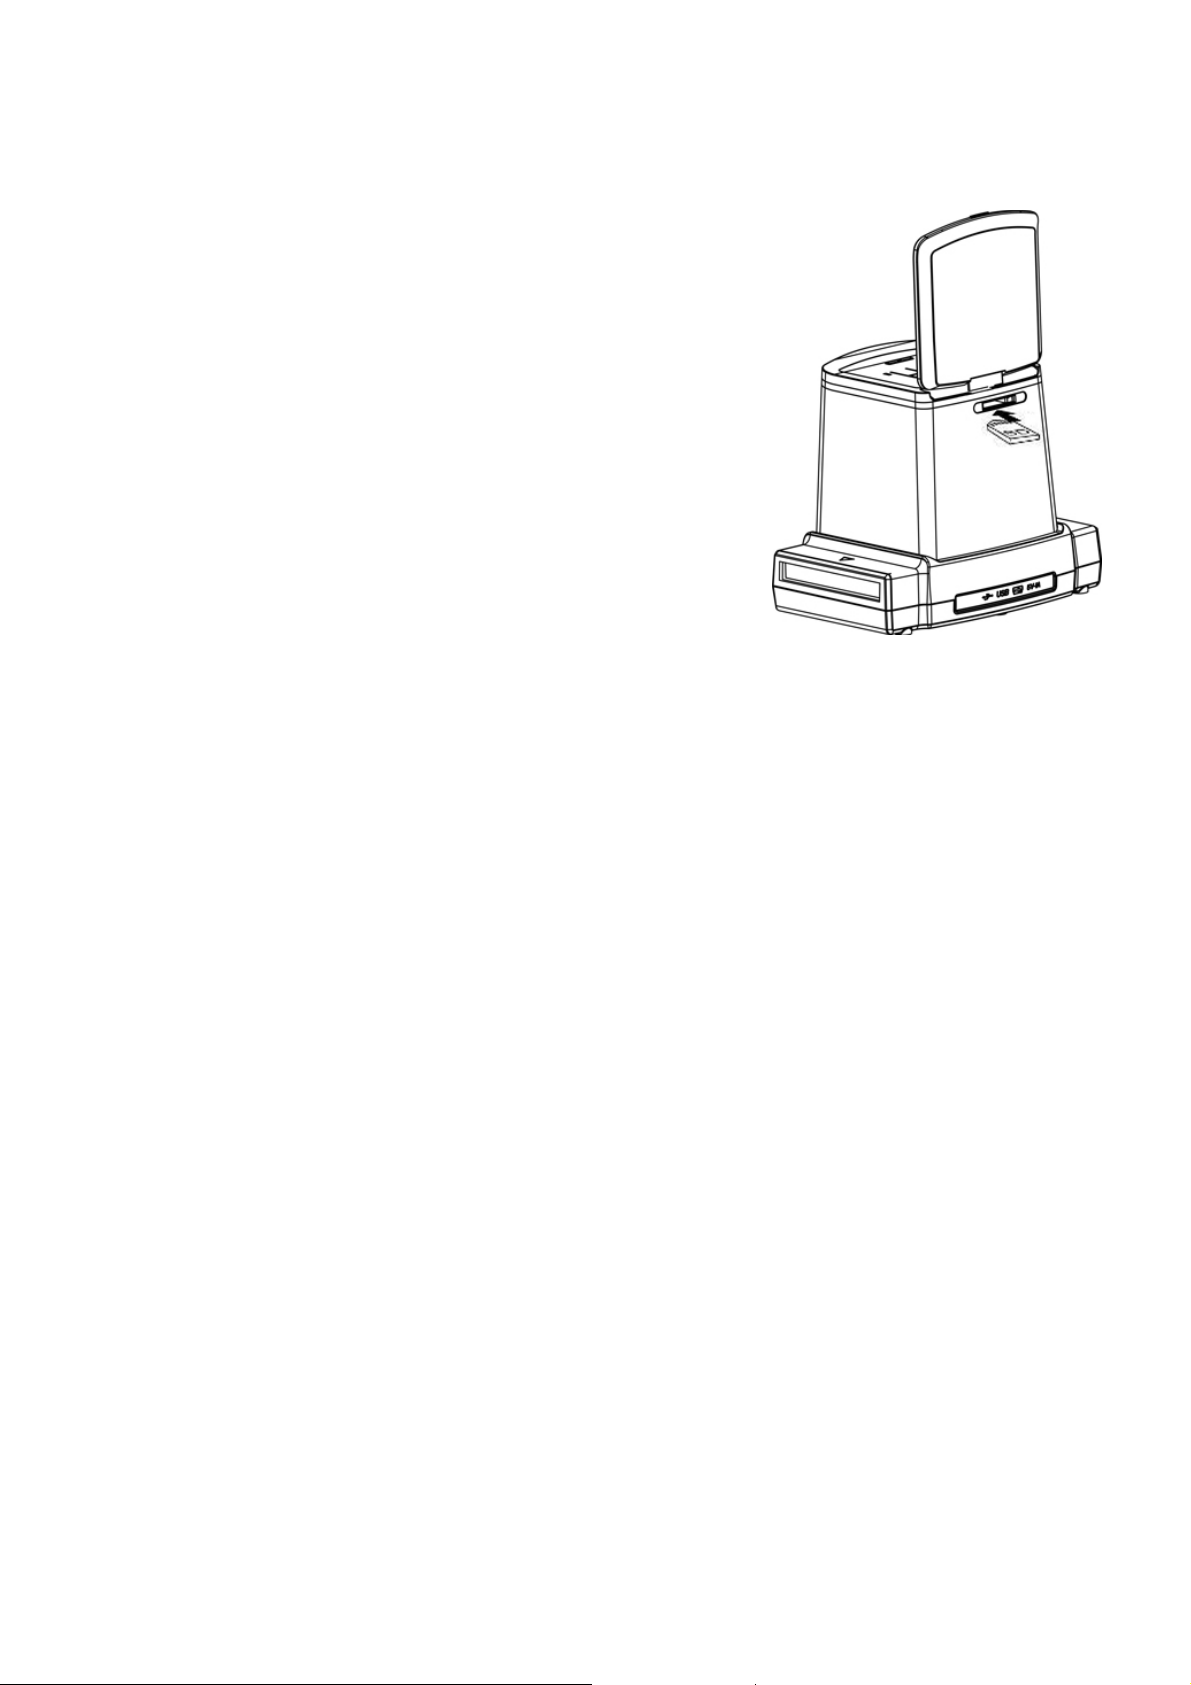
Insert SD Card Into The SD Card Slot
The golden prints of the card facing
upward when insert into the card slot.
Push with a slight force, the card will
automatically lock when it is in the
right position. Push once again will
unlock the card.
Turn on the power of the Copier:
After the electric power is connected, lift up the top cover,
press the Power On / OFF Button to turn on the scanner
for scanning film
The blue LED and the LCD screen will be lighted and
ready for film scanning. Select “NO” if the power is from
computer USB port.
“Yes” means you want to connect the SD card to the
computer for reading or downloading the contents in the
card.
Note:
For safety purpose, the power of the copier will
automatically turned off if it is left unused for more than
10 minutes. You may turn the power ON and OFF
anytime by pushing the Power On/Off button.
-9-

3. Place the film Into The Holder
1. Keep the glossy surface of the film in the upward
direction.
Open the film holder as Illustrated.
2. Put the 120 reversal / negative / B&W film into the
EN
holder as shown.
3. Close the holder and please make sure the holder
close properly.
-10-
 Loading...