

Page 1

PF 135
User‘s Manual
1
Page 2

TABLE OF CONTENT
CONTENTS
Unpacking your Scanner 4
Installing Software 6
Installing Hardware 7
Sorting & Cleaning Film Strips 8
Loading Filmstrips 10
How to Scan 11
Configure Settings 12
Main User Interface 13
Scan Settings defined 14
Scan Settings - Scanning 15
Tips & Troubleshooting
Reference video links 16
Technical Support information 19
Table of Contents
2
Page 3
Unpacking your Scanner
Unpacking your Scanner
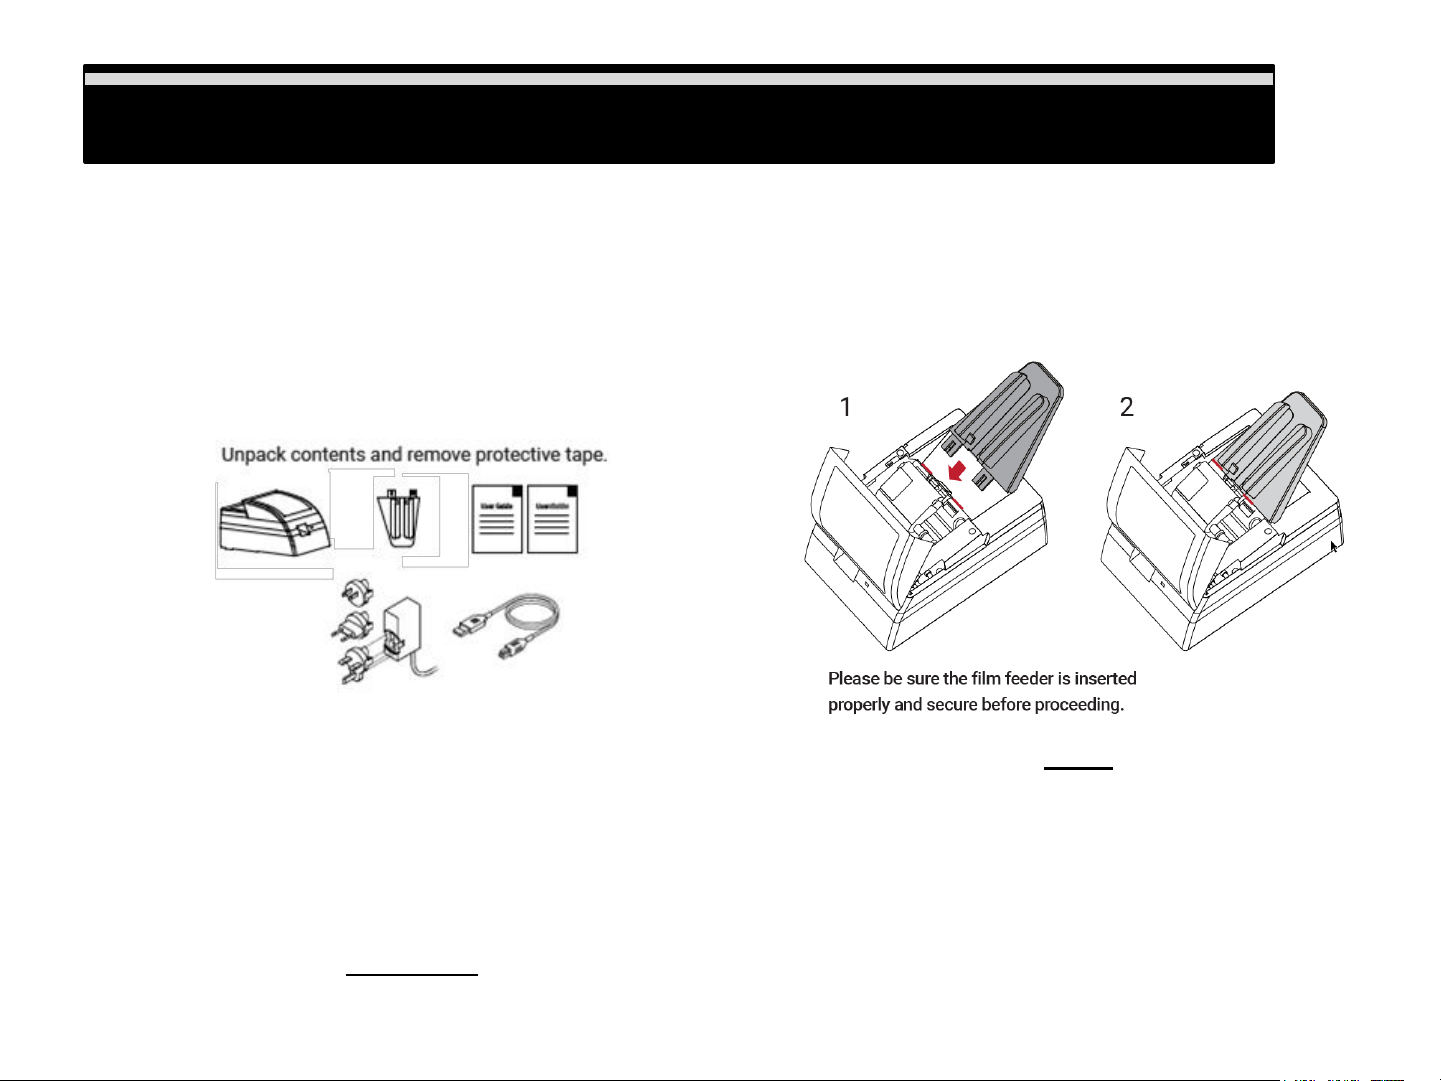
Check the package content before getting started. For Quick Installation please refer to Quick Installation Guide.
Important! Save the original box, receipt and packing material should they be needed for future shipping needs.
Package Contents
• Film Scanner / Film feeder
• Power Adapter 12V DC
• USB 2.0 Cable
• Quick Reference User Guide
Assembling the unit, once unpackaged, and all
the shipping tape is removed, insert the film feed
guide into the unit
Warning!
Using any other power adapter can severely damage the scanner and will VOID the product
warranty.
GENERAL GUIDANCE:
• Only use the supplied USB-Cable. Connect the computer to the scanner directly using the USB 2.0 cable.
• Do not use a Hub or extension cable. Only use the USB ports on the rear of desktop computers is supported
• If there are any other devices (multifunction device, printers, scanners, webcam) connected to the computer via
USB make sure they are powered off.
• A minimum of 4 GB RAM (Windows/Mac) and 30GB Hard drive space minimum is required. 6GB RAM or more
highly recommended.
3
Page 4

Operating Ambient Temperature Range
Note:
stored or transported outside of this range, allow it to return to within this range before
turning it on. Operating Ambient Humidity Range 15% to 76% relative humidity (non
condensing)
been stored or transported outside of this range, allow it to return to within this range
before turning it on. Operating Ambient Humidity Range 15% to 76% relative humidity
(non
Note
into a warm / humid environment condensation may occur.
Operating Temperature info
50º to 104ºF (10º to 40ºC)
Do not turn on the scanner unless it is within this range. If the scanner has been
: Do not turn on the scanner unless it is within this range. If the scanner has
-condensing)
: If the scanner is stored or to be transported in cold temperature and then brought
-
4
Page 5
Installing Software
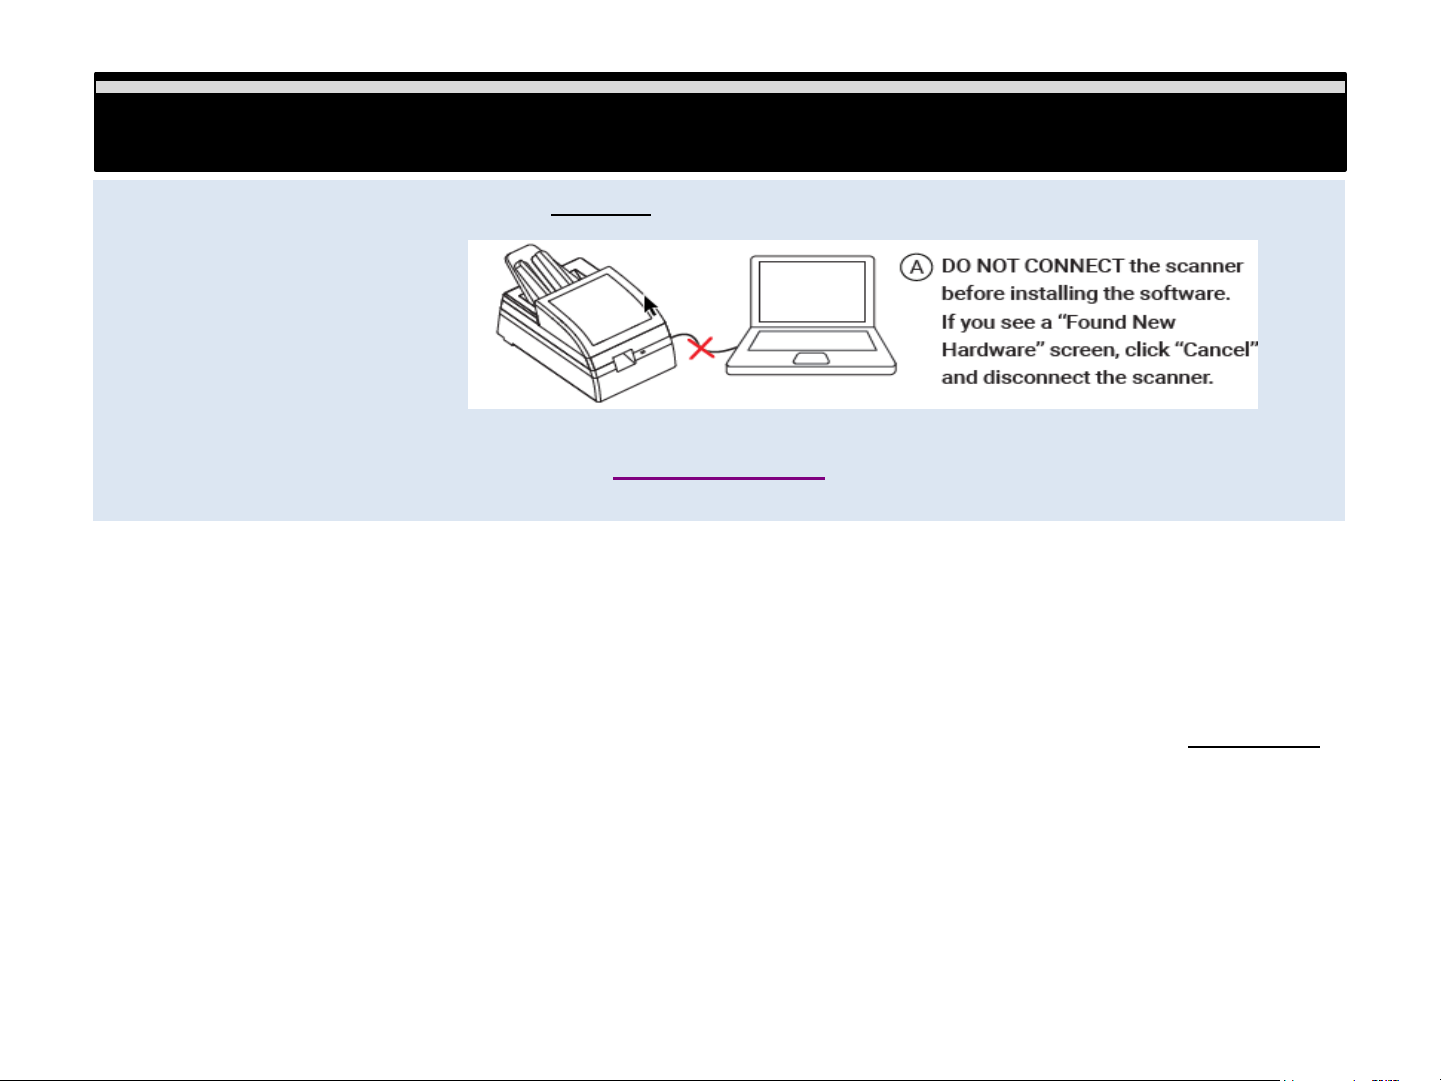
Installing Software
Be sure to install the software application BEFORE connecting the scanner
Download the appropriate software from www.reflecta.de
Installing Software - PC users if you are unsure please verify if your system is 32 or 64 bit here:
Control Panel\System and Security\System
Download the software using the link provided above, selecting the correct version
a. Once downloaded you need to run the installer to install the software on your system
PC: Open the Downloads folder locate the installer file PF135_Windows…. Double click the installer to begin
Installing, you may encounter a warning Windows protected your PC Select “More info…” and choose Run Anyway
Mac: Open downloads locate the installer file PF135_Mac xxx.. New security protocols require these steps to
allow the software installation. Mac OS 10.7-10.12 - Hold down the "Control" key on the keyboard and click on the
software installer package, then click on "Open" then you will see an unidentified developer warning message select
"Open" to begin the installation process Mac OS 10.13 - Hold down the "Control" key on the keyboard and double
click on the software installer, then you will see an unidentified developer warning message, select "Open" to begin
the installation
5
Page 6
Installing Hardware
Installing Hardware
Installing the Hardware
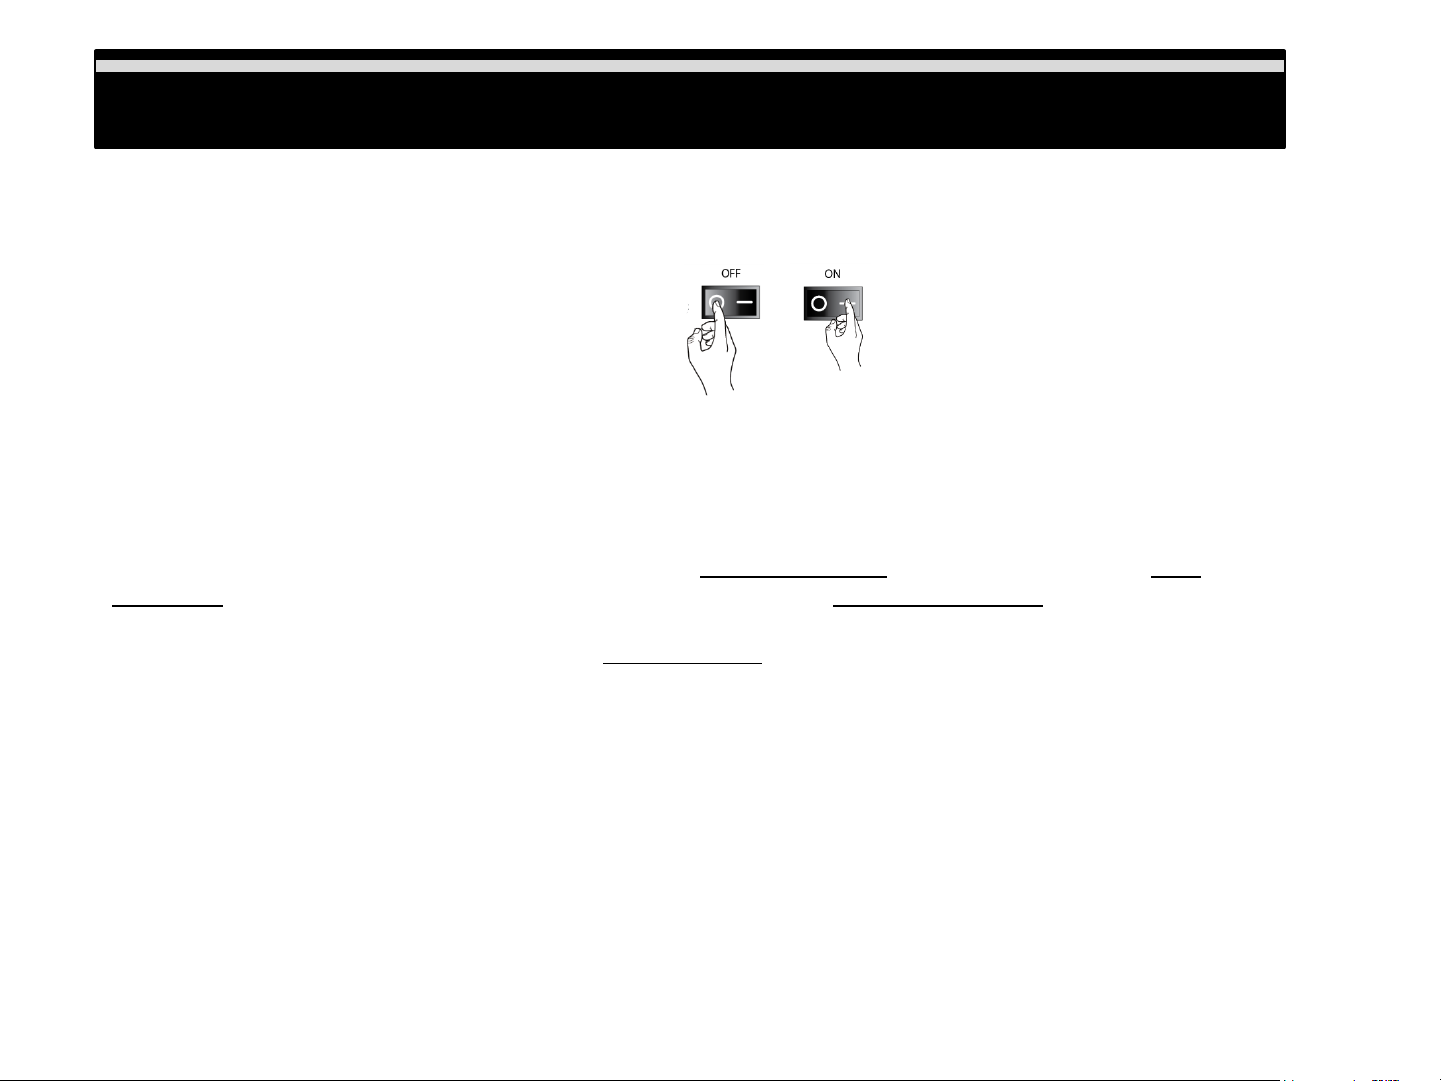
a. Once the software has been successfully installed and the system rebooted, if required you are ready to
connect the scanner, Locate the power switch on the back of the device and make sure it is in the OFF
position (circle in) before connecting
b. Assemble the power adapters 2 pieces together if you have not done so already, by sliding the plug
connector into the slot on the adapter until it clicks into position.
c. Connect the AC adapter to the back of the scanner and connect the adapter to a suitable power outlet
d. Connect the USB cable to the back of the scanner then to the appropriate port on the computer (no hubs,
front ports)
Please Note: When installing your new scanner onto a Windows system that already has another USB
connected Flatbed scanner or All-in-one Scan/Copier/Printer device connected via USB , be sure to power
them off to avoid hardware conflicts, this does not apply to Wi-Fi connected device, If you will be using a
Desktop computer, please connect only to the rear USB ports, do not use any type of USB extension cable
or hub to connect the scanner, data transfer is hindered when doing so causing the software to not respond,
or not communicate at all.
When considering scanner placement be sure to leave sufficient room in front of the unit for the film to come
out, otherwise your strips could end up on the floor.
Power on the scanner
FIRST TIME USE: Give a couple of minutes for your computer to connect the scanning device to the correct
hardware drivers installed previously.
Open the scanning software PF 135 from the desktop icon, or (Mac) under Apple menu –Go – Applications
PF 135
6
Page 7

Sorting & Cleaning Filmstrips
Sorting & Cleaning Filmstrips
The scanner is capable of scanning color positive, color negative and black & white 35mm filmstrips, you will
want to sort these by type into their respective groups before beginning to scan, EXAMPLE: Color positives
together, color negatives together and so on, the scanner can hold up to 10 filmstrips at a time, in sizes ranging
from 2 frames up to 6 frames, this unit does not scan rolls of film
This scanner does not support scanning any other sized filmstrips. (i.e. 110, 126 or APS are not supported),
Note: Strips must be in good condition, If filmstrips have any jagged or gnarled edges please trim them so that
they are smooth before inserting into the scanner. No curled strips, and no tape.
7
Page 8

Sorting & Cleaning continued
Sorting & Cleaning Filmstrips continued
If the films have dust on them, clean them before inserting into the scanner, using a 98% or higher rubbing
alcohol solution and a soft dry lint free cloth, dampen cloth and wipe film clean, turn over and wipe the other
side as well, let the films dry completely before inserting into the scanner
For video instruction please Click Here
8
Page 9

Loading Filmstrips
Loading Filmstrips
Insert filmstrips with the emulsion (DULL) side down (SHINY side up), when inserting strips you may need to lift
the cover to be certain your film strips are being placed properly under the guides on the film feed holder (Fig.1
& 1a.), these guides aid in the negatives feeding properly into the scanner. When inserting a strips of 4 frames
they need to be inserted as far in as the line shown in (Fig. 2) to be accepted by the scanner for scanning, if
not inserted fully it cannot grab the film and begin scanning. 6 frame strips will stick out above the holder, the
software acknowledges proper insertion on the lower left of the main UI for directions on how to loading
capacity and configuring scan settings please Click Here:
Fig. 2
9
Page 10

How to Scan
Scan - User Interface:
When scanning it is best to not run other tasks on the computer for best performance
a. Power on the scanner, wait for the blue light to become solid indicating it is ready to use
b. Open the CyberView PF135 software application:
PC: Go to Windows Desktop – PF 135 icon
Mac: Apple Menu – Go – Applications – PF 135 App icon
How to Scan
10
Page 11

Configure Settings
Configure Settings
Select your scan settings options (definitions of features located on page 13)
a. Scan Mode Fast or Quality, Resolution 6M or 24M, File type TIF or JPG, Color depth 8 or 16
Select the filmstrip Orientation, Magic Touch and Multi Xposure
Select the film type Negative, Positive or Black & White to access the scan/save settings area
11
Page 12

Main User Interface
1) Scan Mode – Fast or Quality - Fast mode offers a fixed
exposure time, and quality mode adjusts the exposure
time according to the film,
2) Resolution – 6M/24M - 6Megapixels and 24
Megapixels
3) File Type - TIF or JPG, TIF is an uncompressed file
format better for post scan editing, JPG Low, Medium
or High , the high setting produces an image with the
least amount of compression, Low produces smaller
files.
4) Color Depth – 8 or 16 bit – 8 bit color is equal to
8bits per color channel 8x3=24 bit color, 16 bits per
color channel 16x3=48 bits color
5) Magic Touch – Removes dust and scratches when
enabled, using Infrared technology
6) Multipass Xposure – This takes three individual
exposures, and then combines them for the final
image, to produce the best quality output.
7) Orientation – Select which direction your films will be
facing before scanning so the software can re-orient
them during the scan process
8) Scan – Select your film type
9) Clean Rollers – This accesses directions for cleaning
the rollers (this should be done every 100 scans)
10) Eject Film – Ejects inserted films (all)
11) Update Firmware – After downloading firmware
updates online click here to apply it
12) About – Provides scanner hardware and software
information
13) Exit – Exits the program prompting you to save your
settings, file directory, custom names etc.
Main User Interface
12
Page 13

Scan Settings defined (Scanning started window)
1) Export file folder: Choose where to save the
scanned files to
2) Filename example: Will show your filename and
number
3) Directory: Display where the files are saving to
4) Create Subfolder: When checked you generate a
sub-folder automatically with the days date
5) Subject: Lets you apply subjects to the saved files
6) Capture date: Lets you apply the date the image
was taken
7) Keywords: “Tags” enter keywords t help identify
the images
8) Comments: Add comments when scanning in JPG
format
9) Base File Name: This filename is used for every
scan and it adds a number to it automatically
example shown beside #2 above
10) Start Scan: Starts the scanning process
11) Exit: This closes the scan settings window
Scan Settings defined
13
Page 14

Scan Settings - Scanning
Once the film has been loaded
a. Select your film type to setup the save to options
b. Scanning started window, here you can input the filmstrip information
c. As the scanner is processing the images you will see the progression on the thumbnail panel
Scan
Settings -
Scanning
14
Page 15

Tips & Troubleshooting
Tips & Troubleshooting
Download software & firmware updates (download link)
Updating the scanners firmware
Download the latest firmware file, save it to your Downloads directory, once
download is complete, Turn on the scanner wait for the solid blue light then open the CyberView PF135 software,
in the main user interface locate the Update firmware button
this will open a file explorer window, browse to the downloads directory on your PC or Mac and locate the firmware file by
Name: PowerFilm_V1.xxxx.UI.bin double click on this file to begin the firmware update process.
Once the firmware install is complete click OK, this will close the CyberView PF135 interface, the scanner will
still be processing this update, the blue light will continue to flash until it has completed, do not open the scanning
Software at this time, once the procedure is complete the light will be solid and may now resume using CyberView
PF135 for scanning.
15
Page 16

Tips & Troubleshooting
Removing stuck film – You have 3 options to
perform this task video reference
Troubleshooting (video link)
As using options 1 & 2 will eject ALL filmstrips
through the unit, please first remove any awaiting
strips from the film feeder, then:
Option 1. Select the Eject button from the software
interface.
Option 2. Restart the scanner by powering it off for a
few seconds, then turning it back on.
Option 3. If there is no power to the unit or the
software has crashed, you may remove the film
manually by lifting the cover and locating the
lever with an arrow to the right of the loading area,
and lifting up on this to release the filmstrip for
removal. Please note this can be difficult, so resort to
options 1 or 2 whenever possible.
Tips & Troubleshooting
Option 1
Option 2
Option 3
16
Page 17

Tips & Troubleshooting
Tips & Troubleshooting continued…
Removing dust from inside the unit (video link, info begins at 1:25)
Dust inside the scanner can be detrimental to scans, leaving lines and distortions on the images, to avoid such
issues clean your scanner regularly, using an air (bulb style) manual blower designed for electronic equipment
to blow off your films, both sides and inside your scanner to keep it clean. See companion video for demonstration.
Cleaning the rollers inside the unit (video link)
To clean the rollers inside the unit, you will want to use a soft lint free cloth to wipe the transport rollers and film
feed area clean
1. Power off and disconnect power from the unit
2. Remove film feed chute, Wipe the film feed chute with clean lint free cloth
3. Lift open the cover to access the inside, Wipe upper external roller to remove dust
4. Lift the internal roller cover, wipe interior rollers, top and bottom
5. Wipe the film white exposure area
6. When complete, close the internal film roller cover and the main unit cover
17
Page 18

Technical Support Contact
Technical Support
Reference Video Links
o Organizing, sorting and cleaning https://youtu.be/ylV5iRM-Ygg
Proper insertion of the film feed chute
Sorting, and inserting negatives
Cleaning dirty films
Information on unsuitable films for scanning
o Loading your negatives https://www.youtube.com/watch?v=ycDfSsaLWY0
Loading capacity
Configuring scan settings
Final scan process
o Cleaning the Rollers https://youtu.be/TmD7X4XnLps
Demonstrates how to clean the feed rollers to
avoid dust lines in images
o Removing stuck film https://youtu.be/kAtd0oLqh6c
Steps to remove stuck film strip
Customer Support: please email us directly at support@reflecta.de, please provide the serial # off the scanner,
your computer operating system, and detailed information about your current issue.
reflecta GmbH – Merkurstraße 8 – 72184 Eutingen im Gäu – Germany – www.reflecta.de
18
 Loading...