

Page 1
reflecta GmbH, Merkurstr. 8, 72184 Eutingen, Germany
www.reflecta.de
Projector Motorized Lift Manual
(Caelos 100, 200, 300 & 300X)
Specifications
Model: Caelos 100, 200, 300
Technical data
Caelos 100
Caelos 200
Caelos 300
Max Running Distance
430-1000mm
490-2000mm
550-3000mm
Net Weight
17Kg
18Kg
19Kg
Load Capacity
15KG
Running Speed
53mm/sec
Operate Method
Manual or Remote Control
Power consumption
130W
Voltage
220V/110V, 50/60HZ
Model: Caelos 300X
Technical data
Caelos 300X
Max Running Distance
750-3000mm
Net Weight
34Kg
Load Capacity
38KG
Running Speed
53mm/sec
Operate Method
Manual or Remote Control
Power consumption
260W
Voltage
220V/110V, 50/60HZ
Page 2
reflecta GmbH, Merkurstr. 8, 72184 Eutingen, Germany
www.reflecta.de
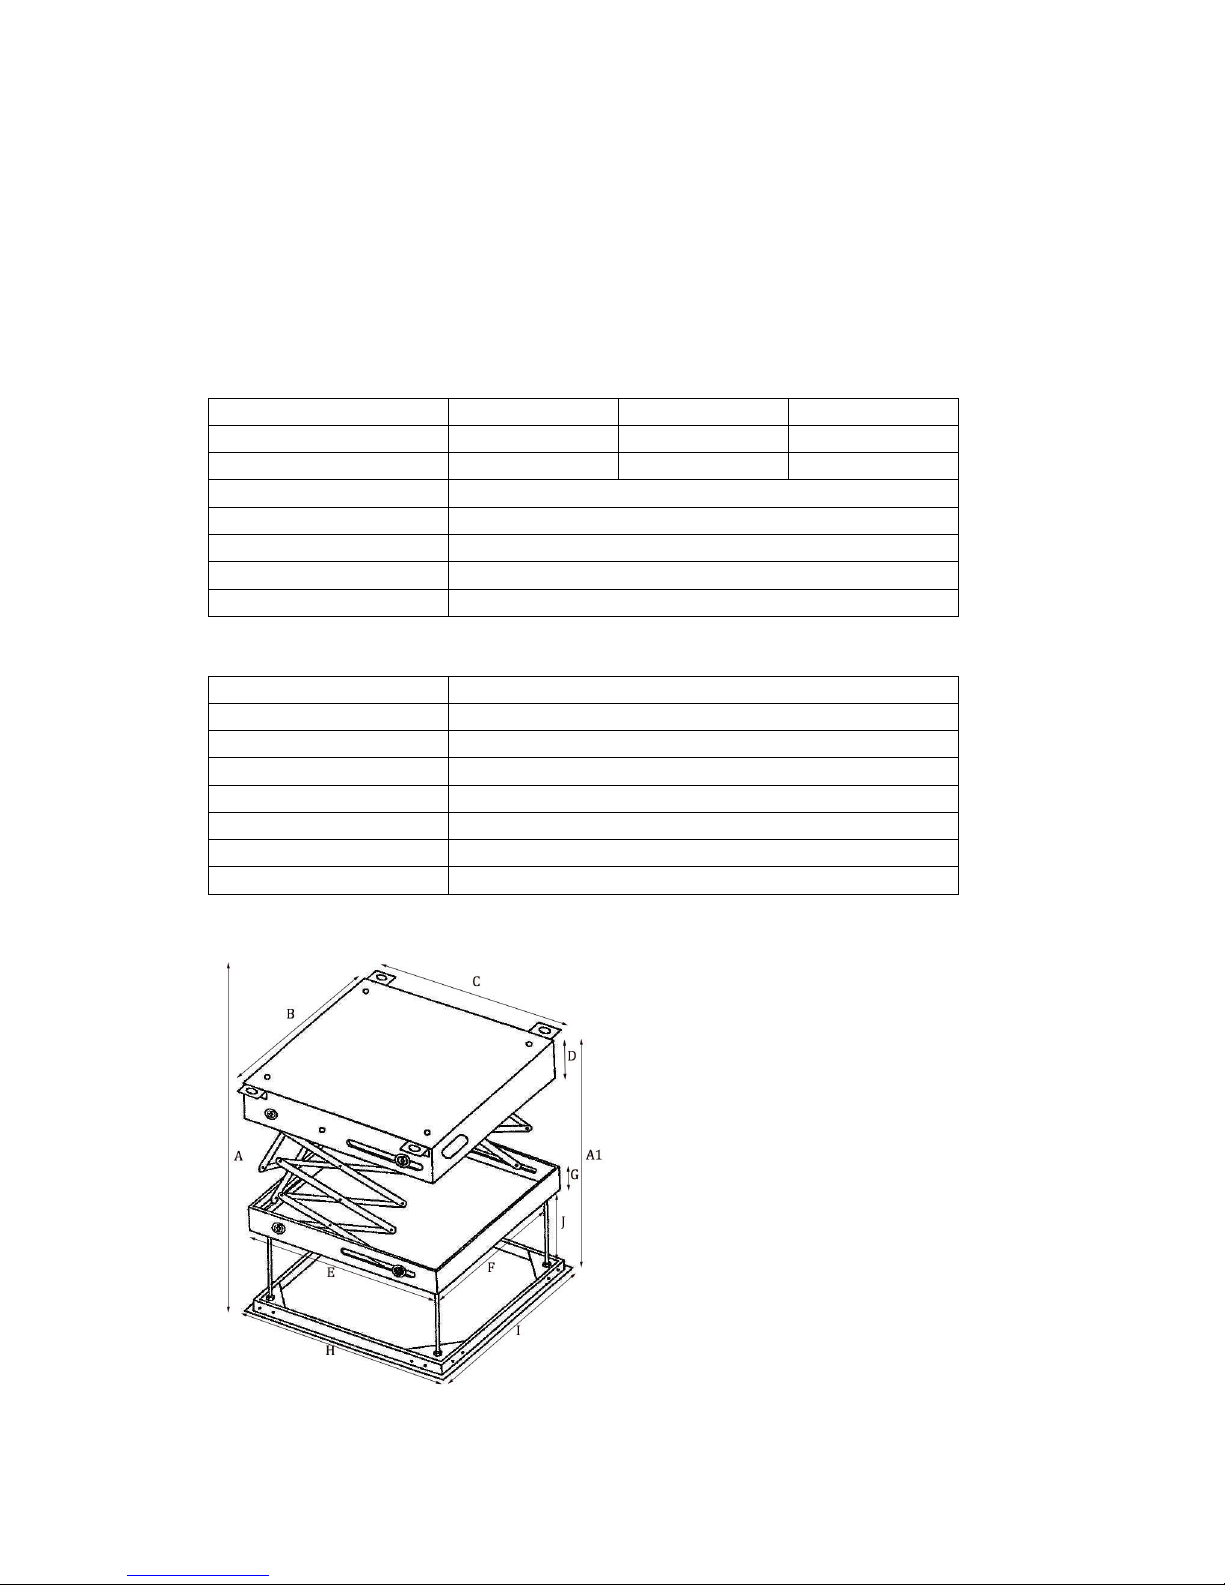
Model
Lift Measurement
CM
CM
CM
CM
CM
CM
CM
CM
CM
CM
CM A(max.)
A1(min.)
B C D E F G H I J
Caelos 100
100
43
45
40
7.5
40
40 5 45
45
30
Caelos 200
200
49
45
40
7.5
40
40 5 45
45
30
Caelos 300
300
55
45
40
7.5
40
40 5 45
45
30
Caelos 300X
300
75
47
43
7.5
53
46 5 60
60
50
Annex list
1. Remote control transmitter x1PC
2. Remote control receiver x1PC
3. Projector bracket x 1set
4. Screw set: 1bag
5. Long Screw: 4PCS
6. Regulator driver: 1PC
7. Down holding bolt: 4PCS
Warnings
Prepare the necessary tools for installation.
This lift must be installed by two or more people.
Check whether the products are damaged, annex are completed
Read this manual carefully before installation and operation.
Make sure the voltage is suitable for products.
Check the installation place is strong enough to bear the products.
Ensure there is enough space to make products run well.
Only professionals are allowed to do the installation and maintenance.
Preparation before installation
1. According to the installation environment (projector lift, fixed bracket, height of
projector, thick of ceiling) to choose a right model of a projector lift.
2. Assemble the lift before installation as per drawing:
3. Check and ensure the projector motorized lift run well (if there is remote control, please
check it) before installation.
Page 3

reflecta GmbH, Merkurstr. 8, 72184 Eutingen, Germany
www.reflecta.de
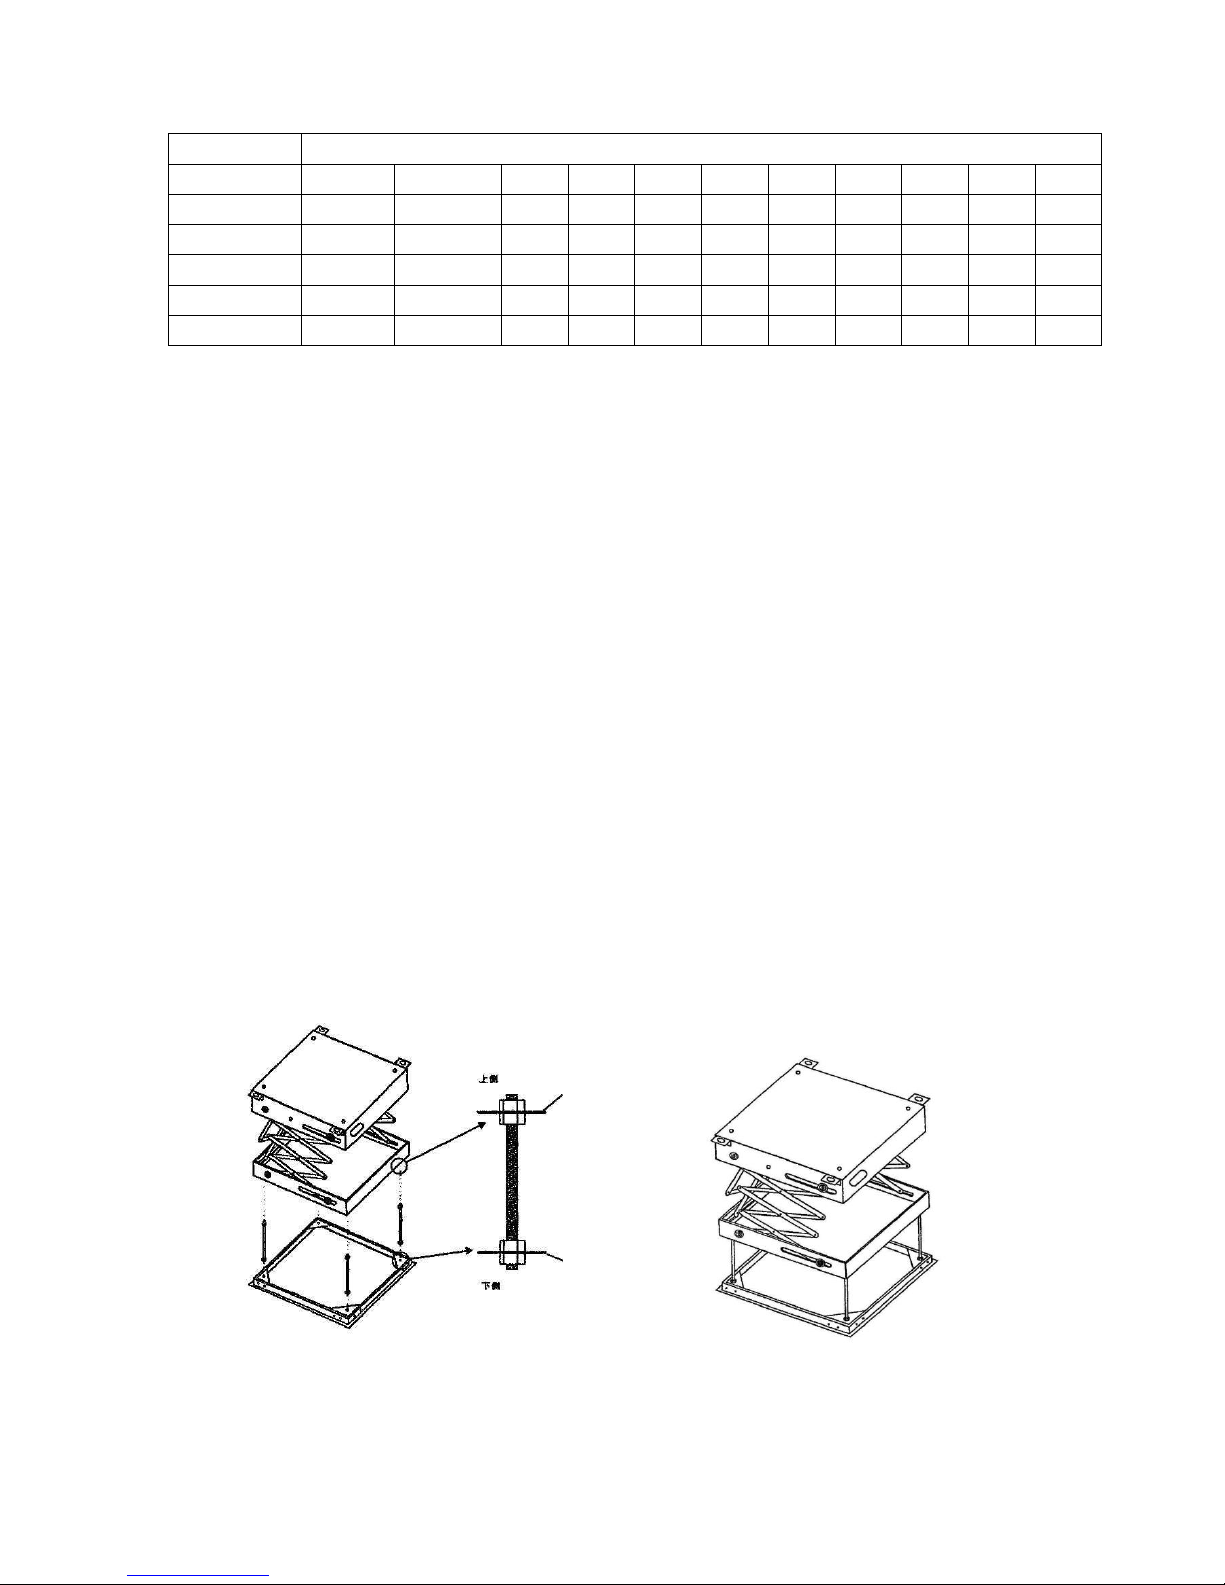
Installation of the lift
1. Prepare AC power supply of 110V/220V/240V ready
2. Use 4pcs M8 down holding bolt to fix the lift firm to the concrete roof of the building.
Concrete Roof
Ceiling
3. Open the ceiling 3CM larger each side than size of this projector lift’s chassis.
4. Connect the lift with AC power supply
5. Adjust the motor to make the highest and lowest position of the lift fit the height of the
ceiling and the ideal working position of the lift
Method: Through the Red hole, turning the regulator clockwise to increased uplink,
counterclockwise to reduce the uplink. Through the white hole, tuning clockwise to
increase downlink, counterclockwise to reduce the downlink.
6. Assemble projector brackets and the projector as is shown:
Projector bracket
Projector
 Loading...