

Page 1
Operating Instructions
Series TB / TBL Tool Balancers
Model Numbers:
TB 10 TB 12 TB 15 TB 23
TBL 10 TBL 12 TBL 15 TBL 23
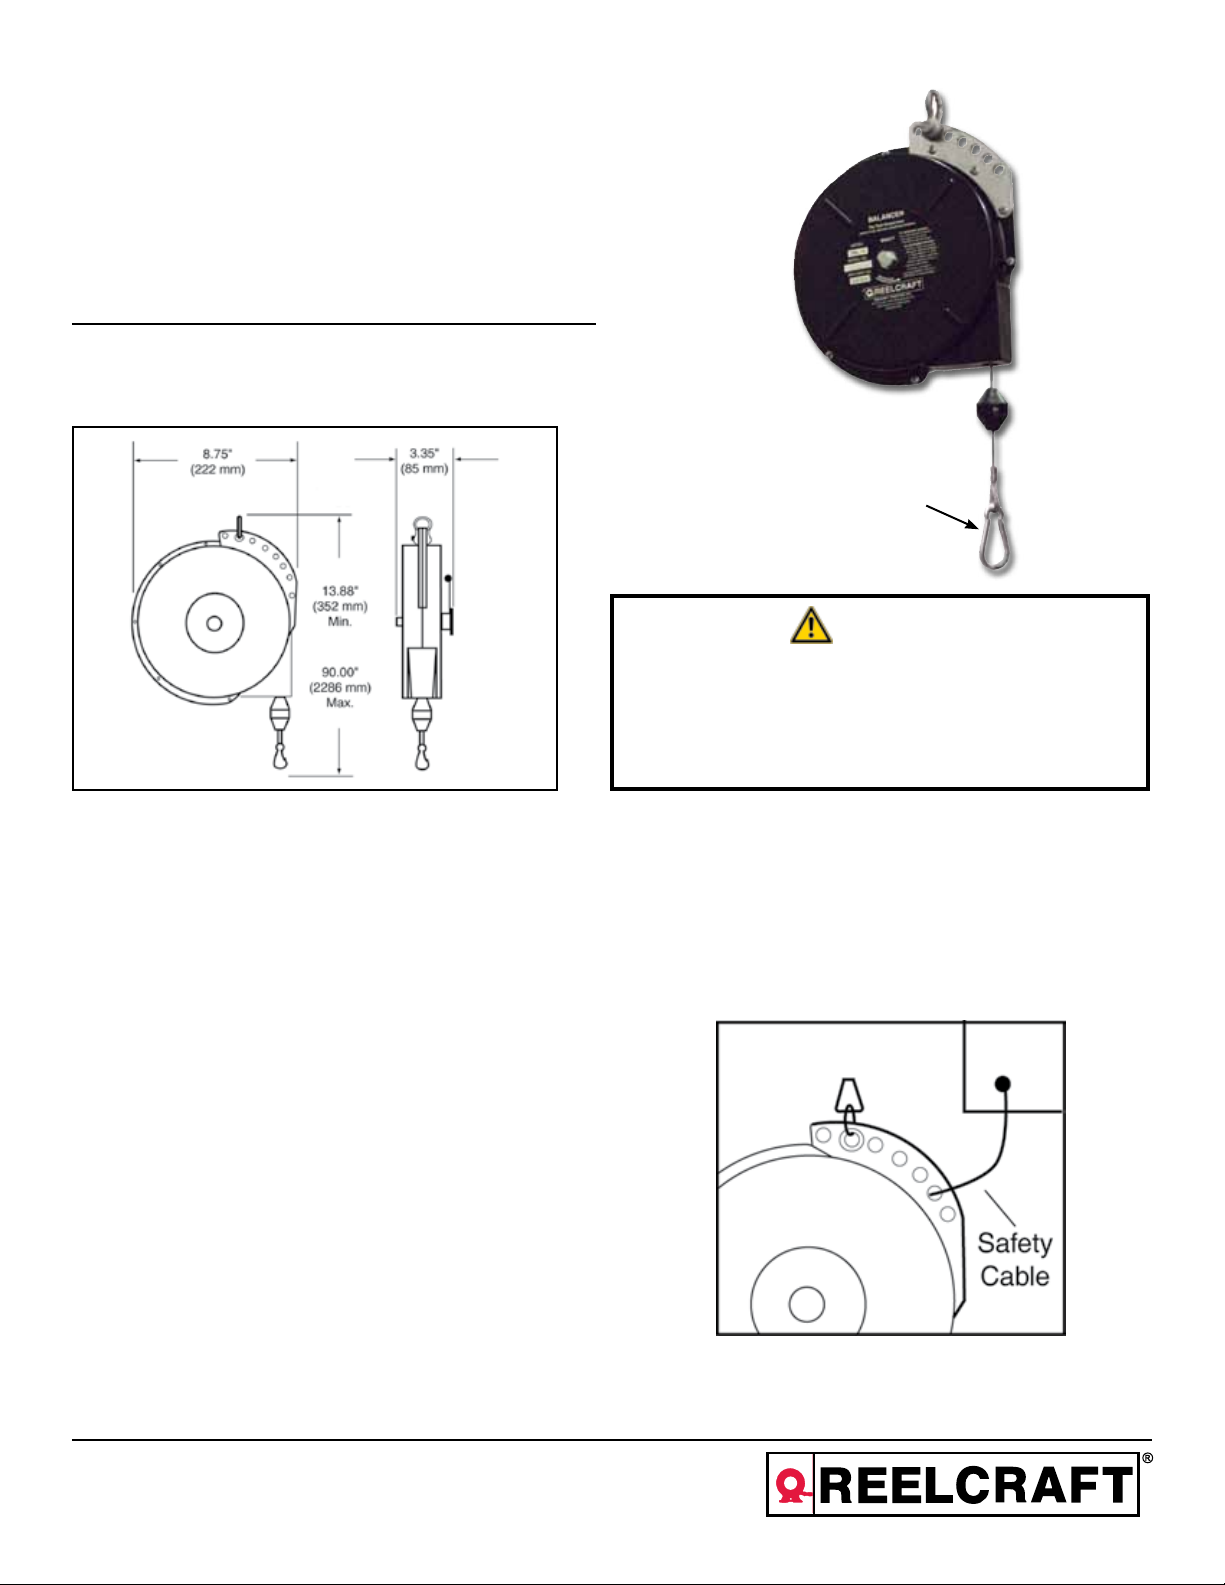
Dimensions
Safety Clip - 261241
Bright zinc plated steel cable and
safety latch for tool attachment and
other uses. Measures 2.375” (60 mm)
long. Included with each model.
WARNING
DO NOT allow spring to unwind in an uncontrolled manner.
Doing so can result in damage to reel or personal injury.
NOTE: To minimize wear on cable and cable guide, reel
should be mounted directly over work area and, preferably, on
a rolling trolley so that cable is pulled out as straight as possible during use.
MOUNT REEL
1. Use clevis to hang reel in desired location. Be sure cotter
pin is installed on clevis pin.
2. Attach optional safety chain to secondary hanger bracket
or other overhead support. Do not use the same attachment point as used for the clevis. See figure 1.
CAUTION: To prevent reel fall should primary clevis mount
fail, it is recommended that a safety chain be used from reel
to a secure secondary support. Failure to use safety chain
could result in personal injury.
DO NOT attempt to remove spring motor from its canister.
Doing so can result in damage to reel or personal injury.
Figure 1
Reelcraft Industries, Inc. • 2842 E Business Hwy 30, Columbia City, IN 46725
Ph: 800-444-3134 / 260-248-8188 • Fax: 800-444-4587 / 260-248-2605
Customer Service: 855-634-9109 • reelcraft@reelcraft.com • www.reelcraft.com
Rev: 8/2013
Page 2
Series TB / TBL Tool Balancers
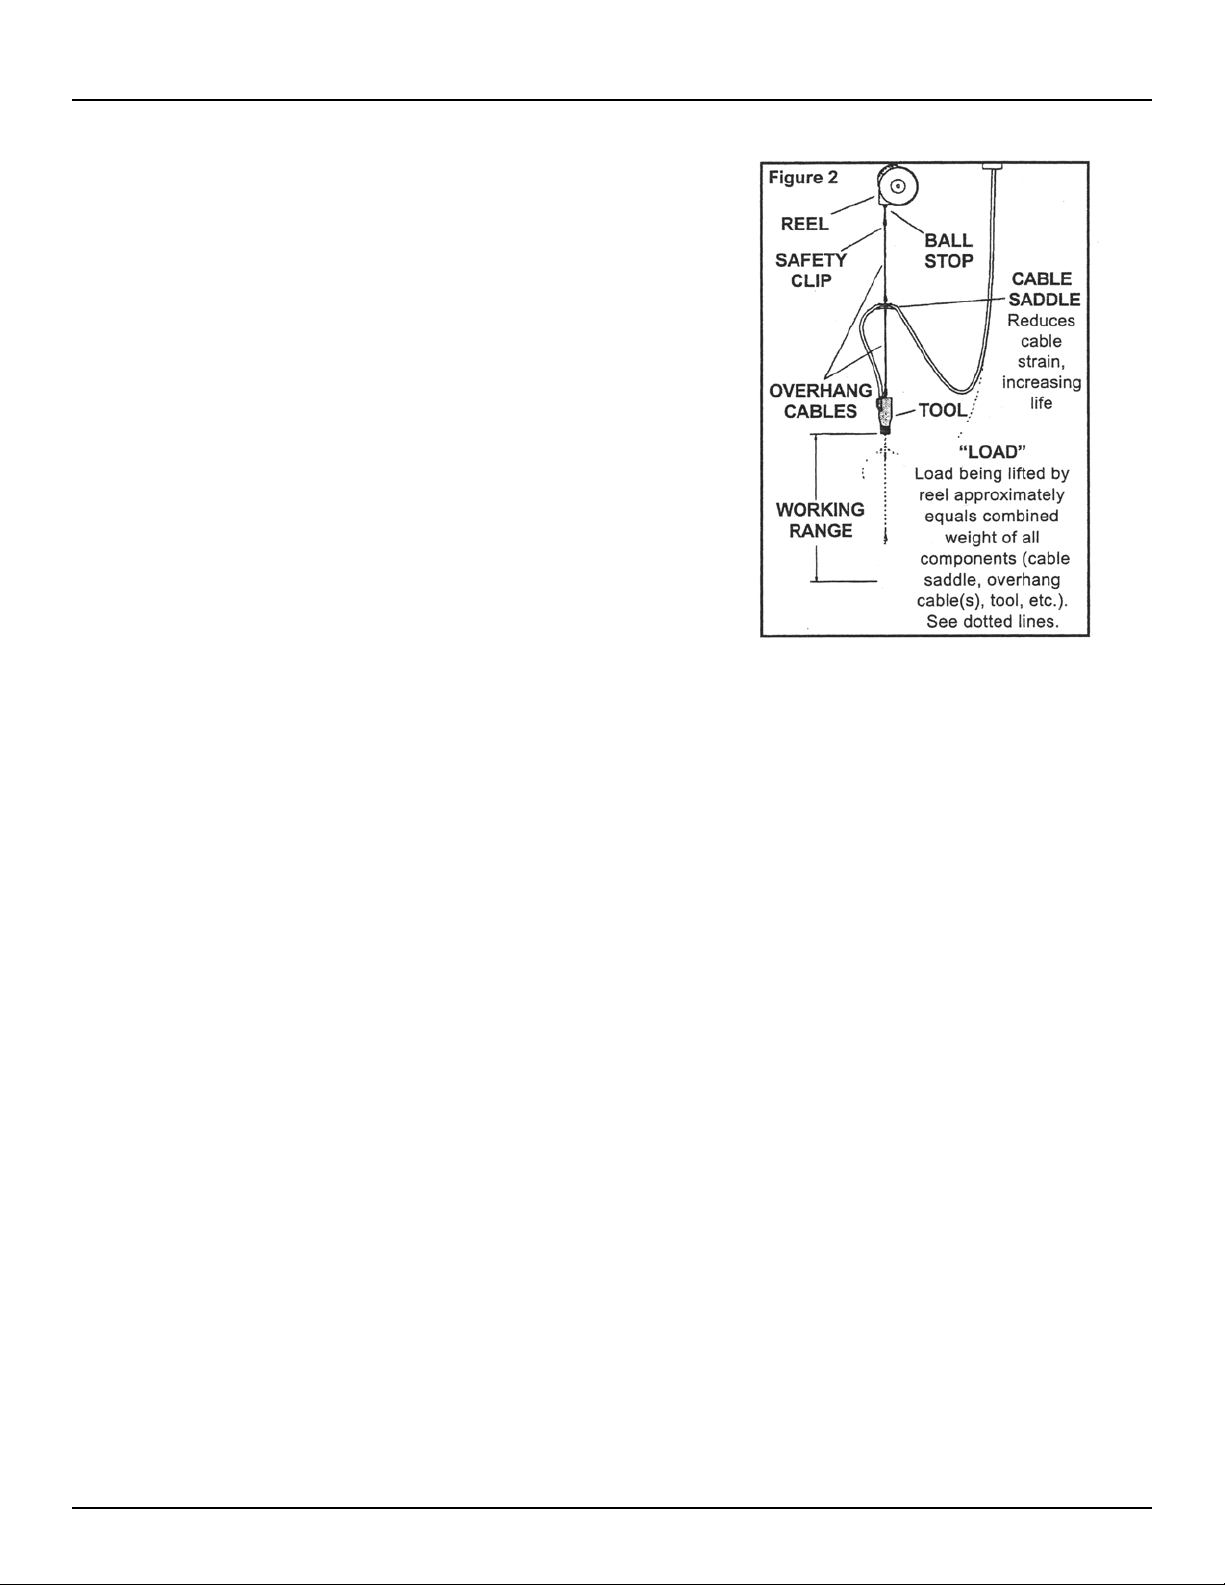
ATTACHING LOAD
For most effective use of reel, tool (Figure 2) should be positioned at top of working range with no cable pulled off reel.
Use overhang cables to achieve proper distance from reel to
tool. Cable on reel should be used only to move tool within
working range. To attach load (all components hung on reel),
raise load to safety clip and attach. DO NOT pull cable
down to load.
CAUTION: Always raise load to safety clip on cable reel.
DO NOT pull reel cable down to load. Doing so can result in
damage to reel or personal injury.
TENSION ADJUSTMENT
Increase tension if reel will not completely rewind cable with
load attached until cable stop reaches guide.
1. Allow cable to retract as far as possible.
2. Place wrench on flats of shaft. Turn shaft counter-clockwise until cable stop reaches guide.
Decrease tension if load cannot easily be pulled down to
desired height.
1. If reel is so equipped, turn ratchet lock to “OFF” (knob is
located on side of reel).
2. Place wrench on flats of shaft.
3. Hold shaft firmly with wrench. Depress spring on opposite side of reel.
4. Allow shaft to turn SLOWLY in clockwise direction until
desired tension is achieved. If shaft will not turn in clockwise direction UNASSISTED, reel is at minimum tension
and further tension reduction should not be attempted.
Optional Accessories
261241 - Replacement bumper
S602549 - Replacement bumper
600603 - Safety cable (1 ft / 30.5 cm); nylon covered steel for 1-6 lbs models
600604 - Safety chain (1 ft / 30.5 cm); steel link chain for 10-23 lbs models
600605-3 - Overhang cable (3 ft / 91.5 cm)
600605-5 - Overhang cable (5 ft / 152.4 cm)
Cables can be combined for added length.
RATCHET LOCK USE
If reel is equipped with ratchet lock (“TBL” models),
engage by pulling cable out to desired position and letting it retract SLOWLY until lock engages. To release lock,
quickly pull cable out a short distance and allow it to begin
to retract - it operates like a window shade. Ratchet lock
may be disengaged by turning knob on side of reel.
REGULAR MAINTENANCE
Reel is factory lubricated for life. No additional lubrication
is required.
Page 2
www.reelcraft.com
 Loading...