


Data Logging
Indoor Air
Quality Meter
R9905
Instruction
Manual
www.REEDInstruments.com
www.GlobalTestSupply.com

Table of Contents
Introduction ................................................................................................ 3
Product Quality ........................................................................................... 4
Safety ......................................................................................................... 4
Features ...................................................................................................... 4
Included ...................................................................................................... 5
Specications .......................................................................................... 5-6
Instrument Description ............................................................................... 7
Display Description .................................................................................... 8
Operating Instructions ........................................................................... 9-16
Power ON/OFF ...................................................................................... 9
Taking Measurements ............................................................................ 9
Unit of Measurement Selection (°C/°F) ................................................. 9
Data Hold. .............................................................................................. 9
Min/Max and Average Readings .......................................................... 10
Backlight .............................................................................................. 11
Setup Mode ......................................................................................... 11
Setting the Data Logging Sampling Rate .......................................11-12
Setting the Relative Humidity/Temperature Offset .............................. 12
Setting the CO2 Offset ......................................................................... 12
Setting Altitude Compensation ......................................................12-13
Set CO2 Alarm Values (Hi/Lo) .........................................................13-14
Setting the Auto-Power Off Time ........................................................ 14
Setting the Time and Date ................................................................... 15
Data Logging ....................................................................................... 16
Upload Recorded Data to PC .............................................................. 16
Software Installation ............................................................................ 16
Clearing Stored Data ........................................................................... 16
www.REEDInstruments.com
www.GlobalTestSupply.com
continued...
2

Calibration Mode ................................................................................. 17-19
CO2 Calibration...............................................................................17-18
Humidity/Temperature Calibration .................................................. 18-19
Calibrating Hi RH .......................................................................18-20
Calibrating Lo RH ............................................................................ 18
Calibrating Hi Temp ......................................................................... 19
Calibrating Lo Temp ................................................................... 19-20
Battery Replacement ................................................................................ 20
Applications .............................................................................................. 20
Accessories and Replacement Parts ....................................................... 20
Appendix A – Recommended Guidelines................................................. 21
NIOSH Recommendations .................................................................. 21
ASHRAE Standard 62 to 1989: 1000ppm ........................................... 21
Building Bulletin 101 (BB101): 1500ppm ............................................ 21
OSHA: 5000ppm ................................................................................. 21
Germany, Japan, Australia: 5000ppm.................................................. 21
Product Care ............................................................................................ 21
Product Warranty ..................................................................................... 22
Product Disposal and Recycling .............................................................. 22
Product Support ....................................................................................... 22
Introduction
Thank you for purchasing your REED R9905 Data Logging Indoor Air
Quality Meter. Please read the following instructions carefully before using
your instrument. By following the steps outlined in this manual your meter
will provide years of reliable service.
www.REEDInstruments.com
www.GlobalTestSupply.com
3

Product Quality
This product has been manufactured in an ISO9001 facility and has been
calibrated during the manufacturing process to meet stated product
specications. If a certicate of calibration is required please contact the
nearest authorized REED distributor or authorized Service Center. Please
note an additional fee for this service will apply.
Safety
• Never attempt to repair or modify your instrument. Dismantling your
product, other than for the purpose of replacing batteries, may cause
damage that will not be covered under the manufacturer's warranty.
Servicing should only be provided by an authorized service center.
• Avoid condensation on CO
• Do not hold the meter in close proximity to your mouth as exhalation
affects CO
• Do not calibrate the meter in the air with unknown CO
levels.
2
sensor.
2
concentration.
2
Features
• Triple LCD display simultaneously monitors carbon dioxide (CO2),
temperature and relative humidity
• Calculates time-weighted average (TWA) and short-term exposure
limit (STEL)
• Low-drift NDIR CO
• Temperature and relative humidity measurements help determine
thermal comfort
• Easy-to-read backlit LCD display
• User adjustable audible alarm
• Data hold, Max/Min and Average functions
• Record up to 32,000 datapoints and keep track with internal time and
date stamp
• User selectable sampling rate from 1 to 60 mins
• Low battery indicator and auto shut-off
sensor for stable and accurate readings
2
www.REEDInstruments.com
www.GlobalTestSupply.com
4

Included
• USB Cable
• Hard Carrying Case
• Batteries
Specifications
Temperature
Measuring Range: -4 to 140°F (-20 to 60°C)
Accuracy: ±1.5°F (±0.8°C)
Resolution: 0.1°F/°C
Humidity
Measuring Range: 0 to 100% RH
Accuracy: 10 to 90% RH: ±3%
<10% & >90% RH: ±5%
Resolution: 0.1% RH
CO2 (Carbon Dioxide)
Sensor Type: Nondispersive Infrared (NDIR)
Measuring Range: 0 to 30,000ppm
Accuracy: 0 to 5000ppm: ±(75ppm + 3% rdg.)
Resolution: 1ppm
Warm-up Time: 20 seconds
Sampling Rate: 2 seconds
General Specifications
Display: LCD
Backlit Display: Yes
Data Hold: Yes
Min, Max, Avg Functions: Yes
CO2 Short Term
Exposure Limit (STEL): Yes (15 minutes)
www.GlobalTestSupply.com
5001 to 30,000ppm: ±(150 ppm +5% rdg.)
continued...
www.REEDInstruments.com
5

CO2 Time Weighted
Average (TWA): Yes (8 hours)
Datalogging Capabilities: Yes
Real-Time Clock and
Date Stamp: Yes
Selectable Sampling Rate: Yes (between 1s and 60m59s)
Internal Memory: Yes (32,000 datapoints)
Alarms: Yes (Low and High)
Auto Shut-off: Yes (adjustable)
Kick Stand: Yes
Low Battery Indicator: Yes
Power Supply: 9V battery
Battery Life: Approx. 10 hours (continuous use)
PC Connectivity: USB
Software OS Compatibility: Windows 7/8/10/11
Product Certications: CE
Operating Temperature: 32 to 122°F (0 to 50°C)
Storage Temperature: -4 to 140°F (-20 to 60°C)
Operating Humidity Range: 0 to 90%
Storage Humidity Range: 10 to 75%
Maximum Operating Altitude: 6561' (2000m)
Dimensions: 11.2 x 2.6 x 1.5" (284 x 65 x 39mm)
Weight: 10.7oz (304g)
www.REEDInstruments.com
www.GlobalTestSupply.com
6

Instrument Description
1
2
R9905
Indoor Air Quality Meter
3
4
6
8
5
7
9
1. Temp/Humidity Probe
2. CO2 Sensor
3. LCD Display
4. Power and Backlight Button
5. MIN MAX AVG Button
6. SETUP Button
7. DATA HOLD Button
10
11
12
13
8. REC Button
9. °C/°F Button
10. CO2 Calibration Inlet
11. USB Interface
12. Tilt Stand
13. Battery Compartment
www.REEDInstruments.com
www.GlobalTestSupply.com
7

Display Description
3
2
1
4 5 6 7 8
SET ALARM
CO2
10
11
1. Setup Indicator
2. Time Weighted
Average Indicator
3. CO2 Alarm Indicator
4. Short-term Exposure
Limit Indicator
5. Hi CO2 Alarm Indicator
6. Lo CO2 Alarm Indicator
7. Recording Data Logger
Indicator
8. Data Hold Indicator
9. CO2 Measurement Indicator
10. CO2 Reading
11. Relative Humidity/
Temperature Reading
HOLD
HiLo
FULLRECSTELTWA
CALAVGMAXMIN
m
ppm
%
RH
222120191817
129
13
14
15
16
12. Memory Full Indicator
13. Altitude Measurement Unit
14. CO2 Measurement Unit
15. Relative Humidity
Measurement Unit
16. Temperature Measurement
Unit
17. Auto Power Off
Enabled Indicator
18. Battery Status Indicator
19. Minimum Indicator
20. Maximum Indicator
21. Average Indicator
22. Calibration Mode
www.REEDInstruments.com
www.GlobalTestSupply.com
8

Operating Instructions
Power ON/OFF
Turn the meter on by pressing the button. To turn the meter off, press
and hold the button for 3 seconds.
Taking Measurements
The meter starts taking measurements when powered on and updates
readings every 2 seconds.
Note: Make sure the CO
the "CAL" position.
Rapid environment changes (i.e., moving your meter from indoors
to outdoors) may cause inaccurate readings, therefore,it is always
recommended to allow your meter to get acclimated to its new
environment (approx. 10 to 15 minutes). Do not
hold the meter close to your mouth or any other source of CO2.
Unit of Measurement Selection (°C/°F)
When the meter is powered on press the button to
toggle between Celsius and Fahrenheit.
Note: The default unit of measurement is Celsius (°C).
The meter will automatically save the last selected unit of
measure when turned off.
Data Hold
Press the button to freeze the current reading on the display.
Press the
Note: When the Data Hold function is enabled the
buttons are disabled.
button again to resume normal operation.
sensor is switched to "MEAS" position and not
2
, and
www.REEDInstruments.com
www.GlobalTestSupply.com
continued...
9

Min/Max and Average Readings
When in this mode, the unit simultaneously monitors and stores the
minimum, maximum and average values into the internal memory while
continuously updating/refreshing the measurement values.
1. Press the button once, the MIN indicator will appear on the LCD
display. The minimum values (CO2, humidity and temperature) are
displayed and will automatically update when new minimum data
values are measured.
2. Press the button again and the MAX indicator will appear on the
LCD display. The maximum values (CO2, humidity and temperature)
are displayed and will automatically update when new maximum
data values are measured.
3. Press the button a third time and the short-term exposure limit
(STEL) indicator will now appear on the LCD display. The STEL
average limit for the past 15 minutes will be displayed and will
automatically be updated every minute.
4. Press the button a fourth time and the time weight average
(TWA) indicator will now appear on the LCD display. The TWA limit
for the past 8 hours will be displayed and will automatically be
updated every 10 minutes.
If the meter has been powered on for less than
15 minutes, the STEL and TWA values will only reflect the
weighted average of readings taken since it was powered on.
If the meter does not have enough data to display STEL
and TWA, "----" will appear on LCD display.
5. Press the
TWA" indicators will blink simultaneously while continuing to update
the readings in memory and can be viewed by returning to the
appropriate function. While in this function, the meter is displaying
the current measurement values only.
6. Press and hold the button for 2 seconds to exit MAX/MIN/AVG
mode and resume normal operation.
button a fth time and the "MAX, MIN, STEL and
www.REEDInstruments.com
www.GlobalTestSupply.com
continued...
10

Backlight
Press the button to turn the LCD Backlight on or off. The backlight will
automatically turn off after 30 seconds to preserve battery life.
Setup Mode
1. Press the button to enter Setup mode.
2. Press the button continuously to scroll through the following
parameters and applicable parameter values.
Note: At any time, you can press the button to exit setup mode and
resume normal operation.
Parameter Description
Int Set the data logging sampling rate
OFS (%RH/°F) Set the Relative Humidity/Temperature offset
OFS (ppm) Set the CO
Alt Set altitude compensation
ALARM Set CO2 Alarm Values (Hi/Lo)
Set the auto-power off time
Set the time and date
offset
2
Setting the Data Logging Sampling Rate
Follow steps 1 through 4 when "Int" appears on the
LCD as shown in Figure 1.
1. The sampling rate can be set from "1" second
(00:01) up to 60 minutes and 59 seconds (60:59).
2. Press the
and buttons to adjust the required
sampling rate by minutes or seconds.
3. Press the
button to conrm each selection.
www.REEDInstruments.com
www.GlobalTestSupply.com
SET
Figure 1
continued...
11

4. Press the button again to skip to next parameter.
Note: At any time, you can press the button to exit setup mode and
resume normal operation.
Setting the Relative Humidity/Temperature Offset
Follow steps 1 through 5 when "OFS" appears on the
LCD as shown in Figure 2.
1. Press the
and buttons to increase or decrease
the required Humidity Offset.
2. Press the button to conrm selection.
3. Press the and buttons to increase or decrease
the required Temperature Offset.
4. Press the button to conrm selection.
5. Press the button again to skip to next parameter.
Note: At any time, you can press the button to exit setup mode and
resume normal operation.
Setting the CO2 Offset
Follow steps 1 and 2 when "OFS" appears on the
LCD as shown in Figure 3.
1. Press the
decrease the required CO2 Offset.
2. Press the button to conrm selection
and skip to next parameter.
Note: At any time, you can press the button to
exit setup mode and resume normal operation.
and buttons to increase or
SET
Figure 2
SET
Figure 3
SET
Setting Altitude Compensation
Follow steps 1 through 8 when "ALT" appears on the
LCD as shown in Figure 4.
1. Press the
and buttons to increase or decrease
the 1st digit.
2. Press the button to conrm selection and
skip to the 2nd digit.
Figure 4
continued...
www.REEDInstruments.com
www.GlobalTestSupply.com
12
%
RH
m
m

3. Press the and buttons to increase or decrease the 2nd digit.
4. Press the button to conrm selection and skip to the 3rd digit.
5. Press the and buttons to increase or decrease the 3rd digit.
6. Press the button to conrm selection and skip to the 4th digit.
7. Press the and buttons to increase or decrease the 4th digit.
8. Press the button to conrm selection and skip to
the next parameter.
Note: At any time, you can press the button to exit setup mode and
resume normal operation.
Altitude compensation can be set from 0 to 3000m.
By default, the meter is set to 0000m. It is strongly the
recommend that the correct altitude compensation is set
in order for the meter to provide accurate measurements.
Set CO2 Alarm Values (Hi/Lo)
Follow steps 1 through 8 when "ALARM" appears on
SET ALARM
CO
2
the LCD as shown in Figure 5.
1. Press the
and buttons to turn the CO2 alarm
On or OFF.
2. Press the button to conrm selection and
set the CO2 alarm values when enabled.
3. Press the and buttons to increase or
decrease the 1st digit of the high alarm value.
Figure 5
4. Press the button to conrm selection and skip to the 2nd digit.
5. Press
the and
buttons to increase or decrease the 2nd digit.
6. Press the button to conrm selection and skip to the 3rd digit.
7. Press
the and
buttons to increase or decrease the 3rd digit.
8. Press the button to conrm selection and skip to the 4th digit.
9. Press
the and
buttons to increase or decrease the 4th digit.
10. Press the button to conrm selection and skip to the 5th digit.
11. Press the button to conrm selection and skip to the low CO2
alarm value setup.
continued...
www.REEDInstruments.com
www.GlobalTestSupply.com
13

12. Press the and buttons to increase or decrease the 1st digit of the
low alarm value.
13. Press
14. Press
the button
the and
buttons to increase or decrease the 2nd digit.
to conrm selection and skip to the 2nd digit.
15. Press the button to conrm selection and skip to the 3rd digit.
16. Press
the and
buttons to increase or decrease the 3rd digit.
17. Press the button to conrm selection and skip to the 4th digit.
18. Press
the and
buttons to increase or decrease the 4th digit.
19. Press the button to conrm selection and skip to the 5th digit.
20. Press
the and
buttons to increase or decrease the 5th digit.
21. Press the button to conrm selection and skip to the
next parameter.
Note: At any time, you can press the button to exit setup mode and
resume normal operation. When an alarm is triggered, the meter will beep
while the applicable ALARM indicator (Hi or Lo) will continuously ash on
the LCD display.
Setting the Auto-Power Off Time
SET
Follow steps 1 through 3 when " " appears on the
LCD as shown in Figure 6.
1. The auto-power off time can be set between 10,
30 minutes, 1, 2, 4, 8 hours, or off.
2. Press the
and buttons to adjust the required
auto-power off time.
3. Press the button to conrm selection and
skip to the next parameter.
Figure 6
Note: At any time, you can press the button to exit setup mode and
resume normal operation.
continued...
www.REEDInstruments.com
www.GlobalTestSupply.com
14

Setting the Time and Date
SET
Follow steps 1 through 12 when the date appears on
the LCD as shown in Figure 7.
1. Press the
and buttons to set the last
2 digits of the applicable year.
2. Press the button to conrm selection and
skip to the rst 2 digits of the applicable year.
3. Press the and buttons to set the rst
2 digits of the applicable year.
Figure 7
4. Press the button to conrm selection and skip to the
Month digits.
5. Press the and buttons to set the applicable month.
6. Press the button to conrm selection and skip to the
Date digits.
7. Press the and buttons to set the applicable date.
8. Press the button to conrm selection and skip to the
hour digits.
9. Press the and buttons to set the hour digits.
10. Press the button to conrm selection and skip to the
minute digits.
11. Press the and buttons to set the minute digits.
12. Press the button to conrm selection and skip to the
next parameter.
Note: At any time, you can press the button to exit setup mode and
resume normal operation. The internal clock will keep accurate time when
the meter is powered off. When new batteries are installed the clock will
have to be reset.
www.REEDInstruments.com
www.GlobalTestSupply.com
continued...
15

Data Logging
1. Turn the meter on and select your desired sampling rate. (see
"Setting the Data Logging Sampling Rate" for details).
2. To begin a data logging session, press the
appear on the LCD.
3. Press the
Note: When the internal memory is full (32,000 data points), the FULL
indicator will blink on the LCD and the recording session stops.
button again to stop data logging.
button and "REC" will
Upload Recorded Data to PC
Connect the R9905 via the included USB cable to a port on your PC
to download the recorded data. For steps to follow on how to use the
software, please refer to the instructions provided in the HELP section
within the software program.
Software Installation
Please visit www.REEDInstruments.com/software
Full specications and Operating System compatibility can be found on
the product page at www.REEDInstruments.com. If you have specic
questions related to your application and/or questions related to software
setup and functionality please contact the nearest authorized distributor
or Customer Service at info@reedinstruments.com or 1-877-849-2127.
to download the R9905 software.
Clearing Stored Data
1. To delete the internal memory, press and hold the button while
powering on the meter.
2. The display will show a 5 seconds countdown along with the "REC",
"CLR" and "SURE" indicators.
3. Once the countdown is completed "CLR" will display conrming the
memory has been erased.
4. Release the buttons when the meter emits a beep.
Note: To cancel the clearing of stored data, release both buttons before
the countdown ends.
www.REEDInstruments.com
www.GlobalTestSupply.com
16

Calibration Mode
CO2 Calibration
The R9905 can be field calibrated using the internal calibration
menu. These adjustments are intended to make calibration
changes to match a user's calibration standards and is not
considered a certified calibration. For multi-point calibration
and certification, please contact the nearest authorized REED
The R9905 CO2 sensor can be calibrated with span gas (cylinder with a
very specic concentration of carbon dioxide) that has a concentration
ranging anywhere between of 0 to 2000ppm, 2% accuracy, with
balanced air.
Note: It is recommended to use a span gas value close to the gas
concentration you expect to measure.
1. Switch the CO
2. Remove the protective cap.
3. Connect the silicone tubing to the calibration inlet of the sensor as
shown in Figure 2.
4. While the meter is off, press the , , and the buttons
simultaneously for 3 seconds and release when
the LCD displays "- - -".
5. Press the -> -> buttons in sequence and within 3
seconds to enter CO2 calibration mode.
6. The CAL indicator will appear at the bottom right of the LCD display
conrming the meter is now in CAL mode.
distributor or authorized service center.
sensor to the "CAL" position as shown in Figure 1.
2
Figure 1
www.REEDInstruments.com
www.GlobalTestSupply.com
Figure 2
continued...
17

7. The upper part of the LCD will display the current CO2 measurement
while the lower part of the LCD will display the CO2 calibration
gas concentration.
8. Press the buttons to increase/decrease the CO2 value to match
the concentration of the span gas.
9. Turn on the calibration gas valve.
10. The current CO2 reading should begin to update.
11. Press the button when current CO2 reading has stabilized
(approx. 2 minutes).
12. The LCD will display "PASS" if there are no errors.
13. Shut off the calibration gas valve when calibration is
successfully completed.
14. Press the button to exit calibration mode and resume
normal operation.
Note: If the meter displays OL, make sure the altitude compensation
value is set correctly.
Humidity/Temperature Calibration
1. While the meter is off, press the , , and the buttons
simultaneously for 3 seconds and release when the LCD
displays "- - -".
2. Press the -> -> buttons in sequence and within 3
seconds to enter humidity calibration.
3. Press the button to select the desired channel (Hi RH, Lo RH, Hi
Temp or Lo Temp) for calibration.
Calibrating Hi RH
1. The upper part of the LCD will display the "Hi" indicator while the
lower part of the LCD will display the "Hi" RH calibration data point.
2. Insert the tip of the meter into the 75% Humidity Calibration
Standard (REED R9975).
3. If using a different Hi calibration standard, press the
increase/decrease the humidity value to match the
humidity standard.
www.REEDInstruments.com
www.GlobalTestSupply.com
buttons to
continued...
18
4. Press the button after 2 to 3 minutes to save the calibration
and skip to the "Lo" RH Calibration mode.
Calibrating Lo RH
1. The upper part of the LCD will display the "Lo" indicator while the
lower part of the LCD will display the "Lo" RH calibration data point.
2. Insert the tip of the meter into the 33% Humidity Calibration
Standard (REED R9933).
3. If using a different Lo calibration standard, press the
buttons to
increase/decrease the humidity value to match the
humidity standard.
4. Press the
button after 2 to 3 minutes to save the calibration
and skip to the "Hi" Temp Calibration mode.
5. When the Hi/Lo RH calibration steps have been successfully
completed, press the
button to exit calibration mode and resume
normal operation.
The steps highlighted below for Hi/Lo Temp calibration should
only be performed by an authorized service center technician
with the use of a temperature chamber as it may affect
the meter's overall accuracy and reliability.
Calibrating Hi Temp
1. The upper part of the LCD will display the "Hi" indicator while
the lower part of the LCD will display the "Hi" Temp calibration
data point.
2. Insert the meter into the standard temperature chamber.
3. Press the
buttons to increase/decrease the temperature value to
match the temperature standard.
4. Press the button after approx. 30 minutes to save the
calibration and skip to the "Lo" Temp Calibration mode.
Calibrating Lo Temp
1. The upper part of the LCD will display the "Lo" indicator while the
lower part of the LCD will display the "Lo" Temp calibration data point.
2. Insert the meter into the standard temperature chamber.
continued...
www.REEDInstruments.com
www.GlobalTestSupply.com
19

3. Press the buttons to increase/decrease the temperature value to
match the temperature standard.
4. Press
5. Press the button to exit calibration mode and resume
the button
the calibration.
normal operation.
after approx. 30 minutes to save
Battery Replacement
When the low battery indicator
appears on the display, the battery
should be replaced. Remove the
battery cover on the back and
insert a new 9V battery.
Applications
Environmental Monitoring in:
• Schools
• Ofce buildings
• Greenhouses
• Factories
• Hotels
• Hospitals
• Areas where high levels of carbon dioxide are generated
Accessories and Replacement Parts
• R9905-PROBE Replacement Temperature and Humidity Probe
• R9933 Humidity Calibration Standard, 33%
• R9975 Humidity Calibration Standard, 75%
• R9980 Humidity Calibration Kit (33% and 75%)
• R8890 Large Hard Carrying Case
Don't see your part listed here? For a complete list of all accessories and
replacement parts visit your product page on www.REEDInstruments.com.
www.REEDInstruments.com
www.GlobalTestSupply.com
20

Appendix A – Recommended Guidelines
NIOSH Recommendations
• 250 to 350ppm: normal outdoor ambient concentrations.
• 600ppm: minimal air quality complaints.
• 600 to 1000ppm: less clearly interpreted.
• 1000ppm: indicates inadequate ventilation; complaints such as
headaches, fatigue, and eye/throat irritation will be more widespread.
1000ppm should be used as an upper limit for indoor levels.
ASHRAE Standard 62 to 1989: 1000ppm
• CO2 concentration in occupied building should not exceed 1000ppm.
Building Bulletin 101 (BB101): 1500ppm
• UK standards for schools say that CO2 at averaged over the whole day
(i.e. 9am to 3.30pm) should not exceed 1500ppm.
OSHA: 5000ppm
• Time weighted average over ve 8-hour work days should not
exceed 5000ppm.
Germany, Japan, Australia: 5000ppm
• 8 hours weighted average in occupational exposure limit is 5000ppm.
Product Care
To keep your instrument in good working order we recommend the following:
• Store your product in a clean, dry place.
• Change the battery as needed.
• If your instrument isn't being used for a period of one month or longer
please remove the battery.
• Clean your product and accessories with biodegradable cleaner. Do not
spray the cleaner directly on the instrument. Use on external parts only.
www.REEDInstruments.com
www.GlobalTestSupply.com
21
Product Warranty
REED Instruments guarantees this instrument to be free of defects
inmaterial or workmanship for a period of one (1) year from date of
shipment. During the warranty period, REED Instruments will repair or
replace, at no charge, products or parts of a product that proves to be
defective because of improper material or workmanship, under normal
use and maintenance. REED Instruments total liability is limited to repair
or replacement of the product. REED Instruments shall not be liable for
damages to goods, property, or persons due to improper use or through
attempts to utilize the instrument under conditions which exceed the
designed capabilities. In order to begin the warranty service process,
please contact us by phone at 1-877-849-2127 or by email at
info@reedinstruments.com to discuss the claim and determine the
appropriate steps to process the warranty.
Product Disposal and Recycling
Please follow local laws and regulations when disposing or recycling your
instrument. Your product contains electronic components and must be
disposed of separately from standard waste products.
Product Support
If you have any questions on your product, please contact your authorized
REED distributor or REED Instruments Customer Service by phone at
1-877-849-2127 or by email at info@reedinstruments.com.
Please visit www.REEDINSTRUMENTS.com for the most
up-to-date manuals, datasheets, product guides and software.
Product specifications subject to change without notice.
All rights reserved. Any unauthorized copying or reproduction of
this manual is strictly prohibited without prior written permission
from REED Instruments.
www.REEDInstruments.com
www.GlobalTestSupply.com
22

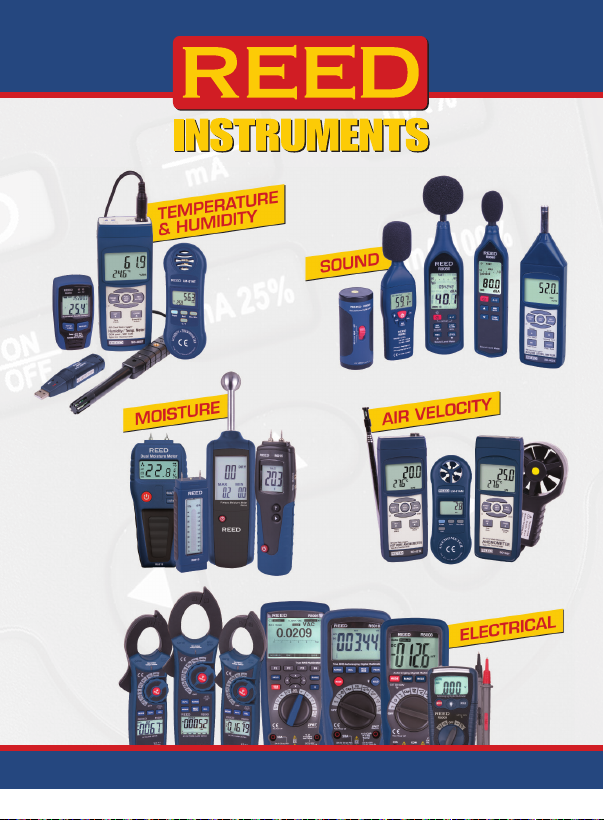
TEST & MEASURE
WITH CONFIDENCE
CHECK OUT OUR LATEST PRODUCTS!
www.REEDInstruments.com
www.GlobalTestSupply.com
www.REEDInstruments.com
www.GlobalTestSupply.com
 Loading...