


Hardness Tester
R9030
Instruction
Manual
www.GlobalTestSupply.com

Table of Contents
Introduction ................................................................................................ 3
Product Quality ........................................................................................... 4
Safety ......................................................................................................... 4
Features ...................................................................................................... 4
Included ...................................................................................................... 4
Specications ............................................................................................. 5
Instrument Description ............................................................................... 6
Display Description .................................................................................7-8
Hardness Testing Principle ..................................................................... 8
Operating Instructions ........................................................................... 8-18
Power On/Off ......................................................................................... 8
Preparation of Test Piece ....................................................................... 8
Prior to First Measurement .................................................................... 9
Loading Impact Device .......................................................................... 9
Taking Measurements ............................................................................ 9
Viewing Measurement Values .............................................................. 10
Storing Average Value .......................................................................... 10
Auto Power OFF .................................................................................. 10
Menu Navigation/Setup Mode ........................................................ 10-16
Test Set........................................................................................11-13
Impact Direction .......................................................................... 11
Average ........................................................................................ 11
Material ........................................................................................ 12
Hardness Scale ............................................................................ 12
Tolerance Limit ............................................................................. 12
Hard/
b (Hardness/Strength Testing) .......................................... 13
Probe Type ................................................................................... 13
Standard ...................................................................................... 13
Memory Manager ........................................................................ 13-15
continued...
www.GlobalTestSupply.com
2

View from No.1/View from End .................................................... 14
View from No. ............................................................................... 14
Transfer ........................................................................................ 14
Delete by No. ..........................................................................14-15
Delete All ...................................................................................... 15
System Set .................................................................................. 15-16
Enabling/Disabling Auto Save ...................................................... 15
Enabling/Disabling Auto Delete.................................................... 15
Enabling/Disabling Auto Transfer ................................................. 15
Enabling/Disabling Auto Shutoff .................................................. 16
Setting the Time and Date ........................................................... 16
Quick Setup Mode .......................................................................... 16-17
Calibration Procedure .......................................................................... 17
Connecting to a Computer .................................................................. 17
Launching the R9030 Software............................................................ 18
Battery Charging and Replacement ......................................................... 18
Applications .............................................................................................. 19
Appendix A: Hardness Scale Tables ...................................................19-22
Accessories and Replacement Parts ....................................................... 22
Product Care .......................................................................................22-23
Product Warranty ..................................................................................... 23
Product Disposal and Recycling .............................................................. 23
Product Support ....................................................................................... 23
Introduction
Thank you for purchasing your REED R9030 Hardness Tester. Please
read the following instructions carefully before using your instrument. By
following the steps outlined in this manual your meter will provide years of
reliable service.
www.GlobalTestSupply.com
3

Product Quality
This product has been manufactured in an ISO9001 facility and has been
calibrated during the manufacturing process to meet stated product
specications. If a certicate of calibration is required please contact the
nearest authorized REED distributor or authorized Service Center. Please
note an additional fee for this service will apply.
Safety
Never attempt to repair or modify your instrument. Dismantling your
product, other than for the purpose of replacing batteries, may cause
damage that will not be covered under the manufacturer's warranty.
Servicing should only be provided by an authorized service center.
Features
• Measures a wide range of materials including; cast steel, alloy steel,
stainless steel, aluminum, bronze, copper and cast irons
• Measures 7 types of hardness scales; Rockwell (HRC, HRB, HRA),
Brinell (HB), Leeb (HL), Vickers (HV) and Shore (HS)
• Compact pen style design
• Bright OLED display
• Real-time clock and internal memory stores up to 350 measurements
• USB connectivity and software allows for further measurement analysis
• Rechargeable lithium battery
• Low battery indicator
Included
• D Impact Device
• Leeb Test Block
• Small Supporting Ring
• Nylon Brush
• AC Adapter
• USB Cable
• Software
• Hard Carrying Case
www.GlobalTestSupply.com
4

Specifications
Hardness Scales: Rockwell (HRA, HRB, HRC)
Measuring Ranges: HRA: 59 to 85
Measuring Direction: 360°
Sampling Time: Less than 1 second (when triggered)
Display: Dot Matrix OLED
Battery Life: Approx. 40 hours
Low Battery Indicator: Yes
Power Supply: Rechargeable Lithium Ion Battery
Charge Time: Approx. 2 hours
Internal Memory: Yes (up to 350 readings)
Product Certications: CE
Operating Temperature: 32 to 104°F (0 to 40°C)
Storage Temperature: -4 to 140°F (-20 to 60°C)
Operating Humidity Range: 0 to 90%
Dimensions: 5.7 x 1.3 x 1" (146 x 32 x 26mm)
Weight: 5.6oz (160g)
Brinell (HB)
Leeb (HLD)
Vickers (HV)
Shore (HS)
HRB: 13 to 100
HRC: 20 to 68
HB: 19 to 651
HLD: 170 to 960
HV: 80 to 967
HS: 30 to 100
www.GlobalTestSupply.com
5

Instrument Description
1 2
4
3
5 6
7
8 9
1. Support Ring
2. LCD Display
3. POWER/Exit Button
4. Menu/Enter Button
5. Measurement set up shortcut/Right/Down/Increase Button
6. Scan/Delete/Left/Up/Decrease Button
7. Micro USB Port
8. Impact Device
9. Coding Sheath
10. Release Button
10
www.GlobalTestSupply.com
6

Display Description
Measured Value Hardness Scale Battery Indicator
HL
Connection Flag
(Cast) Steel
Battery Indicator: Displays battery capacity and charge status when
plugged in.
Impact Direction: Set impact direction.
Hardness Scale: Set hardness scale.
Measured Value: Current measured value (without average value
indicator), or current average value (with average value indicator).
Material: Set material.
Impact Times: The total number of impact times will be displayed. Impact
times set through the menu will also be displayed here.
Connection Flag: The connection ag will blink when the instrument is
trying to connect to the PC. A solid ag means successful connection.
03
Impact DirectionImpact TimesMaterial
continued...
7
www.GlobalTestSupply.com
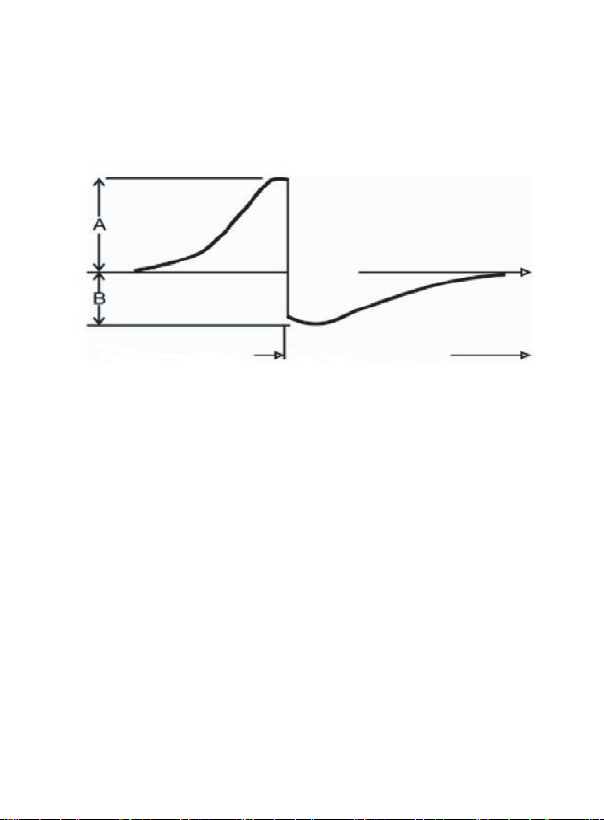
Hardness Testing Principle
The hardness value comes from the rate of rebound velocity and impact
velocity at 1mm distance from the testing surface. Using the Leeb
hardness scale as an example, the following calculation is used to
calculate the hardness value:
HL = 1000 × VB / VA
Time
Impact Phase Rebound Phase
Operating Instructions
Power On/Off
Turn the meter on by pressing the POWER button. To turn the meter off,
press and hold the POWER button for 2 seconds.
Preparation of Test Piece
Please note that measurement values may be affected if the material
under test is exposed to extreme temperatures.
If the tested material is too rough, a measuring error will appear. The
surface of the sample must have metallic luster and the surface must be
at and smooth. No oil or dirt should be present.
Curved surface: It is better that the testing surface of the test piece is
at. When the curvature radius (R) of the curved surface to be tested is
less than 30mm (for D and DL type impact device), a small support ring
(included with the R9030) should be used.
Self-magnetism of the test piece should be less than 30 Gauss.
continued...
www.GlobalTestSupply.com
8

Prior to First Measurement
Before rst use or if unused for an extended period of time,
5 measurements should be performed using the included test block.
If the average values from the charts at the end of this manual are
exceeded, the internal calibration is required (see Calibration Procedure
section for details).
Loading Impact Device
Push down the loading sheath to load and lock the impact body in place.
Taking Measurements
1. Press down on the release button located at the top of the impact
device to take a measurement.
The reading will appear on the display matching the selected material,
hardness or strength testing and impact direction (see Menu Navigation/
Setup Mode section for details).
Note: While taking a measurement, the test piece, impact device and
operator are all required to be stable.
2. Five measurements should be performed of the test piece. The
divergence of data should be not exceed ±15HL of the
required value.
3. The distance between any two impact points, or from the center of
any impact point to the edge of the test piece should be in
accordance with the following specications:
Type of
impact device
D, DC, DL, D+15 No less than: 3mm No less than: 5mm
C No less than: 2mm No less than: 4mm
The distance of two
indentations center
The distance between
indentation center and
edge of test piece
www.GlobalTestSupply.com
continued...
9
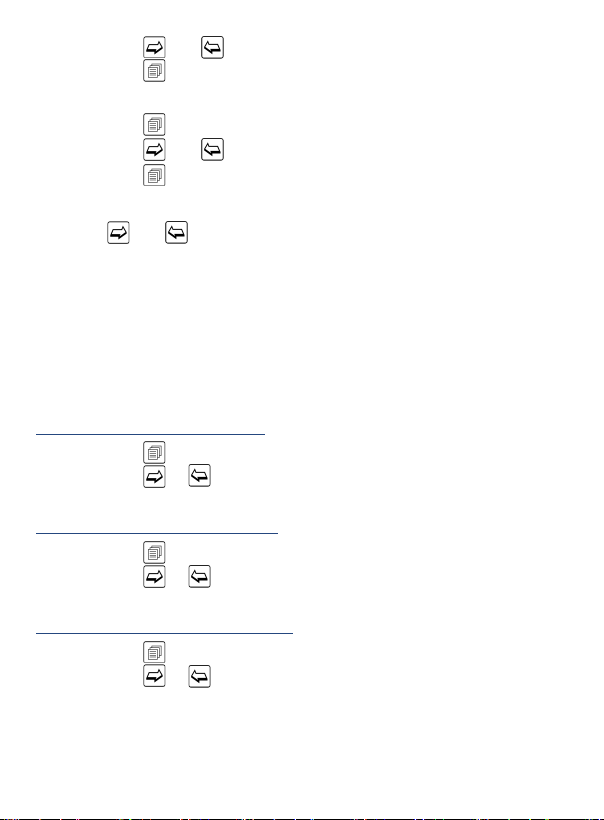
Viewing Measurement Values
1. When testing is complete, press the button to enter the recorded
data mode.
2. Press the button to scroll through the recorded data taking during
the measurement process.
3. To delete the displayed data, press the button.
4. Press the or buttons to select between Yes or No.
5. Press the button to conrm selection, or press the button to
exit and resume normal operation.
Storing Average Value
1. When testing is complete, the meter displays the average value
taken during the measurement process.
2. Press the button to enter storing average value mode.
3. Press the or buttons to select between Save & Exit or Quit.
4. Press the button to conrm selection, or press the button to
exit and resume normal operation.
Auto Power OFF
To preserve battery life, the meter is programmed to turn itself off after
5 minutes of inactivity. Prior to shutting off, the display will begin a 10
second countdown that can be cancelled by pressing the
disable this feature, see Enabling/Disabling Auto Shutoff in Menu
Navigation/Setup Mode section for details.
button. To
Menu Navigation/Setup Mode
1. Press the button to enter the menu screen.
2. Press the
following parameters.
Memory Manager View/Delete/Transfer Data
and buttons to scroll through the
Parameter Description
Test Set Setting up your meter
www.GlobalTestSupply.com
continued...
10

Parameter Description
System Set Setting automatic preferences
About View Firmware Version/Serial Number
3. Press the
button to enter the appropriate parameter and follow
the setup instructions below.
Note: At any time, you can press the
button to exit the Menu Screen/
Setup mode and resume normal operation.
Test Set
While in the Test Set function, press the and buttons to scroll
through the following list of sub parameters:
a) Impact Direction
b) Average
c) Material
d) Hardness Scale
e) Tolerance Limit
f) Hard/
b
g) Probe Type
h) Standard
Follow the instructions below to adjust each setting.
a) Impact Direction
1. Press the button when "Impact Direction" is highlighted.
2. Press the
and buttons to scroll through the 360° measuring
direction list.
3. Press the button to conrm selection.
b) Average
1. Press the button when "Average" is highlighted.
2. Press the and buttons to select the number of measurements
to be used to calculate the average value between 1 and 32.
3. Press the button to conrm selection.
continued...
11
www.GlobalTestSupply.com
c) Material
1. Press the button when "Material" is highlighted.
2. Press the and buttons to select the appropriate material
being tested.
For hardness testing, you can select between the following
materials: Cast Steel, Cold Work Tool Steel, Stainless Steel, Gray Cast
Iron, Nodular Cast Iron, Cast Aluminum Alloys, Copper-Zinc Alloys
Copper-Aluminum Alloys, Wrought Copper and Wrought Steel.
For strength testing, you can select between the following materials:
Mild Steel, High-Carbon Steel, Cr Steel, Cr-V Steel, Cr-Ni Steel, Cr-Mo
Steel, Cr-Ni-Mo Steel, Cr-Mn-Si Steel, Super Strength Steeland
Stainless Steel.
3. Press the
d) Hardness Scale
button to conrm selection.
1. Press the button when "Hardness Scale" is highlighted.
2. Press the
and buttons to select the appropriate hardness
scale for the material under test.
Note: The material under test must rst be selected before selecting the
hardness scale.
3. Press the
e) Tolerance Limit
button to conrm selection.
1. Press the button when "Tolerance Limit" is highlighted.
Note: In this function, the Min/Max Tolerance Limits must be set according
the meters measuring range capabilities for each available scale.
2. Press the button to skip to the required digit.
3. Press the
and buttons until the desired value is reached.
4. Press the button to conrm and skip to the next digit.
5. After each value has been selected and conrmed, it will
automatically exit the "Tolerance Limit setup" screen.
www.GlobalTestSupply.com
continued...
12
f) Hard/ b (Hardness/Strength Testing)
1. Press the button when "Hard or b" is highlighted between hard
(hardness testing) or b (strength testing).
2. Press the
or buttons to skip to the next function
when complete.
g) Probe Type
1. Press the button when "Probe Type" is highlighted to select the
appropriate probe.
2. Press the
or buttons to skip to the next function
when complete.
h) Standard
1. Press the button when "Standard" is highlighted to select the
appropriate standard.
2. Press the
or buttons to skip to the next function
when complete.
Memory Manager
This function allows a user to view, transfer, and delete a le/group
previously saved in memory.
Press the and buttons to scroll through the following parameters
within the Memory Manager function.
a) View From No.1
b) View From End
c) View From No.
d) Transfer
e) Delete By No.
f) Delete All
Follow the instructions below to adjust each setting.
Note: If there is no data in the memory, it will display "No Memory!", and
return to the menu screen.
www.GlobalTestSupply.com
continued...
13

a,b) View from No.1/View from End
The data group displays test results, average result, sample material and
impact direction.
1. Press the
2. Press the
3. Press the
button to enter the selected parameter.
button again to activate les to view.
and buttons to scroll the list of saved les.
4. Press the button see details of the measurement data.
5. Press the and buttons to scroll through the details of the
measurement data.
6. Press the button to return to the previous screen at any time.
c) View from No.
This function allows a user to search within a specic group of data les.
1. Press the
2. Press the
3. Press the
button to enter the selected parameter.
button again to skip to the required digit.
and buttons until the desired value is reached.
4. Press the button to conrm and skip to the next digit.
5. After each value has been selected and conrmed, it will
automatically search for the data les matching the search criteria.
d) Transfer
Allows a user to transfer saved data les to the included software by
pressing the button.
e) Delete by No.
This function allows a user to delete les within a specic group.
1. Press the
2. Press the
3. Press the
button to enter the selected parameter.
button again to skip to the required digit.
and buttons until the desired value is reached.
4. Press the button to conrm and skip to the next digit.
5. After each value has been selected and conrmed, the meter will ask
to conrm deletion of the specic groups.
www.GlobalTestSupply.com
continued...
14
6. Press the and buttons to select between "Yes" or "No".
7. Press the button to conrm selection.
f) Delete All
1. Press the button to enter the selected parameter.
2. Press the
and buttons to select between "Yes" or "No".
3. Press the button to conrm selection.
System Set
Press the and buttons to scroll through the following
setup parameters.
1. Auto Save: Off/On
2. Auto Delete: Off/On
3. Auto Transfer: On/Off
4. Auto Off: On/Off
5. Time Date Set
Follow the instructions below to adjust each setting.
Enabling/Disabling Auto Save
1. Press the
2. Press the or buttons to skip to the next parameter
when complete.
Enabling/Disabling Auto Delete
1. Press the
2. Press the
when complete.
Enabling/Disabling Auto Transfer
1. Press the
2. Press the or buttons to skip to the next parameter
when complete.
button to turn Auto Save On or Off.
button to turn Auto Delete On or Off.
or buttons to skip to the next parameter
button to turn Auto Transfer On or Off.
www.GlobalTestSupply.com
continued...
15

Enabling/Disabling Auto Shutoff
1. Press the button to turn Auto Shutoff On or Off.
2. Press the or buttons to skip to the next parameter
when complete.
Setting the Time and Date
1. Press the
button to enter the selected parameter.
2. Press the and buttons to adjust the month as
indicated by "mm."
3. Press the button to conrm and skip to the next digit.
4. Repeat steps 2 and 3 to set the day, year, hour and minutes as
indicated by (dd/yyyy/h/m).
5. After each value has been selected and conrmed, it will
automatically exit the Setting the time and date setup screen.
Quick Setup Mode
1. While in normal operation, press the button to enter the Quick
Measurement Setup Mode.
2. The meter will automatically default to the previously selected
Hardness Scale preset.
3. Press the
material under test.
4. Press the button to conrm selection and jump to the next
parameter (Impact Direction).
Press the button to scroll through the 360° measuring direction list.
5.
6. Press the button to conrm selection and jump to the next
parameter (Material).
7. Press the
8. Press the
parameter (Average).
9. Press the
used to calculate the average value between 1 and 32.
button to select the appropriate hardness scale for the
button to select the appropriate material being tested.
button to conrm selection and jump to the next
button to select the number of measurements to be
www.GlobalTestSupply.com
continued...
16

10. Press the button to exit Quick Setup Mode and resume
normal operation.
Calibration Procedure
1. While the meter is off, press and hold the button while turning the
meter on.
2. Release the button until the meter enters the calibration mode as
indicated on-screen by "Calibration 0/5 times".
3. The required number of measurements to be used to complete
calibration is automatically set to 5.
Note: The selected impact direction should be vertically down on the
Leeb hardness test block.
4. The average value will appear on the screen at the end of
the 5 measurements.
5. If the value exceeds the standard value, press the
buttons to adjust the nominal value.
6. Press the key to nish calibration and resume normal operation.
Note: Calibration range is ±15HL.
and
Connecting to a Computer
The instrument is equipped with a micro-usb port. Using the included
cable, the hardness tester has the ability to connect to a computer, or
external storage device/mini-printer. Measurement data stored in the
memory of the gauge can be transferred to the computer through the
micro-usb port.
www.GlobalTestSupply.com
continued...
17

Launching the R9030 Software
1. Visit www.REEDInstruments.com/software & drivers to download the
R9030 software.
2. Double click on the software labeled DV-R9030 located in the REED
Hardness Tester Dataview folder to launch.
3. If the meter fails to connect, it may require that the driver be
installed separately.
4. The application can be saved to your computer by Extracting all the
les to a specic folder.
Full specications and Operating System compatibility can be found on
the product page at www.REEDInstruments.com. If you have specic
questions related to your application and/or questions related to software
setup and functionality please contact the nearest authorized distributor
or Customer Service at info@REEDInstruments.com or 1-877-849-2127.
Battery Charging and Replacement
When the battery is empty, recharge the Lithium rechargeable battery.
Connect the USB battery cable to the micro USB port and then connect
the other end of the cable to an AC source or computer.
Battery life expectancy with regular use is 3 years. Should you require a
new battery please contact the nearest authorized distributor or Customer
Service at info@REEDInstruments.com or 1-877-849-2127.
www.GlobalTestSupply.com
18

Applications
• Ideal for hardness testing of large and heavy objects
• In production lines of mass produced components
• Materials identication in stores and warehouses
• In locations with difcult access, or in conned spaces
Appendix A: Hardness Scale Tables
The R9030 includes D impact device. Please note that impact devices DL,
DC, D+15 and C can be ordered seperately. For more information please
contact us at 1-877-849-2127 or info@REEDinstruments.com.
Non conventional impact devices DC(D)/DL D+15 C
Impacting energy 11mJ 11mJ 2.7mJ
Mass of impact body
Test tip Hardness 1600HV 1600HV 1600HV
Diameter of test tip 3mm 3mm 3mm
Material of test tip Tungsten
Impact device Diameter 20mm 20mm 20mm
Impact device Length 86(147)/
Impact device Weight
Max. hardness of workpiece 940HV 940HV 1000HV
Mean roughness of workpiece surface
of the Ra
Min. weight of sample:
Measure directly
Need support rmly
Need coupling tightly
Min. thickness of sample:
Coupling tightly
Min.layer thickness for surface harden
Hardness 300HV Indentation diameter 0.54mm 0.54mm 0.38mm
Indentation depth 24μm 24μm 12μm
Hardness 600HV Indentation diameter 0.54mm 0.54mm 0.32mm
Indentation depth 17μm 17μm 8μm
5.5g/7.2g 7.8g 3.0g
carbide
75mm
50g 80g 75g
1.6μm 1.6μm 0.4μm
>5kg >5kg >1.5kg
2-5kg 2 to 5kg 0.5 to 1.5kg
0.05-2kg 0.05 to 2kg 0.02 to 0.5kg
5mm 5mm 1mm
≥0.8mm ≥0.8mm ≥0.2mm
Tungsten
carbide
162mm 141mm
Tungsten
carbide
www.GlobalTestSupply.com
continued...
19

Non conventional impact devices DC(D)/DL D+15 C
Hardness 800HV Indentation diameter 0.35mm 0.35mm 0.35mm
Available type of
impact device
Indentation depth 10μm 10μm 7μm
D: General test
DC: Hole or hollow-cylindrical test
DL: Slender narrow groove
or hole test
D+15:
groove or
reentrant
surface
C: small,
light, thin
parts or
surface of
hardened
layer
Type of
impact device
D (included)
DC (optional)
DL (optional)
D+15 (optional)
C (optional)
Hardness value
of standard Leeb
hardness block
760±30HLD ±6HLD 6HLD
530±40HLD ±10HLD 10HLD
760±30HLDC ±6HLDC 6HLD
530±40HLDC ±10HLDC 10HLD
878±30HLDL
736±40HLDL
766±30HLD+15
544±40HLD+15
822±30HLC
590±40HLC
www.GlobalTestSupply.com
Error of
displayed value
±12HLDL 12HLDL
±12HLD+15 12HLD+15
±12HLC 12HLC
Repeatability of
displayed value
continued...
20

Material
Steel and
Cast Steel
Hammered Steel HB 143~650
Hardness
Test
Method
HRC 17.9~68.5
HRB 59.6~99.6 37.0~99.9
HRA 59.1~85.8
HB 127~651 80~638 80~638 81~646
HV 83~976 80~937 80~996 80~950
HS 32.2~99.5
D/DC D+15 C DL
Impact Device
19.3~67.9
33.3~99.3
20.0~68.2 20.6~68.2
31.8~102.1 30.6~96.8
Cold Work
Tool Steel
Stainless Steel
Gray Cast Iron HB 93~334
Nodular Cast
Iron
Cast Aluminum
Alloys
Brass (Copper-
Zinc Alloys)
Bronze
(Copper-Aluminum/
Copper-Tin Alloys)
Wrought Copper
Alloys
HRC 20.4~67.1
HV 80~898 80~935 100~941
HRB 46.5~101.7
HB 85~655
HV 85~802
HB 131~387
HB 19~164 23~210
HRB 23.8~84.6 22.7~85.0
HB 40~173
HRB 13.5~95.3
HB 60~290
HB 45~315
www.GlobalTestSupply.com
19.8~68.2
20.7~68.2
continued...
21

No. Material HLD Strength b
1 Mild Steel 350~522 374~780
2 High-Carbon Steel 500~710 737~1670
3 Cr Steel 500~730 707~1829
4 Cr-V Steel 500~750 704~1980
5 Cr-Ni Steel 500~750 763~2007
6 Cr-Mo Steel 500~738 721~1875
7 Cr-Ni-Mo Steel 540~738 844~1933
8 Cr-Mn-Si Steel 500~750 755~1993
9 Super strength Steel 630~800 1180~2652
10 Stainless Steel 500~710 703~1676
Accessories and Replacement Parts
• R8888 Medium Hard Carrying Case
Don't see your part listed here? For a complete list of all accessories and
replacement parts visit your product page on www.REEDInstruments.com.
Product Care
To keep your instrument in good working order we recommend the following:
• Store your product in a clean, dry place.
• Change the battery as needed.
• If your instrument isn't being used for a period of one month or longer
please remove the battery.
• Clean your product and accessories with biodegradable cleaner. Do not
spray the cleaner directly on the instrument. Use on external parts only.
• After using the impact device 1000 times, it is recommended to use the
nylon brush provided to clean the guide tube and the impact body of
the impact device. To clean the guide tube, unscrew the support ring
and then take out the impact body. Use the nylon brush to clean in a
counter-clock direction. Repeat this 5 times and remount the impact
body and the support ring.
continued...
22
www.GlobalTestSupply.com

• Remember to release the impact body after use.
• It is strongly recommended to not use any lubricant agent to clean the
impact device.
• The tester should be stored at room temperature, away from vibration,
strong magnetic eld, corrosive medium, dampness and dust.
Product Warranty
REED Instruments guarantees this instrument to be free of defects in
material or workmanship for a period of one (1) year from date of shipment.
During the warranty period, REED Instruments will repair or replace, at no
charge, products or parts of a product that proves to be defective because
of improper material or workmanship, under normal use and maintenance.
REED Instruments total liability is limited to repair or replacement of the
product. REED Instruments shall not be liable for damages to goods,
property, or persons due to improper use or through attempts to utilize the
instrument under conditions which exceed the designed capabilities. In
order to begin the warranty service process, please contact us by phone
at 1-877-849-2127 or by email at info@REEDInstruments.com to discuss
the claim and determine the appropriate steps to process the warranty.
Product Disposal and Recycling
Please follow local laws and regulations when disposing or recycling your
instrument. Your product contains electronic components and must be
disposed of separately from standard waste products.
Product Support
If you have any questions on your product, please contact your authorized
REED distributor or REED Instruments Customer Service by phone at
1-877-849-2127 or by email at info@REEDInstruments.com.
Please visit www.REEDInstruments.com for the most
up-to-date manuals, datasheets, product guides and software.
Product specifications subject to change without notice.
All rights reserved. Any unauthorized copying or reproduction of
this manual is strictly prohibited without prior written permission
from REED Instruments.
www.GlobalTestSupply.com
23

TEST & MEASURE
WITH CONFIDENCE
Access our
Product Catalog
Over 200 portable test and
measurement instruments
www.GlobalTestSupply.com
 Loading...