

Page 1
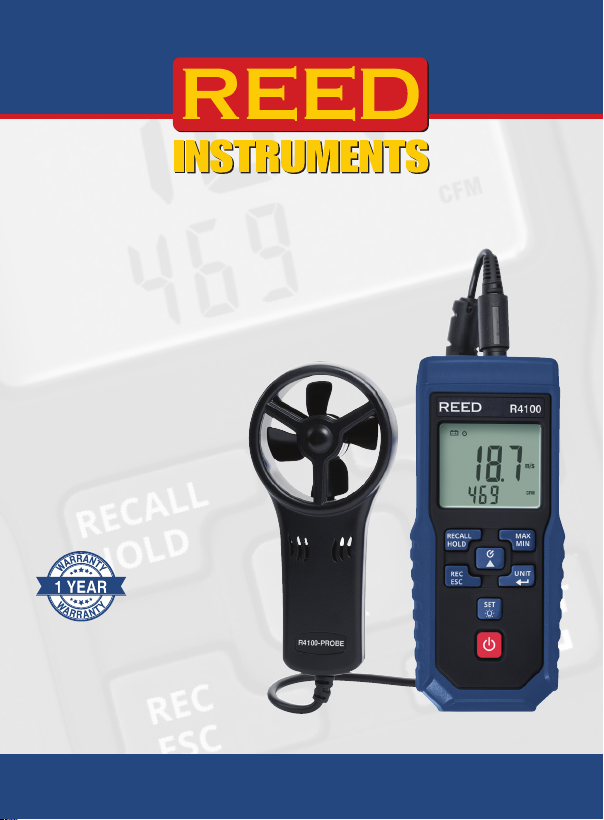
Anemometer
with Air Volume
Instruction
Manual
R4100
1-877-849-2127 | [email protected] | www.reedinstruments.com
REED Instruments
Page 2

Table of Contents
Introduction ................................................................................................ 3
Product Quality
Safety
......................................................................................................... 3
Features
Included
Specications
Instrument Description
Display Description
Operating Instructions
Power ON/OFF
Auto Power Off
Backlight
Enable/Disable Automatic Backlight
Air Velocity/Temperature Measurements
Air Flow (Volume) Measurements (CMM / CFM)
Maximum, Minimum and Average Functions
Data Hold
Saving Measurement Values
Recalling Measurement Values
Clearing Measurement Values
Battery Replacement
Applications
Accessories and Replacement Parts
Product Care
........................................................................................... 3
...................................................................................................... 4
...................................................................................................... 4
.......................................................................................... 4-5
............................................................................... 6
.................................................................................... 7
........................................................................... 8-12
..................................................................................... 8
..................................................................................... 8
............................................................................................... 8
.................................................... 8
.............................................. 9
.............................9-10
..................................... 11
........................................................................................... 11
.............................................................. 11
.......................................................... 11
............................................................ 12
................................................................................ 12
.............................................................................................. 13
....................................................... 13
............................................................................................ 13
1-877-849-2127 | [email protected] | www.reedinstruments.com
REED Instruments
Page 3

Product Warranty ..................................................................................... 14
Product Disposal and Recycling
Product Support
....................................................................................... 14
.............................................................. 14
Introduction
Thank you for purchasing your REED R4100 Anemometer with Air
Volume. Please read the following instructions carefully before using your
instrument. By following the steps outlined in this manual your meter will
provide years of reliable service.
Product Quality
This product has been manufactured in an ISO9001 facility and has been
calibrated during the manufacturing process to meet stated product
specications. If a certicate of calibration is required please contact the
nearest authorized REED distributor or authorized Service Center. Please
note an additional fee for this service will apply.
Safety
Never attempt to repair or modify your instrument. Dismantling your
product, other than for the purpose of replacing batteries, may cause
damage that will not be covered under the manufacturer's warranty.
Servicing should only be provided by an authorized service center.
REED Instruments
1-877-849-2127 | [email protected] | www.reedinstruments.com
Page 4

Features
• Measures fpm, m/s, km/h, mph, knots and beaufort
• Calculates air volume (CFM/CMM)
• Dual LCD display simultaneously displays air velocity and
air temperature
• Basic accuracy of ±3%
• Internal memory up to 99 datapoints
• Min/Max/Avg and Data Hold Functions
• Low battery indicator and auto shut off
Included
• Vane Thermo-Anemometer
• Carrying Case
• Batteries
Specifications
Type: Vane
Measuring Range(s): fpm: 79 to 5866
Accuracy: fpm: ±(3% rdg. + 40 dgt.)
m/s: 0.4 to 30
km/h: 1.5 to 106
mph: 0.9 to 66
knots: 0.8 to 58
Beaufort: 1 to 8
Temperature: -4 to 140°F (-20 to 60°C)
m/s: ±(3% rdg. + 0.2 dgt.)
km/h: ±(3% rdg. + 0.8 dgt.)
mph, knots: ±(3% rdg. + 0.4 dgt.)
Temperature: ±1.8°F (1°C)
continued...
REED Instruments
1-877-849-2127 | [email protected] | www.reedinstruments.com
Page 5

General Specifications
Vane Diameter: 1.96" (50mm)
Response Time: 1 sec.
Display: 4-digit, Dual LCD Display
Backlit Display: Yes
Data Hold: Yes
Min: Yes
Max: Yes
Average: Yes
Air Volume Calculation
(CFM/CMM): Yes
Auto Shut-off: Yes (after 15 mins/off)
Tripod Mountable: Yes
Low Battery Indicator: Yes
Power Supply: 9V battery
Product Certifications: CE
Operating Temperature: 32 to 122°F (5 to 40°C)
Storage Temperature: 14 to 140°F (-10 to 60°C)
Operating Humidity Range: 10-80%
Dimensions: 5.5 x 2.6 x 1.5" (140 x 65 x 38mm)
REED Instruments
1-877-849-2127 | [email protected] | www.reedinstruments.com
Page 6
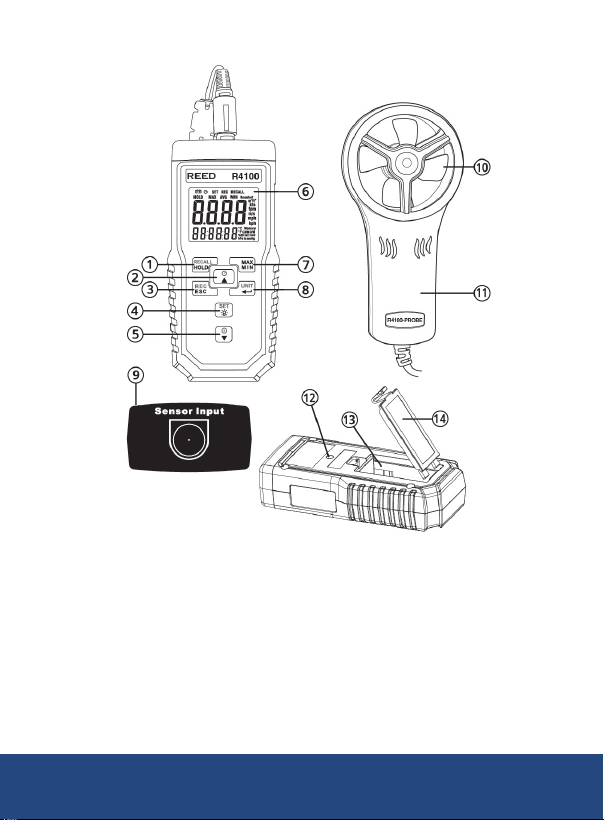
Instrument Description
1. HOLD/RECALL Button
2. Up/Auto Shut Off Button
3. ESC/REC Button
4. Backlight/Set Button
5. Down/Power Button
6. LCD Display
7. MAX, MIN and AVG Button
8. Enter/Unit Selection Button
9. Probe Input Socket
10. Rotating Vane
11. Probe Handle
12. Tripod Mount
13. Battery Compartment
14. Battery cover
REED Instruments
1-877-849-2127 | [email protected] | www.reedinstruments.com
Page 7
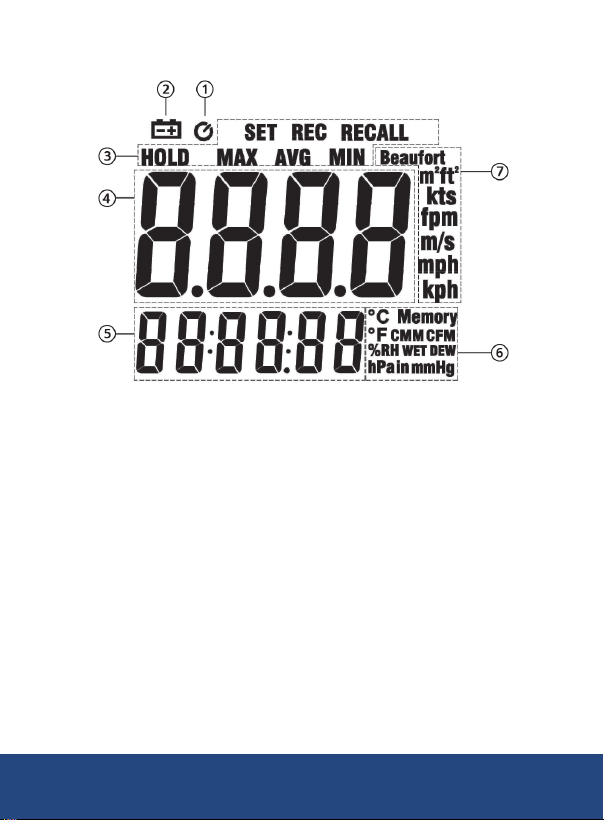
Display Description
1. Auto Shut Off Indicator
2. Low Battery Indicator
3. Function Display area
4. Air Velocity
Measurement Value
5. Secondary Display
6. Secondary Display Unit
of Measurement
7. Primary Display Unit
of Measurement
REED Instruments
1-877-849-2127 | [email protected] | www.reedinstruments.com
Page 8
Operating Instructions
Power ON/OFF
Turn the meter on by pressing the button. To turn the meter off, press
and hold the button for 2 seconds.
Auto Power Off
1. To preserve battery life, the meter is programmed to turn off after
approx. 15 minutes of inactivity.
2. To turn this function off, press and hold the
on the meter.
3. If the meter is turned off and then back on, the "Auto Power Off" feature
will be enabled again.
Backlight
Press the button to turn the backlight on. The backlight will automatically turn off after 30 seconds. To turn off the backlight manually before
the 30-second timer elapses, press the button again.
Enable/Disable Automatic Backlight
Users can enable or disable the 30-second auto-off backlight feature by
following the steps below:
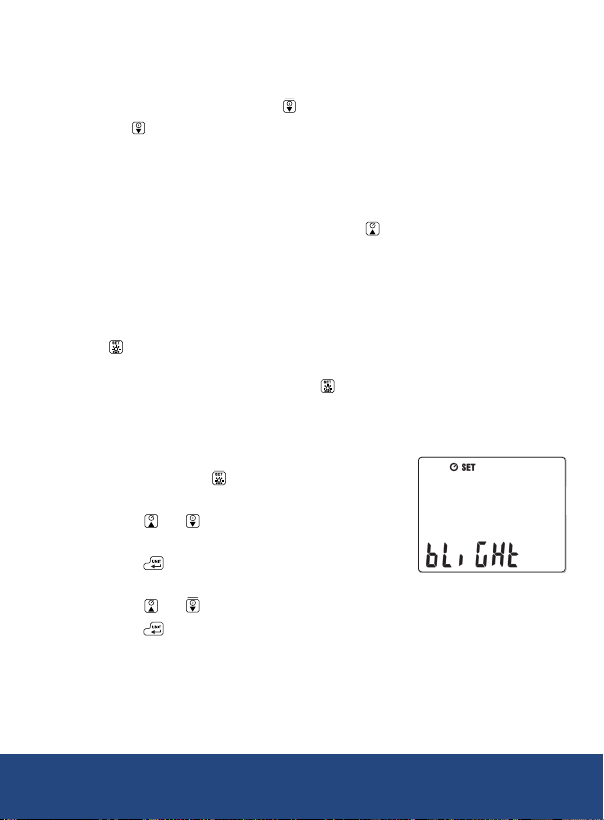
1. Press and hold the button to enter
setup mode.
2. Press the or buttons until "bLiGHt"
appears on the LCD as shown below.
3. Press the button to enter the
backlight mode.
4. Press the or buttons to toggle the auto-off feature on or off.
5. Press the button to conrm the selection and resume
normal operation.
button while powering
continued...
REED Instruments
1-877-849-2127 | [email protected] | www.reedinstruments.com
Page 9
Air Velocity/Temperature Measurements
1. Plug the rotating vane into the Probe Input Socket while the meter
is off.
2. Press the button to turn on the meter.
3. Press the or buttons to select air temperature unit of measure,
if it is not already selected. The secondary display will show either °C
or °F to conrm that the air temperature function is active.
4. Press and hold the button to enter the unit of measure
setup mode.
5. The current unit of measure will blink.
6. Use the and buttons to toggle through the available units:
Beaufort kts fpm m/s mph kph.
7. Press and hold the button to save the selection and skip to the
next parameter.
8. Use the and buttons to select between °C and °F.
9. Press the button to save the selection and resume
normal operation.
NOTE: You can press the button at any time to exit the Setup mode
and resume normal operation.
10. Hold the rotating vane in the air stream, ensuring it aligns with the
ow direction arrow on the instrument head. Keep the vane in the air
stream for approximately ve seconds to allow the meter to reach a
steady speed.
Warning: Avoid bending or touching the vanes, as this may affect
measurement accuracy. Do not immerse the instrument in liquids.
Air Flow (Volume) Measurements (CMM / CFM)
1. Plug the rotating vane into the Probe Input Socket while the meter
is off.
2. Press the button to turn on the meter.
3. Press the or buttons to select air ow mode. The secondary
display will show either CFM or CMM to conrm that the air ow
function is active.
continued...
REED Instruments
1-877-849-2127 | [email protected] | www.reedinstruments.com
Page 10
4. Press and hold the button to enter the unit of measure
setup mode.
5. The current unit of measure will blink.
6. Press and hold the button again to switch to the air ow
setup mode.
7. Use the and buttons to select the required air ow unit: CMM
(cubic meters per minute) or CFM (cubic feet per minute).
8. Press the button to save the selection and resume
normal operation.
9. Measure the dimensions of the duct or vent and calculate the area in
square feet or square meters.
NOTE: If the dimensional measurements are made in inches (or cm),
convert them feet (or meters) before calculating the square area.
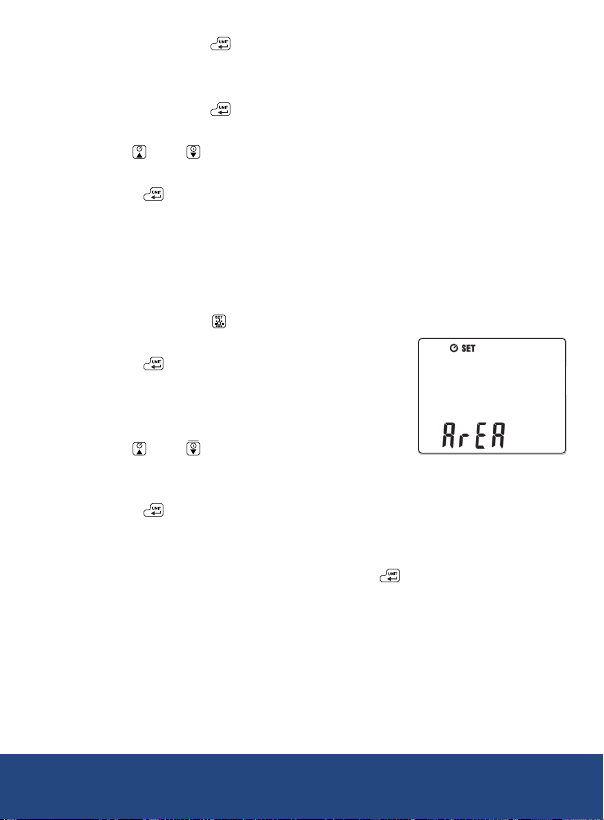
10. Press and hold the button to enter the Area setup mode as
indicated by "ArEA" on the LCD.
11. Press the button to begin entering the area
in m2 or ft2.
12. The leftmost digit of the display will begin
to ash.
13. Use the and buttons to update
the ashing digit within the meters
measurement range.
14. Press the button to conrm the selection and skip to the
next digit.
15. Repeat steps 13 and 14 for the remaining digits.
16. After all of the digits are entered, press the button to conrm the
selections and resume normal operation.
17. Hold the rotating vane in the air stream, ensuring it aligns with the
ow direction arrow on the instrument head. Keep the vane in the air
stream for approximately ve seconds to allow the meter to reach a
steady speed.
18. The secondary display will indicate the air ow measurement.
NOTE: The temperature function is not active in the Air Flow mode.
continued...
REED Instruments
1-877-849-2127 | [email protected] | www.reedinstruments.com
Page 11

Maximum, Minimum and Average Functions
1. Press the button to select the maximum reading as indicated by
the "MAX" symbol. The Max value is updated when a new maximum
data value has been attained.
2. Press the button again to select the minimum reading as
indicated by the "MIN" symbol. The Min value is updated when a
new minimum data value has been attained.
3. Press the button a third time to select the average reading as
indicated by the "AVG" symbol. The average value is updated when
a new average data value has been attained.
4. Press and hold the button to exit and resume normal operation.
Data Hold
1. While taking a measurement, press the button to freeze the
current reading on the display.
2. While in this mode, an "HOLD" will appear on the LCD.
3. Press the button again to exit and resume normal operation.
Saving Measurement Values
NOTES: Once data is stored, the units cannot be changed. You can store
up to 99 data points.
1. To store the current measurement value, press the button to
initiate data storage mode.
2. The storage number will briey ash on the secondary display
to conrm data storage, after which the device will automatically
resume normal operation.
3. Repeat step 1 to store additional measurement values.
Recalling Measurement Values
1. While in the main interface screen, press and hold the button to
view the stored measurement values.
2. Use the and buttons to scroll through the stored
measurement values.
3. Press and hold the to exit storage mode and resume
normal operation.
continued...
REED Instruments
1-877-849-2127 | [email protected] | www.reedinstruments.com
Page 12
Clearing Measurement Values
If the memory is full or you want to clear stored data, follow the
steps below:
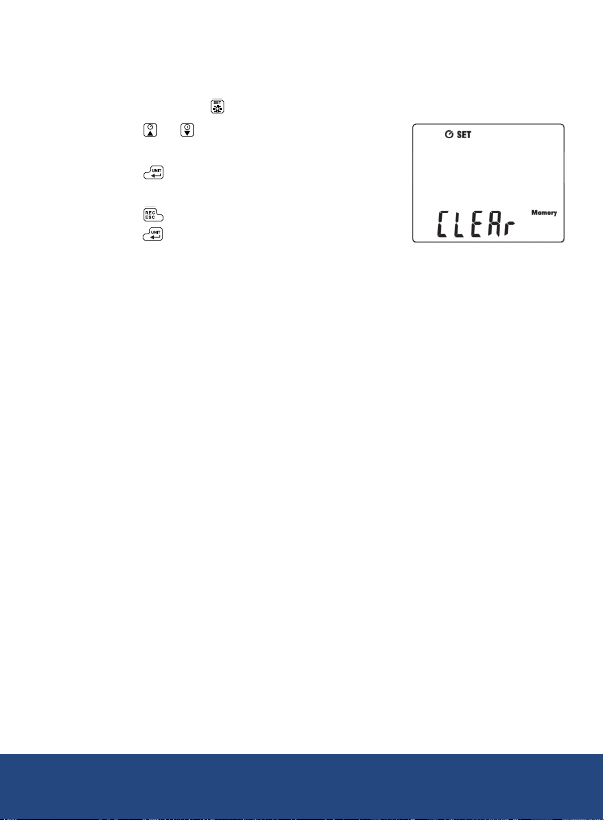
1. Press and hold the button to enter the setup mode.
2. Press the or buttons until "CLEAr"
appears on the LCD as shown below.
3. Press the button to enter the clear memory
mode. The LCD will display "yes" to conrm.
4. Press the button to exit without clearing, or
press the button to clear the memory and
resume normal operation.
Battery Replacement
1. When the low battery icon appears on the display, replace
the battery.
2. Remove the battery cover.
3. Insert a new "9V" battery.
4. Secure the battery cover back into place.
REED Instruments
1-877-849-2127 | [email protected] | www.reedinstruments.com
Page 13

Applications
• HVAC/R and Refrigeration Servicing
• Detecting Filter Blockage
• Condensers and Chillers
• Flow Hood Monitoring
Accessories and Replacement Parts
R4100-PROBE Replacement Rotating Vane Probe
Don't see your part listed here? For a complete list of all accessories and
replacement parts visit your product page on www.reedinstruments.com.
Product Care
To keep your instrument in good working order we recommend the following:
• Store your product in a clean, dry place.
• Change the battery as needed.
• If your instrument isn't being used for a period of one month or longer
please remove the battery.
• Clean your product and accessories with biodegradable cleaner. Do not
spray the cleaner directly on the instrument. Use on external parts only.
REED Instruments
1-877-849-2127 | [email protected] | www.reedinstruments.com
Page 14
Product Warranty
REED Instruments guarantees this instrument to be free of defects in
material or workmanship for a period of one (1) year from date of shipment.
During the warranty period, REED Instruments will repair or replace, at no
charge, products or parts of a product that proves to be defective because
of improper material or workmanship, under normal use and maintenance.
REED Instruments total liability is limited to repair or replacement of the
product. REED Instruments shall not be liable for damages to goods,
property, or persons due to improper use or through attempts to utilize
the instrument under conditions which exceed the designed capabilities.
In order to begin the warranty service process, please contact us by email
at 1-877-849-2127 or [email protected] to discuss the claim and
determine the appropriate steps to process the warranty.
Product Disposal and Recycling
Please follow local laws and regulations when disposing or recycling your
instrument. Your product contains electronic components and must be
disposed of separately from standard waste products.
REED Instruments
1-877-849-2127 | [email protected] | www.reedinstruments.com
Page 15

Product Support
If you have any questions on your product, please contact your authorized
REED distributor or REED Instruments Customer Service by phone at
1-877-849-2127 or by email at [email protected].
Please visit www.REEDInstruments.com for the most
up-to-date manuals, datasheets, product guides and software.
Product specifications subject to change without notice.
All rights reserved. Any unauthorized copying or reproduction of
this manual is strictly prohibited without prior written permission
from REED Instruments.
REED Instruments
1-877-849-2127 | [email protected] | www.reedinstruments.com
Page 16
TEST & MEASURE
WITH CONFIDENCE
Access Our
Product Guide
www.REEDInstruments.com
1-877-849-2127 | [email protected] | www.reedinstruments.com
REED Instruments
 Loading...