


Video
Infrared
Thermometer
R2020
Instruction
Manual
www.GlobalTestSupply.co m

Table of Contents
Introduction ................................................................................................ 4
Product Quality ........................................................................................... 4
Safety ......................................................................................................... 4
Features ...................................................................................................... 4
Specications .......................................................................................... 5-6
Included ...................................................................................................... 7
Instrument Description ............................................................................... 7
Operating Instructions ........................................................................... 8-17
Main Menu ........................................................................................ 8-11
IR Camera Mode ............................................................................... 8
IR Measurement Mode ...................................................................... 9
Dew Point Measurement Mode ......................................................... 9
Data Logger Mode ............................................................................. 9
Media Gallery ..............................................................................10-11
Viewing Saved Pictures .............................................................. 10
Viewing Videos ......................................................................10-11
Viewing Logs .............................................................................. 11
Transfer files to a PC........................................................................ 11
System Settings .............................................................................. 12-14
Setting the Language ...................................................................... 12
Setting the Date and Date Format .............................................. 12-13
Setting the Time and Time Format .................................................. 13
Selecting the Temperature Unit of Measure .................................... 13
Setting the Memory to Flash or Micro SD ....................................... 13
continued...
www.GlobalTestSupply. com

Enable or Disable the Audible Beep ................................................ 14
Enable or Disable the Auto-Screen off Function ............................. 14
Enable or Disable the Auto-Power off Function .............................. 14
Restoring Default Settings ............................................................... 14
Measurement Settings .................................................................... 15-17
Adjusting Emissivity ......................................................................... 15
Setting the High Alarm Value ........................................................... 16
Setting the Low Alarm Value ........................................................... 16
Laser Indicator ................................................................................. 16
Automatic Measurement Mode ....................................................... 16
Max/Min Temperature Values .......................................................... 16
Average/Differential IR Temperature Values .................................... 17
Dew-point/Wet Bulb Temperature Values ....................................... 17
Type K Input .................................................................................... 17
Color ................................................................................................ 17
Logs Time ........................................................................................ 17
Battery Charging and Replacement ......................................................... 17
Applications .............................................................................................. 18
Appendix: Emissivity Chart .................................................................18-20
Accessories and Replacement Parts ....................................................... 20
Product Care ............................................................................................ 20
Product Warranty ..................................................................................... 21
Product Disposal and Recycling .............................................................. 21
Product Support ....................................................................................... 21
www.GlobalTestSupply. com

Introduction
Thank you for purchasing your REED R2020 Video Infrared Thermometer.
Please read the following instructions carefully before using your instrument. By following the steps outlined in this manual your meter will
provide years of reliable service.
Product Quality
This product has been manufactured in an ISO9001 facility and has been
calibrated during the manufacturing process to meet the stated product
specications. If a certicate of calibration is required please contact the
nearest authorized REED distributor or authorized Service Center. Please
note an additional fee for this service will apply.
Safety
Never attempt to repair or modify your instrument. Dismantling your
product, other than for the purpose of replacing batteries, may cause
damage that will not be covered under the manufacturer's warranty.
Servicing should only be provided by an authorized service center.
Features
• Dual lasers assist with target area identication
• 50:1 distance to spot size ratio
• Take photos and record video with built-in camera
• Datalogging capabilities include on-screen graphing with time and
date stamp
• Digitally adjustable emissivity
• Type K thermocouple input for contact measurement
• Ambient air temperature, humidity, dew point and wet bulb temperature
measurement
• Max, min, avg and differential readings
• High and low alarms
• Trigger lock feature for continuous monitoring
• Export data to PC with included USB cable (no software required)
www.GlobalTestSupply. com

Specifications
IR Temperature
Range: -58 to 3992°F (-50 to 2200°C)
Accuracy: -58 to 68°F (-50 to -20°C): ± 6.3°F(3.5°C)
68 to 932°F (20 to 500°C ):
±1% rdg. +1.8°F (1.0°C)
932 to 1832°F (500 to 1000°C): ±1.5% rdg.
Resolution: 0.1°F (0.1°C)
Contact Type K T/C Temperature
Range: -58 to 2498°F (-50 to 1370°C)
Accuracy: -58 to 32°F (-50 to 0°C): ±4. 5°F (2.5°C)
32 to 2498°F (0 to 1370°C):
±0.5% rdg. + 2.7°F (1.5°C)
Resolution: 0.1°F (0.1°C)
Ambient Temperature
Range: 32 to 122°F (0 to 50°C)
Accuracy: 50 to 104°F (10 to 40°C): ±0.9°F (0.5°C)
>104°F (40°C): ±1.8°F (1.0°C)
Dewpoint and Wet Bulb Temperature
Range: 32 to 122°F (0 to 50°C)
Accuracy: <40°C: ±0.9°F (0.5°C)
>40°C: ± 1.8°F (1.0°C)
Relative Humidity
Range: 0 to 100% RH
Accuracy: 0 to 20%: ±5%
20 to 40%: ±3.5%
40 to 60%: ±3%
60 to 80%: ±3.5%
80 to 100%: ±5%
1832 to 3992°F (1000 to 2200°C): ±2.0% rdg.
www.GlobalTestSupply. com
continued...

General Specifications
Optical Resolution (D:S): 50:1
Dual Laser: Yes
Spectral Response: 8 to 14µm
Emissivity: 0.1 to 1.0 (Adjustable)
Response Time: 150ms
Display Size/Type: 2.2" TFT Color LCD
Backlit Display: Yes
Display Hold: Yes
High/Low Alarms: Yes (Audible (beep) and visual (on-screen))
Max/Min: Yes
Average and Differential: Yes
Datalogging Capabilities: Yes
F/C Switchable: Yes
Trigger Lock: Yes
Autoshut off: Yes (adjustable 3,15,60 minutes)
Internal Memory: Yes (72mb), Expandable with micro SD card
Thermocouple Input: Yes
Tripod Mountable: Yes
Laser Class: Class II
Low Battery Indicator: Yes
Power Supply: Li-Ion rechargeable battery
Battery Life: Approx. 4 hours continuous use
Battery Charge Time: Approx. 2 hours
Product Certications: CE, RoHS
Operating Temperature: 32 to 122°F (0 to 50°C)
Storage Temperature: -4 to 140°F (-20 to 60°C)
Operating Humidity Range:
10 to 90%
Dimensions: 8.1 x 2.4 x 6.1" (205 x 62 x 155mm)
Weight: 14.5oz (410g)
www.GlobalTestSupply. com
Included
• Type K Thermocouple Probe
• AC Adapter
• USB Adapter
• Mini-Tripod
• Hard Carrying Case
• Li-ion Rechargeable Battery
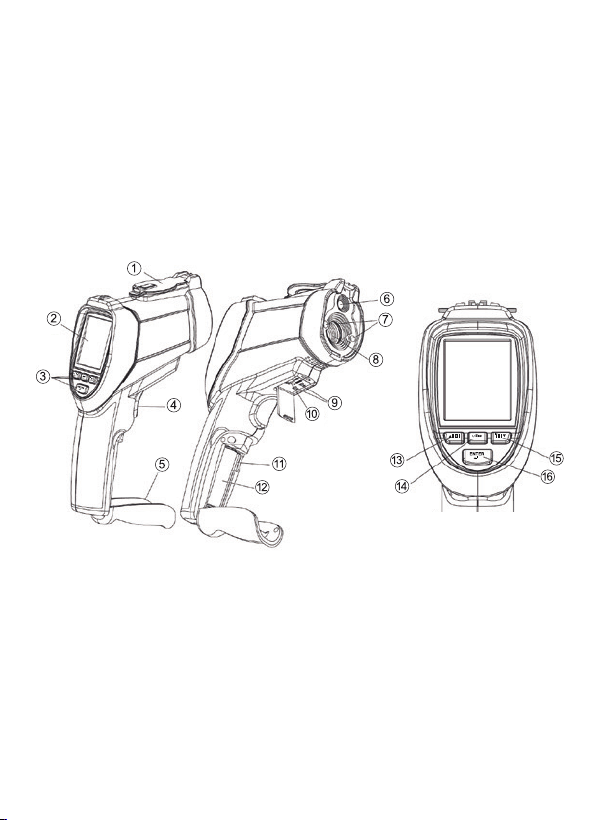
Instrument Description
1. Lens Cover
2. LCD Display
3. Front Panel
4. Trigger
5. Battery Cover
6. Camera
7. Laser
8. IR Sensor
9. Type-K Thermocouple Jack
10. USB Computer Interface Jack
11. Micro SD Memory Card Slot
12. Battery
13. Up/Picture Button
14. Power/ESC Button
15. Down/Video Button
16. Enter Button
www.GlobalTestSupply. com
Operating Instructions
Main Menu
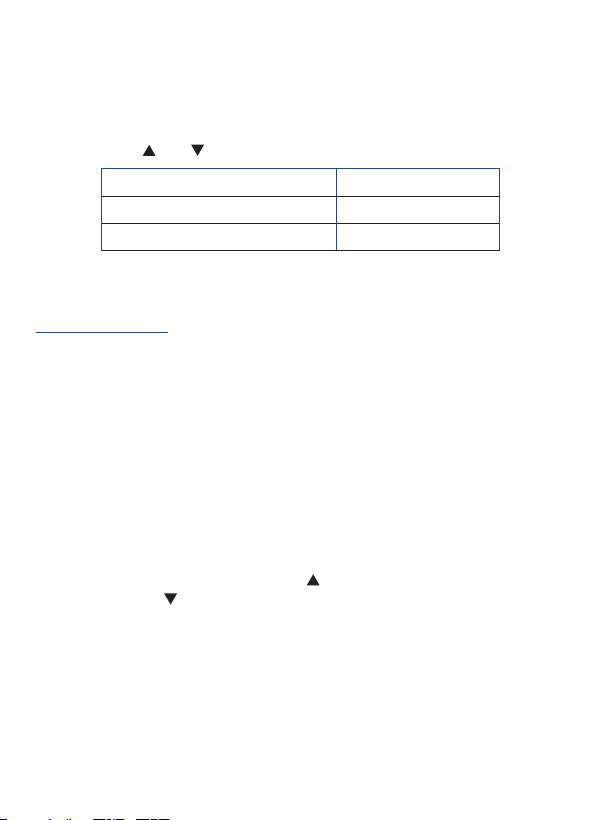
1. When you turn the meter on you will enter the main menu screen
by default.
2. Press the and buttons to scroll through the following parameters.
IR Camera Mode Data Logger Mode
IR Measurement Mode Media Gallery
Dew Point Measurement Mode Settings
3. Once the appropriate parameter has been selected follow the
associated instructions below.
IR Camera Mode
The IR Camera mode measures IR temperature, air temperature, relative
humidity, dew point, temperature, and wet bulb temperature while having
the video camera on.
1. Press the ENTER button when "IR Camera" is highlighted to enter
IR camera mode.
2. Once the measurement settings are congured (see Measurement
Settings section for details), press and hold the trigger to take
a measurement.
Note: This mode allows a user to take pictures and videos.
3. Press the picture button to take a picture of the current image and
readings displayed on the screen.
4. Save the picture by pressing the
pressing the button.
5. To take a video, press the VIDEO button to begin recording.
6. The meter will record video while continuously taking readings.
7. When complete, press the VIDEO button again to stop recording.
8. Press the ESC button to exit IR camera mode and return to the main
menu screen.
button or delete the picture by
www.GlobalTestSupply. com
continued...

IR Measurement Mode
The IR Measurement mode measures IR temperature, air temperature,
relative humidity, Dew point temperature, and wet bulb temperature
without the video camera capabilities.
1. Press the ENTER button when "IR Measure" is highlighted to enter
IR measurement mode.
2. Once the measurement settings are congured (see Measurement
Settings section for details), press and hold the trigger to take
a measurement.
Note: This function is best suited for quick measurements.
Dew Point Measurement Mode
The Dew Point Measurement mode measures IR temperature, air
temperature, relative humidity, Dew point temperature, and wet bulb
temperature. The bottom gradient bar displays the current temperature/
dew point percentage ratio.
1. Press the ENTER button when "DEWPOINT" is highlighted to dew
point measurement mode.
2. Once the measurement settings are congured (see Measurement
Settings section for details), press and hold the trigger to take
a measurement.
Data Logger Mode
The data logger mode automatically records IR Temperature readings and
high/low alarms to memory at user programmable intervals (see
Measurement Settings section for details).
1. Press the ENTER button when "DATALOGGER" is highlighted to
enter data logger mode.
2. Once the measurement settings are congured, press the trigger to
start logging at the set interval (see Measurement Settings section
for details).
3. When completed, press the ESC button to exit the data logger mode
which will automatically save the data to a le.
www.GlobalTestSupply. com
continued...

Media Gallery
The media gallery mode allows a user to view the saved pictures, videos
or logs.
1. Press the ENTER button when "GALLERY" is highlighted to enter the
saved media gallery.
2. Press the and buttons to scroll through the media gallery folders
(Video, Picture or logs).
3. Once the appropriate folder has been selected follow the associated
instructions below.
Viewing Saved Pictures
1. Press the ENTER button when "Picture" is highlighted to enter the
saved pictures gallery.
2. Press ENTER again to view the picture thumbnails.
3. Press the and buttons to scroll through the picture thumbnails.
4. Press the ENTER button to view the selected picture in full screen
Note: A user can also scroll through the pictures by pressing the or
buttons when viewing a picture in full screen.
5. To delete a picture, press the ENTER button twice when viewing a
picture in full screen.
6. Press the
and buttons to select between "Yes" or "No" and
press the ENTER button to conrm selection.
7. Press the ESC button twice to exit the picture thumbnails and return
to the media gallery folders.
Viewing Videos
1. Press the ENTER button when "Video" is highlighted to enter the
saved videos gallery.
2. Press ENTER again to view the video thumbnails.
3. Press the and buttons to scroll through the video thumbnails.
4. Press the ENTER button to play the selected video.
Note: A user can also scroll through the saved videos by pressing the
or buttons twice when playing a video.
5. To delete a selected video, press and hold the ENTER button while
in video thumbnails.
continued...
www.GlobalTestSupply. com

6. Press the and buttons to select between "Yes" or "No" and
press the ENTER button to conrm selection
7. Press the ESC button twice to exit the video thumbnails and return
to the media gallery folders.
Viewing Logs
1. Press the ENTER button when "Logs" is highlighted to enter the
saved logs gallery.
2. Press the and buttons to scroll through the logs thumbnails.
3. Press the ENTER button to display the selected log in graphical form.
4. To delete a log, press and hold the ENTER button while in the logs
thumbnails.
5. Press the and buttons to select between "Yes" or "No" and
press the ENTER button to conrm selection.
6. Press the ESC button to exit the logs thumbnails and return to the
media gallery folders.
Transfer files to a PC
You can save data directly on to the meter (Flash) or on a micro SD card
(see Setting the Memory to Flash or Micro SD in system settings for
details). To transfer the information to a PC you can do so by the included
USB cable or you can insert the optional micro SD card into a computer. If
the USB cable is used, the USB symbol will appear in the display and the
computer will recognize the unit as a removable drive.
Once installed, open the drive to view the three folders:
1. LOGS: Logs will be saved as *.txt les
2. PICTURE: Pictures will be saved as *.jpg les
3. VIDEO: Videos will be save as *.MP4 les
Note: No software is necessary to view the saved data, simply click and
drag your data from the device on to your desktop or open directly from
any of the folders.
www.GlobalTestSupply. com
continued...

System Settings
1. While in the main menu screen, press the ENTER button when
"Settings" is highlighted to enter system settings.
2. Press the and buttons to scroll through the following parameters.
Parameter Description
Languages Set the language
Date/Format Setting the date and date format
Time/Format Setting the time and time format
Units Selecting the temperature unit of measure
Memory Setting the memory to Flash or micro SD
Beeper Enable or Disable the audible beep
Auto screen-off Enable or disable the auto-screen off function
Auto power-off Enable or disable the auto-power off function
System Default Setting Restores the R2020 to its default settings
3. Once the appropriate parameter has been selected follow the
associated instructions below.
Setting the Language
1. Press the ENTER button when "Languages" is highlighted to enter
the appropriate function.
and
2. Press the
3. Press the ENTER button to conrm selection.
4. Press the ESC button to exit the Languages function and return to
system settings.
Setting the Date and Date Format
1. Press the ENTER button when "Date/Format" is highlighted to enter
the appropriate function.
2. Press the
3. Press the ENTER button to conrm selection.
buttons to scroll through the list of languages.
and
buttons to select the desired format for the date.
continued...
www.GlobalTestSupply. com

4. Once the format has been chosen, press the
and
buttons to
select the day, month and year while pressing the ENTER button to
conrm each entry.
5. Press the ESC button to exit the date/format function and return to
system settings.
Setting the Time and Time Format
1. Press the ENTER button when "Time/Format" is highlighted to enter
the appropriate function.
and
2. Press the
buttons to select the desired format for the time.
3. Press the ENTER button to conrm selection.
4. Once the format has been chosen, press the
and
buttons to
select the minute, hour, and AM/PM (if applicable) while pressing the
ENTER button to conrm each entry.
5. Press the ESC button to exit the date/format function and return to
system settings.
Selecting the Temperature Unit of Measure
1. Press the ENTER button when "Units" is highlighted to enter the
appropriate function.
and
2. Press the
buttons to select between °C and °F.
3. Press the ENTER button to conrm selection.
4. Press the ESC button to exit the temperature unit of measure
function and return to system settings.
Setting the Memory to Flash or Micro SD
1. Press the ENTER button when "Memory" is highlighted to enter the
appropriate function.
and
2. Press the
buttons to select between Flash and SD Card.
3. Press the ENTER button to conrm selection.
4. Press the ESC button to exit the memory function and return to
system settings.
www.GlobalTestSupply. com
continued...

Enable or Disable the Audible Beep
1. Press the ENTER button when "Beeper" is highlighted to enter the
appropriate function.
2. Press the
and
buttons to select between "On" or "Off".
3. Press the ENTER button to conrm selection.
4. Press the ESC button to exit the audible beep function and return to
system settings.
Enable or Disable the Auto-Screen off Function
1. Press the ENTER button when "Auto Screen-Off" is highlighted to
enter the appropriate function.
2. Press the and buttons to select between "Disable", "20 seconds",
"1 minute" or "3 minutes".
3. Press the ENTER button to conrm selection.
4. Press the ESC button to exit the auto screen-off function and return
to system settings.
Enable or Disable the Auto-Power off Function
1. Press the ENTER button when "Auto Power-Off" is highlighted to
enter the appropriate function.
and
2. Press the
buttons to select between "Disable", "3 minutes",
"15 minutes", or "60 minutes".
3. Press the ENTER button to conrm selection.
4. Press the ESC button to exit the auto power-off function and return
to system settings.
Restoring Default Settings
1. Press the ENTER button when "System Default Settings" is
highlighted to enter the appropriate function.
and
2. Press the
buttons to select between "Yes" or "No".
3. Press the ENTER button to conrm selection.
4. Press the ESC button to exit the restoring default settings function
and return to system settings.
www.GlobalTestSupply. com
continued...
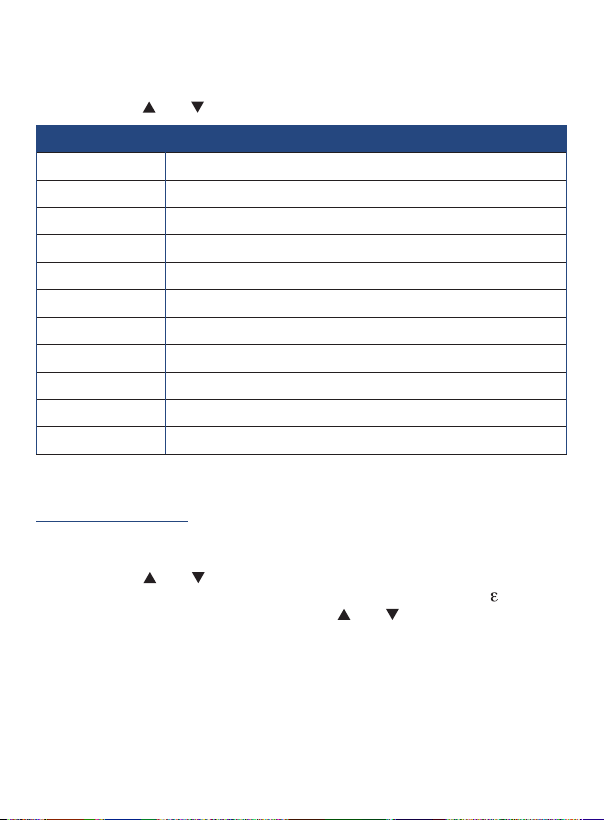
Measurement Settings
1. While taking a measurement, press the ENTER button to open the
"Measurement Settings" menu.
2. Press the and buttons to scroll through the following parameters.
Parameter Description
Emissivity Adjusting the emissivity value
Alarm High Setting high temperature alarm
Alarm Low Setting low temperature alarm
Laser Enable or Disable the laser indicator
Auto Mode Enable or disable automatic measurement mode
Max/Min Enable or disable Max/Min Temperature values
Average Dif Display air temperature and relative humidity values
Ambient Temp Display the dew point and wet bulb temperature values
Type k Enable or disable the type K thermocouple input
Color Setting the font color
Logs Time Set the logs time sampling rate
3. Once the appropriate parameter has been selected, follow the
associated instructions below.
Adjusting Emissivity
1. Press the ENTER button when "Emissivity" is highlighted to enter the
appropriate function.
2. Press the
emissivity matching the material being measured or select
set the emissivity manually using the
Emissivity Chart section details).
3. Press the ENTER button to conrm your pre-set selection value or
press the ESC button to exit and save the manual emissivity value
(if applicable).
4. Press the ESC button to exit the emissivity function and return to
measurement settings.
and
buttons to scroll through the pre-set list of
and
buttons (refer to
=0.94 to
continued...
www.GlobalTestSupply. com

Setting the High Alarm Value
1. Press the ENTER button when "Alarm High" is highlighted to enter
the appropriate function.
2. Press the
and
buttons to enable, disable or set the alarm value.
3. Press the ENTER button to conrm selection.
4. Press the
and
buttons to adjust the value (if applicable).
5. Press the ESC button to save and exit the high alarm value
(if applicable).
6. Press the ESC button to exit the high alarm function and return to
measurement settings.
Setting the Low Alarm Value
1. Press the ENTER button when "Alarm Low" is highlighted to enter
the appropriate function.
and
2. Press the
buttons to enable, disable or set the alarm value.
3. Press the Enter button to conrm selection.
4. Press the
and
buttons to adjust the value (if applicable).
5. Press the ESC button to save and exit the low alarm value
(if applicable).
6. Press the ESC button to exit the low alarm function and return to
measurement settings.
Laser Indicator
While "Laser" is highlighted in measurement settings, press the ENTER
button to enable or disable the laser.
Automatic Measurement Mode
While "Auto Mode" is highlighted in measurement settings, press the
ENTER button to enable or disable automatic measurement mode.
Max/Min Temperature Values
While "Max/Min" is highlighted in measurement settings, press the
ENTER button to set the MAX/MIN mode ON or OFF. The MAX/MIN mode
displays the highest (MAX) and lowest (MIN) IR temperature values.
www.GlobalTestSupply. com
continued...

Average/Differential IR Temperature Values
While "Average/Dif" is highlighted in measurement settings, press the
ENTER button to set the average and differential IR temperature values
ON or OFF.
Dew-point/Wet Bulb Temperature Values
While "Ambient Temp/%RH" is highlighted in measurement settings,
press the ENTER button to set the dew point and wet bulb temperature
values ON or OFF.
Type K Input
While "Type K" is highlighted in measurement settings, press the ENTER
button to enable or disable the Type k contact thermocouple input.
Color
1. Press the ENTER button when "Color" is highlighted to enter the
appropriate function.
2. Press the
3. Press the ESC button to save the selection and return to
measurement settings.
Logs Time
1. Press the ENTER button when "Logs Time" is highlighted to enter
the appropriate function.
2. Press the
1 to 60s.
3. Press the ESC button to save the selection and return to
measurement settings.
and
buttons choose a font color.
and
buttons to adjust the logs time sampling rate from
Battery Charging and Replacement
When the battery is empty, recharge the Lithium ion 3.7V/1400mAh
rechargeable battery. Connect the USB battery cable to the mini USB jack
located above the measurement trigger and then connect the other end of
the cable to an AC source or computer.
www.GlobalTestSupply. com

Applications
• Verify mechanical (bearings, motors) or electrical (circuit breaker boxes)
equipment
• Calibration and control of heater and oven temperatures
• Monitoring materials in processes involving heating and/or cooling
• Quality control monitoring
• Research and development applications
• Automotive diagnostics
• Conduct HVAC energy audits to determine leaks, inltration
Appendix: Emissivity Chart
Emissivity is a term used to describe the energy-emitting characteristics
of materials. Most (90% of typical applications) organic materials and
painted or oxidized surfaces have an emissivity of 0.95.
Inaccurate readings will result from measuring shiny or polished metal
surfaces. To compensate, cover the surface to be measured with masking
tape or at black paint. Allow time for the tape to reach the same
temperature as the material underneath it. Measure the temperature of the
tape or painted surface.
Measured Surfaces Emissivity
Metal
Aluminum: Oxidization 0.2-0.4
A3003 Alloy: Oxidization, Rough 0.3, 0.1-0.3
Brass: Burnishing, Oxidization 0.3, 0.5
Copper: Oxidization, Electric Temrinal Board 0.4-0.8, 0.6
Hastelloy: Alloy 0.3-0.8
Inconel: Oxidization,
Sand-Blasting, Electro Burnishing
0.7-0.95, 0.3-0.6, 0.15
www.GlobalTestSupply. com
continued...

Iron: Oxidization, Rusting 0.5-0.9, 0.5-0.7
Iron (Casting): Oxidization,
Non-Oxidization, Casting
0.6-0.95, 0.2, 0.2-0.3
Iron (Forging): Passivation 0.9
Lead: Rough, Oxidization 0.4, 0.2-0.6
Molybdenum: Oxidization 0.2-0.6
Nickel: Oxidization 0.2-0.5
Platinum: Black 0.9
Measured Surfaces Emissivity
Steel: Cold Rolling, Steel Plate Burnishing,
Steel Plate Rubbing
0.7-0.9, 0.4-0.6, 0.1
Zinc: Oxidization 0.1
Non-Metal
Asbestos 0.95
Asphalt 0.95
Basalt 0.7
Carbon: Non-Oxidization, Graphite,
Silicone Carbide
0.8-0.9, 0.7-0.8, 0.9
Ceramics 0.95
Clay 0.95
Concrete 0.95
Cloth 0.9
Glass: Convex, Smooth,
Lead-Boron
0.76-0.8, 0.92-0.94,
0.78-0.82
Plates 0.96
Stone Products 0.93
www.GlobalTestSupply. com
continued...

Plaster 0.8-0.95
Ice 0.98
Limestone 0.98
Paper 0.95
Plastics 0.95
Water 0.93
Soil 0.9-0.98
Wood 0.9-0.95
Accessories and Replacement Parts
R8888 Deluxe Hard Carrying Case
R1500 Lightweight Tripod
SD-MINI(8GB) Micro SD Memory Card
TP-01 Beaded Thermocouple Wire Probe
R2920 Surface Thermocouple Probe
R2930 Right Angle Thermocouple Surface Probe
R2940 Air/Gas Thermocouple Probe
R2950 Immersion Thermocouple Probe
R2960 Needle Tip Thermocouple Probe
Don't see your part listed here? For a complete list of all accessories and
replacement parts visit your product page on www.reedinstruments.com.
www.GlobalTestSupply. com

Product Care
To keep your instrument in good working order we recommend the following:
• Store your product in a clean, dry place.
• Change the battery as needed.
• If your instrument isn't being used for a period of one month or longer
please remove the battery.
• Clean your product and accessories with biodegradable cleaner. Do not
spray the cleaner directly on the instrument. Use on external parts only.
Product Warranty
REED Instruments guarantees this instrument to be free of defects in
material or workmanship for a period of one (1) year from date of shipment.
During the warranty period, REED Instruments will repair or replace, at no
charge, products or parts of a product that proves to be defective because
of improper material or workmanship, under normal use and maintenance.
REED Instruments total liability is limited to repair or replacement of the
product. REED Instruments shall not be liable for damages to goods,
property, or persons due to improper use or through attempts to utilize the
instrument under conditions which exceed the designed capabilities. In
order to begin the warranty service process, please contact us by phone at
1-877-849-2127 or by email at info@reedinstruments.com to discuss the
claim and determine the appropriate steps to process the warranty.
Product Disposal and Recycling
Please follow local laws and regulations when disposing or recycling your
instrument. Your product contains electronic components and must be
disposed of separately from standard waste products.
www.GlobalTestSupply. com

Product Support
If you have any questions on your product, please contact your authorized
REED distributor or REED Instruments Customer Service by phone at
1-877-849-2127 or by email at info@reedinstruments.com.
Please visit www.REEDINSTRUMENTS.com for the most
up-to-date manuals, datasheets, product guides and software.
Product specifications subject to change without notice.
All rights reserved. Any unauthorized copying or reproduction of
this manual is strictly prohibited without prior written permission
from REED Instruments.
www.GlobalTestSupply. com

TEST & MEASURE
WITH CONFIDENCE
www.GlobalTestSupply. com

www.GlobalTestSupply. com
 Loading...