

Page 1

Managing Servers with
Netscape Console
Netscape Console
Version 6.0
December 2001
Page 2

Netscape Communications Corporation ("Netscape") and its licensors retain all ownership rights to the software programs offered by
Netscape (referred to herein as "Software") and related documentation. Use of the Software and related documentation is governed
by the license agreement for the Software and applicable copyright law.
Your right to copy this documentation is limited by copyright law. Making unauthorized copies, adaptations or compilation works is
prohibited and constitutes a punishable violation of the law. Netscape may revise this documentation from time to time without
notice.
THIS DOCUMENTATION IS PROVIDED "AS IS" WITHOUT WARRANTY OF ANY KIND. IN NO EVENT SHALL NETSCAPE BE
LIABLE FOR INDIRECT, SPECIAL, INCIDENTAL, OR CONSEQUENTIAL DAMAGES OF ANY KIND ARISING FROM ANY
ERROR IN THIS DOCUMENTATION, INCLUDING WITHOUT LIMITATION ANY LOSS OR INTERRUPTION OF BUSINESS,
PROFITS, USE, OR DATA.
The Software and documentation are copyright © 2001 Sun Microsystems, Inc. Portions copyright 1999, 2001 Netscape
Communications Corporation. All rights reserved.
Contains the Taligent ® International Classes ™ from Taligent, Inc. and IBM Corp.
Netscape and the Netscape N logo are registered trademarks of Netscape Communications Corporation in the United States and
other countries. Other Netscape logos, product names and service names are also trademarks of Netscape and may be registered in
some countries. Other product and brand names are trademarks of their respective owners.
The downloading, exporting, or reexporting of Netscape software or any underlying information or technology must be in full
compliance with all United States and other applicable laws and regulations. Any provision of Netscape software or documentation
to the U.S. government is with restricted rights as described in the license agreement for that Software.
Page 3

Contents
About This Guide . . . . . . . . . . . . . . . . . . . . . . . . . . . . . . . . . . . . . . . . . . . . . . . . . . . . . . . . . . . . . . 13
What’s in This Guide . . . . . . . . . . . . . . . . . . . . . . . . . . . . . . . . . . . . . . . . . . . . . . . . . . . . . . . . . . . . . . . . . . . . 13
Conventions Used in This Guide . . . . . . . . . . . . . . . . . . . . . . . . . . . . . . . . . . . . . . . . . . . . . . . . . . . . . . . . . 13
Viewing This Guide Online . . . . . . . . . . . . . . . . . . . . . . . . . . . . . . . . . . . . . . . . . . . . . . . . . . . . . . . . . . . . . . 15
To View This Manual From Netscape Console or Administration Server . . . . . . . . . . . . . . . . . . . . 15
To View This Manual From Another Product . . . . . . . . . . . . . . . . . . . . . . . . . . . . . . . . . . . . . . . . . . . . 15
Getting Additional Help . . . . . . . . . . . . . . . . . . . . . . . . . . . . . . . . . . . . . . . . . . . . . . . . . . . . . . . . . . . . . . . . . 16
To Get Context-Sensitive Help . . . . . . . . . . . . . . . . . . . . . . . . . . . . . . . . . . . . . . . . . . . . . . . . . . . . . . . . . 16
To Search this Guide’s Index . . . . . . . . . . . . . . . . . . . . . . . . . . . . . . . . . . . . . . . . . . . . . . . . . . . . . . . . . . 16
To Open the Product Homepage . . . . . . . . . . . . . . . . . . . . . . . . . . . . . . . . . . . . . . . . . . . . . . . . . . . . . . . 17
Part 1 Overview of Netscape Console . . . . . . . . . . . . . . . . . . . . . . . . . . . . . . . . . . . . . . . . . . 19
Chapter 1 Introducing Netscape Console and Administration Server . . . . . . . . . . . . . . . . . 21
Chapter 2 Installing Netscape Servers and Console . . . . . . . . . . . . . . . . . . . . . . . . . . . . . . . 25
The Setup Program . . . . . . . . . . . . . . . . . . . . . . . . . . . . . . . . . . . . . . . . . . . . . . . . . . . . . . . . . . . . . . . . . . . . . 26
Installing a New Server . . . . . . . . . . . . . . . . . . . . . . . . . . . . . . . . . . . . . . . . . . . . . . . . . . . . . . . . . . . . . . . 26
Directory Server Must Be Installed First . . . . . . . . . . . . . . . . . . . . . . . . . . . . . . . . . . . . . . . . . . . . . . 26
Administration Server Is Required in Each Server Root . . . . . . . . . . . . . . . . . . . . . . . . . . . . . . . . . 26
Installation Modes . . . . . . . . . . . . . . . . . . . . . . . . . . . . . . . . . . . . . . . . . . . . . . . . . . . . . . . . . . . . . . . . . . . 27
Express . . . . . . . . . . . . . . . . . . . . . . . . . . . . . . . . . . . . . . . . . . . . . . . . . . . . . . . . . . . . . . . . . . . . . . . . . . 27
Typical . . . . . . . . . . . . . . . . . . . . . . . . . . . . . . . . . . . . . . . . . . . . . . . . . . . . . . . . . . . . . . . . . . . . . . . . . . 27
Custom . . . . . . . . . . . . . . . . . . . . . . . . . . . . . . . . . . . . . . . . . . . . . . . . . . . . . . . . . . . . . . . . . . . . . . . . . . 27
Installing Netscape Console as a Stand-Alone Application . . . . . . . . . . . . . . . . . . . . . . . . . . . . . . . . 27
To Install Netscape Console as a Stand-Alone Application on UNIX . . . . . . . . . . . . . . . . . . . . . 27
To Install Netscape Console as a Stand-Alone Application on Windows NT . . . . . . . . . . . . . . . 28
Upgrading to Version Version 6.0 . . . . . . . . . . . . . . . . . . . . . . . . . . . . . . . . . . . . . . . . . . . . . . . . . . . . . . . . . 29
3
Page 4

Upgrading Administration Server and Console . . . . . . . . . . . . . . . . . . . . . . . . . . . . . . . . . . . . . . . . . . 30
To Upgrade on UNIX . . . . . . . . . . . . . . . . . . . . . . . . . . . . . . . . . . . . . . . . . . . . . . . . . . . . . . . . . . . . . . 30
To Upgrade on Windows NT . . . . . . . . . . . . . . . . . . . . . . . . . . . . . . . . . . . . . . . . . . . . . . . . . . . . . . . 31
Upgrading a Stand-Alone Version of Netscape Console . . . . . . . . . . . . . . . . . . . . . . . . . . . . . . . . . . 33
To Upgrade a Stand-Alone Version of Netscape Console on UNIX . . . . . . . . . . . . . . . . . . . . . . 33
To Upgrade a Stand-Alone Version of Netscape Console on Windows NT . . . . . . . . . . . . . . . . 34
Silent Installation . . . . . . . . . . . . . . . . . . . . . . . . . . . . . . . . . . . . . . . . . . . . . . . . . . . . . . . . . . . . . . . . . . . . . . 35
Performing a Silent Installation . . . . . . . . . . . . . . . . . . . . . . . . . . . . . . . . . . . . . . . . . . . . . . . . . . . . . . . . 35
To Save Your Installation Answers . . . . . . . . . . . . . . . . . . . . . . . . . . . . . . . . . . . . . . . . . . . . . . . . . . 35
To Perform a Silent Installation . . . . . . . . . . . . . . . . . . . . . . . . . . . . . . . . . . . . . . . . . . . . . . . . . . . . . 36
Uninstallation . . . . . . . . . . . . . . . . . . . . . . . . . . . . . . . . . . . . . . . . . . . . . . . . . . . . . . . . . . . . . . . . . . . . . . . . . 36
Uninstalling a Netscape Server . . . . . . . . . . . . . . . . . . . . . . . . . . . . . . . . . . . . . . . . . . . . . . . . . . . . . . . . 36
To Uninstall a Netscape Server on UNIX . . . . . . . . . . . . . . . . . . . . . . . . . . . . . . . . . . . . . . . . . . . . . 37
To Uninstall a Netscape Server on Windows NT . . . . . . . . . . . . . . . . . . . . . . . . . . . . . . . . . . . . . . 37
Silent Uninstallation . . . . . . . . . . . . . . . . . . . . . . . . . . . . . . . . . . . . . . . . . . . . . . . . . . . . . . . . . . . . . . . . . 38
To Perform a Silent Uninstallation on UNIX . . . . . . . . . . . . . . . . . . . . . . . . . . . . . . . . . . . . . . . . . . 38
To Perform a Silent Uninstallation on Windows NT . . . . . . . . . . . . . . . . . . . . . . . . . . . . . . . . . . . 39
Part 2 Netscape Console Basics . . . . . . . . . . . . . . . . . . . . . . . . . . . . . . . . . . . . . . . . . . . . . . 41
Chapter 3 Using Netscape Console . . . . . . . . . . . . . . . . . . . . . . . . . . . . . . . . . . . . . . . . . . . . . 43
Starting Netscape Console and Logging In . . . . . . . . . . . . . . . . . . . . . . . . . . . . . . . . . . . . . . . . . . . . . . . . . 43
Starting Netscape Console . . . . . . . . . . . . . . . . . . . . . . . . . . . . . . . . . . . . . . . . . . . . . . . . . . . . . . . . . . . . 43
To Start Netscape Console on UNIX . . . . . . . . . . . . . . . . . . . . . . . . . . . . . . . . . . . . . . . . . . . . . . . . . 43
To Start Netscape Console on Windows NT . . . . . . . . . . . . . . . . . . . . . . . . . . . . . . . . . . . . . . . . . . 44
Logging in to Netscape Console With a User Name and Password . . . . . . . . . . . . . . . . . . . . . . . . . 45
To Log in to Netscape Console With a User Name and Password . . . . . . . . . . . . . . . . . . . . . . . . 45
Logging in to Netscape Console Using Client Authentication . . . . . . . . . . . . . . . . . . . . . . . . . . . . . . 46
To Request and Install a New Client Certificate . . . . . . . . . . . . . . . . . . . . . . . . . . . . . . . . . . . . . . . 47
To Make Your Client Certificate Available to Netscape Console on UNIX . . . . . . . . . . . . . . . . 47
To Make Your Client Certificate Available to Netscape Console on Windows NT . . . . . . . . . . 48
To Establish a Secure Connection With an Instance of Administration Server . . . . . . . . . . . . . 48
A Tour of Netscape Console . . . . . . . . . . . . . . . . . . . . . . . . . . . . . . . . . . . . . . . . . . . . . . . . . . . . . . . . . . . . . 49
Netscape Console Menus . . . . . . . . . . . . . . . . . . . . . . . . . . . . . . . . . . . . . . . . . . . . . . . . . . . . . . . . . . . . . 49
Netscape Console Tabs . . . . . . . . . . . . . . . . . . . . . . . . . . . . . . . . . . . . . . . . . . . . . . . . . . . . . . . . . . . . . . . 51
The Servers and Applications Tab . . . . . . . . . . . . . . . . . . . . . . . . . . . . . . . . . . . . . . . . . . . . . . . . . . . . . 51
The Administration Domain . . . . . . . . . . . . . . . . . . . . . . . . . . . . . . . . . . . . . . . . . . . . . . . . . . . . . . . . . . 52
To Create an Administration Domain . . . . . . . . . . . . . . . . . . . . . . . . . . . . . . . . . . . . . . . . . . . . . . . . 52
To Modify an Administration Domain . . . . . . . . . . . . . . . . . . . . . . . . . . . . . . . . . . . . . . . . . . . . . . . 53
To Remove an Administration Domain . . . . . . . . . . . . . . . . . . . . . . . . . . . . . . . . . . . . . . . . . . . . . . 54
Customizing Netscape Console . . . . . . . . . . . . . . . . . . . . . . . . . . . . . . . . . . . . . . . . . . . . . . . . . . . . . . . . . . 54
4 Managing Servers with Netscape Console • December 2001
Page 5

Storing Display Settings . . . . . . . . . . . . . . . . . . . . . . . . . . . . . . . . . . . . . . . . . . . . . . . . . . . . . . . . . . . . . . 55
To Change Where Display Settings are Stored . . . . . . . . . . . . . . . . . . . . . . . . . . . . . . . . . . . . . . . . . 55
To Reset Display Settings to Their Default Values . . . . . . . . . . . . . . . . . . . . . . . . . . . . . . . . . . . . . 55
Setting Display Fonts . . . . . . . . . . . . . . . . . . . . . . . . . . . . . . . . . . . . . . . . . . . . . . . . . . . . . . . . . . . . . . . . . 56
To Create a Font Profile . . . . . . . . . . . . . . . . . . . . . . . . . . . . . . . . . . . . . . . . . . . . . . . . . . . . . . . . . . . . 56
To Edit an Existing Font Profile . . . . . . . . . . . . . . . . . . . . . . . . . . . . . . . . . . . . . . . . . . . . . . . . . . . . . 57
To Rename a Font Profile . . . . . . . . . . . . . . . . . . . . . . . . . . . . . . . . . . . . . . . . . . . . . . . . . . . . . . . . . . . 57
To Use a Font Profile . . . . . . . . . . . . . . . . . . . . . . . . . . . . . . . . . . . . . . . . . . . . . . . . . . . . . . . . . . . . . . 58
To Remove a Font Profile . . . . . . . . . . . . . . . . . . . . . . . . . . . . . . . . . . . . . . . . . . . . . . . . . . . . . . . . . . . 58
Customizing the Main Window . . . . . . . . . . . . . . . . . . . . . . . . . . . . . . . . . . . . . . . . . . . . . . . . . . . . . . . . 59
To Customize the Main Window . . . . . . . . . . . . . . . . . . . . . . . . . . . . . . . . . . . . . . . . . . . . . . . . . . . . 59
Customizing Tables . . . . . . . . . . . . . . . . . . . . . . . . . . . . . . . . . . . . . . . . . . . . . . . . . . . . . . . . . . . . . . . . . . 60
To Change Column Position in a Table . . . . . . . . . . . . . . . . . . . . . . . . . . . . . . . . . . . . . . . . . . . . . . . 60
To Change the Width of Columns in a Table . . . . . . . . . . . . . . . . . . . . . . . . . . . . . . . . . . . . . . . . . . 61
Creating Custom Views of the Navigation Tree . . . . . . . . . . . . . . . . . . . . . . . . . . . . . . . . . . . . . . . . . . 61
To Create a Custom View of the Navigation Tree . . . . . . . . . . . . . . . . . . . . . . . . . . . . . . . . . . . . . . 61
Working with Custom Views . . . . . . . . . . . . . . . . . . . . . . . . . . . . . . . . . . . . . . . . . . . . . . . . . . . . . . . . . . 63
To Switch to a Custom View . . . . . . . . . . . . . . . . . . . . . . . . . . . . . . . . . . . . . . . . . . . . . . . . . . . . . . . . 63
To Edit a Custom View . . . . . . . . . . . . . . . . . . . . . . . . . . . . . . . . . . . . . . . . . . . . . . . . . . . . . . . . . . . . 63
To Rename a Custom View . . . . . . . . . . . . . . . . . . . . . . . . . . . . . . . . . . . . . . . . . . . . . . . . . . . . . . . . . 64
To Set Access Permissions for a Public View . . . . . . . . . . . . . . . . . . . . . . . . . . . . . . . . . . . . . . . . . . 64
To Delete a Custom View . . . . . . . . . . . . . . . . . . . . . . . . . . . . . . . . . . . . . . . . . . . . . . . . . . . . . . . . . . 64
Administration Express . . . . . . . . . . . . . . . . . . . . . . . . . . . . . . . . . . . . . . . . . . . . . . . . . . . . . . . . . . . . . . . . . 65
Accessing Administration Express . . . . . . . . . . . . . . . . . . . . . . . . . . . . . . . . . . . . . . . . . . . . . . . . . . . . . 65
To Open Administration Express . . . . . . . . . . . . . . . . . . . . . . . . . . . . . . . . . . . . . . . . . . . . . . . . . . . . 65
Using Administration Express . . . . . . . . . . . . . . . . . . . . . . . . . . . . . . . . . . . . . . . . . . . . . . . . . . . . . . . . . 67
To Start or Stop a Server Instance from Administration Express . . . . . . . . . . . . . . . . . . . . . . . . . 67
To View Basic Server Information from Administration Express . . . . . . . . . . . . . . . . . . . . . . . . . 67
To View Access and Error Logs from Administration Express . . . . . . . . . . . . . . . . . . . . . . . . . . . 67
Setting the Refresh Rate for Administration Express . . . . . . . . . . . . . . . . . . . . . . . . . . . . . . . . . . . . . . 68
To Set the Refresh Rate for Administration Express . . . . . . . . . . . . . . . . . . . . . . . . . . . . . . . . . . . . 68
Chapter 4 Servers in Netscape Console . . . . . . . . . . . . . . . . . . . . . . . . . . . . . . . . . . . . . . . . . 69
Working With Earlier Netscape Servers . . . . . . . . . . . . . . . . . . . . . . . . . . . . . . . . . . . . . . . . . . . . . . . . . . . 69
Adding a Pre-4.0 Server to the Tree . . . . . . . . . . . . . . . . . . . . . . . . . . . . . . . . . . . . . . . . . . . . . . . . . . . . . 69
To Add a Pre-4.0 Server to the Navigation Tree . . . . . . . . . . . . . . . . . . . . . . . . . . . . . . . . . . . . . . . 71
Migrating from a Pre-4.0 Server to a Newer Server . . . . . . . . . . . . . . . . . . . . . . . . . . . . . . . . . . . . . . . 71
To Migrate from a Pre-4.0 Server to a Newer Version . . . . . . . . . . . . . . . . . . . . . . . . . . . . . . . . . . 72
Working with Netscape Servers . . . . . . . . . . . . . . . . . . . . . . . . . . . . . . . . . . . . . . . . . . . . . . . . . . . . . . . . . . 73
Opening a Server Management Window . . . . . . . . . . . . . . . . . . . . . . . . . . . . . . . . . . . . . . . . . . . . . . . . 73
To Open a Netscape Server Management Window . . . . . . . . . . . . . . . . . . . . . . . . . . . . . . . . . . . . . 73
Creating a New Server Instance . . . . . . . . . . . . . . . . . . . . . . . . . . . . . . . . . . . . . . . . . . . . . . . . . . . . . . . . 74
To Create a New Server Instance . . . . . . . . . . . . . . . . . . . . . . . . . . . . . . . . . . . . . . . . . . . . . . . . . . . . 75
5
Page 6

Modifying Host, Server Group, and Instance Information . . . . . . . . . . . . . . . . . . . . . . . . . . . . . . . . . 75
To Modify Host, Server Group, and Instance Information . . . . . . . . . . . . . . . . . . . . . . . . . . . . . . 75
Cloning a Server . . . . . . . . . . . . . . . . . . . . . . . . . . . . . . . . . . . . . . . . . . . . . . . . . . . . . . . . . . . . . . . . . . . . . 76
To Clone Server Settings to Another Server . . . . . . . . . . . . . . . . . . . . . . . . . . . . . . . . . . . . . . . . . . . 76
Removing a Server Instance . . . . . . . . . . . . . . . . . . . . . . . . . . . . . . . . . . . . . . . . . . . . . . . . . . . . . . . . . . . 76
To Remove a Server Instance . . . . . . . . . . . . . . . . . . . . . . . . . . . . . . . . . . . . . . . . . . . . . . . . . . . . . . . 76
Uninstalling a Netscape Server . . . . . . . . . . . . . . . . . . . . . . . . . . . . . . . . . . . . . . . . . . . . . . . . . . . . . . . . 77
Merging Configuration Data from Two Directory Servers . . . . . . . . . . . . . . . . . . . . . . . . . . . . . . . . . 77
To Merge Configuration Data from Two Directory Servers . . . . . . . . . . . . . . . . . . . . . . . . . . . . . 79
Chapter 5 User and Group Administration . . . . . . . . . . . . . . . . . . . . . . . . . . . . . . . . . . . . . . . 81
Interacting with Directory Server . . . . . . . . . . . . . . . . . . . . . . . . . . . . . . . . . . . . . . . . . . . . . . . . . . . . . . . . . 81
Using Distinguished Names . . . . . . . . . . . . . . . . . . . . . . . . . . . . . . . . . . . . . . . . . . . . . . . . . . . . . . . . . . 82
Distinguished Names, Attributes, and Syntax . . . . . . . . . . . . . . . . . . . . . . . . . . . . . . . . . . . . . . . . . . . 82
Distinguished Names . . . . . . . . . . . . . . . . . . . . . . . . . . . . . . . . . . . . . . . . . . . . . . . . . . . . . . . . . . . . . 82
Attributes . . . . . . . . . . . . . . . . . . . . . . . . . . . . . . . . . . . . . . . . . . . . . . . . . . . . . . . . . . . . . . . . . . . . . . . . 85
DN and Attribute Guidelines and Syntax . . . . . . . . . . . . . . . . . . . . . . . . . . . . . . . . . . . . . . . . . . . . 86
Locating a User or Group in the Directory . . . . . . . . . . . . . . . . . . . . . . . . . . . . . . . . . . . . . . . . . . . . . . 87
To Locate Users or Groups in the Directory . . . . . . . . . . . . . . . . . . . . . . . . . . . . . . . . . . . . . . . . . . . 88
Choosing a Different Directory to Search . . . . . . . . . . . . . . . . . . . . . . . . . . . . . . . . . . . . . . . . . . . . . . . 89
To Change the Directory to Search . . . . . . . . . . . . . . . . . . . . . . . . . . . . . . . . . . . . . . . . . . . . . . . . . . 89
Creating New Directory Entries . . . . . . . . . . . . . . . . . . . . . . . . . . . . . . . . . . . . . . . . . . . . . . . . . . . . . . . . . . 89
Users . . . . . . . . . . . . . . . . . . . . . . . . . . . . . . . . . . . . . . . . . . . . . . . . . . . . . . . . . . . . . . . . . . . . . . . . . . . . . . 90
To Create a New User Entry in the Directory . . . . . . . . . . . . . . . . . . . . . . . . . . . . . . . . . . . . . . . . . 90
The User’s Preferred Language . . . . . . . . . . . . . . . . . . . . . . . . . . . . . . . . . . . . . . . . . . . . . . . . . . . . . 93
Administrators . . . . . . . . . . . . . . . . . . . . . . . . . . . . . . . . . . . . . . . . . . . . . . . . . . . . . . . . . . . . . . . . . . . . . . 93
To Create an Administrator . . . . . . . . . . . . . . . . . . . . . . . . . . . . . . . . . . . . . . . . . . . . . . . . . . . . . . . . 94
Specifying Windows NT and UNIX Options . . . . . . . . . . . . . . . . . . . . . . . . . . . . . . . . . . . . . . . . . . . . 94
To Enable Windows NT and UNIX Panels for an Individual User . . . . . . . . . . . . . . . . . . . . . . . 95
To Enable Windows NT and UNIX Panels for All New Users . . . . . . . . . . . . . . . . . . . . . . . . . . . 95
To Set Windows NT and UNIX Options and Attributes for a New User . . . . . . . . . . . . . . . . . . 96
Groups . . . . . . . . . . . . . . . . . . . . . . . . . . . . . . . . . . . . . . . . . . . . . . . . . . . . . . . . . . . . . . . . . . . . . . . . . . . . . 97
To Create a Static Group in the Directory . . . . . . . . . . . . . . . . . . . . . . . . . . . . . . . . . . . . . . . . . . . . . 98
To Add Users to the Configuration Administrators Group . . . . . . . . . . . . . . . . . . . . . . . . . . . . 100
To Create a Dynamic Group . . . . . . . . . . . . . . . . . . . . . . . . . . . . . . . . . . . . . . . . . . . . . . . . . . . . . . . 101
To Create a Certificate Group . . . . . . . . . . . . . . . . . . . . . . . . . . . . . . . . . . . . . . . . . . . . . . . . . . . . . . 103
Organizational Units . . . . . . . . . . . . . . . . . . . . . . . . . . . . . . . . . . . . . . . . . . . . . . . . . . . . . . . . . . . . . . . . 105
To Create a New Organizational Unit . . . . . . . . . . . . . . . . . . . . . . . . . . . . . . . . . . . . . . . . . . . . . . . 105
Modifying Existing Directory Entries . . . . . . . . . . . . . . . . . . . . . . . . . . . . . . . . . . . . . . . . . . . . . . . . . . . . 106
Updating User and Group Entries . . . . . . . . . . . . . . . . . . . . . . . . . . . . . . . . . . . . . . . . . . . . . . . . . . . . 106
To Edit a User or Group Entry in the Directory . . . . . . . . . . . . . . . . . . . . . . . . . . . . . . . . . . . . . . 106
To Change a User Password . . . . . . . . . . . . . . . . . . . . . . . . . . . . . . . . . . . . . . . . . . . . . . . . . . . . . . . 106
To Change the Configuration Administrator’s User Name or Password . . . . . . . . . . . . . . . . . 107
6 Managing Servers with Netscape Console • December 2001
Page 7

To Change the Administration Server Administrator’s User Name or Password . . . . . . . . . . 108
To Remove a User, Group, or Organizational Unit from the Directory . . . . . . . . . . . . . . . . . . . 108
Part 3 Using Netscape Administration Server . . . . . . . . . . . . . . . . . . . . . . . . . . . . . . . . . . 109
Chapter 6 Administration Server Basics . . . . . . . . . . . . . . . . . . . . . . . . . . . . . . . . . . . . . . . . 111
Restarting Administration Server . . . . . . . . . . . . . . . . . . . . . . . . . . . . . . . . . . . . . . . . . . . . . . . . . . . . . . . . 111
To Restart the Server from Netscape Console . . . . . . . . . . . . . . . . . . . . . . . . . . . . . . . . . . . . . . . . . . . 112
To Restart the Server from the Command Line . . . . . . . . . . . . . . . . . . . . . . . . . . . . . . . . . . . . . . . . . . 112
UNIX . . . . . . . . . . . . . . . . . . . . . . . . . . . . . . . . . . . . . . . . . . . . . . . . . . . . . . . . . . . . . . . . . . . . . . . . . . . 112
Windows NT . . . . . . . . . . . . . . . . . . . . . . . . . . . . . . . . . . . . . . . . . . . . . . . . . . . . . . . . . . . . . . . . . . . . 112
To Restart the Server from the NT Control Panel . . . . . . . . . . . . . . . . . . . . . . . . . . . . . . . . . . . . . . . . 113
Stopping Administration Server . . . . . . . . . . . . . . . . . . . . . . . . . . . . . . . . . . . . . . . . . . . . . . . . . . . . . . . . . 113
To Stop the Server from Netscape Console . . . . . . . . . . . . . . . . . . . . . . . . . . . . . . . . . . . . . . . . . . . . . 113
To Stop the Server from the Command Line . . . . . . . . . . . . . . . . . . . . . . . . . . . . . . . . . . . . . . . . . . . . 113
UNIX . . . . . . . . . . . . . . . . . . . . . . . . . . . . . . . . . . . . . . . . . . . . . . . . . . . . . . . . . . . . . . . . . . . . . . . . . . . 113
Windows NT . . . . . . . . . . . . . . . . . . . . . . . . . . . . . . . . . . . . . . . . . . . . . . . . . . . . . . . . . . . . . . . . . . . . 113
To Stop the Server from the NT Control Panel . . . . . . . . . . . . . . . . . . . . . . . . . . . . . . . . . . . . . . . . . . 114
Logging Options . . . . . . . . . . . . . . . . . . . . . . . . . . . . . . . . . . . . . . . . . . . . . . . . . . . . . . . . . . . . . . . . . . . . . . 114
To View the Access Log . . . . . . . . . . . . . . . . . . . . . . . . . . . . . . . . . . . . . . . . . . . . . . . . . . . . . . . . . . . . . 115
To View the Error Log . . . . . . . . . . . . . . . . . . . . . . . . . . . . . . . . . . . . . . . . . . . . . . . . . . . . . . . . . . . . . . . 115
To Change Where Logs are Stored . . . . . . . . . . . . . . . . . . . . . . . . . . . . . . . . . . . . . . . . . . . . . . . . . . . . 116
The Netscape Administration Page . . . . . . . . . . . . . . . . . . . . . . . . . . . . . . . . . . . . . . . . . . . . . . . . . . . . . . 116
To Access the Administration Page . . . . . . . . . . . . . . . . . . . . . . . . . . . . . . . . . . . . . . . . . . . . . . . . . . . . 117
Chapter 7 Administration Server Configuration . . . . . . . . . . . . . . . . . . . . . . . . . . . . . . . . . . 119
Network Settings . . . . . . . . . . . . . . . . . . . . . . . . . . . . . . . . . . . . . . . . . . . . . . . . . . . . . . . . . . . . . . . . . . . . . . 119
To Configure Network Settings . . . . . . . . . . . . . . . . . . . . . . . . . . . . . . . . . . . . . . . . . . . . . . . . . . . . . . . 120
Access Settings . . . . . . . . . . . . . . . . . . . . . . . . . . . . . . . . . . . . . . . . . . . . . . . . . . . . . . . . . . . . . . . . . . . . . . . . 121
To Set Administration Server Access Settings . . . . . . . . . . . . . . . . . . . . . . . . . . . . . . . . . . . . . . . . . . . 122
Encryption Settings . . . . . . . . . . . . . . . . . . . . . . . . . . . . . . . . . . . . . . . . . . . . . . . . . . . . . . . . . . . . . . . . . . . . 123
To Request and Install a Certificate for Administration Server . . . . . . . . . . . . . . . . . . . . . . . . . . . . 123
To Activate SSL on Administration Server . . . . . . . . . . . . . . . . . . . . . . . . . . . . . . . . . . . . . . . . . . . . . 124
Directory Settings . . . . . . . . . . . . . . . . . . . . . . . . . . . . . . . . . . . . . . . . . . . . . . . . . . . . . . . . . . . . . . . . . . . . . 125
The Configuration Directory . . . . . . . . . . . . . . . . . . . . . . . . . . . . . . . . . . . . . . . . . . . . . . . . . . . . . . . . . 125
Changing the Host or Port Number . . . . . . . . . . . . . . . . . . . . . . . . . . . . . . . . . . . . . . . . . . . . . . . . . . . 126
To Change the Host or Port Number . . . . . . . . . . . . . . . . . . . . . . . . . . . . . . . . . . . . . . . . . . . . . . . . 126
The User Directory . . . . . . . . . . . . . . . . . . . . . . . . . . . . . . . . . . . . . . . . . . . . . . . . . . . . . . . . . . . . . . . . . . 127
User Directory Settings . . . . . . . . . . . . . . . . . . . . . . . . . . . . . . . . . . . . . . . . . . . . . . . . . . . . . . . . . . . . . . 128
User Authentication and Directory Failover Support . . . . . . . . . . . . . . . . . . . . . . . . . . . . . . . . . . 128
Changing User Directory Settings for a Domain . . . . . . . . . . . . . . . . . . . . . . . . . . . . . . . . . . . . . . 128
7
Page 8

To Change the User Directory Settings for a Domain . . . . . . . . . . . . . . . . . . . . . . . . . . . . . . . . . . 129
To Change User Directory Settings for a Server Group . . . . . . . . . . . . . . . . . . . . . . . . . . . . . . . . 130
Chapter 8 Administration Server Command-Line Tools . . . . . . . . . . . . . . . . . . . . . . . . . . . 133
admconfig . . . . . . . . . . . . . . . . . . . . . . . . . . . . . . . . . . . . . . . . . . . . . . . . . . . . . . . . . . . . . . . . . . . . . . . . . . . . 133
Syntax . . . . . . . . . . . . . . . . . . . . . . . . . . . . . . . . . . . . . . . . . . . . . . . . . . . . . . . . . . . . . . . . . . . . . . . . . . . . 133
Options . . . . . . . . . . . . . . . . . . . . . . . . . . . . . . . . . . . . . . . . . . . . . . . . . . . . . . . . . . . . . . . . . . . . . . . . . . . 134
Tasks and Their Arguments . . . . . . . . . . . . . . . . . . . . . . . . . . . . . . . . . . . . . . . . . . . . . . . . . . . . . . . . . . 135
Examples . . . . . . . . . . . . . . . . . . . . . . . . . . . . . . . . . . . . . . . . . . . . . . . . . . . . . . . . . . . . . . . . . . . . . . . . . . 143
admin_ip.pl. . . . . . . . . . . . . . . . . . . . . . . . . . . . . . . . . . . . . . . . . . . . . . . . . . . . . . . . . . . . . . . . . . . . . . . . . . . 143
Usage . . . . . . . . . . . . . . . . . . . . . . . . . . . . . . . . . . . . . . . . . . . . . . . . . . . . . . . . . . . . . . . . . . . . . . . . . . . . . 143
ldapsearch, ldapmodify, and ldapdelete . . . . . . . . . . . . . . . . . . . . . . . . . . . . . . . . . . . . . . . . . . . . . . . . . . 144
sec-activate . . . . . . . . . . . . . . . . . . . . . . . . . . . . . . . . . . . . . . . . . . . . . . . . . . . . . . . . . . . . . . . . . . . . . . . . . . . 144
Syntax . . . . . . . . . . . . . . . . . . . . . . . . . . . . . . . . . . . . . . . . . . . . . . . . . . . . . . . . . . . . . . . . . . . . . . . . . . . . 144
Example . . . . . . . . . . . . . . . . . . . . . . . . . . . . . . . . . . . . . . . . . . . . . . . . . . . . . . . . . . . . . . . . . . . . . . . . . . . 144
sec-migrate . . . . . . . . . . . . . . . . . . . . . . . . . . . . . . . . . . . . . . . . . . . . . . . . . . . . . . . . . . . . . . . . . . . . . . . . . . . 144
Syntax . . . . . . . . . . . . . . . . . . . . . . . . . . . . . . . . . . . . . . . . . . . . . . . . . . . . . . . . . . . . . . . . . . . . . . . . . . . . 145
modutil . . . . . . . . . . . . . . . . . . . . . . . . . . . . . . . . . . . . . . . . . . . . . . . . . . . . . . . . . . . . . . . . . . . . . . . . . . . . . . 145
Syntax . . . . . . . . . . . . . . . . . . . . . . . . . . . . . . . . . . . . . . . . . . . . . . . . . . . . . . . . . . . . . . . . . . . . . . . . . . . . 146
Tasks and Options . . . . . . . . . . . . . . . . . . . . . . . . . . . . . . . . . . . . . . . . . . . . . . . . . . . . . . . . . . . . . . . . . . 146
Usage . . . . . . . . . . . . . . . . . . . . . . . . . . . . . . . . . . . . . . . . . . . . . . . . . . . . . . . . . . . . . . . . . . . . . . . . . . . . . 151
JAR Information File . . . . . . . . . . . . . . . . . . . . . . . . . . . . . . . . . . . . . . . . . . . . . . . . . . . . . . . . . . . . . . . . 152
JAR Information File Syntax . . . . . . . . . . . . . . . . . . . . . . . . . . . . . . . . . . . . . . . . . . . . . . . . . . . . . . . . . 154
Examples of Using modutil . . . . . . . . . . . . . . . . . . . . . . . . . . . . . . . . . . . . . . . . . . . . . . . . . . . . . . . . . . 159
Part 4 Advanced Server Management . . . . . . . . . . . . . . . . . . . . . . . . . . . . . . . . . . . . . . . . . 165
Chapter 9 Access Control . . . . . . . . . . . . . . . . . . . . . . . . . . . . . . . . . . . . . . . . . . . . . . . . . . . . 167
Overview of Access Control . . . . . . . . . . . . . . . . . . . . . . . . . . . . . . . . . . . . . . . . . . . . . . . . . . . . . . . . . . . . 167
Examples of Access Control . . . . . . . . . . . . . . . . . . . . . . . . . . . . . . . . . . . . . . . . . . . . . . . . . . . . . . . . . . 168
Setting Access Permissions For Servers . . . . . . . . . . . . . . . . . . . . . . . . . . . . . . . . . . . . . . . . . . . . . . . . . . . 170
To Set Access Permissions for a Server in the Navigation Tree . . . . . . . . . . . . . . . . . . . . . . . . . . . . 170
Working With Access Control Instructions . . . . . . . . . . . . . . . . . . . . . . . . . . . . . . . . . . . . . . . . . . . . . . . 171
What’s in an ACI . . . . . . . . . . . . . . . . . . . . . . . . . . . . . . . . . . . . . . . . . . . . . . . . . . . . . . . . . . . . . . . . . . . 171
Target . . . . . . . . . . . . . . . . . . . . . . . . . . . . . . . . . . . . . . . . . . . . . . . . . . . . . . . . . . . . . . . . . . . . . . . . . . 171
Permissions . . . . . . . . . . . . . . . . . . . . . . . . . . . . . . . . . . . . . . . . . . . . . . . . . . . . . . . . . . . . . . . . . . . . . 171
Bind Rules . . . . . . . . . . . . . . . . . . . . . . . . . . . . . . . . . . . . . . . . . . . . . . . . . . . . . . . . . . . . . . . . . . . . . . 172
Using the ACI Manager and ACI Editor . . . . . . . . . . . . . . . . . . . . . . . . . . . . . . . . . . . . . . . . . . . . . . . 172
To Specify What You Want an ACI to Apply To . . . . . . . . . . . . . . . . . . . . . . . . . . . . . . . . . . . . . . 173
To Create a New ACI with the Visual ACI Editor . . . . . . . . . . . . . . . . . . . . . . . . . . . . . . . . . . . . 174
To Create a New ACI with the Manual ACI Editor . . . . . . . . . . . . . . . . . . . . . . . . . . . . . . . . . . . 176
8 Managing Servers with Netscape Console • December 2001
Page 9

To Edit an Existing ACI with the ACI Editor . . . . . . . . . . . . . . . . . . . . . . . . . . . . . . . . . . . . . . . . . 177
To Remove an ACI . . . . . . . . . . . . . . . . . . . . . . . . . . . . . . . . . . . . . . . . . . . . . . . . . . . . . . . . . . . . . . . 178
Chapter 10 Using SSL and TLS with Netscape Servers . . . . . . . . . . . . . . . . . . . . . . . . . . . . 179
The SSL and TLS Protocols . . . . . . . . . . . . . . . . . . . . . . . . . . . . . . . . . . . . . . . . . . . . . . . . . . . . . . . . . . . . . . 179
SSL and TLS Ciphers . . . . . . . . . . . . . . . . . . . . . . . . . . . . . . . . . . . . . . . . . . . . . . . . . . . . . . . . . . . . . . . . 180
Choosing SSL and TLS Ciphers . . . . . . . . . . . . . . . . . . . . . . . . . . . . . . . . . . . . . . . . . . . . . . . . . . . . 180
Preparing to Use SSL and TLS Encryption . . . . . . . . . . . . . . . . . . . . . . . . . . . . . . . . . . . . . . . . . . . . . . . . 181
Using External Security Devices . . . . . . . . . . . . . . . . . . . . . . . . . . . . . . . . . . . . . . . . . . . . . . . . . . . . . . 181
Slots and Security Devices . . . . . . . . . . . . . . . . . . . . . . . . . . . . . . . . . . . . . . . . . . . . . . . . . . . . . . . . . 181
To Install an External Security Device . . . . . . . . . . . . . . . . . . . . . . . . . . . . . . . . . . . . . . . . . . . . . . . 182
To Remove an External PKCS #11 Module . . . . . . . . . . . . . . . . . . . . . . . . . . . . . . . . . . . . . . . . . . . 182
Obtaining and Installing a Server Certificate . . . . . . . . . . . . . . . . . . . . . . . . . . . . . . . . . . . . . . . . . . . . . . 183
SSL Certificates . . . . . . . . . . . . . . . . . . . . . . . . . . . . . . . . . . . . . . . . . . . . . . . . . . . . . . . . . . . . . . . . . . . . . 183
Preparing to Set Up SSL and TLS . . . . . . . . . . . . . . . . . . . . . . . . . . . . . . . . . . . . . . . . . . . . . . . . . . . . . 184
Setting up SSL or TLS with an Internal Security Device . . . . . . . . . . . . . . . . . . . . . . . . . . . . . . . . 184
Setting up SSL or TLS with an External Security Device . . . . . . . . . . . . . . . . . . . . . . . . . . . . . . . 184
Setting Up SSL with Internal and External Security Devices . . . . . . . . . . . . . . . . . . . . . . . . . . . . 184
Generating a Server Certificate Request . . . . . . . . . . . . . . . . . . . . . . . . . . . . . . . . . . . . . . . . . . . . . . . . 184
To Generate a Certificate Request . . . . . . . . . . . . . . . . . . . . . . . . . . . . . . . . . . . . . . . . . . . . . . . . . . 184
Sending a Server Certificate Request . . . . . . . . . . . . . . . . . . . . . . . . . . . . . . . . . . . . . . . . . . . . . . . . . . 186
To Send a Server Certificate Request as email . . . . . . . . . . . . . . . . . . . . . . . . . . . . . . . . . . . . . . . . 186
Installing the Certificate . . . . . . . . . . . . . . . . . . . . . . . . . . . . . . . . . . . . . . . . . . . . . . . . . . . . . . . . . . . . . 187
To Back Up a Certificate . . . . . . . . . . . . . . . . . . . . . . . . . . . . . . . . . . . . . . . . . . . . . . . . . . . . . . . . . . . 187
To Install a Server Certificate . . . . . . . . . . . . . . . . . . . . . . . . . . . . . . . . . . . . . . . . . . . . . . . . . . . . . . 187
To Install a CA Certificate or Server Certificate Chain . . . . . . . . . . . . . . . . . . . . . . . . . . . . . . . . . 188
Backing Up and Restoring Your Certificate Database . . . . . . . . . . . . . . . . . . . . . . . . . . . . . . . . . . . . 189
To Back Up Your Certificate Database . . . . . . . . . . . . . . . . . . . . . . . . . . . . . . . . . . . . . . . . . . . . . . . 189
To Restore Your Certificate Database From a Backup . . . . . . . . . . . . . . . . . . . . . . . . . . . . . . . . . 189
Activating SSL . . . . . . . . . . . . . . . . . . . . . . . . . . . . . . . . . . . . . . . . . . . . . . . . . . . . . . . . . . . . . . . . . . . . . . . . 190
To Activate SSL on a Netscape Server or a Netscape 4.x Server . . . . . . . . . . . . . . . . . . . . . . . . . . . . 190
Managing Server Certificates . . . . . . . . . . . . . . . . . . . . . . . . . . . . . . . . . . . . . . . . . . . . . . . . . . . . . . . . . . . . 192
Renewing a Certificate . . . . . . . . . . . . . . . . . . . . . . . . . . . . . . . . . . . . . . . . . . . . . . . . . . . . . . . . . . . . . . . 192
To Check a Certificate Expiration Date . . . . . . . . . . . . . . . . . . . . . . . . . . . . . . . . . . . . . . . . . . . . . . 192
To Generate a Certificate Renewal Request . . . . . . . . . . . . . . . . . . . . . . . . . . . . . . . . . . . . . . . . . . 192
Changing the CA Trust Options . . . . . . . . . . . . . . . . . . . . . . . . . . . . . . . . . . . . . . . . . . . . . . . . . . . . . . 194
To Change the CA Trust Options . . . . . . . . . . . . . . . . . . . . . . . . . . . . . . . . . . . . . . . . . . . . . . . . . . . 194
Changing Security Device Passwords . . . . . . . . . . . . . . . . . . . . . . . . . . . . . . . . . . . . . . . . . . . . . . . . . . 194
To Change a Security Device Password . . . . . . . . . . . . . . . . . . . . . . . . . . . . . . . . . . . . . . . . . . . . . 195
Managing Certificate Lists . . . . . . . . . . . . . . . . . . . . . . . . . . . . . . . . . . . . . . . . . . . . . . . . . . . . . . . . . . . 195
To Obtain a CRL or CKL From a CA . . . . . . . . . . . . . . . . . . . . . . . . . . . . . . . . . . . . . . . . . . . . . . . . 195
To View, Add, or Delete a CRL or CKL . . . . . . . . . . . . . . . . . . . . . . . . . . . . . . . . . . . . . . . . . . . . . . 196
Using Client Authentication . . . . . . . . . . . . . . . . . . . . . . . . . . . . . . . . . . . . . . . . . . . . . . . . . . . . . . . . . . . . 197
9
Page 10

How Client Authentication Works . . . . . . . . . . . . . . . . . . . . . . . . . . . . . . . . . . . . . . . . . . . . . . . . . . . . 197
Preparing to Use Client Authentication . . . . . . . . . . . . . . . . . . . . . . . . . . . . . . . . . . . . . . . . . . . . . . . . 198
The certmap.conf File . . . . . . . . . . . . . . . . . . . . . . . . . . . . . . . . . . . . . . . . . . . . . . . . . . . . . . . . . . . . . . . 198
DNComps . . . . . . . . . . . . . . . . . . . . . . . . . . . . . . . . . . . . . . . . . . . . . . . . . . . . . . . . . . . . . . . . . . . . . . 199
FilterComps . . . . . . . . . . . . . . . . . . . . . . . . . . . . . . . . . . . . . . . . . . . . . . . . . . . . . . . . . . . . . . . . . . . . . 200
VerifyCert . . . . . . . . . . . . . . . . . . . . . . . . . . . . . . . . . . . . . . . . . . . . . . . . . . . . . . . . . . . . . . . . . . . . . . 200
CmapLdapAttr . . . . . . . . . . . . . . . . . . . . . . . . . . . . . . . . . . . . . . . . . . . . . . . . . . . . . . . . . . . . . . . . . . 201
Library . . . . . . . . . . . . . . . . . . . . . . . . . . . . . . . . . . . . . . . . . . . . . . . . . . . . . . . . . . . . . . . . . . . . . . . . . 201
InitFn . . . . . . . . . . . . . . . . . . . . . . . . . . . . . . . . . . . . . . . . . . . . . . . . . . . . . . . . . . . . . . . . . . . . . . . . . . 201
Custom Properties . . . . . . . . . . . . . . . . . . . . . . . . . . . . . . . . . . . . . . . . . . . . . . . . . . . . . . . . . . . . . . . 201
Editing the certmap.conf File . . . . . . . . . . . . . . . . . . . . . . . . . . . . . . . . . . . . . . . . . . . . . . . . . . . . . . . . . 201
To Edit the certmap.conf File . . . . . . . . . . . . . . . . . . . . . . . . . . . . . . . . . . . . . . . . . . . . . . . . . . . . . . 202
Example certmap.conf Mappings . . . . . . . . . . . . . . . . . . . . . . . . . . . . . . . . . . . . . . . . . . . . . . . . . . . . . 203
Example of a Default Mapping . . . . . . . . . . . . . . . . . . . . . . . . . . . . . . . . . . . . . . . . . . . . . . . . . . . . 203
Example of an Additional Mapping . . . . . . . . . . . . . . . . . . . . . . . . . . . . . . . . . . . . . . . . . . . . . . . . 203
Example of a Mapping with an Attribute Search . . . . . . . . . . . . . . . . . . . . . . . . . . . . . . . . . . . . . 204
Using Client Authentication Between Servers . . . . . . . . . . . . . . . . . . . . . . . . . . . . . . . . . . . . . . . . . . 204
To Set Up Client Authentication Between Servers . . . . . . . . . . . . . . . . . . . . . . . . . . . . . . . . . . . . 205
Client Authentication for Users . . . . . . . . . . . . . . . . . . . . . . . . . . . . . . . . . . . . . . . . . . . . . . . . . . . . . . . 206
To Set Up Client Authentication for Users . . . . . . . . . . . . . . . . . . . . . . . . . . . . . . . . . . . . . . . . . . . 206
Chapter 11 Using SNMP to Monitor Servers . . . . . . . . . . . . . . . . . . . . . . . . . . . . . . . . . . . . . 209
SNMP Basics . . . . . . . . . . . . . . . . . . . . . . . . . . . . . . . . . . . . . . . . . . . . . . . . . . . . . . . . . . . . . . . . . . . . . . . . . 209
How SNMP Works . . . . . . . . . . . . . . . . . . . . . . . . . . . . . . . . . . . . . . . . . . . . . . . . . . . . . . . . . . . . . . . . . 211
Netscape MIBs . . . . . . . . . . . . . . . . . . . . . . . . . . . . . . . . . . . . . . . . . . . . . . . . . . . . . . . . . . . . . . . . . . . . . 211
The Administration Server MIB . . . . . . . . . . . . . . . . . . . . . . . . . . . . . . . . . . . . . . . . . . . . . . . . . . . . 212
Types of SNMP Messages . . . . . . . . . . . . . . . . . . . . . . . . . . . . . . . . . . . . . . . . . . . . . . . . . . . . . . . . . . . 213
Network Management Station-Initiated Communication . . . . . . . . . . . . . . . . . . . . . . . . . . . . . . 213
Server-Initiated Communication . . . . . . . . . . . . . . . . . . . . . . . . . . . . . . . . . . . . . . . . . . . . . . . . . . . 213
Setting Up SNMP on UNIX . . . . . . . . . . . . . . . . . . . . . . . . . . . . . . . . . . . . . . . . . . . . . . . . . . . . . . . . . . . . . 214
Using a Proxy SNMP Agent on UNIX . . . . . . . . . . . . . . . . . . . . . . . . . . . . . . . . . . . . . . . . . . . . . . . . . . . . 215
Installing and Starting the Proxy SNMP Agent . . . . . . . . . . . . . . . . . . . . . . . . . . . . . . . . . . . . . . . . . 216
To Install the SNMP Proxy Agent . . . . . . . . . . . . . . . . . . . . . . . . . . . . . . . . . . . . . . . . . . . . . . . . . . 216
To Start the SNMP Proxy Agent . . . . . . . . . . . . . . . . . . . . . . . . . . . . . . . . . . . . . . . . . . . . . . . . . . . 216
To Restart the Native Agent . . . . . . . . . . . . . . . . . . . . . . . . . . . . . . . . . . . . . . . . . . . . . . . . . . . . . . . 217
Reconfiguring a Native Agent on UNIX . . . . . . . . . . . . . . . . . . . . . . . . . . . . . . . . . . . . . . . . . . . . . . . . . . 217
Configuring the Master Agent on UNIX . . . . . . . . . . . . . . . . . . . . . . . . . . . . . . . . . . . . . . . . . . . . . . . . . . 218
Community Strings . . . . . . . . . . . . . . . . . . . . . . . . . . . . . . . . . . . . . . . . . . . . . . . . . . . . . . . . . . . . . . . . . 218
Trap Destinations . . . . . . . . . . . . . . . . . . . . . . . . . . . . . . . . . . . . . . . . . . . . . . . . . . . . . . . . . . . . . . . . . . 218
Configuring the Master Agent using Netscape Console . . . . . . . . . . . . . . . . . . . . . . . . . . . . . . . . . . 218
To Add, Edit, or Remove a Community String using Netscape Console . . . . . . . . . . . . . . . . . 219
To Add, Edit, or Remove a Trap Destination . . . . . . . . . . . . . . . . . . . . . . . . . . . . . . . . . . . . . . . . . 220
Manually Configuring the Master Agent . . . . . . . . . . . . . . . . . . . . . . . . . . . . . . . . . . . . . . . . . . . . . . . 221
10 Managing Servers with Netscape Console • December 2001
Page 11

To Configure the Master SNMP Agent Manually . . . . . . . . . . . . . . . . . . . . . . . . . . . . . . . . . . . . . 221
Editing the Master Agent Config File . . . . . . . . . . . . . . . . . . . . . . . . . . . . . . . . . . . . . . . . . . . . . . . 222
Defining sysContact and sysLocation Variables . . . . . . . . . . . . . . . . . . . . . . . . . . . . . . . . . . . . . . 222
Starting the Master Agent on UNIX . . . . . . . . . . . . . . . . . . . . . . . . . . . . . . . . . . . . . . . . . . . . . . . . . . . . . . 223
Starting the Agent Using Netscape Console . . . . . . . . . . . . . . . . . . . . . . . . . . . . . . . . . . . . . . . . . . . . 223
To Start the Master Agent Using Netscape Console . . . . . . . . . . . . . . . . . . . . . . . . . . . . . . . . . . . 223
Starting the Agent from the Command Line . . . . . . . . . . . . . . . . . . . . . . . . . . . . . . . . . . . . . . . . . . . . 224
To Start the Agent on the Standard Port . . . . . . . . . . . . . . . . . . . . . . . . . . . . . . . . . . . . . . . . . . . . . 224
To Start the Agent on a Non-Standard Port Using the Config File . . . . . . . . . . . . . . . . . . . . . . . 224
To Start the Agent on a Non-Standard Port using System Services . . . . . . . . . . . . . . . . . . . . . . 225
Enabling the Subagent on UNIX . . . . . . . . . . . . . . . . . . . . . . . . . . . . . . . . . . . . . . . . . . . . . . . . . . . . . . . . . 225
Using the Windows NT SNMP Service . . . . . . . . . . . . . . . . . . . . . . . . . . . . . . . . . . . . . . . . . . . . . . . . . . . 225
To Set Up SNMP on Windows NT . . . . . . . . . . . . . . . . . . . . . . . . . . . . . . . . . . . . . . . . . . . . . . . . . . . . 225
Part 5 Appendixes . . . . . . . . . . . . . . . . . . . . . . . . . . . . . . . . . . . . . . . . . . . . . . . . . . . . . . . . . 227
Appendix A Fortezza . . . . . . . . . . . . . . . . . . . . . . . . . . . . . . . . . . . . . . . . . . . . . . . . . . . . . . . . 229
How It Works . . . . . . . . . . . . . . . . . . . . . . . . . . . . . . . . . . . . . . . . . . . . . . . . . . . . . . . . . . . . . . . . . . . . . . . . . 229
How Fortezza Crypto Cards are Certified . . . . . . . . . . . . . . . . . . . . . . . . . . . . . . . . . . . . . . . . . . . . . . . . . 230
Fortezza Keys, Certificates, and Encryption . . . . . . . . . . . . . . . . . . . . . . . . . . . . . . . . . . . . . . . . . . . . . . . 230
CRLs and CKLs . . . . . . . . . . . . . . . . . . . . . . . . . . . . . . . . . . . . . . . . . . . . . . . . . . . . . . . . . . . . . . . . . . . . 231
Encryption Algorithms . . . . . . . . . . . . . . . . . . . . . . . . . . . . . . . . . . . . . . . . . . . . . . . . . . . . . . . . . . . . . . 231
SKIPJACK . . . . . . . . . . . . . . . . . . . . . . . . . . . . . . . . . . . . . . . . . . . . . . . . . . . . . . . . . . . . . . . . . . . . . . . 231
SSL Protocol . . . . . . . . . . . . . . . . . . . . . . . . . . . . . . . . . . . . . . . . . . . . . . . . . . . . . . . . . . . . . . . . . . . . . 231
RC4 Encryption . . . . . . . . . . . . . . . . . . . . . . . . . . . . . . . . . . . . . . . . . . . . . . . . . . . . . . . . . . . . . . . . . . 231
NULL Encryption . . . . . . . . . . . . . . . . . . . . . . . . . . . . . . . . . . . . . . . . . . . . . . . . . . . . . . . . . . . . . . . . 231
Enabling Fortezza . . . . . . . . . . . . . . . . . . . . . . . . . . . . . . . . . . . . . . . . . . . . . . . . . . . . . . . . . . . . . . . . . . . . . 231
To Enable Fortezza on Administration Server . . . . . . . . . . . . . . . . . . . . . . . . . . . . . . . . . . . . . . . . . . . 232
Appendix B Introduction to Public-Key Cryptography . . . . . . . . . . . . . . . . . . . . . . . . . . . . . 233
Internet Security Issues . . . . . . . . . . . . . . . . . . . . . . . . . . . . . . . . . . . . . . . . . . . . . . . . . . . . . . . . . . . . . . . . . 233
Encryption and Decryption . . . . . . . . . . . . . . . . . . . . . . . . . . . . . . . . . . . . . . . . . . . . . . . . . . . . . . . . . . . . . 235
Symmetric-Key Encryption . . . . . . . . . . . . . . . . . . . . . . . . . . . . . . . . . . . . . . . . . . . . . . . . . . . . . . . . . . . 236
Public-Key Encryption . . . . . . . . . . . . . . . . . . . . . . . . . . . . . . . . . . . . . . . . . . . . . . . . . . . . . . . . . . . . . . 237
Key Length and Encryption Strength . . . . . . . . . . . . . . . . . . . . . . . . . . . . . . . . . . . . . . . . . . . . . . . . . . 238
Digital Signatures . . . . . . . . . . . . . . . . . . . . . . . . . . . . . . . . . . . . . . . . . . . . . . . . . . . . . . . . . . . . . . . . . . . . . 239
Certificates and Authentication . . . . . . . . . . . . . . . . . . . . . . . . . . . . . . . . . . . . . . . . . . . . . . . . . . . . . . . . . . 240
A Certificate Identifies Someone or Something . . . . . . . . . . . . . . . . . . . . . . . . . . . . . . . . . . . . . . . . . . 241
Authentication Confirms an Identity . . . . . . . . . . . . . . . . . . . . . . . . . . . . . . . . . . . . . . . . . . . . . . . . . . 242
Password-Based Authentication . . . . . . . . . . . . . . . . . . . . . . . . . . . . . . . . . . . . . . . . . . . . . . . . . . . . 243
Certificate-Based Authentication . . . . . . . . . . . . . . . . . . . . . . . . . . . . . . . . . . . . . . . . . . . . . . . . . . . 244
11
Page 12

How Certificates Are Used . . . . . . . . . . . . . . . . . . . . . . . . . . . . . . . . . . . . . . . . . . . . . . . . . . . . . . . . . . 246
Types of Certificates . . . . . . . . . . . . . . . . . . . . . . . . . . . . . . . . . . . . . . . . . . . . . . . . . . . . . . . . . . . . . . 246
SSL Protocol . . . . . . . . . . . . . . . . . . . . . . . . . . . . . . . . . . . . . . . . . . . . . . . . . . . . . . . . . . . . . . . . . . . . 248
Signed and Encrypted Email . . . . . . . . . . . . . . . . . . . . . . . . . . . . . . . . . . . . . . . . . . . . . . . . . . . . . . 248
Form Signing . . . . . . . . . . . . . . . . . . . . . . . . . . . . . . . . . . . . . . . . . . . . . . . . . . . . . . . . . . . . . . . . . . . . 249
Single Sign-On . . . . . . . . . . . . . . . . . . . . . . . . . . . . . . . . . . . . . . . . . . . . . . . . . . . . . . . . . . . . . . . . . . 249
Object Signing . . . . . . . . . . . . . . . . . . . . . . . . . . . . . . . . . . . . . . . . . . . . . . . . . . . . . . . . . . . . . . . . . . . 250
Contents of a Certificate . . . . . . . . . . . . . . . . . . . . . . . . . . . . . . . . . . . . . . . . . . . . . . . . . . . . . . . . . . . . . 251
Distinguished Names . . . . . . . . . . . . . . . . . . . . . . . . . . . . . . . . . . . . . . . . . . . . . . . . . . . . . . . . . . . . 251
A Typical Certificate . . . . . . . . . . . . . . . . . . . . . . . . . . . . . . . . . . . . . . . . . . . . . . . . . . . . . . . . . . . . . 252
How CA Certificates Are Used to Establish Trust . . . . . . . . . . . . . . . . . . . . . . . . . . . . . . . . . . . . . . . 254
CA Hierarchies . . . . . . . . . . . . . . . . . . . . . . . . . . . . . . . . . . . . . . . . . . . . . . . . . . . . . . . . . . . . . . . . . . 255
Certificate Chains . . . . . . . . . . . . . . . . . . . . . . . . . . . . . . . . . . . . . . . . . . . . . . . . . . . . . . . . . . . . . . . . 256
Verifying a Certificate Chain . . . . . . . . . . . . . . . . . . . . . . . . . . . . . . . . . . . . . . . . . . . . . . . . . . . . . . 257
Managing Certificates . . . . . . . . . . . . . . . . . . . . . . . . . . . . . . . . . . . . . . . . . . . . . . . . . . . . . . . . . . . . . . . . . 260
Issuing Certificates . . . . . . . . . . . . . . . . . . . . . . . . . . . . . . . . . . . . . . . . . . . . . . . . . . . . . . . . . . . . . . . . . 260
Certificates and the LDAP Directory . . . . . . . . . . . . . . . . . . . . . . . . . . . . . . . . . . . . . . . . . . . . . . . . . . 261
Key Management . . . . . . . . . . . . . . . . . . . . . . . . . . . . . . . . . . . . . . . . . . . . . . . . . . . . . . . . . . . . . . . . . . . 261
Renewing and Revoking Certificates . . . . . . . . . . . . . . . . . . . . . . . . . . . . . . . . . . . . . . . . . . . . . . . . . . 262
Registration Authorities . . . . . . . . . . . . . . . . . . . . . . . . . . . . . . . . . . . . . . . . . . . . . . . . . . . . . . . . . . . . . 263
Appendix C Introduction to SSL . . . . . . . . . . . . . . . . . . . . . . . . . . . . . . . . . . . . . . . . . . . . . . . 265
The SSL Protocol . . . . . . . . . . . . . . . . . . . . . . . . . . . . . . . . . . . . . . . . . . . . . . . . . . . . . . . . . . . . . . . . . . . . . . 265
Ciphers Used with SSL . . . . . . . . . . . . . . . . . . . . . . . . . . . . . . . . . . . . . . . . . . . . . . . . . . . . . . . . . . . . . . . . . 267
Cipher Suites With RSA Key Exchange . . . . . . . . . . . . . . . . . . . . . . . . . . . . . . . . . . . . . . . . . . . . . . . . 268
Fortezza Cipher Suites . . . . . . . . . . . . . . . . . . . . . . . . . . . . . . . . . . . . . . . . . . . . . . . . . . . . . . . . . . . . . . 270
The SSL Handshake . . . . . . . . . . . . . . . . . . . . . . . . . . . . . . . . . . . . . . . . . . . . . . . . . . . . . . . . . . . . . . . . . . . 272
Server Authentication . . . . . . . . . . . . . . . . . . . . . . . . . . . . . . . . . . . . . . . . . . . . . . . . . . . . . . . . . . . . . . . 274
Man-in-the-Middle Attack . . . . . . . . . . . . . . . . . . . . . . . . . . . . . . . . . . . . . . . . . . . . . . . . . . . . . . . . . . . 276
Client Authentication . . . . . . . . . . . . . . . . . . . . . . . . . . . . . . . . . . . . . . . . . . . . . . . . . . . . . . . . . . . . . . . 277
Glossary . . . . . . . . . . . . . . . . . . . . . . . . . . . . . . . . . . . . . . . . . . . . . . . . . . . . . . . . . . . . . . . . . . . . 281
Index . . . . . . . . . . . . . . . . . . . . . . . . . . . . . . . . . . . . . . . . . . . . . . . . . . . . . . . . . . . . . . . . . . . . . . . 293
12 Managing Servers with Netscape Console • December 2001
Page 13

Managing Servers with Netscape Console provides background information that
system architects and administrators need to successfully install and manage
Netscape servers in their enterprise. Read about Netscape server basics here before
you begin installing and configuring servers in your enterprise.
What’s in This Guide
This book provides information you need to use Netscape servers. It is divided into
the following parts:
• Part 1, “Overview of Netscape Console”
• Part 2, “Netscape Console Basics”
About This Guide
• Part 3, “Using Netscape Administration Server”
• Part 4, “Advanced Server Management”
• Part 5, “Appendixes”
Conventions Used in This Guide
The following typographical conventions are used in this guide:
Monospaced font
This typeface is used for any text that appears on the computer screen or text that
you should type. It’s also used for file, path, and function names.
Boldface
In UI reference material, boldface type identifies window elements such as input
areas and checkboxes.
13
Page 14

Conventions Used in This Guide
Italic
Italic type is used for emphasis, book titles, glossary terms, and variables.
TIP Tips are useful information that can help you save time.
NOTE Notes mark important information. Make sure you read the
CAUTION Cautions alert you to potentially problematic situations, and tell you
[ ]
Square brackets enclose commands that are optional. You can choose to omit any
text that appears in square brackets.
/
information before continuing with a task.
how to avoid them.
Forward slashes are used to separate directories in a path. If you use the Windows
NT operating system, you may be more familiar with paths containing back slashes
(\). NT supports both types of slashes; you can use whichever you prefer.
>
Forward angle brackets are used to indicate menu hierarchies. For example, the
text “from the Console menu, choose Security > Manage Certificates” means that
you should open the Console menu, select the Security item to open its submenu,
and then choose the Manage Certificates item from that submenu.
“Start”
In Windows NT -related sections of this guide, “Start” typically refers to the
Windows NT Start menu button. For example, “click Start, and then choose
Programs > Netscape Server Products > Netscape Console Version 6.0” means that
you should click the Windows NT Start menu button, and then select Programs >
Netscape Server Products > Netscape Console Version 6.0.
14 Managing Servers with Netscape Console • December 2001
Page 15

UNIX
Marks text that applies only to UNIX users.
NT
Marks text that applies only to Windows NT users.
Viewing This Guide Online
For your convenience, this book is also available online. When using any Netscape
server software, you can view the online version of Managing Servers with Netscape
Console.
To View This Manual Fro m Netscape Console or Administration Server
1. From the Help menu, choose Contents or press the F1 key.
Viewing This Guide Online
A browser window opens and displays an HTML version of the table of
contents for this manual. Click a link to go to a chapter or section.
To View This Manual From Another Product
1. From the server management window’s Help menu, choose Documentation
Resources.
A browser window opens and displays a Documentation Resources page.
2. Click Managing Servers with Netscape Console to view an HTML version of this
manuals’ table of contents. Click a link to go to a chapter or section.
About This Guide 15
Page 16

Getting Additional Help
Getting Additional Help
The following types of help are available from within Netscape Console:
• Context-sensitive help
• A searchable version of this guide’s index
• A Documentation Resources page with product-related links.
This section shows you how to access these resources.
To Get Context-Sensitive Help
1. Click a Help button.
You will see a browser window with information about the screen you are
viewing.
2. If you need further assistance, click one of the following links at the top or
bottom of the screen:
Help Topics and Procedures. This displays a list of all available help topics
and procedures for the product you’re working in.
Manual Contents. This displays the table of contents of the manual for the
product you’re working in.
Manual Index. This displays the index of the manual for the product you’re
working in.
Documentation Resources. This displays the Documentation Resources page,
which contains links to documentation for the product you’re using.
To Search this Guide’s Index
1. From the Help menu, choose Search Index.
This opens the Search Index dialog box, an interface used for searching this
guide’s index. The text field at the top of the dialog box accepts a search term,
the middle frame shows an alphabetical list of all indexed terms, and the
bottom frame is used to show topics.
16 Managing Servers with Netscape Console • December 2001
Page 17

Getting Additional Help
2. Enter a search term in the top field of the search interface.
If the index contains your search term, you will see it highlighted in the
alphabetical list. If your search term is not found, the closest match is
highlighted.
3. Click the desired topic from the bottom frame.
These topics are links to sections of this guide. Clicking one opens a browser
displaying the appropriate section.
4. To dismiss the Search Index dialog box, click Close.
To Open the Product Homepage
• From the Help menu, choose Documentation Resources.
A browser window opens containing a list of Netscape Console-related links.
You can also access this page by clicking Documentation Resources from
within context-sensitive help.
About This Guide 17
Page 18

Getting Additional Help
18 Managing Servers with Netscape Console • December 2001
Page 19

Part 1
Overview of Netscape Console
Chapter 1, “Introducing Netscape Console and Administration
Server”
Chapter 2, “Installing Netscape Servers and Console”
19
Page 20

20 Managing Servers with Netscape Console • December 2001
Page 21

Chapter 1
Introducing Netscape Console and
Administration Server
Netscape Console and Administration Server Version 6.0 are two parts of a system
that lets you manage Netscape software and users in your enterprise. This chapter
presents a high-level overview of what this system is and how you can use it to
work with resources across your network.
In order to run most Netscape software, you must first install Netscape Directory
Server. By default, when you do this, Netscape Console and Administration Server
are automatically installed for you. Although Netscape Directory Server, Netscape
Console, and Netscape Administration Server work tightly with one another, each
plays a specific role in the management of servers, applications, and users.
Netscape Directory Server stores server and application configuration settings as
well as user information. This data is used by other servers in the enterprise.
Typically, application and server configuration information is stored in one subtree
of Netscape Directory Server while user and group entries are stored in another
subtree. If you have a large enterprise, however, you can store your configuration
and user information in separate instances of Directory Server (which can be on the
same host machine or on two different host machines). When the terms
configuration directory and user directory are used in this guide, they refer to where
the configuration information and the user information is stored—either in the
subtrees of a single instance of Directory Server or in two separate instances of
Directory Server.
Netscape Console is the front-end management application for Netscape software
in your enterprise. It finds all servers and applications registered in your
configuration directory, displays them in a graphical interface, and lets you
manage and configure them. In addition, Netscape Console provides graphical
tools for locating and managing entries in the user directory. Figure 1-1 shows
Netscape Console’s interface.
21
Page 22

Figure 1-1 The Netscape Console Interface
When you log in to Netscape Console, it connects to an instance of Administration
Server using the Hypertext Transfer Protocol (HTTP). Administration Server
manages requests for all Netscape products installed in a single root folder.
When you install a Netscape product in a new folder, Administration Server is
installed for you. If you install additional products in the same folder, they can use
the instance of Administration Server that is already there. If a product includes a
newer version of Administration Server and Console than the versions in the root
folder, the installer updates the folder with the latest versions. Administration
Server and Console are backward compatible; all existing Netscape servers will
continue to work normally.
The system for managing Netscape products works as follows:
Netscape Console lets you manage resources (servers or applications) as well as
add or edit user information. When you use Netscape Console to manage
resources, Console sends HTTP requests to the instance of Administration Server
that controls the resource. Upon receiving these requests, the instance of
22 Managing Servers with Netscape Console • December 2001
Page 23

Administration Server executes programs that perform the requested tasks. For
example, Administration Server can execute programs to modify the server and
application settings that are stored in the configuration directory or to change the
port number that a server listens to.
When you use Netscape Console to add or edit user entries, it sends Lightweight
Directory Access Protocol (LDAP) messages directly to Directory Server. The
information in these messages is then stored in the user directory. Figure 1-2
illustrates the system.
Figure 1-2 A Simple System With Netscape Console
Figure 1-2 shows an example of a relatively simple system. As your enterprise
grows and your needs change, you have the flexibility to add additional hosts and
servers. Even when you install new hardware and software, you can continue to
use a single instance of Netscape Console to manage your network. Figure 1-3
shows how a complex system might be organized.
Chapter 1 Introducing Netscape Console and Administration Server 23
Page 24

Figure 1-3 A More Complex System With Netscape Console
The rest of this guide shows you how to install and use Netscape Console and
Administration Server to manage servers, applications, and users.
If you would like to learn more about how Netscape Console works before
installing the product, see “A Tour of Netscape Console” on page 49.
24 Managing Servers with Netscape Console • December 2001
Page 25

Chapter 2
Installing Netscape Servers and
Console
This chapter provides an overview of the Netscape Server Products Setup program
and how it is used in various situations.
This chapter contains the following sections:
• The Setup Program
• Upgrading to Version Version 6.0
• Silent Installation
• Uninstallation
Each Netscape server has its own detailed installation instructions.
25
Page 26

The Setup Program
The Setup Program
The Netscape Server Products Setup program is for installing Netscape servers all
at once or one at a time. Use the Setup program each time you need to do any of the
following:
• Install a new server or server component
• Install Netscape Console as a stand-alone application
• Update a server
Installing a New Server
This section provides an overview of installation dependencies and options
common to all Netscape servers.
Directory Server Must Be Installed First
In order to install Netscape software, you must first set up Directory Server. When
you do this, you create a user ID and password for the Configuration
Administrator. During a typical installation, the Setup program checks this user ID
and password against the installed directory. If the values do not match,
authentication fails, and you can’t complete the installation.
For detailed information on installing the Directory Server, see the server’s
documentation.
When you install a Directory Server for the first time, Netscape Administration
Server and Console are automatically installed for you.
Administration Server Is Required in Each Server Root
Every Netscape server root must contain an instance of Administration Server. If
you are installing a server into a new folder, the Setup program will automatically
install Administration Server for you.
NOTE Installing or upgrading Console on Windows NT requires
rebooting the machine at the end of the install process. The option
to reboot is offered at the end of the setup program. If you choose
not to reboot at the end of the install process you must remember to
reboot later, before you use Console.
26 Managing Servers with Netscape Console • December 2001
Page 27

The Setup Program
Installation Modes
The Setup program offers three installation modes: Express, Typical, and Custom.
Express
Use this mode to get the system running quickly, using default settings as much as
possible. This mode was designed for administrators who want to test a server’s
basic operation on a particular system before deploying. It automatically generates
as much information as possible to complete the most basic installation. Generally,
you only need to enter administrator names and passwords during an express
installation.
Typical
Use this mode if you want to specify some, but not all, installation options.
Administrators often use this mode because it handles the details of server
configuration, while still letting them modify settings such as directory location,
port numbers, user names, and passwords.
Custom
Use this mode only if you’ve run the installer before, and are familiar with server
configuration settings and how to modify them. This mode is most useful to the
administrator who routinely installs and upgrades servers, and whose company
has already identified special enterprise needs. When using custom mode, you can
specify all typical options as well as advanced ones such as the IP address of a host
system.
Installing Netscape Console as a Stand-Alone Application
You can install Netscape Console as a stand-alone application on a machine local to
you. This is useful when you want to manage servers on remote machines.
To Install Netscape Console as a Stand-Alone Application on UNIX
1. Download the compressed product binaries for Netscape Console.
2. Extract the binaries into a new directory.
3. Run the Setup program by typing setup.
The first installation screen appears.
Chapter 2 Installing Netscape Servers and Console 27
Page 28

The Setup Program
4. Proceed through the installation process. Here are the prompts you encounter
with instructions about what to do:
Would you like to continue with installation? Enter
Yes
Do you agree to the license terms? Enter Yes
Select the component you want to install. Enter 2 for Netscape Console
Installation location. Enter the path where you want to install Netscape
Console. If the specified folder does not exist, the Setup program will create it
for you.
5. Press Enter.
The Setup program installs Netscape Console in the folder you specified.
Once installation completes, you can run Netscape Console by navigating to the
folder you specified as the installation location, and then typing
startconsole.
To Install Netscape Console as a Stand-Alone Application on
Windows NT
1. Download the compressed product binaries for Netscape Console.
2. Extract the binaries into a new folder and run the setup.exe program.
The installation startup screen appears.
28 Managing Servers with Netscape Console • December 2001
Page 29

Upgrading to Version Version 6.0
3. Click Next.
4. Proceed through the installation process. Here are the prompts you encounter
with instructions about what to do:
Do you accept all of the terms of the preceding license agreement? Click
Choose the type of Setup you prefer. Select Netscape Console
Installation directory. Enter the location where you want to install Netscape
Console. If this folder does not exist, the Setup program asks if you want to
create it.
5. Review your selections. If you need to make any changes, click Back and
modify your choices.
6. Click Install.
The Setup program installs Netscape Console in the specified folder.
7. When the installer completes, click Finish.
Once installation completes, you can run Netscape Console by clicking Start, and
then choosing Programs > Netscape Server Products > Netscape Console Version
6.0.
Upgrading to Version Ve rsio n 6. 0
If you already have versions of Netscape Console and Administration Server
installed on your system, you can upgrade to Netscape Console Version 6.0. This
section contains instructions for performing the following upgrades:
Yes
• Upgrading Administration Server and Console
• Upgrading a Stand-Alone Console.
NOTE The instructions presented in this section apply only when
upgrading Netscape Administration Server and Console. If you
want to upgrade a different Netscape product, please refer to the
installation instructions for the upgraded version of that product.
Chapter 2 Installing Netscape Servers and Console 29
Page 30

Upgrading to Version Version 6.0
Upgrading Administration Server and Console
To upgrade Netscape Administration Server and Console to Netscape
Administration Server and Console Version 6.0, follow the directions for your
operating system.
To Upgrade on UNIX
1. Download the compressed product binaries for Netscape Administration
Server and Console.
2. Extract the binaries into a new folder.
3. Run the Setup program by typing setup.
The first installation screen appears.
4. Proceed through the installation process. Here are the prompts you encounter
with instructions about what to do:
Would you like to continue with installation? Press Enter for Yes
Do you agree to the license terms? Enter
Yes
Select the component you want to install Enter 1 for Netscape Servers
Choose an installation type Enter
2 for Typical
Installation location Enter the location where Administration Server is
currently installed.
If Administration Server was installed with another Netscape server, enter the
path to that product’s server root. For example, if you installed Netscape
Directory Server 4.1 in the
/usr/netscape/server4 as your installation location.
enter
/usr/netscape/server4 folder, then you would
Specify the components you wish to install Press Enter (for All)
(Core Components) Specify the components you wish to install Choose all
three core components by entering
1, 2, 3.
(Administration Services) Specify the components you wish to install
Choose both components by entering
1,2
Computer name Enter the fully qualified hostname of your computer. For
example,
eastcoast.example.com.
System User Enter the user ID that Netscape Administration Server is
currently running as. The server will continue to run as this user.
30 Managing Servers with Netscape Console • December 2001
Page 31

Upgrading to Version Version 6.0
System Group Enter the UNIX group to which the System User belongs.
Configuration Admin ID or DN Enter the user ID or distinguished name of
the administrator who is currently authorized to access the configuration
directory.
Password Enter the password for the user specified by the Configuration
Admin ID or DN.
5. Press Enter.
The installer replaces your existing Administration Server and Console with
the new versions of the software.
Once installation completes, you can run Netscape Console by navigating to the
folder you specified as the Install location, and then typing
startconsole.
To Upgrade on Windows NT
1. Download the compressed product binaries for Netscape Administration
Server and Console.
2. Extract the binaries into a new folder and run the setup.exe program.
The installation startup screen appears.
Chapter 2 Installing Netscape Servers and Console 31
Page 32

Upgrading to Version Version 6.0
3. Click Next.
4. Proceed through the installation process. Here are the prompts you encounter
with instructions about what to do:
Do you accept all of the terms of the preceding license agreement? Click Yes
Choose the type of Setup you prefer Select Netscape Servers
(Type of Installation) Choose the type of Setup you prefer Select Typical
Installation directory Enter the location where Netscape Administration
Server is currently installed.
If Administration Server was installed with another Netscape server, enter the
path to that product’s server root. For example, if you installed Netscape
Directory Server 4.1 in the
C:\Netscape\Server4 as your installation location.
Select the products you want to install Both boxes are checked, by default.
User ID or Distinguished Name Enter the user ID or distinguished name of
the administrator who is currently authorized to access the configuration
directory.
C:\Netscape\Server4 folder, you would enter
Password Enter the password for the user ID or distinguished name entered
above.
5. Review your selections. If you need to make any changes, click Back and
modify your choices.
6. Click Next.
The Setup program replaces your existing Administration Server and Console
with version Version 6.0.
7. When the installer completes, click Finish.
Once installation completes, you can run Netscape Console by clicking Start, and
then choosing Programs > Netscape Server Products > Netscape Console Version
6.0.
32 Managing Servers with Netscape Console • December 2001
Page 33

Upgrading to Version Version 6.0
Upgrading a Stand-Alone Version of Netscape Console
If you have installed a stand-alone version of Netscape Console, you can upgrade it
to version Version 6.0.
To Upgrade a Stand-Alone Version of Netscape Console on UNIX
1. Download the compressed product binaries for Netscape Console.
2. Extract the binaries into a new folder.
3. Run the Setup program by typing setup.
The first installation screen appears.
4. Proceed through the installation process. Here are the prompts you encounter,
with instructions about what to do:
Would you like to continue with installation? Press Enter for Yes
Do you agree to the license terms? Enter
Select the component you want to install Enter 2 for Netscape Console
Installation location Enter the location where Netscape Console is currently
installed.
5. Press Enter.
The installer replaces your existing version of Netscape Console with the new
version of the software.
Once installation completes, you can run Netscape Console by navigating to the
folder you specified as the installation location, and then typing
Yes
startconsole.
Chapter 2 Installing Netscape Servers and Console 33
Page 34

Upgrading to Version Version 6.0
To Upgrade a Stand-Alone Version of Netscape Console on
Windows NT
1. Download the compressed product binaries for Netscape Console.
2. Extract the binaries into a new folder and run the setup.exe program.
The installation startup screen appears.
3. Click Next.
4. Proceed through the installation process. Here are the prompts you encounter
with instructions about what to do:
Do you accept all of the terms of the preceding license agreement? Click Yes
Choose the type of Setup you prefer. Select Netscape Console
Installation directory. The installer will automatically supply the location
where Console is currently installed.
5. Review your selections. If you need to make any changes, click Back and
modify your choices.
34 Managing Servers with Netscape Console • December 2001
Page 35

6. Click Install.
The Setup program replaces your existing version of Netscape Console with
the new version of the software.
7. When the installer completes, click Finish.
Once installation completes, you can run Netscape Console by clicking Start, and
then choosing Programs > Netscape Server Products > Netscape Console Version
6.0.
Silent Installation
The Silent Installation feature of the Netscape Server Products Setup program
allows you to use a file to predefine all the answers that you would normally
supply interactively during installation. This is useful when you want to install a
large number of Netscape server instances using identical installation options.
Performing a Silent Installation
Silent Installation
In order to perform a silent installation, you must create a set of installation
answers and then run the Netscape Server Products Setup program in silent mode.
The easiest way to create a set of installation answers is to perform an installation
and save your installation cache to a file. Once you’ve done this, you can modify
the cache file and then use it when performing additional installations.
You can use Silent Installation to upgrade multiple instances of Administration
Server. Rather than manually entering the same set of answers for each server, you
can save your installation answers while upgrading one instance of Administration
Server, and then upgrade the remaining instances using the same answers.
To Save Your Installation Answers
1. From the system prompt, run the Setup program by typing setup -k.
-k flag instructs the Setup program to store your answers to installation
The
questions.
2. Perform your installation or upgrade.
The answers that you specify for installation and upgrade questions are stored
setup/install.inf file which is contained in the destination directory
in the
that you indicate during installation.
Chapter 2 Installing Netscape Servers and Console 35
Page 36

Uninstallation
3. If you plan to perform multiple silent installations using different sets of
installation answers, rename
then repeat this procedure.
For more details on installation, see “The Setup Program,” which begins on page
26.
install.inf to a more descriptive name and
To Perform a Silent Installation
1. Make any necessary changes to the file(s) containing your installation answers.
2. Copy the installation answer file(s) to the directory containing the Setup
program.
3. From the system prompt, run the Setup program by typing setup -s -f
filename.
The -s flag instructs the Setup program to perform a silent installation. The -f
flag tells the Setup program to use the answer file specified by filename.
On UNIX, Silent Installation outputs some status messages and alerts. Complete
status information is written to the
destination directory that you indicate during installation.
setup/setup.log file which is contained in the
On Windows NT, Silent Installation does not produce any status messages or
alerts. All status information is written to the
contained in the destination directory that you indicate during installation.
For detailed information on how a particular server uses Silent Installation, see that
server’s documentation.
Uninstallation
If you are no longer using a Netscape server, you can uninstall it. Uninstallation
completely removes a server from your computer. The server will not be accessible
and you will lose all settings.
Uninstalling a Netscape Server
The following procedures show you how to uninstall a Netscape server on UNIX
and Windows NT.
36 Managing Servers with Netscape Console • December 2001
setup/setup.log file which is
Page 37

To Uninstall a Netscape Server on UNIX
1. In the server root, type uninstall.
The first uninstallation screen appears.
2. Proceed through the uninstallation process. Here are the prompts you
encounter with instructions about what to do. Depending on the selections you
make, you may see additional prompts:
Select the components you wish to uninstall Select the components to
uninstall or press Enter (for All) to remove all listed software.
Configuration Admin ID or DN Enter the user ID or distinguished name of
the administrator who is currently authorized to access the configuration
directory.
Password Enter the password for the user specified by the Configuration
Admin ID or DN.
3. Press Enter.
The uninstaller removes the selected software. If the uninstaller cannot remove
all files in the server root, it prints a message to the screen. To remove any
remaining files, go to the server root and delete the files manually.
Uninstallation
To Uninstall a Netscape Server on Windows NT
1. Click Start, and then choose Settings > Control Panel.
2. Double-click Add/Remove Programs.
You can also run
3. In the Add/Remove Program Properties window, click the Install/Uninstall
tab.
4. Select Netscape Server Products Version 6.0, then click Remove.
5. In the Netscape Uninstall window, select the Netscape servers and
components you want to uninstall.
uninst.exe from the server root.
Chapter 2 Installing Netscape Servers and Console 37
Page 38

Uninstallation
6. If you want to specify which subcomponents of your Netscape software to
remove, highlight the installed product or component name and then click the
Subcomponents button.
The Select Sub-components dialog appears. Select the subcomponents that
you want to remove, then click Continue.
Select the components you wish to uninstall Select the components to
uninstall or press Enter (for All) to remove all listed software.
Configuration Admin ID or DN Enter the user ID or distinguished name of
the administrator who is currently authorized to access the configuration
directory.
7. Password Enter the password for the user specified by the Configuration
Admin ID or DN.
8. Click Uninstall.
The uninstaller removes the selected software. If the uninstaller cannot remove
all files in the server root, it prints a message to the screen. To remove any
remaining files, go to the server root and delete the files manually.
Silent Uninstalla tion
The Silent Uninstallation feature allows you to automatically uninstall a product
without providing answers to uninstallation questions.
To Perform a Silent Uninstal lation on UNIX
• From the system prompt, run the uninstallation program in silent mode by
typing
If the uninstallation program cannot contact the instance of Directory Server
containing the configuration information for the product you are trying to
uninstall, uninstallation will fail. In this case, no product files or configuration
information will be removed. If you want the uninstallation program to
remove the local product files regardless of whether it can contact the instance
of Directory Server containing configuration information, run the
uninstallation program by typing
While it removes files, the uninstallation program outputs some status
messages and alerts. When uninstallation is finished, you are returned to the
system prompt.
38 Managing Servers with Netscape Console • December 2001
uninstall -s.
uninstall -s -force.
Page 39

Uninstallation
To Perform a Silent Uninstallation on Windows NT
• From the system prompt, run the uninstallation program in silent mode by
typing
If the uninstallation program cannot contact the instance of Directory Server
containing the configuration information for the product you are trying to
uninstall, uninstallation will fail. In this case, no product files or configuration
information will be removed. If you want the uninstallation program to
remove the local product files regardless of whether it can contact the instance
of Directory Server containing configuration information, run the
uninstallation program by typing
The uninstallation program does not produce any status messages or alerts. All
status information is written to the uninstallation log file which is contained in
your system’s temporary directory (for example,
uninst -s.
uninstall -s -force.
C:\TEMP).
Chapter 2 Installing Netscape Servers and Console 39
Page 40

Uninstallation
40 Managing Servers with Netscape Console • December 2001
Page 41

Netscape Console Basics
Chapter 3, “Using Netscape Console”
Chapter 4, “Servers in Netscape Console”
Chapter 5, “User and Group Administration”
Part 2
41
Page 42

42 Managing Servers with Netscape Console • December 2001
Page 43

Chapter 3
Using Netscape Console
This chapter shows you how to log in to, customize, and use Netscape Console. It
contains the following sections:
• Starting Netscape Console and Logging In
• A Tour of Netscape Console
• Customizing Netscape Console
• Administration Express
Starting Netscape Console and Logging In
Netscape Console is a stand-alone Java application that works in conjunction with
an instance of Directory Server and an instance of Administration Server on your
network. Typically, you log in to Netscape Console using your own user name and
password. If the instance of Administration Server that you’re logging in to
requires client authentication, you will be prompted to present a client certificate.
This certificate is used to create a secure channel of communication between
Netscape Console and the instance of Administration Server.
Starting Netscape Console
The following procedures tell you how to start Netscape Console.
To Start Netscape Console on UNIX
• In the server root, enter startconsole [arguments] where arguments are
any of the optional command-line arguments listed in Table 3-1.
43
Page 44

Starting Netscape Console and Logging In
To Start Netscape Console on Windows NT
• Click Start, and then choose Programs > Netscape Server Program Group >
Netscape Console Version 6.0.
You can also start Netscape Console in two additional ways:
❍ Double-click the startconsole icon in your server root.
❍ Enter startconsole [arguments] on the command line. For
arguments, you can specify any of the arguments listed in Table 3-1.
Table 3-1 Arguments for startconsole
Argument What it Does
-a adminURL Specifies a base URL for the instance of Administration Server that
-f fileName Captures errors and system messages to fileName.
you want to log in to.
For example, to log in to
http://eastcoast.example.com:987, you would enter the
following:
startconsole -a http://eastcoast.example.com:987
For example, to capture all errors and messages to a file called
system.out, you would enter the following:
startconsole -f system.out
-h Prints out the help message for startconsole.
-l languageCode Specifies which language this version of Netscape Console should
use. Possible values for languageCode are en, fr, and ja.
For example, to start Netscape Console in French, you would enter
the following:
startconsole -l fr
-u userID Specifies the user ID to log in to Netscape Console with.
For example, to start Netscape Console and log in with the user ID
bjensen, you would enter the following:
startconsole -u bjensen
44 Managing Servers with Netscape Console • December 2001
Page 45

Starting Netscape Console and Logging In
Table 3-1 Arguments for startconsole
Argument What it Does
-w password Specifies the password for the user entered with the -u argument.
For example, to start Netscape Console and log in with the user ID
bjensen and password super15243, you would enter the
following:
startconsole -u bjensen -w super15243
-x extraOptions Specifies that you want to use extra options.
Possible values for extraOptions are nowinpos and nologo. If
you specify the nologo option, the Netscape Console splash
screen will not be displayed. If you specify the nowinpos option,
the Netscape Console window will be placed in the upper
left-hand corner of the screen. To specify both options, separate
them with a comma.
For example, to start Netscape Console in the upper left-hand
corner of the screen and without a splash screen, you would enter
the following:
startconsole -x nologo, nowinpos
Logging in to Netscape Console With a User Name and Password
The following procedure tells you how to log in to Netscape Console with just a
user name and password. If you are logging in to an instance of Administration
Server that requires you to present a client certificate, see “Logging in to Netscape
Console Using Client Authentication,” which begins on page 46.
To Log in to Netscape Console With a User Name and Password
1. Start Netscape Console.
For more information, see “To Start Netscape Console on UNIX” on page 43
and “To Start Netscape Console on Windows NT” on page 44.
Chapter 3 Using Netscape Console 45
Page 46

Starting Netscape Console and Logging In
2. In the Netscape Console Login dialog box, enter your user name, password,
and the URL for the instance of Administration Server you want to access.
When specifying an Administration Server URL, you can use a hostname (such
eastcoast.example.com:8943) or IP address (such as 199.99.9.1:4434)
as
You do not need to include
you must include the Administration Server port number.
3. Click OK.
The user name and password you use to log in determine which servers and
server operations you can access through Netscape Console. See “Overview of
Access Control” on page 167 for more information.
http:// or use a fully qualified domain name, but
TIP Netscape Console remembers the last five Administration URLs that
you entered. To use one of these URLs, select it from the drop-down
list in the Administration URL field.
Logging in to Netscape Console Using Client Authentication
When logging in to an instance of Administration Server that has been configured
to require client authentication, you enter your user name and password, and then
present a client certificate. This certificate is used by the instance of Administration
Server to establish a secure connection with Netscape Console. For more
information on this process, known as the Secure Sockets Layer (SSL) handshake,
see Appendix C, “Introduction to SSL.”
46 Managing Servers with Netscape Console • December 2001
Page 47

Starting Netscape Console and Logging In
The client certificates that Netscape Console presents to an instance of
Administration Server are stored in a copy of your Netscape Communicator
certificate database. Depending on which types of certificates the instance of
Administration Server is configured to accept, you may be able to use an existing
certificate from Communicator or you may need to request a new one. You must
use Communicator to request and install client certificates.
This section tells you how to do the following:
• Request and install a new client certificate
• Make your client certificate available to Netscape Console
• Establish a secure connection with an instance of Administration Server
For more information on configuring an instance of Administration Server to
require client authentication, see Chapter 10, “Using SSL and TLS with Netscape
Servers,” which begins on page 179.
To Request and Install a New Client Certificate
1. Go to the web site for a certificate authority (CA) that is trusted by the instance
of Administration Server that you want to establish a secure connection with.
2. Follow the CA’s instructions to request and install a client certificate.
NOTE If you already have a client certificate that is acceptable to the
instance of Administration Server that you want to log in to, you do
not need to request and install a new certificate.
To Make Your Client Certificate Available to Netscape Console on
UNIX
1. From the system prompt, go to the .netscape subdirectory of your home
directory. For example,
2. Copy the key3.db, cert7.db, and secmodule.db files to the .mcc subdirectory
of your home directory.
These are the certificate database files that Netscape Console uses during client
authentication. These files are only used by Netscape Console. Administration
Server creates and uses its own certificate database files.
/u/bjensen/.netscape.
Chapter 3 Using Netscape Console 47
Page 48

Starting Netscape Console and Logging In
To Make Your Client Certificate Available to Netscape Console on
Windows NT
1. Open the folder containing Netscape Communicator. For example,
C:\Program Files\Netscape.
2. Open the Users folder and then open your specific user folder. For example,
BJensen (C:\Program Files\Netscape\Users\BJensen).
3. Copy the key3.db, cert7.db, and secmod.db files from your user folder to the
C:\WINNT\Profiles\your_user_ID\.mcc folder, where your_user_ID is
the ID that you use to log in to Windows NT.
These are the certificate database files that Netscape Console uses during client
authentication. These files are only used by Netscape Console. Administration
Server creates and uses its own certificate database files.
To Establish a Secure Connec tion With an Instan ce of Administra tion
Server
1. Start Netscape Console.
For more information, see “To Start Netscape Console on UNIX” on page 43
and “To Start Netscape Console on Windows NT” on page 44.
2. In the Netscape Console Login dialog box, enter your user name, password,
and the URL for the secure instance of Administration Server you want to
access.
When specifying an Administration Server URL, you can use a hostname (such
eastcoast.example.com:8943) or IP address (such as 199.99.9.1:4434).
as
Make sure to include
https:// and the Administration Server port number in
the URL.
48 Managing Servers with Netscape Console • December 2001
Page 49

3. Click OK.
The user name and password you use to log in determine which servers and
server operations you can access through Netscape Console. See “Overview of
Access Control” on page 167 for more information.
4. In the Password Entry dialog box, enter the password for Netscape Console’s
certificate database (this is the same as the password for your Netscape
Communicator certificate database), and then click OK.
5. In the “Select a Certificate” dialog box, select your client certificate from the
drop-down list, and then click OK.
Netscape Console presents this certificate to the instance of Administration
Server. If the instance of Administration Server is configured to accept
certificates from your CA, your user name and password will be authenticated,
and you will see the main Netscape Console interface. Otherwise, you will be
prompted to select a different certificate.
A Tour of Netscape Console
A Tour of Netscape Console
After you log in to an Administration Server, you see the main Netscape Console
interface. This section introduces the graphical elements of this interface and
explains the basic concepts you need to understand before managing Netscape
servers with Netscape Console.
Netscape Console Menus
The main Netscape Console window (shown in Figure 3-1 on page 50) has five
menus: Console, Edit, View, Object, and Help. Table 3-2 summarizes what these
menus are used for.
Table 3-2 Netscape Console’s Menus and What You Can Do With Them
Menu What It Lets You Do
Console Add and remove items from the navigation tree.
Edit Set general Netscape Console preferences.
View Change the appearance of the main Netscape Console
window.
Chapter 3 Using Netscape Console 49
Page 50

A Tour of Netscape Console
Table 3-2 Netscape Console’s Menus and What You Can Do With Them (Continued)
Menu What It Lets You Do
Object Perform tasks related to resources such as administration
domains, server groups, and servers.
Help Obtain online assistance while using Netscape Console.
Other Netscape products may have additional menus or use these menus
differently. For more information, see the documentation for each product.
Figure 3-1 The Servers and Applications Tab of the Main Netscape Console Window
50 Managing Servers with Netscape Console • December 2001
Page 51

A Tour of Netscape Console
Netscape Console Tabs
The main Netscape Console window (shown in Figure 3-1) has two tabs: “Servers
and Applications” and “Users and Groups.” The “Servers and Applications” tab
contains a navigation tree and an information panel. The “Users and Groups” tab
has an interface that you can use to manage entries in the user directory. The
“Users and Groups” tab is discussed in Chapter 5, “User and Group
Administration.”
The Servers and Applications Tab
The “Servers and Applications” tab consists of a navigation tree and an
information panel. The navigation tree represents a Netscape topology. A topology
is a hierarchical representation of all the resources, or objects (such as servers,
applications, and hosts), that are registered in a configuration directory. You use
the navigation tree to navigate to the resource you want to work with.
One type of resource in a topology is an administration domain. An administration
domain is a collection of host systems and servers that share the same user
directory.
A number of server groups can exist within an administration domain. A server
group consists of all servers that are managed by a common instance of
Administration Server and that share a server root folder. The individual servers in
a server group are instances of server software that provide specific services such
as directory database services, messaging, and publishing.
Figure 3-1 shows a sample navigation tree. In this example, the
administration domain includes three hosts. The
have Messaging Server groups while the
group. If the administration domain grows, an administrator can install additional
server groups on these hosts. To expand a section of the navigation tree, click the
plus (+) signs. To collapse a section of the tree, click the minus (-) sign.
On the right-hand side of the “Servers and Applications” tab is the information
panel. When you select an administration domain, host, server group, or server
instance in the navigation tree, this panel displays detailed information about it.
Depending on the selected resource, you can edit all or some of these details.
For information on modifying administration domain settings, see “To Modify an
Administration Domain” on page 53. For information on modifying host, server
group, and instance information, see “Modifying Host, Server Group, and Instance
Information” on page 75.
westcoast host contains a web server
eastcoast and midwest hosts
Chapter 3 Using Netscape Console 51
example.com
Page 52

A Tour of Netscape Console
The Administrati on Domain
An administration domain is a group of Netscape servers that share a user
directory for data management and authentication. A company might want to
create separate administration domains for each of its business sites. Each of these
domains could include the host computers used only by that business site.
Before you can create a new administration domain, you must be a member of the
Configuration Administrators group. If you are not a member of this group, you
must ask your Configuration Administrator to add you to it. For instructions on
adding a user to the Configuration Administrators group, see “To Add Users to the
Configuration Administrators Group” on page 100.
To Create an Administration Domain
1. Open Netscape Console.
2. From the Console menu, choose Create Administration Domain.
3. In the Create Administration Domain dialog box, enter domain information:
Domain Name. Enter a name that helps you identify this domain. This can be a
fully qualified domain name such as
example.com or a descriptive title such as
East Coast Sales.
User Directory Host. Specify the host machine on which the user directory for
this domain is located. Use the fully qualified domain name. For example,
east.example.com.
User Directory Port. Enter the port number for the user directory you specified
above.
Secure Connection. Check this box if you want to connect to the user directory
using SSL. If you select this option, make sure that the user directory port
you’ve entered is already enabled for SSL communication.
Directory Subtree. Enter the base DN of the user subtree in the directory.
Example:
o=example.com
Bind DN. Enter the distinguished name for a user who has full access
permission to the user directory. Example:
o=example.com
.
Bind Password. Enter the password for the user specified by the Bind DN.
Owner DN. Enter the distinguished name for the user who has administrative
control over this domain. By default, your DN is entered.
52 Managing Servers with Netscape Console • December 2001
uid=jdoe, ou=people,
Page 53

A Tour of Netscape Console
4. Click OK.
If you’ve made a change to the User Directory option or the Secure Connection
option, you must restart the server for the change to take effect.
To Modify an Administration Domain
1. In the Netscape Console navigation tree, select the domain you want to
modify, then click the Edit button in the server information section of Netscape
Console.
2. Modify domain information as necessary:
Domain Name. Enter the name of the domain as you want it to appear in the
navigation tree.
Description (Optional). Enter a text string that helps you identify this domain.
User Directory Host and Port. Specify the location of the user directory using
the host computer’s fully qualified domain name and port number. You can
enter more than one user directory location separated by spaces. This is useful
when you use multiple directories to allow users to log in if a primary
Directory Server is inaccessible. Example:
east.example.com:389 west.example.com:393
See “User Authentication and Directory Failover Support” on page 128 for
more information.
All host computers specified in the User Directory Host and Port field must
have the same settings for the following fields:
Secure Connection. Check this box if the new user directory port is already
enabled for SSL communication.
User Directory Subtree. Enter the base DN of the user information in the new
user directory. Example:
o=example.com
Bind DN. Enter the distinguished name for a user who has full access
permission to the new user directory. Example:
o=example.com
.
uid=jdoe, ou=people,
Bind Password. Enter the password for the user specified by the Bind DN.
CAUTION These settings affect all servers in the domain. If you make changes
here, you must restart all servers in the domain.
Chapter 3 Using Netscape Console 53
Page 54

Customizing Netscape Console
3. Click OK.
To Remove an Administration Domain
1. Open Netscape Console.
2. Remove all server instances from the administration domain that you want to
remove.
For more information on removing server instances, see “Removing a Server
Instance” on page 76.
3. Select the administration domain that you want to remove.
4. From the Console menu, choose Remove Administration Domain.
5. Click OK.
Customizing Netscape Console
This section tells you how to specify where to store display settings as well as how
to change Netscape Console’s appearance to meet your specific needs. It explains
the following:
• How to specify where Netscape Console should store your display preferences
• How to specify which fonts Netscape Console should use for onscreen
elements
• How to create custom views of the navigation tree
• How to change the width and position of columns in tables.
In addition, you can change Netscape Console’s appearance by applying access
control instructions to user interface elements. This procedure is discussed in
Chapter 9, “Access Control.”
54 Managing Servers with Netscape Console • December 2001
Page 55

Customizing Netscape Console
Storing Display Settings
When you exit Netscape Console, any display changes you’ve made during the
session are saved. This includes changes to window size or position; banner bar,
status bar, or navigation tree visibility; and fonts.
You can store these display settings on the network or on your local disk to suit
your needs. If, at any time, you want the settings reset to what they were when you
installed Netscape Console, you can do so.
To Change Where Display Settings are Stored
1. In Netscape Console, from the Edit menu, choose Preferences.
2. Click the Settings tab.
3. Specify where you want to save your display settings:
In your configuration directory. Select this option if you want to be able to use
your settings no matter where you are when you log in to Netscape Console.
This option is useful if you frequently “roam” between a number of similar
workstations at your business site. No matter what workstation you’re using,
when you log in to Netscape Console you can use your preset display
preferences.
On your computer’s hard disk. Select this option if you want to be able to use
different display settings depending upon the individual workstation you’re
using. This option is useful when you use one workstation at work and a
dissimilar system, such as a laptop computer, at home. The settings for the
workstation are stored and used on the workstation. The settings for the laptop
are stored and used on the laptop.
4. Click OK.
To Reset Display Settings to Their Default Values
1. In Netscape Console, from the Edit menu, choose Preferences.
2. Click the Settings tab.
3. Click the Restore Defaults button to revert to the default display settings.
4. Click OK.
Chapter 3 Using Netscape Console 55
Page 56

Customizing Netscape Console
Setting Display Fonts
You can specify which fonts Netscape Console should use for different screen
elements. If you use more than one computer system to administer servers, you can
save different sets of font preferences, or profiles, for use on each system.
To Create a Font Profile
1. In the main Netscape Console window, from the Edit menu, choose
2. Click the Fonts tab.
3. Click Save As, enter a name for this profile, and then click OK.
4. In the Screen Element column, click a screen element that you want to change
5. Click Change Font.
Preferences.
the font for.
The Font column contains samples of the fonts that are currently associated
with the listed screen elements.
The Select Font dialog box appears.
6. In the Select Font dialog box, make your font selections:
Font. Choose the font face you want to use for this element.
Size. Choose a size for the selected font face.
Bold. Select this option to display the font in bold.
Italic. Select this option to display the font in italics.
Sample. This frame displays sample type using the current settings.
7. Click OK to close the Select Font dialog box.
8. If you want to set fonts for additional screen elements, repeat steps 4 through 7.
9. Click OK to save the profile.
56 Managing Servers with Netscape Console • December 2001
Page 57

Customizing Netscape Console
To Edit an Existing Font Profile
1. In the main Netscape Console window, from the Edit menu, choose
Preferences.
2. Click the Fonts tab.
3. Select the font profile to edit.
From the Font Profile drop-down list, choose a profile. If the list is grayed out,
no profiles are available.
4. Make the desired changes to the font profile.
5. Click OK to save the profile.
To Rename a Font Profile
1. In the main Netscape Console window, from the Edit menu, choose
Preferences.
2. Click the Fonts tab.
3. Select the font profile to rename.
From the Font Profile drop-down list, choose a profile. If the list is grayed out,
no profiles are available.
4. Click Save As, enter the new name for this profile, and then click OK.
A new profile with the name you specified appears in the Font Profile
drop-down list. The original profile is still listed.
5. From the Font Profile drop-down list, select the original font profile.
6. Click Remove, and then confirm the deletion.
7. Click OK to save the renamed profile.
Chapter 3 Using Netscape Console 57
Page 58

Customizing Netscape Console
To Use a Font Profile
1. In the main Netscape Console window, from the Edit menu, choose
2. Click the Fonts tab.
3. Select the font profile to use.
4. Click OK.
To Remove a Font Profile
1. In the main Netscape Console window, from the Edit menu, choose
2. Click the Fonts tab.
3. Select the font profile to remove.
Preferences.
From the Font Profile drop-down list, choose a profile. If the list is grayed out,
no profiles are available.
Preferences.
From the Font Profile drop-down list, choose a profile. If the list is grayed out,
no profiles are available.
4. Click Remove, and then confirm the deletion.
5. Click OK.
58 Managing Servers with Netscape Console • December 2001
Page 59

Customizing the Main Window
You can specify which elements of the main Netscape Console window you want
to see.
To Customize the Ma in Window
• Select or deselect items in the View menu.
Selecting a menu item displays it and deselecting an item hides it. You can
show or hide the following screen elements:
❍ Banner Bar
❍ Status Bar
❍ Tree
Figure 3-2 The Banner Bar, Navigation Tree, and Status Bar
Customizing Netscape Console
Chapter 3 Using Netscape Console 59
Page 60
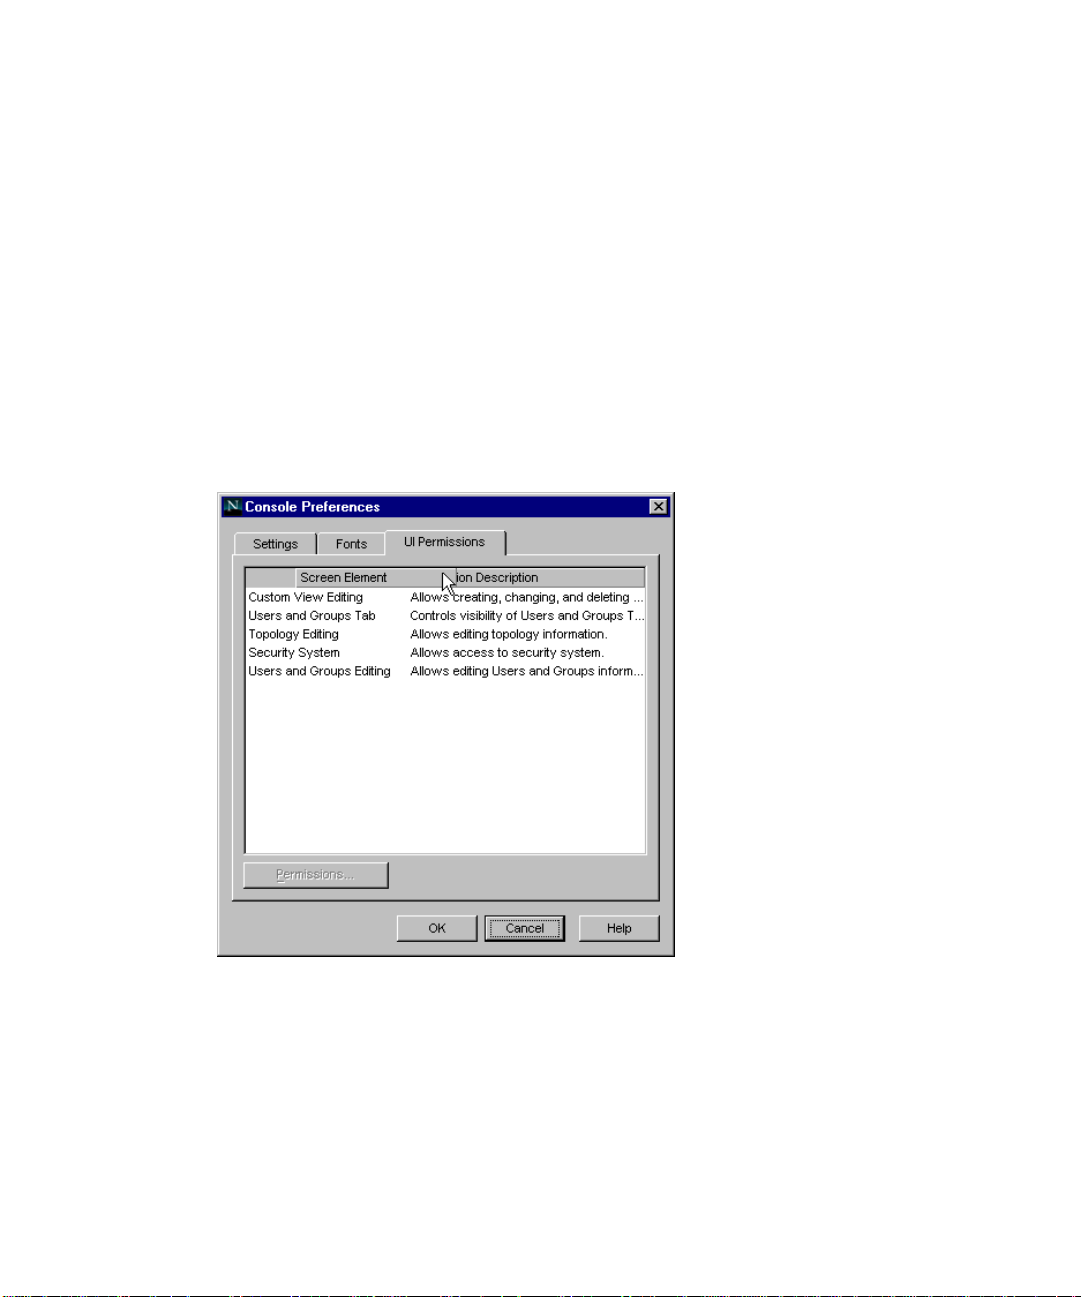
Customizing Netscape Console
Customizing Tables
Some Netscape Console tasks, such as setting display fonts, use tables. You can
change the position and adjust the width of columns in these tables.
To Change Column Position in a Table
• Drag each column head into the desired position.
Figure 3-3 Changing the Position of a Column
See Figure 3-3 for an example.
When you release the mouse button, the column will snap into its new
position.
60 Managing Servers with Netscape Console • December 2001
Page 61

To Change the Width of Columns in a Table
1. Position the pointer over a boundary of a column head.
It turns into a double arrow, as shown in Figure 3-4.
2. Drag the boundary to change the width of the column.
Figure 3-4 Resizing a Column
Customizing Netscape Console
Creating Custom Views of the Navigation Tree
You can create custom views of the navigation tree. Custom views are useful when
you want to see the resources that you access routinely, and hide resources that
you access infrequently.
When creating a custom view, you can specify whether the view is public or
private. A public view is visible to any user who logs in to Netscape Console. A
private view is visible only to the person who created it.
To Create a Custom Vi ew of the Navigati on Tree
1. From the View menu, choose Custom View Configuration, then click New.
Chapter 3 Using Netscape Console 61
Page 62

Customizing Netscape Console
2. Choose whether the new view will be public or private, then click OK.
3. In the Edit View window, position your cursor in the text field and enter a
4. Select a resource from the Default View navigation tree on the left. Click Copy
5. Click OK when you have finished adding resources.
In the example that follows, an administrator has created a view named Messaging
Servers that includes instances of Netscape Messaging Server and their hosts.
By default, a public view is visible to all users of Netscape Console, but you can
restrict access to it using access control instructions (ACIs). For more
information, see “To Set Access Permissions for a Public View.”
A private view is only visible to you. You cannot apply ACIs to it.
descriptive name for this Custom View.
to include it in your Custom View navigation tree on the right.
If you need to remove a resource from the new tree, select it and click Remove.
You can select a range of resources by clicking the first item and then pressing
Shift while clicking the last item. You can select multiple resources by pressing
Control while clicking each item.
62 Managing Servers with Netscape Console • December 2001
Page 63

Customizing Netscape Console
Working with Custom Views
You can use multiple views to suit your needs. The administrator who created the
view shown in the preceding example might also have views called Directory
Servers and Enterprise Servers. The administrator can switch to the Custom View
needed for a specific task or choose Default View to see all the servers in the
navigation tree.
When you install Netscape Console, a Custom View called Server View is
configured for you. This view displays server instances grouped by type; it does
not include administration domains, hosts, or server groups.
To Switch to a Custom View
• Choose the desired custom view from the drop-down list on the “Servers and
Applications” tab. To return to the default view, choose Default View from the
drop-down list.
Figure 3-5 Switching to a Custom View
To Edit a Custom View
1. From the View menu, choose Custom View Configuration.
2. Select a Custom View from the list and click Edit.
3. Make any necessary changes to the Custom View.
4. Click OK.
Chapter 3 Using Netscape Console 63
Page 64

Customizing Netscape Console
To Rename a Custom View
1. From the View menu, choose Custom View Configuration.
2. Choose a Custom View from the list and click Edit.
3. In the Edit View window, position the cursor in the text field, then type the
4. Click OK.
To Set Access Permissions for a Public View
1. From the View menu, choose Custom View Configuration.
2. Choose a public Custom View from the list and click Access.
3. Specify the ACI you want to use, or create a new ACI:
new name for your Custom View.
❍ If you want to use an existing Access Control Instruction (ACI), select it
and click OK.
❍ If you want to create a new ACI, click New, and then follow the directions
for creating a new ACI under “Using the ACI Manager and ACI Editor”
beginning on page 172.
4. Click OK when you have finished setting access permissions.
For more information on setting Access Permissions and creating Access Control
Instructions, see Chapter 9, “Access Control.”
To Delete a Custom View
1. From the View menu, choose Custom View Configuration.
2. Choose a Custom View from the list and click Delete.
3. Click Yes to confirm the deletion.
64 Managing Servers with Netscape Console • December 2001
Page 65

Administration Express
The Administration Express page is an HTML-based version of Netscape Console
that provides quick access to servers running Administration Server 4.2 or later. In
the Administration Express page, you can perform four administration tasks:
• Starting servers (except stopped instances of Administration Server, which
must be started from the command line)
• Stopping servers
• Viewing basic server information, such as name, description, and installation
folder.
• Viewing logs
Keep the following in mind when you use the Administration Express page:
• Before you can use Administration Express to manage a server, you must
upgrade its Administration Server to version 4.2 or later. If you try to use
Administration Express with a server using a pre-4.2 version of Administration
Server, you’ll get the message “Status Unknown.”
• If you turn off the instance of Administration Server that you used to log in to
Administration Express, you will no longer be able to use that Administration
Express page. If this happens, log in again using a different Administration
Server URL.
Administration Express
Accessing Administration Express
The Administration Express page is accessed through a browser.
To Open Administration Express
1. Open version 3.0 or later of either Netscape Navigator or Microsoft Internet
Explorer, and enter the qualified host name and port number for the instance
of Administration Server that you want to access.
Example:
In the Administration page, under Services for Administrators, click Netscape
2.
Administration Express.
eastcoast.example.com:26751
Chapter 3 Using Netscape Console 65
Page 66

Administration Express
3. If prompted, enter your user name and password in the dialog box, then click
OK.
If the instance of Administration Server that you are logging in to uses SSL,
you may be prompted to confirm the acceptability of the instance’s certificate.
Additionally, if the server instance is configured to require client
authentication, you may be prompted to present a client certificate. Typically,
accepting server certificates involves clicking through several dialog boxes
while presenting a client certificate involves making a selection from a
drop-down list. If you need more information on accepting server certificates
and presenting client certificates, see your browser documentation.
Once authentication is complete, you will see the main Administration Express
screen:
Figure 3-6 The Administration Express Page and How to Use It
66 Managing Servers with Netscape Console • December 2001
Page 67

Administration Express
Using Administrati on Express
From the main Administration Express screen, you can start and stop server
instances, view basic server information, and view access and error logs.
To Start or Stop a Server Instance from Administration Express
1. In the row containing the server instance that you want to start or stop, click
On to start the server instance or Off to stop it.
Keep the following in mind when starting and stopping server instances:
• Before you can turn a server instance on or off, or view its log files, the instance
of Administration Server for the server group must be running.
• You cannot use the Administration Express page to start a stopped instance of
Administration Server or an instance that’s using SSL encryption.
UNIX
To start a stopped instance of Administration Server or an instance that’s running
SSL, you must always run
information on starting the Administration Server, see “Restarting Administration
Server.” on page 111.
start-admin from the command line. For more
Windows NT
To start a stopped instance of Administration Server or an instance that’s running
SSL, you can run
information on starting the Administration Server, see “Restarting Administration
Server.” on page 111.
start-admin or use the Services control panel. For more
To View Basic Server Information from Administration Express
• In the row containing the server instance that you want to view information
about, click Server Info.
To View Access and Error Logs from Administration Express
• In the row containing the server instance that you want to view the logs for,
click Logs.
Chapter 3 Using Netscape Console 67
Page 68

Administration Express
Setting the Refresh Rate fo r Administration Express
You can configure Administration Express to automatically refresh its display of
hosts and server instances. This is useful if you want to monitor the status of your
Netscape servers and applications at regular intervals.
To Set the Refresh Rate for Administration Express
1. In a text editor, open the serverRoot/admin-serv/config/adm.conf file.
2. Add the following line to adm.conf:
ExpressRefreshRate: refreshRate
where refreshRate is an integer value representing the number of seconds
Administration Express should wait before refreshing its display. For example,
entering
refresh the display every two minutes (120 seconds).
3. Save adm.conf.
ExpressRefreshRate: 120 instructs Administration Express to
68 Managing Servers with Netscape Console • December 2001
Page 69

Servers in Netscape Console
This chapter explains how to perform basic server management using Netscape
Console. It contains the following sections:
• Working With Earlier Netscape Servers
• Working with Netscape Servers
Working With Earlier Netscape Servers
Chapter 4
You can use Netscape Console to access pre-4.0 versions of Netscape servers. This
section tells you how to add a pre-4.0 server to your navigation tree and how to
migrate your pre-4.0 data to a newer Netscape server.
Adding a Pre-4.0 Server to the Tree
If you already have pre-4.0 versions of Netscape servers installed in your
enterprise, you can access them through the Netscape Console navigation tree.
This capability is useful when you want to continue using a pre-4.0 server while
preparing to deploy a newer version, and you want all servers accessible in one
tree.
Pre-4.0 servers that are added to the navigation tree are not integrated completely
into the Netscape Console environment; you administer them through a browser
as before. For example, you can add an existing instance of Netscape Messaging
Server 3.0 to the navigation tree, but when you open that instance, the 3.0 Server
Manager (which you use to administer the server) appears in a browser window.
69
Page 70

Working With Earlier Netscape Servers
If you want to fully integrate the information from a pre-4.0 server into Netscape
Console, you must upgrade the server to version 4.0 or later and then migrate your
original configuration data to the new version. See “Migrating from a Pre-4.0
Server to a Newer Server” on page 71 for more information.
Figure 4-1 shows an example of a pre-4.0 server listed in the Netscape Console
navigation tree and managed from a browser.
Figure 4-1 A Pre-4.0 Server Listed in the Navigation Tree and Managed From a Browser
70 Managing Servers with Netscape Console • December 2001
Page 71

Working With Earlier Netscape Servers
To Add a Pre-4.0 Server to the Navigation Tree
1. Open Netscape Console and choose Add Pre-4.0 Server from the Console
menu.
2. In the Add Pre-4.0 Server window, enter information for the server you want
to add to the navigation tree.
Administration Server URL. Enter the host name and port number of the
instance of Administration Server that you use to manage the pre-4.0 server.
For example:
Server Administrator ID. Enter the user name of the administrator who
manages the pre-4.0 instance of Administration Server.
Password. Enter the password for the administrator who manages the pre-4.0
instance of Administration Server.
Target Administration Domain. From the drop-down list, select the
administration domain that you want to add the pre-4.0 server to.
3. Click OK.
The Server List window appears. This window lists all server instances that use
the instance of Administration Server entered in step 2.
http://superserver.example.com:495.
4. In the Server List window, deselect servers that you do not want to add to the
navigation tree.
By default, all servers in the server root are selected for addition to the tree.
5. Click OK.
Migrating from a Pre-4.0 Server to a Newer Server
When you migrate pre-4.0 configuration settings, you copy them to a 4.0 or later
server installed in a different server root. The old and new servers can co-exist on
the same host system because they are installed in different server roots.
Typically, migrating the configuration settings takes less time than manually
configuring a new server. It also ensures that you maintain settings that are
identical to those that worked for you with the older version.
Chapter 4 Servers in Netscape Console 71
Page 72

Working With Earlier Netscape Servers
For example, if you’re already using Netscape Messaging Server version 3.0, you
can install Messaging Server 4.0 in a different server root. You can then migrate the
3.0 server settings to the 4.0 server. Once you’re certain that the configuration
settings work in the new server environment, you can safely uninstall your pre-4.0
server.
NOTE If you use the same port number for both a pre-4.0 and newer
To Migrate from a Pre-4.0 Server to a Newer Version
1. Stop the pre-4.0 server.
2. Install the new version of the server software. When prompted, specify a server
root that is different from the pre-4.0 server root.
3. Start Netscape Console and select the server group that contains the new
server.
This group becomes the target group.
server, you cannot run the two servers at the same time. Before
starting the newer server, turn off the pre-4.0 server. Before starting
the pre-4.0 server, turn off the newer server.
4. Make sure the target group’s instance of Administration Server is turned on
and that you have the access privileges you need to configure a new server.
5. From the Object menu, choose Migrate Server Config.
6. In the Migrate Server Configuration window, enter the absolute path to the
pre-4.0 server root folder, and then click OK.
7. In the Select Server for Migration window, check the pre-4.0 server that you
want to migrate to a newer version, and then click Migrate.
8. In the “Migrate Key and Certificate” window, do one of the following:
❍ If the pre-4.0 server uses SSL, provide the key password you used when
you installed its SSL certificate, then click Migrate.
❍ If the pre-4.0 server does not use SSL, click Cancel.
9. Restart the target group’s instance of Administration Server.
72 Managing Servers with Netscape Console • December 2001
Page 73

Working with Netscape Servers
You can perform a number of basic server tasks with Netscape Console. This
section contains the following procedures:
• Opening a server management window
• Creating a new server instance
• Cloning a Netscape server
• Removing a Netscape server instance
• Uninstalling a Netscape server
Opening a Server Management Window
Each Netscape server has its own set of tasks and configuration settings. You can
access these by opening a server management window.
To Open a Netscape Server Management Window
1. In Netscape Console, click the “Servers and Applications” tab to see the
navigation tree on the left and server information on the right.
Working with Netscape Servers
2. In the navigation tree, click a server to select it.
3. In the information panel on the right-hand side of the window, click Open.
You can also open a server management window by double-clicking its icon in the
navigation tree.
Each Netscape server has specialized tabs for setting configurations or viewing
server-specific information. For detailed information about a specific tab, see your
server’s documentation.
Chapter 4 Servers in Netscape Console 73
Page 74

Working with Netscape Servers
Figure 4-2 is an example of a server management window.
Figure 4-2 A Netscape Server Management Window
Creating a New Server Instance
Once you have one instance of a server installed in a server root, you can create
additional instances in the same server root. Having multiple instances in a single
server root is useful for testing and for when one host is used for multiple
purposes.
For example, a company’s Human Resources and Finance departments each need a
web server. Because each department has limited publishing requirements, one
host can serve both departments’ needs. The administrator installs the web server
software once, creating one instance of the server, and then creates a second
instance. One instance is for the Human Resources department and the other is for
the Finance department. Only one instance can run on the default web server port
(80); the administrator must assign a different port number to the other instance.
74 Managing Servers with Netscape Console • December 2001
Page 75

Working with Netscape Servers
NOTE You cannot create two instances of Administration Server in one
server root.
To Create a New Server Instance
1. In Netscape Console, select the server group that will contain the new server
instance.
2. From the Object menu, select Create Instance Of.
3. In the Select Server window, select the server that you want to create a new
instance of.
4. Click OK.
Modifying Host, Server Group, and Instance Information
You can edit some of the host, server group, and instance information that
Netscape Console displays in the information panel. This is useful when you want
to add detailed descriptions of the different installations in your organization.
To Modify Host, Server Group, and Instance Information
1. In the Netscape Console navigation tree, select the host, server group, or
instance for which you want to modify information.
2. In the information panel, click Edit.
3. Edit information for the following fields:
Host/Group/Server Name. Enter a descriptive name for this host, server
group, or instance. Examples:
❍ Midwest ES10000
❍ East Coast Sales Servers
❍ West Coast Messaging Server No. 3 (P-Z).
Description. Enter a detailed description of this server group or instance.
Examples:
❍ Midwestern team’s Sun ES10000.
Chapter 4 Servers in Netscape Console 75
Page 76

Working with Netscape Servers
4. Click OK.
Cloning a Server
Cloning allows you to copy one server’s configuration settings to other servers of
the same type.
To Clone Server Set tings to Another Server
1. In the Netscape Console navigation tree, select a reference server, the server
2. From the Object menu, choose Clone Server.
❍ The server group containing the East Coast Sales team’s
instances of Messaging Server and Certificate Management
System
❍ The West Coast Messaging Server for users with last names
beginning with P through Z.
Location. (Host only) Enter a description of this host’s location. Example:
Building 17, 3rd floor, Lab 1749.
that has the settings you want to replicate on other servers of the same type.
3. In the Select Target Servers for Cloning window, select the servers that you
want to copy the reference server’s settings to.
4. Click OK.
Removing a Server Instance
You can remove an instance of any server, other than Administration Server, from
the navigation tree. Removing a server instance is useful when you no longer need
to manage a particular server instance, but want to continue creating or using
servers of the same type. When you remove an instance, all configuration settings
for that instance are deleted.
To Remove a Server Instance
1. In the navigation tree, select the server instance you want to remove.
2. From the Object menu, choose Remove Server.
76 Managing Servers with Netscape Console • December 2001
Page 77

Working with Netscape Servers
Uninstalling a Netscape Server
If you no longer want to create or use any instances of a particular server, you can
uninstall the server. This is different from removing a server instance since all
program files will be deleted. For more information on uninstallation, see
“Uninstallation” on page 36.
Merging Configuration Data from Two Directory Servers
You can use Netscape Console’s Merge Configuration Directory utility to merge
the contents of two configuration directories. During a merge operation, the
contents of a server group in one configuration directory are copied into a new
server group in another configuration directory. No files are transferred during a
Merge Configuration Directory operation; the destination configuration directory
is simply updated to include information from the source.
The Merge Configuration Directory utility is useful if you’ve installed and
deployed a number of Netscape servers, and now find it necessary to merge new
data into an existing configuration directory.
For example, you may wish to test out a new product before deployment. Rather
than make major changes to an existing configuration directory, you can try the
product with a pilot instance of Directory Server, using just the new data required
to configure the pilot.
This way, you can make adjustments to the new instance’s configuration without
impacting other server instances or the existing directory. Once you’re satisfied
with the settings in the pilot configuration directory, you can merge its
configuration data into the configuration directory that’s already deployed.
When merging configuration information, you copy from a source to a destination.
In the example just described, the source is the pilot Directory Server with the new
configuration data, and the destination is the existing Directory Server with current
configuration data.
Figure 4-3 shows what two configuration directories might contain before you
merge them.
Chapter 4 Servers in Netscape Console 77
Page 78

Working with Netscape Servers
Figure 4-3 Two Configuration Directories and the Servers They Have Settings For,
Before Using the Merge Configuration Directory Utility
Figure 4-4 shows what the same two configuration directories would contain after
you merged them.
Figure 4-4 Two Configuration Directories and the Servers They Have Settings For, After
Using the Merge Configuration Directory Utility
78 Managing Servers with Netscape Console • December 2001
Page 79

Working with Netscape Servers
When you have finished using the Merge Configuration Directory utility, you can
safely remove your source configuration directory.
CAUTION Do not remove your source configuration directory until you have
merged all data to the destination. Once you remove the source
directory, all its data will be lost.
To Merge Configuration Data from Two Directory Servers
1. In the navigation tree, select the server group containing the source
configuration directory.
2. From the Object menu, choose Merge Configuration.
3. In the Merge Configuration Directory Server Information window, enter
information about the configuration directory into which you want to merge
the source data:
Destination Domain. Enter the domain name for the configuration directory
that you want to merge into. Example:
Destination LDAP Host. Enter the hostname for the configuration directory
you specified above. Example:
eastcoast.example.com
example.com
Destination LDAP Port. Enter the port number for the existing configuration
directory. Example: 389
Secure Connection. Check this box if the configuration directory uses the
Secure Sockets Layer (SSL) protocol on the port specified above. Make sure
that SSL is enabled on the destination configuration directory before selecting
this option.
Destination LDAP Bind DN. Enter the distinguished name for a user who has
access to the destination configuration directory. Example:
Jones, ou=Administration, o=Example Corporation, c=US
cn=Barbara
.
Destination LDAP Bind Password. Enter the password for the user specified
by the Destination LDAP Bind DN.
After you merge the configuration directories, the affected server instances will use
the destination directory you specified. If you want the instances to switch back to
the original configuration directory, you must manually modify the local
configuration files. See “Changing the Host or Port Number” on page 126 for more
information.
Chapter 4 Servers in Netscape Console 79
Page 80

Working with Netscape Servers
80 Managing Servers with Netscape Console • December 2001
Page 81

Chapter 5
User and Group Administration
Netscape Console allows you to create, locate, and manage user and group
information from any system in your enterprise.
This chapter contains the following sections:
• Interacting with Directory Server
• Creating New Directory Entries
• Modifying Existing Directory Entries
Chapter 9, “Access Control” shows you how to work with user and group
information when setting access privileges and other security information.
Interacting with Directory Server
When you use Netscape Console to create or modify users and groups, you make
changes in the user directory, a subtree of Directory Server. These changes affect all
applications that use Directory Server. For information on how Netscape Console
uses the data stored in the directory, see Chapter 1, “Introducing Netscape Console
and Administration Server.”
81
Page 82

Interacting with Directory Server
Using Distinguished Names
A distinguished name (DN) is a text string that identifies a specific directory
branch or entry. Each user and group in your enterprise is represented in the
Directory Server by a DN. Whenever you make changes to user and group
information in the Directory, you use distinguished names (DNs). For example,
you need to specify a DN each time you perform one of the following operations:
• Create or modify directory entries
• Set up access controls
• Set up user accounts for applications such as mail or publishing
From the Netscape Console “Users and Groups” tab, you can create, select, and use
directory entries.
Distinguished Names, Attributes, and Syntax
This section presents a brief summary of distinguished names, directory attributes,
and syntax information. For a more detailed discussion of these concepts, see the
Netscape Directory Server Administrator’s Guide.
Distinguished Na m es
A distinguished name (DN) is the string representation of an entry’s name and
location in an LDAP directory. A DN describes a path to a directory entry. Each
DN is made up of a number of components called relative distinguished names
(RDNs). Each RDN identifies a specific entry in the directory. In order to ensure
that every directory entry is unique, LDAP dictates that a single parent entry
cannot have two identical RDNs below it.
Customarily, a DN for a user or group contains at least three types of RDN:
• A user name, user ID, or group name (identified by the
• An organization name (identified by the
• One or domain name components (identified by the
example.com contains two domain name components: example and com.
Other common RDNs are organizational unit (
82 Managing Servers with Netscape Console • December 2001
cn keyword)
o keyword)
dc keyword). Example:
ou), state (st), and country (c).
Page 83

Interacting with Directory Server
The exact composition of a DN depends on the structure of the directory. Most
directories are organized by more categories than just country designations and
organization names. As a result, the DNs used to identify entries are longer and
contain more specific RDNs. For example, the DNs for three employees or users in
the same company might look like this:
cn=Ben Hurst, ou=Operations, o=Klondike Corp, st=CA, c=US
cn=Jeff Lee, ou=Marketing, o=Klondike Corp, st=CA, c=US
cn=Mary Smith, ou=Sales, o=Klondike Corp, st=MN, c=US
In these examples, all three users work in different departments or organizational
ou) and for the same company or organization (o), Klondike Corp. The third
units (
user works in a different state (
st) from the first two users.
LDAP allows organizations and organizational units to contain other organizations
and organizational units, allowing for the representation of complex enterprises.
For example, the DN for a group within a large corporation might look like this:
cn=Technical Publications, ou=Super Server Group, ou=Server
Division, o=Example Corporation, o=MegaCorp, dc=megacorp, dc=com
Table 5-1 contains a list of common RDN keywords.
Table 5-1 Common RDN Keywords Used in DNs
RDN Keyword Meaning in a DN Description
c country Country in which the user or group resides.
Examples:
c=US
c=GB
cn common name or full name Full name of person or object defined by
the entry. Examples:
cn=Wally Henderson
cn=Database Administrators
cn=printer 3b
Chapter 5 User and Group Administration 83
Page 84

Interacting with Directory Server
Table 5-1 Common RDN Keywords Used in DNs (Continued)
RDN Keyword Meaning in a DN Description
dc domain component Part of a DNS domain. This keyword is
l locality Locality in which the user or group resides.
o organization Organization to which the user or group
typically used at the top levels of a
directory tree.
For example, a user in the
ldap.example.com domain might have
the following DN:
cn=Barbara Jones,ou=Engineering,
dc=sexample, dc=com
This can be the name of a city, country,
township, or other geographic regions.
Examples:
l=Tucson
l=Pacific Northwest
l=Anoka County
belongs. Examples:
ou organizational unit Unit within an organization. Examples:
sn surname User’s last name. Example:
st state or province State or province in which the user or
Keep in mind that the DNs you specify when using Netscape Console must reflect
the types of data in your user directory. For information on setting up the user data
in your Netscape Directory Server see the Directory Server documentation.
84 Managing Servers with Netscape Console • December 2001
o=Netscape E-Commerce Solutions
o=Public Power & Gas
ou=Sales
ou=Manufacturing
sn=Henderson
group resides. Examples:
st=Iowa
st=British Columbia
Page 85

Interacting with Directory Server
Attributes
Directory attributes hold descriptive information about an entry. For example, a
user entry might have attributes for a user ID, email address, given name, and
password.
Table 5-2 contains a list of common user and group directory attributes.
Table 5-2 Common User and Group Directory Attributes
Attribute Keyword Attribute Name Description
givenName given name User’s first name.
mail email address User’s or group’s email
address.
streetAddress street Street number and address
of user or group defined by
the entry. Example:
street=494 Rice Creek
Terrace
telephoneNumber telephone User’s or group’s telephone
number. Example: (545)
555-1221
title title User’s job title. Examples:
title=writer
title=manager
uid user ID Name that uniquely
identifies the person or
object defined by the entry.
userPassword password A user’s password.
A user entry can include many more attributes than those listed above. In addition,
you can create new attributes to meet your company’s needs. For more detailed
information, see the Netscape Directory Server Administrator’s Guide.
Chapter 5 User and Group Administration 85
Page 86

Interacting with Directory Server
DN and Attribute Guideli nes an d Synta x
As you create, select, and use directory entries, follow these guidelines:
Separate RDNs with a comma. If an RDN value contains a comma, enclose the
part of the name that uses the comma in double-quotation marks. For example, to
include the string Ace Industry, Corp in a DN, use the form
o=”Ace Industry, Corp”, c=US
When schema checking is turned on, attributes must match directory schema. If
you are using Netscape Directory Server and schema checking is turned on, use
RDN keywords and attributes that can be recognized by the Directory Server and
are allowed by the entry’s object classes. If schema checking is turned off, you can
use all attributes, regardless of an entry’s object classes. For more information on
required attributes and schema checking, see the Netscape Directory Server
Administrator’s Guide and the Netscape Directory Server Schema Reference Guide.
Specify RDNs in the same sequence or path. It is important to remember that a
DN represents a path through a directory tree. If RDN keywords are not specified
in the appropriate order, the Directory Server may not be able to locate an entry.
For example,
cn=Ralph Swenson, ou=Accounting, o=Ace Industry, c=US
is not the same as
cn=Ralph Swenson, o=Ace Industry, ou=Accounting, c=US
because the organizational unit (ou) and organization (o) keywords are not listed in
the same order.
User IDs must be unique. If duplicate user IDs exist in your directory, users with
those IDs will not be able to authenticate to the directory. Exercise caution when
using the
ldapmodify command line utility to create users, since the utility does
not check for duplicate user IDs.
86 Managing Servers with Netscape Console • December 2001
Page 87

Interacting with Directory Server
Locating a User or Group in the Directory
You can use the “Users and Groups” Search function to locate directory entries.
Initially, the function is set to search within the default user directory. If you do not
want to use the default user directory, you can manually change to another one.
See “Choosing a Different Directory to Search” on page 89 for more information.
Figure 5-1 The Users and Groups Tab of Netscape Console
Chapter 5 User and Group Administration 87
Page 88

Interacting with Directory Server
To Locate Users or Groups in the Directory
1. In Netscape Console, click the “Users and Groups” tab.
2. Specify your search criteria in one of these ways:
To find specific entries, enter all or part of a user, group, or organizational unit
name in the text entry box. For example, entering
entries with DNs containing “John Swanson” while entering
entries with DNs contains the word “John.”
To see all the entries currently stored in your directory, leave the Search field
blank or enter an asterisk (*). Keep in mind that retrieving all entries in a large
database can take a long time.
To specify more focused search criteria, click the Advanced button. In the
“Search users and groups” dialog box, enter the following information:
Search. Specify where to perform the search by choosing Users, Groups, Users
and Groups, or Administrators.
Where. First choose an RDN keyword, and then choose a search operator and
term.
John Swanson returns any
John returns all
3. Click Search. Results are displayed in the list box.
88 Managing Servers with Netscape Console • December 2001
Page 89

Creating New Directory Entries
Choosing a Different Directory to Search
When you use the Users and Groups Search function, the URL for the default user
directory appears above the text entry box (see Figure 5-1). Initially, all searches are
performed in this user directory. If you need to search a different user directory,
you can choose one other than the default.
To Change the Directory to Search
1. In Netscape Console, click the “Users and Groups” tab.
2. From the User menu, choose Change Directory.
3. In the Change Directory dialog box, provide user directory information:
User Directory Host. Enter the fully qualified host name where the user
directory is installed.
User Directory Port. Enter the port number used to connect to the user
directory.
Secure Connection. Check this box if the port number entered above is for use
with the Secure Sockets Layer (SSL) protocol. Make sure that the port is
configured to support SSL before selecting this option.
User Directory Subtree. Enter the DN of the user directory subtree to search
in. For example, to search all user entries in your organization, you might enter
o=example.com. To search within the sales force, you might enter ou=sales,
o=example.com
Bind DN. Enter the distinguished name of a user authorized to search entries
in the user directory.
Bind Password. Enter the password for the user specified by the Bind DN.
4. Click OK.
.
Creating New Directory Entries
From the Netscape Console “Users and Groups” tab, you can add or modify a user,
group, or organizational unit.
You can also perform these directory operations from the command line. For
detailed information, see the Netscape Directory Server Administrator’s Guide.
Chapter 5 User and Group Administration 89
Page 90

Creating New Directory Entries
Users
A user entry contains information about an individual person or resource in the
directory. For example, you can create user entries for
Conference Room 25.
To Create a New User Entry in the Directory
1. In Netscape Console, click the “Users and Groups” tab.
2. Click the Create button and then choose User. You can also open the User
John Smith, Printer 3B, or
menu and choose Create > User.
90 Managing Servers with Netscape Console • December 2001
Page 91

Creating New Directory Entries
3. In the Select Organizational Unit dialog box, select the organizational unit (ou)
to which the user will belong, and then click OK.
4. In the Create User window, enter user information:
First Name. Enter the user’s first name.
Last Name. Enter the user’s last name (surname).
Common Name. This is the user’s full name. It is automatically generated
based on the First Name and Last Name entered above. You can edit this name
as necessary.
Chapter 5 User and Group Administration 91
Page 92

Creating New Directory Entries
5.
User ID. When you enter a first and last name, the user ID is automatically
generated. You can replace this user ID with one of your choosing. The user ID
must be unique from all other user IDs in the directory.
Password. (Optional) Enter the user’s password. Alphanumeric characters,
spaces, and punctuation marks are all acceptable.
Confirm Password. If you entered the user’s password, enter it again to
confirm.
E-Mail. (Optional) Enter the user’s email address. If the user has multiple
email addresses, separate them with commas. For example:
jdoe@example.com, john.doe@example.net
Phone. (Optional) Enter the user’s telephone number. If the user has multiple
telephone numbers, separate them with commas. For example:
(550)555-1212, (950)555-2121, (725)222-5151
Fax. (Optional) Enter the user’s fax number. If the user has multiple fax
numbers, separate them with commas. For example:
555-2211, 555-1221
If you want to specify language-related information, click the Languages tab.
From the drop-down list in the Languages panel, select the user’s preferred
language, and then enter language-related information:
First Name. Enter the user’s first name in the selected language.
Last Name. Enter the user’s last name (surname) in the selected language.
Common Name. This is the user’s full name in the selected language. It is
automatically generated based on the First Name and Last Name entered
above. You can edit this name as necessary.
Phone. Enter the user’s telephone number. If the user has multiple telephone
numbers, separate them with commas. For example:
(950)555-2121, (725)222-5151
Pronunciation. If the selected language is commonly represented phonetically,
additional fields are displayed. Enter the phonetic representation for the user’s
first, last, and common name.
6. If you want to specify NT- or UNIX-specific attributes, click the NT User or
Posix User tab. For more information, see “Specifying Windows NT and UNIX
Options” on page 94.
7. Click OK.
92 Managing Servers with Netscape Console • December 2001
(550)555-1212,
Page 93

Creating New Directory Entries
The User’s Preferred Language
Sometimes a user’s name can be more accurately represented using a character set
other than that of the default language. For example, Noriko’s name is Japanese,
and she has indicated on her hiring forms that she prefers when Japanese
characters represent her name. You can select Japanese as her preferred language
so that her name will display in Japanese characters, even when a user’s default
language is English.
To indicate a user’s preferred language, follow the instructions in step 5 of the
section “To Create a New User Entry in the Directory”
beginning on page 90.
Administrators
During installation, you are asked to enter a user name and password for the
Configuration Administrator, the user authorized to access and modify the entire
configuration directory. The Configuration Administrator entry is stored in the
directory under the following DN:
uid=userID, ou=Administrators, ou=TopologyManagement,
o=NetscapeRoot.
During installation, the Configuration Administrator’s user name and password
are used to automatically create the Administration Server Administrator. This user
can perform a limited number of tasks, such as starting, stopping, and restarting
servers in a local server group. The Administration Server Administrator is created
for the purpose of logging into Netscape Console when the Directory Server is not
running.
The Administration Server Administrator does not have an LDAP entry; it exists
only as an entity in a local configuration file stored at:
<server_root>/admin-serv/config/admpw.
Even though they are created at the same time during installation, and are identical
at that time, the Configuration Administrator and Administration Server
Administrator are two separate entities. If you change the user name or password
for one, Netscape Console does not automatically make the same changes for the
other.
For more information on modifying the Configuration and Administration Server
Administrators, see “Modifying Existing Directory Entries” on page 106.
Chapter 5 User and Group Administration 93
Page 94

Creating New Directory Entries
To Create an Administrator
1. In Netscape Console, click the “Users and Groups” tab.
2. Click the Create button and then choose Administrator.
3. In the Create Administrator window, enter the appropriate user information.
Specifying Windows NT and UNIX Options
You can also open the User menu and choose Create > Administrator.
The requested information is exactly the same as in the Create User dialog box,
except that Password is a required field. For more information, see steps 4
through 7 of “To Create a New User Entry in the Directory” beginning on page
90.
You can enable additional user configuration panels to store Windows NT and
UNIX user information in the directory. If you are using Directory Server
Synchronization Services, you can use these panels to specify the options and
attributes to synchronize with your operating system. There are two panels you
can enable: NT User and Posix User.
By default, you must enable these panels for each individual user. If you want to
enable these panels automatically for every new user, you can do so by modifying
the configuration directory. Once you have enabled these panels, you can use them
to set Windows NT and UNIX options and attributes.
The following procedures show you how to enable these panels and modify
Windows NT and UNIX options and attributes.
94 Managing Servers with Netscape Console • December 2001
Page 95

Creating New Directory Entries
To Enable Windows NT and UNIX Panels for an Individual User
1. In the Create User window, click the NT User or Posix User tab.
The appropriate panel appears.
2. Enable the fields in the panel.
To enable the NT User fields, select “Enable Windows NT user attributes.”
To enable the Posix User fields, select “Enable Posix user attributes.”
To Enable Windows NT and UNIX Panels for All New Users
1. Open your Directory Server management window.
2. Click the Directory tab and click NetscapeRoot in the navigation tree.
3. Click to open your administration domain, and then click the pluses (+) to
expand GlobalPreferences > Admin > 4.0.
4. Click the defaultObjectClassesContainer folder, and then click “user” in the
right-hand panel.
5. From the Object menu, choose Open.
6. Select “nsdefaultobjectclass,” then, from the Edit menu, choose Add Value.
A blank field appears. If you are enabling both the Windows NT and
Posix/UNIX panels, choose Add Value a second time to create another blank
field.
7. Enter the appropriate object class name in the field.
To enable the NT User panel, enter
posixUser.
enter
8. Click OK.
ntUser. To enable the Posix User panel,
Chapter 5 User and Group Administration 95
Page 96

Creating New Directory Entries
To Set Windows NT a nd UN I X Op ti on s and Attributes for a N ew U s er
1. Follow steps 1-5 of “To Create a New User Entry in the Directory” beginning
2. If you want to store Windows NT-specific user information in the directory,
on page 90.
click the NT User tab, enable the fields by selecting “Enable Windows NT user
attributes,” and then enter the following information:
NT User ID. Enter the user’s NT login name.
Create New NT Account. (Optional) Check this box if you are using Directory
Server’s NT Synch Service and want to add this entry to the NT user database.
Delete NT Account If Person Deleted. (Optional) Check this box if you are
using Directory Server’s NT Synch Service and want the delete operation to
also remove this user from the NT user database. Checking this box will not
delete the user. It only indicates that, if the user is deleted from the Netscape
User Directory, he will also be removed from the NT user database.
Comment. (Optional) Enter a descriptive comment about this user.
User Profile Path. (Optional) Enter the path to this user’s profile. Use the NT
network path format. For example:
\\aphrodite\profiles\john.
Logon Script. (Optional) Enter the path to the user’s logon script. This path is
relative to the system’s logon script path. For example, if the system path is
\\aphrodite\logon, you might enter writers.bat or writers\john.cmd
depending on where you store your user scripts.
Home Drive. (Optional) Use the drop-down list to choose the drive on which
this user’s home directory is located.
Home Directory. (Optional) Enter the path to this user’s home directory. Use
the NT network path format or an absolute path. For example, you can enter
\\aphrodite\users\john or C:\user profiles\john.
either
Logon Server. (Optional) Enter the path to the server on which this user’s
logon script is stored. Use the NT network path format.
Logon Hours. (Optional) Click to set the hours during which this user can log
on.
User Workstations List. (Optional) Enter the computers from which this user
can log on.
Change. (Optional) Click to change the date and time at which the user’s
account expires.
96 Managing Servers with Netscape Console • December 2001
Page 97

Creating New Directory Entries
3. If you want to store UNIX-specific user information in the directory, click the
Posix User tab, enable the fields by selecting “Enable Posix user attributes,”
and then enter the following information:
UID Number. Enter the user’s UNIX ID number.
GID Number. Enter the user’s UNIX group ID number.
Home Directory. Enter the path to the user’s home directory. For example,
/u/jdoe.
Login Shell. (Optional) Enter the path to the user’s login shell. For example,
/usr/local/bin/tcsh.
Gecos. (Optional) The value of this user’s pw_gecos entry in /etc/passwd.
4. Click OK.
Groups
A group consists of users who share a common attribute or are part of a list. For
example, you might set up a group called Sales consisting of all users whose entries
contain the attribute
groups: static, dynamic, and certificate. Each group differs by the way in which
users, or members, are added to it. The following descriptions explain this.
ou=Sales. Netscape Directory Server supports three types of
A static group consists only of users that have been added to it. It is called static
because it doesn’t change unless you add a user to it or delete a user from it. For
example, if you create a static group called Marketing, none of the users who have
the attribute
department=marketing in their entry are members of the Marketing
group until you explicitly add each one to the group.
One special static group is called the Configuration Administrators group. It is
automatically created and populated when the configuration directory is installed.
Members of the Configuration Administrators group have unrestricted access to
the configuration directory. The group is stored in the configuration directory
under the following DN:
ou=Groups, ou=TopologyManagement, o=NetscapeRoot
Initially, the Configuration Administrator is the only member of the Configuration
Administrators group. If he wants to give additional users his level of
administrative privilege, he can do so by adding them as members of the group.
These users can access the configuration directory in the same way as the
Configuration Administrator. Any member of the Configuration Administrators
group can add additional members.
Chapter 5 User and Group Administration 97
Page 98

Creating New Directory Entries
A dynamic group automatically includes users based on one or more attributes in
their entry. For example, you can create a dynamic group called California Sales
that automatically includes any entry containing the attributes
department=sales. These attributes are specified as part of an LDAP URL.
Whenever you search for members of the California Sales group, the results
contain all entries located by the URL.
A certificate group includes all users who have a certificate containing a common
attribute. For example, you can create a certificate group called California Western
Sales whose members share these attributes:
an individual user logs on to a server, if all of these attributes are found in his
certificate, the user is automatically recognized as belonging to the group. If the
user’s certificate does not contain these attributes, he is not recognized as a member
of the California Western Sales group and does not receive the same access,
privileges, or permissions as group members.
To Create a Static Group in the Directory
1. In Netscape Console, click the “Users and Groups” tab.
2. Click the Create button and then choose Group. You can also open the User
st=California and
ou=Sales, ou=West, st=CA. When
menu and choose Create > Group.
3. In the Select Organizational Unit dialog box, select the organizational unit(ou)
to which the group will belong, and then click OK.
98 Managing Servers with Netscape Console • December 2001
Page 99

Creating New Directory Entries
4. In the Create Group dialog box, enter group information:
Group Name. Enter a name for the group.
Description. (Optional) Enter a description to help you identify this group.
5. Create the group, or specify members for the group before creating it.
If you want to create only the group now, and add group members later, click
OK and skip the rest of this procedure.
If you want to immediately add members to the group, click Members and
then continue to the next step.
6. In the Members panel, click Add or Edit as appropriate, and then use the
Search dialog box to locate a user you want to add to the Members User ID list.
Repeat this step until all the users you want to add to the group are displayed
in the Member User ID list.
Chapter 5 User and Group Administration 99
Page 100

Creating New Directory Entries
To Add Users to the Configuration Administrators Group
1. In Netscape Console, click the “Users and Groups” tab, and then choose
2. In the Change Directory window, indicate the location of the user directory
Change Directory from the User menu.
that contains the Configuration Administrators group:
User Directory Host. Enter the fully qualified host name where the user
directory is installed.
User Directory Port. Enter the port number you want to use to connect to the
user directory.
User Directory Subtree. Enter
o=NetscapeRoot to indicate where to find the
Configuration Administrators group.
Bind DN. Enter the DN of a user authorized to change entries in the user
directory.
Bind Password. Enter the password of the user directory administrator.
3. Click OK.
4. Use the Search function to locate and highlight the Configuration
Administrators group, and then click Edit.
100 Managing Servers with Netscape Console • December 2001
 Loading...