

Page 1
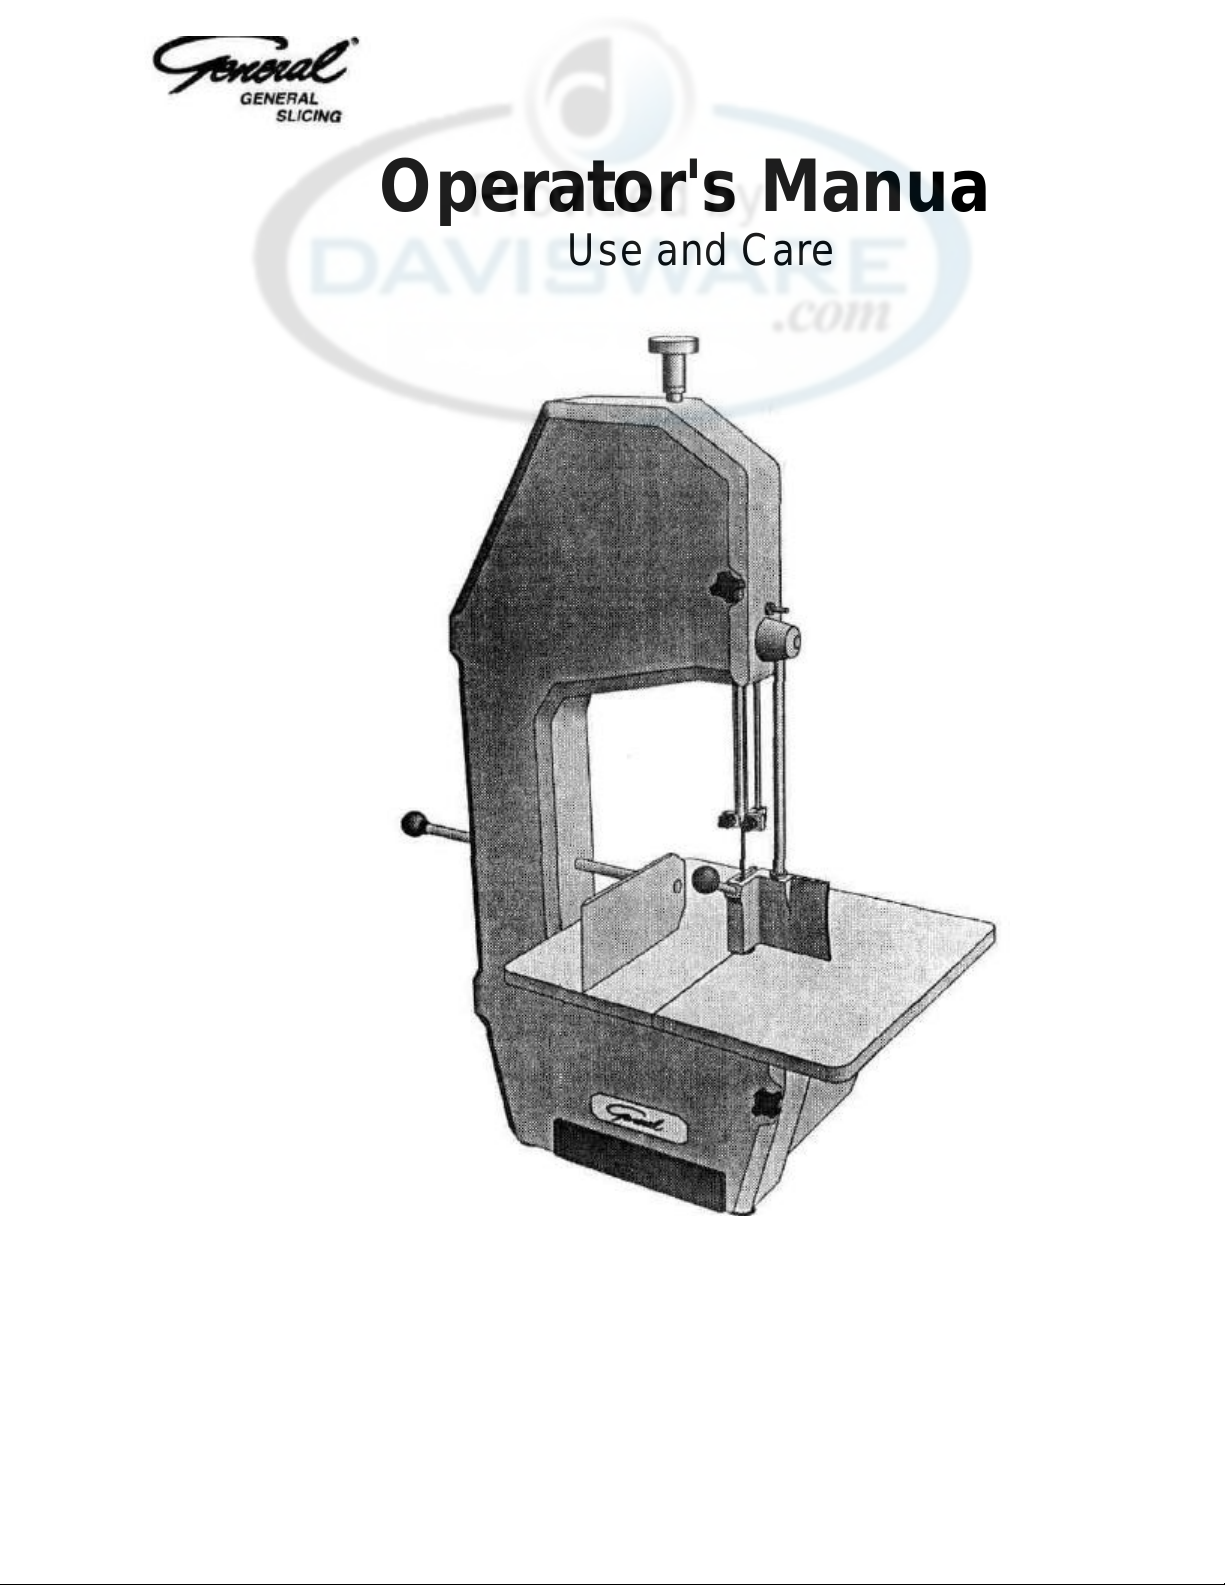
Operator's Manual
Use and Care
MS -72A
Page 2
INTRODUCTION
CONTENTS
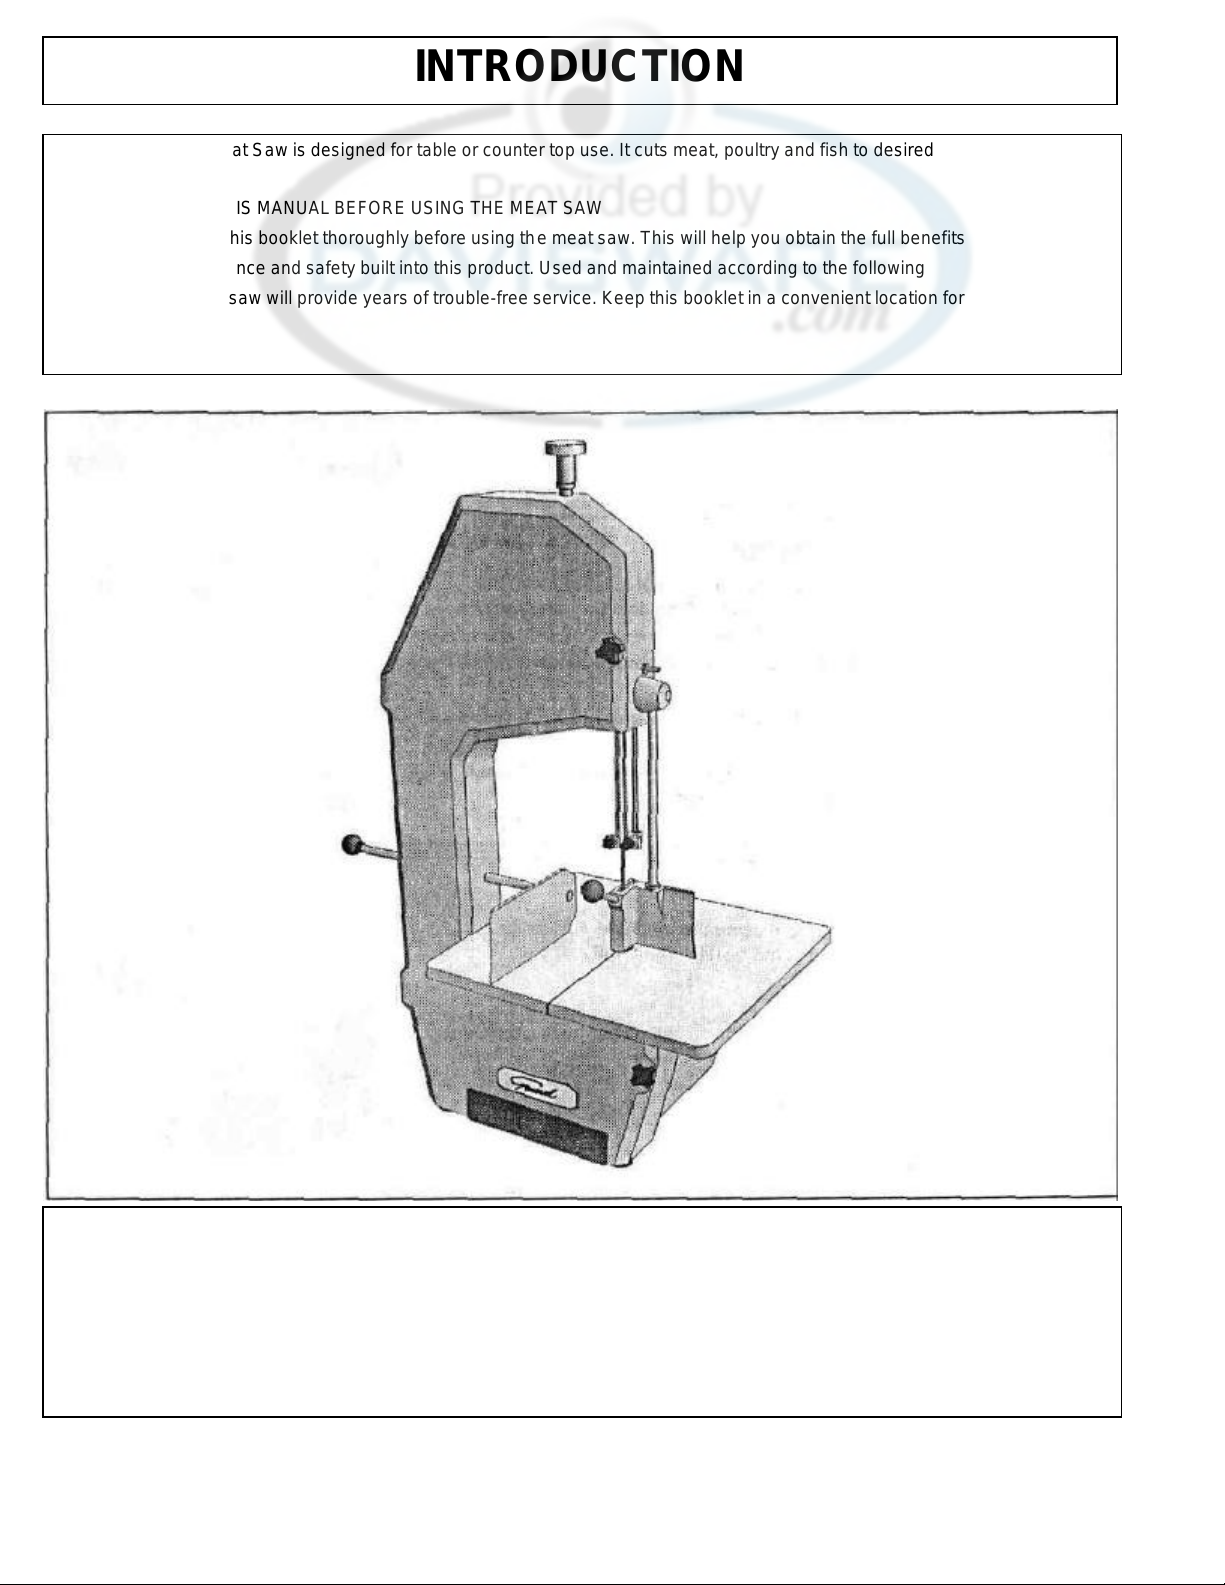
The Model MS-72A Meat Saw is designed for table or counter top use. It cuts meat, poultry and fish to desired
thickness.
IMPORTANT: READ THIS MANUAL BEFORE USING THE MEAT SAW
It is important to read this booklet thoroughly before using the meat saw. This will help you obtain the full benefits
of the quality, convenience and safety built into this product. Used and maintained according to the following
instructions, the meat saw will provide years of trouble-free service. Keep this booklet in a convenient location for
future reference.
Safety ........................................................... 2 Electrical Requirements............................... 11
General Description ...................................... 5
Unpacking..................................................... 6
Assembly...................................................... 6
Cleaning ....................................................... 8
Operation .................................................... 12
Lubrication................................................... 15
Maintenance................................................ 15
Parts Replacement and Service................... 16
1
Page 3

SAFETY
RECOGNIZE SAFETY INFORMATION
This is the safety-alert symbol. When you see this symbol on your
machine or in this manual, be alert to the potential for personal injury.
Follow the recommended precautions and safe operating practices.
UNDERSTAND SIGNAL WORDS
Signal words (DANGER, WARNING and CAUTION) appear with the
safety-alert symbol in this manual and on safety labels on the machine
to identify the level of hazard seriousness.
DANGER indicates a hazard that WILL result in severe personal injury
or death.
WARNING indicates a hazard or unsafe practice which COULD result in
severe personal injury or death.
CAUTION indicates hazards or unsafe practices which COULD result in
minor personal injury or equipment damage.
READ ALL INSTRUCTIONS
Read this operator's manual before using the machine. Failure to
follow the instructions provided could result in personal injury or
equipment damage.
KEEP OUT OF REACH OF CHILDREN
This saw is intended for commercial use only.
2
Page 4
SAFETY
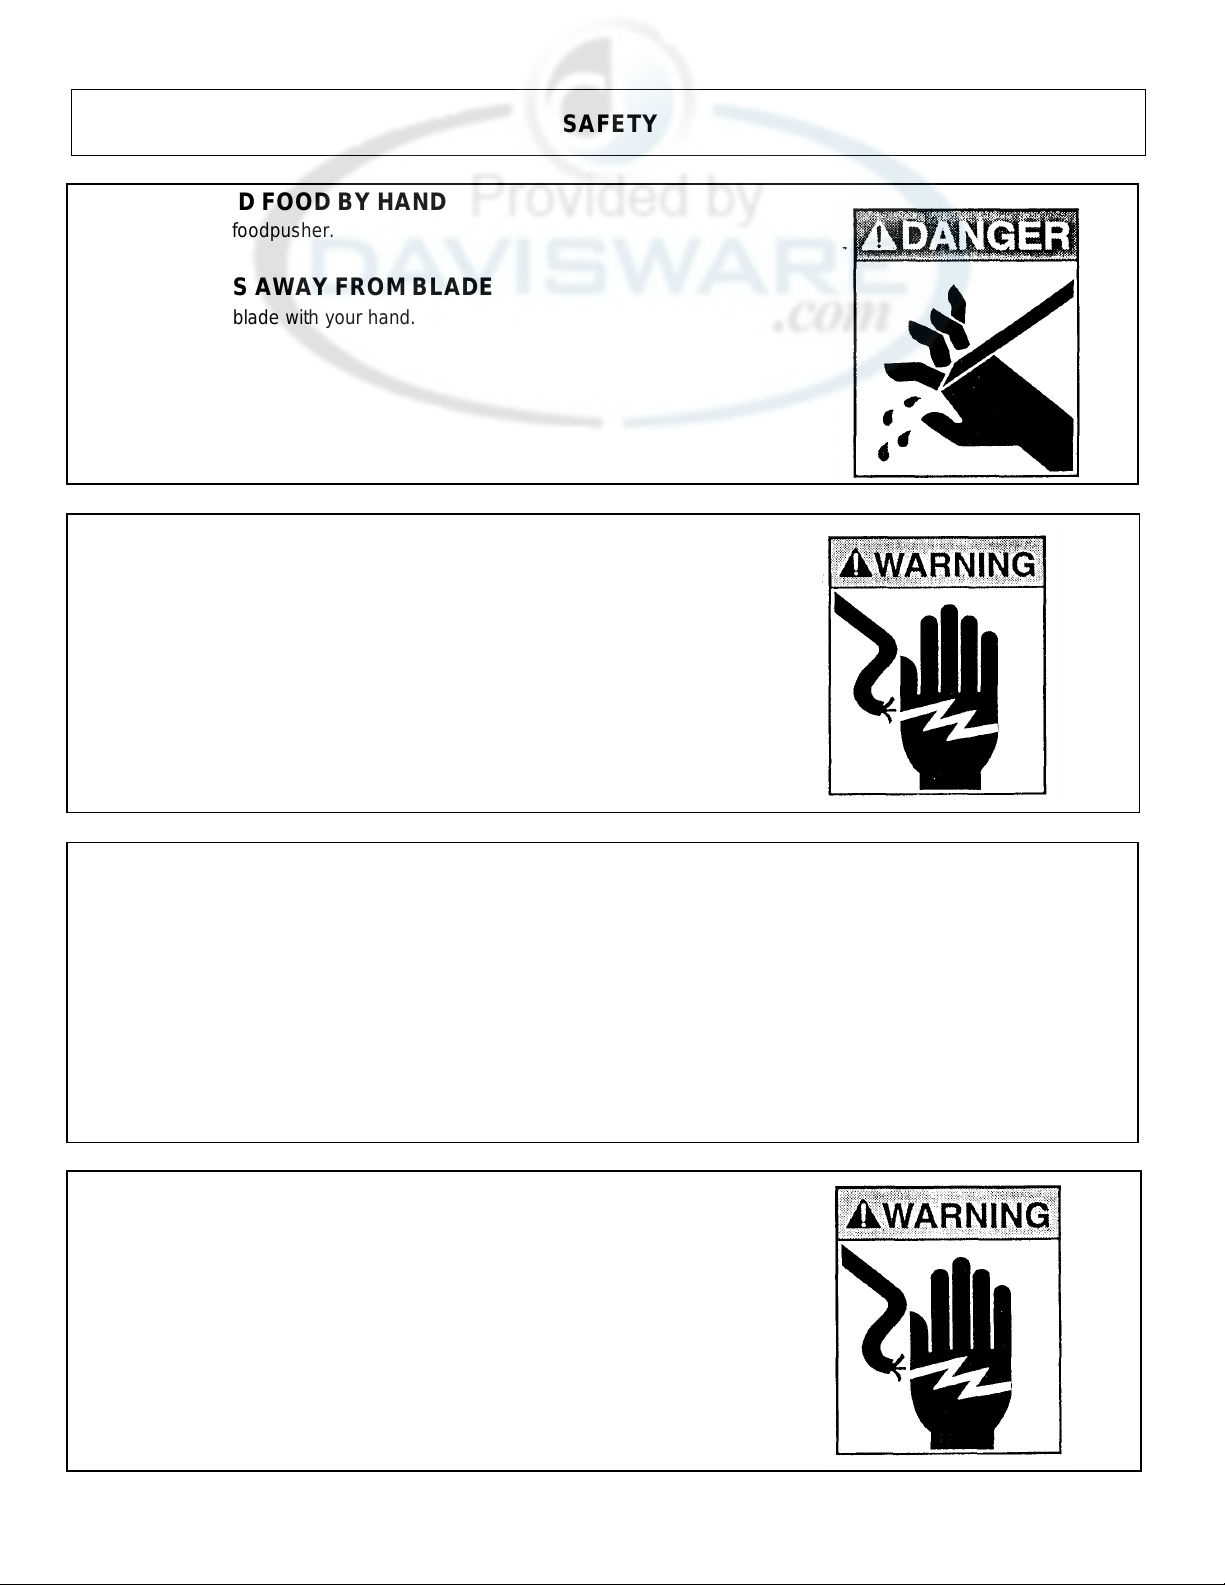
DO NOT FEED FOOD BY HAND
Always use the foodpusher.
KEEP HANDS AWAY FROM BLADE
Never touch the blade with your hand.
DO NOT OPERATE IF DAMAGED
Do not operate this saw with a damaged cord or plug, or if the saw
has been dropped or damaged in any manner. Contact the nearest,
factory-authorized service center for examination, repair or adjustment. (Refer to the authorized service centers list included in the
Owner's Information Packet.)
Do not allow the cord to touch hot surfaces.
Do not allow the cord to hang over the edge of a table or counter.
DO NOT LEAVE SAW UNATTENDED
Never leave the saw unattended while the unit is operating.
UNPLUG SAW
Unplug the saw from the outlet when not in use, before putting on or
taking off parts, before cleaning, and before clearing a jam.
3
Page 5

SAFETY
DO NOT IMMERSE
Do not place the saw in water or any other liquid.
ATTACHMENTS
Do not use attachments not recommended by the manufacturer.
Follow the manufacturer's instructions for use of attachments.
SAVE THESE INSTRUCTIONS.
Keep this booklet in a convenient location for future reference.
4
Page 6
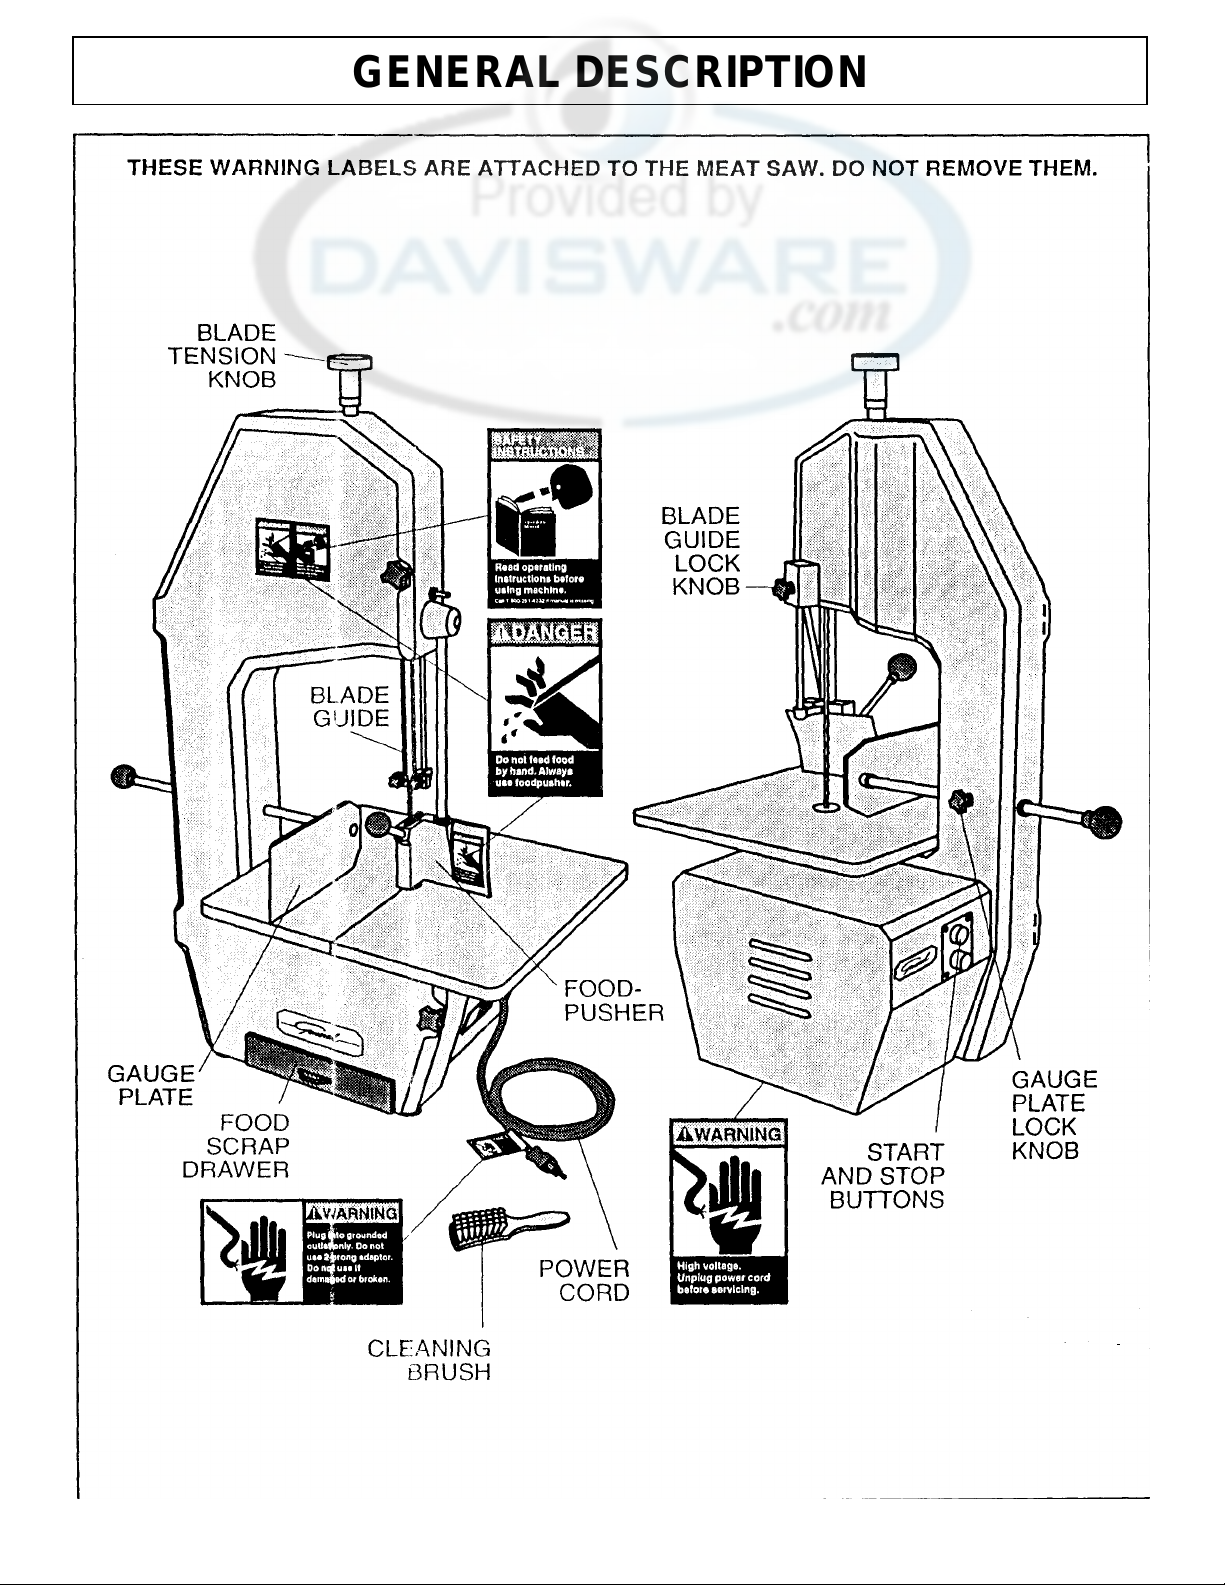
GENERAL DESCRIPTION
5
Page 7
UNPACKING AND ASSEMBLY
UNPACKING
Inspect the shipping carton and its contents for shipping damage. If you
detect shipping damage to any of the contents of the carton, notify your
carrier.
Remove the packing materials and take out the loose components
(platform and cleaning brush), before removing the meat saw from the
carton. If there are any parts missing, notify us immediately at the
number listed on the back cover of this manual.
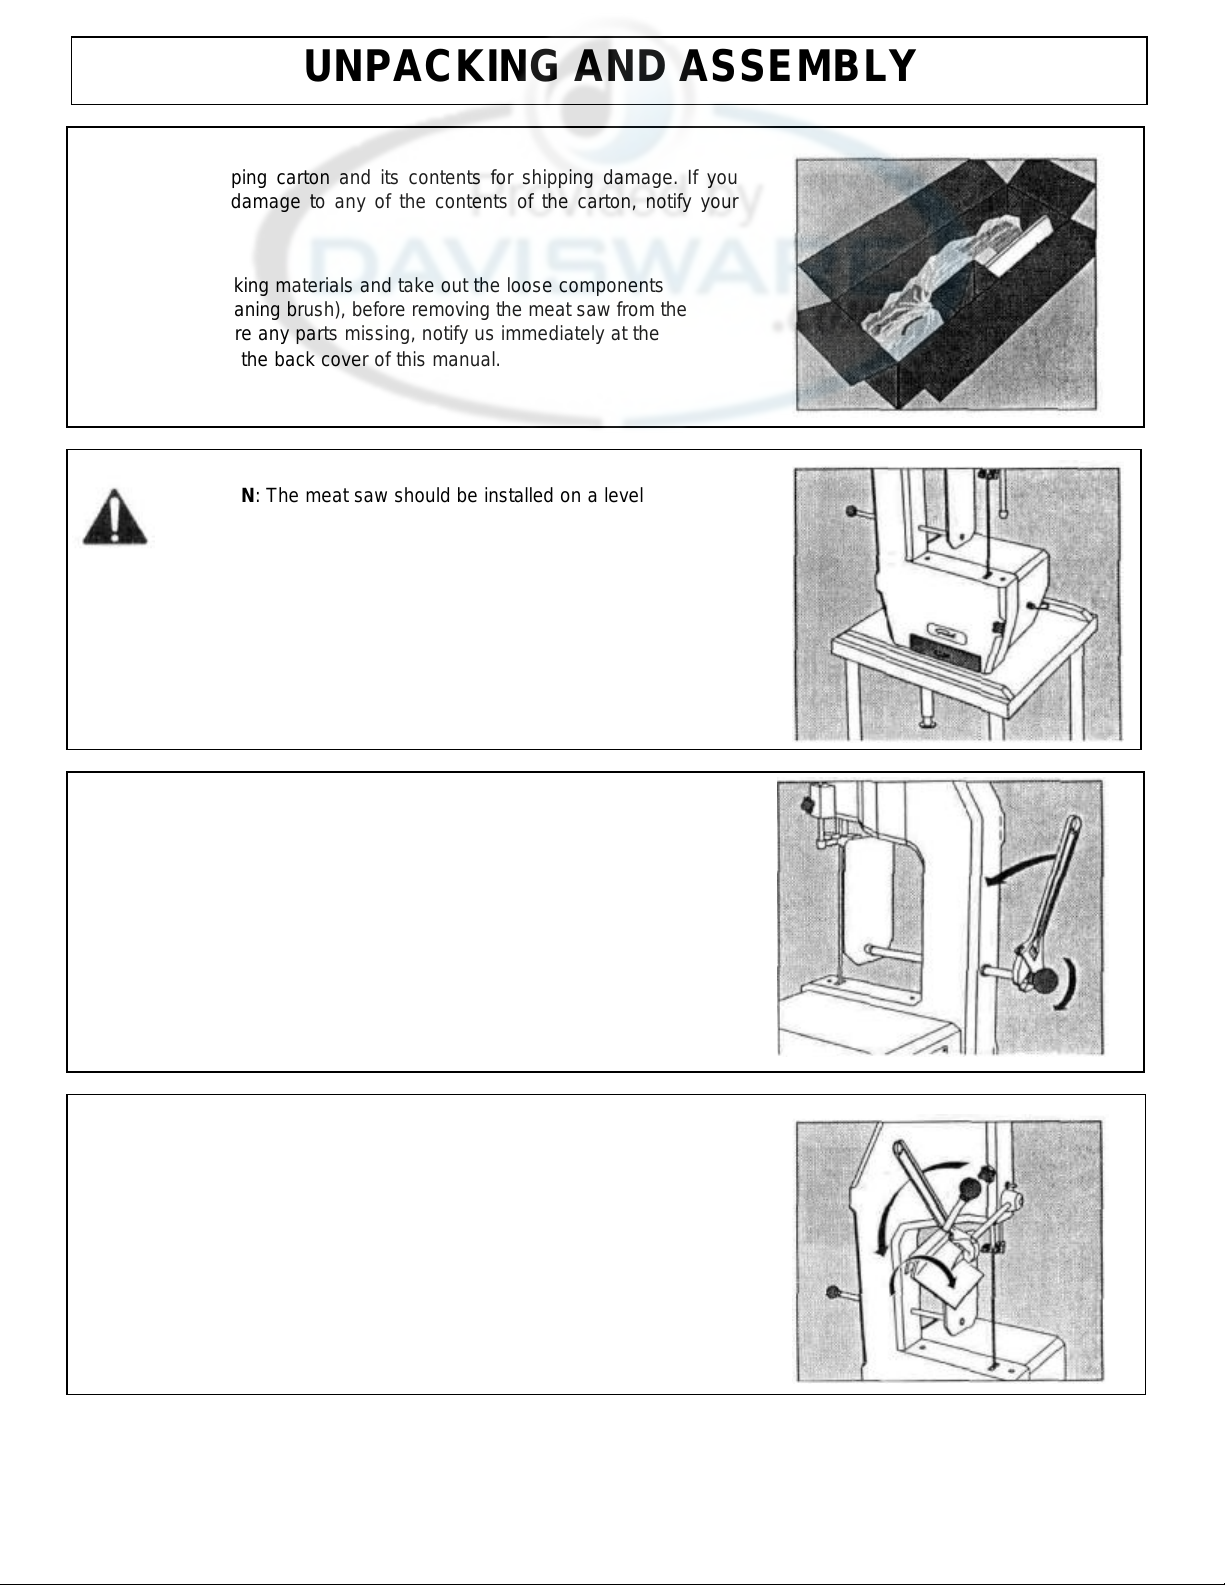
ASSEMBLY
CAUTION: The meat saw should be installed on a level
surface strong enough to safely support its weight (for
example, Model MST-24 Meat Saw Table).
Gauge Plate Knob
1. Attach the gauge plate knob to the gauge plate rod by turning it
clockwise.
2. Tighten the jam nut against the knob by turning it counter clockwise
with an adjustable wrench.
Foodpusher
1. Attach the foodpusher to the foodpusher arm by turning it
clockwise.
2. Tighten the jam nut against the foodpusher by turning it counterclockwise with an adjustable wrench.
3. Pivot the foodpus her up out of the way.
6
Page 8

UNPACKING AND ASSEMBLY
Platform
1. Remove the food scrap drawer.
2. Turn the two housing door knobs counter-clockwise to loosen, and
open the housing door.
3. Remove the mounting nuts and washers from the mounting screws on
the underside of the platform.
4. Slide the platform to the left (with the cutting blade passing through the
slit), and line up the mounting screws in the housing holes.
5. Put the washers and nuts on, and tighten with an adjustable
wrench.
6. The saw should be thoroughly cleaned and sanitized (See Page 8.)
before using to ensure sanitary conditions.
7
Page 9

CLEANING
Clean and sanitize the saw before using the first time, after each use,
and before cutting different types of food products. Follow company,
local and state health/sanitation codes.
WARNING: Unplug saw before cleaning.
Do NOT use caustic or abrasive cleaners.
Do NOT spray cleaning materials or water toward the vented areas or
pushbuttons.
DISASSEMBLY FOR CLEANING
Housing Door
1. Remove the food scrap drawer.
2. Turn the two housing door knobs counter-clockwise to loosen, and
open the housing door.
Blade Cover
1. Loosen the blade guide assembly lock knob and lower the blade
guide assembly.
2. Loosen the two silver blade cover nuts by turning them counterclockwise. (Do not unscrew black knobs.)
3. Slide the blade cover up (A), pull it to the right (B), and slide it
down (C) to remove it.
8
Page 10

CLEANING
Blade
CAUTION: Wear protective cut -resistant gloves when
handling the blade.
1. Loosen the blade tension knob by turning it counter-clockwise.
2. Remove the blade.
WASH ALL SURFACES
1. Clean all surfaces of the meat saw with hot, soapy water and a
clean cloth.
2. Remove food scraps from the blade and blade wiper with the
brush supplied with the saw.
3. Clean the blade with chlorine bleach. Coat the blade with Pre-Em
Oil or a light non-toxic mineral oil after cleaning.
4. Remove food scraps from the drawer and blade guide cover;
wash in hot, soapy water.
REASSEMBLY
Blade
1. Replace the blade, with the cutting edge out.
2. Tighten the blade tension knob by turning it clockwise until it
clicks. (The blade tension knob is equipped with a clutch to
prevent over-tightening.)
Blade Cover
1. Holding the blade cover to the right of the blade, slide the top up (A)
through the grooves in front of the blade.
2. Straighten it to an upright position (B), and lower it (C) to seat
behind the blade cover nuts. Tighten the nuts.
WARNING: Never operate the meat saw without the blade
cover.
9
Page 11

CLEANING
Housing Door
1. Close the door and tighten the two housing door knobs.
2. Replace the food scrap drawer in door.
10
Page 12

ELECTRICAL REQUIREMENTS
Use a properly grounded three-prong outlet to reduce the hazard of
electrical shock.
The saw should be placed close enough to the electrical power supply
so that an extension cord will not be needed. It is designed to be used
on 115 Volt, A.C., 60 Hz power source, as indicated on the Data Plate
affixed to the front of the unit. Be sure that the voltage is the same
before plugging the saw into the outlet. To operate the unit on other
voltages, the unit must be returned to the factory for modification.
All electrical connections must be made in compliance with all appli-
cable local electrical codes, as well as the latest edition of the National
Electrical Code (NFPA 70).
11
Page 13

OPERATION
BLADE CHOICE
The meat saw is equipped with a general-purpose blade which cuts
through bone quickly, leaving it smooth and burr-free. It is especially
efficient for ham processing when vacuum wrapping is used.
Other blades recommended for special applications:
The coarse blade is engineered for straight, fast portion control cutting
with minimum waste, and for cutting frozen products.
The scalloped blade is designed to cut chicken and other soft -boned
and boneless material.
NOTE: For most efficient use of the meat saw, use the appropriate
blade for the application. Blade and spare parts information are
included in the Owner's Information Packet.
Clean and sanitize the saw before using the first time, after each use,
and before cutting different types of food products. Follow company,
local and state health/sanitation codes (See Page 8.).
OPERATION
1. Plug power cord into a grounded three-prong outlet. (See
Electrical Requirements, Page 11.)
2. Swing the foodpusher up out of the way .
12
Page 14

OPERATION
3. Loosen the gauge plate lock knob. Push or pull the rod to set the
gauge plate for desired thickness of cut, and tighten the knob.
4. Place the product to be sliced on the platform to the left of the
blade.
5. Loosen the blade guide lock knob by turning it counter-clockwise.
Adjust the blade guide 1/8"-1/4" (3mm-6mm) above the product
to be cut, and tighten the knob.
CAUTION: Do not adjust the blade assembly higher than 1/4"
(6mm) above the product to be cut.
6. Press the START button.
DANGER: Keep your hands away from the cutting edge of
the blade.
13
Page 15

OPERATION
DANGER: Do not feed food by hand. Always use the
foodpusher.
7. Swing the foodpusher down behind the product, and push the
product with the foodpusher until it is clear of the blade.
8. Raise the foodpusher, slide the remaining product back, and
repeat Step 7.
NOTE: Occasionally fibrous food will jam in the slit behind the blade,
causing the saw to stall.
WARNING: Turn the machine off and unplug the power plug
before clearing jams.
WARNING: Never leave the machine running while
unattended.
9. When finished press the STOP button and unplug the saw.
WARNING: Unplug the saw when not in use.
10. Clean the machine thoroughly after each use. See
cleaning instructions on Page 8.
14
Page 16

LUBRICATION AND MAINTENANCE
LUBRICATION
This unit has permanently lubricated bearings. Do not add oil or
grease.
MAINTENANCE
Blade Guide Inserts Adjustment/Replacement
A spacing of 1/8" (3mm) should be maintained between the blade
guide inserts. After prolonged use, the inserts become worn and the
space will be too wide. Loosen the blade guide knobs and move the
inserts to the correct spacing (There should be equal space on both
sides of the blade.), and retighten the knobs. The blade guide inserts
should be replaced when they are less than 3/4" (19mm) long.
15
Page 17

PARTS REPLACEMENT AND SERVICE
PARTS REPLACEMENT
Use the replacement parts list and the parts distributors list included in
the Owner's Information Packet to order spare parts. Specify the part
number and part name.
SERVICE CENTER LIST
For repair consult the authorized service centers list included in the
Owner's Information Packet for the closest service center.
16
Page 18

REPLACEMENT PARTS LIST
KEY NO. PART NO. NAME/DESCRIPTION/QTY. PER MACHINE
1 23-MS-701 Housing
(1)
49 9-MS-749 Blade, Coarse: (Fish)
2
9-MS-702 Knob: Blade
Tension Adjusting
(1)
49
9-MS-800 Blade, Scalloped: (Chicken)
3
9-MS-703 Bearing: Blade Tension Adj
.
Knob
(1)
50
23-MS-750 Door: Housing
(1) 3A 8-MS-703A Washer: Blade Tension Adj. Knob
(2)
51
9-MS-751 Knob: Housing Door
(2) 4 9-MS-704 Spring: Bl
ade Tension Adj. Knob (I)
52
8-MS-752 Nut: Housing Door Knob
(2) 5 1-MS-705 Pulley Slide
(1)
52
8-MS-752 Nut: Pulley Slide Bracket
(8) 6 1-MS-706 Plate: Pulley Slide (I)
53
8-MS-753 Washer: Housing Door Knob
(2) 7 9-MS-707 Shaft: Upper Pulley
(1)
62
6-MS-762 Foot
(4) 8 8-MS-708 Nut: Upper Pulley Shaft
(1)
*
9-MS-762A Spacer: Foot, Front
(2) 9 8-MS-709 Washer: Upper Pulley Shaft
(1)
63
8-MS-763 Screw: Foot, Front
(2) 10 9-MS-710 Bracket: Pulley Slide
(4)
*
8-MS-763A Screw: Foot, Rear
(2) 11 8-MS-711 Stud: Pulley Slide Bracket
(4)
66
9-MS-766 Knob: Gauge Place Rod
(1) 11A 8-MS-711A Washer: Pulley Slide Bracket
(8)
67
9-MS-767 Washer, Rubber: Gauge Plate Rod
12
8-MS-712 Screw: Pulley Slide Plate (I)
68
9-MS-768 Knob, Lock: Gauge Pla
te Rod
(1) 13 8-MS-713 Nut: Pulley Slide Plate
(1)
70
8-MS-770 Screw: Gauge Plate
(1) 14 4-MS-714 Cover: Pulley Slide (I)
80
8-MS-780 Nut: Pivot Bolt
(1) 15 1-MS-715 Bracket: Blade Wiper (1)
81
8-MS-781 Washer: Pivot Bolt
(1) 16 6-MS-716 Wiper: B
lade
(2)
82
9-MS-782 Collar, Pivot: Food Pusher
(1) 17 8-MS-717 Screw: Blade Wiper (4)
83
9-MS-783 Arm: Food Pusher
(1) 17A 8-MS-717A Screw: Blade Wiper Bracket
(2)
84
8-MS-784 Screw, Limit: Food Pusher
(2) 18 9-MS-718 Hinge: Door
(2)
85
8-MS-78
5 Washer, Wave: Pivot Bolt
(1) 19 8-MS-719 Screw: Door Hinge
(8)
86
8-MS-786 Bolt, Pivot: Food Pusher
(1) 20 9-MS-720 Collar, Spring: Tension Adj. Knob
(2)
87
8-MS-787 Washer, Spacer: Pivot Bolt
(1) 21 9-MS-721 Rider: Blade
(1)
88
8-MS-788 Screw:
Pivot Bolt (I)
22
8-MS-722 Stud: Blade Rider (I)
89
9-MS-789 Rod: Food Pusher Knob
(1) 23 8-MS-723 Nut: Blade Rider
(1)
90
23-MS-790 Food Pusher
(1) 24 8-MS-724 Washer: Blade Rider
(1)
30-MS-790 Food Pusher Assembly:
25
23-MS-725 Gauge Plate
(1
)
Includes Items
80
Thru
92 26 23-MS-726 Guide: Blade
(1)
91
9-MS-791 Knob: Food Pusher
(1)
30-MS-726 Blade Guide Assembly:
92
8-MS-792 Nut, Jam: Food Pusher Arm
(1)
Includes Items
26, 29
Thru
31
*
9-MS-801 Cover, Bottom: Motor Housing
(1) 27 9-MS-727 Rod Assy.: Gauge Plate (I)
*
2-MS-802 Motor: 208
-
240V/50
-
60HZ
(1) 28 9-MS-728 Knob, Adjusting: Blade Guide
(1)
*
8-MS-764 Screw, Mounting: Motor
(4) 29 9-MS-729 Nut: Blade Guide
(1)
*
8-MS-765 Washer: Motor Mounting Screw
(4) 30 9-MS-730 Knob: Blade Guide
(1)
*
5- 6-323 Cord
(1) 31 9-MS-731 Insert: Blade Guide
(1)
*
5- 6-322 Plug
(1) 32 4-MS-732 Cover: Blade
(1)
*
5-SM-1563 Strain Relief
(1) 33 9-MS-733 Rod, Adjusting: Blade Guide
(1)
*
5-SM-757 Capacitor
(1) 34 8-MS-7
34 Nut: Blade Guide Adj. Rod (I)
*
9-MS-803 Bracket: Capacitor
(1) 35 8-MS-735 Washer: Blade Guide Adj. Rod
(1)
*
8-MS-804 Nut, Mounting: Capacitor
(1) 36 23-MS-736 Platform
(1)
*
8-MS-805 Washer: Capacitor
(1) 37 9-MS-737 Drawer (I)
*
8-MS-806 Screw: Capacitor Bracket
(1) 38 8-MS-738 Screw: Platform
(2)
*
8-MS-807 Nut: Capacitor Bracket
(1) 39 8-MS-739 Washer: Platform
(2)
*
9-MS-808 Housing: Motor
(1) 40 9-MS-740 Insert, Phenolic: Platform
(1)
*
7-MS-809 Gasket: Motor Housing
(1) 41 1-MS-741 Pulley, Upper
(1)
*
8-MS-810 Nut: Motor Housing
(8)
30-MS-741 Upper Pulley Assembly:
*
8-MS-811 Washer: Motor Housing
(4)
Includes Items
41
Thru
43
*
5-MS-812 Switch Assy., Start
(1) 42 8-MS-742 Snap Ring: Upper Pulley
(1)
*
5-MS-8
13 Switch Assy., Stop
(1) 42A 8-MS-742A Spacer: Pulley Bearing
(1)
*
4-MS-814 Plate, Mounting: Switch
(1) 43 9-MS-743 Bearing: Upper Pulley
(2)
*
8-MS-815 Screw: Switch Mtg. Plate
(4) 44 8-MS-744 Washer: Upper Pulley
(1)
*
30-MS-816 Electrical Box
(1) 45 8-MS-745 Screw: Upper Pulley
(1)
*
5-MS-817 Relay
(1) 46 1-MS-746 Pulley: Motor
(1)
*
5-MS-818 Socket: Relay
(1) 47 8-MS-747 Screw: Motor Pulley (1)
*
5-MS-819 Transformer
(1) 48 8-MS-748 Washer: Motor Pulley
(1)
*
5-MS-820 Terminal Blo
ck: Elec. Box
(1) 49 9-MS-799 Blade, Fine: (General Use)
* 8-MS-821 Screw. Mounting: Elec. Box
(2) * 12- 6-602 Warning Label
(2)
*
5-MS-821 Terminal Block
(1)
* INDICATES ITEMS NOT PICTURED
* 30-MS-822 Micro Switch Assembly
(1)
EFFECTIVE
: 5/1/85
MODEL "MS-72A" MEAT SAW
KEY NO. PART NO. NAME/DESCRIPTION/QTY. PER MACHINE
Page 19

REPLACEMENT PARTS FOR MODEL "MS
- 72A" MEAT SAW
EFFECTIVE: 5/1/85
General Slicing/Red Goat Disposers
11 52 Park Avenue • P.O. Box 428
MurFreesboro, Tennessee 37133-0428 • (615)893-4820 • TELEX 786695
Page 20

Page 21

Page 22

Page 23

 Loading...