

Page 1
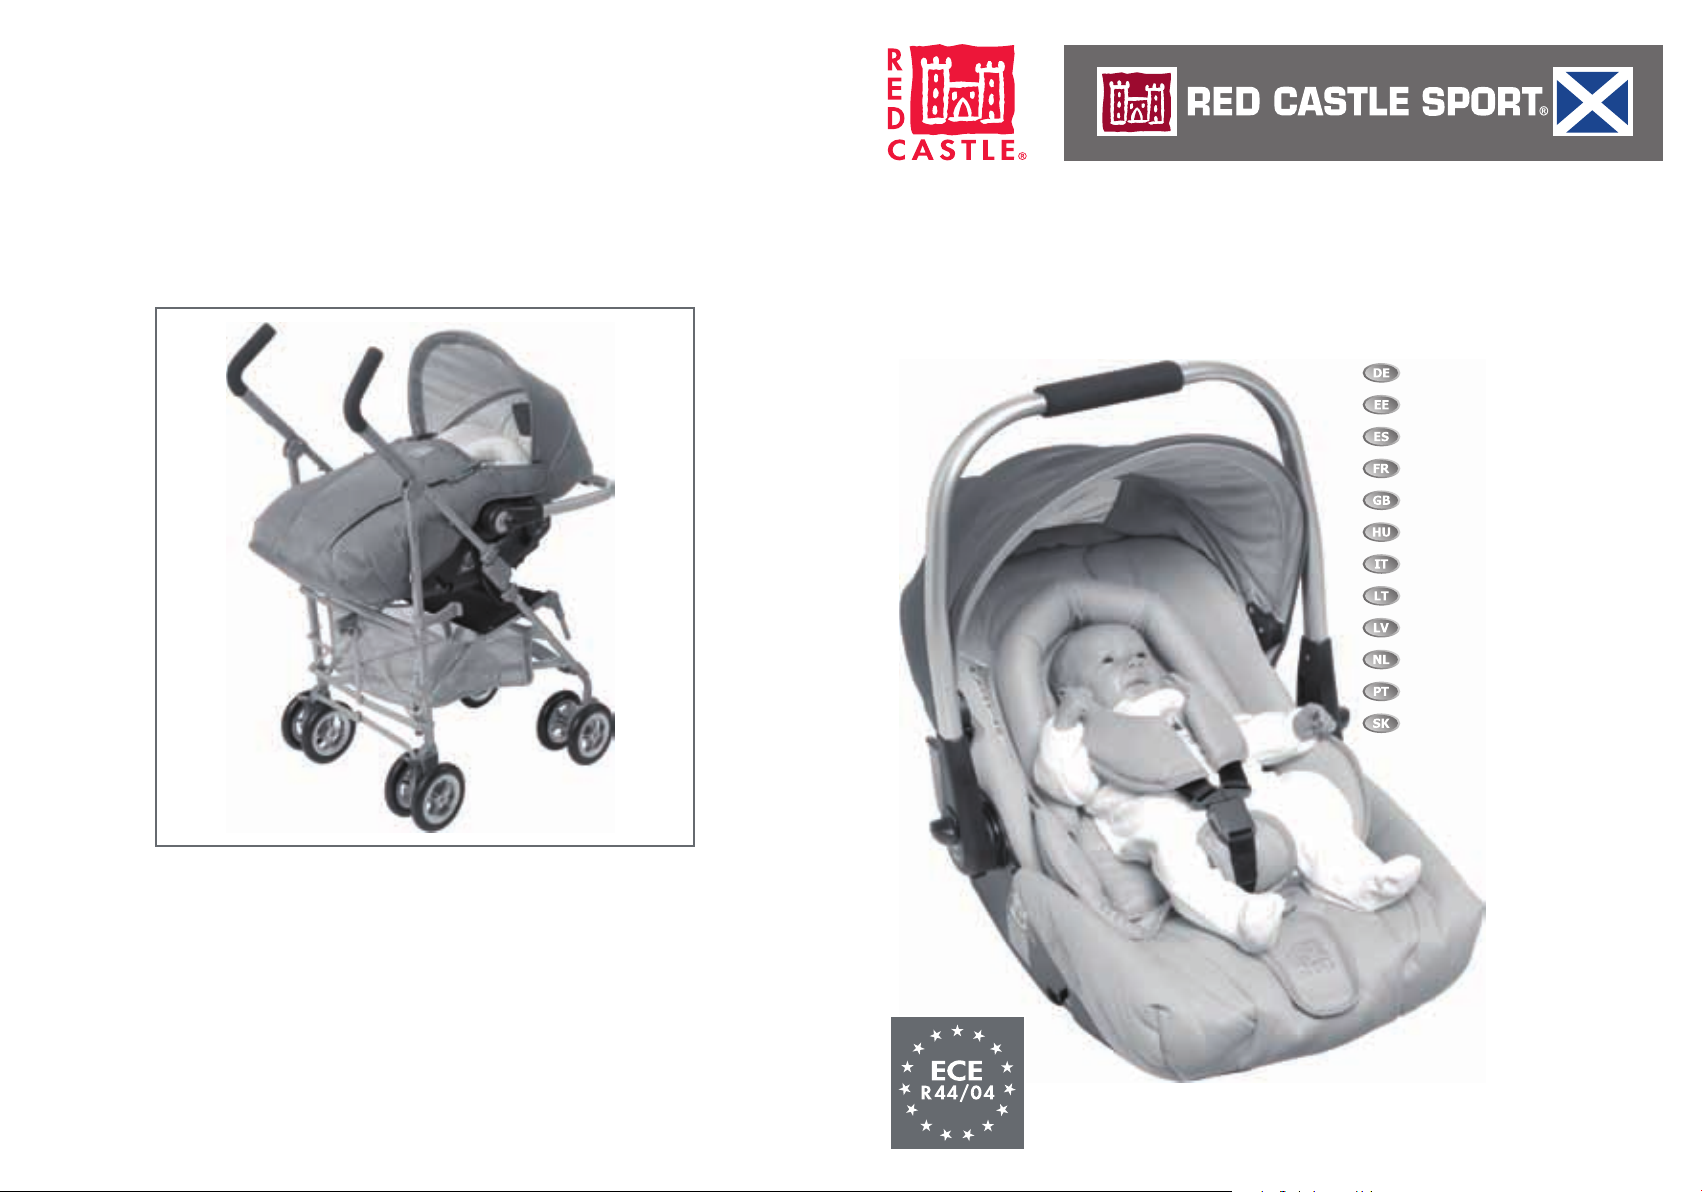
© N° 166/2010
RC/RCS Gr. 0 / < 10 kg
Autositz Gr 0
Turvahäll, grupp 0
Asiento de coche Gr. 0
Siège auto Gr 0
Car Seat Gr 0
Autóshordozó Gr 0
Seggiolino auto Gr. 0
0 gr. automobilinė vaiko kėdutė
Autokrēsliņš, Gr. 0
Autozitje groep 0
Cadeira-Auto Gr. 0
Autosedačka Skupiny 0
PHOTOS NON CONTRACTUELLES / PHOTOS ARE NOT CONTRACTUALLY BINDING
RED CASTLE et le logo est une marque enregistrée de la société RED CASTLE FRANCE
RED CASTLE and the device is a trademark belonging to RED CASTLE FRANCE
RED CASTLE SPORT et le logo est une marque enregistrée de la société RED CASTLE FRANCE
RED CASTLE SPORT and the device is a trademark belonging to RED CASTLE FRANCE
RED CASTLE FRANCE
13100 Aix-en-Provence
www.redcastle.fr
Page 2

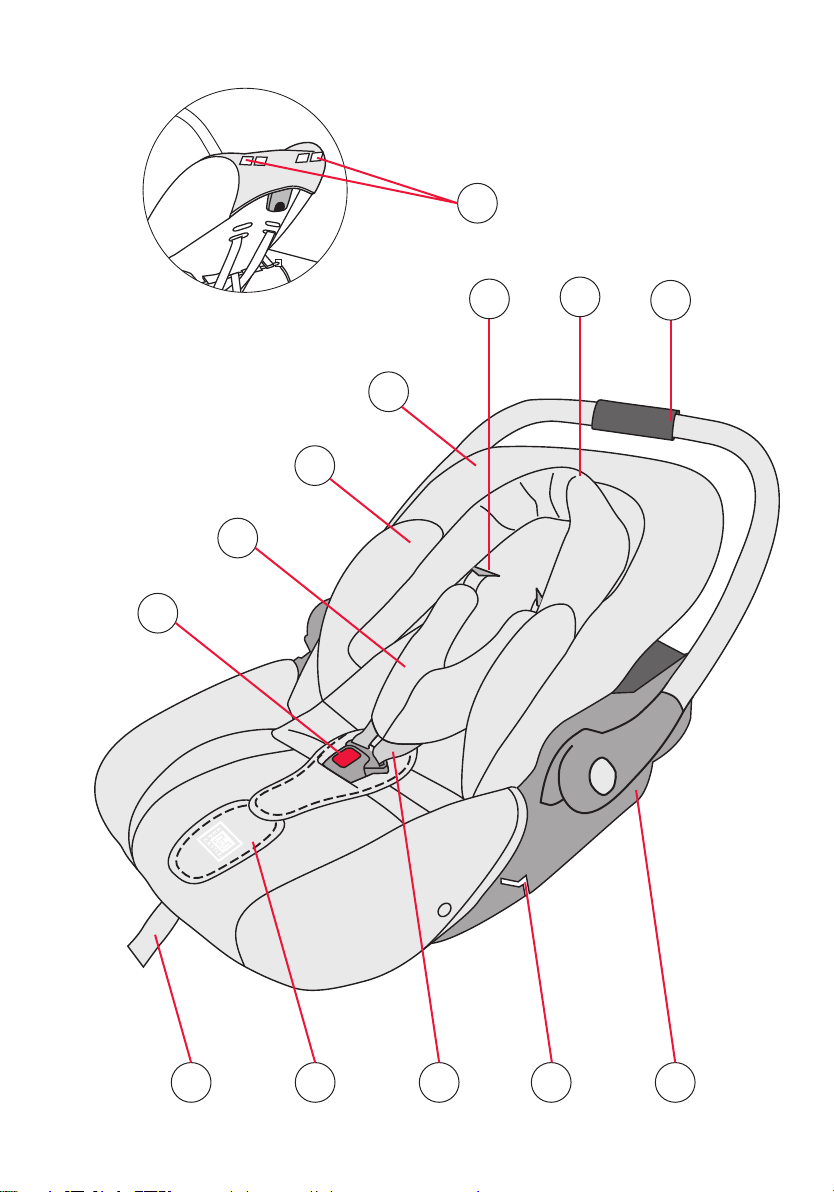
1. Schale
2. Führung zur Justierung der Schultergurte
3. Sicherheitsgurt
4. Führung für den Beckengurt des Autositzes
5. Führung für den Brustgurt des Autositzes
6. Gurtschloss
7. Sicherheitsgurt-Regler TMS System
(unterhalb des Stoffs)
8. Zentralgurt zur Justierung
des Sicherheitsgurtes
9. Abnehmbarer Bezug
10. Tragegriff
11. Kopfschutz
12. Gurt-Schulterpolster
13. Sitzverkleinerung
1. Coque
2. Encoches pour réglage des bretelles
3. Bretelles du harnais
4. Encoches pour passage de
la ceinture de sécurité ventrale
5. Encoches pour passage de
la ceinture de sécurité diagonale
6. Fermoir
7. Bouton de réglage du harnais TMS
System sous la protection en tissu
8. Sangle centrale du réglage du harnais
9. Housse amovible
10. Poignée de transport
11. Réducteur Caline-tête
12. Protections épaules
13. Réducteur
1. Turvahälli korpus
2. Pilud turvarihmade reguleerimiseks
3. Turvarihmad
4. Pilud auto sülerihma jaoks
5. Pilud auto diagonaalrihma jaoks
6. Klamber
7. Turvarihmade regulaator TMS System (kanga all)
8. Keskmine rihm turvarihmade reguleerimiseks
9. Eemaldatav kate
10. Kandesang
11. Peapadi
12. Õlarihmade padjad
13. Istme reduktor
1. Asiento
2. Aberturas para ajustar las correas de los hombros
3. Correas del arnés de seguridad
4. Aberturas para la correa abdominal del cinturón
5. Aberturas para la correa diagonal del cinturón
6. Hebilla
7. Regulador con sistema TMS del arnés
(debajo del textil)
8. Correa central para ajustar el arnés.
9. Funda extraíble.
10. Manillar
11. Reposacabezas
12. Protección para las correas de los hombros.
13. Reductor
1
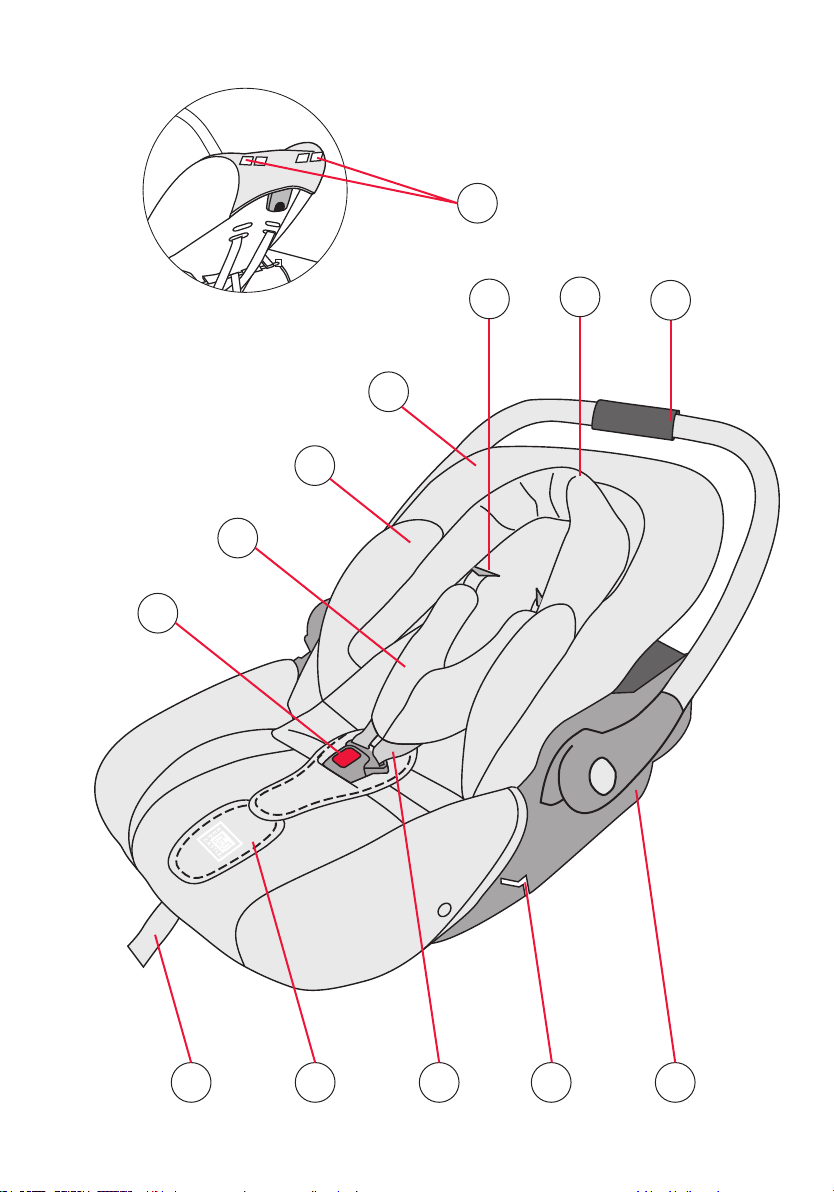
1. Car seat shell
2. Slots for the shoulder straps
3. Safety harness straps
4. Slots for the vehicle’s lap seat belt
5. Slots for the vehicle’s diagonal seat belt
6. Buckle
7. Harness regulator TMS System (below fabric)
8. Central strap for adjusting the harness
9. Removable cover
10. Carrying handle
11. Head hugger
12. Shoulder strap protection
13. Seat reducer
1. Ülés talp
2. Nyílások a biztonsági öv vállöveihez
3. Biztonsági övek
4. Övvezető a biztonsági öv csípőrészéhez
5. Hátsó övvezető a biztonsági öv átlós részéhez
6. Csat
7. Biztonsági öv szabályozó TMS
rendszer, mely a huzat alatt
8. Központi övfeszítő (szalag a vállövek
megszorításához)
9. Levehető huzat
10. Hordozókar, fogó
11. 3 az 1-ben Fejszűkítő
12. Vállövek övpárnái
13. Ülésszűkítő betét
Page 3
5
2
11
10
9
13
12
6
78
3 4
1
2
Page 4

1. Scocca
2. Passante per regolare le bretelle
3. Bretelle d'aggancio
4. Feritoia per passaggio cintura di sicurezza ventrale
5. Feritoia per passaggio cintura di sicurezza diagonale
6. Fermoir Blocco d'aggancio
7. Bottone di regolazione TMS System
sotto la protezione in tessuto
8. Cinghia centrale di regolazione degli agganci
9. Fodera amovibile
10. Impugnatura per il trasporto
11. Riduttore proteggitesta
12. Proteggispalle
13. Riduttore
1. Kuip
2. Gleuven om de riemen te regelen
3. Riemen van het harnas
4. Geleiders voor de heupgordel van de auto
5. Geleiders voor de schoudergordel van de auto
6. Sluiting
7. Regelknop voor het harnas (TMS-systeem)
8. Centrale riem om het harnas te regelen
9. Afneembare hoes
10. Draagbeugel
11. Verkleiner Hoofd Beschermer
12. Schouderbeschermers
13. Zitverkleiner
1. Automobilinės vaiko kėdutės korpusas
2. Angos pečių diržams reguliuoti
3. Saugos diržų juostos
4. Grioveliai automobilio saugos
diržo juosmens daliai
5. Grioveliai įstrižiniam automobilio saugos diržui
6. Sagtis
7. Diržų reguliatorius – TMS sistema (po audiniu)
8. Centrinis dirželis saugos diržams sureguliuoti
9. Nuimama danga
10. Rankena
11. Pagalvėlė
12. Pečių diržų pagalvėlės
13. Sėdynės reduktorius
1. Autokrēsliņa korpuss
2. Plecu lenšu noregulēšanas atveres
3. Drošības stiprinājuma lences
4. Atveres, kas paredzētas automobiļa
vidukļa drošības jostai
5. Atveres, kas paredzētas automobiļa
diagonālajai drošības jostai
6. Sprādze
Stiprinājuma regulators – TMS sistēma (zem auduma)
7.
8. Centrālā lence, kas paredzēta
stiprinājuma regulēšanai
9. Noņemams pārvalks
10. Nešanas rokturis
11. Galvas balsts
12. Plecu lences aizsardzība
13. Sēdekļa pārveidotājs
1. Base do assento
2. Ranhuras para regulação dos cintos
3. Amarres dos cintos de segurança
4. Ranhuras para passagem do cinto
de segurança ventral
5. Ranhuras para passagem do cinto
de segurança diagonal
6. Fivela
7. Botão de regulação do cinto TMS system
(abaixo do tecido)
8. Amarre central para regulação do cinto
9. Forra removível
10. Guidão
11. Redutor
12. Proteção dos cintos
13. Redutor do assento
1. Konštrukcia autosedačky
2. Otvory na nastavenie popruhov na ramenách
3. Bezpečnostné popruhy
4. Otvory pre dolný bezpečnostný
automobilový pás
5. Otvory pre diagonálny bezpečnostný
automobilový pás
6. Pracka
7. Regulátor popruhov - TMS Systém (pod látkou)
8. Stredový pás na nastavenie popruhu
9. Odnímací kryt
10. Rúčka na nosenie
11. Vankúšik pod hlavu
12. Bezpečnostný popruh cez ramená
13. Mechanizmus na polohovanie autosedačky
3
Page 5
5
2
11
10
9
13
12
6
78
3
4
1
4
Page 6
B
1
B
2
A
C
A
5
Page 7
3
4a
5-10 kg.
-5 kg.
4
6
Page 8
5a
5
5b
6
1 2
3
7
6a
Page 9
7
5-10 kg.
-9 kg.
-9 kg.
8
-5 kg.
-5 kg.
-10 kg.
-5 kg.
-9 kg. -9 kg.
-9 kg. -9 kg.
8a
8
Page 10
(DE) zusätzliches zubehör / (EE) Lisavarustus (lisavõimalus)
(ES) Accesorios opcionales / (FR) Accessoires en option
(GB) Optional accessories / (HU) Opcióként megvásárolható
(IT) Accessori opzionali / (LT) Pasirenkami priedai
(LV) Papildu piederumi / (NL) Optionele accessoires
(PT) Acessorios opcional / (SK) Nepovinné doplnkové vybavenie
a1
a3 a4
b1 b2
9
a2
a5
Page 11
Allgemeine Sicherheitsbestimmungen
BITTE LESEN SIE ALLE ANWEISUNGEN VOR DER
ERSTEN VERWENDUNG DES AUTOSITZES SORGFÄLTIG
DURCH UND BEFOLGEN SIE DIE EMPFEHLUNGEN, UM
EINE MAXIMALE SICHERHEIT IHRES KINDES ZU
GARANTIEREN. WICHTIG! BITTE FÜR DEN SPÄTEREN
BEDARF AUFBEWAHREN
WARNUNG
• Das Kind niemals unbeaufsichtigt lassen.
• Der RC/RCS Autositz Gruppe 0 entspricht dem
Europäischen Sicherheitsstandard ECE R-44/04.
Er passt für Kinder ab der Geburt bis zu einem
Gewicht von maximal 10 kg (ca. 9 Monate)
• Der RC/RCS Autositz Gruppe 0 ist in der Kategorie
Kinderrückhaltesysteme „universal“ klassifiziert.
Er kann auf dem Großteil aller Autositze montiert
werden. Die Verwendung ist möglich, wenn im
Handbuch des Autoherstellers angegeben ist,
dass die Montage von „universalen“
Kinderhaltesystemen dieser Gruppe möglich ist.
• Der RC/RCS Autositz muss immer rückwärts zur
Fahrrichtung gerichtet montiert werden. Er muss
AUSSCHLIESSLICH mit dem 3-Punkt-Sicherheitgurt
(mit statischer oder automatischer
Gurtaufrollung) Ihres Fahrzeugs fixiert werden
und dem europäischen Sicherheitsstandard
ECE-16 bzw. dem Äquivalent entsprechen.
• Die Gurte können je nach Auto verschieden lang
sein. Wir empfehlen daher den Autositz zuerst in
Ihrem Wagen probeweise zu montieren.
B
A
R
I
A
immer geschlossen, wenn Ihr Kind im Autositz
liegt, auch wenn sie ihn nicht im Auto verwenden.
• Der Hersteller garantiert die Sicherheit des Autositzes
nur für den Erstbesitzer. Wir empfehlen dringend
keinen gebrauchten Autositz zu verwenden.
• Es ist gefährlich, diesen Autositz auf einer hohen
Stellfläche zu verwenden, zum Beispiel auf
einem Tisch.
• Verwenden Sie den Autositz nicht länger als 5 Jahre.
Starke Beanspruchung kann zu Beschädigungen
führen, die nicht auf den ersten Blick erkennbar sind.
• Diesen Autositz nicht länger als Wiege
verwenden, sobald das Kind alleine sitzen kann.
• Nehmen Sie Ihr Kind niemals aus dem Autositz,
solange sich Ihr Auto nicht im Stillstand befindet.
• Stets das Gurtsystem benutzen.
• Dieser Autositz, sobald als Wippe benutzt, ist
nicht für lange Schlafperioden vorgesehen.
Der RC/RCS Autositz darf
•
G
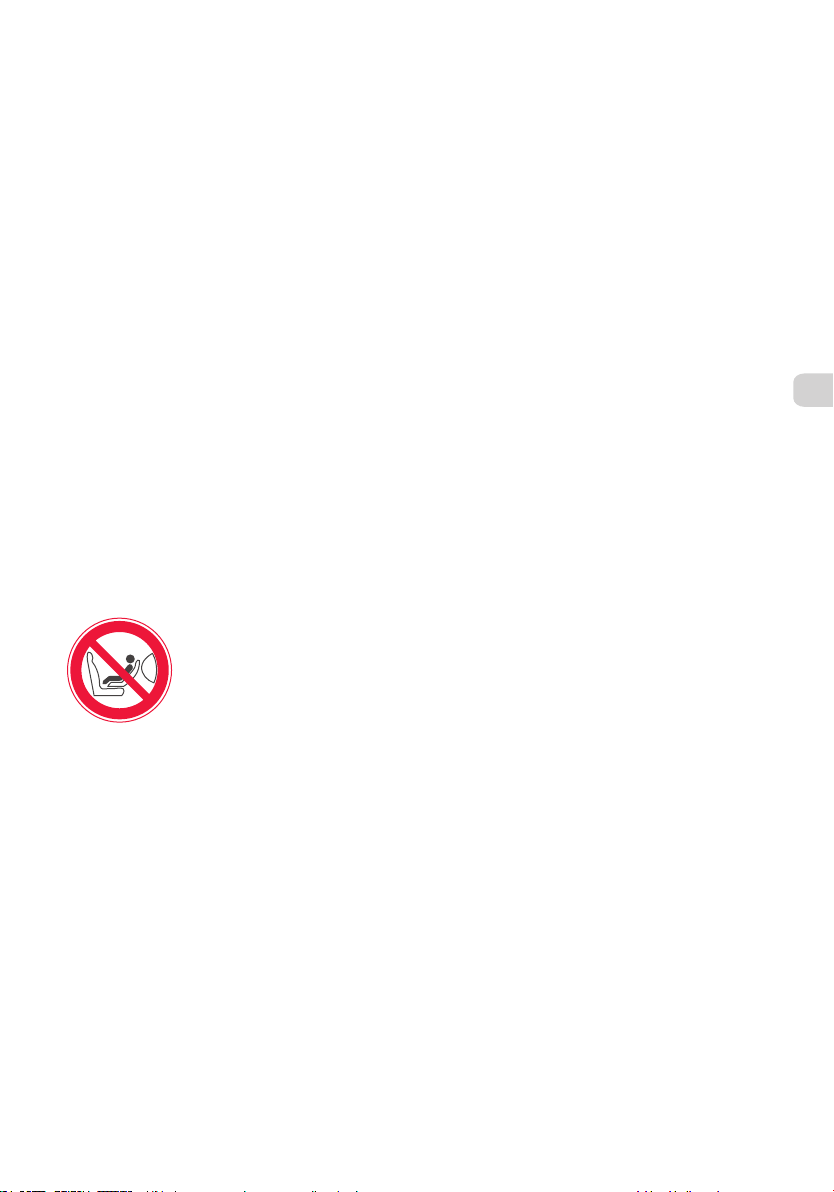
niemals auf Autositzen mit
Airbag montiert werden, da
dies nachweislich gefährlich
sein kann.
• Lassen Sie die Sicherheitsgurte
Befestigung des RC/RCS Autositzes im
(Bild 1+2)
Auto
WARNUNG: Montieren Sie den RC/RCS Autositz
niemals auf Autositzen mit Airbag, da dies zum Tod
oder schweren Verletzungen führen kann. Wenn Ihr
Auto mit einem Airbag ausgestattet ist, montieren
Sie den Autositz im Fond des Wagens. Egal ob am
Beifahrersitz oder im Fond des Wagens verwendet,
muss der Autositz in jedem Fall rückwärts gerichtet
fixiert werden.
1. Legen Sie den Griff in Position 1 (siehe Abschnitt
über “Justierung der Rückenlehne und
Griffpositionen”).
2. Schließen Sie den Gurt des Autositzes.
3. Ziehen Sie den Beckengurt durch die Führungen
an der Vorderseite des Autositzes (diese befinden
sich an der Unterseite der Schale (Bild 2A).
4.
Legen Sie den Brustgurt um die Rückseite des
Autositzes und ziehen Sie ihn durch die obere
Führung an der Rückseite der Lehne (Bild 2B).
Dabei muss der Brustgurt unterhalb der
Griffaufhängung verlaufen.
5. Ziehen Sie fest am Gurt, um ihn zu spannen.
WICHTIG: Immer wenn Sie die Rückenlehne
verstellen, muss der Gurt nachgespannt werden.
Der Gurt muss dabei unterhalb der Griffaufhängung
verlaufen. Während der Fahrt muss der Griff immer
in der Transportposition stehen.
WARNUNG: Der Gurt darf nicht verdreht werden.
Montage des Sicherheitsgurtes (Bild 3+4)
Passen Sie den Sicherheitsgurt an die Größe Ihres
Kindes an. Die Schultergurte müssen durch die
Führungen direkt über den Schultern des Babys
liegen.
• Der Gurt des RC/RCS Autositzes ist zweifach
höhenverstellbar, um ihn mit der Größe des
Kindes abzustimmen. Bitte beachten Sie Bild 4A,
um die Führungen für die Schulterhöhe
anzupassen.
•
Positionieren Sie den 3-Punkt-Sicherheitsgurt
sachgemäß und schließen Sie das Gurtschloss.
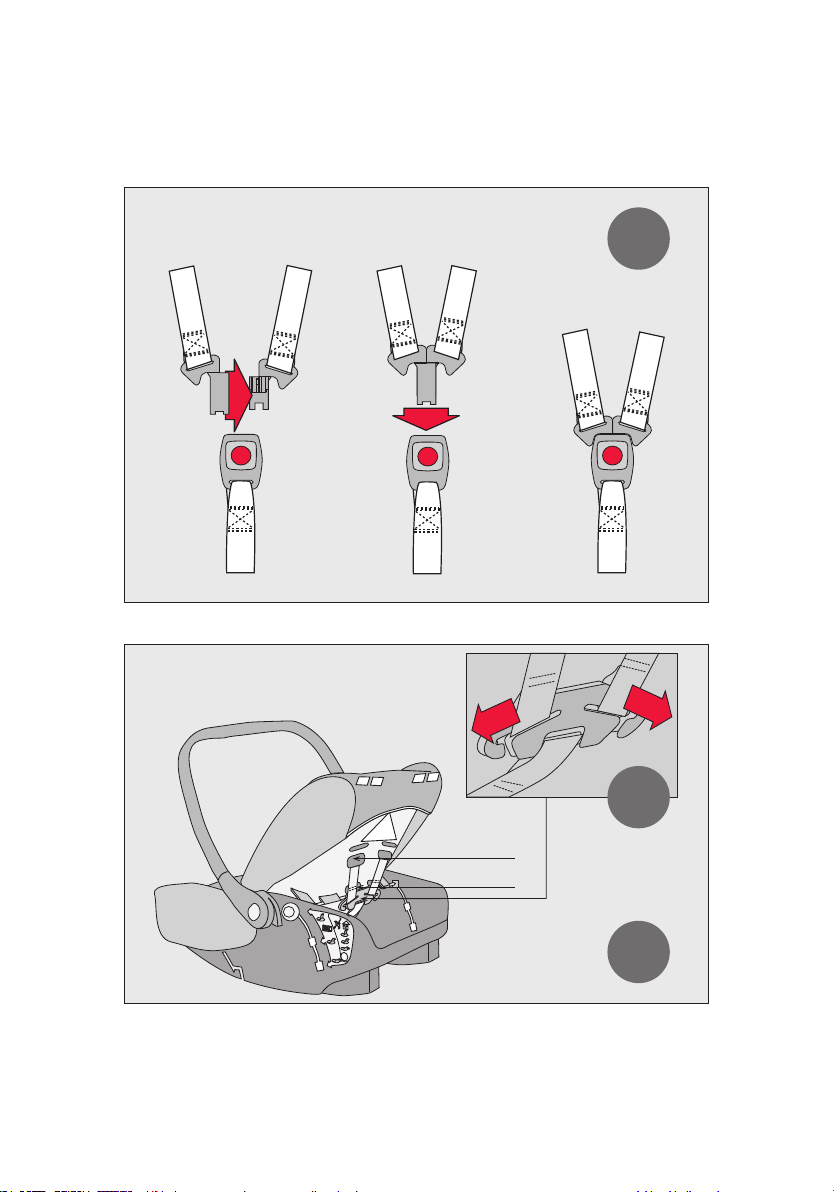
• Öffnen und Schließen des Gurtschlosses (Bild. 3)
Schließen: aDie 2 oberen Teile des Gurtschlosses
zusammenfügen und in die Befestigung schieben,
bis sie mit einem „Klick“ fixiert sind.
Öffnen: den roten Knopf drücken.
• Anpassung des Sicherheitsgurtes:
Wir empfehlen die Länge des Sicherheitsgurtes
anzupassen, bevor Sie den Autositz im Auto
befestigen.
DE
10
Page 12
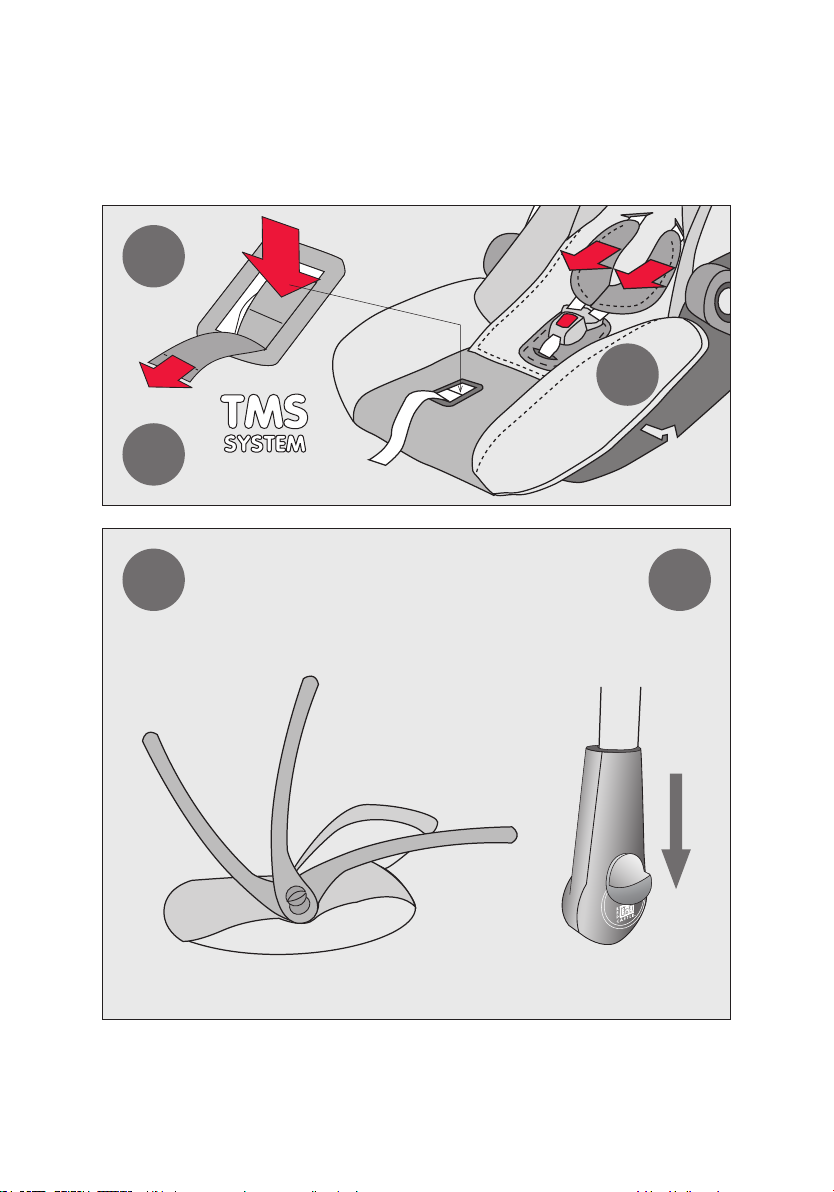
Zum Spannen der Schultergurte: ziehen Sie am
Ende des TMS Gurtes bis er straff gespannt ist (Bild
5/A).
Um den Sicherheitsgurt zu lockern: Mit einer Hand
den TMS Regulator vorne am Autositz, in
Pfeilrichtung runter drücken, (Bild 5/B) und
gleichzeitig mit der anderen Hand die Schultergurte
zu sich ziehen.
WICHTIG: Der Sicherheitsgurt sollte straff
angezogen werden, das Kind jedoch nicht in seinen
Bewegungen einschränken. Prüfen Sie, ob die Gurte
nicht verdreht sind. Das Gurtschloss sollte so tief
wie möglich im unteren Bauchbereich des Kindes
liegen und niemals in Höhe des Magens, um einen
entsprechenden Beckenschutz zu gewährleisten.
Das Kind im RC/RCS Autositz
WARNUNG: Lassen Sie Ihr Kind NIEMALS
DE
unbeaufsichtigt im Autositz.
WICHTIG: Wir empfehlen die Länge des Gurtes an
die Größe des Kindes anzupassen, BEVOR Sie den
Autositz im Auto montieren. Verwenden Sie für die
Schultergurte jene Führungen, die so nah wie
möglich über den Schultern des Kindes liegen.
• Legen Sie den Griff in Position 1 (Bild 6).
• Öffnen Sie das Gurtschloss indem Sie den roten
Knopf drücken.
• Setzen Sie ihr Kind bequem in den Autositz mit
dem Rücken stabil gegen die Rückenlehne.
• Passen Sie die Position der Rückenlehne an (siehe
Abschnitt „Justierung der Rückenlehne und
Griffpositionen“).
• Fügen Sie die oberen Teile des Gurtschlosses
zusammen und schieben Sie es in die
Befestigung.
• Passen Sie den Sicherheitsgurt an Ihr Baby an
(siehe Abschnitt „Anpassung des
Sicherheitsgurtes“).
Kopfschutz (Sonnenschutz)
Der RC/RCS inkludiert einen 3-fach-Kopfschutz –
reduziert die Größe des Sitzes, schützt und polstert
den Kopf des Babys und schützt es vor
Sonneneinstrahlung.
Der Kopfschutz sorgt für zusätzlichen Komfort in
Liegeposition und gibt seitlichen Schutz für den
oberen Kopfteil. Wenn es wächst, nehmen Sie die
Polsterung weg und verwenden Sie den einfachen
Kopfschutz und Sonnenschutz (Öffnen und Schließen
mittels Reißverschluss).
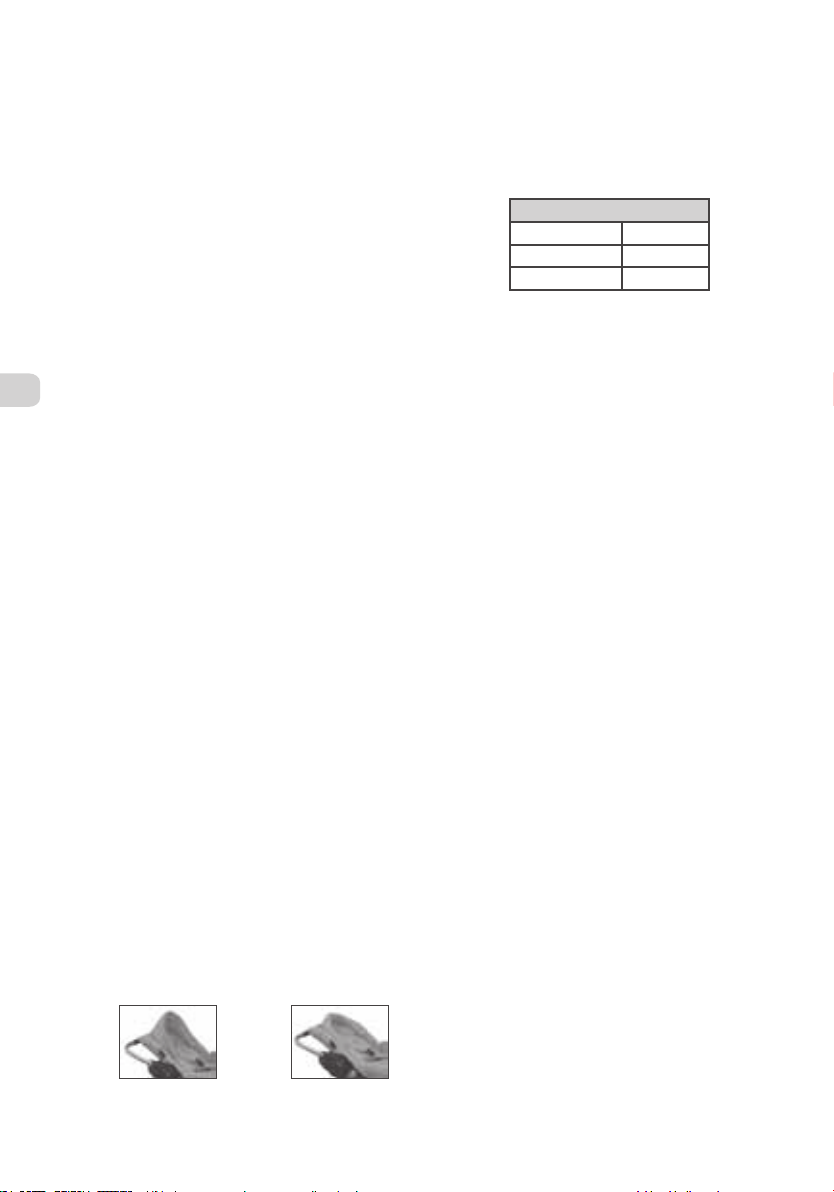
geöffnet gefaltet
Justierung der Rückenlehne und der
Griffpositionen
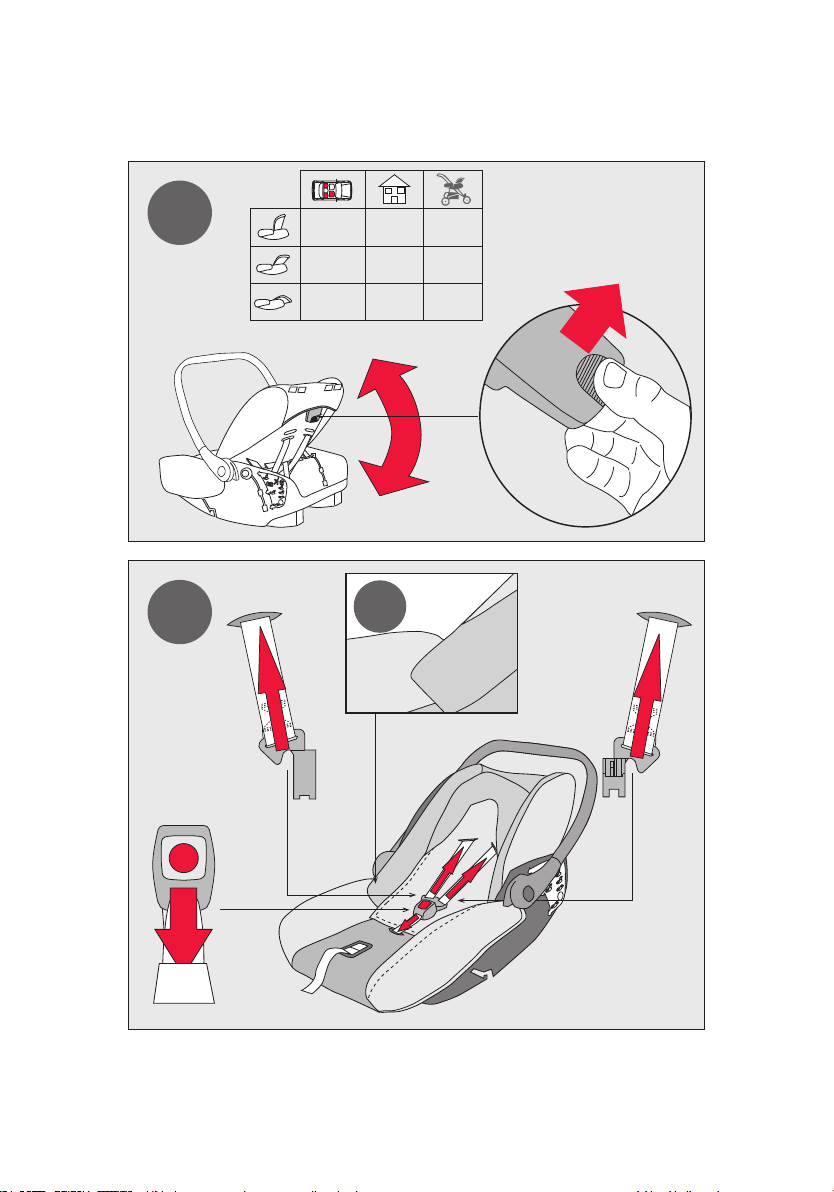
• Justierung der Rückenlehne (Bild 7) :
Ziehen Sie am Hebel an der Rückseite des
Autositzes und wählen Sie die, für das Gewicht
Ihres Kindes passende Position
3 POSITIONEN
liegend - 5 kg
erhöht - 5 kg
traditionell 5 <10 kg
PS: Außerhalb des Autos sind alle 3 Positionen bis
zu einem Gewicht von 9 kg möglich.
• Griffpositionen (Bild. 6) :
Es gibt 3 Griffpositionen.
Um die Position zu ändern, lösen Sie den Griff
indem Sie beidseitig, gleichzeitig an den Knöpfen
nach unten drücken (Bild 6A) und dabei die
Griffstellung nach vorne oder hinten in die
gewünschte Position ändern.
1. Position zur Verwendung im Auto
2. Position zum Tragen des Babys
3. Position zum Schaukeln / auf dem Kinderwagen
WICHTIG: Bleiben Sie immer wachsam! Wenn Sie Ihr
Baby außerhalb des Autos tragen, prüfen Sie unbedingt,
dass der Griff sicher in Position 2 arretiert ist.
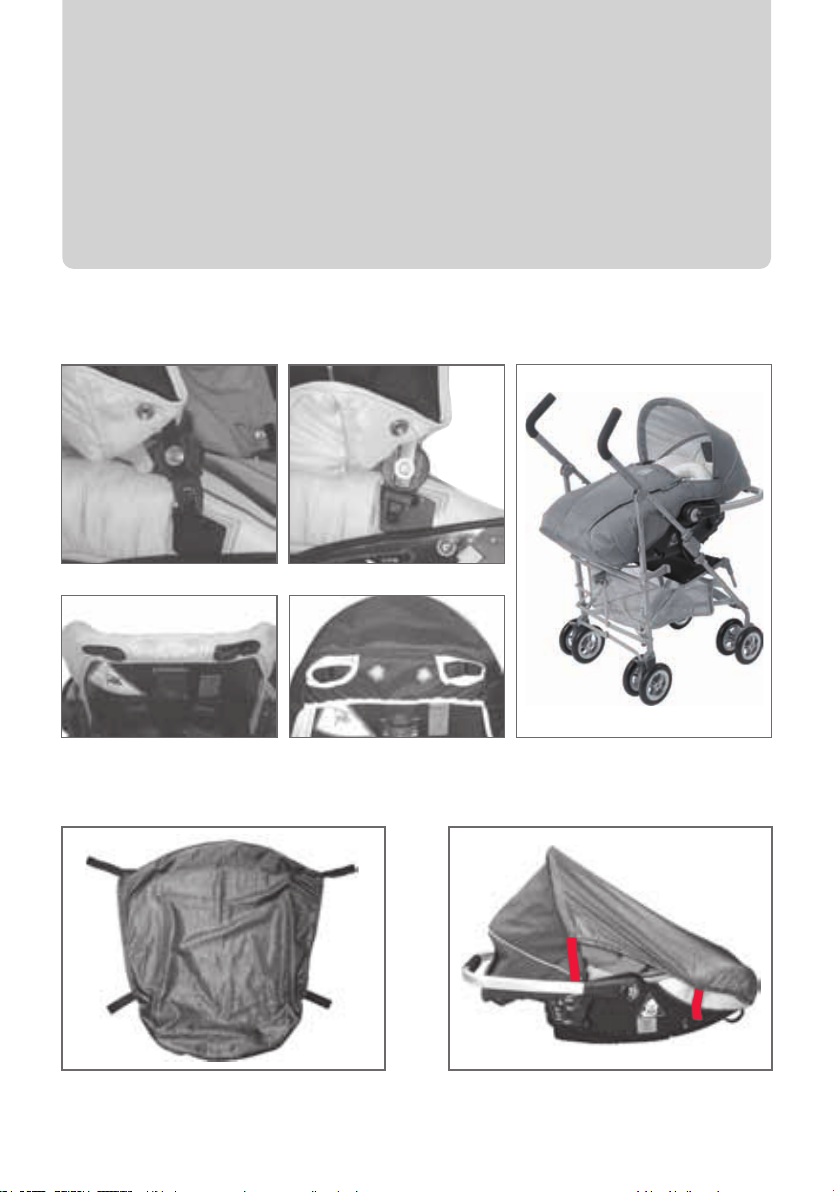
zusätzliches zubehör
Befestigung des Verdecks
• Um das Verdeck zu befestigen, schieben Sie die
Kunststoffstecker auf beiden Seiten des Verdecks
in die vorgesehenen Halterungen des RC/RCS
Autositzes (Bild. a1+a2).
• Achten Sie darauf, dass die, durch blaue Pfeile
gekennzeichneten Öffnungen (an der Unterseite
des Verdecks) gegenüber den Gurtführungen
liegen (Bild a3+a4).
• Justieren Sie das Verdeck nach Wunsch, um Ihr
Baby vor der Sonne zu schützen.
•
Um das Verdeck wieder abzunehmen: Drücken Sie
die Kunststoffstecker auf beiden Seiten nach
unten und gleichzeitig das hintere Verdeckende
nach oben.
Befestigung der Fußdecke
Montieren Sie das Verdeck, bevor Sie die Fußdecke
anbringen (siehe vorigen Abschnitt).
•
Bedecken Sie den RC/RCS Autositz mit der
Fußdecke (Bild a5).
• Fixieren Sie die Klettverschlüsse und schließen Sie
die Druckknöpfe an den der Fußdecke und des
Verdecks am Autositz.
11
Page 13
• Öffnen Sie die Klettverschlüsse und die Druckknöpfe,
um die Fußdecke wieder abzunehmen.
Verwenden Sie die Fußdecke nicht im Auto. Im
Notfall kann dies den Zugriff zum Kind erschweren.
Befestigung des Sonnenschutzes
• Legen Sie den breiteren Teil (Bild b1 oben) auf das
Verdeck und befestigen Sie den Klettverschluss.
• Ziehen Sie den Sonnenschutz straff nach unten
und befestigen Sie die Klettverschlüsse (Bild b2).
Der Sonnenschutz wurde als Blendschutz und zur
reduzierten Wirkung der UV-Strahlen konzipiert. Die
Verwendung des Sonnenschutzes ersetzt keinesfalls
den Schutz des Kindes vor der Wirkung der Sonne.
Eine ausreichende und regelmäßige Pflege Ihres
Babys mit entsprechenden Sonnenschutzmitteln ist
auf jeden Fall erforderlich. Sorgen Sie auch dafür,
dass Ihr Baby regelmäßig trinkt.
Wasch- und Pfleganleitung (Bild 8)
• Der Autositz und der Sicherheitsgurt können mit
warmem Seifenwasser abgewischt werden (keine
Maschinenwäsche!). Gründlich ausspülen und
zum Trocknen auflegen. Nicht bügeln. Keine
aggressiven Reinigungsmittel verwenden.
•
Bei der Montage sicherstellen, dass die
Sicherheitsgurte und die Kanten des Bezugs
korrekt montiert sind (Bild 8A).
•
Den Bezug zum Waschen abnehmen. Die
Sicherheitsgurte und das Gurtschloss durch die
Führungen des Bezugs schieben.
Wichtige
Sicherheitshinweise
• Der RC/RCS Autositz kann (rückwärts gerichtet) auf
dem Beifahrersitz (außer bei Fahrzeugen, die mit
einem Beifahrerairbag ausgestattet sind) oder
(rückwärts gerichtet) auf den hinteren Autositzen
montiert werden.
• Verwenden Sie den RC/RCS Autositz nur mit einem
3-Punkt-Sicherheitsgurt.
• Lassen Sie Ihr Kind niemals unbeaufsichtigt.
• Lassen Sie ihr Kind immer und unter allen Umständen
angeschnallt, wenn es sich im Kindersitz befindet.
• Die Originalausstattung des RC/RCS Autositzes
Gruppe 0 darf nicht verändert werden.
• Aus Sicherheitsgründen raten wir ausdrücklich davon
ab, den Kindersitz auf einen Einkaufswagen zu legen.
• Dies Sicherheitsgurte des Autositzes und des
Kinder-Autositzes dürfen nicht verdreht sein.
• Nach einem Autounfall muss der Sitz unbedingt
ersetzt werden. Er können nämlich Beschädigungen
entstanden sein, die mit bloßem Auge nicht
erkennbar sind.
• Wenn der Autositz vorne im Fahrzeug verwendet wird,
muss der Beifahrersitz so weit wie möglich zurück
geschoben, die Lehne aufrecht gestellt, und die
Kopfstütze auf die tiefste Position abgesenkt werden.
• Den Autositz nicht auf Beifahrersitzen verwenden,
die mit deinem Airbag ausgestattet sind.
• Der Autositz muss immer mit dem Sicherheitsgurt
befestigt werden, auch wenn er nicht verwendet
wird. Unbefestigt stellt er im Fall einer Notbremsung
eine Gefahr für die Fahrzeuginsassen dar.
• Wenn Ihr Fahrzeug während des Parkens in der Sonne
steht, kann die Temperatur im Auto stark ansteigen.
Wir empfehlen Ihnen den Autositz in dieser Zeit (z.B.
mit einem Stofftuch) abzudecken, damit es für Ihr
Kind bequemer ist, wenn Sie es in den Autositz
legen. Damit wird auch vermieden, dass sich
Metallteile aufheizen können und Ihr Kind damit
möglicherweise verletzen. Zusätzlich wird der Stoff
vor dem Ausbleichen geschützt.
• Setzen Sie Ihr Kind niemals auf den Schoß während
Sie fahren. Bei einem Unfall würde Ihr Kind
unangegurtet mit großer Wucht nach vorne
geschleudert werden. Schnallen Sie sich und Ihr Kind
während der Fahrt immer an.
• Beachten Sie die Straßenverkehrsordnung.
Vergewissern Sie sich, dass alle Fahrzeuginsassen
korrekt angeschnallt sind.
• Legen Sie keine schweren Gegenstände auf die Ablage
im Fond des Wagens . Achten Sie darauf, dass alle
Gepäckstücke im Fahrzeuginneren gesichert sind, so
dass Sie bei einem Unfall weder das Baby noch die
anderen Fahrzeuginsassen verletzen können.
• Positionieren Sie den Autositz sorgfältig und achten
Sie darauf, dass er korrekt montiert ist. Prüfen Sie
regelmäßig den Verschleiß der Sicherheitsgurte des
Autositzes und des Kinder-Autositzes. Achten Sie
darauf, dass keine Teile des Sitzes oder der
Sicherheitsgurte in der Autotür eingeklemmt sind.
• Verwenden Sie den Sitz nicht ohne
Original-Sitzbezug. Verwenden Sie nur Sitzbezüge
des Herstellers.
• Wenn Sie den Autositz auf einem Kinderwagen
montiert haben, heben Sie den Wagen niemals am
Griff des Autositzes, sondern AUSSCHLIESSLICH am
Kinderwagengestell hoch.
• Heben Sie die Bedienungsanleitung für den späteren
Gebrauch auf.
• Entfernen Sie nicht die aufgenähten Etiketten und
vermeiden Sie die Beschädigung des Stoffes.
• Auch wenn als Wippe verwendet, ersetzt der Autositz
kein Gitter- oder Kinderbett. Wenn Ihr Kind Schlaf
braucht, soll es in der entsprechenden Schlafposition
in ein Gitter- oder Kinderbett gelegt werden.
• Verwenden Sie den Autositz nicht, wenn Teile
gebrochen oder verloren sind.
• Verwenden Sie keine Zubehör- oder Ersatzteile, die
nicht vom Hersteller freigegeben wurden.
DE
12
Page 14
Üldised turvalisuse juhised
Üldised turvalisuse juhised
ENNE TOOTE ESMAKORDSET KASUTAMIST LOE
ENNE TOOTE ESMAKORDSET KASUTAMIST LOE
HOOLIKALT LÄBI KÕIK JUHISED ARVESTADES
HOOLIKALT LÄBI KÕIK JUHISED ARVESTADES
ANTUD SOOVITUSI, AINULT NII GARANTEERID OMA
ANTUD SOOVITUSI, AINULT NII GARANTEERID OMA
LAPSELE MAKSIMAALSE TURVALISUSE.
LAPSELE MAKSIMAALSE TURVALISUSE.
TÄHTIS ! HOIA EDASPIDISEKS ALLES
TÄHTIS ! HOIA EDASPIDISEKS ALLES
HOIATUS
HOIATUS
•
Ära kunagi jäta oma last järelevalveta
•
Ära kunagi jäta oma last järelevalveta
•
RC/RCS turvahäll, grupp 0 vastab Euroopa
•
RC/RCS turvahäll, grupp 0 vastab Euroopa
turvalisuse standardile ECE R-44/04. Toode
turvalisuse standardile ECE R-44/04. Toode
sobib lastele alates sünnist kuni kaaluga 10kg
sobib lastele alates sünnist kuni kaaluga 10kg
(umbes 9 elukuud).
(umbes 9 elukuud).
• RC/RCS turvahäll, grupp 0 on klassifitseeritud
• RC/RCS turvahäll, grupp 0 on klassifitseeritud
kategooriasse “universaalne” laste
kategooriasse “universaalne” laste
kinnitusvahend. Toodet võib kasutada enamikel
kinnitusvahend. Toodet võib kasutada enamikel
auto reisijaistmetel. Toodet on võimalik
auto reisijaistmetel. Toodet on võimalik
korrektselt paigaldada kui liiklusvahendi tootja
korrektselt paigaldada kui liiklusvahendi tootja
käsiraamatus on märge antud gruppi kuuluvate
käsiraamatus on märge antud gruppi kuuluvate
“universaalsete” lapse kinnitusvahendite
EE
“universaalsete” lapse kinnitusvahendite
kasutamise kohta.
kasutamise kohta.
• RC/RCS turvahäll tuleb kinnitada alati seljaga
• RC/RCS turvahäll tuleb kinnitada alati seljaga
sõidusuunas. Toode tuleb autosse kinnitada
sõidusuunas. Toode tuleb autosse kinnitada
AINULT 3-punkti turvarihmadega (staatiline või
AINULT 3-punkti turvarihmadega (staatiline või
automaatne), mis vastavad ECE-16
automaatne), mis vastavad ECE-16
regulatsioonile või samaväärsele.
regulatsioonile või samaväärsele.
•
•
Turvarihma pikkus võib olla autoti erinev.
Turvarihma pikkus võib olla autoti erinev.
Soovitame kontrollida, et meie turvahäll sobiks
Soovitame kontrollida, et meie turvahäll sobiks
sinu sõidukisse.
sinu sõidukisse.
• RC/RCS turvahälli ei tohi kunagi paigaldada
• RC/RCS turvahälli ei tohi kunagi paigaldada
B
A
R
I
A
• Tootja garanteerib turvahälli turvalisuse ainult
• Tootja garanteerib turvahälli turvalisuse ainult
toote esmakasutajale. Me tungivalt soovitame
toote esmakasutajale. Me tungivalt soovitame
mitte kasutada nö second hand turvahälli.
mitte kasutada nö second hand turvahälli.
• Ära jätka selle autotooli kasutamist lamavas
• Ära jätka selle autotooli kasutamist lamavas
asendis kui laps oskab iseseisvalt istuda.
asendis kui laps oskab iseseisvalt istuda.
• Ära kasuta turvahälli rohkem kui 5 aastat. Tihe
• Ära kasuta turvahälli rohkem kui 5 aastat. Tihe
kasutamine võib põhjustada silmale nähtamatu
kasutamine võib põhjustada silmale nähtamatu
toote halvenemise.
toote halvenemise.
• On ohtlik panna antud autotooli kõrgele
• On ohtlik panna antud autotooli kõrgele
tasapinnale: näiteks lauale jne.
tasapinnale: näiteks lauale jne.
• Ära kunagi võta last mingilgi põhjusel turvahällist
• Ära kunagi võta last mingilgi põhjusel turvahällist
samal ajal kui auto liigub.
samal ajal kui auto liigub.
• Kasuta alati turvarihmu.
• Kasuta alati turvarihmu.
• Antud autotool ei ole lamavas asendis sobiv
• Antud autotool ei ole lamavas asendis sobiv
magamiseks pikal perioodil.
magamiseks pikal perioodil.
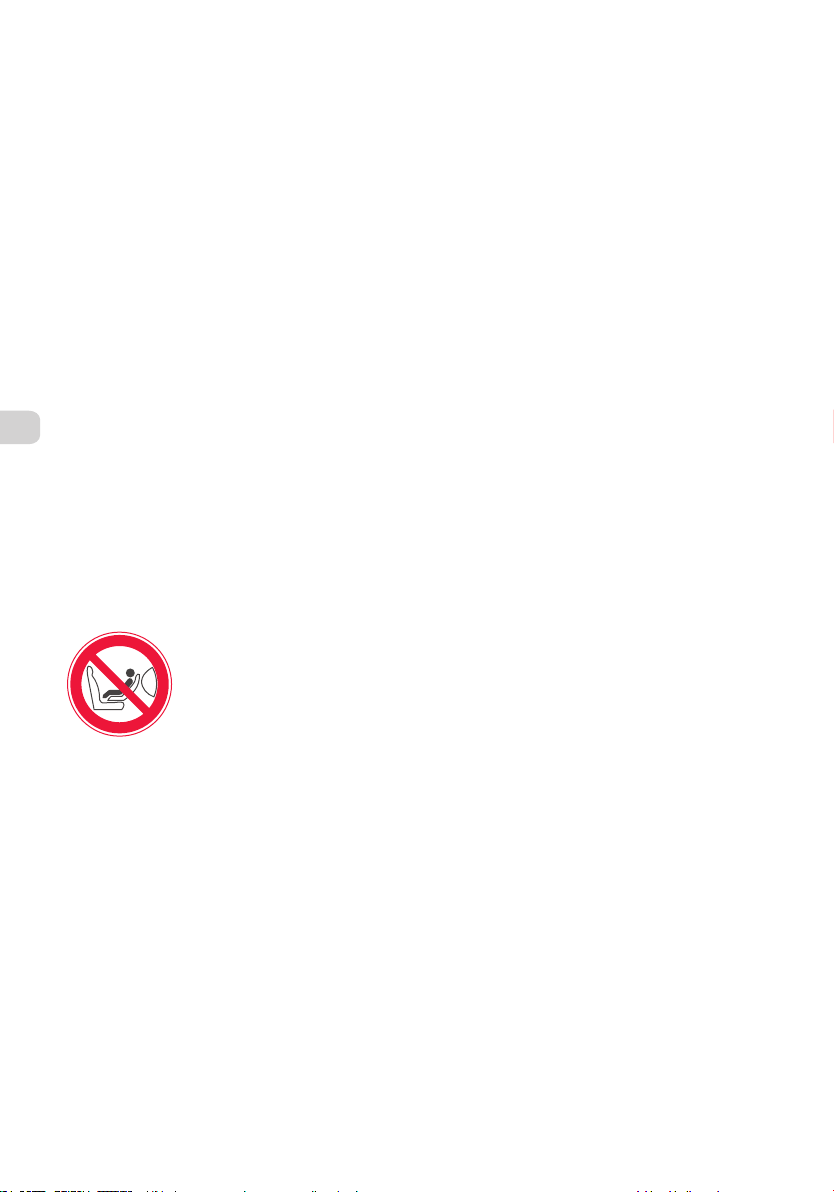
õhkturvapadjaga varustatud
õhkturvapadjaga varustatud
esiistmele, see võib olla väga
esiistmele, see võib olla väga
G
ohtlik.
ohtlik.
• ALATI kinnita oma laps
• ALATI kinnita oma laps
turvarihmadega, isegi kui sa ei
turvarihmadega, isegi kui sa ei
kasuta RC/RCS turvahälli
kasuta RC/RCS turvahälli
autos.
autos.
RC/RCS turvahälli paigaldamine
autosse
HOIATUS: Ära kunagi paigalda RC/RCS turvahälli
õhkturvapadjaga varustatud auto esiistmele. See
võib põhjustada surma või tõsise vigastuse. Kui auto
on varustatud turvapadjaga, paigalda turvahäll
tagaistmele. Nii auto ees- kui tagaosas, peab
turvahäll olema paigaldatud seljaga sõidusuunas.
1. Pane kandesang asendisse 1 (vaata alalõiku
2. Kinnita autoturvarihm.
3. Pane auto sülerihm läbi turvahälli eesosas
4. Seejärel libista diagonaalne rihm ümber
5. Tõmba diagonaalset rihma kõvasti, et välistada
TÄHTIS: Iga kord kui seljatoe asendit on muudetud,
tuleb turvarihm uuesti pingutada. Turvarihm peab
asetsema allpool kandesanga liigendust. Reisi ajal
peab kandesang olema alati transportimise asendis.
HOIATUS: Turvarihm ei tohi kunagi olla keerdus.
(Pilt 1+2)
“Seljatoe ja kandesanga reguleerimine”)
olevate juhikute (asuvad turvahälli korpuse all).
(pilt 2A)
turvahälli tagaosa ja pane läbi juhiku, mis asub
turvahälli seljatoe ülaosas (pilt 2B).
Diagonaalne rihm peab asetsema allpool
turvahälli kandesanga liigendust (pilt 2C).
igasugune lõtk.
Kuidas turvarihmu reguleerida (Pilt 3+4)
Turvarihmad peavad olema reguleeritud vastavalt
lapse suurusele. Turvarihmad peavad jooksma läbi
lapse õlgadele lähima pilu.
•
RC/RCS turvahällil on kaks turvarihmade
reguleerimise kõrgust, mis võimaldavad hällil
kohaneda lapse kasvamisega. Turvarihmade
kõrguse muutmiseks vaata palun pilt 4a.
• Paigalda 3-punkti turvarihmad õigesti ning kinnita
klamber.
• Klambri avamine ja sulgemine. (pilt 3)
Sulgemine: pane klambri 2 osa kokku ning suru
need luku sisse kuni need on turvaliselt paigas
(kuuled “klõpsatust”).
Avamine: vajuta punasele nupule.
• Turvarihmade reguleerimine:
Soovitame turvarihmad reguleerida lapse suurusele
vastavaks ENNE kui paigaldada turvahälli autosse.
Õlarihmade pingutamine: Tõmba TMS rihma otsast
kuni see on pingul. (pilt 5 / A)
Turvarihmade lõdvendamine: Ühe käega vajuta
alla TMS regulaator, mis asub turvahälli esiosas,
noolega näidatud suunas (pilt. 5 / B), ja teise käega
tõmba samaaegselt rihmu enda suunas.
13
Page 15
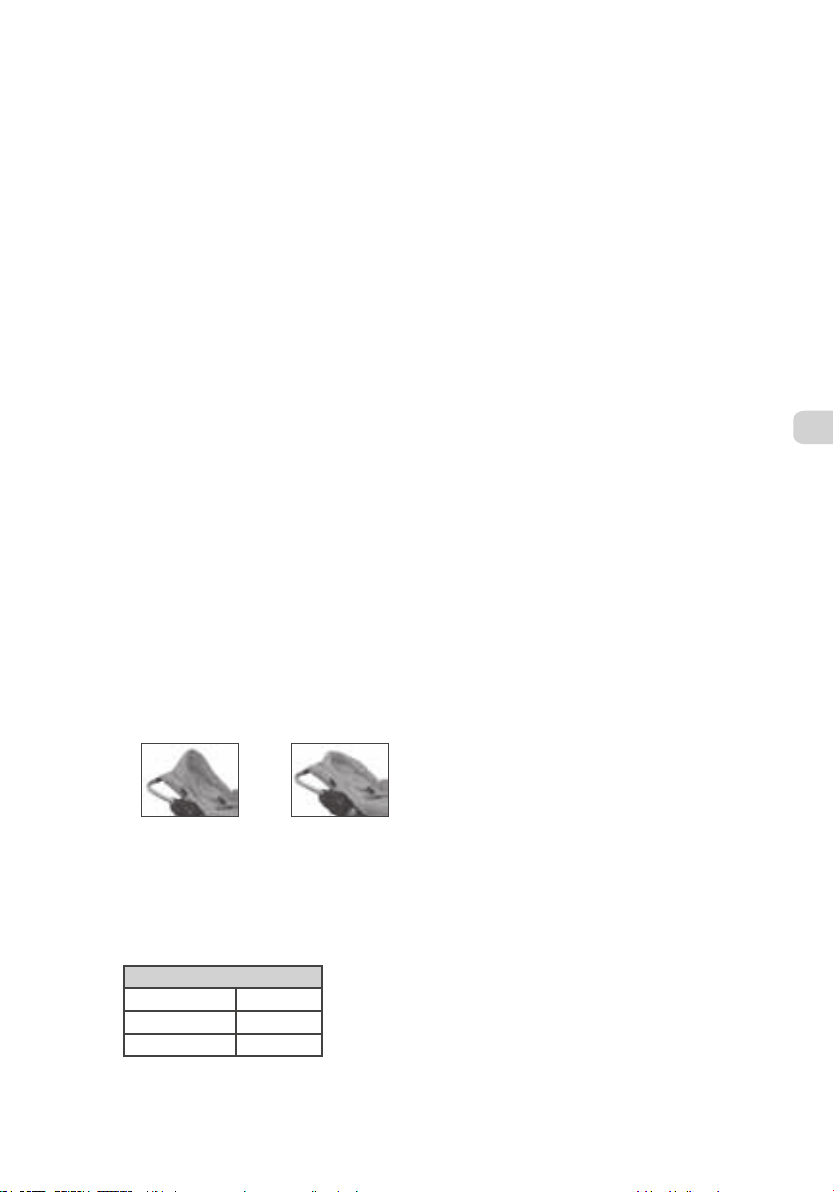
TÄHTIS: Turvarihmad peavad olema tihedalt kui ei
tohi piirata lapse liikumist. Veendu, et rihmad ei
oleks keerdus. Rihmade klamber peab asetsema nii
madalal lapse puusadel kui võimalik ning mitte
kunagi lapse kõhul. See tagab piisava vaagnavöö
kaitse.
Lapse RC/RCS turvahälli paigutamine
HOIATUS: ÄRA KUNAGI jäta last turvahälli
järelevalveta.
TÄHTIS: Soovitame turvarihmade pikkuse
reguleerida lapsele sobivaks ENNE kui paigaldad
turvahälli autosse. Turvarihmad peavad jooksma
läbi lapse õlgadele võimalikult lähedal oleva pilu.
• Pane kandesang asendisse 1 (pilt 6).
• Vabasta rihmade kinnituslukk vajutades punasele
nupule.
• Pane laps mugavalt, selg vastu seljatuge,
turvahälli istuma.
• Reguleeri seljatoe asend sobivaks (vaata alalõik
“seljatoe ja kandesanga reguleerimine”).
• Pane turvarihmade 2 osa kokku ning suru need
kinnituslukku.
• Reguleeri turvarihmad lapsele parajaks (vaata
alalõik “turvarihmade reguleerimine”).
Peapadi (Päikesevari)
RC/RCS turvahäll sisaldab 3 funktsiooniga Peapatja
– see vähendab turvahälli suurust, see pehmendab
beebi pead, see kaitseb päikese eest.
Peapadi pakub lisamugavust kui beebi lamab ning
külgkaitset lapse peale ning keha ülaosale. Ku laps
kasvab, eemalda pehmendus ja kasuta seda lihtsalt
kui peatuge ning päikesevarju (saab kokku pakkida
ning sulgeda lukuga).
Lahtine
päikesevarjuna
Tagasi
lükatud
Seljaoe ja kandesanga asendite
reguleerimine
Seljatoe reguleerimine (pilt 7):
Tõsta turvahälli tagaosas olev käepide üles ning vali
oma lapse kaalule sobivaim asend:
3 ASENDIT
Lamav - 5 kg
Naalduv - 5 kg
Traditsioonilne 5 <10 kg
NB: Kui ei ole kasutuses autos, on kõik kolm
asendit võimalikud kuni 9kg.
• Kandesanga asendid (pilt 6):
On 3 kandesanga asendit.
Asendi muutmiseks vajuta samaaegselt kandesanga
mõlemal küljel olevaid nuppe (pilt 6A) ning samal
ajal liiguta sanga ette või tahapoole soovitud
asendisse.
1. Autos kasutamise asend
2. Lapse kandmise asend
3. Kiikuva hällina / kärul kasutamise asend
TÄHTIS: Ole alati tähelepanelik! – Kui kannad last
RC/RCS turvahällis autost väljaspool, siis veendu, et
kandesang on kindlalt asendis 2.
Lisavarustus (lisavõimalus)
Kaarvarju kinnitamine
•
Kaarvarju kinnitamiseks: lükka plastikust
klambrid, mis asuvad kaarvarju mõlemal küljel,
RC/RCS turvahälli küljes olevatesse vastavatesse
avadesse (pilt a1+a2).
• Tõmba kaarvarju tekstiil üle hälli servade nii, et
kaarvarju tekstiili sees olevad sinise noolega
tähistatud avad (asuvad kaarvarju tagaosas) oleks
kohakuti autoturvarihmade suunajatega (pilt
a3+a4).
•
Reguleeri kaarvari asendisse, kus see kaitseb
last päikese eest.
• Kaarvarju eemaldamiseks vajuta varju mõlemal
küljel olevad klambrid all ning samal ajal tõmba
varju ülespoole.
Jalakatte kinnitamine
Enne jalakatte kinnitamist, pane paika kaarvari
(vaata eelmist lõiku).
•
Kata RC/RCS turvahäll jalakattega (pilt 5).
•
Pane jalakatte ning kaarvarju trukid ning
takjakinnitused kohakuti ning vajuta kinni.
•
Jalakatte eemaldamiseks võta takjakinnitused
ja trukid lahti.
Ära kasuta jalakatet autos. Avarii korral võib see
takistada lapsele juurdepääsu.
Päikesesirmi kasutamine
• Aseta laiem osa (näidatud pildil 1 üleval)
kaarvarjule ning kinnita takjakinnitusega.
• Tõmba päikesesirm alumise osa suunas pingule
ning kinnita takjakinnitusega (pilt 2).
EE
14
Page 16
Päikesesirm on mõeldud vähendama ereda päikese
helki ning vähendama UV-kiirte efekti. Antud
päikesesirmi kasutamine ei vabasta sind vajadusest
kaitsta oma last. Me soovitame süstemaatiliselt
kasutada päikesekreemi. Kontrolli regulaarselt, et
lapsel oleks piisavalt juua.
Hooldus- ja pesemisjuhised (pilt 8)
• Turvahälli ja turvarihmu võib puhtaks pühkida
sooja seebise veega.
• Pesemiseks eemalda istmekate. Pista rihmad ja
klamber läbi kattes olevate pilude.
• Selle tagasipanemisel veendu, et turvarihmad ja
kattenurgad oleks paigaldatud õigesti (pilt 8 A).
• Pese istekate soojas, seebivees (ära kasuta
masinpesu). Loputa hoolikalt ja pane avatult
kuivama. Ära triigi. Ära kasuta abrasiivseid
puhastusvahendeid.
EE
TÄHTIS
turvalisuse informatsioon
•
RC/RCS turvahälli võib paigaldada (seljaga
sõidusuunas) auto esiistmel (välja arvatud
autodes mis on varustatud õhkturvapadjaga) või
(seljaga sõidusunnas) tagumisele istmele.
• Kasuta RC/RCS turvahälli ainult 3-punkti
autoturvarihmadega.
• Ära kunagi jäta oma last järelevalveta.
• Kinnita oma laps igas olukorras, kasuta alati
turvasüsteeme.
•
RC/RCS turvahälli originaalvarustust ei tohi
ümber teha.
•
Lapse turvalisuse huvides soovitame me
ametilikult mitte paigaldada turvahälli
supermarketi kärule.
• Õnnetusjuhtumi korral ei tohi turvahälli enam
edaspidi kasutada ja see tuleb kohustuslikult
välja vahetada. Toode võib olla silmale
nähtamatult vigastatud.
•
Kui turvahälli kasutatakse auto esiistmel
(reisijaistmel), peab autoiste olema lükatud nii
taha kui võimalik, seljatugi peab olema üles
tõstetud ning peatugi nii madalal kui võimalik.
• Ära kunagi kasuta turvahälli autoistmel,mis on
varustatud õhkturvapadjaga.
•
Turvahäll peab olema alati kinnitatud
autoturvarihmadega, isegi kui turvahäll ei ole
kasutuses. Kinnitamata turvahäll kujutab auto
äkilise pidurdamise korral ohtu autos reisijatele.
•
Autoturvarihmad ja turvahälli rihmad ei tohi olla
keerdus.
Päikese kätte pargitud autos tõuseb auto
•
sisetemperatuur. Soovitame turvahäll katta (nt.
Kangatükiga) nii on lapsel mugavam kui teda
turvahälli pannakse. Samuti takistab see
metallosade kuumenemist ning lapse kõrvetada
saamist. Samuti tekstiilosad ei pleegi.
• Ära kunagi hoia last autos süles. Liiklusavarii
korral muutub kinnitamata las ”lendavaks
objektiks”. Ära kunagi pane enda 3-punkti
turvarihma ümber lapse.
• Arvesta Kiirtee Koodiga. Veendu, et kõik sõidukis
viibivad reisijad oleks oma turvarihmadega
õigesti kinnitatud.
• Ära aseta raskeid esemeid tagaakna riiulile.
Veendu, et kogu autos olev pagas on kinnitatud
nii, et liiklusavarii korral ei vigastaks see last ega
teisi reisijaid.
•
Paigalda turvahäll autosse ettevaatlikult,
veendudes alati, et see on õigesti paigaldatud.
Kontrolli alati, et sõiduki ja turvahälli
turvarihmad ei oleks kulunud. Samuti veendu
alati, et turvahälli, selle turvarihmad ega
autoturvarihmad ei oleks autoistme all ega
autoukse vahel.
•
Ära kunagi kasuta turvahälli ilma selle
originaalkatteta. Kasuta ainult tootja poolt
toodetud istmekatet.
• Kui turvahäll on kärul, ÄRA KUNAGI tõsta käru
turvahällist kinni võttes, vaid AINULT käru
raamist.
•
Hoia käesoleva juhend kogu aeg käeulatuses
edaspidiseks kasutamiseks.
• Ära eemalda turvahälli külge õmmeldud etikette
sest võid vigastada kangast.
•
Lamavas asendis seljatoega turvahäll ei asenda
hälli või voodit. Kui lapsel on vajadus magada,
tuleb ta panna hälli või voodisse.
•
Ära kasuta antud autotooli kui mingi osa on katki
või kadunud.
•
Kasuta ainult tootja poolt aksepteeritud
lisatarvikuid või varuosi.
15
Page 17
Instrucciones generales de seguridad
ANTES DE UTILIZAR LA SILLA GRUPO 0 POR PRIMERA
VEZ, LEA ATENTAMENTE ESTAS INSTRUCCIONES
RESPETANDO LAS RECOMENDACIONES INDICADAS,
PARA SALVAGUARDAR LA MÁXIMA SEGURIDAD PARA
.
SU BEBÉ
PARA FUTURAS REFERENCIAS.
IMPORTANTE! CONSERVE ESTE MANUAL
ADVERTENCIA
• Nunca deje a su hijo sin atención.
•
La silla Grupo 0 RC/RCS cumple con el estándar
Europeo de seguridad ECE R-44./04 Es adecuada
para bebés desde el nacimiento hasta los 10 kgs
(alrededor de 9 meses).
• La silla Grupo 0 RC/RCS está clasificada como
“universal” dentro de los dispositivos de retención
infantil. Se adapta a la gran mayoría de asientos de
automóviles. El dispositivo podrá montarse de
forma adecuada en el vehículo si el manual del
fabricante especifica que acepta sillas de retención
infantil para niños de este grupo de edad.
• La silla grupo 0 RC/RCS debe utilizarse siempre
en sentido contrario a la marcha. Debe fijarse
ÚNICAMENTE con el cinturón de seguridad de 3
puntos del vehículo (con o sin retractor) que
cumpla con el reglamento ECE-16 o equivalente.
• El largo de los cinturones de seguridad varía
según cada modelo de automóvil. Sugerimos que
compruebe que esta silla grupo 0 puede
utilizarse en su vehículo.
B
R
I
A
silla Grupo 0 RC/RCS aún si no la utiliza en el
automóvil.
• El fabricante solo puede garantizar la seguridad
de la silla grupo 0 cuando es utilizado por el
primer propietario. Sugerimos que no utilice un
grupo 0 de segunda mano.
• No continúe utilizando esta silla de auto como
hamaca reclinable en cuanto el niño pueda
sentarse solo y sin ayuda.
• No use la silla grupo 0 por un período de tiempo
superior a 5 años. El uso intensivo del producto
puede provocar un deterioro no visible.
• Es peligroso utilizar la silla Grupo 0 en una
superficie elevada: por ejemplo, sobre una mesa...
• En ningún caso saque al bebé de la silla grupo 0
mientras el vehículo esté en movimiento.
• Use siempre el cinto de retención.
• Si utiliza la silla de auto como hamaca reclinable,
no es adecuada para largos periodos de sueño.
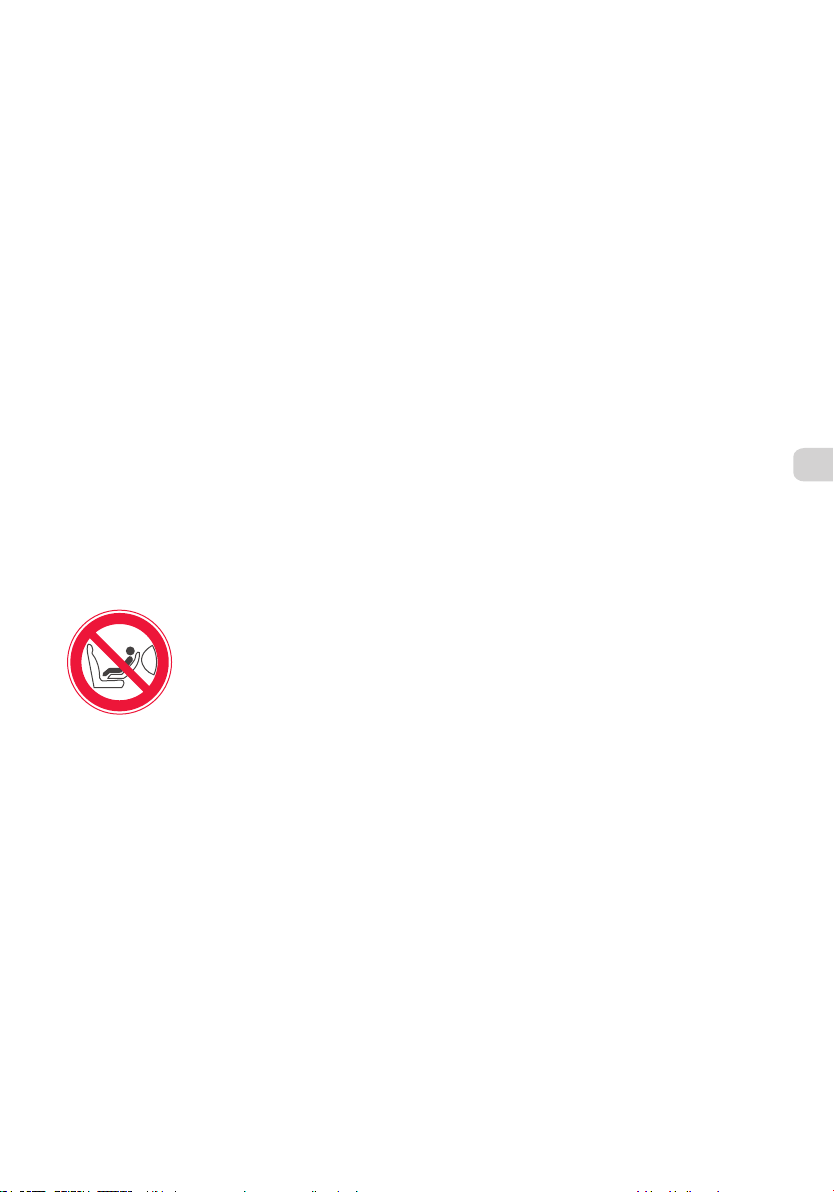
• La silla Grupo 0 RC/RCS nunca
A
G
debe situarse en asientos
delanteros equipados con
“airbag”, esto podría ser muy
peligroso.
• Asegure SIEMPRE a su bebé con
el arnés de seguridad de la
Instalación de la silla Grupo 0 RC/RCS
en el automóvil
ADVERTENCIA: Nunca instale la silla grupo 0
RC/RCS en el asiento delantero del automóvil si
está equipado con “airbag”. Esto puede causar la
muerte o importantes lesiones. Si su vehículo
dispone de “airbag” utilice la silla en los asientos
traseros. Tanto en el asiento delantero como en los
traseros, la silla siempre debe mantenerse en el
sentido contrario a la marcha.
1.
Coloque el manillar en la posición 1 (vea el
apartado ”Ajuste del respaldo y posiciones del
manillar”).
2. Abroche el cinturón de seguridad del automóvil.
3.
Pase la correa abdominal por las ranuras
destinadas a tal efecto en la parte delantera del
la silla grupo 0 (ubicadas debajo de la
estructura) (fig. 2A).
4.
Después, pase la correa diagonal por la ranura
trasera de la silla grupo 0 (fig. 2B). La correa
diagonal debe quedar colocada bajo el manillar
de la silla (fig. 2C).
5.
Tire con fuerza de la correa diagonal para que
quede tensada.
IMPORTANTE: Cada vez que cambie la posición del
respaldo tendrá que tensar el cinturón. El cinturón
debe quedar colocado debajo de la coyuntura del
manillar de la silla. En el automóvil, el manillar
siempre debe estar en posición de transporte.
ADVERTENCIA: El cinturón nunca debe estar
retorcido.
(Fig. 1 + 2)
Ajuste el arnés de seguridad (Fig. 3 + 4)
El arnés de seguridad debe ajustarse al tamaño del
niño. Las correas del arnés deben pasar a través de
las aberturas más próximas a los hombros de su bebé.
• El arnés de la silla Grupo 0 RC/RCS tiene dos
posiciones de altura regulables que permiten que
se adapte al crecimiento del niño. Para ver cómo
cambiar las posiciones del arnés, refiérase a la
fig. 4A.
• Coloque adecuadamente el arnés de seguridad de
3 puntos y cierre la hebilla.
• Para abrir y cerrar la hebilla. (fig. 3)
Para cerrar la hebilla del arnés: junte ambas partes
de la hebilla e insértelas en el cierre presionando
hasta asegurarlas (escuchará un “clic”).
Para abrir la hebilla presione el botón rojo.
• Ajuste del arnés:
Recomendamos ajustar el arnés al tamaño de su
bebé ANTES de instalar la silla grupo 0 en el
automóvil.
ES
16
Page 18
Para ajustar las correas de los hombros: Estire de
la correa en el regulador TMS hasta que las correas
de los hombros queden suficientemente ajustadas
(fig. 5 / A).
Para aflojar las correas de los hombros: Con una
mano presione en el regulador TMS (en la parte
frontal de la silla) en la dirección de la flecha (fig.
5 / B), y con la otra simultáneamente tire de las
correas de los hombros hacia Ud.
IMPORTANTE: El arnés de seguridad debe estar
ajustado para limitar el movimiento del bebé pero
no debe hacer que se sienta incómodo. Es muy
importante asegurarse que el cinturón abdominal se
coloque lo más bajo posible y nunca en su
estomago. Así asegurará que la pelvis quede
adecuadamente protegida.
Asegurar al bebé en la silla
grupo 0 RC/RCS
ADVERTENCIA: NUNCA deje al niño sin la atención
de un adulto.
IMPORTANTE: Es recomendable que ajuste el arnés
ES
al tamaño de su bebé ANTES de instalar la silla
grupo 0 en el automóvil. Las correas del arnés
deben pasar a través de las aberturas más próximas
a los hombros de su bebé.
• Coloque el manillar en la posición 1 (fig. 6).
• Abra la hebilla del arnés presionando el botón rojo.
• Siente a su bebé en la silla grupo 0 asegurándose
de que está cómodo y su espalda bien apoyada.
• Ajuste la posición del respaldo de la silla (vea el
apartado ”Ajuste del respaldo y posiciones del
manillar”)
• Junte ambas partes de la hebilla e insértelas en
el cierre.
• Ajuste el arnés al tamaño de su bebé (vea el
apartado “Ajuste del arnés”).
Reposacabezas (y protector de sol)
La silla Grupo 0 RC/RCS posee un reposacabezas
con 3 funciones – reduce el tamaño de la silla, es
una almohada para la cabeza del bebé y le protege
del sol.
Proporciona una comodidad extraordinaria cuando
el bebé está recostado y un apoyo lateral extra a la
cabeza y parte superior del cuerpo. Cuando el bebé
crezca, extraiga el reductor y utilícelo como una
simple capota y protector de sol (se pliega y
despliega con cremallera).
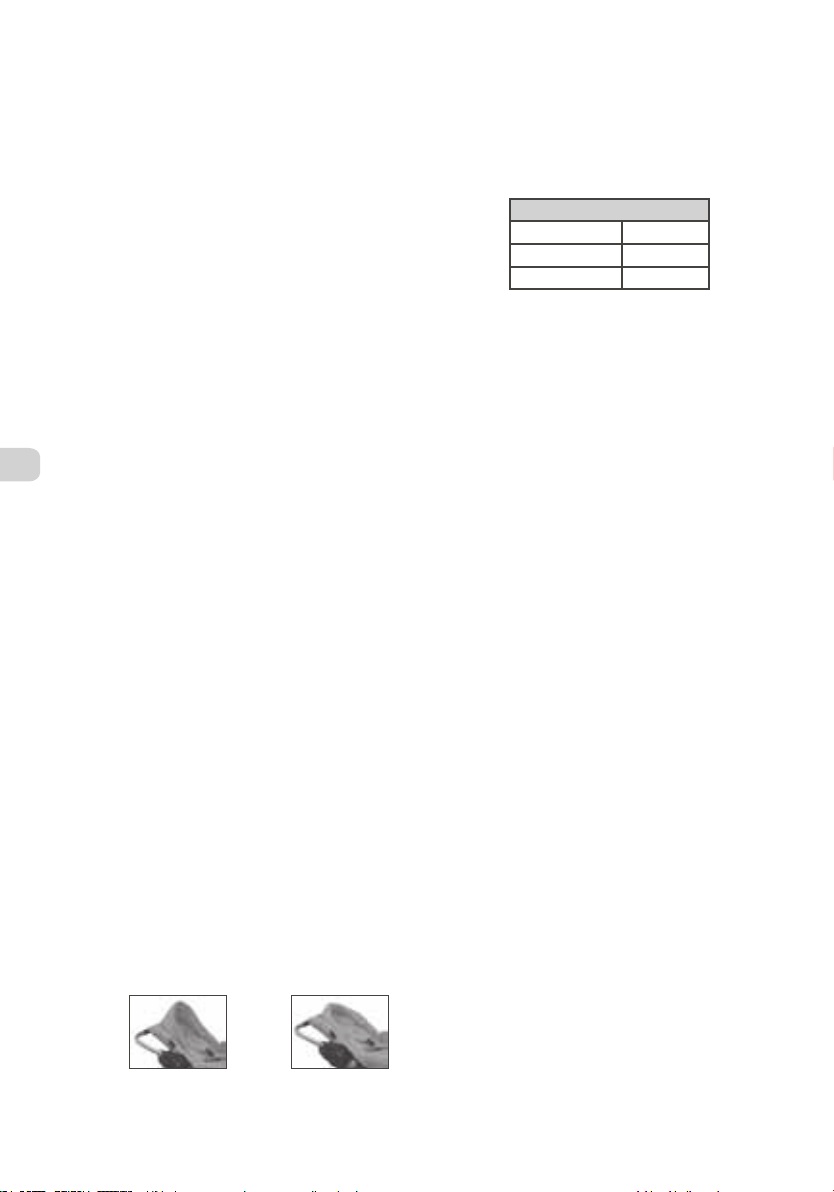
Desplegado
como
protector
solar Plegado
Ajuste del respaldo y posiciones del
manillar
• Para ajustar el respaldo (fig 7):
Levante la palanca situada en la parte posterior
de la silla Grupo 0 y elija la posición más
recomendable de acuerdo con el peso de su bebé:
3 POSICIONES
Acostado - 5 kg
Reclinado - 5 kg
Sentado 5 <10 kg
Si la silla se utiliza fuera del automóvil, podrá
usar las 3 posiciones de reclinado hasta los 9kgs.
• Posiciones del manillar (fig. 6):
Existen 3 posiciones del manillar.
Para cambiar la posición, apriete los dos
pulsadores a ambos lados (fig. 6A) y desplácela
hacia adelante o hacia atrás, hasta la posición
que necesite.
1. Posición de instalación en el automóvil
2. Posición de transporte
3. Posición de balancín o para uso en una silla de
paseo
IMPORTANTE: ¡Tenga cuidado en todo momento! -Si
desea pasear a su bebé en la silla grupo 0 fuera el
vehiculo, compruebe que el manillar esté
firmemente bloqueado en la posición 2.
Accesorios opcionales
Instalación de la Capota
• Para instalar la capota: Inserte las piezas de
plástico, ubicadas en los extremos de la capota,
en los broches laterales de la silla Grupo 0
RC/RCS (fig. a1 + a2).
• Alinee las aberturas, indicadas por las flechas
azules (en la parte trasera de la capota), con las
guías para insertar el cinturón de seguridad del
automóvil en la silla Grupo 0 (fig. a3 + a4).
• Ajuste la capota como lo requiera para proteger
a su bebé del sol.
• Para extraer la capota: presione las piezas de
plástico que se encuentran a ambos lados de la
capota y al mismo tiempo tire de ella hacia
arriba.
Montaje del cubrepiés
Antes de colocar el cubrepiés, instale la capota (ver
capítulo anterior)
• Cubra la silla grupo 0 RC/RCS con el cubrepiés
(fig. a5).
17
Page 19
• Haga corresponder las cintas de Velcro y los
cierres a presión del cubrepiés y de la capota con
los situados en la funda del grupo 0. Presione
para cerrarlos.
•
Para extraer el cubrepiés, desprenda las cintas
Velcro y abra los cierres a presión.
No utilice el cubrepiés de la silla grupo 0 en el
automóvil. En caso de una emergencia, esto puede
dificultar el acceso al bebé.
I
nstalación del protector solar
• Coloque la parte más ancha (arriba en la foto b1)
sobre la capota y ajuste las cintas de Velcro.
• Tense el protector solar hacia la parte inferior de
la silla y ajuste las cintas de Velcro (foto b2).
El protector solar ha sido diseñado para reducir el
resplandor del sol y limitar los efectos de los rayos
ultravioleta. El uso del protector solar no le exime
de proteger a su hijo del sol. Le recomendamos el
uso sistemático de crema solar. Controle
regularmente que el niño tiene agua para beber.
de
Instrucciones de mantenimiento (Fig.8)
• La silla y el arnés de seguridad se pueden limpiar
con agua jabonosa y tibia.
• Extraiga la funda de la silla para lavarla. Para
hacerlo, deslice las correas y la hebilla a través
de los orificios de la funda.
Para colocarla nuevamente, asegúrese que el
arnés de seguridad y los bordes de la funda están
colocados correctamente (fig. 8 A).
• Lave la funda a mano con agua jabonosa y tibia
(no utilizar lavadora). Aclarar bien y dejarla
abierta para secar. No planchar. No utilizar
productos abrasivos para su limpieza.
Información
de seguridad
• La silla grupo 0 RC/RCS puede instalarse (contra la
marcha) en el asiento delantero (excepto en
vehículos equipados con “airbag) o (contra la
marcha) en los asientos traseros.
• Utilice la silla Grupo 0 RC/RCS únicamente con el
cinturón de seguridad de 3 puntos del automóvil.
• Nunca deje al bebé sin el control de un adulto.
• Sujete al bebé en todo momento, utilice siempre el
arnés de la silla Grupo 0.
• No realice modificaciones al equipo o partes
originales de la silla Grupo 0 RC/RCS.
• Por la seguridad de su hijo, no es aconsejable utilizar
la silla grupo 0 en carros de compra de supermercado.
• Nunca utilice la silla grupo 0 en un asiento delantero
si el coche está equipado con “airbag”.
• En el caso de un accidente, la silla grupo 0 no debe
ser utilizada nuevamente y deberá cambiarse.
Pueden existir daños no visibles.
• Si la silla grupo 0 se sitúa en el asiento delantero,
éste deberá estar colocado lo más atrás posible, el
respaldo de la silla en posición vertical y el
reposacabezas lo más abajo posible.
• La silla de seguridad debe permanecer asegurada
con el cinturón de seguridad en todo momento,
aunque el bebé no viaje en ella. De no ser así
podría resultar peligroso para el resto de pasajeros.
• Verifique que el cinturón de seguridad del automóvil
y el arnés de seguridad no estén retorcidos.
• Si el coche permanece aparcado a pleno sol, puede
que suba mucho la temperatura. Le recomendamos
que cubra la silla con una tela o similar, para que su
bebé esté más cómodo cuando vuelva a sentarlo. De
esta forma evitará también que las piezas metálicas
se calienten demasiado y puedan quemar al niño y
las partes textiles se descoloren con el tiempo.
• No sostenga al bebé en sus piernas al estar en el
vehículo. Su bebé debe viajar siempre en una silla
apropiada para su seguridad. Nunca viaje con el
cinturón de seguridad del automóvil sujetándolos a
usted y su hijo juntos.
• Respete el código de circulación y asegúrese de que
todos los pasajeros tienen el cinturón de seguridad
correctamente ajustado.
• No sitúe objetos en la parte trasera del automóvil
que pueden resultar peligrosos en caso de
accidente. Para su seguridad y la de su bebé todos
los objetos deberían ir en el maletero.
• Instale la silla Grupo 0 en el automóvil con cuidado,
asegurándose que esté correctamente colocada.
Siempre vea el estado del cinturón de seguridad y
del arnés. Verifique que ninguna parte de la silla,
así como el cinturón o el arnés, estén entre los
asientos o atrapados con la puerta del coche.
• No utilice la silla Grupo 0 sin su funda original.
Utilice solamente la provista por el fabricante.
• No levantar NUNCA la silla de paseo cogiéndola por
la Silla Grupo 0, sino ÚNICAMENTE por el chasis.
• Conservar estas instrucciones a mano para futuras
referencias.
• Do not remove the sewn on labels on the car seat so
as to avoid damaging the fabric.
• No extraiga las etiquetas del producto para evitar
dañar el textil o sus materiales.
• Al utilizarla como hamaca reclinable, esta silla de
auto no reemplaza una cuna o cama. Cuando el
niño necesite dormir, deberá colocarlo en una cuna
o cama.
• No utilice esta silla de auto si falta cualquiera de sus
partes o está rota.
• No utilice ningún accesorio o piezas de recambio
distintas a las recomendadas por el fabricante.
ES
18
Page 20
Conditions générales de Sécurité
AVANT D’UTILISER VOTRE SIEGE AUTO POUR LA
PREMIÈRE FOIS, LISEZ LE MODE D’EMPLOI DANS SA
TOTALITÉ EN RESPECTANT SOIGNEUSEMENT LES
CONSIGNES INDIQUÉES AFIN DE GARANTIR UNE
SÉCURITÉ MAXIMUM POUR VOTRE ENFANT.
IMPORTANT ! A CONSERVER POUR DE FUTURS
BESOINS DE REFERENCE
AVERTISSEMENTS
• Ne jamais laisser l’enfant sans surveillance.
• Le siège-auto RC/RCS Groupe O est conforme à la
norme européenne ECE R-44/04. Son usage est
destiné aux enfants de la naissance à moins de
10kg (environ 9 mois).
• Le siège-auto RC/RCS Groupe 0 est classé dans la
catégorie "universel". Il peut être adapté à la
plupart des sièges de voiture. Il est possible qu’il
puisse s’adapter correctement sur un véhicule si
son constructeur spécifie, dans le manuel du
véhicule, que ce dernier peut recevoir des
dispositifs de retenue pour enfants "universels"
pour ce groupe d’âge.
• Le siège-auto RC/RCS doit toujours être
FR
obligatoirement installé dos à la route. Il doit
être fixé dans votre véhicule EXCLUSIVEMENT par
une ceinture de sécurité à trois points (avec ou
sans enrouleur) homologuée selon la
réglementation ECE-16 ou équivalente.
• La longueur des ceintures de sécurité varie selon
les modèles de voiture. Nous vous conseillons de
vérifier que notre siège convient pour votre
véhicule.
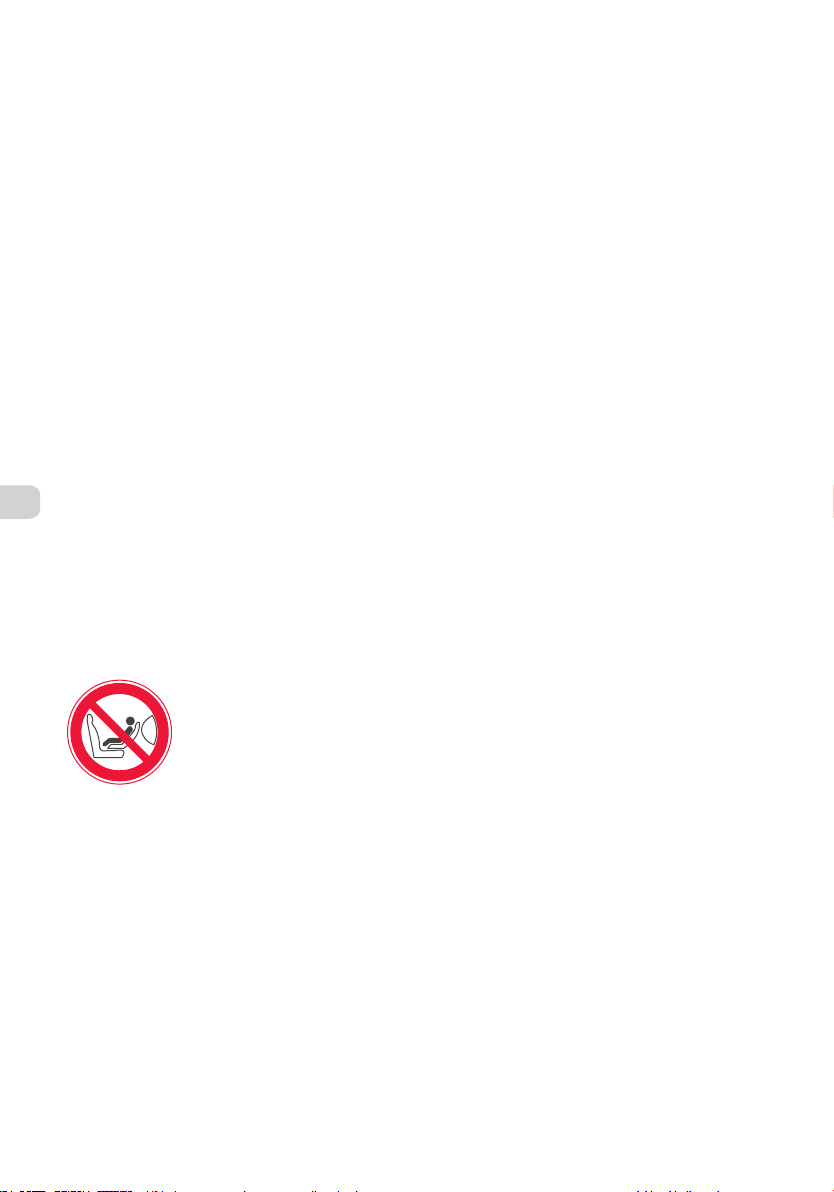
• Le siège-auto RC/RCS ne doit jamais être installé
B
A
R
I
A
• Le fabricant peut garantir la sécurité du dispositif
uniquement si celui-ci n’a pas changé de
propriétaire. Aussi, nous vous conseillons de ne
pas acheter de siège auto d’occasion.
• Il est dangereux de poser ce siège auto sur une
surface en hauteur : par exemple une table.
• Ne pas utiliser le siège-auto plus de 5 ans. Son
usage intensif peut entraîner des dégradations.
• Ne plus utiliser ce siège auto en tant que transat
dès que l’enfant tient assis tout seul.
• Ne pas sortir le bébé de son siège sous aucun
prètexte pendant que le véhicule roule.
• Toujours utiliser le système de retenue.
• Ce siège auto, lorsqu’il est utilisé comme transat,
n’est pas prévu pour de longues périodes de
sommeil.
aux places avant équipées
G
d’un airbag frontal, ce qui
peut être très dangereux.
• Attacher TOUJOURS votre bébé
avec le harnais, même lorsque
vous utilisez le siège-auto
RC/RCS hors du véhicule.
Installation du siège-auto RC/RCS dans
la voiture
AVERTISSEMENT : Ne jamais installer le siège auto
RC/RCS sur le siège passager avant si votre véhicule
est équipé d'un airbag frontal. Ceci pourrait
entraîner le décès ou de graves lésions. Dans ce
cas, vous pouvez bien sûr l'installer sur la
banquette arrière. Sur le siège avant, comme sur la
banquette arrière, placez toujours le siège auto dos
à la route.
1. Mettre l'anse dans la position 1 (voir chapitre :
"réglage du dossier et positions de l’anse")
2. Boucler la ceinture de sécurité de la voiture.
3. Passer la ceinture ventrale dans les guides avant
(situés sous la coque) (fig. 2A)
4. Ensuite, glisser la ceinture diagonale autour du
dossier puis dans le guide situé à l’arrière du
siège auto (fig. 2B). La ceinture de sécurité doit
passer en dessous de l’articulation de l’anse
(fig.2C).
5. Tirer fermement sur la ceinture diagonale pour
la resserrer au maximum.
IMPORTANT : à chaque changement d'inclinaison du
dossier, veillez à tendre de nouveau la ceinture de
sécurité. La ceinture de sécurité doit passer en
dessous de l'articulation de l'anse. Pendant le
voyage, l'anse doit toujours être placée en position
transport.
AVERTISSEMENT : La ceinture ne doit jamais être
vrillée.
(Fig 1+2)
Réglage du harnais (Fig 3+4)
Le harnais doit être ajusté selon la taille de
l’enfant. Les bretelles du harnais doivent passer par
les ouvertures les plus rapprochées des épaules du
bébé.
• Le siège-auto RC/RCS possède deux hauteurs de
réglage du harnais, lui permettant ainsi de
s’adapter à la croissance de l’enfant. Pour
changer la hauteur des sangles, merci de vous
reporter à la figure 4A.
• Bien positionner la courroie du harnais 3 points et
fixer la boucle.
• Fermeture et ouverture de la boucle de fixation
(fig. 3)
Pour fermer : assembler les 2 boucles et les insérer
dans le fermoir jusqu’au verrouillage (" clic "
entendu).
Pour ouvrir : appuyer sur le bouton rouge.
• Ajustement du harnais :
Il est recommandé d’ajuster la longueur du harnais
à la taille de l’enfant AVANT d’installer le siège
auto dans la voiture.
19
Page 21
Pour resserrer les sangles au niveau des épaules :
tirer l’extrémité de la sangle du tendeur TMS
jusqu’à son réglage (fig. 5 / A).
Pour desserrer le harnais : D’une main, appuyer
sur le bouton de réglage TMS situé à l’avant du
siège, dans la direction de la flèche (fig. 5 / B), et
de l’autre, tirer simultanément les sangles du
harnais vers vous.
IMPORTANT : le harnais doit être bien tendu mais
ne doit pas gêner l'enfant dans ses mouvements.
Vérifiez que les bretelles ne soient pas vrillées. La
boucle du harnais doit être située le plus bas
possible de l'abdomen et en aucun cas sur l'estomac
afin d'assurer une protection adéquate du bassin.
Installation de l’enfant dans le
siège-auto RC/RCS
AVERTISSEMENT : Ne JAMAIS laisser un enfant seul
dans son siège sans surveillance.
IMPORTANT : Il est recommandé d'ajuster la
longueur du harnais à la taille de l'enfant AVANT
d'installer le siège auto dans la voiture. Les bretelles
du harnais doivent passer par les ouvertures les plus
rapprochées des épaules du bébé.
• Mettre l’anse dans la position 1. (fig.6)
• Ouvrir le fermoir du harnais en appuyant sur le
bouton rouge.
• Installer confortablement l’enfant dans son siège,
le dos bien calé contre le dossier.
• Régler la position du dossier (voir chapitre "
réglage du dossier et positions de l’anse ").
• Superposer les 2 boucles des sangles d’épaules et
insérer les dans le fermoir.
• Ajuster le harnais (voir chapitre : ajustement du
harnais).
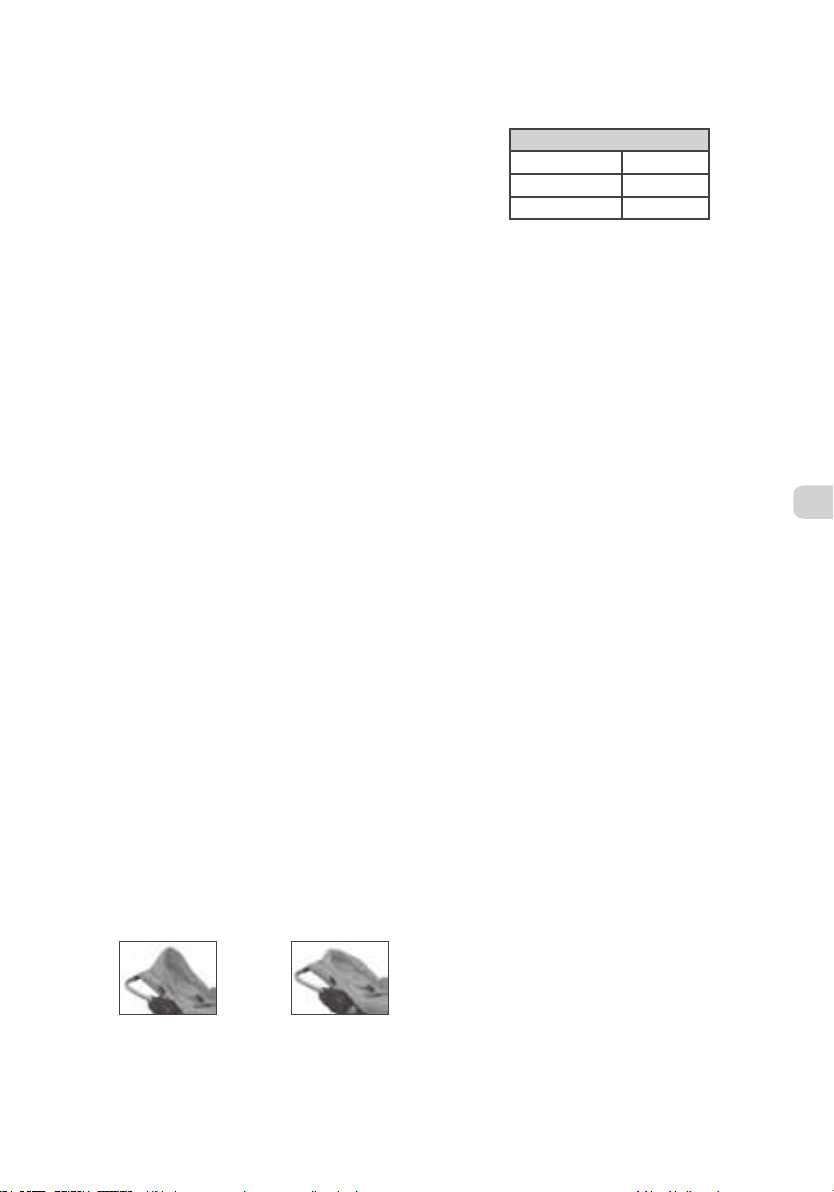
Le Caline-tête (Protège soleil)
Le siège-auto RC/RCS est muni du Caline-tête qui
assure à la fois une fonction de réducteur d’assise,
de cale-tête et de protège soleil.
Le Caline-tête permet un ajustement de la position
allongée et offre un support latéral au niveau de la
tête du bébé. Ensuite, retirer le rembourrage et
utiliser le Caline-tête comme cale tête et protège
soleil (pour le déplier ou le fermer utilisez la
fermeture éclair).
Déplié
contre
le soleil
Replié
Réglage du dossier et positions de l’anse
• Réglage du dossier (fig. 7) :
Actionner le bouton poussoir situé à l’arrière du
dossier et opter pour la position la mieux
adaptée à votre enfant en fonction de son poids :
3 POSITIONS
Allongée - 5 kg
Inclinée - 5 kg
Traditionnelle 5 <10 kg
NB. : Hors du véhicule, les trois positions sont
possibles jusqu’à 9 Kg.
• Positions de l’anse (fig. 6) :
Elles sont au nombre de 3.
Pour changer de position, déverrouiller l’anse en
appuyant simultanément sur les boutons latéraux
(fig.6A), pendant que vous déplacez l’anse vers
l’avant ou vers l’arrière, jusqu’à l’inclinaison voulue.
1. Position Transport voiture
2. Position Porte-bébé
3. Position Balancelle / transport poussette
IMPORTANT : Restez vigilants ! Si vous portez bébé
dans son siège auto RC/RCS hors du véhicule, vérifiez
que l'anse soit bien enclenchée en position 2.
IMPORTANT : L’enfant doit être attaché en toutes
circonstances.
Accessoires en option
Installation de la Capote
• Pour fixer la capote : introduire les parties
plastiques situées aux extrémités de la capote
dans les encoches latérales du siège auto RC/RCS
(fig. a1 et a2).
• Bien ajuster les ouvertures indiquées par les flèches
bleues (et situées au dos de la capote) en face des
guides pour la ceinture diagonale (fig. a3 et a4).
• Ajustez la capote comme vous le souhaitez afin
de protéger votre bébé du soleil.
• Pour ôter la capote : appuyer sur la partie
plastique tout en tirant l’extrémité de la capote
vers le haut.
Installation du Tablier
Tout d’abord, installer la capote (voir chapitre
ci-dessus).
• Recouvrir le siège auto RC/RCS avec le tablier
(fig. a5).
• Faire correspondre les velcros et les pressions du
tablier et de la capote avec ceux situés sur la
housse du siège auto. Appuyer pour les fermer.
• Pour ôter le tablier : défaire les velcros et ouvrir
les boutons pressions.
Ne pas utiliser le tablier du siège auto RC/RCS dans le
véhicule, en cas d’urgence il gênerait l’accès à l’enfant.
FR
20
Page 22
Installation du protège soleil
• Positionner la partie la plus large (celle du haut
sur la photo b1) sur la capote et accrocher les
velcros.
• Tendre le protège soleil jusqu'à la partie basse du
siège et accrocher les velcros (photo b2).
Le protège soleil est conçu pour diminuer
l'éblouissement du soleil et limiter l'effet des
rayons UV. Son utilisation ne vous dispense pas de
protéger votre enfant. Aussi, nous vous
recommandons d'utiliser systématiquement une
crème protectrice solaire et de veiller à
l'hydratation de votre enfant.
Entretien (Fig.8)
• Le siège et le harnais peuvent être nettoyés à
l'eau savonneuse tiède.
• Démonter la housse pour la laver. Faites passer
les bretelles et le fermoir par les fentes de la
housse. Pour la remettre en place, s'assurer que
les extrémités de l'habillage soient correctement
positionnées (fig. 8 A).
• Laver à l'eau tiède savonneuse la housse du siège
FR
(pas de lavage en machine). Rincez
abondamment et laisser sécher. Ne pas repasser.
Ne pas utiliser de produits abrasifs.
IMPORTANT
• Le siège auto RC/RCS peut être installé sur le
siège avant (dos à la route) (sauf véhicules
équipés d'un airbag frontal) ou bien à l'arrière de
votre véhicule (dos à la route).
• Utiliser le siège-auto uniquement avec des
ceintures 3 points.
• Ne jamais laisser votre enfant sans surveillance.
• Attacher votre enfant en toutes circonstances,
toujours utiliser le système de retenue.
• L’équipement original du siège auto RC/RCS
Groupe O ne doit pas être modifié.
• Pour la sécurité de votre enfant, nous vous
déconseillons formellement d’installer le
siège-auto sur un chariot de supermarché.
• En cas d’accident de voiture, le siège-auto doit
être obligatoirement changé. En effet, celui-ci
peut présenter des dégâts pas toujours visibles à
l’oeil nu.
• Lorsque le siège-auto est utilisé à l’avant du
véhicule (à la place du passager), le siège sur
lequel il est installé doit être reculé à son
maximum, son dossier remonté et son appui-tête
enfoncé.
• Ne pas utiliser le siège-auto aux places équipées
d’un "airbag".
• Le siège-auto doit toujours être maintenu par la
ceinture de sécurité, même lorsque ce dernier
n’est pas utilisé. Non attaché, il représente un
danger pour les occupants du véhicule en cas de
freinage brutal.
• La ceinture de sécurité et celles du harnais ne
doivent pas être vrillées.
• Le stationnement au soleil entraîne une
température élevée à l'intérieur du véhicule.
Nous vous recommandons de recouvrir le siège
auto d'un tissu (ou autre) ce qui sera plus
confortable pour bébé lors de son installation.
Ceci évitera également aux pièces métalliques
de chauffer et de risquer de brûler bébé, ainsi
qu'une décoloration prématurée du textile.
• Ne jamais tenir l’enfant sur les genoux dans le
véhicule. Non attaché, en cas de choc, il se
transformerait en projectile. Ne pas voyager
avec l’enfant attaché avec vous dans la ceinture
3 points.
• Respecter le code de la route. S’assurer que tous
les passagers du véhicule soient attachés.
• Ne pas poser d’objets lourds sur la plage arrière.
Veiller à bien maintenir les bagages à l’intérieur
du véhicule de sorte, qu’en cas d’accident,
ceux-ci ne viennent pas blesser le bébé et les
passagers.
• Placer le siège-auto avec précaution en veillant à
son installation correcte. Surveiller toujours
l’usure de la ceinture et des sangles du siège.
Vérifier également que les parties du siège ou du
harnais ainsi que la ceinture de sécurité du
véhicule ne soient pas coincées sous un siège ou
dans la porte de la voiture.
• Ne jamais utiliser le siège sans la housse
d’origine. Utiliser uniquement la housse fournie
par le fabricant.
• Lorsque le siège auto est installé sur la
poussette, ne JAMAIS la soulever en la prenant
par le siège auto mais UNIQUEMENT par le
châssis.
• Conservez le mode d'emploi à proximité pour
consultation ultérieure.
• N'enlevez pas les étiquettes cousues sur le siège
auto afin d'éviter d'endommager le tissu.
• Ce siège auto utilisé en tant que transat ne
remplace pas un couffin ou un lit. Lorsque
l’enfant a besoin de dormir, il convient de le
placer dans un couffin ou un lit approprié.
• Ne pas utiliser ce siège auto si des composants
sont cassés ou manquants.
• Ne pas utiliser d’accessoires ou pièces de
rechange autres que ceux approuvés par le
fabricant.
CONFORME AUX EXIGENCES DE SÉCURITÉ
21
Page 23
General safety instructions
BEFORE USING YOUR CAR SEAT FOR THE FIRST
TIME, READ ALL OF THE INSTRUCTIONS
CAREFULLY RESPECTING THE RECOMMENDATIONS
AS INDICATED IN ORDER TO GUARANTEE YOUR
CHILD MAXIMUM SAFETY. IMPORTANT! KEEP FOR
FUTURE REFERENCE
WARNING
• Never leave the child unsupervised.
• The RC/RCS Car seat Group O conforms to the
European safety standard ECE R-44/04. It is
suitable for children from birth to less than 10
kgs (around 9 months).
• The RC/RCS Car seat Group O is classed in the
"universal" category of retaining devices for
children. It can be adapted on the majority of
car passenger seats. It is possible to fit the
device correctly in the vehicle if the
manufacturer’s vehicle handbook states that it
will take “universal” retaining devices for
children of this age group.
• The RC/RCS Car seat must always be used in the
rear facing position. It must be fixed in your
vehicle EXCLUSIVELY with a 3 point seat belt
(static or automatic) which conforms to the
ECE-16 regulation or its equivalent.
• Seat belt lengths vary from car to car. We suggest
you check that our car seat can be used in your
vehicle.
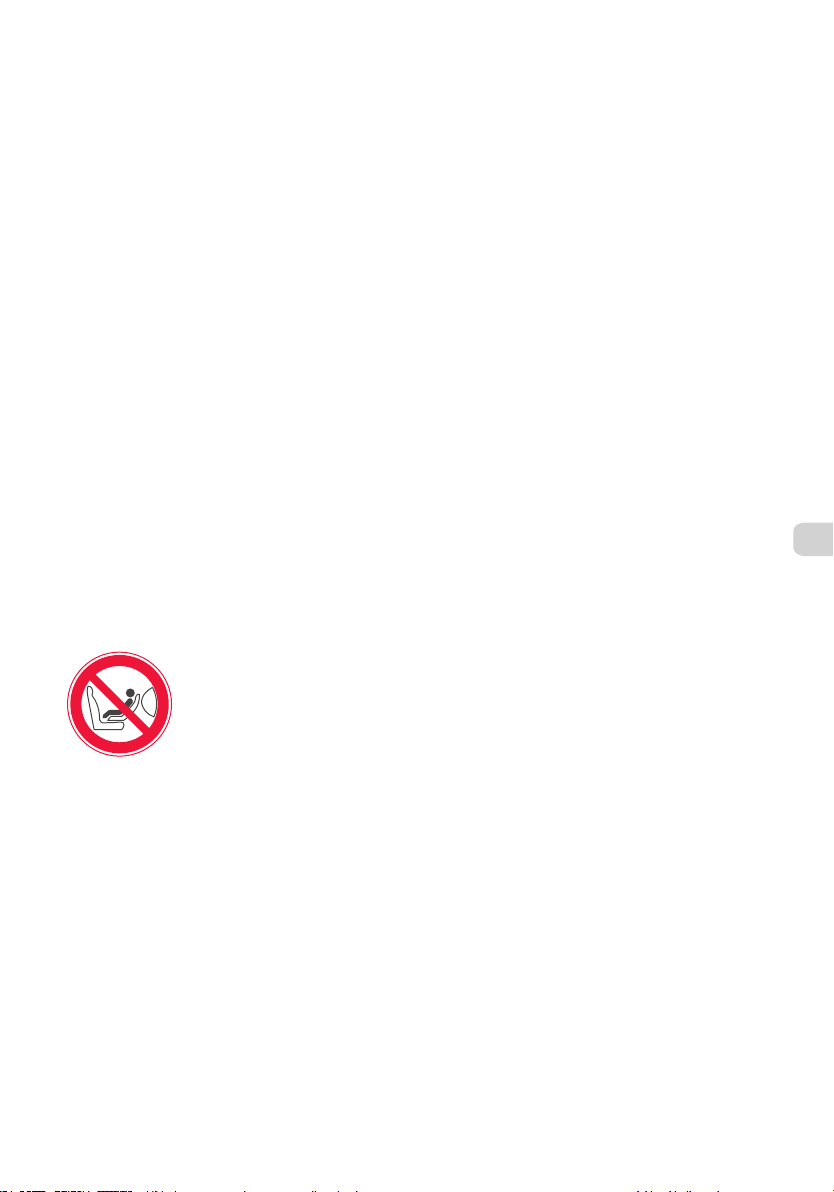
• The RC/RCS Car seat must never be installed in
B
A
R
I
A
• The manufacturer can only guarantee the safety
of the car seat if it is used by the first time
owner. We strongly suggest that you do not use a
second hand car seat.
•
Do not continue to use this car seat when used as
a reclined cradle once the child can sit unaided
• Do not use the car seat for more than 5 years.
Intensive use can cause deterioration not always
visible.
•
It is dangerous to place this car seat on a raised
surface: for example, on a table…
• Never take the baby out of the car seat for any
reason while the vehicle is in motion.
• Always use the restraint system.
•
When used as a reclined cradle, this car seat is
not intended for use during long periods of sleep.
front seats equipped with a
G
front airbag, this may prove
very dangerous.
• ALWAYS attach your baby with
the safety harness even when
you are not using the RC/RCS
car seat in the vehicle.
Installing the RC/RCS car seat in the
(Figs 1+2)
car
WARNING: Never install the RC/RCS car seat on the
front passenger seat if the car is equipped with a
front airbag. This could cause death or serious
injury. If you have a front airbag use the car seat in
the rear of the car. Both in the front and in the rear
of the car, the car seat must always be used in a
rear facing position.
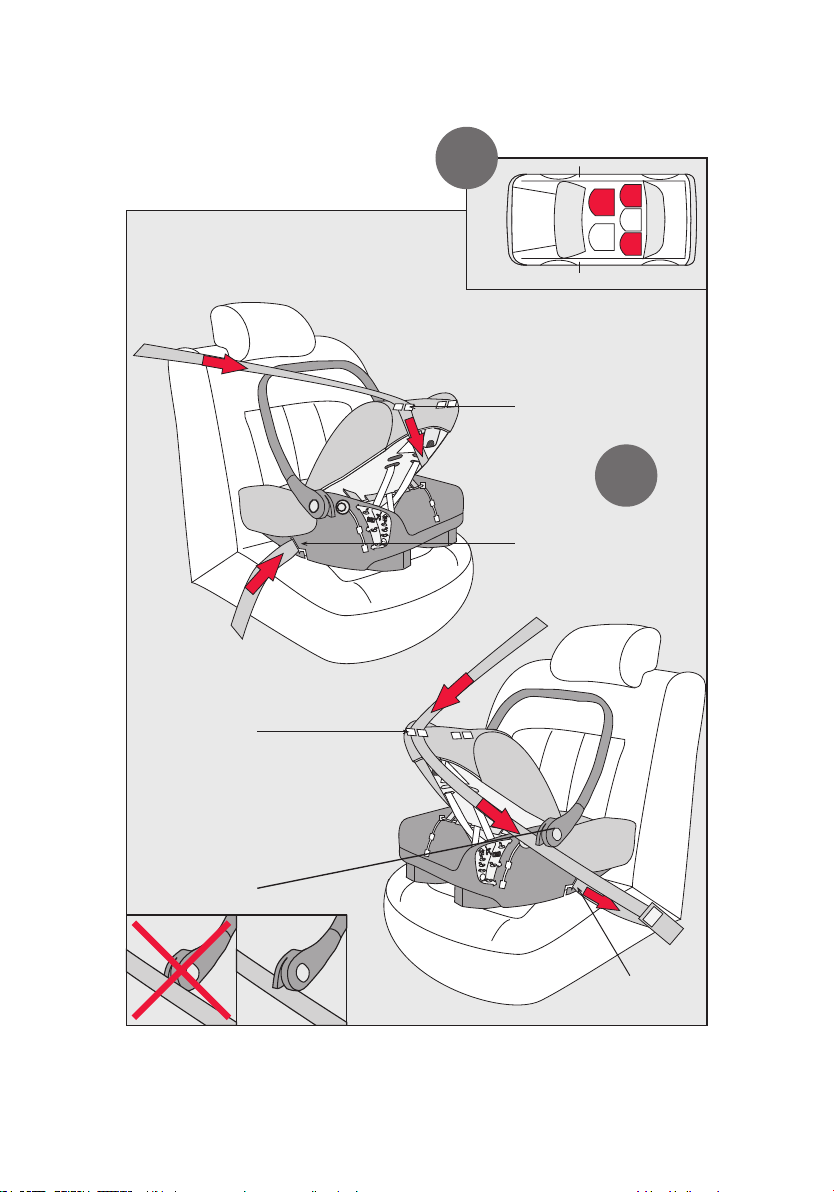
1. Put the handle into position 1 (see chapter on
"Adjusting the seat back and handle positions")
2. Buckle the car seat belt.
3. Feed the lap belt of the car through the guides
at the front of the car seat (located below the
car shell). (fig. 2A)
4. Then, slip the diagonal belt around the rear of
the car seat and feed it through the guide
located at the back of the car seat (fig 2B).
The diagonal belt must be positioned below the
articulation of the car seat handle (fig 2C).
5. Pull firmly on the diagonal belt to take up any
slack.
IMPORTANT: Each time the position of the car seat
back is changed, the seat belt must be tightened.
The seat belt must be positioned below the
articulation of the car seat handle. During travel,
the handle must always be in the transport
position.
WARNING: The seat belt must never be twisted.
How to adjust the safety harness (Figs 3+4)
harness must be adjusted to fit the child’s size. The
harness straps must go through the slots nearest to
the baby’s shoulders.
• The RC/RCS car seat has two adjustable harness
heights which enables it to adapt to the child as
he grows. To change the heights of the harness,
please refer to fig 4A.
• Position the 3 point safety harness correctly and
attach the buckle
• To open and close the buckle (fig. 3)
To close: assemble the 2 parts of the buckle and
insert them into the fastener until they are secured
(“click” heard).
To open: push on the red button.
• Adjusting the harness:
It is recommended that you adjust the length of the
harness to fit the size of the child BEFORE installing
the car seat in the car.
GB
22
Page 24
To tighten the straps at shoulder height: Pull on the
end of the TMS strap until it is tightened (fig. 5 / A).
To untighten the safety harness: With one hand
push down on the TMS regulator located at the
front of the car seat, in the direction of the
arrow (fig. 5 / B), and with the other hand,
simultaneously pull the shoulder straps toward you.
IMPORTANT: The safety harness should be tightened
firmly but must not restrict the child’s movements.
Check that the straps are not twisted. The harness
buckle should be situated as low as possible on the
child’s abdomen and never on his stomach. This is
to ensure adequate pelvic protection.
Installing the child in the RC/RCS car
seat
WARNING: NEVER leave a child unattended in his
car seat.
IMPORTANT: It is recommended that you adjust the
length of the harness to the child’s size BEFORE
installing the car seat in the car. The harness straps
must go through the slots nearest to the child’s
shoulders.
• Put the handle in position 1 (fig. 6).
• Release the harness buckle by pressing on the red
GB
button.
• Sit your child comfortably in the car seat with his
back firmly against the rear of the seat.
• Adjust the position of the seat back (see chapter
"adjusting the seat back and handle positions").
• Assemble the 2 parts of the buckle together and
insert them into the fastener.
• Adjust the harness to fit your baby (see chapter
on "adjusting the harness ").
Head Hugger (Sun shade)
The RC/RCS car seat includes a 3 function Head
Hugger – it reduces the car seat size, it cushions the
baby’s head, it protects from the sun.
The Head Hugger provides extra comfort when baby
is lying down and lateral support for baby’s head ad
upper body. As he grows, remove the padding and
use it as a simple head hugger and sun shade
(unfolds and closes with the zip).
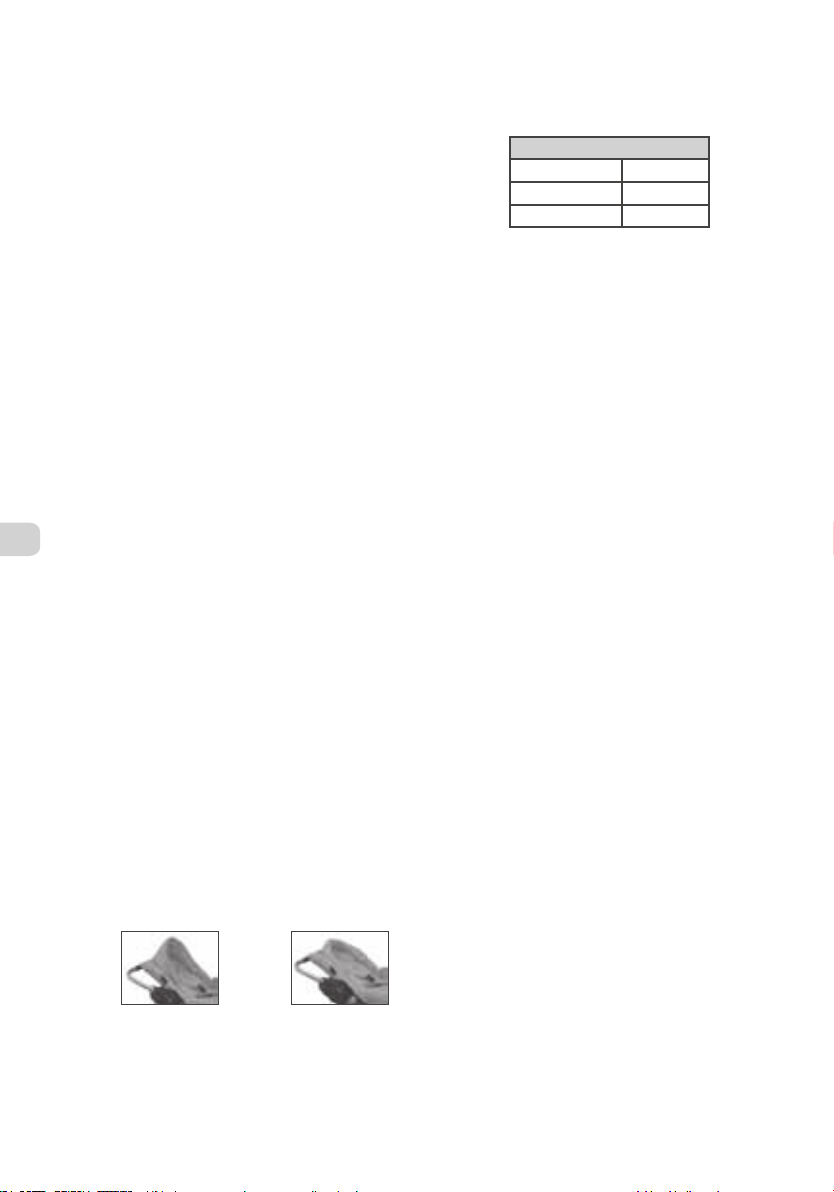
Unfolded
as sun
shade
Folded
back
Adjusting the seat back and handle
positions
• To adjust the seat back (fig 7):
Lift up the lever situated at the rear of the car
seat and choose the position best suited to your
baby’s weight:
3 POSITIONS
Lying - 5 kg
Reclining - 5 kg
Traditional 5 <10 kg
NB: When not used in the car, all three positions
are possible up to 9kgs.
• Handle positions (fig. 6):
There are 3 handle positions.
To change position, release the handle position by
pushing down simultaneously on the buttons at
either side (fig. 6A) while at the same time
moving the handle forwards or backwards, to the
required position.
1. Position when used in the car
2. Position when carrying baby
3. Position when used as a rocking chair / on the
stroller
IMPORTANT: Remain vigilant at all times! - If you
carry baby in his RC/RCS car seat outside of the
vehicle, check that the handle is enclenched firmly
in position 2.
Optional accessories
Attaching the Hood
• To attach the hood: Insert the plastic attachments
located either side of the hood into the side
sockets of the RC/RCS car seat (figs a1+a2).
• Line up the openings, indicated by the blue
arrows (located at the rear of the hood), with
the guides for the car seat belts (figs a3 + a4).
• Adjust the hood as required in order to protect
your baby from sun.
• To remove the hood: push down on the plastic
attachments at either side of the hood, at the
same time pulling the end of the hood upwards.
Attaching the Apron
Before attaching the apron, attach the hood (see
previous chapter).
• Cover the RC/RCS car seat with the apron
(fig.a5).
• Match the velcro straps and the press studs of the
apron and the hood with those on the car seat
cover. Press them to close them.
• To remove the apron, detach the Velcro and undo
the press studs.
23
Page 25
Do not use the car seat apron in the vehicle. In the
case of an emergency, this could impede the access
to the child.
Attaching the sun screen
• Position the wider part (shown at the top of photo
b1) onto the hood and attach the velcros.
• Pull the sun screen taut towards the lower part of
the seat and attach the velcros (photo b2).
The sun screen has been designed to reduce the
sun's glare and limit the effect of UV rays.
The use of this sun screen does not exempt you
from the need to protect your child.
We recommend the systematic use of a sun cream.
Regularly check that the child has enough to drink.
Care and washing instructions (Fig.8)
• The car seat and the safety harness can be wiped
clean with warm, soapy water.
• Remove the seat cover to wash it. Slip the straps
and the buckle through the slots in the cover. To
replace it, make sure that the safety harness and
the edges of the cover are positioned correctly
(fig 8 A).
• Wash the seat cover in warm, soapy water (do not
machine wash). Rinse thoroughly and leave open
to dry. Do not iron. Do not use abrasive cleaning
products.
Important
safety information
• The RC/RCS car seat can be installed (rear facing)
on the front passenger seat (except in vehicles
equipped with a front airbag) or (rear facing) on
a rear passenger seat.
• Only use the RC/RCS car seat with a 3 point car
seat belt.
• Never leave your child unattended.
• Attach your child in all circumstances, always use
the restraining system
• The original equipment of the RC/RCS car seat
Group 0 must not be altered.
• For your child’s safety we formally advise against
installing the car seat on a supermarket trolley.
• In the event of an accident, the car seat must no
longer be used and must obligatorily be changed.
It may have incurred damaged not visible to the
eye.
• When the car seat is used in the front of the
vehicle (on the passenger seat), the seat on
which it is installed should be as far back as
possible, the seat back should be upright and the
headrest as low as possible.
• Never use the car seat on any seat equipped with
an “airbag”.
• The car seat must always be held in place by the
car seat belt, even when the car seat is not being
used. Unattached, it represents a danger for the
vehicle’s occupants, were the vehicle to brake
suddenly.
• The car seat belt and the car seat safety harness
must not be twisted.
• When parked in the sun, the temperature rises
inside the vehicle. We recommend that you cover
the car seat (e.g. with a piece of fabric) so that
it will be more comfortable for baby when
placing him into the car seat. This will also
prevent metal parts from heating up and perhaps
burning him. It will also prevent the textiles
parts from discolouring.
• Never hold the child on your lap when in the
vehicle. Unattached, in the case of an accident,
he will be transformed into a “flying object ".
Never travel with your own 3 point set belt
attached around you and the child.
• Respect the Highway Code. Make sure that all of
passengers in the vehicle are wearing their seat
belts correctly attached.
• Do not place heavy objects on the rear window
shelf. Make sure that any luggage inside the
vehicle is placed in such a way that, in the event
of an accident, it does not injure either the baby
or any other occupants.
• Place the car seat in the vehicle with caution,
making sure that it is correctly installed. Always
check the wear and tear of the vehicle seat belt
and the car seat safety harness. Always also
check that no part of the car seat, its safety
harness, or the car seat belt is caught beneath
the passenger seat or in the car door.
• Never use the car seat without its original seat
cover. Use only the seat cover provided by the
manufacturer.
• When the car seat is combined on the stroller,
NEVER lift the stroller by the car seat but ONLY
by the stroller chassis.
• Keep this instruction manual close to hand at all
times for future reference.
• Do not remove the sewn on labels on the car seat
so as to avoid damaging the fabric.
• When used as a baby bouncer, this car seat does
not replace a crib or a cot. When the child needs
to sleep, he should be place in an appropriate
crib or cot.
• Do not use this car seat if any parts are broken or
are missing.
• Do not use any accessories or replacement parts
other than those approved by the manufacturer.
GB
24
Page 26
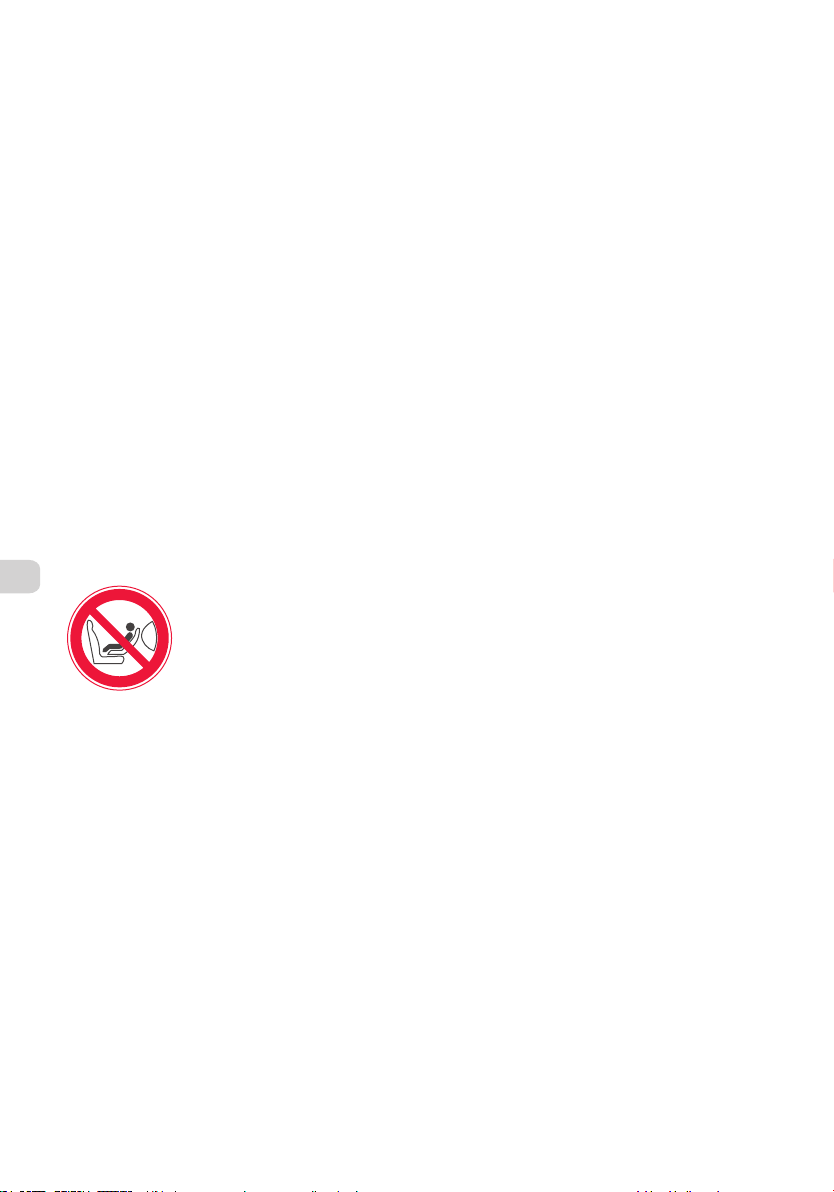
Általános biztonsági utasítások
ELSŐ HASZNÁLAT ELŐTT KÉRJÜK FIGYELMESEN OLVASSA
EL ÉS TARTSA BE A HASZNÁLATI UTASÍTÁSBAN LEÍRTAKAT
AZÉRT,HOGY A GYERMEKE NAGYOBB BIZTONSÁGBAN
LEGYEN. A HELYTELEN BEKÖTÉS GYERMEKE
BIZTONSÁGÁT VESZÉLYEZTETHETI. FONTOS ! ŐRÍZZE
MEG MERT A KÉSŐBBIEK FOLYAMÁN SZÜKSÉGE LEHET RÁ
FIGYELMEZTETÉS
• Soha ne hagyja a gyermeket felügyelet nélkül.
• Az RC/RCS Groupe 0 autósülést az ECE R-44/04 európai
direktíva előírásainak megfelelően készítették. Egy
gyermek helyezhető el benne, újszülött kortól –
maximum 10 kg-ig (kb.9 hónapos korig) használható.
• Az RC/RCS Groupe 0 autósülés "univerzális"
kategóriába tartozik, ezáltal a legtöbb autóban
használható. Az autósülés korrekt használata abban
az esetben lehetséges, ha az autó kézikönyvében
leírták, hogy a megfelelő súlycsoportú "univerzális"
autósülés alkalmazása lehetséges.
• Az RC/RCS Groupe 0 autósülést a menetiránynak háttal
kell beszerelni. Kizárólag olyan ülésen használja,
amelyet automata vagy statikus 3 pontos rögzítésű
biztonsági övvel láttak el és amelyet jóváhagytak az
ECE –16 vagy egy vele összehasonlítható előírásokat
tartalmazó szabvány szerint.
• A biztonsági övek mérete autónként változó, ezért kérjük
az autósülés megvásárlása előtt ellenőrízze le, hogy az
HU
Ön autójában a mi autóshordozónk használható-e.
B
A
R
G
I
A
• MINDÍG kösse be a biztonsági övet akkor is, ha a
hordozót a gépkocsin kívül használja.
• A gyártó csak abban az esetben garantálja az ülés
biztonságát, ha azt az első tulajdonos használja.
Nyomatékosan javasoljuk, hogy ne alkalmazzon
használt terméket.
• Ne használja ezt az autóshordozót pihenőszékként abban
az esetben ha a gyermek már egyedül feltud ülni.
• 5 évnél idősebb autóshordozó használatát nem
javsoljuk. A termék minősége, többek között a
műanyag öregedése miatt is gyengülhet (például a
napfény hatására) amit szabad szemmel nem vehet
észre.
• Veszélyes lehet ha az autósülést/hordozót magas
tárgyra helyezi : pl. asztalra, ….
• Soha ne vegye ki a gyermeket a gépjármű mozgása
közben az autóshordozóból.
• Mindíg használja a biztonsági övet.
• Ebben az autósülésben hosszabb ideig tartó alvás nem
ajánlott, még abban az esetben sem ha azt
pihenőszékként használják.
• Az RC/RCS autósüléseket ne
használja az autó első ülésén
abban az esetben ha az
légzsákkal (airbag) felszerelt.,
mert ez veszélyes lehet a
gyermekre.
A RC és a RCS autósülés behelyezése
az autóba
FIGYELMEZTETÉS : Soha ne használja a gépjármű első
ülésén abban az esetben ha az autó légzsákkal
felszerelt. Ez súlyos sérülésekhez akár halálesethez is
vezethet. Természetesen a gépjármű hátsó ülésén
probléma mentesen használhatja a hordozót abban az
esetben is, ha az első ülés légzsákkal elvan látva.
Mindíg menetiránnyal háttal használja a hordozót
akár az első, akár a gépjármű hátsó ülésén helyezi el.
1. A hordozó fogót helyezze az 1-es pozícióba (lsd : a
háttámla és a hordozókar (fogó) beállítás fejezet).
2. Csatolja be az autó biztonsági övét.
3. Vezesse az autó biztonsági övének csípő részét a
nyílásokon keresztül (az övnek az ülés alatt kell
áthaladnia) (2A ábra).
4. Az autó biztonsági övének vállrészét vezesse
keresztül a nyíláson, ami a hordozó hátulján
található (2B ábra). Az autó biztonsági övének a
hordozó fogójának kapcsolódása alatt kell
elhaladnia (2C ábra).
5. Húzza meg a gépjármű övének vállrészét azért,
hogy az szoros legyen.
FONTOS : Amikor hordozó háttámlájának pozicióján
változtatott akkor a biztonsági övet újra feszítse
meg. Az autó biztonsági övének a hordozó fogójának
kapcsolódása alatt kell elhaladnia (2C ábra). Az
utazások során a hordozó fogójának mindíg a
"szállítás gépjárműben" pozícióban kell lennie.
FIGYELEM : Vigyázzon arra, hogy a biztonsági öv
soha ne legyen megcsavarodva.
(1 + 2 ábra)
Az autósülés biztonsági övének
beállítása
Mindíg a gyermek méretének megfelelően állítsa be
a biztonsági övet. A vállöveknek azokon az állító
nyílásokon kell áthaladniuk, melyek legközelebb
vannak a kisbaba válla fölött.
• Az RC/RCS hordozóban a biztonsági öv 2 pozícióba
állítható, így a gyemeke fejlődésével egyidejűleg
állíthat az öv méretén is. Az övek magasságának
állításához nézze meg a 4A ábrát.
• Helyezze jól vissza mind a 3 biztonsági szíjat,
majd csatolja össze őket.Ellenőrízze le, hogy az
övek ismét könnyedén kezelhetők és nem
csavarodtak meg.
• Az övek ki és bekapcsolása (3 ábra)
Bekapcsolás : Illesze össze vállövek csatjait, majd
nyomja bele a nagy csatba a « klikk » hang hallatáig.
Kicsatolás : nyomja meg a nagy csaton lévő piros
gombot.
• Biztonságiöv beállítása :
Ajánljuk, hogy a biztonsági övet még az autóba
helyezés ELŐTT állítsa be a gyerek méretének
megfelelően.
(3 + 4 ábra)
25
Page 27
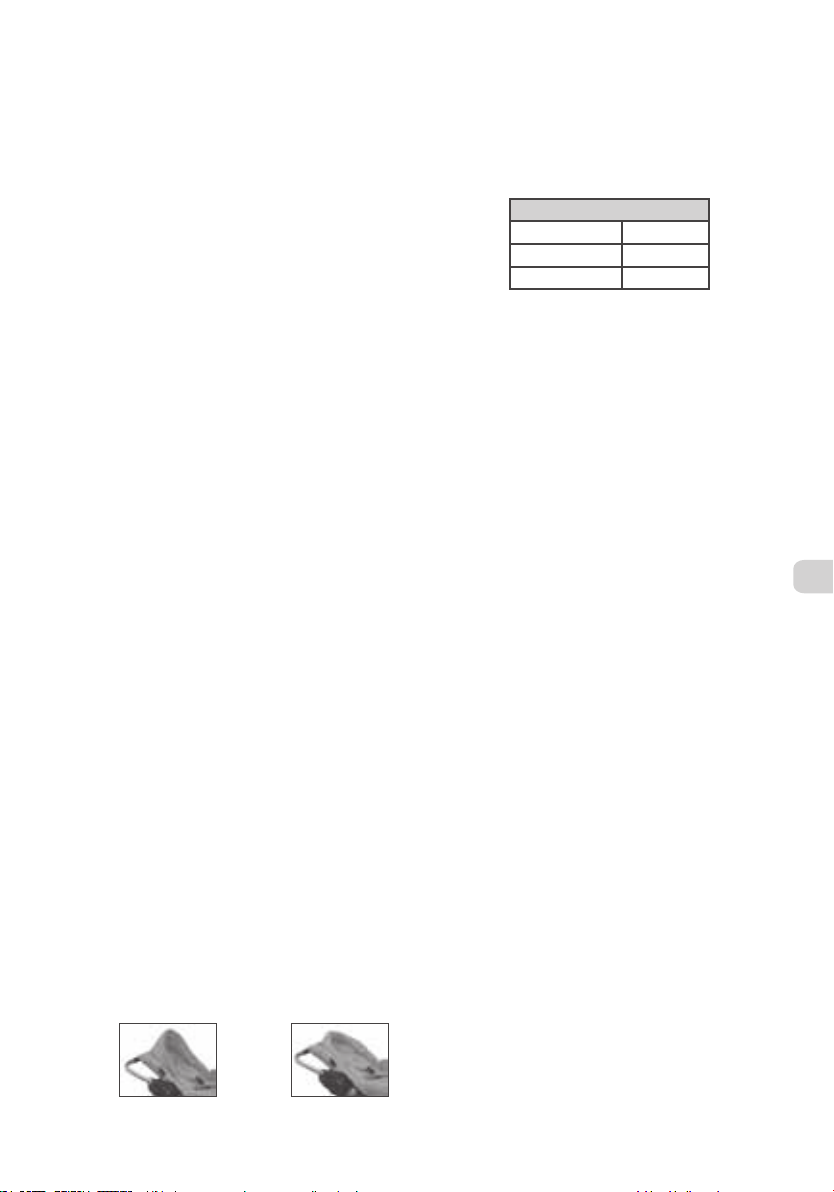
A vállövek megfeszítése : A TMS övet (szíjjat) húzza
meg addíg míg azok feszesek nem lesznek. (5/A. ábra).
A vállövek meglazítása : Az egyik kezével nyomja
be a TMS szabályozót a nyíl irányába (5/B ábra),
ezzel egyidőben a másik kezével húzza a vállrészt
saját maga fele.
FONTOS : Az öveknek feszesnek kell lennie, de nem
szabad zavarnia a gyermeket a mozgásban. Minél
szorosabban fogják körbe az övek a gyermeket,
annál nagyobb a védelem. Az övek és a gyermek
között nem maradhat egy újjnyinál nagyobb hely.
Az öveknek nem szabad megcsavarodniuk.
A medence biztonsága érdekében az öv csatját a
lehető legalacsonyabb helyre kell helyezni a
gyermeken, soha nem lehet a gyermek hasánál.
A gyermek elhelyezése az RC/RCS
autóshordozóba
FIGYELMEZTETÉS : SOHA ne hagyja felnőtt
felügyelet nélkül a gyermeket az autósülésben, még
egy pillanatra sem !
FONTOS : Ajánljuk, hogy a biztonsági övet még az
autóba helyezés ELŐTT állítsa be a gyerek
méretének megfelelően. A vállöveknek azokon az
állító nyílásokon kell áthaladniuk, melyek
legközelebb vannak a kisbaba válla fölött.
•
A hordozó fogót helyezze az 1-es pozícióba (6.ábra)
• Nyissa ki az övcsatot, nyomja meg a nagy csaton
lévő piros gombot. Győződjön meg arról, hogy
nincs-e játék vagy más kemény tárgy az ülésben.
• Helyezze óvatosan a gyermeket az ülésbe úgy,
hogy a baba kényelmesen érezze magát benne és
a háta is jól kilegyen támasztva.
• Válassza ki és állítsa be a háttámlát a kívánt pozicióba
(lásd a Háttámla és a horozókar beállítása részt)
• Fogja össze a vállrész zárónyelveit és helyezze
bele a zárba. Kapcsolja be a gyermekülés övét.
• Állítsa be a biztonságiöv méretét a gyermek
méretének megfelelően (lásd a Biztonságiöv
beállítása részt)
A 3 az 1-ben Fejszűkítő (napfényvédő)
Az RC/RCS autósülés fejszűkítőjének három
funkciós szerepe van : fejkitámasztó, napfényvédő,
űlésszűkítő (kipárnázott rész).
A fejszűkítő nagyon kényelmes a babának fekvő
helyzetben is, mert megtámasztja a baba fejét. Amikor
a baba már nagyobb és az űlésszűkítőre már nincs
szüksége vegye ki és használja csak a fejszűkítőt, úgy
mint egy napfényvédőt (használatához cipzározza ki,
ha már nincs rá szüksége cipzározza vissza).
Szétcipzározva
napfényvédő
Visszacipzározva
fejszűkítő
A háttámla és a hordozókar (fogó)
beállítása
• A háttámla beállítása (7. ábra) :
Az autósülés hátulján található emelőkart
(kallantyút) emelje felfele és állítsa be a gyermek
súlyának megfelelő poziciót.
3 POZÍCIÓ
Fektetett - 5 kg
Döntött - 5 kg
Hagyományos 5 <10 kg
Megjegyzés : A hordozó gépjárműn kívűli használata
esetén mind a Három pozíció esetében a hordozó
9 kg-ig használható.
• A hordozókar (fogó) pozíciói (6. ábra) :
A hordozókar 3 pozícióba állítható.
A pozíciók változtatásához elegendő a hordozókar
két oldalán lévő gombot (6/A ábra) lefelenyomni
miközben a hordozókart előre vagy háttra
mozgathatja a kívánt pozícióig.
1. Szállítás gépjárműben pozíció
2. Hordozóként használva (szállítás kézben)
3. Ringatható pozíció / babakocsira helyezett pozíció
FIGYELMEZTETÉS : Legyen óvatos ! Ha a babát az
RC/RCS autóshordozóban (gépjárműn kívűl, vagyis
kézben) szeretné szállítani akkor a hordozókarnak
(fogónak) mindíg a 2. pozícióban kell lennie.
Opcióként megvásárolható
A kupolás tető felszerelése
• A kupolás tető rögzítése : A műanyag részeket
helyezze bele az RC/RCS hordozó két oldalán
lévő nyílásba (a1 és a2 ábra).
• Illessze a nyílásoknak megfelelő részhez a kupolás
tetőt, segítségére lesznek a kék nyilak (a kupolás
tető hátoldalán) az átlós autós biztonságiöv
vezetővel szembe (a3 és a4.ábra).
• Igazítsa meg a kupolás tetőt azért, hogy
megvédje a gyermekét a napsütéstől.
• A kupolástető eltávolítása : nyomja meg a műanyag
részt miközben a kupolás tetőt felfele húzza.
A lázsák felszerelése
Első lépésként szerelje fel a kupolás tetőt (lásd a
fenti kupolás tető felszerelése részt).
• Helyezze a lábzsákot az RC/RCS hordozóra (a5.ábra).
• A hordozón és a lábzsákon lévő tépőzáras és a
patentos részeket illessze össze. A rögzítéséhez
nyomja össze őket.
• A lábzsák eltávolítása : húzza szét a tépőzáras
részeket és patentokat patentolja szét, majd
vegye le a lábzsákot.
HU
26
Page 28
Gépjárműben ne használja a lábzsákot, mert
veszélyhezet esetén megnehezíti a gyermek
kivételét az RC/RCS hordozóból.
Napfényvédőháló felszerelése
• A szélesebb felsőrészt (az b1 számú ábra felső
része) helyezze a kupolástetőre és a tépőzáras
részeket illessze egymásba.
• Feszítse ki a hálót teljesen az ülés alsó részéhez,
majd a tépőzáras résszel rögzítse. (b2.ábra)
A napfényvédőhálót azért készítették, hogy csökkentse
a Nap vakító hatását és korlátozza az általa
kibocsátott UV sugárzást. Gyermekének biztonsága
érdekében használjon más napvédő szereket. A
gyermeke érdekében javasoljuk, hogy rendszeresen
használjon napfényvédő krémet, sűrűn itassa meg a
babát vízzel azért, hogy elkerülje a kiszáradást.
Karbantartás (8.ábra)
• Az ülés és a biztonsági öv langyos szappanos vízzel
tisztítható.
• A huzatot távolítsa el a hordozóról majd az
övvédőket és a szűkítőt. Az öveket és az
állítószalagot húzza át a nyíláson. A
visszahelyezése után győződjön meg arról, hogy a
huzat és a biztonsági öv a helyén van-e. (8/A ábra)
• A huzat kézel, langyos, szappanos vízzel mosható.
(Mosógépben nem mosható). Bő vízzel öblítse ki
és hagyja megszáradni. Vasalni nem szabad.
HU
Savas-maró anyagot nem szabad használni. A
csatot nedves ruhával tisztítsa.
FONTOS
• A RC/RCS autósülések mind az első (kivétel a légzsákkal
ellátott autó), mind pedig a hátsó ülésen menetiránnyal
háttal használhatóak.
• Az RC/RCS autóshordozó kizárólag 3 pontos biztonsági
övvel használható.
• Soha ne hagyja a gyermeket felnőtt felügyelet nélkül
még egy pillanatra sem.
• Minden esetben használja (csatolja be) a biztonsági
övet. Ha autóban utazik akkor minden esetben az
autósülésben szállítsa a gyermeket, kapcsolja be a
biztonsági övet még rövid távolságokra is, hiszen
baleset bármikor bekövetkezhet. Rendszeresen
ellenőrízze le, hogy a gyermek utazás és játék közben
nem kapcsolta-e ki a biztonsági övet.
• Az RC/RCS Groupe 0 autósülésen semmiféle változtatást
ne eszközöljön.
• A gyermek biztonsága érdekében bevásárló kocsikra ne
helyezze az autósülést. Ne tegye a hordozót magas
felületre például : asztalra, konyhalapra, ágyra stb.
mert leeshet.
• Ha az autósülést az első ülésen használja akkor az autó
ülését tolja hátra amennyire csak tudja, a háttámláját
állítsa függőleges helyzetbe (legegyenesebb állásba) és
az állítható fejtámlát pedig a legalacsonyabb állásba.
• Bármilyen baleset után egy közvetlenül nem látható
sérülés miatt az autósülés használata veszélyessé
válhat, emiatt minden esetben kikell cserélni.
• Soha ne használja az autósülést légzsákkal ellátott
ülésen.
• A gyermekülést mindíg rögzíteni kell a gépjárműben, még
akkor is ha nincs benne a gyermek. A nem rögzített ülés
vészfékezés esetén a többi utas sérülését okozhatja.
• Az autó biztonságiöve és a hordozó biztonsági öve soha
ne legyen megcsavarodva. Vigyázzon arra, hogy az öv
nehogy becsípődjön az ajtóba, vagy ne dörzsölődjön
éles felületnek. Ha az övön bevágást vagy erős
kirojtozódást észlel, cserélje ki.
• Ha a gépjármű hosszú ideig a napon maradt, ellenőrízze le
a gyermekülést, mielőtt a gyermeket beletenné. Napon
parkoláskor az autó belseje nagyon felmelegedhet.
Takarja le az autóshordozót egy takaróval, máskülönben a
hordozóban lévő fémrészek nagyon felmelegedhetnek és
esetleg megégethetik a baba bőrét. Ha a hordozót sokáig
hagyják a napon akkor a textil részei hamar kifakulhatnak
vagy elszineződhetnek.
• Soha ne utazzon a gépjárműben úgy, hogy a gyermek az
ölében van. A baleset során felszabaduló hatalmas erő
hatására a gyermeket nem lesz képes a kezében
megtartani (kirepülhet a gyermek a kocsiból). A gyermeket
ne szállítsa magával együtt rögzítve az autóban.
• Tartsa be a közlekedési szabályokat. Minden utas
biztonsági övvel legyen bekapcsolva, mert ellenkező
esetben veszélyt jelentenek a gyermek ülésben ülő
babára és a gépjármű utasaira.
• Ne helyezzen nehéz tárgyakat az autó hátsó részére.
Győződjön meg róla, hogy minden olyan csomagot és
egyéb tárgyat megfelelően rögzített-e, mely baleset
esetén sérülést okozhat az utasokban és a gyermekben.
A biztonság érdekében a csomagtartóban tároljon
minden nem rögzített tárgyat.
• Figyeljen arra, hogy az autóshordózó megfelelően
legyen beszerelve a gépjárműbe. Mindíg ellenőrízze le a
biztonsági övek állapotát (a gépjárműét és a hordozóét
is). Figyeljen arra, hogy a hordozó vagy az ülés ne
szoruljanak be sehova (pl. az autó ajtójába, ülések
közé, stb). A babakocsi és a gyermekülés beállításakor
mindíg győződjön meg arról, hogy a baba teste ne érjen
a váz mozgó részeihez.
• Soha ne használja a hordozót az eredeti huzata nélkül.
Használja mindíg az eredeti gyári huzatot, mert az
hozzájárul az ülés biztonságosságához.
• Amikor a hordozó a babakocsihoz lett rögzítve onnantól
kezdve KIZÁRÓLAG a babakocsi vázánál emelhető meg.
Hosszú út esetén gyakran tartson pihenőt. A gyerekek
gyorsan elfáradnak.
• Ezt a használati utasítást mindíg tartsa kéznél.,
gondosan tegye el egy mindíg könnyen hozzáférhető
helyre. A nem helyes használatból eredő minden
felelősséget és kárt a gyártócég automatikusan elhárít.
• A huzaton lévő emblémákat és a bevarrt etikettet ne
távolítsa el, mert az megrongálhatja a huzatot.
• Ezt a hordozót pihenőszékként is használhatja, viszont
ezzel nem helyettesítheti a mózeskosarat vagy a
kiságyat. Amikor a gyermek aludni szeretne akkor
helyezze őt a mózeskosárba vagy a kiságyba.
• Ne használja ezt az autósülés/hordozót abban az
esetben ha valamelyik része eltört vagy hiányzik.
• Kizárólag a gyártó által javasolt kiegészítőket illetve
csere alkatrészeket használja.
27
Page 29
Condizioni generali di Sicurezza
PRIMA DI UTILIZZARE IL SEGGIOLINO AUTO PER LA
PRIMA VOLTA, LEGGERE ATTENTAMENTE LE
ISTRUZIONI NELLA LORO TOTALITA’ SEGUENDO
ACCURATAMENTE LE INDICAZIONI RIPORTATE AL
FINE DI GARANTIRE LA MASSIMA SICUREZZA PER IL
VOSTRO BAMBINO. IMPORTANTE ! DA CONSERVARE
PER FUTURE CONSULTAZIONI
AVVERTENZE
• Non lasciare mai il bambino senza sorveglianza.
• Il seggiolino-auto RC/RCS Gruppo O è conforme
alle norme europee ECE R-44/04. Il suo utilizzo è
per bambini dalla nascita ai 10kg (circa 9 mesi).
• Il seggiolino-auto RC/RCS Gruppo 0 è classificato
nella categoria "universale". Può adattarsi alla
maggior parte dei sedili delle vetture. E’ possibile
che si possa adattare correttamente su un’auto
se il costruttore specifica, nel suo manuale
dell’auto, che puo’ avere i dispositivi di sicurezza
per bambini "universali" per questo gruppo d’età.
• Il seggiolino-auto RC/RCS deve sempre
obbligatoriamente installato di schiena alla
strada. Deve essere fissato sull’auto
ESCLUSIVAMENTE da una cintura di sicurezza a
tre punti (con o senza avvolgibile) omologato
secondo regolamento ECE-16 o equivalente.
• La lunghezza delle cinture di sicurezza varia a
secondo del modello della vettura. Vi
consigliamo di verificare che il nostro seggiolino
sia adatto per il vostro veicolo.
B
R
I
A
utilizzate il seggiolino-auto RC/RCS fuori dal veicolo.
• Il produttore può garantire la sicurezza del
dispositivo unicamente se il seggiolino non ha
cambiato di proprietà. Inoltre, vi consigliamo di
non acquistare seggiolino auto d’occasione.
• E’ pericoloso posizionare il seggiolino auto su una
superfice alta : per esempio un tavolo.
• Non utilizzare il seggiolino-auto più di 5 anni. Il
suo utilizzo intenso può provocare dell’usura.
• Non utilizzare più il seggiolino auto come
sdraietta quando il bambino sta seduto da solo.
• Non far scendere il bambino dal seggiolino, per
nessun motivo, quando l’auto è in movimento.
• Utilizzare sempre il sistema di sicurezza.
• Questo seggiolino auto, nel caso venga utilizzato
come sdraietta, non è consigliato per lunghi
periodi di sonno.
• Il seggiolino-auto RC/RCS non
A
G
deve mai essere installato sul
sedile anteriore dotato di
airbag, puo’ essere molto
pericoloso.
• Agganciare SEMPRE il bambino
con le cinture, anche se
Installazione del seggiolino-auto RC/RCS
nell’auto
AVVERTENZE : Non installare mai il seggiolino auto
RC/RCS sul sedile anteriore dell’auto se dotato di
airbag frontale. Può provocare il decesso o gravi
lesioni. In questo caso, potete installarlo sul sedile
posteriore. Sul sedile anteriore, come su quello
posteriore, posizionate sempre il seggiolino auto di
schiena alla strada.
1. Mettere il maniglione nella posizione 1 (vedi
capitolo : "regolazione dello schienale e posizioni
del maniglione").
2. Allacciare la cintura di sicurezza dell’auto.
3. Passare la cintura ventrale nelle guide anteriori
(situate sotto la scocca) (fig. 2A).
4. In seguito, far scivolare la cintura diagonale
intorno allo schienale poi nelle guide situate
dietro il seggiolino auto (fig. 2B). La cintura di
sicurezza deve passare sotto l’articolazione del
maniglione (fig.2C).
5. Stringere bene la cintura diagonale.
IMPORTANTE : ad ogni variazione d’inclinazione
dello schienale, vogliate tendere di nuovo la
cintura di sicurezza. La cintura di sicurezza deve
passare sotto l’articolazione del maniglione.
Durante il viaggio, il maniglione deve seere sempre
messo nella posizione trasporto.
AVVERTENZE : La cintura non deve mai essere
attorcigliata.
(Fig 1+2)
Regolazione delle cinture (Fig 3+4)
Le cinture devono essere regolate secondo la taglia
del bambino. Le bretelle delle cinture devono
passare attraverso i passanti più vicini alle spalle
del bambino.
• Il seggiolino auto RC/RCS è dotato di due altezze
di regolazione delle cinture, permettendo così
d’adattarsi nella crescita del bambino. Per
cambiare l’altezza delle cinghie, vedere le
indicazioni figura 4A.
• Posizionare bene la cinghia a 3 punti ed
agganciarla.
• Chiusura ed apertura del gancio di fissaggio (fig. 3)
Per chiudere : unire i 2 ganci ed inserirli nel blocco
fino allo scatto «clic »
Per aprirer : spingere il bottone rosso.
•
Regolazione delle cinture :
Si raccomanda di regolare la lunghezza della
cintura alla taglia del bambino PRIMA d’installare il
seggiolino auto nell’auto.
IT
28
Page 30
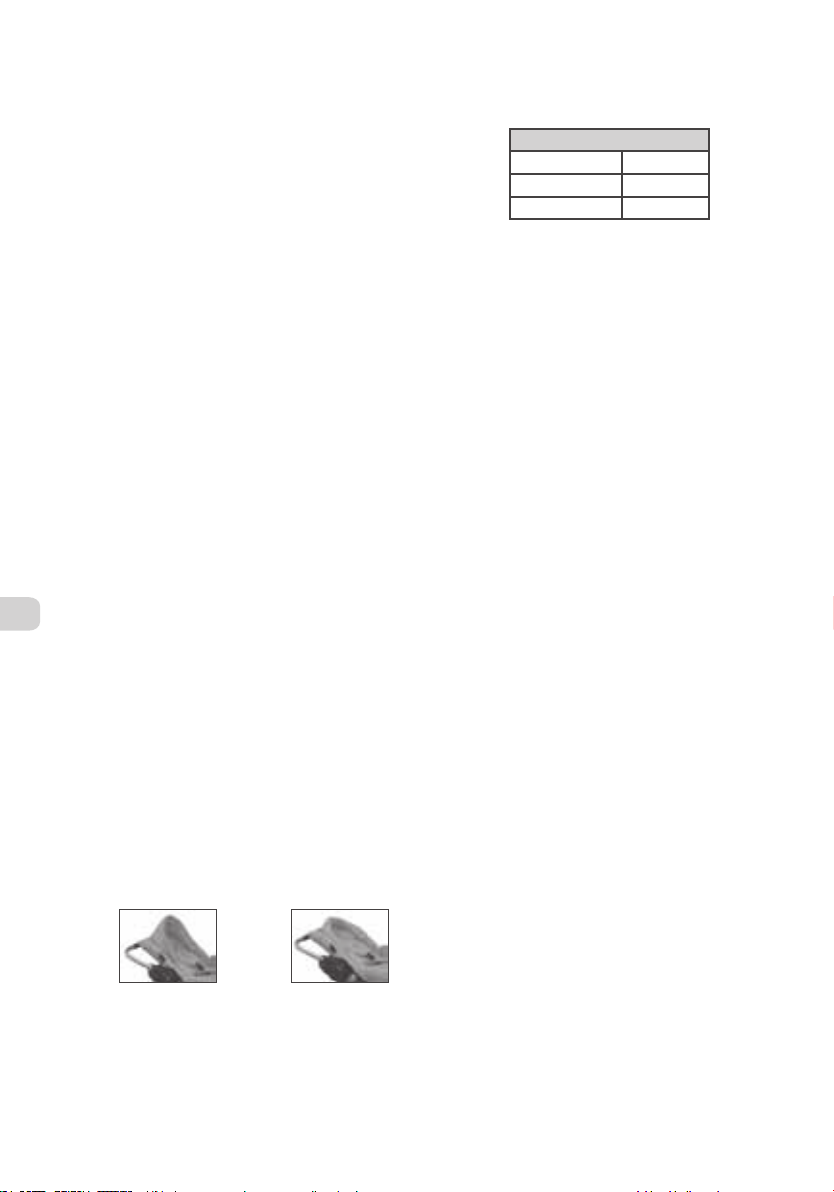
Per stringere le cinghie a livello spalle : tirare
l’estremità della cinghia di tensione TMS fino alla
sua regolazione (fig. 5 / A).
Per allargare le cinture : Con una mano, spingere il
bottone di regolazione TMS situato sul davanti del
seggiolino, nella direzione della freccia (fig. 5 / B),
e con l’altra, tirare simultaneamente le cinture
verso di voi.
IMPORTANTE : le cinture devono essere ben tese ma
non devono infastidire il bambino nei movimenti.
Verificare che le bretelle non siano attorcigliate. Il
gancio delle cinture deve essere situato più basso
possibile dell’addome e in nessun caso sullo stomaco
alfine d’assicurare una protezione adeguata del bacino.
Installazione del bambino nel
seggiolino-auto RC/RCS
AVVERTENZE : Non lasciare MAI un bambino solo
nel seggiolino senza sorveglianza.
IMPORTANTE : Si raccomanda di regolare la
lunghezza della cintura alla taglia del bambino
PRIMA d’installare il seggiolino auto nella vettura.
Le bretelle delle cinture devono passare per i
passanti più vicini alle spalle del bambino.
• Mettere il maniglione nella posizione 1. (fig.6)
• Sganciare le cinture spingendo il tasto rosso.
• Installare confortevolmente il bambino nel
seggiolino, la schiena ben appoggiata allo schienale.
• Regolare la posizione dello schienale (vedi
IT
capitolo " regolazione dello schienale e posizione
del maniglione ").
• Unire i 2 ganci delle cinture spalle e inserirle nel
fermaglio.
• Regolare le cinture (vedi capitolo: regolazione cinture).
Proteggi testa (proteggi sole)
Il seggiolino auto RC/RCS è dotato di un proteggi
testa che assicura una funzione di riduttore seduta,
di proteggi testa e proteggi sole.
Il proteggi testa permette di regolare la posizione
allungata e offre un supporto laterale a livello testa
del bambino. In seguito, togliere l’imbottitura ed
utilizzarlo come proteggisole (per piegarlo o
chiuderlo utilizzare la chiusura lampo).
Spiegare
contro
il sole
Ripiegare
Regolazione dello schienale e posizioni
del maniglione
• Regolazione dello schienale (fig. 7) :
Spingere il pulsante situato sul retro dello
schienale e scegliere la posizione migliore per il
vostro bambino in funzione del suo peso :
3 POSIZIONI
Sdraiato - 5 kg
Inclinato - 5 kg
standard 5 <10 kg
NB. : Fuori dal veicolo, le tre posizioni sono possibili
fino ai 9 Kg.
• Posizioni del maniglione (fig. 6) :
Esse sono 3.
Per cambiare posizione, sbloccare il maniglione
spingendo simultaneamente sui bottoni laterali
(fig.6A), intanto che posizionate il maniglione in
avanti o indietro , fino all’inclinazione desiderata.
1. Posizione trasporto in auto
2. Posizione Porta-bébé
3. Posizione Dondolo / trasporto passeggino
IMPORTANTE : Attenzione ! Se trasportate il bambino
nel suo seggiolino auto RC/RCS fuori dal veicolo,
verificare che il maniglione sia ben bloccato in
posizione 2.
Accessori in opzione
Installazione della Cappotta
• Per fissare la cappotta : introdurre le parti in
plastica situate alle estremità della cappotta
negli agganci laterali del seggiolino auto RC/RCS
(fig. a1 et a2).
•
Ben sistemare i passanti indicati dalle frecce blu
(situate sulla schiena della cappotta) di fronte
delle guide per la cintura diagonale (fig.a3 et a4).
• Regolare la cappotta come desiderate al fine di
proteggere dal sole il vostro bambino.
• Per togliere la cappotta : spingere sulla parte in
plastica tirando l’estremità della cappotta verso
l’alto.
Installazione della copertina
Prima di tutto, installare la cappotta (vedi capitolo
sopra).
• Coprire il seggiolino auto auto RC/RCS con la
copertina (fig. a5).
• Corrispondere il velcro e gli automatici della
copertina e della cappotta con quelli situati sulla
fodera del seggiolino auto. Spingere per fermarli.
• Per togliere la copertina : sganciare gli
eutomatici ed il velcro.
Non utilizzare la copertina del seggiolino auto RC/RCS
in auto, in caso d’urgenza intralcerebbe l’accesso al
bambino.
29
Page 31

Installazione del proteggi sole
• Posizionare la parte più grande (quella in alto
sulla foto b1) sulla cappotta e agganciare il
velcro.
• Tendere il proteggi sole fino alla parte basse del
seggiolino ed agganciare il velcro (foto b2).
Il proteggi sole è concepito per diminuire
il’abbagliamento del sole e limitare l’effetto dei
raggi UV. Il suo utilizzo non vi dispensa dal
proteggere il vostro bambino. Inoltre, vi
raccomandiamo d’utilizzare sistematicamente una
crema protezione solare e di controllare
l’idratazione del vostro bambino.
Manutenzione (Fig.8)
•
Il seggiolino e le cinture possono essere pulite
con acqua sapone tiepida.
• Smontare la fodera per lavarla. Fate passare le
bretelle ed il gancio attraverso i passanti della
fodera. Per rimetterla, assicurarsi che
l’estremità del rivestimento siano correttamente
posizionate (fig. 8 A).
• Lavare in acqua tiepida e sapone la fodera del
seggiolino (non in lavatrice). Risciaquare
abbondantemente e lasciare asciugare. Non
stirare. Non utilizzare prodotti abrasivi.
IMPORTANTE
• Il seggiolino auto RC/RCS può essere installato sul
seggiolino anteriore (schiena alla strada) (salvo
veicoli dotati di airbag frontale) o posteriore del
veicolo (schiena alla strada).
• Utilizzare il seggiolino auto unicamente con le
cinture a 3 punti.
• Non lasciare mai il bambino senza sorveglianza.
• Allacciare il bambino in tutte le circostanze,
sempre utilizzando il sistema di sicurezza.
• La dotazione originale del seggiolino auto RC/RCS
Gruppo O non deve essere modificata.
•
Per la sicurezza del vostro bambino, vi
consigliamo formalmente d’installare il
seggiolino auto su un carrello del supermercato.
• In caso d’incidente d’auto, il seggiolino auto deve
essere obbligatoriamente cambiato. In quanto
può presentare dei difetti ad occhio nudo non
visibili.
• Quando il seggiolino auto è utilizzato sul sedile
anteriore del veicolo (al posto del passeggero), il
sedile sul quale è posizionato deve essere
indietreggiato al massimo, lo schienale diritto ed
il suo appoggiatesta abbassato.
• Non utilizzare il seggiolino auto in spazi dotati di
"airbag".
• Il seggiolino auto deve sempre essere bloccato
dalla cintura di sicurezza, anche quando
ques’ultimo non è utilizzato. Non agganciarlo,
rappresenta un pericolo per gli occupanti del
veicolo in caso di brusca frenata.
• La cintura di sicurezza e quelle del seggiolino non
devono essere attorcigliate.
•
Lo stazionamento al sole comporta una
temperatura elevata all’interno del veicolo. Vi
raccomandiamo di coprire il seggiolino auto con
un tessuto (o altro) per renderlo più confortevole
per il bambino nel momento della sua
installazione. Questo eviterà in ugual modo ai
pezzi metallici di scottare e rischiare di bruciare
il bambino, oltre ad uno scolorimento del
tessuto.
• Non tenere mai il bambino sulle ginocchia in
auto. Non allacciato, in caso di choc, si
trasformerebbe in un proiettile, Non viaggiare
mai con il bambino allacciato con voi con la
cintura a 3 punti.
•
Rispettare il codice della strada. Assicurarsi che
tutti i passeggeri del veicolo siano allacciati.
•
Non appoggiare oggetti pesanti sul sedile
posteriore. Tenere i bagagli nel baule, così in
caso d’incidente, non vengano a ferire il
bambino ed i passeggeri.
• Posizionare il seggiolino auto con precauzione
rispettando la sua corretta installazione.
Verificare sempre l’usura della cintura e delle
cinghie del seggiolino. Controllare che le parti
del seggiolino e delle cinture di sicurezza del
veicolo non siano incastrate sotto il seggiolino o
nella portiera dell’auto.
• Non utilizzare mai il seggiolino senza la fodera
originale. Utilizzare unicamente la fodera fornita
dal produttore.
• Una volta installato il seggiolino sul passeggino,
non sollevarlo MAI prendendolo dal seggiolino
auto ma UNICAMENTE per il telaio.
• Questo seggiolino auto utilizzato come sdraietta
non rimpiazza una culla o un letto. Quando il
bambino deve dormire, va posizionato nella sua
culla o nel lettino.
• Non utilizzare questo seggiolino auto se dei
componenti sono rotti o mancanti.
• Non utilizzare degli accessori o pezzi di ricambio
diversi da quelli approvati dal produttore.
• Conservare a portata di mano le istruzioni per
ulteriori consultazioni.
• Non togliere le etichette cucite sul seggiolino
auto alfine di evitare danneggiamenti al tessuto.
IT
30
Page 32
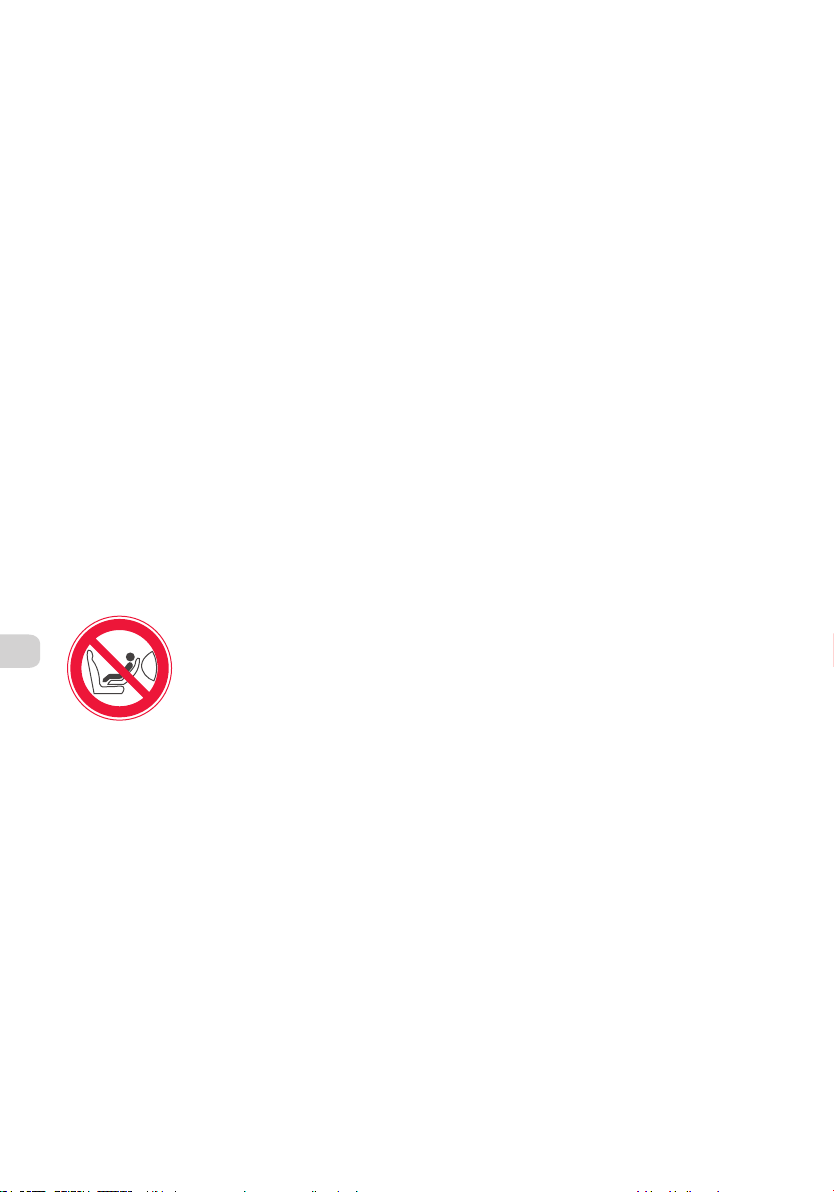
Bendri saugos nurodymai
PRIEŠ PIRMĄ KARTĄ NAUDODAMIESI AUTOMOBILINE
VAIKO KĖDUTE ĮDĖMIAI PERSKAITYKITE VISĄ
INSTRUKCIJĄ IR, KAD BŪTŲ UŽTIKRINTAS JŪSŲ
VAIKO SAUGUMAS, LAIKYKITĖS JOJE PATEIKTŲ
NURODYMŲ. DĖMESIO! INSTRUKCIJOS NEIŠMESKITE;
JOS GALI PRIREIKTI ATEITYJE.
ĮSPĖJIMAI
• Niekada nepalikite vaiko be priežiūros
• Automobilinė vaiko kėdutė RC/RCS (0 grupė) atitinka
Europos saugos standartą ECE R-44/04. Ji skirta
vaikams nuo gimimo iki maždaug 9 mėnesių (10 kg).
• Automobilinė vaiko kėdutė RC/RCS (0 grupė)
priskiriama universalių kėdučių kategorijai. Ją
galima montuoti prie daugelio automobilio
sėdynių. Kėdutę galima teisingai įmontuoti tuose
automobiliuose, kurių gamintojas automobilio
instrukcijoje nurodo, jog automobilyje galima
naudoti universalią šios amžiaus grupės vaikų
saugos kėdutę.
• RC/RCS kėdutę galima montuoti tik atsuktą į
automobilio galą. Ją galima tvirtinti TIK tuose
automobiliuose, kurie turi 3 tvirtinimo taškų
saugos diržus (stacionarius arba automatinius),
atitinkančius ECE-16 taisykles arba kitus
atitinkamus standartus.
• Sėdynių diržai įvairiuose automobiliuose būna
nevienodo ilgio. Rekomenduojame patikrinti, ar
ši kėdutė tinka jūsų automobiliui.
B
A
R
I
A
LT
saugos diržus, net kai RC/RCS kėdutę naudojate
ne automobilyje.
• Gamintojas garantuoja automobilinės kėdutės
saugumą tik pirmajam savininkui. Todėl nepatariame
naudoti jau naudotos automobilinės kėdutės.
• Nebenaudokite šios automobilinės kėdutės kaip
lopšio pusiau gulimoje padėtyje, jei vaikas jau
gali atsisėsti savarankiškai.
• Nenaudokite automobilinės kėdutės ilgiau kaip 5
metus. Nuo intensyvaus naudojimo ji gali
susidėvėti, tačiau to galite nepastebėti.
• Pavojinga dėti šią automobilinė kėdutę aukštai,
pavyzdžiui, ant stalo.
• Jokiais atvejais neišimkite vaiko iš automobilinės
kėdutės, kai automobilis važiuoja.
• Visada naudokite kėdutės saugos diržus.
• Šios kėdutės pusiau gulima padėtis nėra skirta
ilgam miegui.
• RC/RCS kėdutės niekada
G
negalima montuoti ant
priekinių sėdynių, priešais
kurias yra oro pagalvė, nes
tai gali būti pavojinga.
• VISADA užsekite kėdutės
RC/RCS automobilinės kėdutės
montavimas automobilyje
ĮSPĖJIMAS. Niekada netvirtinkite automobilinės
vaiko saugos kėdutės RC/RCS prie priekinės keleivio
sėdynės, jei priešais ją yra oro pagalvė. Avarijos
atveju išsiskleidusi pagalvė gali vaiką sunkiai
sužeisti ir sukelti pavojų gyvybei. Jei automobilio
priekyje yra oro pagalvė, vaiko kėdutę tvirtinkite
prie galinės sėdynės. Tiek montuojant prie priekinės
keleivio sėdynės, tiek prie galinės, vaiko kėdutė
visada turi būti atsukta atgal.
1.
Pasukite rankeną į 1 padėtį (žr. skyrių „Kėdutės
atlošo ir rankenos padėčių reguliavimas“).
2. Užsekite automobilio saugos diržą.
3.
Įkiškite automobilio saugos diržo juosmens dalį
už kreipiklių, esančių kėdutės priekyje (po
kėdutės uždangalu) (2A pav.).
4.
Įstrižine automobilio saugos diržo dalimi
apjuoskite užpakalinę vaiko kėdutės dalį ir
įkiškite ją už kreipiklio, esančio ant kėdutės
atlošo (2B pav.). Įstrižinis diržas turi praeiti po
kėdutės rankenos tvirtinimo vieta (2C pav.).
5.
Gerai įtempkite įstrižinį diržą, kad jis nebūtų
laisvas.
DĖMESIO: kiekvieną kartą pakeitus automobilio
sėdynės atlošo padėtį, saugos diržą reikia įtempti.
Automobilio saugos diržas turi praeiti po kėdutės
rankenos tvirtinimo vieta. Automobiliui važiuojant
kėdutės rankena visada turi būti vežimo padėtyje.
ĮSPĖJIMAS. Diržas niekada negali būti susisukęs.
(1 ir 2 pav.)
Kaip sureguliuoti kėdutės saugos diržus
(3 ir 4 pav.)
Kėdutės saugos diržus reikia sureguliuoti pagal
vaiko ūgį. Saugos diržai turi būti prakišti per angas,
esančias arčiausiai vaiko pečių.
• Automobilinė vaiko kėdutė RC/RCS turi dvi
saugos diržo aukščio padėtis, todėl vaikui
paaugus diržą galima perkelti į aukštesnę
padėtį. Kaip pakeisti diržo padėtį, žr. pav. 4A.
• Teisingai uždėkite 3 tvirtinimo taškų saugos diržą
ir užsekite sagtį.
• Kaip atsegti ir užsegti sagtį (3 pav.)
Užsegimas : suglauskite 2 viršutines sagties dalis ir
įkiškite jas į apatinę dalį – kai sagtis užsisegs, turi
pasigirsti spragtelėjimas.
Atsegimas : paspauskite raudoną sagties mygtuką.
• Diržų reguliavimas
Diržų ilgį rekomenduojama sureguliuoti pagal vaiko
ūgį dar PRIEŠ montuojant kėdutę automobilyje.
31
Page 33
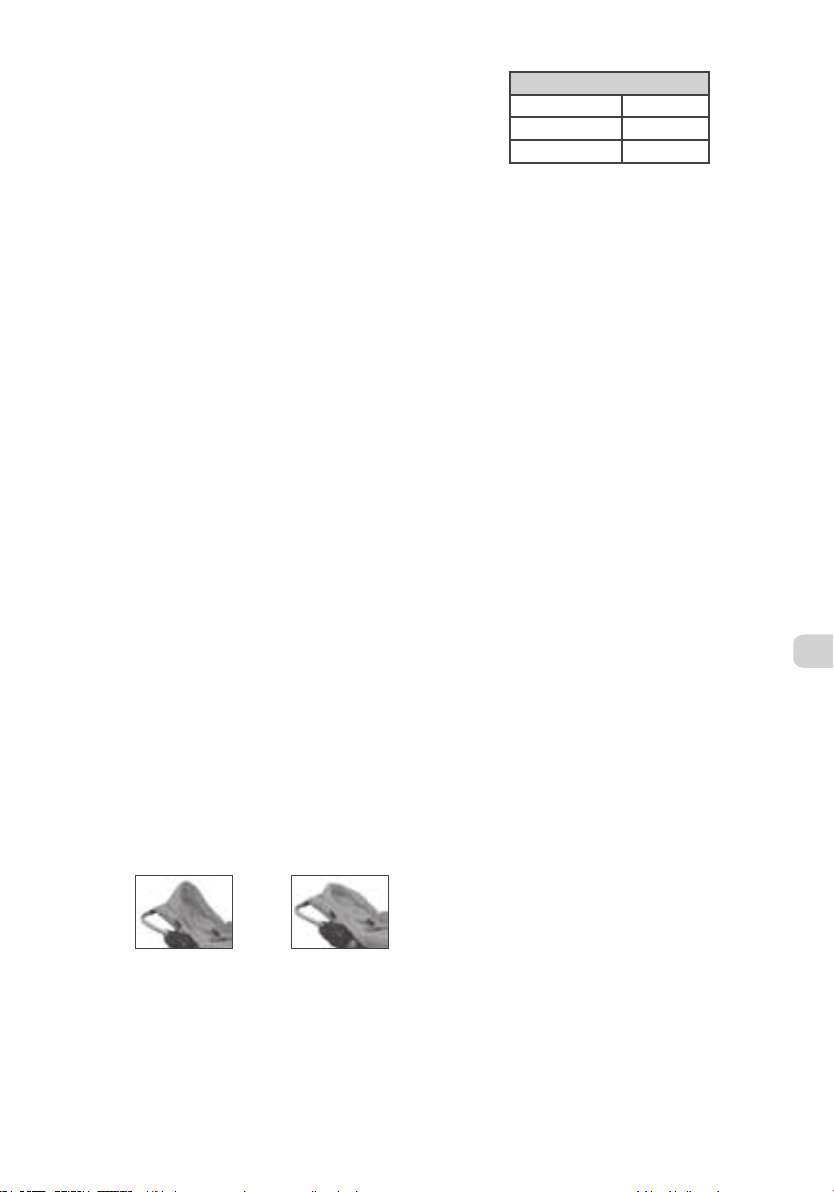
Diržų įtempimas pečių aukštyje : Patraukite už TMS
juostelės galo, kol jis įsitemps (5A pav.).
Diržų atlaisvinimas : Viena ranka spauskite TMS
reguliatorių, esantį kėdutės priekyje, rodyklės
kryptimi (5 B pav.), o kita ranka tuo pačiu metu
traukite pečių diržus.
DĖMESIO: saugos diržai turi gerai priglusti prie
vaiko, tačiau turi nevaržyti jo judesių. Patikrinkite,
ar diržai nesusisukę. Saugos diržo sagtis turi būti
kuo žemiau ant vaiko pilvo, tačiau ne ties
skrandžiu. Tai apsaugos jo pilvo organus.
Vaiko pasodinimas į RC/RCS
automobilinę kėdutę
ĮSPĖJIMAS: NIEKADA nepalikite vaiko
automobilinėje kėdutėje be priežiūros.
DĖMESIO: rekomenduojama pagal vaiko ūgį
sureguliuoti diržų ilgį dar PRIEŠ montuojant kėdutę
automobilyje. Saugos diržai turi būti prakišti per
angas, esančias arčiausiai vaiko pečių.
• Pasukite rankeną į 1 padėtį (6 pav.)
• Paspausdami raudoną sagties mygtuką atsekite
diržo sagtį
• Pasodinkite vaiką patogiai ant automobilinės
kėdutės, kad jo nugara tvirtai remtųsi į atlošą.
• Nustatykite kėdutės atlošo padėtį (žr. skyrių
„Kėdutės atlošo ir rankenos padėties reguliavimas“)
• Suglauskite 2 viršutines sagties dalis ir įkiškite jas
į apatinę dalį.
• Pagal vaiko ūgį sureguliuokite diržų ilgį (žr. skyrių
„Diržų reguliavimas“)
Pagalvėlė (saulės skydelis)
RC/RCS automobilinė kėdutė turi 3 funkcijas
atliekančią pagalvėlę, kuri sumažina automobilinę
kėdutę, suteikia atramą kūdikio galvai ir saugo nuo
saulės.
Ši pagalvėlė suteikia daugiau patogumo gulinčiam
vaikui, taip pat iš šono prilaiko galvą ir viršutinę
kūno dalį. Kūdikiui paaugus, išimkite kamšalą ir
naudokite ją kaip snapelį arba saulės skydelį
(išsilanksto ir užsisega užtrauktuku).
Neišlankstytas
naudojamas
kaip saulės
skydelis
Atlenktas
atgal
Kėdutės atlošo ir rankenos padėties
reguliavimas
• Sėdynės atlošo sureguliavimas (7 pav.):
Pakelkite galinėje kėdutės dalyje esančią svirtelę ir
pasirinkite geriausiai vaiko svoriui tinkamą padėtį:
3 PADĖTYS
Gulėjimo - 5 kg
Pusiau sėdimoji - 5 kg
Sėdimoji 5 <10 kg
Dėmesio: kai kėdutė naudojama ne automobilyje,
iki 9 kg svorio vaikui tinka visos trys padėtys.
• Rankenos padėtys (6 pav.) :
Rankena turi 3 padėtis.
Norėdami pakeisti rankenos padėtį, pirmiausia
atlaisvinkite rankeną iš karto abiejose pusėse
spausdami mygtukus (6A pav.) ir tuo pačiu metu
traukdami rankeną į priekį arba atgal į reikiamą
padėtį.
1. Padėtis kėdutę naudojant automobilyje.
2. Padėtis kūdikiui nešti.
3. Padėtis kūdikiui supti arba dėti į vežimėlį.
DĖMESIO: Būkite atsargūs visą laiką! Jei RC/RCS
automobilinę kėdutę naudojate ne automobilyje, o
nešate joje vaiką, rankena visada turi būti tvirtai
užfiksuota 2 padėtyje.
Pasirenkami priedai
Gaubto uždėjimas
• Norėdami uždėti gaubtą, abiejose jo pusėse
esančius plastikinius fiksatorius įkiškite į RC/RCS
automobilinės kėdutės šonuose esančius lizdus
(a1 ir a2 pav.).
• Mėlynomis rodyklėmis pažymėtos angos (esančios
užpakalinėje gaubto pusėje) turi būti prie
automobilio saugos diržų kreipiklių (a3 ir a4
pav.).
• Sureguliuokite gaubtą taip, kad vaikas būtų
apsaugotas nuo saulės.
• Norėdami nuimti gaubtą, paspauskite abiejose jo
pusėse esančius plastikinius fiksatorius, ir tuo
pačiu metu kelkite gaubto galą į viršų.
Kojų užkloto uždėjimas
Prieš uždedant kojų užklotą, reikia uždėti gaubtą
(žr. ankstesnį skyrelį).
• Uždenkite RC/RCS automobilinę kėdutę kojų
užklotu (a5 pav.).
• Kojų užklotą reikia uždėti taip, kad ant jo ir ant
gaubto esančios lipnios juostelės ir spaustukai
būtų priešais juosteles ir spaustukus, esančius
ant kėdutės dangos. Suspauskite juos ir
sukabinkite.
• Norėdami užklotą nuimti, atsekite lipnias
juosteles ir spaustukus.
LT
32
Page 34
Kojų užkloto nenaudokite automobilyje. Nelaimingo
atsitikimo atveju jis apsunkintų priėjimą prie vaiko.
Saulės skydelio uždėjimas
• Uždėkite platesnę skydelio dalį (žr. b1 pav.
viršuje) ant gaubto ir pritvirtinkite lipniomis
juostelėmis.
• Patraukite saulės skydelio įtempiklį link apatinės
kėdutės dalies ir pritvirtinkite lipniomis
juostelėmis (b2 pav.).
Saulės skydelis skirtas apsaugoti nuo ryškios saulės
šviesos ir sumažinti UV spindulių poveikį. Naudojant
saulės skydelį, vaiką reikia apsaugoti nuo saulės ir
kitomis priemonėmis. Rekomenduojama nuolat
naudoti kremą nuo saulės. Nepamirškite pakankamai
dažnai duoti vaikui atsigerti.
Priežiūros ir plovimo nurodymai (8 pav.)
•
Kėdutę ir saugos diržus galima valyti šiltu
muiluotu vandeniu.
• Kėdutės dangą galima nuimti ir išskalbti. Per
dangoje esančias angas ištraukite diržus ir sagtį.
Uždėdami dangą žiūrėkite, kad teisingose vietose
būtų diržai ir dangos kraštai (8A pav.).
• Kėdutės dangą išskalbkite šiltu muiluotu vandeniu
(neskalbkite mašina). Gerai išskalaukite ir palikite
išskleistą, kol išdžius. Nelyginkite. Nenaudokite
abrazyvinių valiklių.
SVARBŪS
LT
• RC/RCS kėdutę galima montuoti ant priekinės
sėdynės (atsuktą į galą), jei prieš ją nėra oro
pagalvės, arba ant galinės sėdynės (taip pat
atsuktą į galą).
• RC/RCS automobilinę kėdutę galima tvirtinti tik 3
taškų saugos diržu.
•
Niekada nepalikite vaiko be priežiūros.
•
Vaikas visada turi būti prisegtas saugos diržais.
•
Perdaryti originalios RC/RCS automobilinės
kėdutės (0 grupės) negalima jokiais atvejais.
•
Vaiko saugumo sumetimais oficialiai
nerekomenduojama dėti automobilinės kėdutės
ant parduotuvės vežimėlio.
•
Po avarijos vaiko kėdutės daugiau naudoti
negalima, ją būtina pakeisti nauja kėdute.
Avarijos metu kėdutė gali būti sugadinta, nors tai
gali būti ir nepastebima.
• Kai vaiko kėdutė montuojama ant priekinės
keleivio sėdynės, sėdynė turi būti kuo daugiau
atitraukta atgal, pastatyta kuo statesniu kampu,
o galvos atrama nuleista kuo žemiau.
saugos nurodymai
• Vaiko kėdutės niekada negalima tvirtinti prie
jokios sėdynės, kur yra oro pagalvė.
• Vaiko kėdutė visada turi būti pritvirtinta saugos
diržais, net kai ji ir nenaudojama. Jei kėdutė
nepritvirtinta, staigiai stabdant ji gali sukelti
pavojų automobilio keleiviams.
• Automobilio ir kėdutės saugos diržai turi būti
nesusisukę.
•
Jei automobilis stovi saulės apšviečiamoje
vietoje, temperatūra jo viduje gali labai pakilti.
Kad vaikui būtų patogiau, rekomenduojame į
automobilinę kėdutę pakloti patiesalą. Tai
apsaugos ir metalines detales nuo įkaitimo,
kurios įkaitusios gali nudeginti vaiką. Kėdutę
uždengus, jos tekstilinės dalys ne taip greitai
nubluks.
• Važiuodami automobiliu niekada nelaikykite vaiko
ant kelių. Nelaimingo atsitikimo atveju
neprisegtas vaikas iškristų iš automobilio.
Niekada nevažiuokite automobiliu prisisegę kartu
su vaiku vienu 3 tvirtinimo taškų saugos diržu.
• Laikykitės Kelių eismo taisyklių. Visi asmenys
automobilyje turi būti teisingai užsisegę saugos
diržus.
• Ant galinės automobilio palangės nelaikykite
sunkių daiktų. Bet koks bagažas automobilio
viduje turi būti laikomas taip, kad avarijos atveju
nesužeistų nei kūdikio, nei kito keleivio.
• Automobilinę kėdutę įtvirtinkite rūpestingai ir
patikrinkite, ar ji gerai laikosi. Nuolat tikrinkite,
ar nesusidėvėję automobilio ir vaiko kėdutės
saugos diržai. Taip pat patikrinkite, kad jokia
kėdutės dalis, jos saugos diržai, arba automobilio
saugos diržai nebūtų prispausti keleivio sėdynės
arba automobilio durų.
•
Niekada nenaudokite vaiko kėdutės be originalios
dangos. Naudokite tik gamintojo pateiktą dangą.
• Kai automobilinė kėdutė naudojama vežimėlyje,
NIEKADA nekelkite vežimėlio paėmę už kėdutės,
vežimėlį kelkite TIK už jo rėmo.
•
Laikykite šią instrukciją po ranka ir išsaugokite ją
ateičiai.
•
Nenuplėškite nuo dangos prisiūtų etikečių, nes
galite sugadinti audinį.
• Nors kėdutėje vaiką galima supti, ji nepakeičia
lovelės. Kai vaikas nori miego, jį reikia migdyti
tam skirtoje lovelėje.
• Nenaudokite šios automobilinės kėdutės, jei kuri
nors jos dalis yra sulūžusi arba pamesta.
• Nenaudokite jokių atsarginių dalių ar priedų,
kurie nėra aprobuoti gamintojo.
33
Page 35
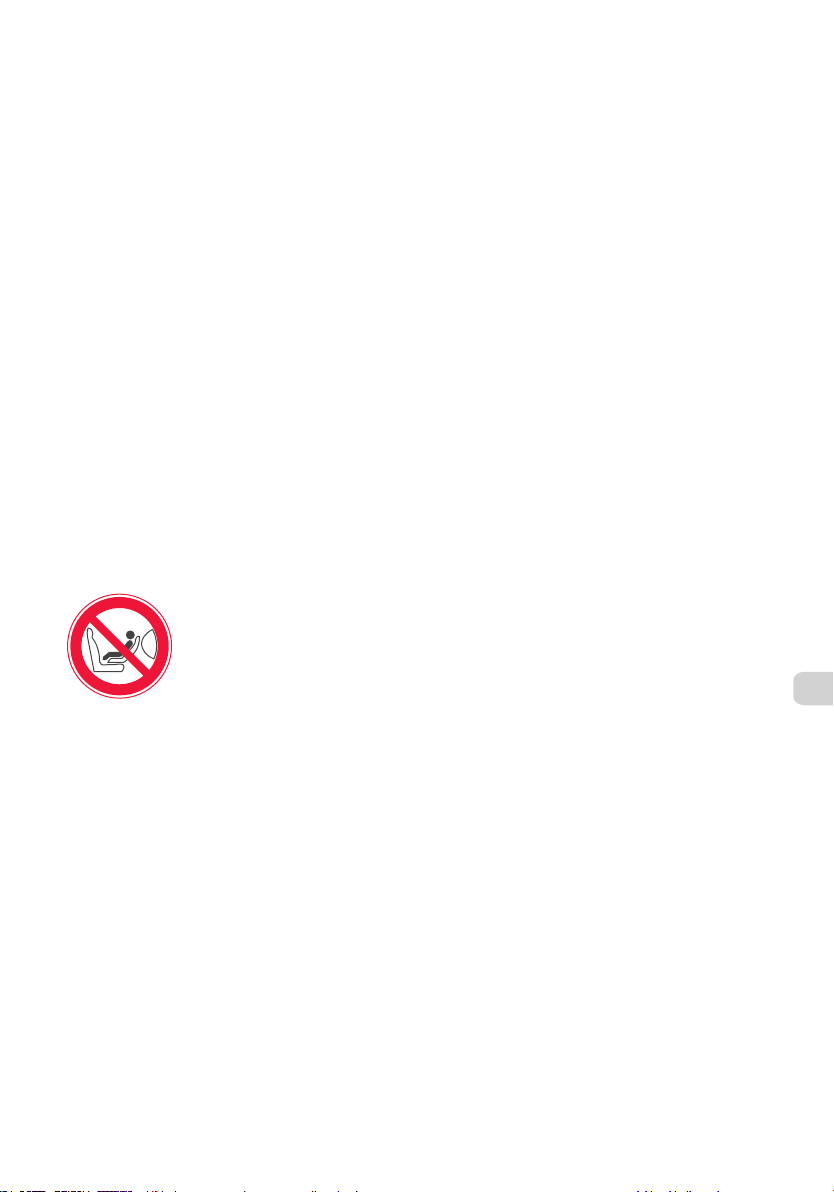
Vispārējie drošības norādījumi
PIRMS AUTOKRĒSLIŅA PIRMĀS LIETOŠANAS
UZMANĪGI IZLASIET VISUS NORĀDĪJUMUS, RŪPĪGI
IEVĒROJOT DOTOS IETEIKUMUS, LAI GARANTĒTU
BĒRNAM MAKSIMĀLU DROŠĪBU.
SVARĪGI! SAGLABĀJIET VĒLĀKAI LIETOŠANAI.
BRĪDINĀJUMS
• Nekad neatstājiet bērnu bez uzraudzības
• RC/RCS autokrēsliņš, O grupa, atbilst Eiropas
drošības standartam ECE R-44/04. Tas ir
piemērots bērniem no dzimšanas līdz laikam,
kamēr svars ir mazāks par 10 kg (apm. 9 mēneši).
• RC/RCS autokrēsliņš, O grupa, ir klasificēts
"universālajā" bērniem paredzēto drošības ierīču
kategorijā. To var novietot uz pasažieru sēdekļa
vairumā automobiļu. Ierīci var uzstādīt automobilī
pareizi, ja automobiļa ražotāja rokasgrāmatā ir
norādīts, ka tajā var lietot šī vecuma bērniem
paredzētās "universālās" drošības ierīces.
• RC/RCS autokrēsliņš vienmēr jāizmanto uz
aizmuguri vērstā pozīcijā. Automobilī tas jāfiksē
EKSKLUZĪVI ar 3 punktu drošības jostu (statisko
vai automātisko), kas atbilst standartam ECE-16
vai tā ekvivalentam.
• Dažādos automobiļos drošības jostas garums var
būt atšķirīgs. Ieteicams pārbaudīt, vai
autokrēsliņš ir izmantojams automobilī.
B
A
R
I
A
drošības stiprinājums pat tad, ja RC/RCS
autokrēsliņu neizmanto automobilī.
•
Ražotājs var garantēt autokrēsliņa drošību tikai
tā pirmajam īpašniekam. Stingri ieteicams
neizmantot iepriekš lietotu autokrēsliņu.
•
Neturpiniet lietot šo autokrēsliņu slīpa šūpuļa
funkcijā, ja bērns var sēdēt patstāvīgi bez
palīdzības.
• Autokrēsliņu drīkst lietot ne vairāk kā 5 gadus.
Intensīva lietošana var izraisīt funkciju
pasliktināšanos, kas ne vienmēr ir pamanāma.
• ŠŠo autokrēsliņu bīstami novietot uz paaugstinātas
virsmas: piemēram, uz galda…
• Bērnu nedrīkst izņemt no autokrēsliņa automobiļa
braukšanas laikā.
• Vienmēr lietojiet drošības stiprinājuma sistēmu
• Šis autokrēsliņš, ja to lieto par kā slīpu šūpuli,
nav piemērots ilgiem gulēšanas periodiem.
• RC/RCS autokrēsliņu nedrīkst
G
uzstādīt priekšējā sēdeklī, kas
ir aprīkots ar priekšējo
drošības gaisa spilvenu, jo tas
var būt ļoti bīstami.
•
Bērnam VIENMĒR jāapliek
RC/RCS autokrēsliņa uzstādīšana
automobilī
UZMANĪBU! RC/RCS autokrēsliņu nedrīkst uzstādīt
priekšējā pasažiera sēdeklī, ja automobilis ir
aprīkots ar priekšējo drošības gaisa spilvenu. Tas
varētu izraisīt bērna nāvi vai smagus miesas
bojājumus. Ja ir priekšējais drošības gaisa spilvens,
autokrēsliņš lietojams automobiļa aizmugurē. Gan
automobiļa priekšpusē, gan mugurpusē autokrēsliņš
vienmēr lietojams uz aizmuguri vērstā pozīcijā.
1.
Novietojiet rokturi pozīcijā 1 (sk. punktā
"Atzveltnes un roktura pozīcijas noregulēšana")
2. Aizsprādzējiet autokrēsliņa jostu.
3.
Izvelciet automobiļa vidukļa drošības jostu cauri
vadotnēm autokrēsliņa priekšpusē (atrodas zem
korpusa). (ilustr. 2A)
4. Pēc tam aplieciet diagonālo jostu ap autokrēsliņa
aizmuguri un izvelciet to caur vadotni, kas
atrodas autokrēsliņa mugurpusē (ilustr. 2B).
Diagonālajai drošības jostai jāatrodas zem
autokrēsliņa roktura šarnīra ass (ilustr. 2C).
5.
Stingri savelciet diagonālo drošības jostu, lai
nebūtu vaļīgu posmu.
SVARĪGI! Katru reizi, kad tiek mainīta autokrēsliņa
atzveltnes pozīcija, drošības josta jāsavelk.
Drošības jostai jāatrodas zem autokrēsliņa roktura
šarnīra ass. Brauciena laikā rokturim vienmēr jābūt
nešanas pozīcijā.
UZMANĪBU! Drošības josta nedrīkst būt sagriezusies.
(ilustrācija 1+2)
Drošības stiprinājuma lenču
noregulēšana
Drošības stiprinājums jānoregulē atbilstīgi bērna
lielumam. Drošības jostas lencēm jāiet caur
atverēm, kas atrodas vistuvāk bērna pleciem.
• RC/RCS autokrēsliņam ir divi regulējami lenču
augstumi, kas ļauj to pielāgot, bērnam augot. Lai
mainītu lenču augstumu, sk. ilustrācijā 4A.
•
Pareizi pozicionējiet 3 punktu drošības
stiprinājuma lences un iestipriniet sprādzē.
• Sprādzes atvēršana un aizvēršana (ilustr. 3)
Lai aizvērtu: salieciet sprādzes 2 daļas un ielieciet
tās fiksatorā, līdz tās fiksējas (dzirdams klikšķis).
Lai atvērtu: nospiediet sarkano pogu.
• Drošības stiprinājuma lenšu noregulēšana
Ieteicams noregulēt stiprinājuma lenšu garumu
atbilstīgi bērna lielumam PIRMS autokrēsliņa
uzstādīšanas automobilī.
Lai savilktu lences plecu augstumā: velciet TMS
lences galu, kamēr tā ir savilkta. (ilustr. 5/A)
(ilustrācija 3+4)
LV
34
Page 36
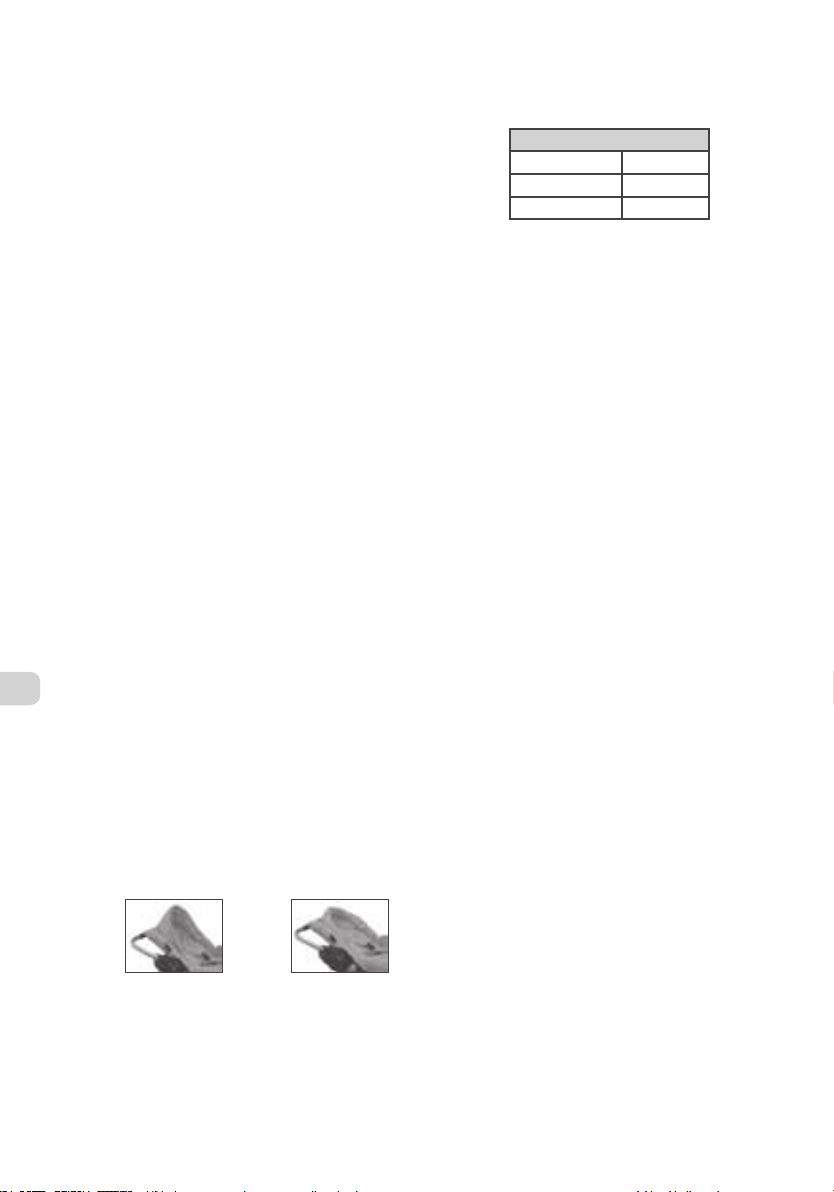
Lai atslābinātu drošības stiprinājuma lences: ar
vienu roku spiediet uz leju TMS regulatoru, kas
atrodas autokrēsliņa priekšpusē, bultas virzienā
(ilustr. 5 / B), un ar otru roku vienlaicīgi velciet
plecu lences pret sevi.
SVARĪGI! Drošības stiprinājuma lencēm jābūt stingri
savilktām, tomēr tās nedrīkst ierobežot bērna
kustības. Jāpārbauda, vai lences nav sagriezušās.
Drošības stiprinājuma sprādzei jāatrodas pēc
iespējas zemāk uz bērna vēderiņa, nevis kuņģa
vietā. Tādējādi tiks nodrošināta adekvāta iegurņa
aizsardzība.
Bērna ievietošana RC/RCS autokrēsliņā
UZMANĪBU! NEKAD neatstājiet bērnu bez
uzraudzības autokrēsliņā.
SVARĪGI! Ieteicams noregulēt stiprinājuma lenšu
garumu atbilstīgi bērna lielumam PIRMS
autokrēsliņa uzstādīšanas automobilī. Drošības
stiprinājuma lencēm jāiet caur atverēm, kas
atrodas vistuvāk bērna pleciem.
• Novietojiet rokturi pozīcijā 1 (ilustr. 6).
•
Atbrīvojiet drošības stiprinājuma sprādzi,
uzspiežot uz sarkanās pogas.
• Ielieciet bērnu ērti autokrēsliņā tā, lai viņa
mugura stingri atbalstītos pret sēdekļa atzveltni.
• Noregulējiet atzveltnes pozīciju (sk. punktā
"Atzveltnes un roktura pozīcijas noregulēšana").
• Salieciet kopā sprādzes 2 daļas un ielieciet tās
fiksatorā.
• Noregulējiet stiprinājuma lences atbilstīgi bērnam
(sk. punktā "Drošības stiprinājuma lenšu
noregulēšana ").
LV
Galvas balsts (saulessargs)
RC/RCS autokrēsliņš ietver 3 funkciju galvas balstu
– tas samazina autokrēsliņa lielumu, atbalsta bērna
galviņu un aizsargā viņu pret saules stariem.
Galvas balsts nodrošina papildu ērtības, kad bērns
atrodas guļus stāvoklī un sānu atbalstu bērna
galviņai un ķermeņa augšdaļai. Bērnam augot,
polsterējumu var izņemt un lietot kā parastu galvas
balstu un saulessargu (atlocīšana un salikšana ar
rāvējslēdzēja palīdzību).
atlocītā
veidā
lietojams
par
saulessargu
Sēdekļa atzveltnes un roktura pozīcijas
noregulēšana
• Atzveltnes noregulēšana (ilustr. 7)
nolocītā
veidā
Paceliet sviru, kas atrodas autokrēsliņa
aizmugurē, un izvēlieties pozīciju, kas ir
vislabāk piemērota bērna svaram :
3 POZĪCIJAS
Guļus stāvoklis
Slīps stāvoklis
Tradicionāls stāvoklis
NB! Ja autokrēsliņu neizmanto automobilī, visas trīs
pozīcijas ir piemērotas līdz 9 kg smagam bērnam.
• Roktura pozīcijas (ilustr 6) :
3 roktura pozīcijas.
Lai mainītu pozīciju, atbrīvojiet roktura pozīciju,
vienlaicīgi nospiežot pogas abās pusēs (ilustr. 6A) un
tajā pašā laikā virzot rokturi uz priekšu vai atpakaļ
līdz vajadzīgajai pozīcijai.
1. Pozīcija, ja izmanto automobilī
2. Pozīcija, nesot bērnu
3. Pozīcija, ja lieto kā šūpuļkrēslu / ratiņos
SVARĪGI: Vienmēr ievērojiet piesardzību. - Nesot
bērnu šajā RC/RCS autokrēsliņā ārpus automobiļa,
jāpārbauda, vai rokturis ir stingri fiksēts pozīcijā 2.
- 5 kg
- 5 kg
5 <10 kg
Papildu piederumi
Jumtiņa piestiprināšana
• Lai piestiprinātu jumtiņu: ielieciet plastmasas
stiprinājumus, kas atrodas katrā jumtiņa pusē,
RC/RCS autokrēsliņa sānu ietverēs (ilustrācija
a1+a2).
• Izlīdzinoiet atveres, kuras norāda zilās krāsas
bultas (atrodas jumtiņa aizmugurē), ar
autokrēsliņa lenšu vadotnēm (ilustrācija a3 + a4).
• Noregulējiet jumtiņu, lai aizsargātu bērnu no
saules stariem.
• Lai noņemtu jumtiņu: spiediet lejup plastmasas
stiprinājumus abās jumtiņa pusēs, vienlaicīgi
velkot jumtiņa galu uz augšu.
Pārsega piestiprināšana
Pirms pārsega piestiprināšanas jāpievieno jumtiņš
(sk. iepriekšējā punktā).
• Pārklājiet RC/RCS autokrēsliņu ar pārsegu
(ilustr. a5).
• Salāgojiet pārsega un jumtiņa līpklipšus un
iespiežamās skrūves ar autokrēsliņa pārvalka
elementiem. Nospiediet tās, lai aizvērtu.
• Lai noņemtu pārsegu, atvienojiet līpklipšus un
izņemiet iespiežamās skrūves.
Nelietojiet autokrēsliņa pārsegu automobilī.
Avārijas gadījumā tas varētu traucēt piekļuvi
bērnam.
35
Page 37
Saulessarga piestiprināšana
• Novietojiet platāko daļu (redzama b1. attēla
augšpusē) uz jumtiņa un piestipriniet līpklipšus.
• Velciet saulessargu sēdekļa apakšdaļas virzienā un
piestipriniet līpklipšus (b2. attēls).
Saulessargs ir paredzēts saules gaismas spilgtuma
mazināšanai un UV starojuma iedarbības
ierobežošanai. Šī saulessarga lietošana nenozīmē,
ka nebūtu jānodrošina bērna aizsardzība. Ieteicams
sistemātiski lietot pretiedeguma krēmu. Regulāri
pārbaudiet, vai bērns ir pietiekami daudz dzēris.
Norādījumi par kopšanu un mazgāšanu
(ilustr. 8)
• Autokrēsliņu un drošības stiprinājuma lences var
notīrīt, noslaukot ar siltā ziepjūdenī samitrinātu
lupatu.
• Sēdekļa pārvalku var noņemt un mazgāt. Lences
un sprādze jāizvelk caur pārvalka atverēm. Lai to
uzstādītu atpakaļ, jāpārliecinās, ka drošības
stiprinājums un pārvalka malas ir pareizi
pozicionētas (ilustr. 8A).
• Sēdekļa pārvalks mazgājams siltā ziepjūdenī
(neizmantot veļas mašīnu). Tas kārtīgi jāizskalo,
un tam jāļauj izžūt. Negludināt. Nelietot
abrazīvus tīrīšanas līdzekļus.
SVARĪGA
drošības informācija
• RC/RCS autokrēsliņu var uzstādīt (uz aizmuguri
vērstā pozīcijā) priekšējā pasažiera sēdeklī
(izņemot tad, ja automobiļi ar aprīkoti ar
priekšējo drošības gaisa spilvenu) vai (uz
aizmuguri vērstā pozīcijā) aizmugurējā pasažiera
sēdeklī.
• Drīkst lietot RC/RCS autokrēsliņu tikai ar 3
punktu automobiļa drošības jostu.
• Nekad nedrīkst atstāt bērnu bez uzraudzības.
• Visos apstākļos bērnam jābūt piestiprinātam,
vienmēr lietojiet drošības stiprinājuma sistēmu.
• RC/RCS autokrēsliņa, 0 grupa, oriģinālo
aprīkojumu
•
Bērna drošībai ieteicams nelikt autokrēsliņu
lielveikalu ratiņos.
• Ja ir bijusi avārija, autokrēsliņu vairs nedrīkst
izmantot, un tas noteikti jānomaina. Var būt
bojājums, kas nav saskatāms ar acīm.
• Ja autokrēsliņu lieto automobiļa priekšpusē
(pasažiera sēdeklī), sēdeklis, kurā tas atrodas,
jānovieto pēc iespējas tālāk uz aizmuguri,
atzveltnei jābūt vertikālā stāvoklī un galvas
balstam jābūt nolaistam pēc iespējas zemāk.
nedrīkst pārveidot.
• Nedrīkst lietot autokrēsliņu sēdeklī, kas ir
aprīkots ar drošības gaisa spilvenu.
• Autokrēsliņam vienmēr jābūt fiksētam vietā ar
automobiļa drošības jostu, arī tad, ja
autokrēsliņu neizmanto. Nepiestiprinātā veidā
tas rada bīstamību automobilī esošajiem
cilvēkiem, ja pēkšņi tiek lietotas automobiļa
bremzes.
• Nedrīkst savīt automobiļa drošības jostu ar
autokrēsliņa drošības stiprinājuma lencēm.
• Ja automobilis tiek novietots stāvēšanai saulē,
automobilī paaugstinās temperatūra. Ieteicams
pārklāt autokrēsliņu (piem., ar kādu auduma
gabalu), lai bērns justos komfortablāk, kad tiks
ievietots autokrēsliņā. Tāpat tas novērš metāla
detaļu uzkaršanu un varbūt pat apdegšanu. Tas
pasargās arī auduma daļas no izbalēšanas.
•
Nekad neturiet bērnu klēpī, ja atrodaties
automobilī. Avārijas gadījumā, būdams
nepiestiprināts, bērns pārvērtīsies par «lidojošu
objektu». Nekad nelieciet savu 3 punktu drošības
jostu apkārt sev un bērnam.
•
Ievērojiet ceļu satiksmes noteikumus.
Pārliecinieties, ka visiem pasažieriem automobilī
ir pareizi apliktas drošības jostas.
•
Nelieciet smagus priekšmetus uz aizmugurējā
loga plaukta. Pārliecinieties, ka bagāža
automobilī ir novietota tā, ka avārijas gadījumā
tā nevarētu ievainot bērnu vai kādu citu
pasažieri.
• Uzmanīgi novietojiet autokrēsliņu automobilī,
pārbaudot, vai tas ir pareizi uzstādīts. Vienmēr
pārbaudiet, vai nav nolietotas automobiļa
drošības jostas un autokrēsliņa drošības
stiprinājuma lences. Tāpat pārbaudiet, vai daļa
no autokrēsliņa drošības stiprinājuma vai
automobiļa drošības jostas nav aizķērusies zem
pasažiera sēdekļa vai ievērta automobiļa durvīs.
•
Nekad nelietojiet autokrēsliņu bez oriģinālā
sēdekļa pārvalka. Lietojiet vienīgi ražotāja
sēdekļa pārvalku.
• Ja autokrēsliņš ir kombinēts ar ratiņiem, NEKAD
neceliet ratiņus, turot aiz autokrēsliņa, drīkst
celt, VIENĪGI turot aiz ratiņu rāmja.
•
Vienmēr turiet šīs instrukcijas aizsniedzamā vietā
vēlākai lietošanai.
• Lai novērstu auduma bojājumu, nenoņemiet
autokrēsliņam piešūtās uzlīmes.
• Lietojot par šūpuli, šis autokrēsliņš neaizstāj
bērna vai zīdaiņa gultiņu. Kad bērnam jāguļ, viņš
jāieliek piemērotā bērna vai zīdaiņa gultiņā.
• Šo autokrēsliņu nedrīkst lietot, ja kāda daļa ir
salauzta vai trūkst.
• Lietojiet tikai ražotāja ieteiktās rezerves detaļas
un piederumus.
LV
36
Page 38
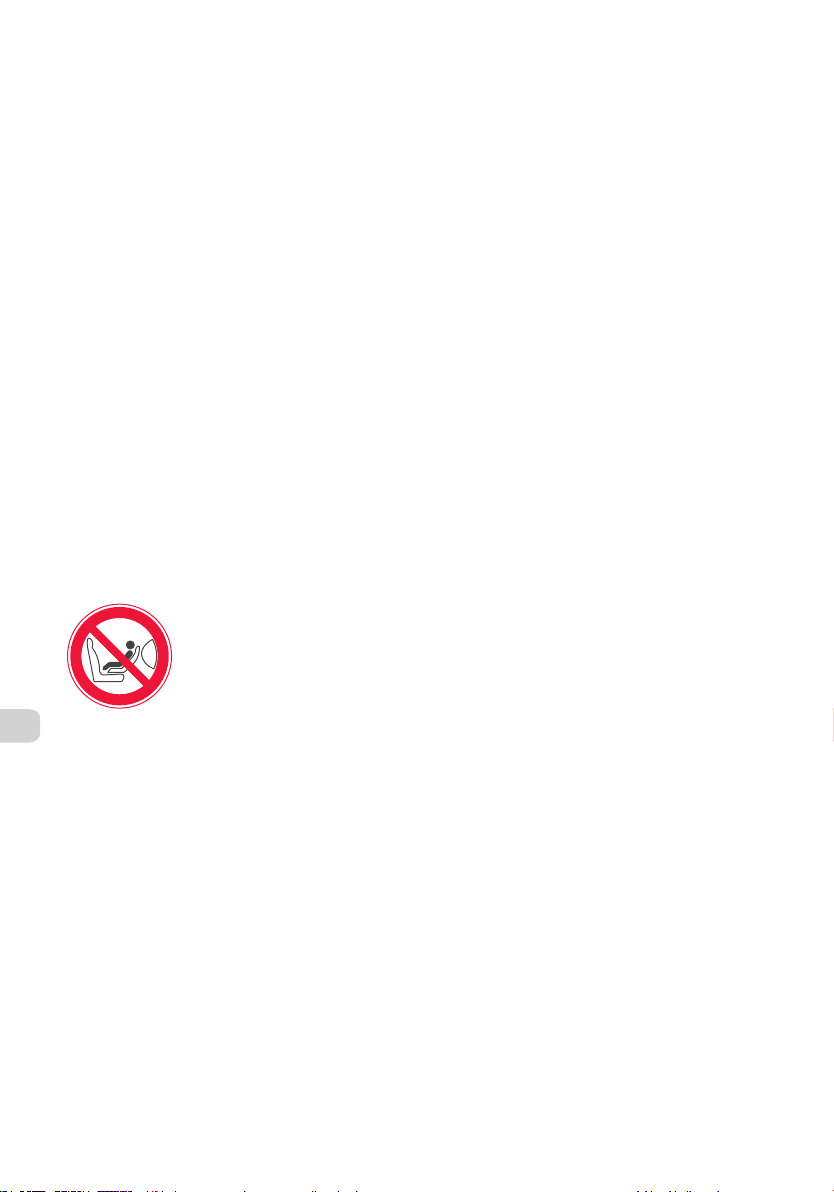
Algemene veiligheidsinstructies
VOORDAT U UW AUTSTOEL VOOR DE EERSTE KEER
GAAT GEBRUIKEN, LEES DAN EERST GOED DE
VOLLEDIGE GEBRUIKSAANWIJZING EN VOLG DEZE
OOK GOED OP VOOR DE MAXIMALE VEILIGHEID
VAN UW BABY. BELANGRIJK! BEWAAR DIT VOOR
HET GEBRUIK IN DE TOEKOMST
WAARSCHUWING
• Laat uw kind nooit alleen zonder toezicht.
• De RC/RCS autostoel groep O voldoet aan de
Europese veiligheidsnormen ECE R-44/04. Het is
geschikt voor baby’s vanaf de geboorte tot 10 kilo
(ongeveer 9 maanden).
•
De RC/RCS autostoel groep O is geclassificeerd in
een universele categorie voor vastmaaksystemen
voor kinderen. Hij kan gebruikt worden op de
meeste passagiers autostoelen. Hij past op de
autostoel, wanneer de handleiding van de auto
aangeeft dat er een universeel vastmaaksysteem
voor kinderen van deze leeftijd in de auto zit.
• De RC/RCS autostoel moet altijd achterste voren in
de auto geplaatst worden. Hij mag alleen
vastgemaakt worden in een auto die een
3-puntsgordel heeft (handmatig of automatisch) die
voldoen aan de ECE-16 regels of soortgelijke regels.
• Ledere auto heeft zijn eigen autogordellengte.
We adviseren dat u eerst controleert of de
autostoel gebruikt kan worden in uw auto.
B
A
•
R
I
A
NL
de veiligheidsgordels, zelfs wanneer u de
autostoel niet in de auto gebruikt.
• De fabrikant van de autostoel kan alleen veiligheid
garanderen wanneer deze wordt gebruikt door de
eerste eigenaar. We raden u ten zeerste af om een
tweedehands autostoel te kopen.
• Gebruik deze autostoel niet meer in de ligstand
zodra een kind zelfstandig kan zitten.
• Gebruik de autostoel niet meer dan 5 jaar.
Intensief gebruik kan slijtage veroorzaken die
niet altijd zichtbaar is.
•
Het is gevaarlijk om deze autostoel op een
verhoogd oppervlak te zetten, bv op een tafel…
• Haal de baby nooit uit de autostoel in een
rijdende auto.
• Gebruik altijd de gordel.
• Deze autostoel is niet geschikt om uw kind lange
tijd in te laten slapen, zowel in de normale als in
de ligstand).
De RC/RCS autostoel mag nooit
G
vooraan geïnstalleerd worden
wanneer de auto voorzien is
van een frontale airbag. Dit
kan zeer gevaarlijk zijn.
• Maakt uw baby ALTIJD vast met
Het installeren van de RC/RCS
autostoel in uw auto
WAARSCHUWING: Plaats nooit uw autostoel op de
voorstoel wanneer uw auto voorzien is van een
frontale airbag op die plaats. Dit kan ernstige
verwondingen of zelfs de dood tot gevolg hebben.
Wanneer u een airbag aan de voorkant heeft,
gebruik de autostoel dan alleen achterin de auto.
De autostoel moet altijd in tegengestelde richting
geplaatst worden (met de voeten tegen de
rugleuing van de stoel waarop hij bevestid wordt).
1. Zet het handvat in stand 1 (zie het hoofdstuk over
het aanpassen van de rugleuning en het handvat
van de autostoel).
2. Maak de autogordel vast.
3. Doe de autogordel door de aangegeven gaten aan
de voorkant van de autostoel (die zitten aan de
onderkant van de autostoel) (fig 2A)
4.
Doe dan de schoudergordel aan de achterkant
van de autostoel door de aangegeven gaten (fig
2B). De schoudergordel moet onder het
hanvatmechanisme gepositioneerd zijn
5. Trek de autogordel stevig aan zodat deze
gespannen staat.
BELANGRIJK: Telkens u de rugleuning van de
autostoel aanpast, moet de autogordel strak
getrokken worden. Tijdens het reizen, moet het
handvat in de transport positie blijven staan.
WAARSCHUWING: de autogordel mag nooit
gedraaid zitten.
(Fig 1+2)
Het vastmaken van het
veiligheidsharnas
Het veiligheidsharnas moet goed aangepast worden
aan de lichaamsgestalte van uw kind. De
schoudergordels moeten door de openingen die het
dichtst mogelijk bij de schouders zitten.
• De RC/RCS autostoel heeft twee verschillende
hoogtes schoudergordels zodat de gordels met
uw kind meegroeien. Kijk op fig 4A om te zien
hoe u deze schoudergordels in hoogte kunt
verstellen.
• Bevestig de 3-puntsgordel op de juiste manier en
gesp deze daarna vast.
• De gespen openen en sluiten (fig. 3)
Sluiten : leg de twee delen van de gesp op elkaar en
druk deze in de onderste gesp totdat u een ‘klik’ hoort.
Openen : druk op de rode knop.
• Het aanpassen van het harnas:
Het is aanbevolen om de lengte van het harnas aan
te passen voordat u de autostoel in de auto
bevestigt.
(fig 3+4)
37
Page 39
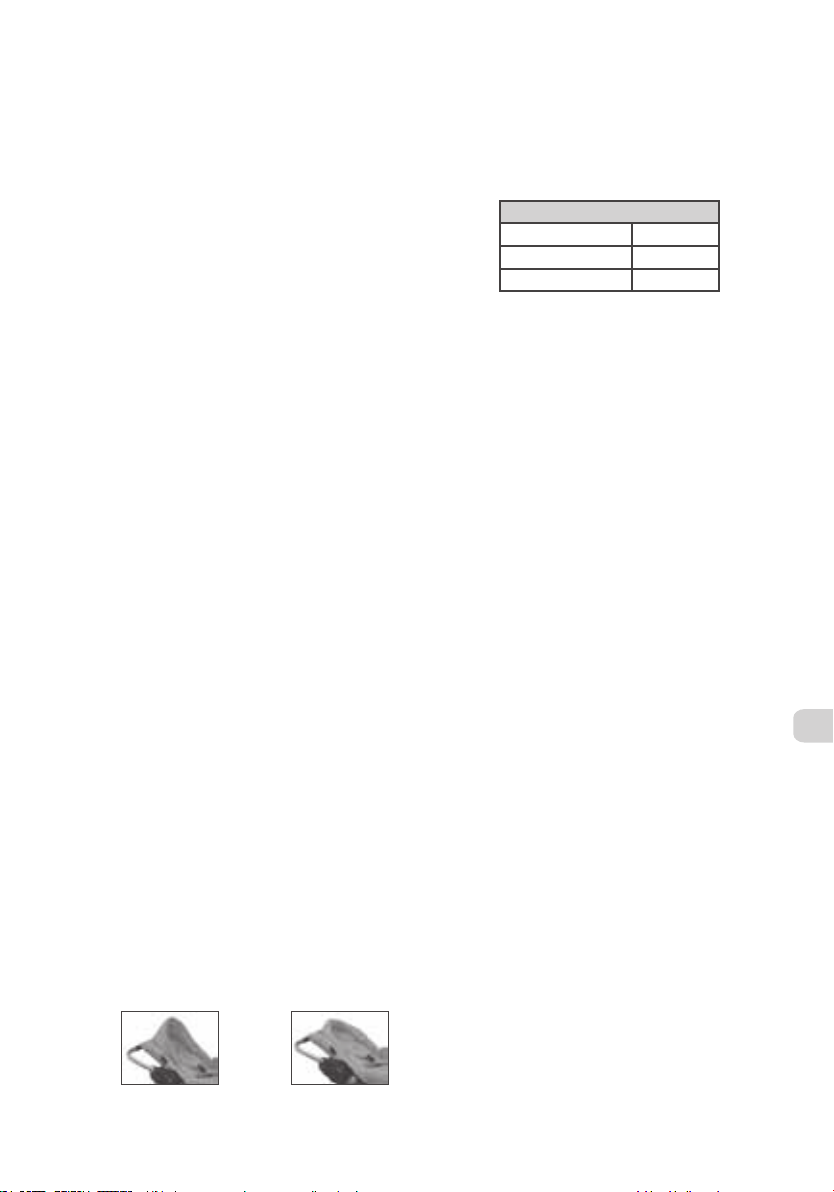
Om de schouderbanden goed strak aan te trekken:
trek aan het uiteinde van de TMS band totdat deze
strak genoeg zit (fig 5A).
Om het harnas losser te zetten: duw met één hand
de TMS band die aan de voorkant van de autostoel
zit naar beneden in de richting van de pijl (fig 5B)
en trek tegelijkertijd met de andere hand de
schouderbanden naar u toe.
BELANGRIJK: het veiligheidsharnas moet goed strak
zitten, maar mag de bewegingen van het kind niet
belemmeren. Controleer of de banden niet
gedraaid zitten. De gespen moeten zo laag mogelijk
op de buik vastgemaakt zitten en nooit ter hoogte
van de maag van het kind. Dit om het bekken van
het kind goed te beschermen.
Uw kind installeren in de RC/RCS
autostoel
WAARSCHUWING: laat uw kind nooit zonder
toezicht achter in de autostoel.
BELANGRIJK: het is aanbevolen om eerst het
veiligheidsharnas op maat te maken voordat u de
autostoel installeert in uw auto. De schouderbanden
moeten door de opening die het dichtst bij de
schouders van het kind zitten.
• Doe het handvat in positie 1 (fig 6)
• Maak de banden los door op de rode knop te
drukken
• Plaats uw kind comfortabel in de autostoel met de
rug stevig tegen de rugleuning van de autostoel.
• Pas de rugleuning aan (zie het hoofdstuk over het
aanpassen van de rugleuning en de handvat
posities).
• Plaats de twee onderdelen aan de onderkant van
de schouderbanden op elkaar en stop ze in de
gespenhouder met de rode knop.
• Pas het harnas aan aan uw kind (zie het
hoofdstuk over het aanpassen van het harnas).
Hoofdsteun (schaduw voor de zon)
De RC/RCS autostoel heeft een hoofdsteun met drie
functies – hij verkleintd de autostoel, het hoofd van
de baby kan zacht liggen en hij beschermd tegen de
zon.
De hoofdsteun zorgt voor extra comfort wanneer de
baby ligt en geeft extra steun aan de nek en het
bovenlichaam. Zodra uw baby groeit en deze niet
meer goed in de hoofdsteun past, kunt u de vulling
verwijderen en de hoofdsteun bijvoorbeeld nog wel
gebruiken voor extra bescherming tegen de zon.
het
uitvouwen
van het
zonnescherm
het
terugvouwen
van het
zonnescherm
Het aanpassen van de rugleuning en het
handvat
Om de rugleuning aan te passen (fig 7):
Gebruik de drukknop aan de achterkant van de
autostoel en kies de beste positie volgens het
gewicht van uw kind
3 POSITIES
Ligstand - 5 kg
Zitstand - 5 kg
Traditionele stand 5 <10 kg
Wanneer u de autostoel niet in de auto gebruikt,
dan kunnen alle drie de standen gebruikt worden
tot 9 kilo.
• Positie handvat (fig 6):
Er zijn drie standen voor het handvat
Om de positie te veranderen, druk dan aan beide
zijden van het handvat de knoppen samen in (fig
6A) terwijl u tegelijkertijd het handvat naar
voren of naar achter duwt.
1. wanneer u de autostoel gebruikt in de auto
2. wanneer u uw baby draagt
3. wanneer u uw autostoel op de kinderwagen
gebruikt of om het kind te wiegen
BELANGRIJK: blijf altijd alert! Wanneer u uw kind uit
de auto haalt met de autostoel, zorg dan dat deze in
positie 2 staat.
Optionele accessoires
De kap vastmaken
• Om de kap vast te maken: plaats de plastic
klippen die aan beide kanten van de kap zitten in
de beugels die aan de zijkanten zitten van de
RC/RCS autostoel (fig 1+2).
• Plaats de openingen die door de blauwe lijnen
zijn aangeduid (aan de achterkant van de
autostoel) op de gleuven die voorzien zijn voor
de de autogordel (fig 3+4)
• Plaats de kap zodat uw baby beschermd is tegen
de zon.
• Om de kap te verwijderen: druk op de plastic
klippen aan de zijkanten van de kap en trek deze
tegelijkertijd naar boven.
Bevestiging van de beschermhoes
Bevestig eerst de kap en pas daarna de
beschermhoes (zie vorig hoofdstuk)
• Bedek de RC/RCS autostoel met de beschermhoes
(fig 5)
• Plaats het klitteband en de drukkers van de kap
en de beschermhoes op elkaar. Druk goed aan om
ze vast te maken.
NL
38
Page 40
• Om de beschermhoes te verwijderen, maak het
klittenband en de drukkers los.
Gebruik de beschermhoes niet in de auto. In geval
van nood moet u direct bij uw baby kunnen.
Bevestiging van het zonnescherm
• Bevestig het breedste gedeelte aan de bovenkant
van de kap en maak deze vast met het
klittenband (fig 1).
• Trek het zonnescherm naar het laagste gedeelte
van de zitting en bevestig deze met het
klittenband (fig 2)
Het zonnescherm is ontworpen om zowel de
verblinding als het effect van de UV-stralen te
verminderen. Ondanks het gebruik van dit
zonnescherm, is het van belang dat u uw baby goed
beschermt tegen de zon. Wij raden aan uw baby
regelmatig in te smeren met een zonnecrème.
Controleer of uw baby voldoende drinkt.
Wasvoorschriften (fig 8)
• De autostoel en het veiligheidsharnas mogen
gereinigd worden met lauw zeepsop.
• Verwijder de hoes voordat u deze gaat wassen.
De schoudergordels en de gesp moeten door de
openingen van de hoes Zorg ervoor dat u de
cover na het wassen op de juiste manier
terugplaatst (fig 8A)
• Was de cover met de hand in lauw warm water met
wat zeep, nooit in de wasmachine. Goed spoelen
en de cover rustig laten drogen en niet strijken.
Gebruik geen agressieve schoonmaakmiddelen.
BELANGRIJKE
NL
• De RC/RCS autostoel kan tegen de rijrichting in
• Gebruik de RC/RCS autostoel alleen met een 3
• Laat uw kind nooit achter zonder toezicht.
• Hecht uw kind altijd vast met het
• Gebruik alleen de originele uitrusting van de
• Voor de veiligheid van uw kind, adviseren wij u
• Wanneer u een ongeluk heeft gehad met de auto,
VEILIGHEIDSINFORMATIE
op de voorstoel geplaatst worden (behalve
wanneer op deze plek een frontale airbag zit) of
op de achterbank van de auto (ook tegen de
rijrichting in).
puntsgordel.
veiligheidsharnas.
RC/RCS autostoel.
uw autostoel nooit op een supermarktkar te
zetten.
dan kunt u uw autostoel niet langer gebruiken.
Deze kan onzichtbare schade hebben opgelopen.
• Wanneer u uw autostoel op de voorstoel gebruikt,
dan moet deze zo ver mogelijk naar achteren
worden gezet. De rugleuning moet recht staan en
de hoofdsteun op zijn laagste positie.
• Gebruik de autostoel nooit op een stoel die is
uitgerust met een airbag.
• De autostoel moet altijd vast worden gezet met
de autogordels, zelfs wanneer de autostoel niet
gebruikt wordt. Wanneer de autostoel los staat,
kan deze bij een hevige remming een gevaar zijn
voor alle inzittenden van de auto.
• Het veiligheidsharnas en de autogordel mogen
nooit gedraaid zitten.
• Wanneer u de auto in de zon parkeert, dan zal de
temperatuur in de auto snel oplopen. We
adviseren u om iets over de autostoel heen te
leggen zodat uw kind er daarna weer
comfortabel gebruik van kan maken. Dit zorgt er
ook voor dat de baby niet verbrand wordt door
metale stukken die te heet worden en dat de
kleur van de hoes niet zal vervagen.
• Hou uw kind nooit op uw schoot wanneer u in de
auto zit. In geval van een ongeluk, zal u kind als
een vliegend projectiel door de auto gaan. Ga
nooit rijden met de autogordel om u en uw kind.
• Respecteer de verkeersregels; zorg ervoor dat
alle passagiers een autogordel op de correcte
manier dragen.
• Zorg ervoor dat losse spullen in de auto goed
opgeborgen zijn of vast liggen voor het geval er
een ongeluk gebeurtd. Dit zou u en uw kind
kunnen verwonden.
• Zorg ervoor dat de autostoel altijd correct en
stevig in de auto zit. Controleer altijd of de
autogordel en het veiligheidsharnas van de
autostoel goed vast zitten en niet versleten zijn.
Controleer altijd of de autogordel niet per
ongeluk onder een autostoel of tussen de deur
blijft zitten.
• Gebruik de autostoel nooit zonder de originele
hoes. Gebruik alleen de hoes van de producent.
• Til nooit de kinderwagen op aan de autostoel,
wanneer de autostoel op de kinderwagen zit. Til
deze altijd aan de onderkant van het chassis.
• Bewaar de gebruiksaanwijzing goed.
• Verwijder geen genaaide etiketten van de
autostoel ten einde een beschadiging van de
textiel te vermijden.
• Deze autostoel is geen vervanging voor een bed
of een wieg. Wanneer uw kind moet slapen, moet
u hem in bed of in een wieg leggen.
• Gebruik deze autostoel niet wanneer er
onderdelen gebroken zijn of missen.
• Gebruik geen vervangende materialen of accessoiries
die niet van de fabrikant afkomstig zijn.
39
Page 41
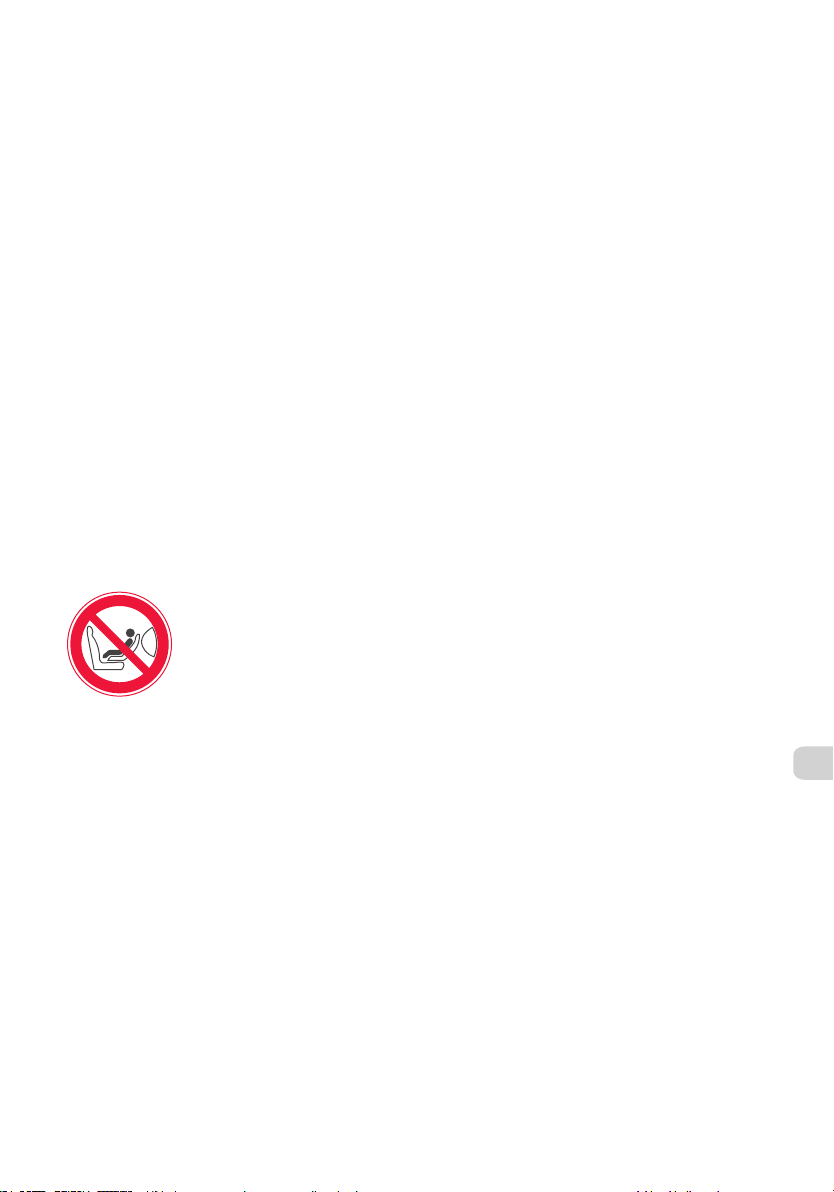
Conselhos Gerais de segurança
ANTES DE UTILIZAR A SUA CADEIRA AUTO PELA 1a
VEZ, LEIA ATENTAMENTE AS INSTRUÇÕES NA SUA
TOTALIDADE E RESPEITE OS CONSELHOS
INDICADOS PARA GARANTIR A MÁXIMA SEGURANÇA
DA CRÍANÇA. IMPORTANTE! CONSERVAR ESTE
MANUAL PARA FUTURAS REFERÊNCIAS.
AVISO
• Nunca deixe sua criança sem atenção.
• A cadeira auto RC/RCS Grupo O, está conforme a
norma européia ECE R-44/03. A sua utilização é
destinada a crianças de 0 a 9 meses ( até um
peso máximo de 10kg )
• Este é um dispositivo de retenção de categoria "
universal " para crianças e pode ser adaptada à
maioria dos assentos dos veículos. É provável que o
dispositivo possa ficar corretamente montado no
veículo, que este último possa receber os
dispositivos de retenção " universais " para crianças.
• A cadeira auto RC/RCS deve ser instalada sempre
obrigatoriamente contra o sentido do trânsito.
Deve ser fixa ao automóvel exclusivamente por
um cinto de segurança de 3 pontos (com ou sem
enrolador) homologado segundo a norma ECE-16
ou equivalente.
• O comprimento dos cintos de segurança varia de carro
para carro. Sugerimos que verifique se a Cadeira
Auto RC/RCS pode ser instalada no seu carro.
B
R
I
A
ao ser transportada fora do veículo.
• O fabricante só pode garantir a segurança da
cadeira auto se não mudar de proprietário. Não
aconselhamos a compra de cadeiras auto usadas.
• Não continuar utilizando esta cadeira auto como
cadeira reclinável tão logo que a criança possa
sentar-se sozinha e sem ajuda.
•
Nunca usar a cadeira auto por mais de cinco anos.
O seu uso intenso pode provocar degradação dos
materiais.
• É perigoso usar a cadeira auto para crianças, numa
superfície elevada: por exemplo, sobre uma mesa...
• Nunca tire o bebê do assento de carro para
qualquer razão enquanto o veículo está em
movimento.
• Use sempre o cinto de retenção.
• Se você usa a cadeira de auto como uma cadeira
reclinável, não é adequada para longos períodos
do sono.
• A cadeira auto RC/RCS nunca
A
G
deve ser instalada em
assentos frontais equipados
com um airbag frontal, isto
pode provar muito perigoso.
• Prender SEMPRE a criança com
os cintos da cadeira, mesmo
Instalação da cadeira auto RC/RCS no
automóvel
Nunca instalar no lugar do passageiro da frente à
cadeira auto se o automóvel for equipado com um
”airbag” frontal. Pode provocar a morte ou
graves lesões. Neste caso deve instalar nos
lugares traseiros. Tanto no lugar da frente como
nos de trás, instale sempre a cadeira auto RC/RCS
Grupo O contra o sentido do trânsito.
1. Colocar a manivela da cadeira auto na posição 1
(veja capítulo "Regulação do espaldar e posição
do guidom”)
2. Puxar o cinto de segurança do automóvel.
3. Passar o cinto de segurança ventral nas ranhuras
frontais (localizadas de baixo da base da cadeira
auto). (fig. 2A)
4. De seguida deslize o cinto de segurança diagonal
ao redor da parte traseira da cadeira auto pela
ranhura situada das costas da cadeira (fig. 2B). O
cinto de segurança deve passar debaixo da zona
de fixação da pega de transporte (fig. 2C).
5. Esticar bem os cintos de segurança para não haver
folgas.
IMPORTANTE : Cada vez que mude a posição a
inclinação da cadeira auto, deve ajustar novamente
o cinto de segurança do automóvel.
AVISO : Os cintos de segurança não devem estar
torcidos.
(Fig 1+2)
Regulação dos cintos da cadeira auto
(Fig 3+4)
Os cintos devem estar ajustados para a estatura da
criança. Devem passar pelas ranhuras mais perto
dos ombros da criança.
• A cadeira auto RC/RCS possui duas alturas de
regulação dos cintos, que permitem assim
adaptar-se ao crescimento da criança. Para
mudar os cintos em altura, seguir as instruções
com a fig. 4A.
• Posicionar bem os cintos e fixar com fivela.
• Fecho e abertura da fivela da fixação (fig. 3).
Para fechar : Juntar duas partes dela fivela e
inseri-las no fecho até trancar (ouve-se um clic).
Para abrir : Pressione no botão vermelho.
• Ajuste dos cintos da cadeira auto :
É recomendado ajustar os cintos á estatura da
criança ANTES de instalar a cadeira auto no
automóvel.
PT
40
Page 42
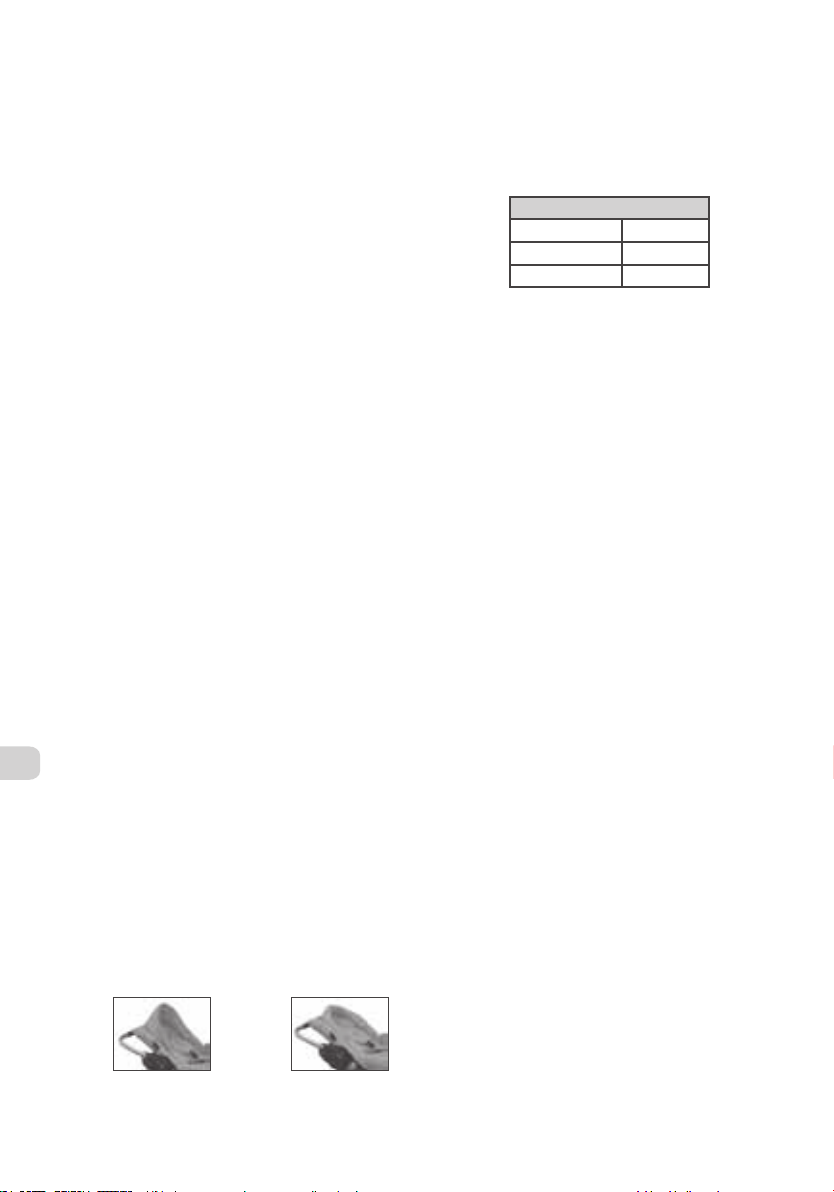
Para ajustar os cintos ao nível dos ombros : Puxar a
extremidade do sistema TMS até estar regulado.
(fig.5A).
Para desapertar os cintos: Com uma mão pressionar
no botão do sistema TMS localizado na frente da
cadeira auto, em direção da flecha (fig.5B), com a
outra mão, simultaneamente puxar ambos os cintos
para si.
IMPORTANTE: Os cintos têm que estar juntos, mas
nunca em demasiado para evitar fazer a criança
sentir-se incômoda. O sistema de fecho da fivela
deve estar colocado o mais abaixo possível do
abdômen e nunca sobre o estomago, para assegurar
uma proteção adequada da zona da bacia.
Colocação da criança na cadeira auto
RC/RCS
AVISO : Nunca deixe a criança sozinha na cadeira
auto.
IMPORTANTE : Recomenda-se que ajuste o
comprimento do arnês à estatura da criança ANTES
de instalar a cadeira auto grupo 0 no automóvel. As
fitas do arnês devem passar pelas aberturas mais
próximas dos ombros da criança.
• Colocar a manivela da cadeira auto na posição 1
(fig.6)
• Abrir a fivela pressionando no botão vermelho.
• Colocar a criança confortavelmente na cadeira
auto com as costas bem apoiadas.
•
Regular a posição desejada do espaldar da
cadeira auto (veja capítulo “Regulação do
espaldar e posição do guidom”).
• Sobrepor os dois cintos e inseri-los no fecho da
fivela.
• Ajustar os cintos da cadeira auto á estatura da
PT
criança (veja capítulo “Regulação dos cintos da
cadeira auto”).
Redutor e capota
A cadeira auto RC/RCS vem equipada com um
redutor e capota de 3 funções – reduz o tamanho de
assento, ele almofadas a cabeça do bebê, protege
do sol.
Proporciona conforto extra quando bebê deita-se e
apoio lateral extra ao nível da cabeça do bebê.e
parte superior da corpo. Como cresce, retira o
redutor e use-o como uma mera capota e protetor
solar (abre e fecha com cremalheira).
Aberto
como
protetor
solar Dobrado
Regulação do espaldar e posição do
guidão
Regulação do espaldar (fig.7):
Levante a alavanca situada no fundo do assento de
carro e escolha a posição melhor se adapta ao peso
do bebê:
3 POSIÇÕES
Deitado - 5 kg
Inclinado - 5 kg
Sentado 5 <10 kg
Nota : Fora do automóvel as 3 posições são
possíveis até ao peso de 9Kgs.
• Regulação das posições do guidão (fig. 6) :
Possibilidade de 3 posições.
Para mudar posição, libera a posição de asa por
empurrar para baixo simultaneamente nos botões
em qualquer lado (fig. 6A) enquanto ao mesmo
tempo movendo e para frente o para trás, à
posição necessária.
1. Posição de transporte em automóvel
2. Posição de transporte na rua
3. Posição de balance
IMPORTANTE : Mantenga su vigilância ! Se desejar
transportar o bebê no seu assento para automóvel
RC/RCS fora do veículo, verifique que a asa é
trancada firmemente em posição 2.
Acessorios opcional
Montagem da capota
• Para fixar a capota : prender as molas das
extremidades nas molas laterais da cadeira auto
RC/RCS (fig. a1 + a2)
• Ajustar bem as aberturas indicadas por setas azuis
(nas costas da capota ) com os guias para o cinto
de segurança de carro (Fig. a3 + a4)
• Ajuste a capota como mais lhe convem para
proteger a criança do sol.
• Para retirar a capota : abaixe nos acessórios
plásticos em um ou outro lado da capota, ao
mesmo tempo puxando a extremidade da capota
para cima.
Montagem do tapa pés
Antes de montar o tapa pés, primeiro montar a
capota (veja capítulo prévio).
• Cobrir a cadeira auto RC/RCS com o tapa pés (fig. a5).
• Junte o Velcro amarra e os botões de pressão do
tapa pés e da capota com os aqueles na forra da
cadeira. Pressione-os para fechá-los.
41
Page 43
• Para remover a tapa pés, separe o Velcro e
desfaça os botões de pressão.
Não utilizar o tapa pés da cadeira auto RC/RCS no
automóvel. Em caso de urgência difficultará o
acesso à criança.
Instalação do protetor solar
• Posicionar a parte mais larga (arriba na foto b1)
na capota e fixar os velcros.
• Esticar o protetor solar hasta a parte mais baixa
do assento e fixar os velcros (foto b2).
O protetor solar foi desenhado para reduzir a
luminosidade do sol e limitar os efeitos dos raios
UV. O uso deste protetor solar não dispensa de
proteger a criança do sol. Recomendamos o uso
sistemático de um creme de sol. Verifique com
regularidade se a criança ingere líquidos.
Manutenção (Fig.8)
• A cadeira e os cintos podem ser lavados em água
ensaboada morna.
• Retire a forra de assento para lavar. Deslize as
correias e a fivela pelas ranhuras da forra. Para
colocar novamente assegure-se que as
extremidades estão corretamente posicionadas.
(Fig. 8A)
•
Lave a forra de assento em água morna
ensaboada (não lavar na máquina). Enxaguar
completamente e deixar secar. Não passar a
ferro. Não use produtos de limpeza abrasivos.
IMPORTANTE
• A cadeira auto RC/RCS pode ser instalada (contra
o sentido do trânsito) no assento frontal de
passageiro (exceto em veículos equipados com
um airbag) ou (contra o sentido do trânsito) num
assento de passageiro traseiro.
• Utilize unicamente a cadeira auto com cintos de
segurança de 3 pontos.
• Nunca deixe a criança sem a vigilância de um
adulto.
• Em todas as circunstancias transporte à criança
segura, utilize sempre um sistema de retenção.
•
O produto original da cadeira auto RC/RCS Grupo
0 não deve ser modificado.
•
Para segurança da criança nunca instale a cadeira
Grupo 0 num carrinho de super-mercado.
• Em caso de acidente de automóvel, a cadeira
auto não mais deve ser usada e obrigatoriamente
ser substituída. Podem existir danos não visíveis
a olho nu.
• Não utilizar a cadeira auto nos assentos equipados
“airbag”.
com
• Sempre que a cadeira auto é utilizada no assento
frontal de passageiro, convém recuar o assento
ao máximo, com espaldar da cadeira direito e o
apoio de cabeça para baixo.
•
A cadeira auto deve ser sempre presa pela
por os cintos de segurança do automóvel, mesmo
quando não utilizada. Solta representa um perigo
para os ocupantes do automóvel em caso de
parada repentina ou colisão.
• Os cintos de segurança não devem estar torcidos.
• Se o seu veiculo estacionar ao sol, a temperatura
interior pode ser elevada. Recomendamos cobrir
o assento para automóvel com um tecido (ou
outro) o que será mais confortável para o bebê
quando o colocar-lo o na cadeira auto. Isto
evitará igualmente as peças metálicas
aquecerem e poderem queimar o bebê. Também
impedirá as partes de tecidos de descolorar-se.
•
Nunca transporte o bebê ao colo. Sem um
de retenção apropriado, em caso de colisão a
criança transformar-se num projétil. Nunca viaje
com seu próprio cinto de segurança de 3 pontos
preso ao redor de você e a criança.
• Respeite o código da estrada. Assegure-se que
todos os passageiros do automóvel usam seus
cintos de segurança corretamente e estão seguros.
• Não coloque objetos pesados na parte traseira do
veículo. Assegure-se que qualquer bagagem
dentro do automóvel é colocada de tal modo
que, em caso de um acidente, não prejudica o
bebê ou qualquer outro ocupante.
•
Instale a cadeira auto em o assento com
precaução e siga as instruções corretamente.
Vigie o desgaste dos cintos de segurança e
materiais. Sempre cheque também que nenhuma
parte da cadeira auto, seu cinto de segurança,
nem o cinto de segurança do automóvel é pegado
embaixo do assento de passageiro ou na porta de
veículo.
•
Nunca utilize a cadeira auto sem forra de origem.
Só aprovada pelo fabricante.
• Levante sempre o carro de passeio combinado
com a cadeira SO pelo chassis do carro e NUNCA
pela cadeira.
• Conservar instruções para futuras referencias.
•
Não remova os cosidos em rótulos na cadeira
a fim de evitar danificar o tecido.
• Quando a utilize como cadeira reclinável, esta
cadeira auto não substitui um berço ou cama.
Quando a criança necessite dormir, deverá
deitá-la num berço ou cama.
• Não utilize esta cadeira auto se falta alguma das
suas peças ou está rota.
•
Não utilize nenhum acessório ou peças de
substituição diferentes das recomendadas pelo
fabricante.
cintura
sistema
auto
PT
42
Page 44
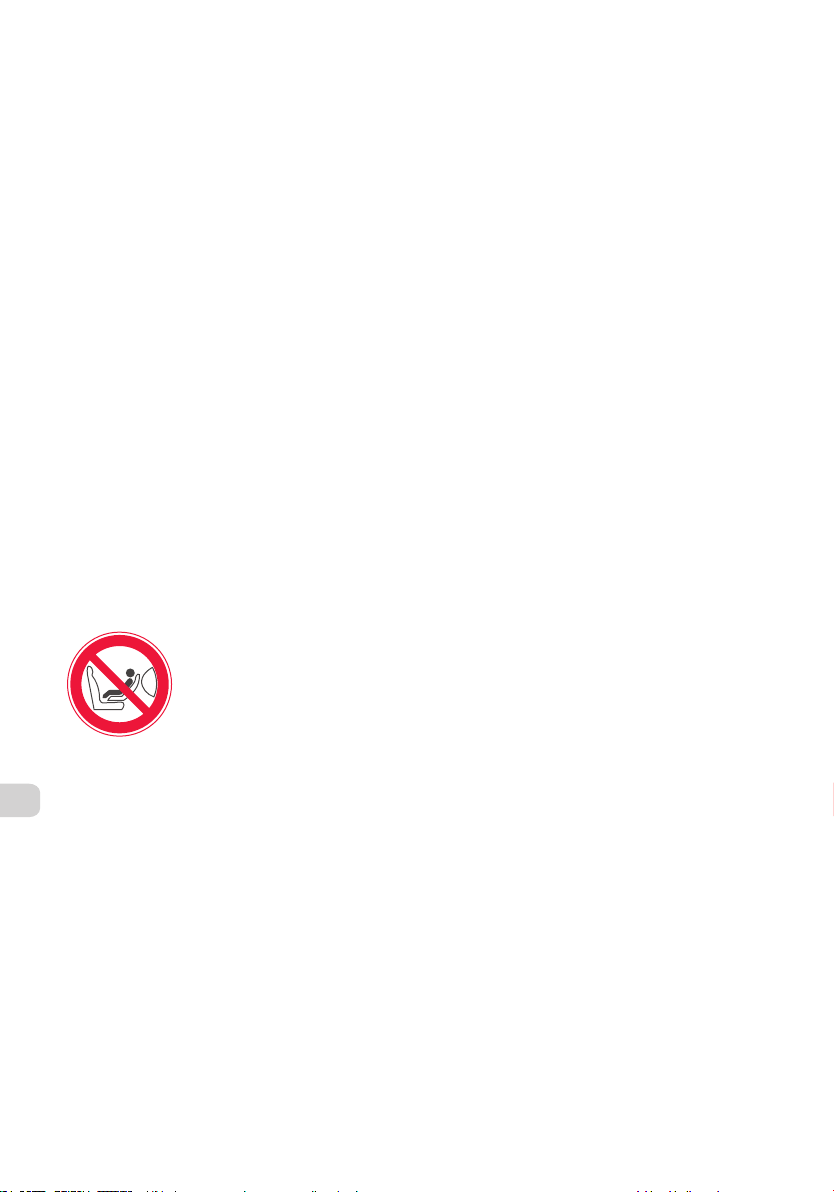
Všeobecné bezpečnostné pokyny
NEŽ SVOJU AUTOSEDAČKU POUŽIJETE PO PRVÝ
RAZ, POZORNE SI PREČÍTAJTE VŠETKY POKYNY A
PRESNE SA RIAĎTE UVEDENÝMI ODPORÚČANIAMI,
ABY STE SVOJMU DIEŤAŤU ZARUČILI MAXIMÁLNU
BEZPEČNOSŤ. DOLEZITE! TENTO TEXT SI
STAROSTLIVO USCHOVAJTE
POZOR
• Dieťa nikdy nenechávajte bez dozoru.
• Autosedačka RC/RCS Skupiny O je v súlade s
európskou bezpečnostnou normou ECE R-44/04.
Je určená deťom od narodenia do 10 kg
(približne do 9 mesiacov).
• Autosedačka RC/RCS Skupina O je zaradená do
kategórie “univerzálnych" bezpečnostných
zariadení pre deti. Dá sa prispôsobiť väčšine
sedadiel pre cestujúcich v osobných automobiloch.
Dá sa správne upevniť vo vozidle, ktorého výrobca
uvádza v manuáli k vozidlu, že vo vozidle sa dajú
používať “univerzálne” bezpečnostné zariadenia
pre deti tejto vekovej skupiny.
• Autosedačka RC/RCS sa musí vždy upevňovať
smerom dozadu vozidla. Môže sa používať LEN vo
vozidle s trojbodovým bezpečnostným pásom
(statickým, alebo samonavíjacím), ktorý je v
súlade s normou ECE-16, alebo ekvivalentnou
normou.
• Dĺžky bezpečnostných pásov v automobiloch sa
líšia. Odporúčame, aby ste si skontrolovali, či sa
táto autosedačka dá použiť vo vašom vozidle.
B
A
R
I
A
bezpečnostným pásom, aj v prípade, že autosedačku
RC/RCS nepoužívate v automobile.
• Výrobca zaručuje bezpečnosť autosedačky len v
SK
prípade, že ju používa prvý vlastník. Absolútne
neodporúčame používanie autosedačiek z druhej ruky.
• Autosedačku nepoužívajte ako kolísku, keď sa v
nej dieťa vie bez pomoci posadiť.
• Nepoužívajte autosedačku dlhšie ako 5 rokov.
Intenzívne používanie môže spôsobiť
opotrebovanie, ktoré nie je vždy viditeľné.
•
Používanie autosedačky na vyvýšenom podklade,
napríklad na stole, nie je bezpečné.
•
Za žiadnych okolností nevyberajte dieťa za jazdy
z autosedačky.
•
Vždy používajte bezpečnostný systém.
•
Autosedačka nie je určená na dlhodobý spánok
ani ak sa používa v sklopenej polohe.
• Autosedačka RC/RCS sa nikdy
G
nesmie umiestňovať na predné
sedadlá vybavené predným
airbagom. Mohlo by to byť
veľmi nebezpečné.
• VŽDY svoje dieťa pripútajte
Inštalácia autosedačky RC/RCS do
automobilu
POZOR: Nikdy neupevňujte autosedačku RC/RCS na
závoznícke sedadlo, pokiaľ je vybavené predným
airbagom. Môže to spôsobiť smrť, alebo vážne
poranenie dieťaťa. Pokiaľ máte predný airbag,
používajte autosedačku na zadných sedadlách. Aj
na závozníckom, aj na zadných sedadlách sa
autosedačka musí vždy umiestňovať smerom
dozadu.
1.
Dajte rúčku do polohy 1 (pozri kapitolu
"Nastavenie opierky chrbta a polohy rúčky")
2. Zapnite automobilový bezpečnostný pás.
3. Prevlečte spodný automobilový pás cez otvory v
prednej časti sedačky (umiestnené pod vaničkou
sedačky). (Obr. 2A)
4.
Potom prevlečte diagonálny automobilový pás
poza autosedačku a cez otvor v zadnej časti
autosedačky (Obr.2B). Diagonálny automobilový
pás musí byť umiestnený pod mechanizmom
nastavovania rúčky autosedačky (Obr. 2C).
5. Silno zatiahnite diagonálny pás, aby bol napevno.
DÔLEŽITÉ: keď zmeníte polohu opierky chrbta
autosedačky, treba opäť zatiahnuť bezpečnostný
pás. Bezpečnostný pás musí byť umiestnený pod
mechanizmom nastavovania rúčky autosedačky.
Počas cesty musí byť rúčka vždy v cestovnej
polohe.
POZOR: Autosedačka nesmie byť nikdy vykrivená.
(obr. 1+2)
Nastavenie bezpečnostného popruhu
(obr. 3+4)
Bezpečnostný popruh treba prispôsobiť veľkosti
dieťaťa. Popruhy by mali byť prevlečené cez
otvory najbližšie k ramenám dieťaťa.
•
Autosedačka RC/RCS má dve polohy bezpečnostného
popruhu, ktoré umožňujú prispôsobiť popruh výške
dieťaťa. Ak chcete zmeniť polohu popruhu, pozrite
si, prosím, obr. 4A.
• Správne umiestnite 3-bodový bezpečnostný
popruh a zapnite pracku.
• Otváranie a zatváranie pracky (Obr. 3)
Zatváranie: 2 časti pracky a tlačte ich do otvoru,
kým nezapadnú (ozve sa “klik”).
Otváranie: Stlačte červené tlačítko.
• Nastavovanie popruhu:
Odporúčame, aby ste nastavovali popruh
bezpečnostného pásu veľkosti dieťaťa PRED
inštaláciou autosedačky do automobilu.
43
Page 45
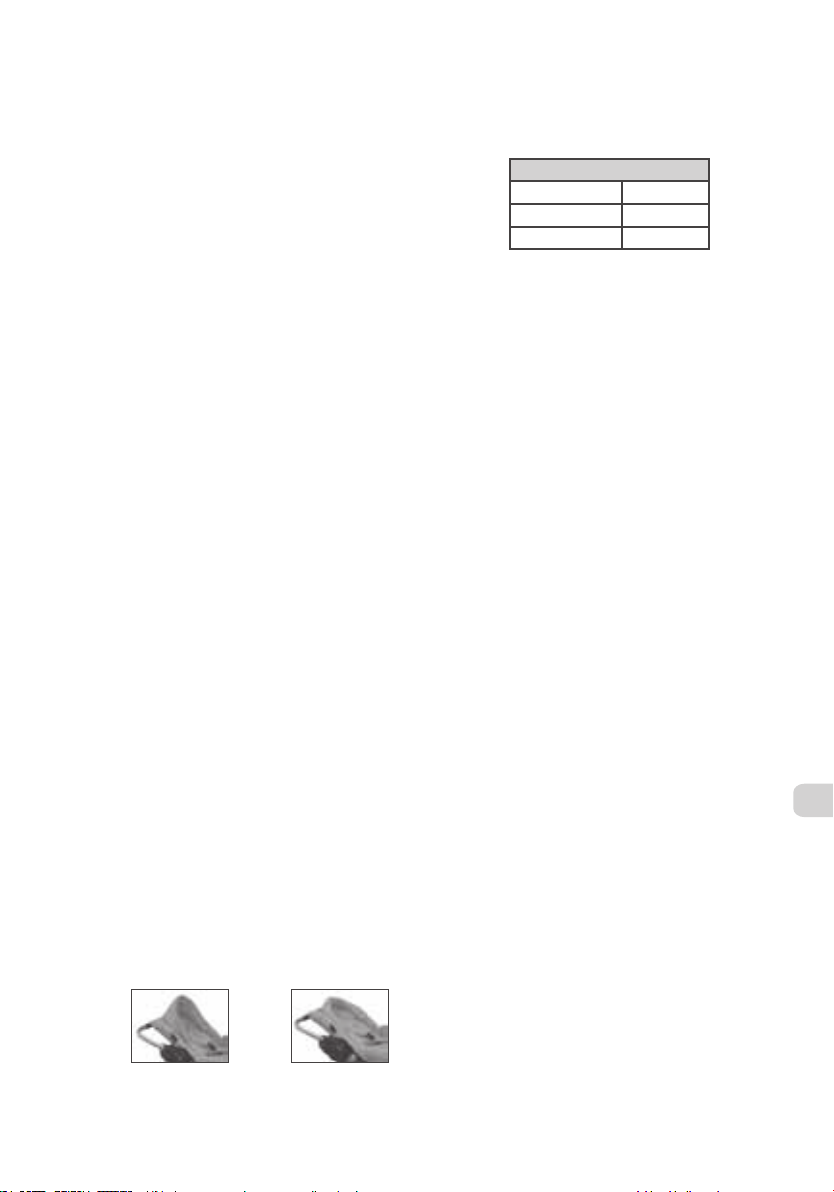
Utiahnutie popruhov vo výške ramien: Ťahajte za
koniec TMS popruhu, kým nie je zatiahnutý. (obr. 5
/ A).
Uvoľnenie bezpečnostného popruhu: Jednou rukou
stláčajte TMS regulátor umiestnený na prednej časti
autosedačky v smere šípky.(obr. 5 / B), a zároveň
uťahujte popruh druhou rukou smerom k sebe.
POZOR: Bezpečnostný popruh musí byť pevne
pritiahnutý, ale nesmie brániť dieťaťu v pohybe.
Skontrolujte, či popruh nie je pokrútený. Pracka
bezpečnostného popruhu by sa mala nachádzať čo
najnižšie nad podbruškom dieťaťa, nikdy nie nad
jeho žalúdkom. Týmto spôsobom zabezpečíte
dieťaťu správnu ochranu vnútorných orgánov.
Inštalácia autosedačky RC/RCS
POZOR: NIKDY nenechávajte dieťa v autosedačke
bez dozoru.
DÔLEŽITÉ: Odporúčame, aby ste prispôsobili dĺžku
popruhu bezpečnostného pásu veľkosti dieťaťa
PRED inštaláciou autosedačky do automobilu.
Popruhy bezpečnostného pásu by mali prechádzať
otvormi v opierke chrbta autosedačky najbližšie k
ramenám dieťaťa.
• Dajte rúčku do polohy 1 (obr. 6).
• Uvoľnite pracku na popruhu zatlačením
červeného tlačítka.
• Posaďte dieťa pohodlne do autosedačky tak, aby
malo chrbátik pritisnutý k opierke chrbta na
autosedačke.
• Nastavte opierku chrbta autosedačky (pozri
kapitolu "Nastavenie opierky chrbta a polohy
rúčky").
• Spojte dve časti pracky a zasuňte ich do otvoru
na pracke.
• Utiahnite pás podľa veľkosti dieťaťa (pozri
kapitolu "Nastavenie popruhu ").
Vankúšik pod hlavu (Ochrana proti slnku)
Súčasťou autosedačky RC/RCS je vankúšik pod
hlavu, ktorý má 3 funkcie – zmenšuje veľkosť
autosedačky, vystiela priestor pod hlavičkou
bábätka a chráni pred slnkom.
Vankúšik pod hlavu poskytuje dieťatku väčšie
pohodlie, keď sa nachádza vo vertikálnej polohe a
vystieľa jeho hlavičku a hornú časť tela. Keď dieťa
podrastie, vyberte výstelku a používajte ho len ako
jednoduchú opierku a ochranu proti slnku.
(upevňuje a odstraňuje sa pomocou zipsu).
Po rozbalení
slúži ako
ochrana
proti slnku
Zbalený
Polohovanie opierky chrbta a rúčky
• Polohovanie opierky chrbta (obr. 7) :
Potiahnite páku na zadnej strane autosedačky a
polohujte autosedačku podľa váhy dieťaťa:
3 POSITIONS
Ležiaca - 5 kg
Poloľah - 5 kg
Klasická 5 <10 kg
P: Mimo automobil môžete používať všetky tri
polohy do 9kg.
• Polohy rúčky (obr. 6) :
Rúčka má tri polohy.
Ak chcete zmeniť polohu rúčky, zatlačte naraz
tlačítka po stranách a zmeňte polohu (obr. 6A)
potisnutím rúčky dopredu, alebo dozadu do
požadovanej polohy.
1. Poloha, ktorá sa používa pri ceste automobilom
2. Poloha pri prenášaní dieťaťa
3. Poloha, keď sa autosedačka používa ako kolíska /
športový kočík
POZOR: bdelí! – Pokiaľ používate autosedačku
RC/RCS na prenášanie dieťatka mimo vozidla,
dbajte, aby bola rúčka pevne zafixovaná v polohe 2.
Nepovinné doplnkové vybavenie
Upevnenie striešky
•
Upevňovanie striešky: Vsuňte umelohmotné
úchyty po oboch stranách striešky do drážok na
autosedačke RC/RCS (obr. a1+a2).
• Nastavte otvory vyznačené modrými šípkami
(umiestnené na zadnej strane striešky) vzhľadom
k úchytom na bezpečnostné pásy autosedačky
(obr. a3 + a4).
• Vysuňte striešku do požadovanej polohy, aby
chránila vaše dieťatko pred slnkom.
•
Odopínanie striešky: stlačte umelohmotné tlačidlá
po oboch stranách striešky a zároveň potiahnite
koniec striešky smerom dohora.
Upevnenie krytu
Pred upevnením krytu upevnite striešku (pozri
predošlú kapitolu).
• Zakryte autosedačku RC/RCS krytom (obr.a5).
• Priložte suché zipsy a cvoky krytu a striešky k
zipsom a cvokom na poťahu autosedačky.
Zatlačte, aby sa spojili.
• Pri odopínaní krytu odlepte suché zipsy a
odopnite cvoky.
Nepoužívajte kryt na autosedačku vo vozidle. V
prípade nehody by to mohlo zhoršiť prístup k dieťaťu.
SK
44
Page 46
Upevnenie krytu proti slnku
• Priložte širšiu časť (horná časť fotografie b1) na
striešku a upevnite suchým zipsom.
• Stiahnite sieťku krytu proti slnku k spodnej časti
sedačky a upevnite suchými zipsami (fotografia
b2).
Kryt proti slnku bol navrhnutý, aby zmierňoval
slnečnú žiaru a vplyv UV žiarenia. Používanie tohto
krytu vás nezbavuje potreby chrániť svoje dieťa
pred slnkom. Odporúčame systematické používanie
opaľovacieho krému. Pravidelne kontrolujte, či má
dieťa dostatočný prísun tekutín.
Starostlivosť a umývanie (obr.8)
• Autosedačka a bezpečnostný popruh sa dajú
očistiť teplou mydlovou vodou.
•
Pri umývaní odopnite poťah autosedačky.
Prevlečte popruhy a pracky cez otvory v poťahu.
Pri opätovnom upevňovaní sa presvedčte, či sú
popruhy a okraje poťahu v správnej polohe.
(obr.8 A).
• Poťah umývajte v teplej mydlovej vode (neperte
v práčke). Dôkladne opláchnite a nechajte voľne
vysušiť. Nežehlite. Nepoužívajte drsné čistiace
prostriedky.
DÔLEŽITÉ
bezpečnostné pokyny
• Autosedačka RC/RCS sa dá inštalovať (smerom
dozadu) na predné sedadlo spolujazdca (pokiaľ
automobil nie je vybavený predným airbagom),
alebo (smerom dozadu) na zadné sedadlá.
•
Používajte autosedačku RC/RCS výlučne s
3-bodovým bezpečnostným pásom.
• Nikdy nenechávajte dieťa bez dozoru.
•
Za každých okolností dieťa pripútajte, vždy
používajte bezpečnostný systém.
•
SK
Pôvodné príslušenstvo autosedačky RC/RCS
Skupiny 0 sa nesmie zamieňať za iné.
•
Kvôli bezpečnosti dieťaťa formálne
neodporúčame inštaláciu autosedačky na vozíky
v obchodných domoch.
• Po nehode sa autosedačka nesmie ďalej používať
a musí sa vymeniť za inú. Môže mať poškodenia,
ktoré nie sú viditeľné.
•
Pokiaľ sa autosedačka používa na prednom
závozníckom sedadle, toto sedadlo by malo byť
čo najďalej vzadu, s vyrovnanou opierkou chrbta
a opierkou hlavy na najnižšej možnej polohe.
•
Nikdy nepoužívajte autosedačku na sedadle
vybavenom airbagom.
•
Autosedačka musí byť vždy prichytená
bezpečnostným pásom automobilu, aj keď sa
práve nepoužíva. Neupnutá môže pri náhlom
zabrzdení predstavovať nebezpečenstvo pre
cestujúcich vo vozidle.
• Bezpečnostný pás automobilu a bezpečnostný
popruh na autosedačke nesmú byť pokrútené.
•
Pri parkovaní na slnku teplota v automobile
stúpa. Odporúčame, aby ste autosedačku
prikryli (napríklad kusom látky), aby bola pre
dieťa príjemnejšia, keď ho do nej opäť
umiestnite. Týmto zabránite aj rozhorúčeniu
kovových častí pracky a možnému popáleniu
dieťaťa. Zároveň tým zabránite vyblednutiu
textilných častí.
• Za jazdy nikdy nedržte dieťa na kolenách.
Nepripútané by sa pri havárii premenilo na
“letiace teleso”. Nikdy sa neprepásavajte spolu s
dieťaťom svojim 3-bodovým pásom.
•
Dodržiavajte Predpisy o cestnej premávke.
Dbajte, aby mali všetci cestujúci v automobile
správne upásané bezpečnostné pásy.
• Neumiestňujte ťažké predmety na poličku pri
okne. Dbajte, aby bola batožina v automobile
umiestnená tak, aby v prípade nehody nezranila
dieťa, ani nikoho z cestujúcich.
•
Inštalujte autosedačku pozorne, dbajte, aby bola
správne uchytená. Vždy skontrolujte
opotrebovanosť bezpečnostného pásu a
bezpečnostného popruhu. Taktiež vždy
skontrolujte, či žiadna časť autosedačky,
bezpečnostného popruhu, ani bezpečnostného
pásu automobilu nie je zaseknutá do dverí
automobilu.
•
Nikdy nepoužívajte autosedačku bez jej
pôvodného poťahu. Používajte len poťah
dodávaný výrobcom.
•
Keď používate autosedačku so športovým
kočíkom, NIKDY nezdvíhajte kočík za
autosedačku, ale VŽDY len za konštrukciu kočíka.
•
Ponechajte si tento užívateľský manuál po ruke,
aby ste doňho mohli kedykoľvek nahliadnuť.
•
Neodstraňujte značky z poťahov autosedačky, aby
ste nepoškodili látku.
•
Ak používate autosedačku ako ležadlo,
pamätajte, že autosedačka v žiadnom prípade
nenahrázda detskú postieľku. Ak dieťa potrebuje
spať, uložte ho do vhodnej detskej postieľky.
•
Nepoužívajte autosedačku, ak je akákoľvek z jej
častí zlomená alebo chýba.
• Nepoužívajte doplnky alebo náhradné diely iné
ako tie, ktoré odporúča výrobca.
45
 Loading...