

Page 1

G
eneral Warnings:
1
2
3
4
5
6
7
8
9
1
1
1
1
1
1
-
-
T
s
b
y
t
r
p
.) Not for commercial use.
.) Indoor use only.
.) This is not a toy. Do not allow children or pets to play on or around.
.) Use only on a flat stable surface.
.) No part of this unit should be used as a step stool or ladder.
.) If any part of the unit is damaged, missing or loose, immediately remove it from service.
.) Weight limit: 250 lbs per barstool.
.) Spills should be wiped up immediately.
.) All 4 legs should remain on the floor at all times.
0.) Do not let any sharp objects touch or rub the surface of the product.
1.) When assembling, do not let children play around the working area.
2.) Please confirm all parts are correct before starting the assembly process.
3.) Do not tighten bolts and screws completely until the entire unit has been assembled and set up.
4.) DO NOT USE POWER TOOLS. Power tools can overtighten screws and strip threads.
5.) For each screw:
Tighten each screw until you meet resistance.
Tighten one additional full rotation. DO NOT OVERTIGHTEN.
his product was inspected before packaging and we recommend that you inspect all the part
efore assembly. Please follow the instructions carefully and ensure all fittings are properl
ightened. Follow assembly instructions carefully will help to avoid accidents and ensure you
roduct is sat
isfactory for its purpose.
Page 1 of 2
Page 2
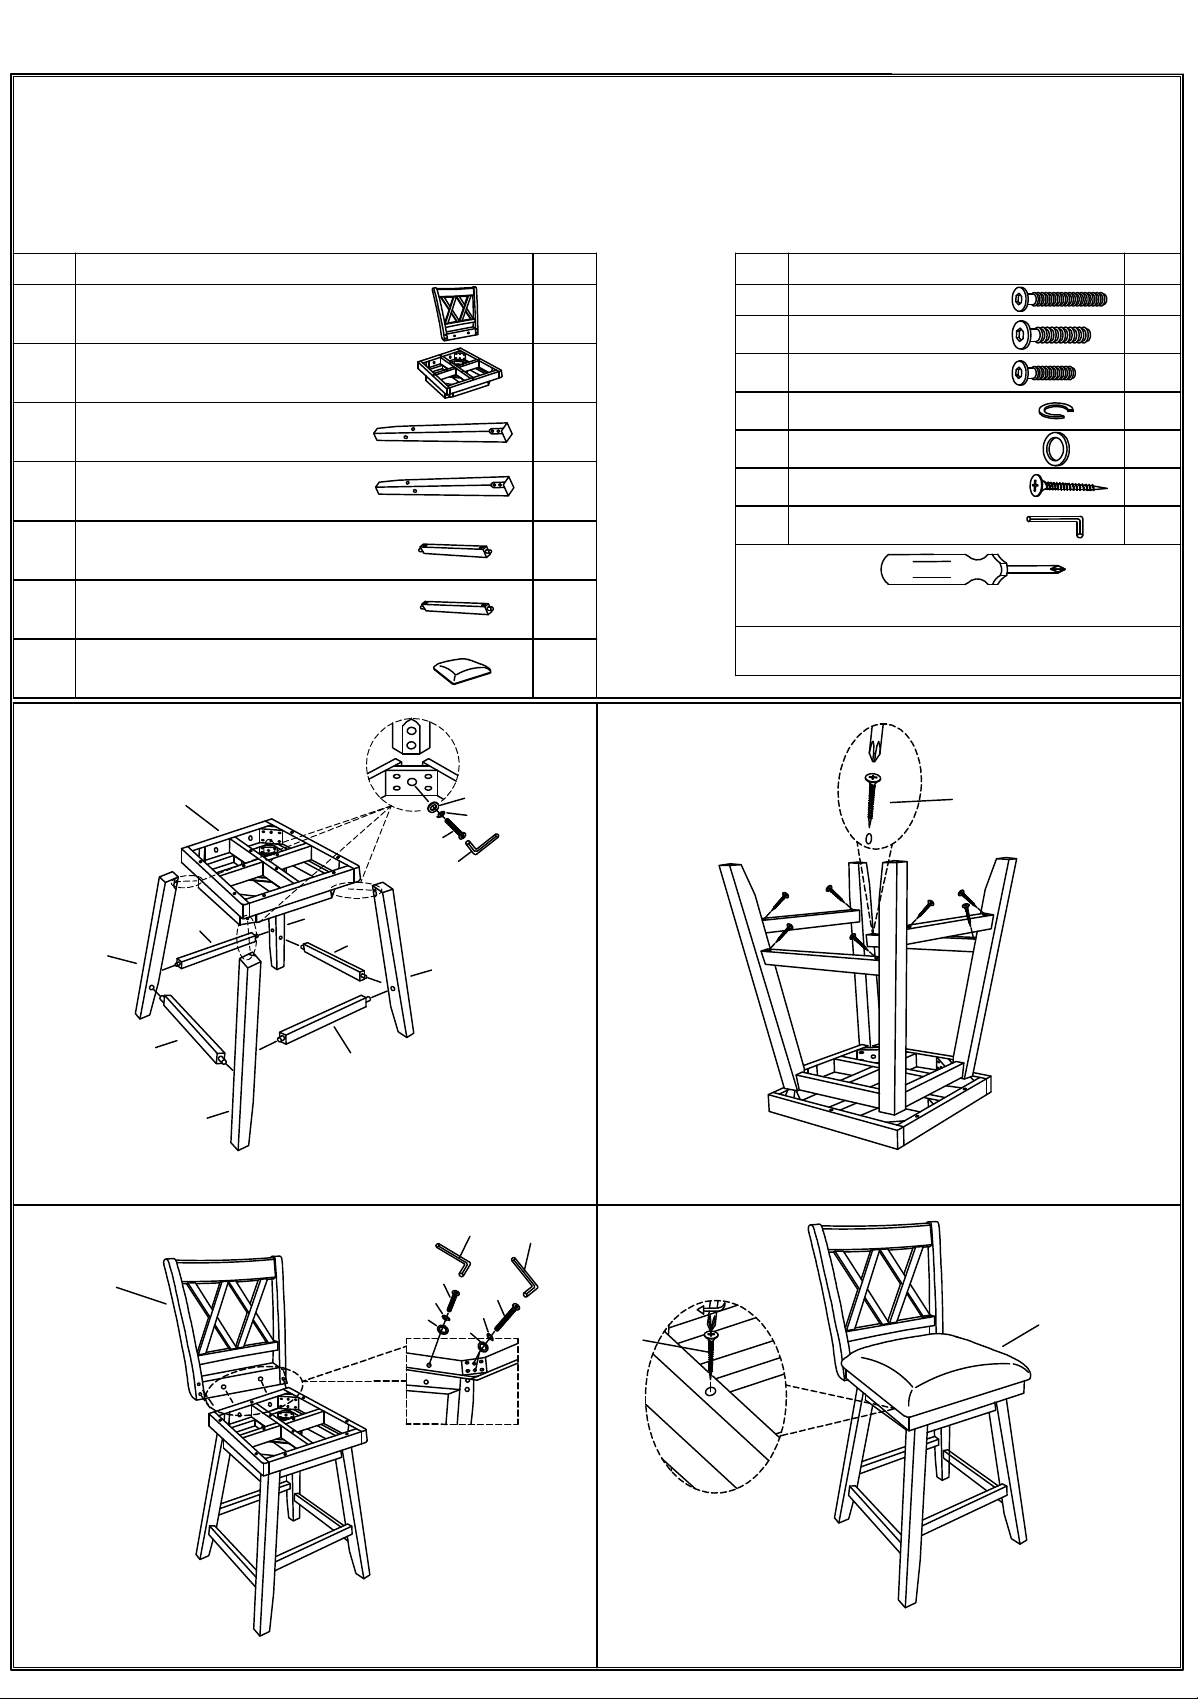
ASSEMBLY INSTRUCTIONS
Important note :
- Place all wooden parts on a clean and smooth surface such as a rug or carpet to avoid scratching the parts.
- Kindly follow the assembly instructions step by step.
- Do not tighten all screws and bolts until the chair is fully assembled.
HARDWARE
NO COMPONENT QTY
BACKREST
1
1
NO
BOLT (LONG)
A
BOLT (MEDIUM)
B
QTY
4
4
2
3
4
5
6
7
STEP 1
FRAME
LEG (A)
LEG (B)
STRETCHER (LEFT+RIGHT)
STRETCHER (FRONT+BACK)
CUSHION SEAT
2
6
3
4
1
2
2
2
2
1
BOLT (SHORT)
C
D
SPRING WASHER
E
FLAT WASHER
F
SCREW
ALLEN KEY
G
PHILLIPS HEAD SCREW DRIVER
IS REQUIRED BUT NOT INCLUDED
2
10
10
14
1
STEP 2
E
D
B
G
F
5
4
STEP 3
5
6
3
DO NOT FULLY TIGHTEN ALL BOLTS AT THIS TIME
G
1
C
D
E
D
E
G
STEP 4
A
7
E
FULLY TIGHTEN ALL BOLTS & SCREW
Page 2 of 2
 Loading...