

Page 1
Recliner Assembly Instructions
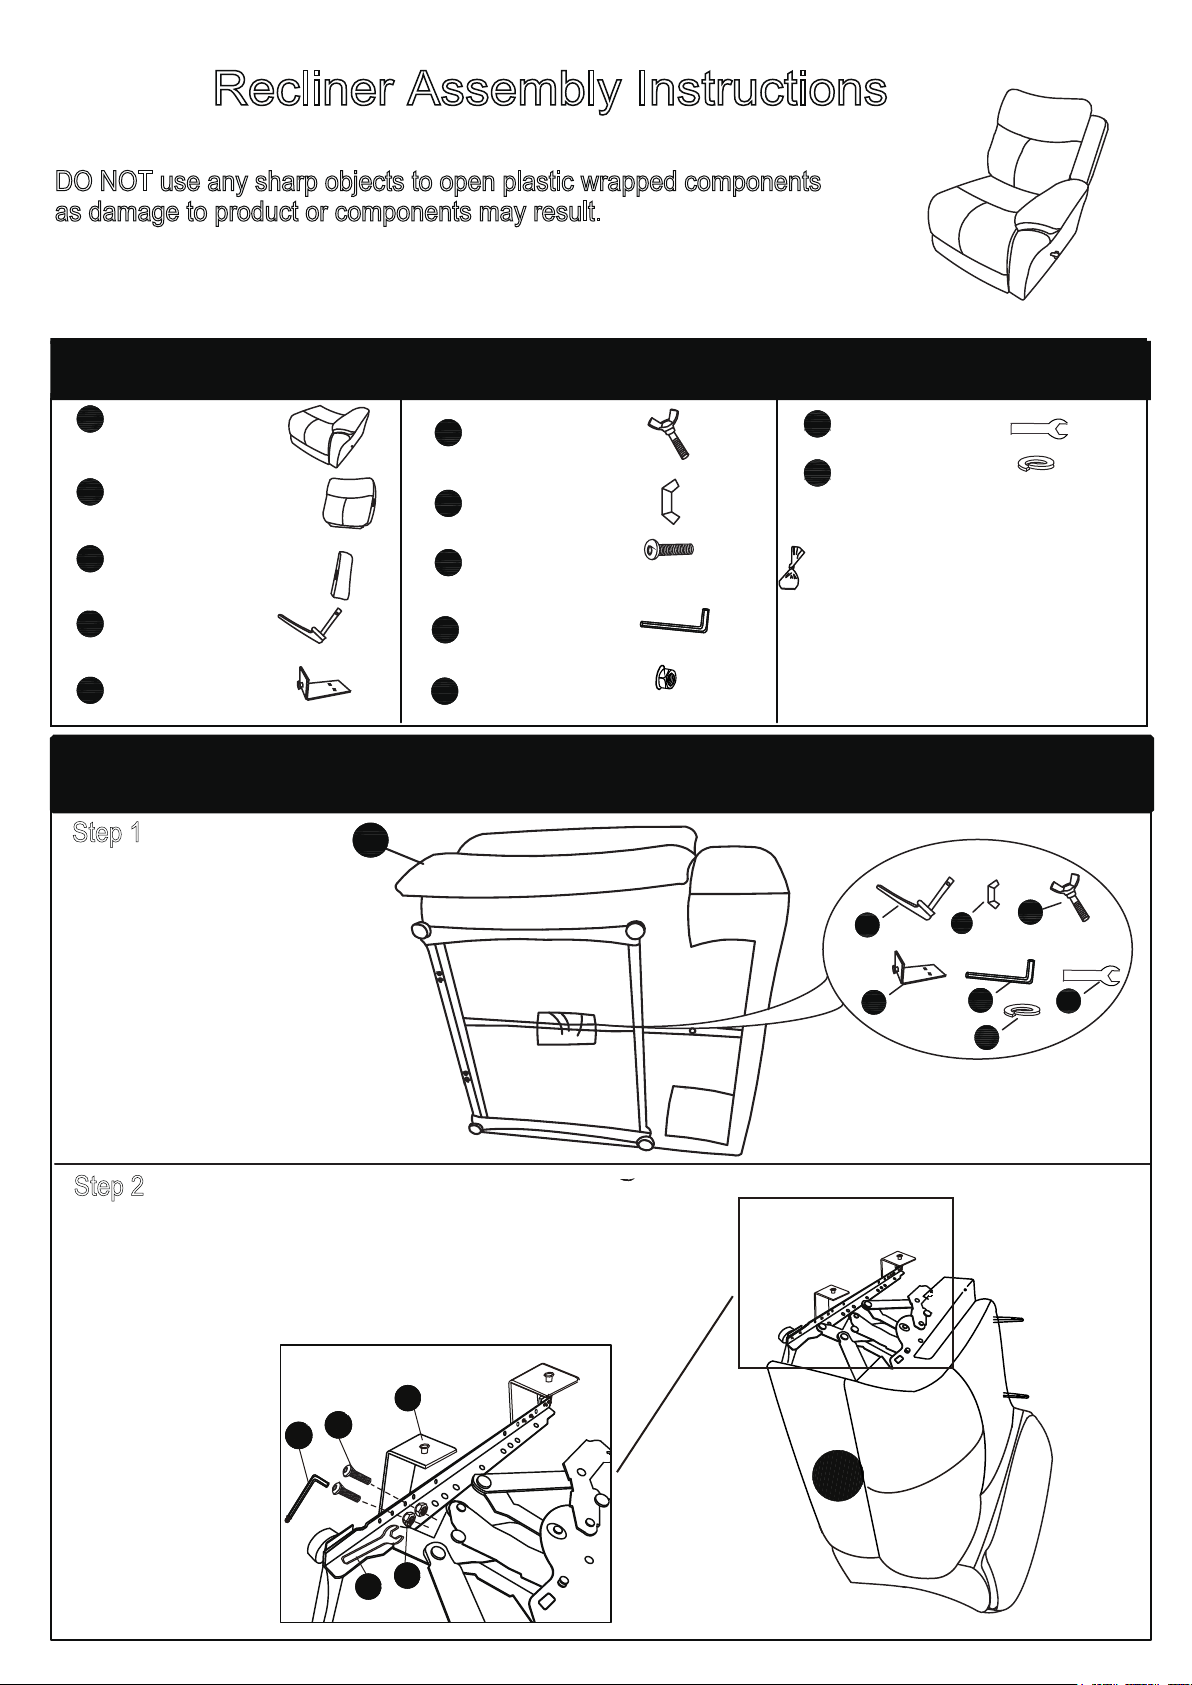
Your recliner comes packaged in one box.
DO NOT use any sharp objects to open plastic wrapped components
as damage to product or components may result.
Carefully remove all of the components from the packaging and
set aside for assembly. Assemble on a soft surface to prevent
scratching the finish.
A
B
C
D
*
E
*
Step 1
Parts List
1 x Right Arm
Recliner Seat
1 x
Right Arm
Recliner Back
1 x Right Back
wing
1 x Handle
2 x Left
Connectors
A
*
*
*
*
*
1 x Bolt
F
1 x Wing Nut
G
4 x Bolts
H
Pre-Attached
1 x
Hex Key
I
4 x
J
Nuts
Pre-Attached
M6 x 11mm
Assembly
Hardware List
1 x Wrench
K
*
L
1 x Lock Washers
*
Replaceable Parts
*
Hardware bag can be found under
the seat
M6 x 80mm
M6
M6
D
G
F
Step 2
Remove the pre-attached nuts and bolts
from the frame. Align the (E) connector to
the frame and loosely reattach the nuts
and bolts. Attach all nuts and bolts to the
connector before fully tightening. Repeat
for each connector.
E
H
I
J
K
E
A
I
L
K
Page 2
Step 3
Assembly
A
Step 4
B
B
A
D
L
G
F
Step 6Step 5
I
C
Your recliner style may differ from images. Care for your furniture by periodically
tightening all bolts using the included hex key.
About your furniture piece:
• Softening of foam is natural and will happen over time with use.
• Fabric will fade or discolor in direct sunlight. Minimize exposure to
direct sunlight to extend the life of your furniture.
• Wood grain, knots, streaks, and color variation occur naturally in wood
and are not considered defects.
BACK
Please note the handle is used to release
the foot rest. Use your arms to recline all
the way back. To close, please use your
legs to push the foot rest down.
CAUTION:
before use. Failure to do so may result in
personal injury.
Tighten all components securely
 Loading...