

Page 1
SlimDuct
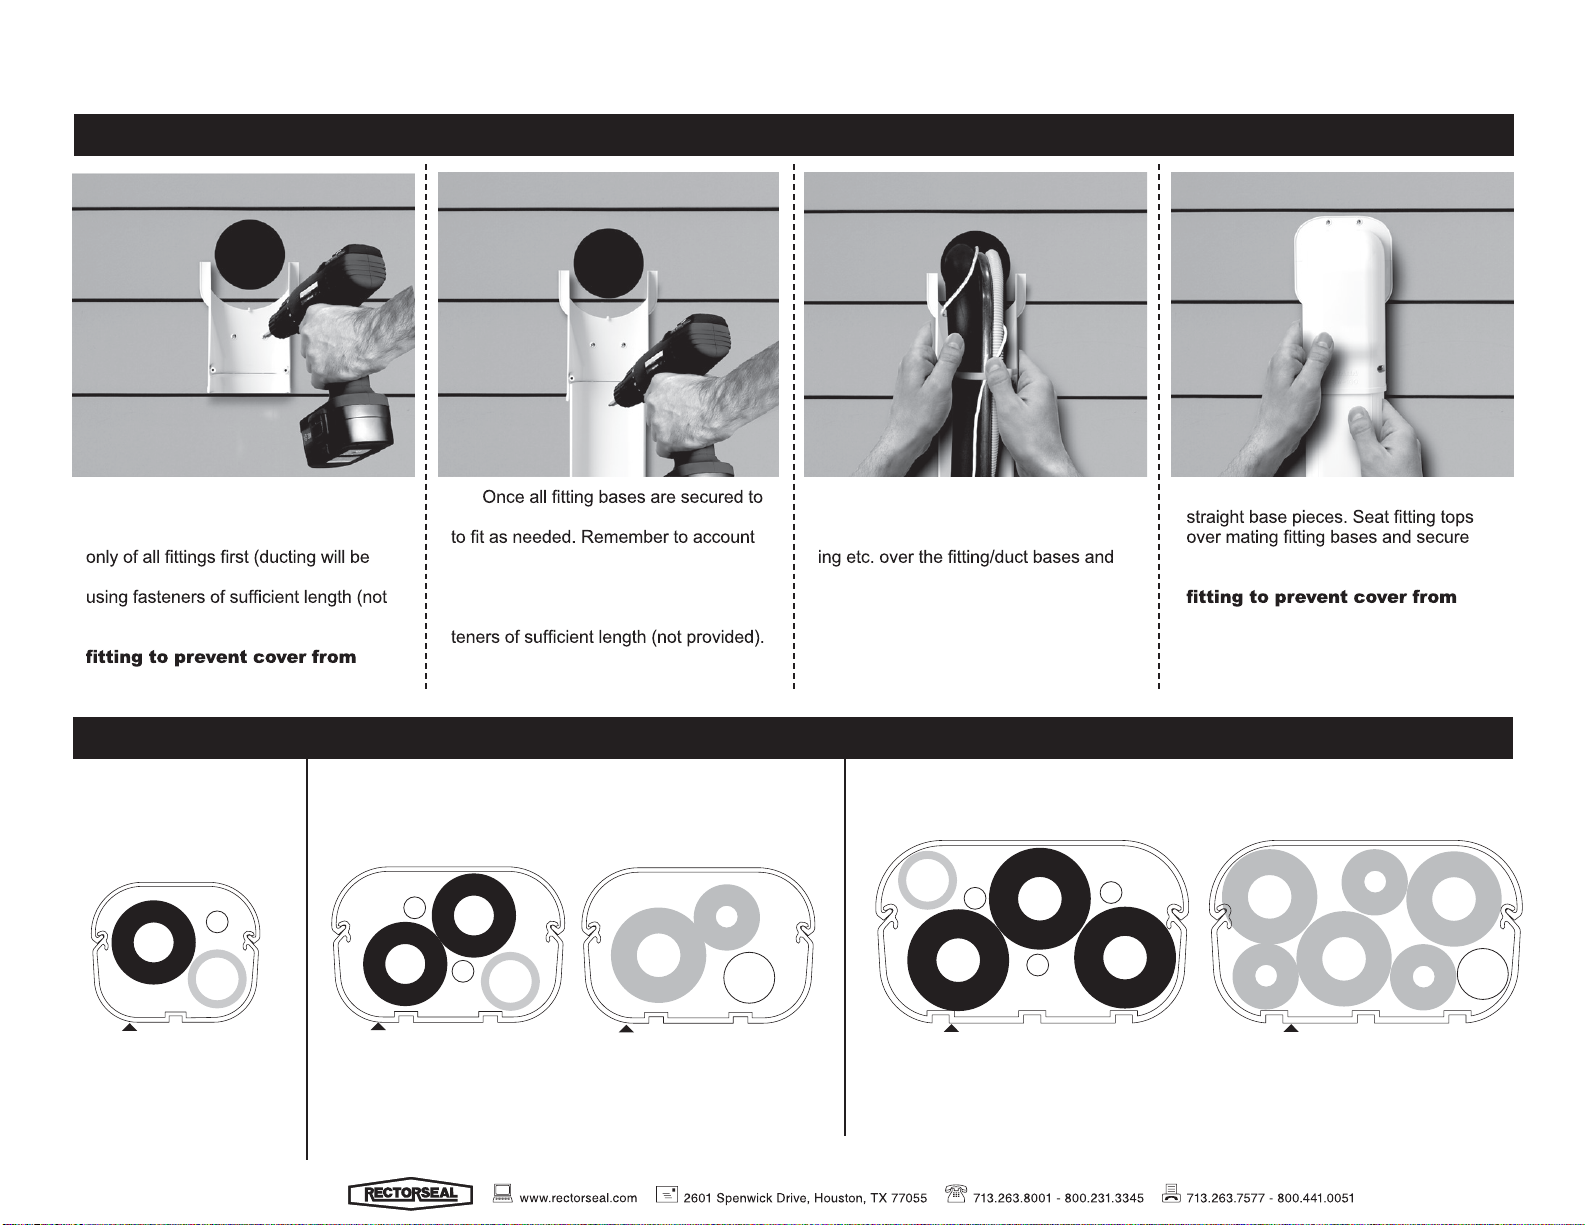
Installation instructions
(1) Determine the pathwhich the lineset
will follow and strike a chalk line to mark
the surface material. Attach the base
placed last), along the marked path,
(2)
the siding, measure and cut SD Ducting
for some seasonal expansion and con-
traction. Install and fasten SD Ducting
(3) Secure optional SL300 straps (strap
kit not included) evenly spaced inside
Slimduct. Run lineset, drainhose, wir-
straps. Tighten straps to secure.
(4) Snap straight duct top over mating
with provided stainless screws.
Duct must terminate with a
bases. Attach bases only to structure
provided). Predrill where necessary.
through provided punch outs using fas-
sliding out of position.
Duct must terminate with a
sliding out of position.
Typical lineset* capacity
SD-77 27/8”W x 23/8”D SD-100 4”W x 23/4”D SD-140 53/8”W x 31/8”D
AC or Refrigeration
AC orRefrigeration
SD-77 w/Single 3/4” Lineset
BTU - 35,000
Suction Line - 1
(Insulation) - 1/2”
Liquid Line - 1/2”OD
Drain Line- 3/4”PVC
* Lineset size may change on Seer Rating
1
/8”OD
AC orRefrigeration
SD-100 w/Dual 3/4” Lineset
BTU - 36,000
Suction Lines - 3/4”OD
(Insulation) - 3/8”
Liquid Lines - 3/8”OD
Drain Line- 3/4”PVC
®
SD-100 w/Single 3/4” Lineset
BTU - 42,000
Suction Line - 3/4”OD
(Insulation ) - 1/2”
Liquid Line - 3/8”OD
(Insulation ) - 1/2”
Drain Hose - 7/8” OD
Minisplit
SD-140 w/Triple 3/4” Lineset
BTU - 36,000
Suction Lines - 3/4”OD
(Insulation) - 1/2”
Liquid Lines - 3/8”OD
Drain Line- 3/4”PVC
SD-140 w/Triple 3/4” Lineset
BTU - 42,000
Suction Lines - 3/4”OD
(Insulation ) - 1/2”
Liquid Lines - 3/8”OD
(Insulation ) - 1/2”
Drain Hose - 7/8” OD
Minisplit
ZLI001
 Loading...